
Goodbye 4-Banger, Hello LS2 – Miata Build
 10-21-2011, 02:49 PM
#41
11 Second Club
Thread Starter
I found a bolt at a place called 'bolt and screw' or something like that. Was a couple bucks I think for the bolt and hand full of washers to use as spacers. Found the place by asking some people that do a lot of farming, they always seem to know where to get random stuff like that.
It was sitting on my doorstep in less that 24 hours from the time I ordered it!
 10-21-2011, 02:50 PM
#42
11 Second Club
Thread Starter
More parts showed up!
- LS3 heads
- Oil pan gasket
- Water pump gasket
- Front crank seal
- LS3 head gasket
- Piolot bearing
- LS3 intake rockers
- LS3 rocker stands
- SLP 25% pulley
- V8R oil pan screw on filter
The only thing I need to start building up the engine is the cam kit
- LS3 heads
- Oil pan gasket
- Water pump gasket
- Front crank seal
- LS3 head gasket
- Piolot bearing
- LS3 intake rockers
- LS3 rocker stands
- SLP 25% pulley
- V8R oil pan screw on filter
The only thing I need to start building up the engine is the cam kit

 10-27-2011, 10:27 AM
#44


Nice thread you have here.
1. From what I've seen at flyin miata most builds use the F-body T-56 not the GTO or CTS-V, which will you use? BTW, what's the reason to use either the forward mount or rear mount engine mounting set-ups?
2. Do you know if any of the OEM oil pans fit using an aftermarket subframe without cutting/reworking the pan?
Thanks,
--JMarsa
10-27-2011, 06:14 PM
#45
11 Second Club
Thread Starter
Nice thread you have here.
1. From what I've seen at flyin miata most builds use the F-body T-56 not the GTO or CTS-V, which will you use? BTW, what's the reason to use either the forward mount or rear mount engine mounting set-ups?
2. Do you know if any of the OEM oil pans fit using an aftermarket subframe without cutting/reworking the pan?
Thanks,
--JMarsa
1. From what I've seen at flyin miata most builds use the F-body T-56 not the GTO or CTS-V, which will you use? BTW, what's the reason to use either the forward mount or rear mount engine mounting set-ups?
2. Do you know if any of the OEM oil pans fit using an aftermarket subframe without cutting/reworking the pan?
Thanks,
--JMarsa
I went with the rear mount for radiator clearance and weight distribution.
2. To my knowledge there isn't any OEM pan that fits with the V8R tubular subframe. The cheap way to do it is to modify a new F-body pan. I went the expensive route and bought the V8R pan. I figure it's one less thing to worry about.
10-27-2011, 06:28 PM
#46
11 Second Club
Thread Starter
Speaking of subframes.. I ordered some more parts today.
- LSx rearward mount kit
- Motor mount heat shields
- Frame reinforcement kit
- Oil pressure adapter, 16x1.5 -> 1/8 NPT
Spoke with EPS today. The cam is taking longer than expected but they said it should be compete tomorrow or Monday. Hopefully I'll have it next week so I can put this engine together!
10-27-2011, 06:40 PM
#47
Staging Lane
Join Date: Oct 2011
Location: Creighton saskatchewan Canada.
Posts: 73
Likes: 0
Received 0 Likes
on
0 Posts
Interesting build, I would like to see the time slip difference when done. Will it hook up alright with the setup you are going to use. My neighbor has a twin turbo older Miata, kicks his brand new Challenger easily.
10-28-2011, 10:38 AM
#48

You are going to love the LS3 heads and PatG cam, 243s, even ported, have NOTHING on the LS3 heads. Very interested to see the final dyno and track numbers. Also, that CTSV rear will hold fine with lots of power since the Miata weighs almost a ton less than the CTSV.
10-31-2011, 11:36 AM
#49
11 Second Club
Thread Starter
Any ideas what it might run in the 1/4 with this power to weight?(450rwhp/2300lbs) I was guessing 11's but i dunno. Either way I'm sure I'd only get one shot at it before I got kicked out of the dragstrip.
 11-01-2011, 03:47 PM
#51
11 Second Club
Thread Starter
With that said, I was a little paranoid about the anchors and my less than perfect floor. I decided to add some supports up to the ceiling and across the top of the posts using 4" reinforced C-channel as vertical posts and 2 x 4 x 3/16 rectangle tubing across the top. It's probably way overkill but it gives me extra piece of mind.
 11-06-2011, 08:06 PM
#53
11 Second Club
Thread Starter
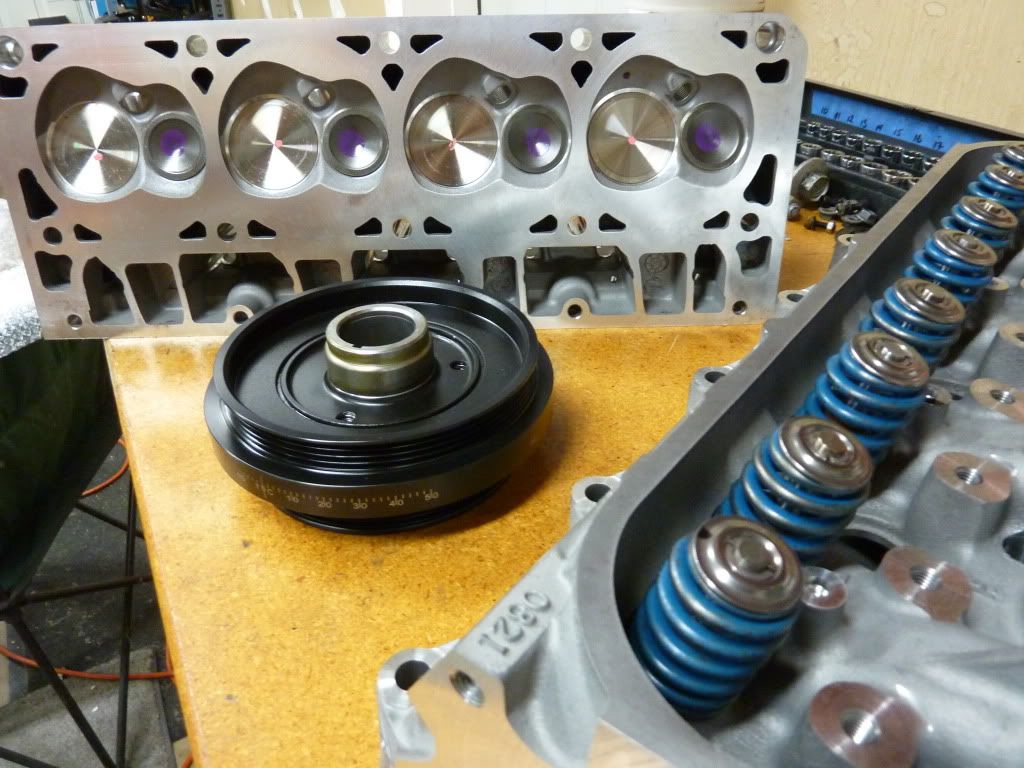
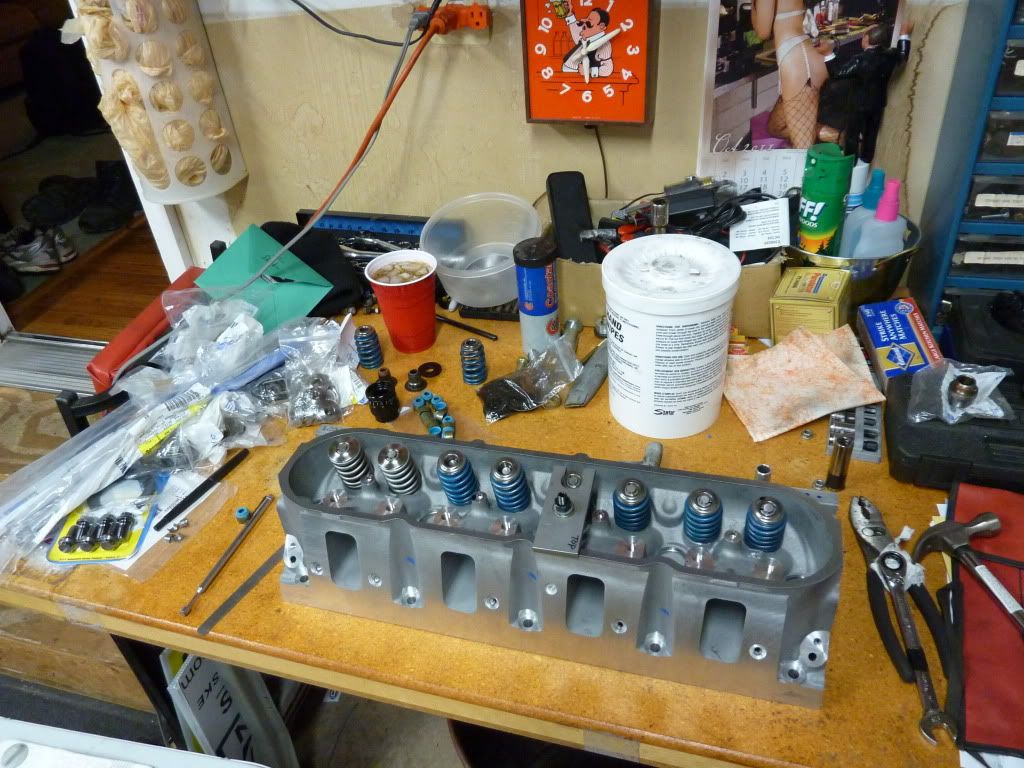
The cam kit showed up Friday so I was able to make some good progress this weekend. Spent Friday night assembling the new heads.
Last edited by MX6.0; 11-06-2011 at 08:17 PM.
11-06-2011, 08:16 PM
#54
11 Second Club
Thread Starter
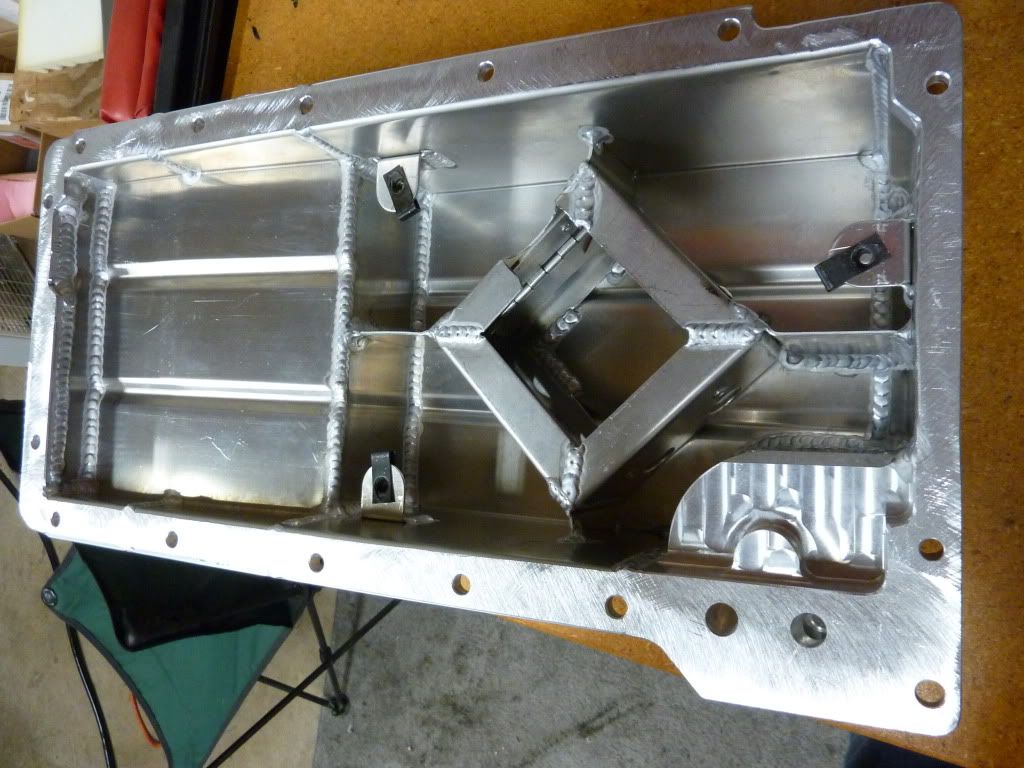
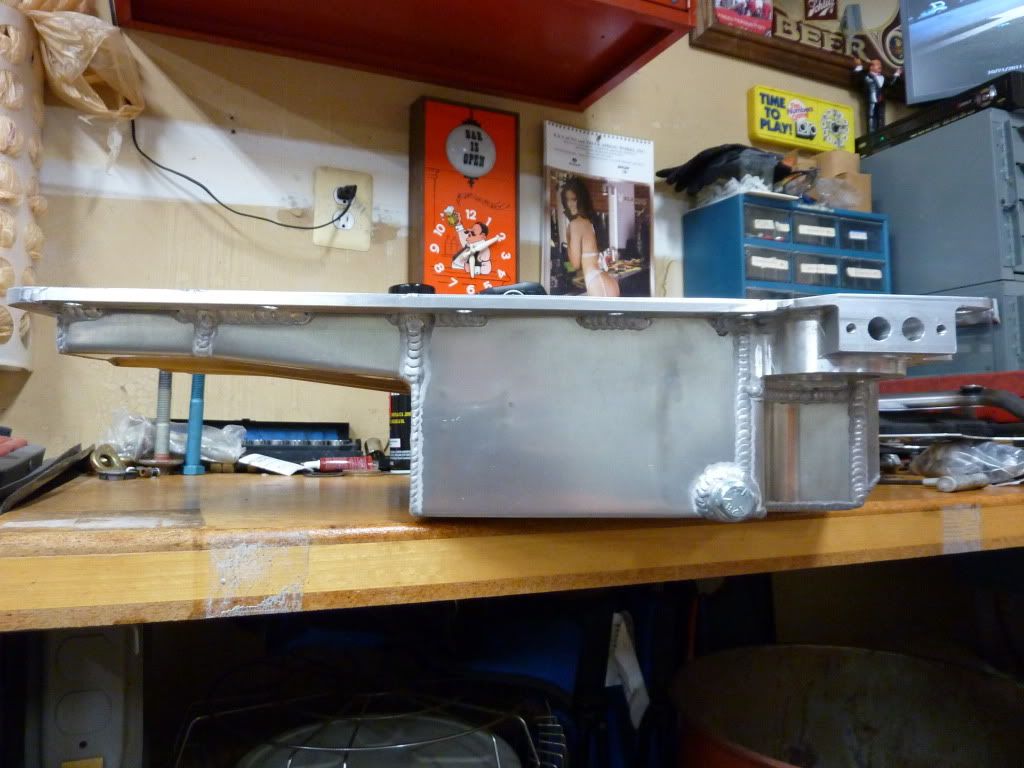
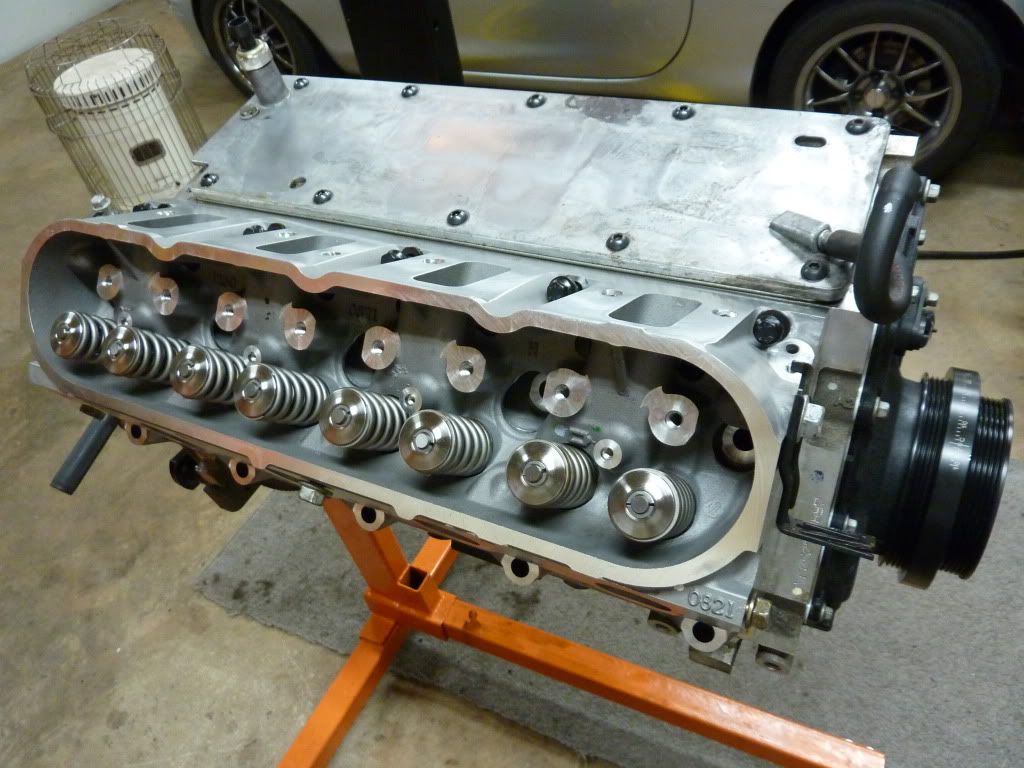
Then I spend most of the day Saturday putting the rest of the engine together.
Still need to figure out if I need to modify the windage tray and mount the new oil pan.

Still need to figure out if I need to modify the windage tray and mount the new oil pan.
11-06-2011, 09:10 PM
#55
11 Second Club
Thread Starter
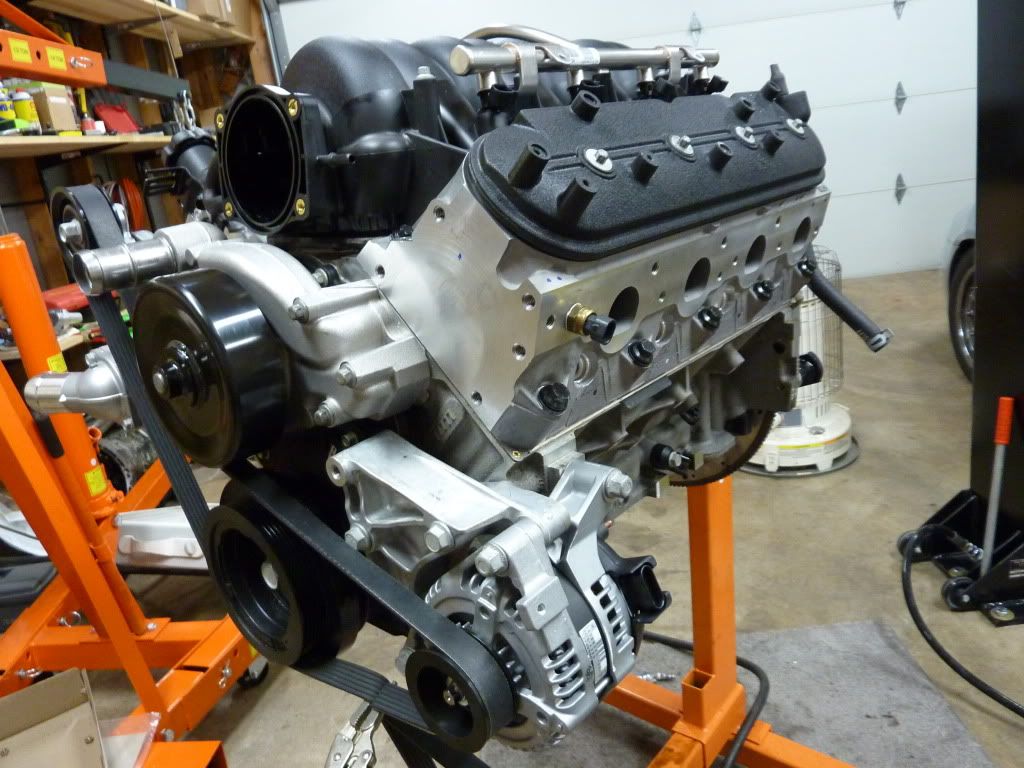
I've been trying to figure out the best belt routing since I'm not running a P/S pump. This is the 1st option. It doesn't provide a lot of contact with the water pump but after doing a search it looks like some others have run this setup before.
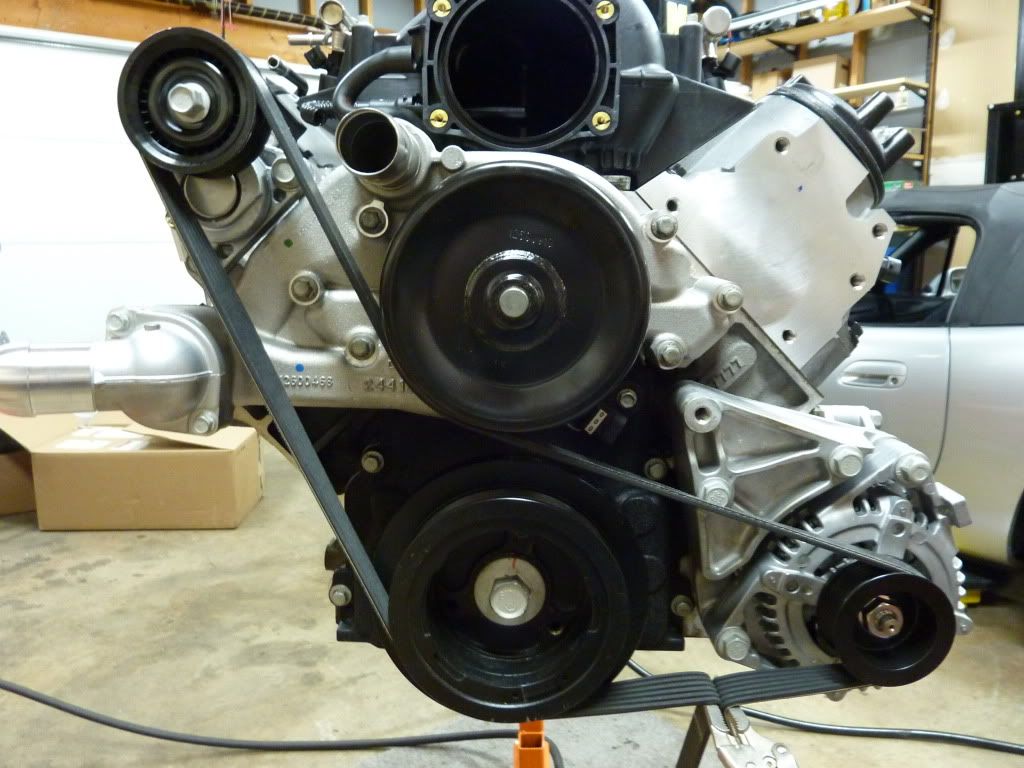
The 2nd option is to add another idler pulley next to the water pump. Obviously if I had the correct 6 rib pulley I'd just go this route, but I don't. (The one used in the pic isn't ribbed)

How much of a load will the water pump have on it once the system is filled with water? I ask this because right now it spins very freely and I don't believe the 1st option would be a problem.
The 2nd option is to add another idler pulley next to the water pump. Obviously if I had the correct 6 rib pulley I'd just go this route, but I don't. (The one used in the pic isn't ribbed)
How much of a load will the water pump have on it once the system is filled with water? I ask this because right now it spins very freely and I don't believe the 1st option would be a problem.
11-06-2011, 09:22 PM
#56
Staging Lane

Join Date: Feb 2011
Location: NW PA
Posts: 56
Likes: 0
Received 0 Likes
on
0 Posts
Monster approved of all the new parts, thankfully.
http://i974.photobucket.com/albums/a...s/P1010171.jpg
http://i974.photobucket.com/albums/a...s/P1010171.jpg
 11-07-2011, 07:30 AM
#57

The 2nd option is to add another idler pulley next to the water pump. Obviously if I had the correct 6 rib pulley I'd just go this route, but I don't. (The one used in the pic isn't ribbed)
http://i974.photobucket.com/albums/a...s/P1010197.jpg
How much of a load will the water pump have on it once the system is filled with water? I ask this because right now it spins very freely and I don't believe the 1st option would be a problem.
http://i974.photobucket.com/albums/a...s/P1010197.jpg
How much of a load will the water pump have on it once the system is filled with water? I ask this because right now it spins very freely and I don't believe the 1st option would be a problem.
Option 2 for sure w/ a 6 rib pulley. Would also suggest a small non ribbed pulley in the bolt hole left of the alternator pulley, between the alternator & crank to increase wrap around crank.
11-07-2011, 09:20 AM
#58
11 Second Club
Thread Starter
I believe the idler pulley shown in option 2 is supposed to provide more wrap on the crank as opposed to the W/P. In order to get more wrap on both I'd probably have to run the P/S idler. I was just trying to avoid the extra clutter of all the extra idlers,ect.
11-07-2011, 10:58 AM
#59
Gotcha,
 IMO, the clutter is worth it. I've got mine set up exactly as noted in the reply, as to avoid high RPM slippage. For the idler between the crank & alternator, used a small diameter idler pulley left over from a BRP cold side kit. It's like 2" in diameter.
11-07-2011, 11:32 AM
IMO, the clutter is worth it. I've got mine set up exactly as noted in the reply, as to avoid high RPM slippage. For the idler between the crank & alternator, used a small diameter idler pulley left over from a BRP cold side kit. It's like 2" in diameter.
11-07-2011, 11:32 AM
#60
11 Second Club
Thread Starter
On your setup is the upper idler pulley that's next to the water pump ribbed or smooth? The ribbed side of the belt rides on this pulley but I wasn't sure if it was required to be ribbed since it's just an idler.