67 Chevelle LS1 T56 Build
 01-13-2012, 12:26 PM
#21
Staging Lane
Thread Starter

Join Date: Dec 2007
Posts: 85
Likes: 0
Received 0 Likes
on
0 Posts

While I wait for the S&P oil pan to reach the market, I need to start gathering parts and I would like some advice.
Front accessories:
- I have the GTO waterpump still on the engine, hopefully I can use this, but I need a power steering pump, aternator, tensioners, etc... What is the best route to fit the chevelle? I thought about the corvette system with the kwik bracket?
Also, need to start figuring out the harness. Unfortunately I do not have the original harness and ECM for the GTO, but I do have the harness from the 99 camaro that the T56 came from and I also have a harness and ECM from a 2004 5.3L silverado. Could this ECM be flashed to run the gto engine? Can I use the 99 harness to run the engine?
I will need to lay this stuff out tonight and take a closer look. Any help you guys can throw my way is appreciated.
 01-13-2012, 12:47 PM
#22
On The Tree

Join Date: Apr 2011
Location: Mobile Alabama
Posts: 108
Likes: 0
Received 0 Likes
on
0 Posts
I have the Kwik bracket and am pleased. Some people dislike the look but I was unwilling to spend the extra grand or more for the nicer looking systems.
That said I would like a low mount AC compressor system that made use of the main drive belt to help with frame clearance but have not been able to find such a thing.
As to the computer check out LT1swap.com for lots of great information. You will need to make sure your computer can run the IAC if you are going DBC or can use your TAC module if you are going DBW. I suspect you can make it work. I would email Brandon on this and see if you can send the computer to him to get you set up with a base tune that will work for your combination.
Aside from that the harness will at least provide a good starting point even if you do have to change a few plugs around.
01-17-2012, 05:50 AM
#23
Staging Lane
Thread Starter
Join Date: Dec 2007
Posts: 85
Likes: 0
Received 0 Likes
on
0 Posts
I have the Kwik bracket and am pleased. Some people dislike the look but I was unwilling to spend the extra grand or more for the nicer looking systems.
That said I would like a low mount AC compressor system that made use of the main drive belt to help with frame clearance but have not been able to find such a thing.
That said I would like a low mount AC compressor system that made use of the main drive belt to help with frame clearance but have not been able to find such a thing.
As to the computer check out LT1swap.com for lots of great information. You will need to make sure your computer can run the IAC if you are going DBC or can use your TAC module if you are going DBW. I suspect you can make it work. I would email Brandon on this and see if you can send the computer to him to get you set up with a base tune that will work for your combination.
Aside from that the harness will at least provide a good starting point even if you do have to change a few plugs around.
Aside from that the harness will at least provide a good starting point even if you do have to change a few plugs around.
Thanks for the replies.
01-17-2012, 06:01 AM
#24
Staging Lane
Thread Starter
Join Date: Dec 2007
Posts: 85
Likes: 0
Received 0 Likes
on
0 Posts
I didn't do much with the engine this past weekend, except research. Looks like I am leaning toward the C5 corvette accessories. Now I need to see if I can pick some up used.
I did work on a buddies bucket seat for his '69 firebird. We put new foam in it and restretched the cover.
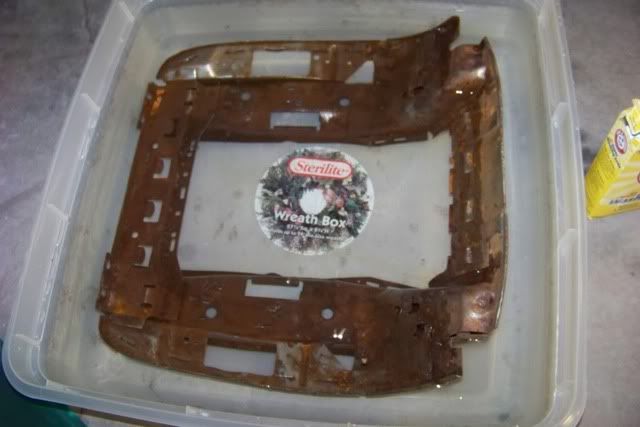
I also worked on the bucket seats for my '67 chevelle. I tore the driver seat down a few weeks back and discovered the springs needed replaced in the bottom, so ordered a new bottom spring assembly from NPD. Over the weekend, I made up an electrolysis bath with water and washing soda to remove the rust from my seat frames and seat slides. Turned out nice.
Will post pictures and describe process tonight.
I did work on a buddies bucket seat for his '69 firebird. We put new foam in it and restretched the cover.
I also worked on the bucket seats for my '67 chevelle. I tore the driver seat down a few weeks back and discovered the springs needed replaced in the bottom, so ordered a new bottom spring assembly from NPD. Over the weekend, I made up an electrolysis bath with water and washing soda to remove the rust from my seat frames and seat slides. Turned out nice.
Will post pictures and describe process tonight.
01-17-2012, 09:51 PM
#25
Staging Lane
Thread Starter
Join Date: Dec 2007
Posts: 85
Likes: 0
Received 0 Likes
on
0 Posts
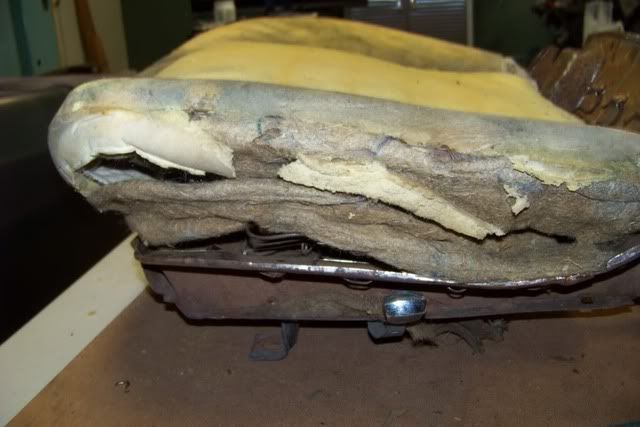
Here are some pictures of the seat I am working on. This particular seat had a lot of busted springs in the bottom, so I ordered a new spring assembly for the driver seat.
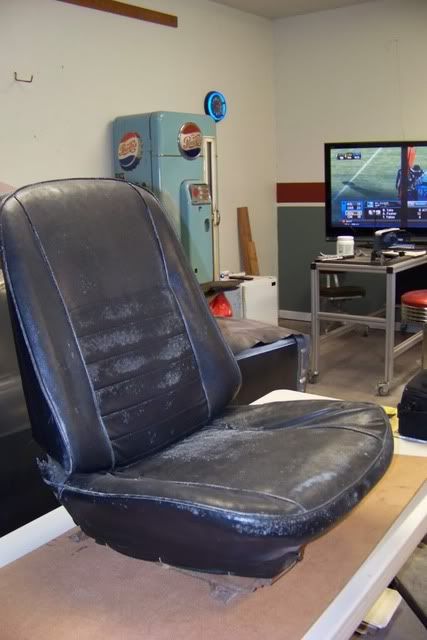
You can tell it is rusty like many of these 40+ year old seats are. No primer was used on the seat frames, so it is common to find them with some degree of rust.
Here I have found the right sized tote (wife's wreath tote..ssshhhhh) to start my electrolysis bath to remove the rust.
Next, you need to mix in Washing soda at 1 tablespoon per gallon.
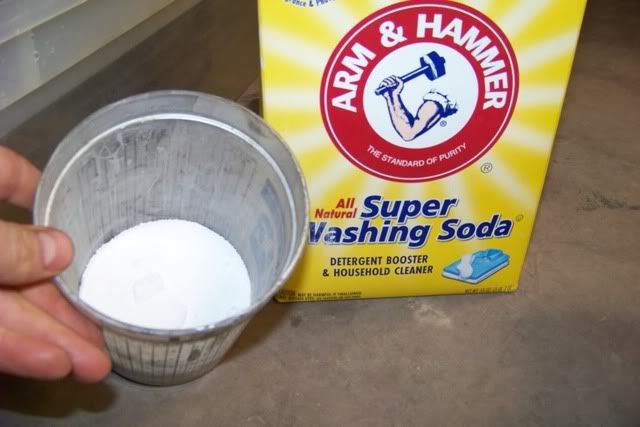
Mix well until it all dissolves!
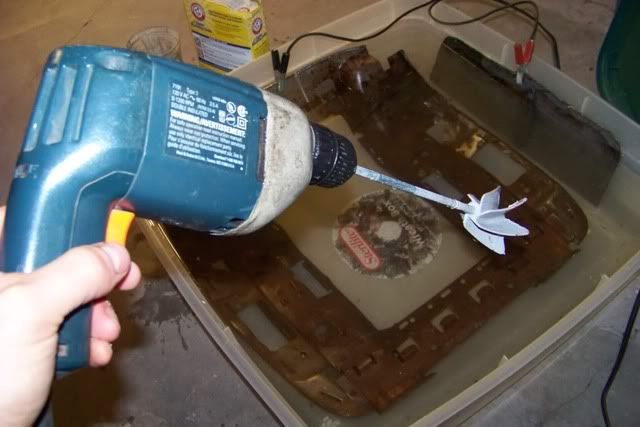
You also need a battery charger. I set mine to 10 amps.
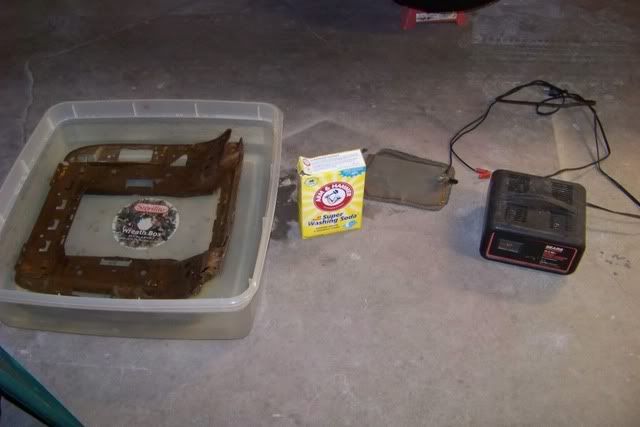
Next, you need some steel for positive electrode. (DO NOT use stainless! Stainless contains chromium which will be released into the water through this process!) I had some 0.080" plate steel left over from some lower control arms that I had boxed in. Make sure the positive (Red) is hooked to the donor electrode and the negative (black) is connected to the part you wish to clean.
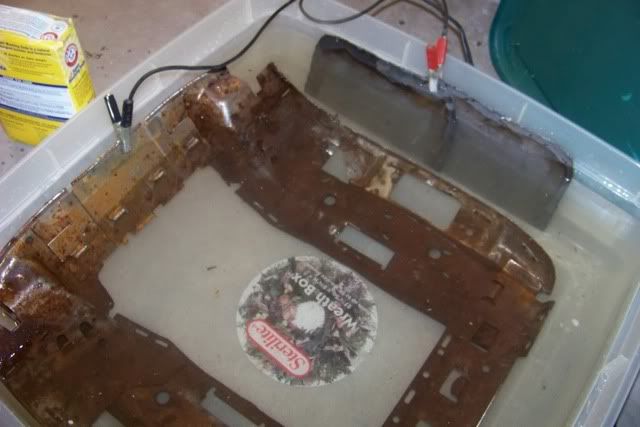
When setting up it is important to keep the donor electrode close to the piece being cleaned, but do not have them touching or you will have a short. Also, relative size is important as it will determine the rate of your reaction.
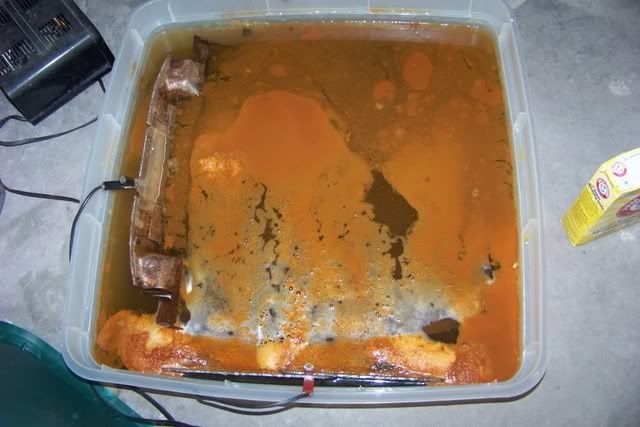
After about 12 hours, I turned the seat frame around to get the other side closer to the donor electrode. You can tell that much of the rust is already gone.
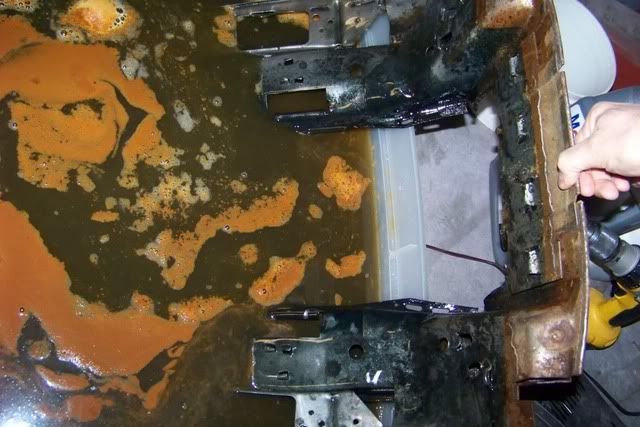
After another 12 hours and about 10 minutes of wire brush and rinsing, here is the final product!

Now I will spray a coat of paint on them to protect them. Time to do that seat back and tracks.
You can tell it is rusty like many of these 40+ year old seats are. No primer was used on the seat frames, so it is common to find them with some degree of rust.
Here I have found the right sized tote (wife's wreath tote..ssshhhhh) to start my electrolysis bath to remove the rust.
Next, you need to mix in Washing soda at 1 tablespoon per gallon.
Mix well until it all dissolves!
You also need a battery charger. I set mine to 10 amps.
Next, you need some steel for positive electrode. (DO NOT use stainless! Stainless contains chromium which will be released into the water through this process!) I had some 0.080" plate steel left over from some lower control arms that I had boxed in. Make sure the positive (Red) is hooked to the donor electrode and the negative (black) is connected to the part you wish to clean.
When setting up it is important to keep the donor electrode close to the piece being cleaned, but do not have them touching or you will have a short. Also, relative size is important as it will determine the rate of your reaction.
After about 12 hours, I turned the seat frame around to get the other side closer to the donor electrode. You can tell that much of the rust is already gone.
After another 12 hours and about 10 minutes of wire brush and rinsing, here is the final product!
Now I will spray a coat of paint on them to protect them. Time to do that seat back and tracks.
01-20-2012, 12:36 PM
#26
Staging Lane
Thread Starter
Join Date: Dec 2007
Posts: 85
Likes: 0
Received 0 Likes
on
0 Posts
Guys, where is a good place to buy the 97-04 corvette front accessory set up? I would consider buying new or used, but not really sure on what I should expect to pay or where to find them.
Thanks for the help!
Thanks for the help!
 01-20-2012, 04:44 PM
#29
TECH Apprentice

Join Date: Jul 2011
Posts: 393
Likes: 0
Received 0 Likes
on
0 Posts
Here is a link for that drive setup with everything
http://www.superchevyperformance.com...p/19155067.htm
http://www.superchevyperformance.com...p/19155067.htm
01-20-2012, 07:53 PM
#30
Staging Lane
Thread Starter
Join Date: Dec 2007
Posts: 85
Likes: 0
Received 0 Likes
on
0 Posts
Thanks for a link to that site! I guess now I need to determine if my gto drive pulley and gto waterpump will line up with that set up. I think that is the route I am going to go. I have decided to notch the frame on the passenger side for the a/c compressor.
still waiting on the new cast S&P pan due to come out the first week of Feb. I have heard it mentioned that the Holley pan is the same pan as the Mast, but not sure if this is correct.
still waiting on the new cast S&P pan due to come out the first week of Feb. I have heard it mentioned that the Holley pan is the same pan as the Mast, but not sure if this is correct.
01-20-2012, 08:27 PM
#31

Yeah, the Kwik brackets are nice enough for me in appearance, but I with you on the low mount AC compressor. I do believe that I am going to notch the crossmember in order to use the corvette AC mounting bracket. This will save me a couple hundred for other necessities and since my frame had previous repair on the front frame horn I am not all that concerned about keeping it stock.
I have the LS6 intake with DBW LS1 TB. Is the IAC computer specific, or can it be programmed onto the computer? I will email Brandon as you mentioned.
Thanks for the replies.
I have the LS6 intake with DBW LS1 TB. Is the IAC computer specific, or can it be programmed onto the computer? I will email Brandon as you mentioned.
Thanks for the replies.
 01-21-2012, 07:30 AM
#32
Staging Lane
Thread Starter
Join Date: Dec 2007
Posts: 85
Likes: 0
Received 0 Likes
on
0 Posts
Some time back, there was a thread posted and at one time in the stickies of a mount to locate the AC compresser in the corvette position using the corvette accessory drive. It moves the compresser forward to use the main drive belt and works great. When I made one up for my 65, I did not have to notch the frame. I could not find this thread a month ago for another member, if you can it would be great info for you. If you do not find it, I can make some copies of the "blueprint" and send them to you.
01-21-2012, 09:51 AM
#33
TECH Apprentice
Join Date: Jul 2011
Posts: 393
Likes: 0
Received 0 Likes
on
0 Posts
Unfortunately the GTO waterpump and crank pulley are spaced .750" further away from the block then the Corvette stuff. The GTO is the same as the LS1 F-body stuff.
If you look in my build I had the truck crank pulley which is 1.5" away and made 1.5" spacers to use the Corvette accessory drive parts.
So your options would be
-Use F-body or GTO drive without any spacers. I do not know how these will fit your frame though. The low mount stuff can interfere with your steering gear box.
-Use Corvette stuff with existing waterpump and pulley with .75" spacers. You will probably spend some time finding the correct belt to use though. I tried 4 different belts before I got mine right.
-Switch out crank pulley and waterpump to vette parts and then use vette drive without spacers. Guaranteed to work, easiest, most expensive option...
 01-23-2012, 05:37 AM
#35
Staging Lane
Thread Starter
Join Date: Dec 2007
Posts: 85
Likes: 0
Received 0 Likes
on
0 Posts
Thanks FatFreeGTO. I am probably not going to mess with spacers, so it looks like I will be buying all the corvette stuff.
john 67, I am sending you a PM now! I reviewed your entire build - awesome! Thanks for sharing your innovation. Oh, if there was Pepsi in there it would be free! What you see there is a future vintage bottled beer fridge - awaiting restoration. Beer will be free to car guys as well!
I guess it is time to start ordering and spending.
05-19-2012, 10:18 AM
#36
Staging Lane
Thread Starter
Join Date: Dec 2007
Posts: 85
Likes: 0
Received 0 Likes
on
0 Posts
Well it has been almost 4 months since I posted an update to the build! A lot of things have changed, so I will update.
First, I have another 67 LS1 T56 car that I tore down a few years ago to start restoring the body. Because I am so short on time with work and 4 kids, I have decided to just do a chasis swap to shorten my project time.
So, now I already have the other engine all configured to the chasis, running a modified S&P oil pan and C5 corvette front accessory drive set up.
Thanks to John, I have the drawings of the brackets to fit my Sanden A/C compressor without modifying the frame.
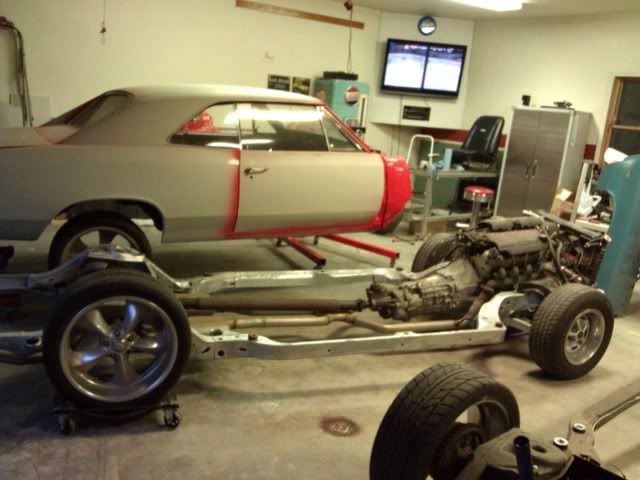
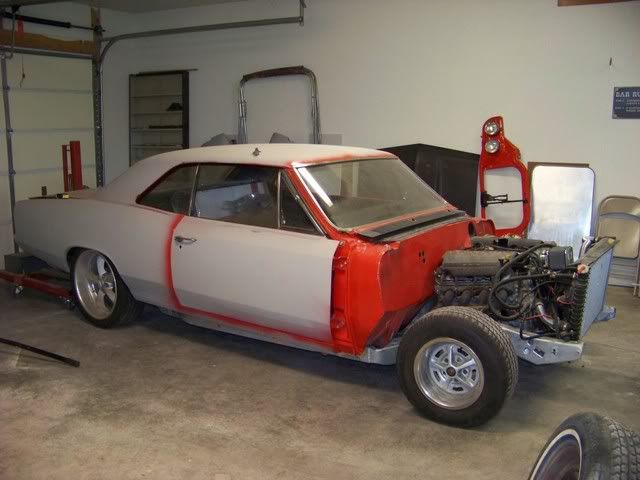
05-19-2012, 10:33 AM
#37
Staging Lane
Thread Starter
Join Date: Dec 2007
Posts: 85
Likes: 0
Received 0 Likes
on
0 Posts
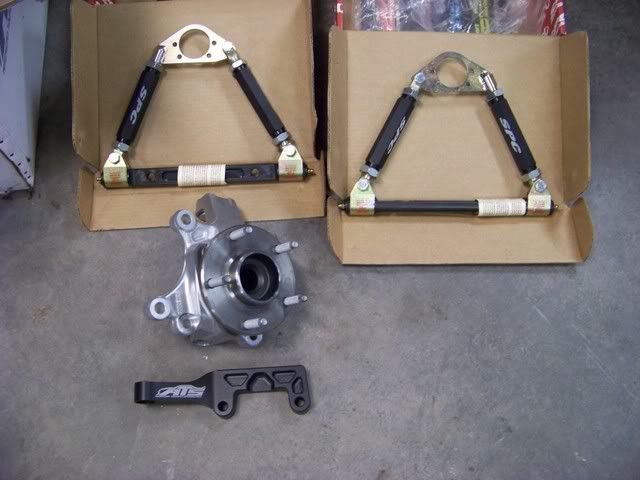
Here are some of the goodies that I will be installing this week.
SC&C Control arms
ATS AFX Spindles + steering arms
Eibach Front/Rear Springs
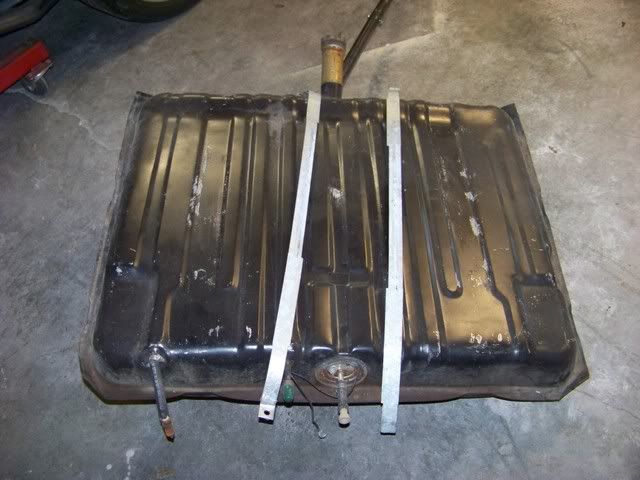
I just ordered my Tanks Inc pump set up for the tank, due Tuesday.
NEED YOUR HELP with the following!
What brakes should I run? Willwood, Baer, Kore 3 C5/C6???? You can see that I have Boyd Coddington smoothie II wheels, but not sure if that is my final wheel selection or not. I have been looking hard at Forgelines with red lip rims. Either way, I want brakes that will fit the coddingtons for now. Also, can I just run a master cylinder without a booster or should I run a booster?
Also, What side of the tank to mount the Tanks Inc pump? Center/Right/Left?
SC&C Control arms
ATS AFX Spindles + steering arms
Eibach Front/Rear Springs
I just ordered my Tanks Inc pump set up for the tank, due Tuesday.
NEED YOUR HELP with the following!
What brakes should I run? Willwood, Baer, Kore 3 C5/C6???? You can see that I have Boyd Coddington smoothie II wheels, but not sure if that is my final wheel selection or not. I have been looking hard at Forgelines with red lip rims. Either way, I want brakes that will fit the coddingtons for now. Also, can I just run a master cylinder without a booster or should I run a booster?
Also, What side of the tank to mount the Tanks Inc pump? Center/Right/Left?
05-19-2012, 11:35 AM
#38

I finished my install for my other '67 chevelle LS2/T56 build, but didn't update my pictures in this thread. You see that I recessed mine so that I didn't have to make an access panel or lower the tank like most do. I'll get some final pictures uploaded to my photobucket account.
http://www.chevelles.com/forums/showthread.php?t=354984
check back here: http://s117.photobucket.com/albums/o...hnson/TankMod/
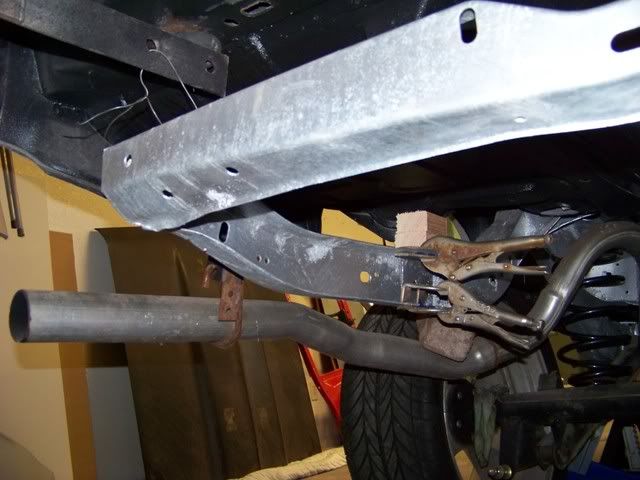
Also, you have pretty severe engine angle as indicated by the driveshaft angle versus tailhousing. I'm sure that clears your tunnel but you're going to have drivetrain engine angle issues, most notably the driveshaft going uphill to meet your pinion.
05-19-2012, 01:33 PM
#39
Staging Lane
Thread Starter
Join Date: Dec 2007
Posts: 85
Likes: 0
Received 0 Likes
on
0 Posts
Thanks for the links to the Tanks Inc pump install! I remember seeing that thread some time ago, but could not find it the other day.
05-19-2012, 11:03 PM
#40
Staging Lane
Thread Starter
Join Date: Dec 2007
Posts: 85
Likes: 0
Received 0 Likes
on
0 Posts
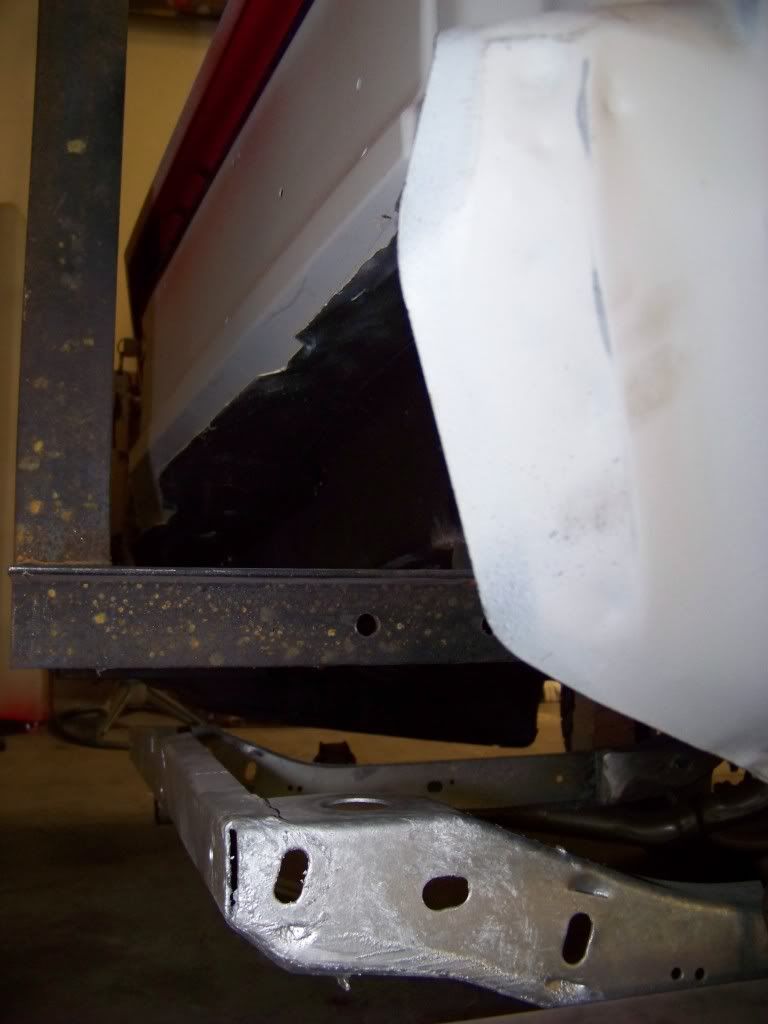
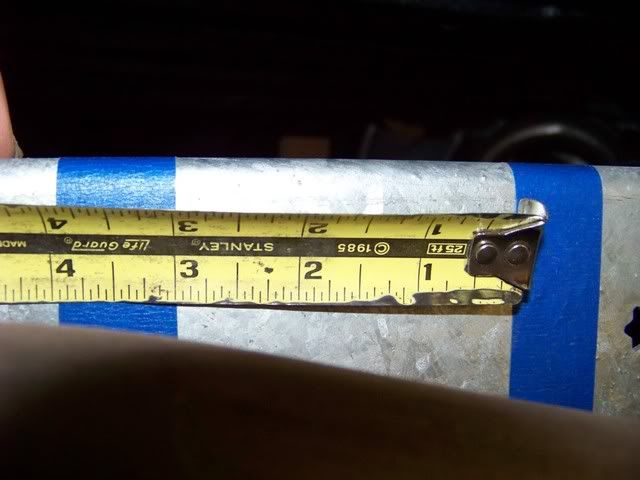
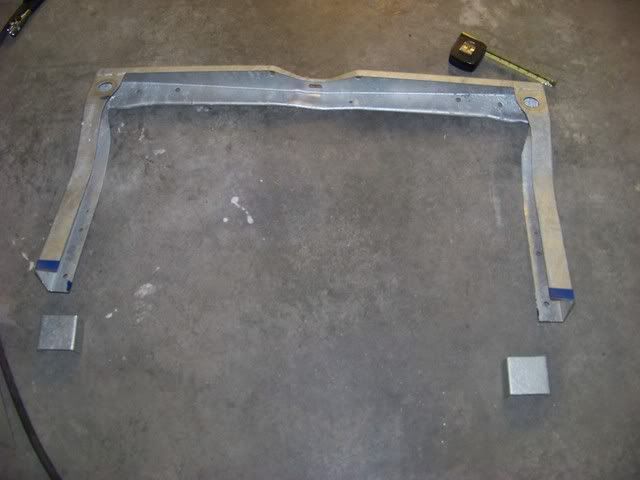
The galvanized frame that I am using was about 3" longer in the back, either from a 4 door or some BOP with a longer back end. Anyway, I measured it out and cut 3" off of both sides. It is all ready to weld back up, but since it is zinc coated, I am going to weld it outside while I hold my breath!