
Superdave's 65 Impala SS 5.3 Swap
 05-13-2012, 07:14 AM
#21


Great Job.......and Info.....Thanks
 05-14-2012, 12:35 AM
#22
TECH Resident
Thread Starter
05-20-2012, 11:47 AM
#23
TECH Resident
Thread Starter
I have been such a slacker lately. I have been busy with other things so the car progress has been a lot slower than I would like. I have been buttoning up odds and ends on it, but nothing worthy of taking pictures.
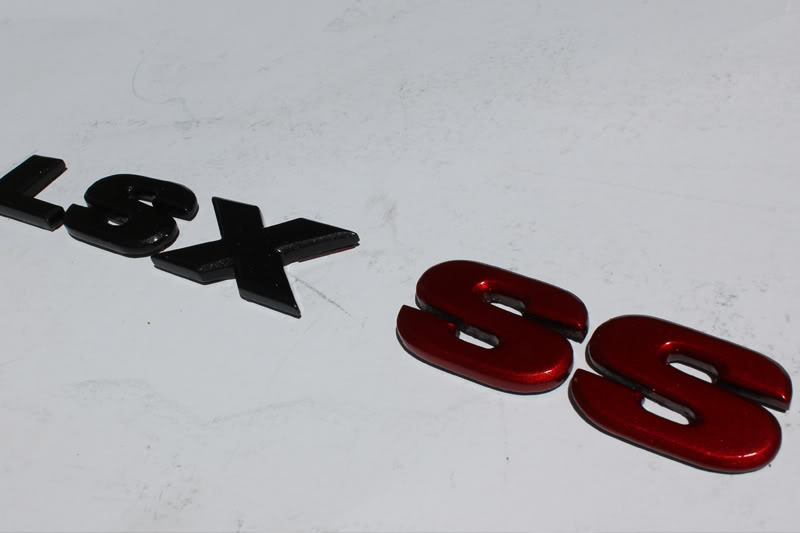
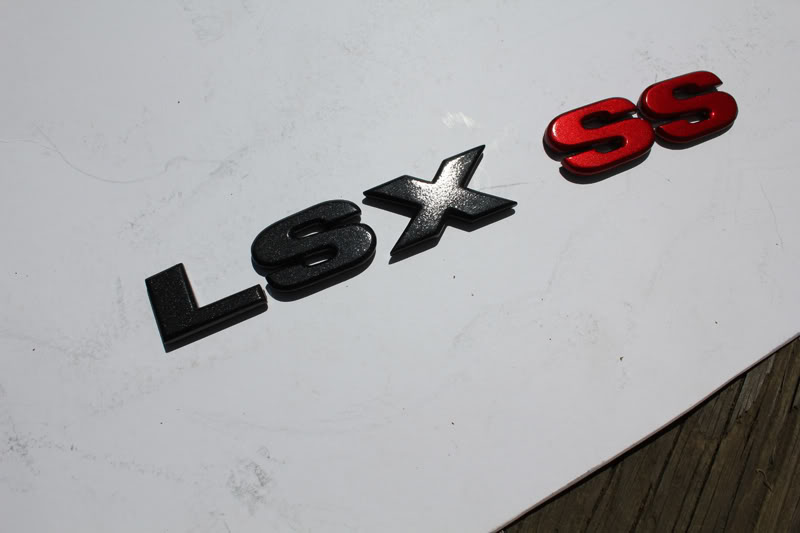
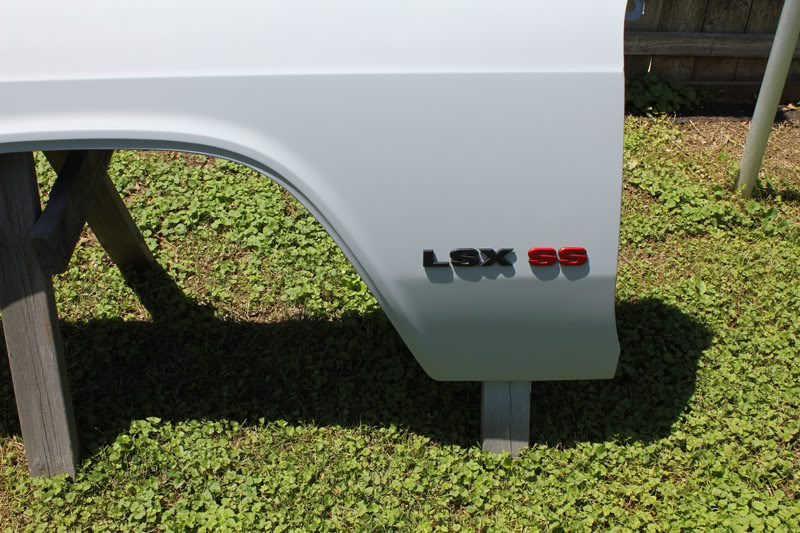
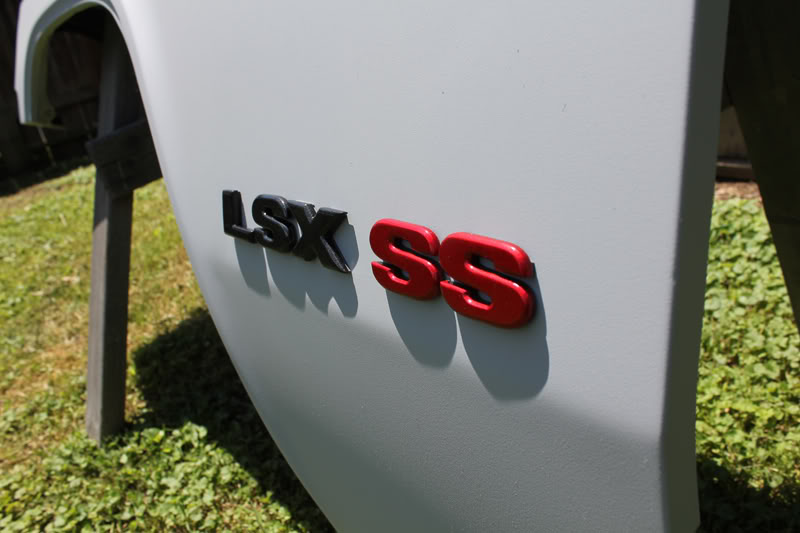
However, I did make some new emblems for the fenders. Like the dash parts, I started with wood, and then made molds for the letters. Then they were cast in plastic. Originally the "LSX" was supposed to be black, but the metallic red just looked 10x better than the black letters, so I repainted the "LSX" in a very dark (almost black) metallic gray. Then they were all clearcoated and 3M automotive double-sided tape was put on the back, and then I stuck 'em on the fenders. Eventually I want to paint the car a very dark metallic gray I think, and when the car has a real paintjob I will repaint "LSX" in silver instead of the dark, dark metallic gray.
However, I did make some new emblems for the fenders. Like the dash parts, I started with wood, and then made molds for the letters. Then they were cast in plastic. Originally the "LSX" was supposed to be black, but the metallic red just looked 10x better than the black letters, so I repainted the "LSX" in a very dark (almost black) metallic gray. Then they were all clearcoated and 3M automotive double-sided tape was put on the back, and then I stuck 'em on the fenders. Eventually I want to paint the car a very dark metallic gray I think, and when the car has a real paintjob I will repaint "LSX" in silver instead of the dark, dark metallic gray.
 07-08-2012, 06:19 PM
#26
TECH Resident
Thread Starter
I haven't stopped....just been slowed down some. I am busy doing all the boring stuff like painting the core support, modifying the a/c box, mounting the computer....stuff that no one cares to see pictures of.
I'll have another progress report up soon.
I'll have another progress report up soon.
07-16-2012, 12:53 PM
#27
Launching!

-Nick
07-16-2012, 09:10 PM
#28
TECH Resident
Thread Starter
I have some really, really cool stuff in store. All things to modernize the old car. Pics coming in a few days because I am waiting on parts. Stay tuned!!!
07-17-2012, 03:31 PM
#29
Staging Lane
Join Date: Jun 2012
Posts: 52
Likes: 0
Received 0 Likes
on
0 Posts
I like how you smoothed out the dash and the install of the gauges.
I see a lot of the truck bedliner spray-on material has little/no UV resistance, do you know about the stuff you got?
I see a lot of the truck bedliner spray-on material has little/no UV resistance, do you know about the stuff you got?
07-17-2012, 10:43 PM
#30
TECH Resident
Thread Starter
�Formulated with DuPont� Kevlar�
�Will Not Fade or Deteriorate with UV Exposure
�Rust and Corrosion Resistant
�Flexible, Impact-Resistant Coating that will Not Peel, Chip or Flake
�Maximum Adhesion to Metal, Wood, Concrete and other Surfaces
�Gasoline and Chemical Resistant
�Water-Based Polyurethane Coating is Easy-To-Use and Low Odor
�Provides a Textured, Non-Skid Surface
�Durable, Rubberized Finish Extends Truck Bed Life
�BAK2010 - Gallon Kit
�BAQ2010 - Quart
Plus, if it ever fades, I can just go over it again. I literally painted it on with a rag haha
07-18-2012, 09:04 AM
#32

It's looking Super...Dave!
I like how you have placed the car in your signature. It gives you a vision of what you'd like to accomplish.
I did the same...cut out a picture of my car model and placed it on the wall, so that the completed version was 'within reach'.
I like how you have placed the car in your signature. It gives you a vision of what you'd like to accomplish.
I did the same...cut out a picture of my car model and placed it on the wall, so that the completed version was 'within reach'.
07-18-2012, 04:20 PM
#33
TECH Resident
Thread Starter
Ok, here's a small update. With a modern engine going into the car, I thought I would modernize a few other things as well. The interior is already ripped out and will be replaced with a design of my own. I haven't worked it all out yet, but below are a few sketches I have some up with so far.
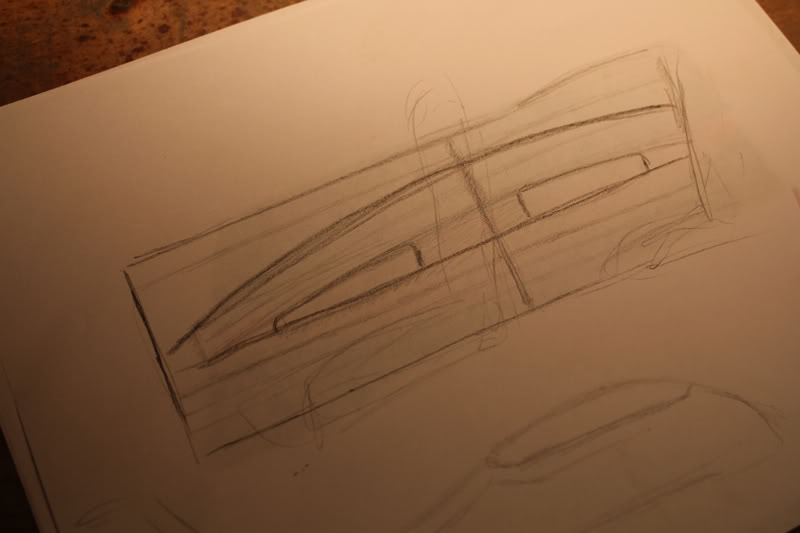
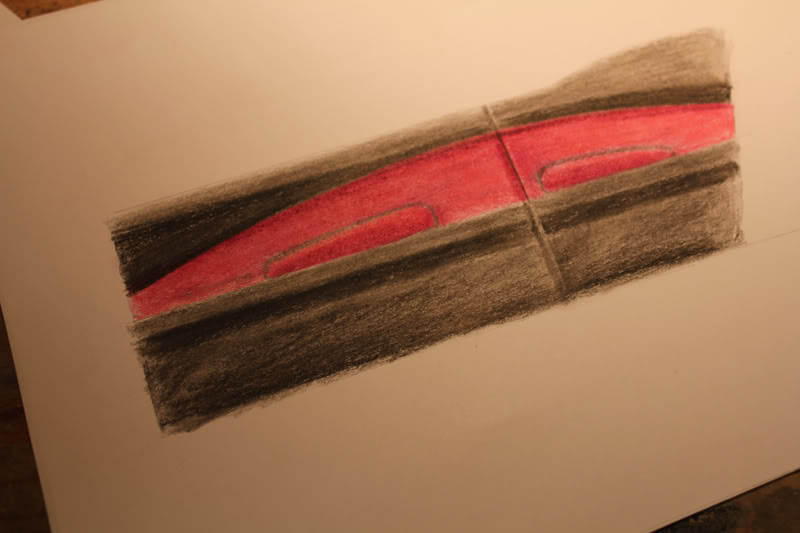
The red is actually going to be a dark red, not all obnoxious like you see in the picture....it as the only red colored pencil I had
Next up are the dash vents. This is a picture of the original:
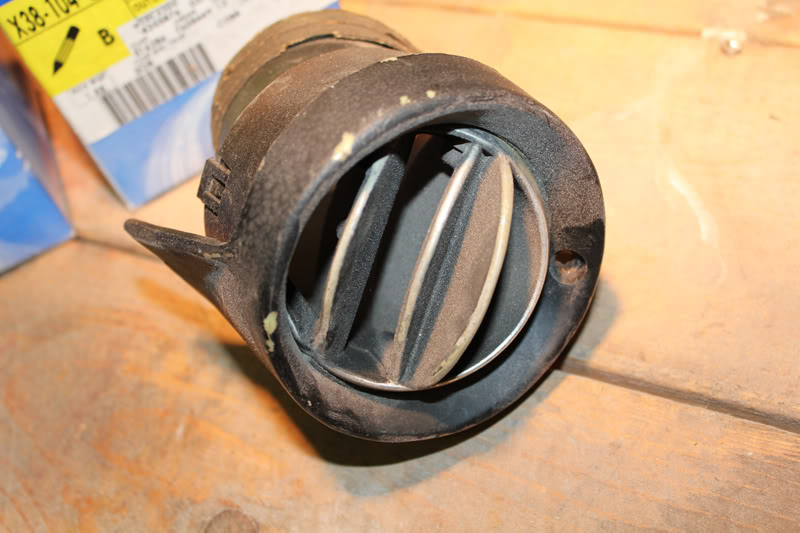
Wow, super ugly. So I found some brand new Pontiac G6 dash vents on Ebay for $25. Much nicer if you ask me. Once the interior starts coming together, I will make some brackets and integrate these into the dash.
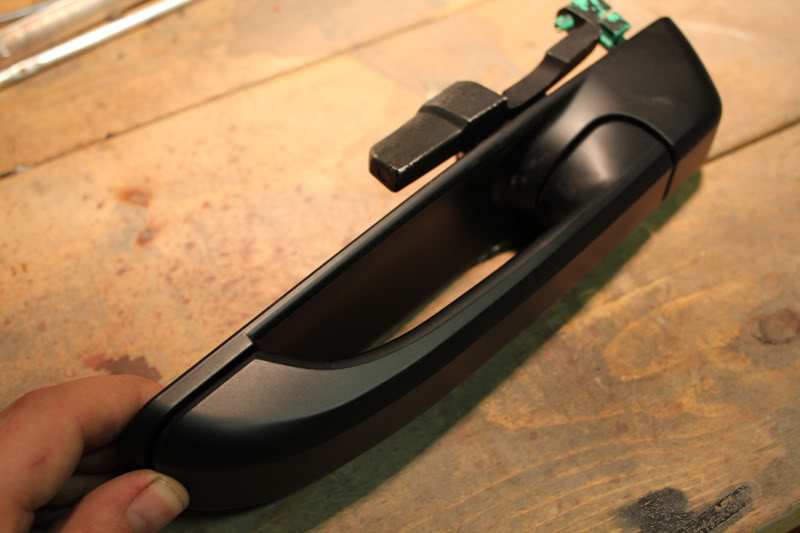
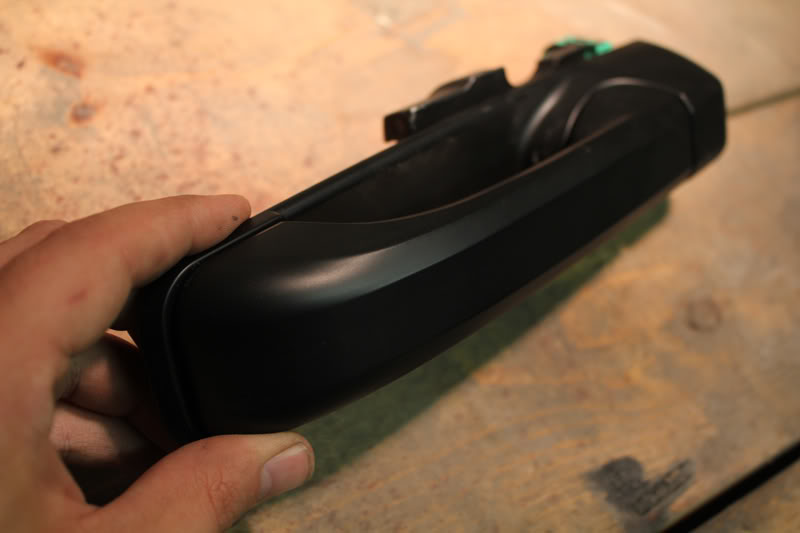
On the exterior, I wanted a more modern door handle instead of that tired old "pickup truck" handle on every classic car. After a lot of searching (in parking lots and online) I found these. They are brand new ($20 each) from a newer Jeep Cherokee. I think the lines will match the Impala well, and they are (mostly) flat on the back, meaning I don't have to create a recess in the door for it to fit into. I will eventually install these and paint them body color....but that's a ways down the road.
And the radio is going to be something along these lines:

I haven't decided on a model yet, but I wanted a double din, without all that touchscreen jazz. Bluetooth would be nice too. Also, all of my gauges are red, so I want one that is either red, or can be adjusted to any color. I bought the install kit for a G6, and I will build a custom console surrounding it.
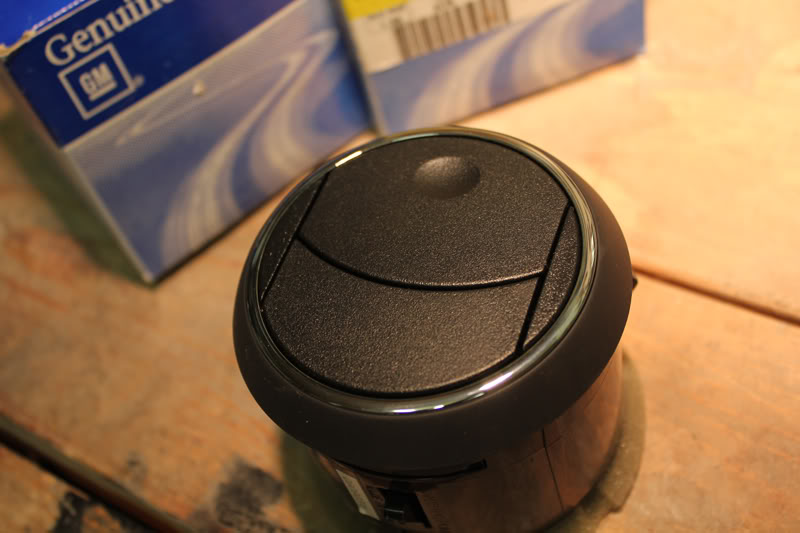
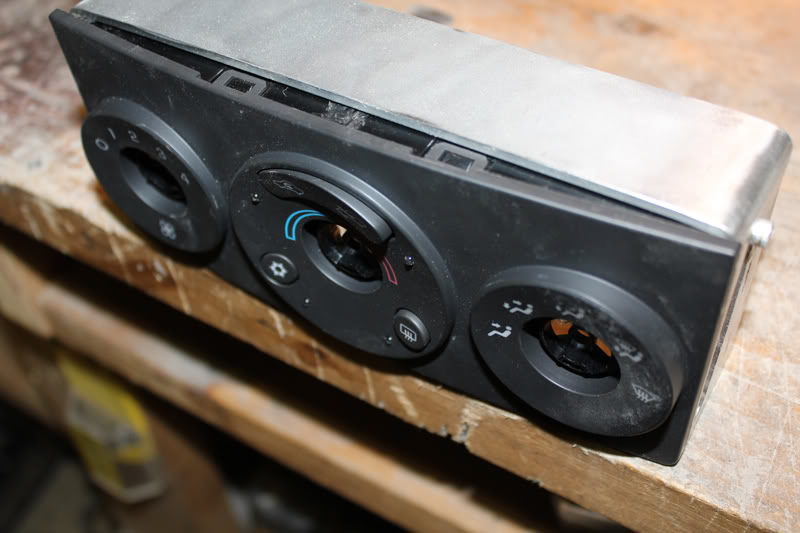
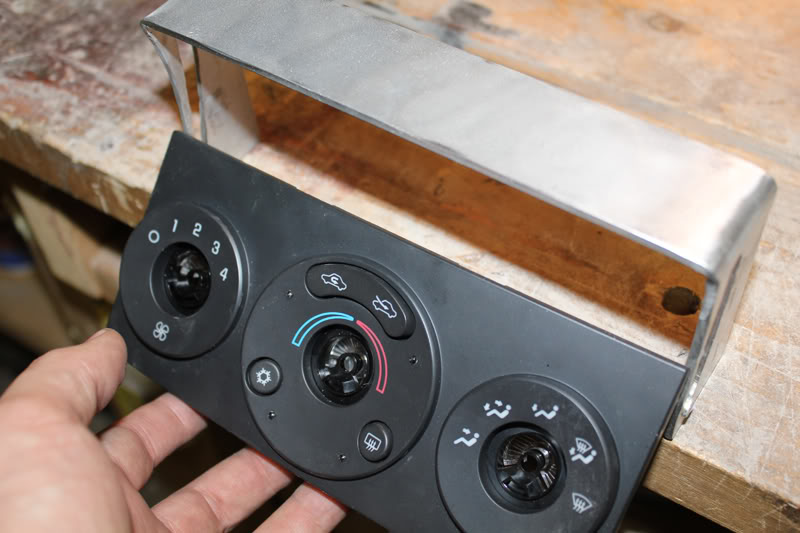
Also from a G6 is this heater control unit.
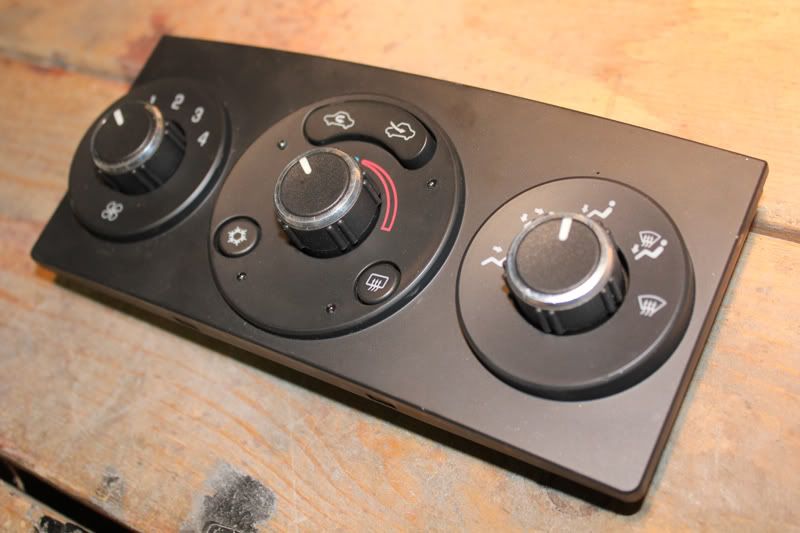
I certainly can't make this thing communicate with my ancient slider (cable driven) controls, however I came up with a cool idea to keep the dash modern and unified. I tore it apart, saving just the pretty center section, and made a bracket for it to fit into the dash install kit (under the radio)
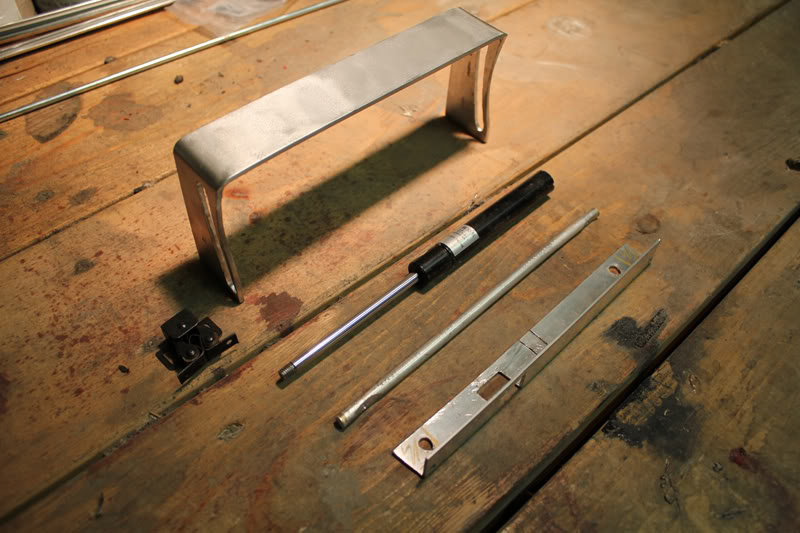
I designed this to only be a dummy plate to cover the old slider controls. I will have to move the original controls to a lower position, but that should be easy. When the left **** is turned, a latch is released, allowing the dummpy plate to slide down, and then outwards, revealing the hideous slider controls. I had originally designed the system to be actuated by a gas spring (those things that help keep your rear hatch on your SUV in the air) but even the weakest one I could find (30n or about 6.6 lbs) was WAY too strong. I cut it apart, hoping to modify it with a spring or something, but nothing is working so far. I really want it to open slowly, like a CD player does, but I am still trying to figure out how to make that happen. Oh and I am going to run red LED lights into the back so that the whole dash is all lit up red. Thinking of putting a single red LED deep inside the heating vents too (out of sight so only the glow is visible, not the LED itself)

Any ideas on how to get the thing to open slowly would be greatly appreciated. I need something with 3" of travel.
I am also looking into putting in a backup camera so I can back this titanic thing up. That should add a little modern flare as well.
The red is actually going to be a dark red, not all obnoxious like you see in the picture....it as the only red colored pencil I had
Next up are the dash vents. This is a picture of the original:
Wow, super ugly. So I found some brand new Pontiac G6 dash vents on Ebay for $25. Much nicer if you ask me. Once the interior starts coming together, I will make some brackets and integrate these into the dash.
On the exterior, I wanted a more modern door handle instead of that tired old "pickup truck" handle on every classic car. After a lot of searching (in parking lots and online) I found these. They are brand new ($20 each) from a newer Jeep Cherokee. I think the lines will match the Impala well, and they are (mostly) flat on the back, meaning I don't have to create a recess in the door for it to fit into. I will eventually install these and paint them body color....but that's a ways down the road.
And the radio is going to be something along these lines:
I haven't decided on a model yet, but I wanted a double din, without all that touchscreen jazz. Bluetooth would be nice too. Also, all of my gauges are red, so I want one that is either red, or can be adjusted to any color. I bought the install kit for a G6, and I will build a custom console surrounding it.
Also from a G6 is this heater control unit.
I certainly can't make this thing communicate with my ancient slider (cable driven) controls, however I came up with a cool idea to keep the dash modern and unified. I tore it apart, saving just the pretty center section, and made a bracket for it to fit into the dash install kit (under the radio)
I designed this to only be a dummy plate to cover the old slider controls. I will have to move the original controls to a lower position, but that should be easy. When the left **** is turned, a latch is released, allowing the dummpy plate to slide down, and then outwards, revealing the hideous slider controls. I had originally designed the system to be actuated by a gas spring (those things that help keep your rear hatch on your SUV in the air) but even the weakest one I could find (30n or about 6.6 lbs) was WAY too strong. I cut it apart, hoping to modify it with a spring or something, but nothing is working so far. I really want it to open slowly, like a CD player does, but I am still trying to figure out how to make that happen. Oh and I am going to run red LED lights into the back so that the whole dash is all lit up red. Thinking of putting a single red LED deep inside the heating vents too (out of sight so only the glow is visible, not the LED itself)
Any ideas on how to get the thing to open slowly would be greatly appreciated. I need something with 3" of travel.
I am also looking into putting in a backup camera so I can back this titanic thing up. That should add a little modern flare as well.
Last edited by superdave84; 07-18-2012 at 04:26 PM.
07-18-2012, 04:30 PM
#34
Staging Lane
Join Date: Jun 2012
Posts: 52
Likes: 0
Received 0 Likes
on
0 Posts
Different ideas, but they all work nicely together and will look good on this. I like Pontiac vents, simple and look good. Door handles are a nice change too. Have you thought of maybe getting a center console cover for hiding the old slider HVAC controls? Car coming to mind with the door I'm thinking of is a scion tc, used that style design for a new age Cougar XR7 I was dreaming up. Cover may be too tall though, and need cut down?
07-18-2012, 05:29 PM
#35
TECH Resident
Thread Starter
Different ideas, but they all work nicely together and will look good on this. I like Pontiac vents, simple and look good. Door handles are a nice change too. Have you thought of maybe getting a center console cover for hiding the old slider HVAC controls? Car coming to mind with the door I'm thinking of is a scion tc, used that style design for a new age Cougar XR7 I was dreaming up. Cover may be too tall though, and need cut down?
07-18-2012, 05:48 PM
#36
On The Tree
iTrader: (2)
Join Date: Mar 2012
Location: Mobile,Al
Posts: 116
Likes: 0
Received 0 Likes
on
0 Posts
Take a look at some RC car shocks. Not sure you will find 3" worth of travel in them but you could put it on a lever. If you take the spring off its just a dampener. They are adjustable too. So you can fine tune the opening rate.
07-18-2012, 05:59 PM
#37
TECH Resident
Thread Starter
The longest I can find are 100mm, which is like 4" total, and a travel of probably like 1.5". That's just a guess though...I really wanted to actually SEE one before I bought it. I was thinking I could bolt two together.
Are they all adjustable? Or is it only the more expensive ones?
07-19-2012, 12:35 PM
#39
TECH Resident
Thread Starter
