Superdave's 65 Impala SS 5.3 Swap
 12-17-2012, 09:18 PM
#121
TECH Resident
Thread Starter
No real updates to report. I have been doing boring bodywork, and it's not worthy of pictures yet. Coming along well though. Got the other drip rail all done I think, fixed a hole in the door, filled in the emblem holes on the trunk and the keyhole too. Also doing pretty extensive work to the front valance (the part under the front bumper), cleaning it up and ditching all the trim, filling the holes, including the license plate holes.
I am also going to dive in and flush mount the front and rear windows. Delete the trim, raise the glass about 1/3", and fill in the gap around the window to close it in some.
Thanks I am definitley still looking for something to power the heater thingy. I will definitely check them out. Thank you
In regards to the power, it might not be some kind of powerhouse, but the car is about 1,200 lbs lighter than the truck it came out of, so I think it will be ok....untill I can get my hands on a more powerful LS motor
So what will you do with the F-body pan then? I know my GMPP Hotrod pan hangs lower than I would like. If the F-body is significantly shorter, I might buy it off you. As it stands now though, my headers hang lowest, so I won't be scraping the pan unless I do something really stupid (and I NEVER do anything stupid!) I plan to run airbags, but man, it's already pretty close to the ground and I haven't even lowered it yet. I can only afford to drop it about 1.5" right now, and that only gives me 3" from header to asphalt.
Oh, I was sitting here thinking as I typed, and you might want to load the engine bay with engine weight as you check your clearance. I would hate for you to drop it in and find that the loaded suspension causes the linkage to hit the pan.
I am also going to dive in and flush mount the front and rear windows. Delete the trim, raise the glass about 1/3", and fill in the gap around the window to close it in some.
I like the Impala, Ive got a 65 too so I am anxious to see how it runs and drives. I'd like to see if that 5.3 has enough sack to push that Impala.
I just looked over your thread and if you still needed them, the best source for a device for the heater control door is Ace Controls. They make the stuff you need (Ive used them on automated equipment in manufacturing). Mostly industrial stuff but I think they have the mass produced automotive crap as well (you know on a Lexus when the doors glide open all smooth) that's a rotary damper that does this.
The rest of the dash is nicely done btw...
In regards to the power, it might not be some kind of powerhouse, but the car is about 1,200 lbs lighter than the truck it came out of, so I think it will be ok....untill I can get my hands on a more powerful LS motor
Super Dave your ride is coming along fine. I was reviewing your post when you first started your restoration and ran across a pic of your steering. Mine is exacly the same. I just now decided to check to see the clearance between the truck pan and the frame, and GLORY HALLELUYAH, it fit. A little tight though. I bought a f body pan and don't need it. There should be enough clearance once I get the engine in the bay. Thanks for your post!!! Heres a couple pics of my engine bay.
Oh, I was sitting here thinking as I typed, and you might want to load the engine bay with engine weight as you check your clearance. I would hate for you to drop it in and find that the loaded suspension causes the linkage to hit the pan.
Last edited by superdave84; 12-17-2012 at 10:04 PM.

 12-18-2012, 07:34 AM
#123
Staging Lane
iTrader: (4)
Join Date: Jul 2009
Location: Killeen, Texas
Posts: 99
Likes: 0
Received 0 Likes
on
0 Posts
The fbody pan sits on top of the steering linkage, I'll send u a pic when I get home this evening.
No real updates to report. I have been doing boring bodywork, and it's not worthy of pictures yet. Coming along well though. Got the other drip rail all done I think, fixed a hole in the door, filled in the emblem holes on the trunk and the keyhole too. Also doing pretty extensive work to the front valance (the part under the front bumper), cleaning it up and ditching all the trim, filling the holes, including the license plate holes.
I am also going to dive in and flush mount the front and rear windows. Delete the trim, raise the glass about 1/3", and fill in the gap around the window to close it in some.
Thanks I am definitley still looking for something to power the heater thingy. I will definitely check them out. Thank you
In regards to the power, it might not be some kind of powerhouse, but the car is about 1,200 lbs lighter than the truck it came out of, so I think it will be ok....untill I can get my hands on a more powerful LS motor
So what will you do with the F-body pan then? I know my GMPP Hotrod pan hangs lower than I would like. If the F-body is significantly shorter, I might buy it off you. As it stands now though, my headers hang lowest, so I won't be scraping the pan unless I do something really stupid (and I NEVER do anything stupid!) I plan to run airbags, but man, it's already pretty close to the ground and I haven't even lowered it yet. I can only afford to drop it about 1.5" right now, and that only gives me 3" from header to asphalt.
Oh, I was sitting here thinking as I typed, and you might want to load the engine bay with engine weight as you check your clearance. I would hate for you to drop it in and find that the loaded suspension causes the linkage to hit the pan.
I am also going to dive in and flush mount the front and rear windows. Delete the trim, raise the glass about 1/3", and fill in the gap around the window to close it in some.
Thanks I am definitley still looking for something to power the heater thingy. I will definitely check them out. Thank you
In regards to the power, it might not be some kind of powerhouse, but the car is about 1,200 lbs lighter than the truck it came out of, so I think it will be ok....untill I can get my hands on a more powerful LS motor
So what will you do with the F-body pan then? I know my GMPP Hotrod pan hangs lower than I would like. If the F-body is significantly shorter, I might buy it off you. As it stands now though, my headers hang lowest, so I won't be scraping the pan unless I do something really stupid (and I NEVER do anything stupid!) I plan to run airbags, but man, it's already pretty close to the ground and I haven't even lowered it yet. I can only afford to drop it about 1.5" right now, and that only gives me 3" from header to asphalt.
Oh, I was sitting here thinking as I typed, and you might want to load the engine bay with engine weight as you check your clearance. I would hate for you to drop it in and find that the loaded suspension causes the linkage to hit the pan.
12-19-2012, 06:22 PM
#125
TECH Resident
Thread Starter
I see that, but I would think without the weight of the engine in the bay, the suspension is not loaded, and so the linkage will probably sit higher than it does in the pic and maybe give you clearance issues. I would put the engine in and check
12-21-2012, 03:03 PM
#126
TECH Resident
Thread Starter
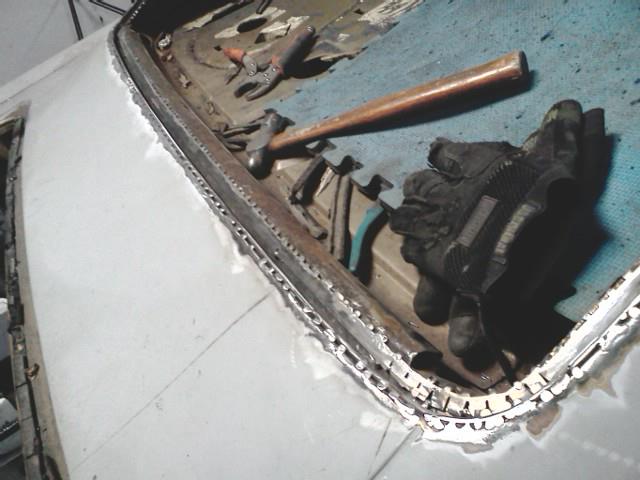
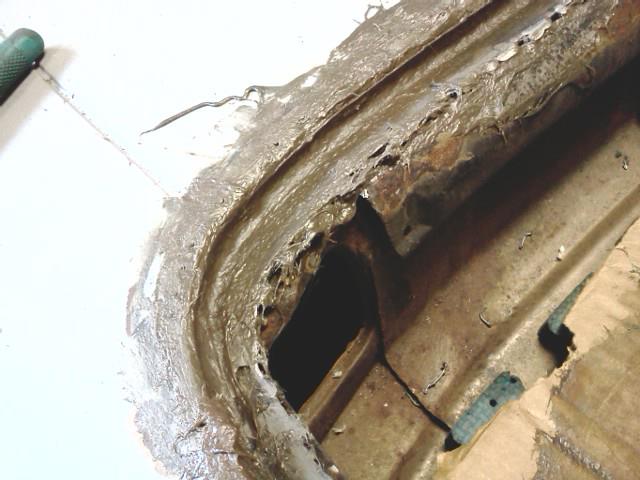
So I pulled the rear window out. Some heartless owner before me had caulked all around the window with what looked like bathroom caulk from Home Depot. I have to admit I was afraid to deal with the issue, thinking there would be extensive rust damage (you could easily see lots of rust on the package shelf inside the car). But I got very lucky and there was nothing but surface rust. Everything back there is solid as a rock, just ugly. Whew.
So, in my quest to eliminate all chrome and strim from the car, I am about to take on flush mounting the front and rear glass. For anyone who has not heard of it, it's basically raising the glass up, and then adding some metal around the opening to close up the gap a little. Take a look at the picture below:
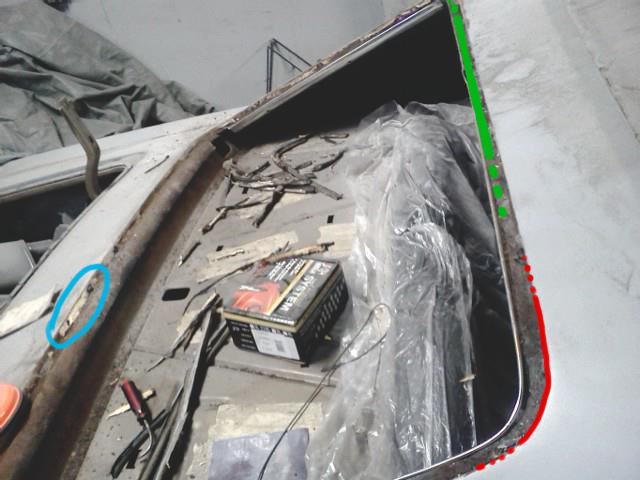
What you see marked with green is the ledge the glass sits on. This ledge will have new metal welded on top of it (either 1/4" or 1/8", not sure about all the measurements yet). This raises the glass up closer to the level of the surrounding body
In red you see where I will add in metal to "cinch" in around the window to narrow the gap. Right now it's about 1/4", so I will probably use 1/8" round rod, bent to conform to the body, and then do bodywork to blend the rod out. This will give me a nice, rounded, consistant ridge all the way around the window.
Circled in blue is the bathroom caulk that was holding the window in. There was still some window rubber between the shelf and the glass, but the sun and other weather had deteriorated it to a point where the window basically just popped out after a little scraping and pushing.
So, if I haven't bored you by this point, you're still reading and you're probably wondering about how the rubber is supposed to seal and not deteriorate under the sunlight. Well, raising the shelf does not affect the seal, as long as everything is welded up and any voids are filled with metal or a small amount of fiberglass. Since the whole window is raised the same amount, there are no issues with the geometry changing.
"But Dave," you ask, "won't you be able to see the ugly rubbery glue stuff through the glass?"
Yes, good question. Modern windows have a blackened area to hide the glue. I can't do that exactly, but I can get some 3M vinyl (the kind used for stripes, ect, like I used to cover my vent windows) and cover the entire outside of the window. Then I will make a little cutting tool that will ride along the edge of the glass, scouring a perfect line all around the edge of the window. Then when I remove the center section, I will be left with a black rim all around the window, hiding the glue and protecting it from the sun.
For the front window, it's the same method. Should be a really cool way to modernize the car....and I knwo you guys are all abot modernizing these old hot rods or you wouldn't be on this site!
Lots more interesting pics to come. I hope I can inspire some of you to try this too.
There are no Impalas I can find with flush windows, but here's a look at some Camaros with it done:

So, in my quest to eliminate all chrome and strim from the car, I am about to take on flush mounting the front and rear glass. For anyone who has not heard of it, it's basically raising the glass up, and then adding some metal around the opening to close up the gap a little. Take a look at the picture below:
What you see marked with green is the ledge the glass sits on. This ledge will have new metal welded on top of it (either 1/4" or 1/8", not sure about all the measurements yet). This raises the glass up closer to the level of the surrounding body
In red you see where I will add in metal to "cinch" in around the window to narrow the gap. Right now it's about 1/4", so I will probably use 1/8" round rod, bent to conform to the body, and then do bodywork to blend the rod out. This will give me a nice, rounded, consistant ridge all the way around the window.
Circled in blue is the bathroom caulk that was holding the window in. There was still some window rubber between the shelf and the glass, but the sun and other weather had deteriorated it to a point where the window basically just popped out after a little scraping and pushing.
So, if I haven't bored you by this point, you're still reading and you're probably wondering about how the rubber is supposed to seal and not deteriorate under the sunlight. Well, raising the shelf does not affect the seal, as long as everything is welded up and any voids are filled with metal or a small amount of fiberglass. Since the whole window is raised the same amount, there are no issues with the geometry changing.
"But Dave," you ask, "won't you be able to see the ugly rubbery glue stuff through the glass?"
Yes, good question. Modern windows have a blackened area to hide the glue. I can't do that exactly, but I can get some 3M vinyl (the kind used for stripes, ect, like I used to cover my vent windows) and cover the entire outside of the window. Then I will make a little cutting tool that will ride along the edge of the glass, scouring a perfect line all around the edge of the window. Then when I remove the center section, I will be left with a black rim all around the window, hiding the glue and protecting it from the sun.
For the front window, it's the same method. Should be a really cool way to modernize the car....and I knwo you guys are all abot modernizing these old hot rods or you wouldn't be on this site!
Lots more interesting pics to come. I hope I can inspire some of you to try this too.
There are no Impalas I can find with flush windows, but here's a look at some Camaros with it done:
Last edited by superdave84; 12-21-2012 at 03:23 PM.
 Nice! Keep the pics up! Thx Superdave!
  01-12-2013, 03:08 PM
#132
TECH Resident
Thread Starter
Hi all!
The holidays have kept me busy, but here's a little something for you to chew on.
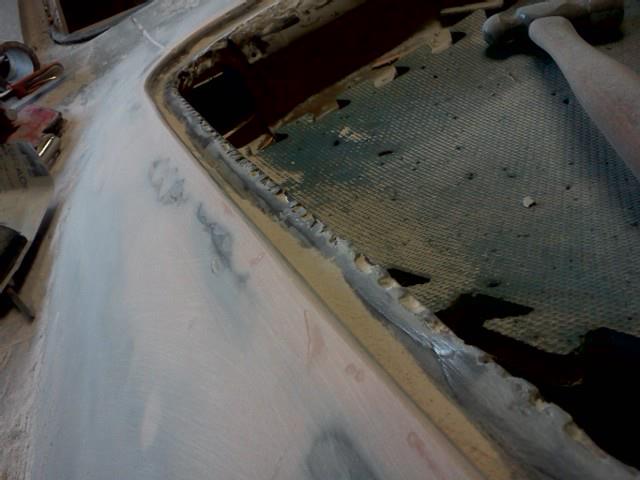
Spacers added to check for fit
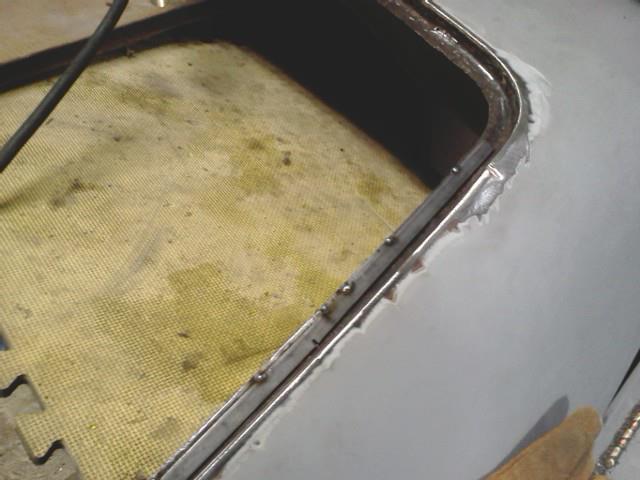
1/8" flat stock shaped to fit the ledge and then tacked in place
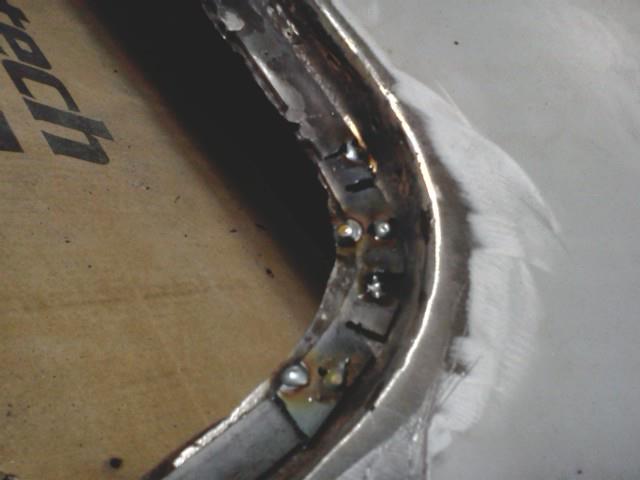

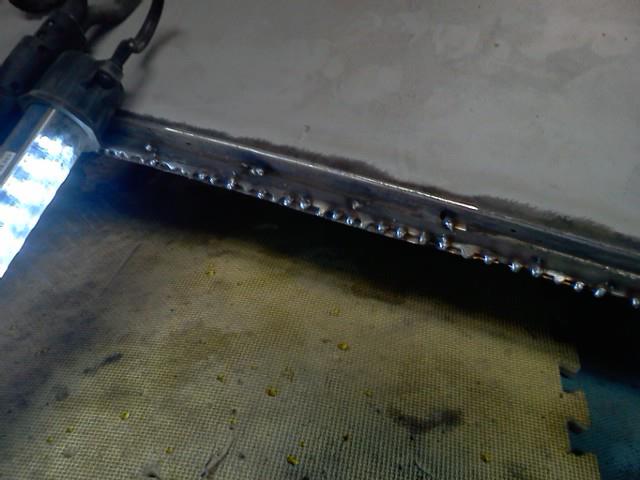

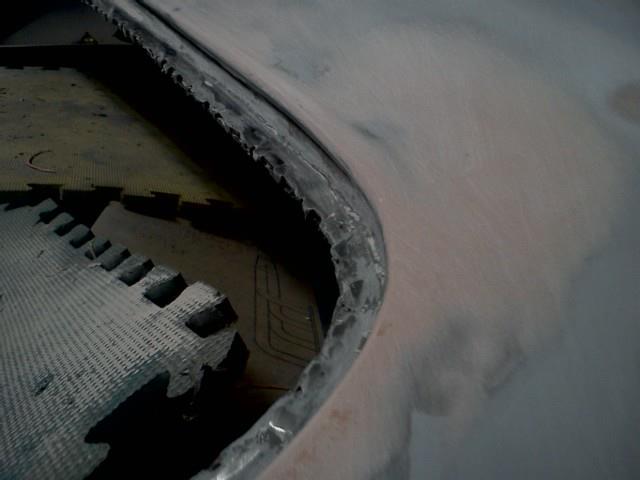
3/16" round rod added to close the gap around the window some
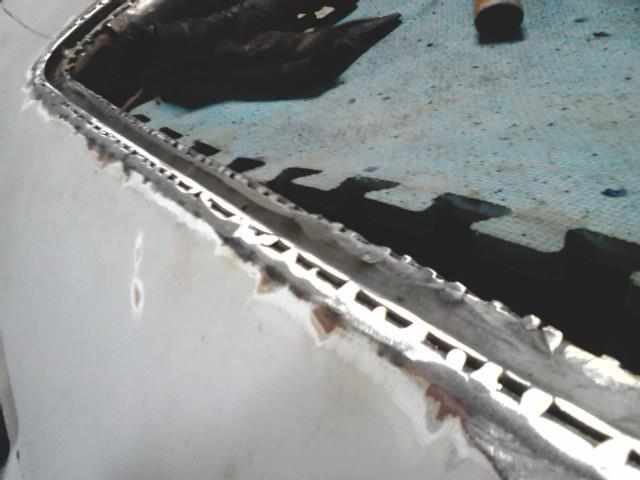
Entire channel filled with fiberglass to seal everythign up and prevent rust from ever having the chance to form (hopefully!)

Beginning of bodywork. Pretty minimal. I think even IIIIII can do it in two coats.
So far I only have about 10 hours in the whole flush mounting project. Much less than I expected. And you pros can probably do it in half the time.
The holidays have kept me busy, but here's a little something for you to chew on.
Spacers added to check for fit
1/8" flat stock shaped to fit the ledge and then tacked in place
3/16" round rod added to close the gap around the window some
Entire channel filled with fiberglass to seal everythign up and prevent rust from ever having the chance to form (hopefully!)
Beginning of bodywork. Pretty minimal. I think even IIIIII can do it in two coats.
So far I only have about 10 hours in the whole flush mounting project. Much less than I expected. And you pros can probably do it in half the time.
Last edited by superdave84; 01-12-2013 at 03:22 PM.
 01-18-2013, 09:37 AM
#135
TECH Resident
Thread Starter
Painted the glass shelf yesterday in preparation for glass install, and also painted the bodywork I did. WOW I am terrible at bodywork. Hopefully the flaws are small enough not to show up on camera! Before paint, I will have someone with more skill than me go over the car.
Glass is back from the tint shop so I will hopfully install and post a few pics for you guys later on today.
Glass is back from the tint shop so I will hopfully install and post a few pics for you guys later on today.
01-18-2013, 10:57 AM
#136
I love threads like this!! Great job Dave, I'm really digging the Dash and flush window idea. I recently pushed my LS swap 67 LeMans out to pasture for a LS swap 93 Mustang coupe. My friend just posted a thread on his 70 ElCamino that sparked my intrest again in the Lemans. I may have the Mustang sold that will fund finishing my 67. I'm really wanting to try the front flush window and make my own dash like yours!
Thanks for more inspiration and the great ideas keep it up.
Thanks for more inspiration and the great ideas keep it up.
01-18-2013, 02:21 PM
#138
TECH Resident
Thread Starter
Thanks guys! I'm glad you're liking the build as much as I am....although I wish it was faster and cheaper haha.
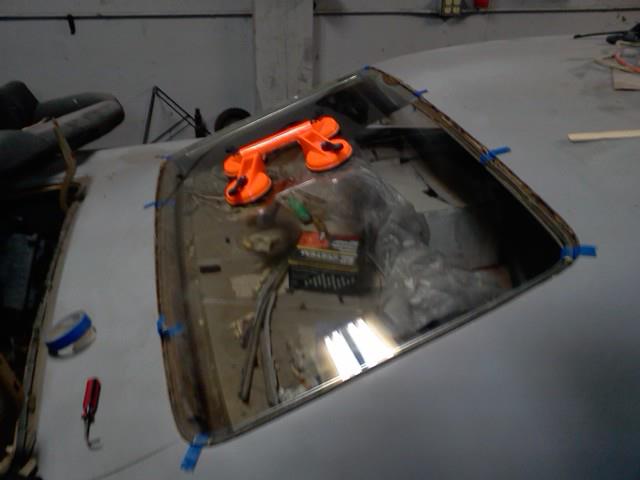
Here's some pics from the window install today:
Glass shelf painted with primer and then High Gloss Enamel paint
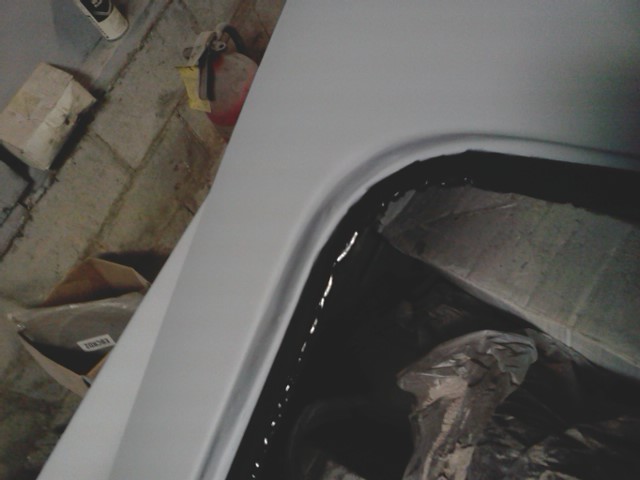
Here's a pic of the window sealer stuff laid on the shelf

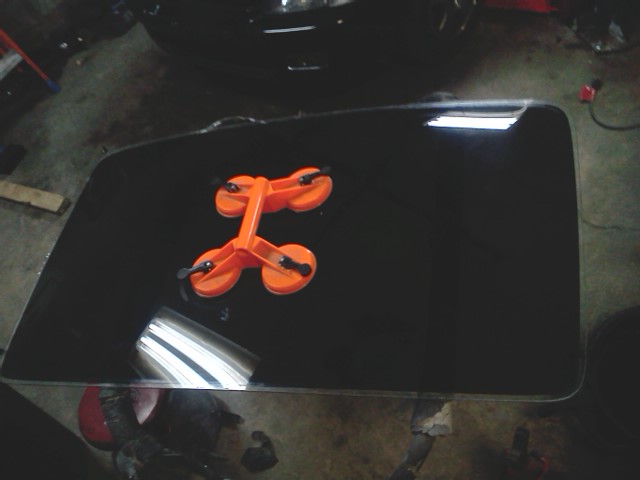
Here's the rear glass, tinted and ready to install. I actually had to sand the edges a bit because they were a little uneven from the factory (original 1965 glass)
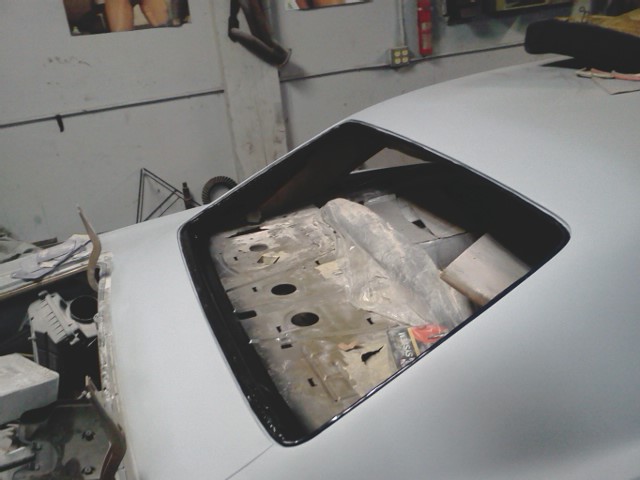
Here's the car with bodywork done and ready for the glass
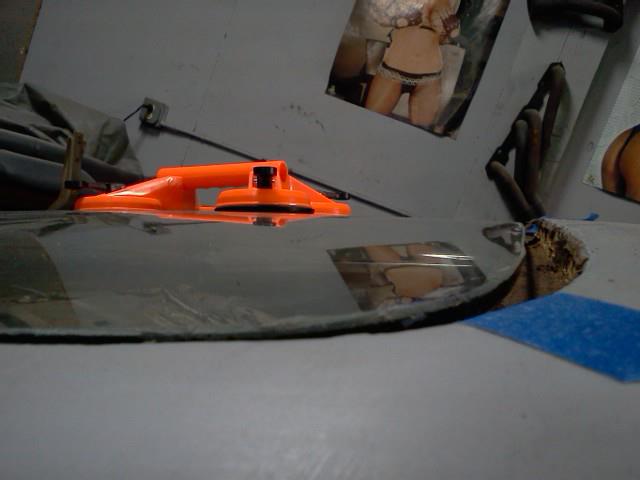
And finally, the glass installed
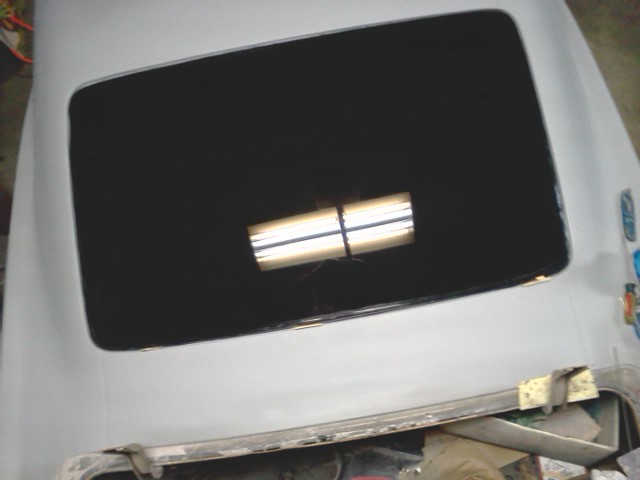
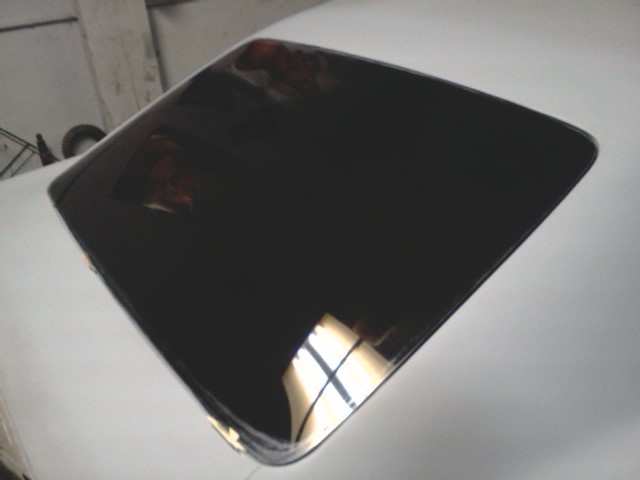

If you look close, the gap is not quite perfect all the way around. The upper driver's side is a little bit bigger than the gaps elsewhere. The rod that I welded in was perfectly aligned with the car, and exactly 3/16" all the way around, so I am thinking that the glass is about 1/8" off up in that corner. I will address that issue before final paint....but the window is in! I think it looks great. I still need to apply a 1" border of 3M vinyl all around the perimeter to protect the sealer and also to hide some milky spots on the ancient glass.
Very modern, sleek and classy if you ask me.
EDIT: Here's a side-by-side (top-by-bottom?) comparison of a stock back window vs. mine.

Here's some pics from the window install today:
Glass shelf painted with primer and then High Gloss Enamel paint
Here's a pic of the window sealer stuff laid on the shelf
Here's the rear glass, tinted and ready to install. I actually had to sand the edges a bit because they were a little uneven from the factory (original 1965 glass)
Here's the car with bodywork done and ready for the glass
And finally, the glass installed
If you look close, the gap is not quite perfect all the way around. The upper driver's side is a little bit bigger than the gaps elsewhere. The rod that I welded in was perfectly aligned with the car, and exactly 3/16" all the way around, so I am thinking that the glass is about 1/8" off up in that corner. I will address that issue before final paint....but the window is in! I think it looks great. I still need to apply a 1" border of 3M vinyl all around the perimeter to protect the sealer and also to hide some milky spots on the ancient glass.
Very modern, sleek and classy if you ask me.
EDIT: Here's a side-by-side (top-by-bottom?) comparison of a stock back window vs. mine.
Last edited by superdave84; 01-19-2013 at 01:48 PM.