


LM7 into '86 C10
Thread Starter
TECH Regular


Joined: Oct 2011
Posts: 453
Likes: 178
From: Alaska
Thanks guys!
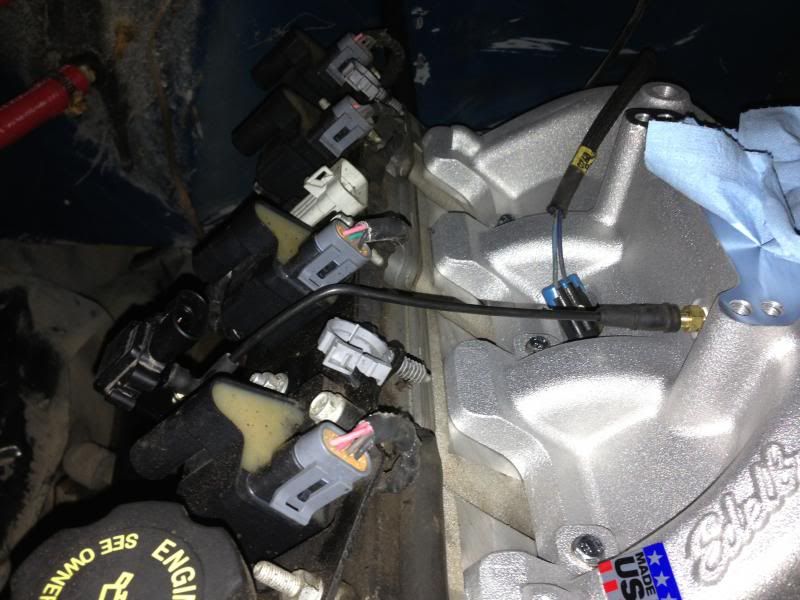
The steam vent is nothing to worry about, this is actually the way GM runs the line on the V8 Trailblazers. Tapping into the return line gives it a scavenging effect on the smaller vent line, and it will draw any air out quickly.
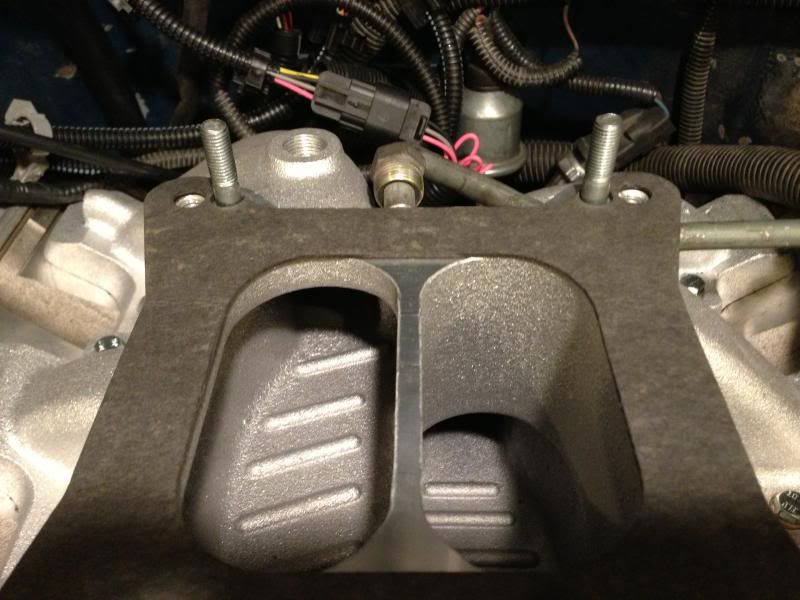
Here is my progress for today. Made up the line between the MAP and intake. I will probably end up modifying it again, I may need to tap into it from the TCC vacuum solenoid.
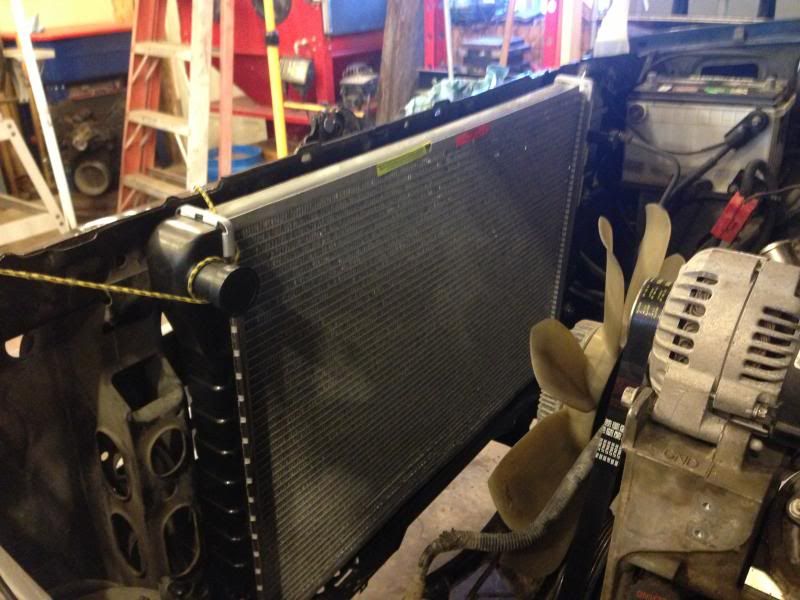
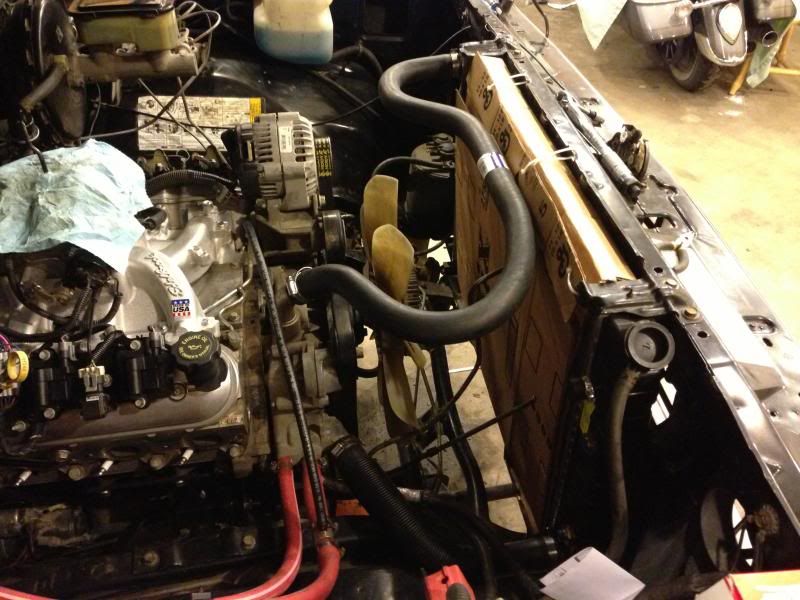
Picked up a new aluminum stock replacement radiator. Still need to find the mounting brackets and fan shroud.
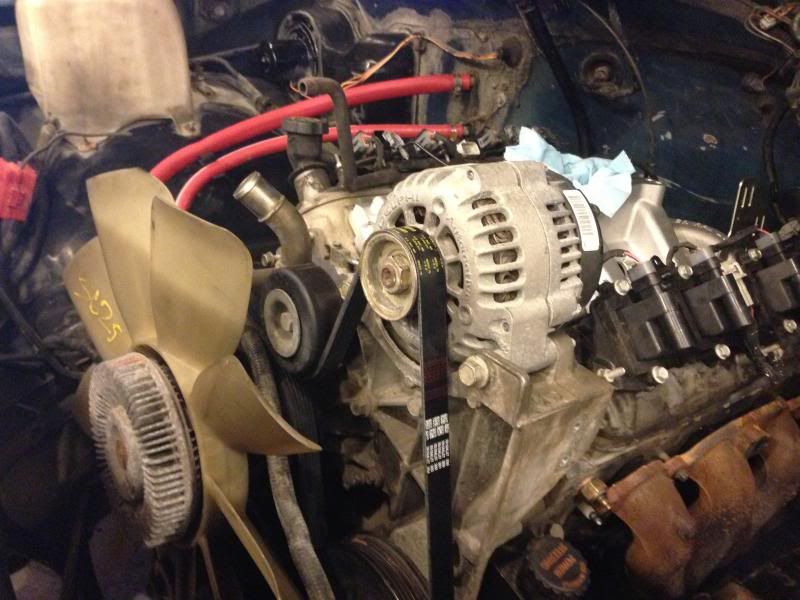
Picked up a new belt and got a reman'd alternator from the junkyard.
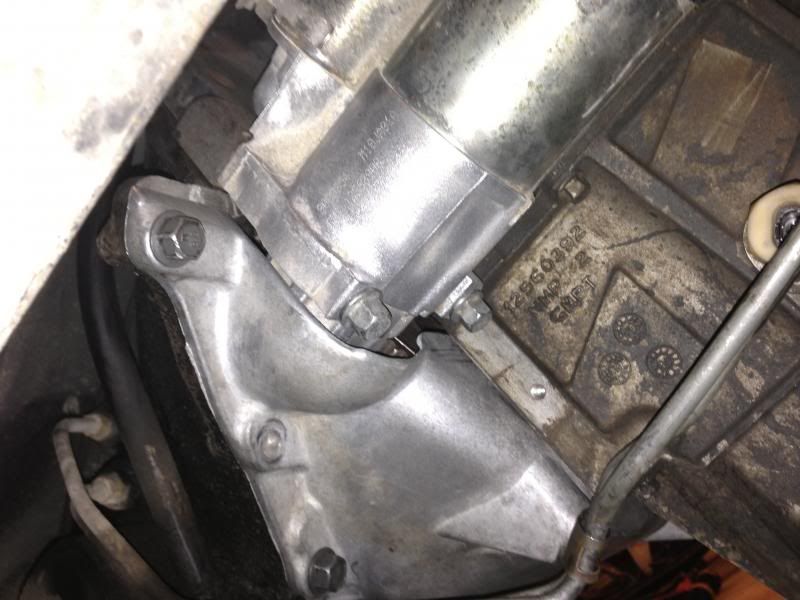
Picked up a starter as well, fits nicely with the transmission cover.
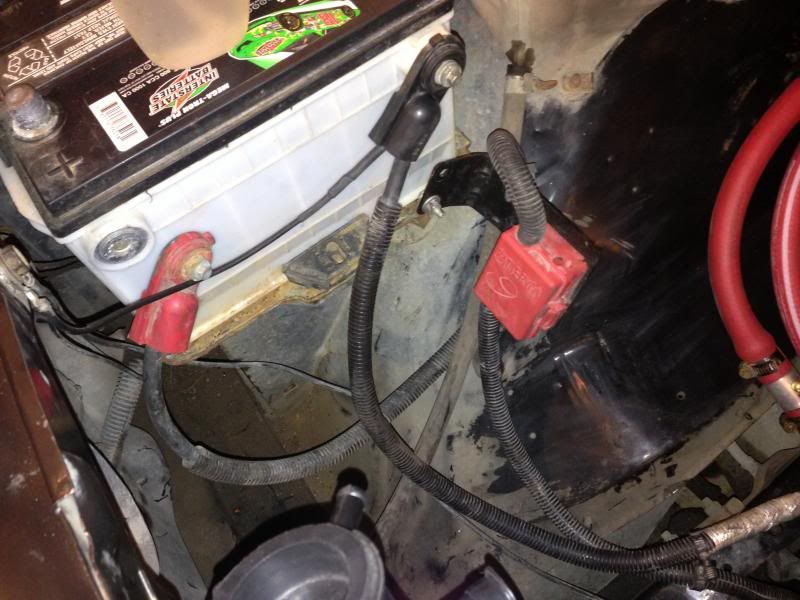
I decided to use the 2001 battery cables since they were larger gauge and in better shape. Got them ran to the block and starter.
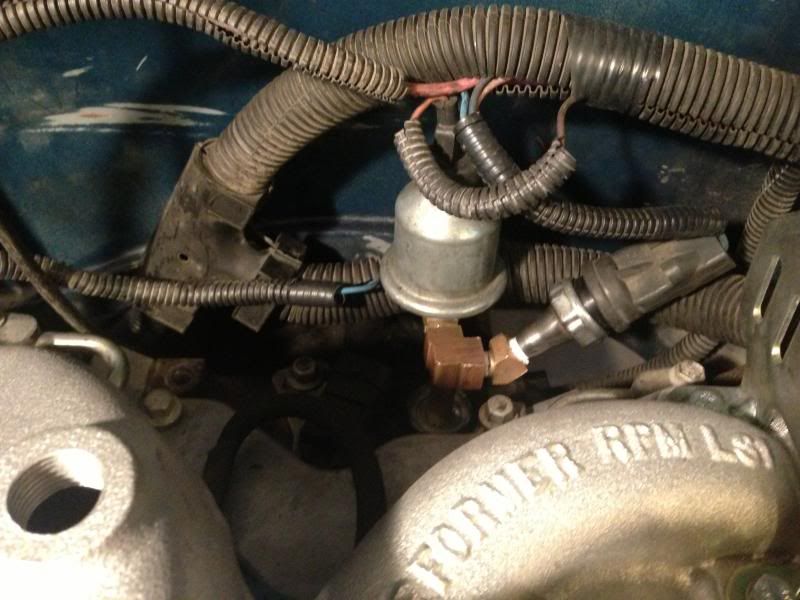
I accidentally broke the 5.3L oil pressure sensor while removing it. So instead of just tossing it, I turned it down and tapped it to go from the metric thread to 1/8" NPT needed for the stock '86 oil sensors. I need another T or Y adapter, as one of them hits on the firewall due to the engine setback.
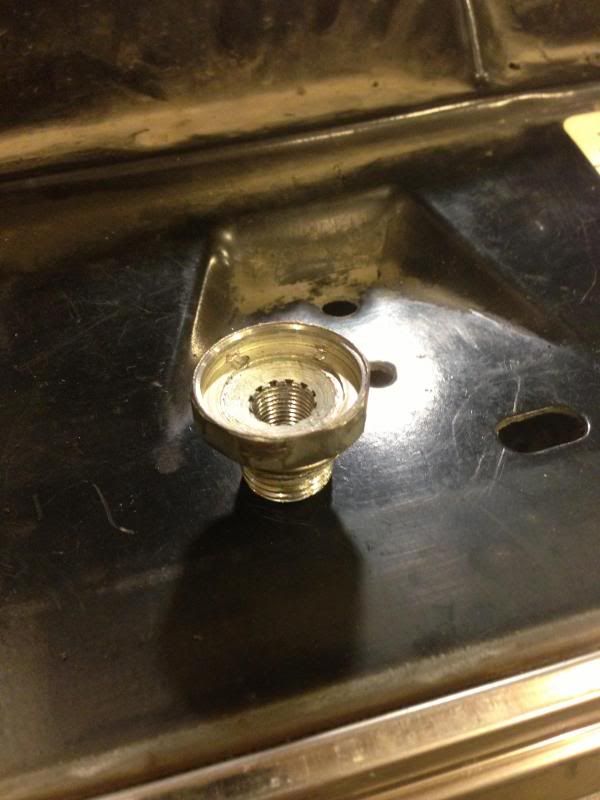
And installed.
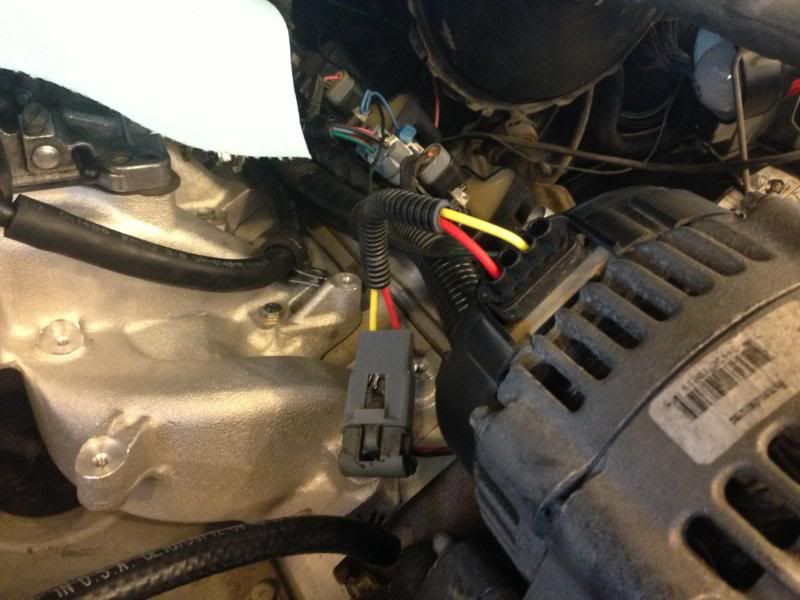
I also started doing a bit of the wiring, and decided to eliminate the ESC, since I didn't need it anymore.
Harness laid out, conduit removed.
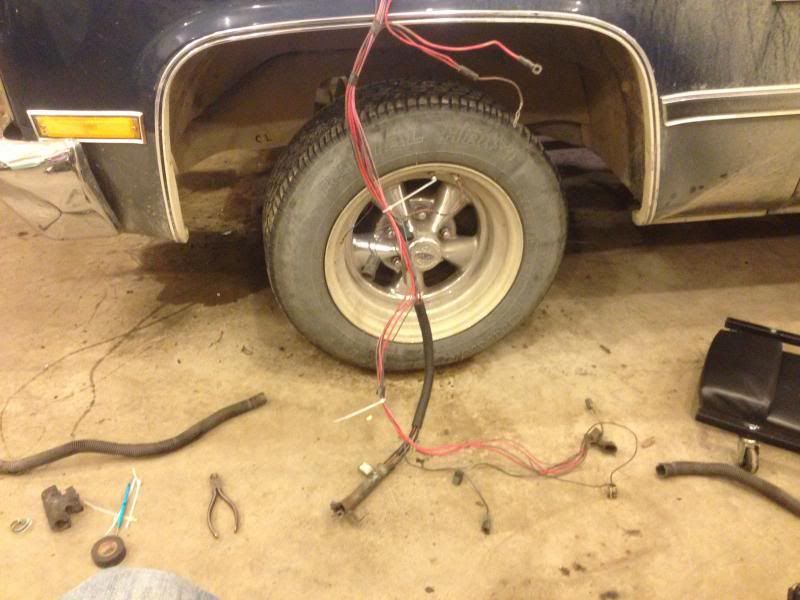
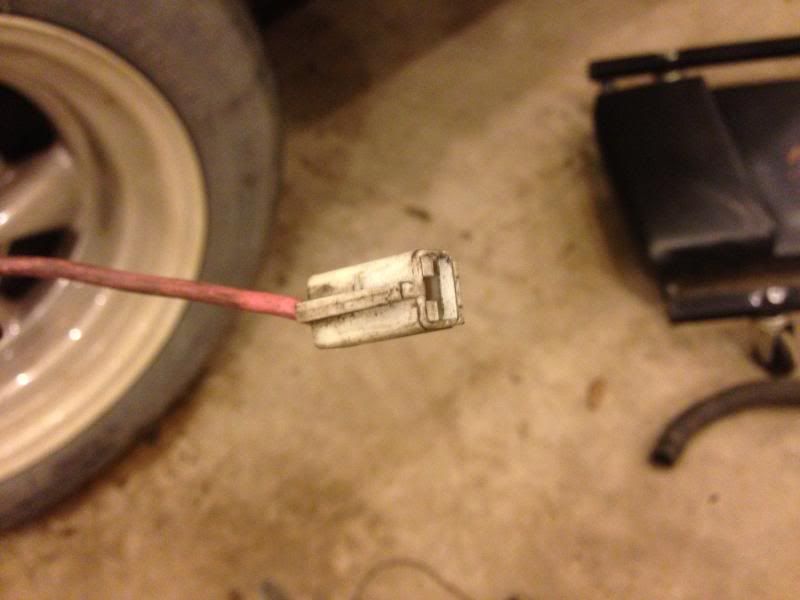
This is the ESC subharness seperated from the main harness.
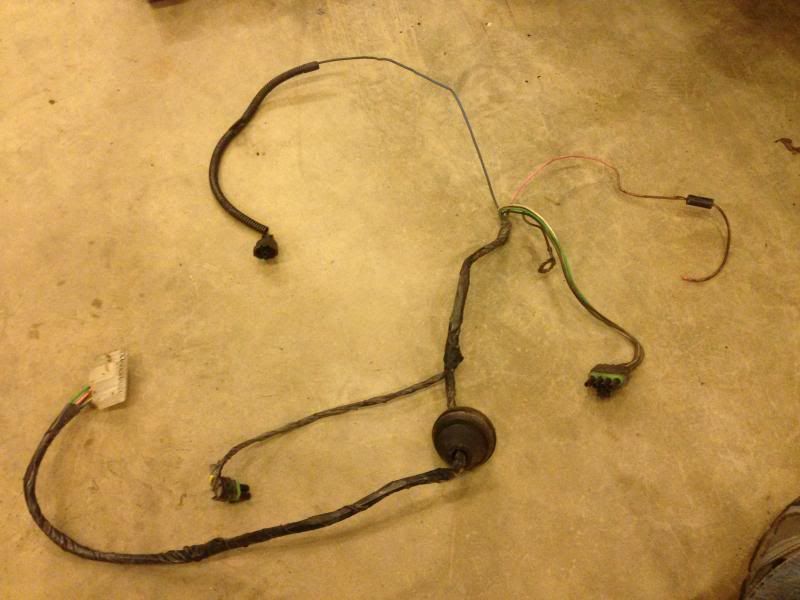
It's actually completely stand alone, except that one wire ties into the distributors +12V wire, this pink one. Cut that one free, and I've eliminated the ESC system.
And the harness wrapped back up.
The steam vent is nothing to worry about, this is actually the way GM runs the line on the V8 Trailblazers. Tapping into the return line gives it a scavenging effect on the smaller vent line, and it will draw any air out quickly.
Here is my progress for today. Made up the line between the MAP and intake. I will probably end up modifying it again, I may need to tap into it from the TCC vacuum solenoid.
Picked up a new aluminum stock replacement radiator. Still need to find the mounting brackets and fan shroud.
Picked up a new belt and got a reman'd alternator from the junkyard.
Picked up a starter as well, fits nicely with the transmission cover.
I decided to use the 2001 battery cables since they were larger gauge and in better shape. Got them ran to the block and starter.
I accidentally broke the 5.3L oil pressure sensor while removing it. So instead of just tossing it, I turned it down and tapped it to go from the metric thread to 1/8" NPT needed for the stock '86 oil sensors. I need another T or Y adapter, as one of them hits on the firewall due to the engine setback.
And installed.
I also started doing a bit of the wiring, and decided to eliminate the ESC, since I didn't need it anymore.
Harness laid out, conduit removed.
This is the ESC subharness seperated from the main harness.
It's actually completely stand alone, except that one wire ties into the distributors +12V wire, this pink one. Cut that one free, and I've eliminated the ESC system.
And the harness wrapped back up.
Thread Starter
TECH Regular
Joined: Oct 2011
Posts: 453
Likes: 178
From: Alaska
Making more progress! I got a lot of the little stuff done today, I guess I forgot to take more pictures though!
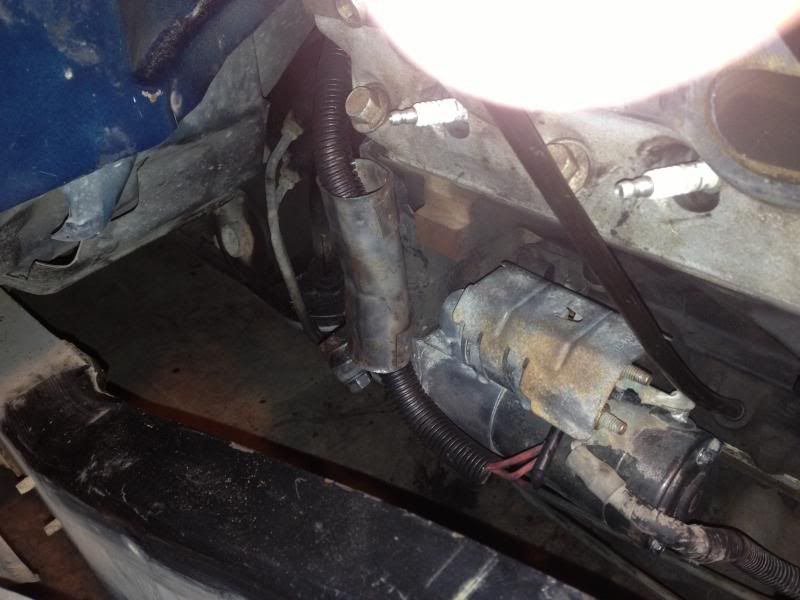
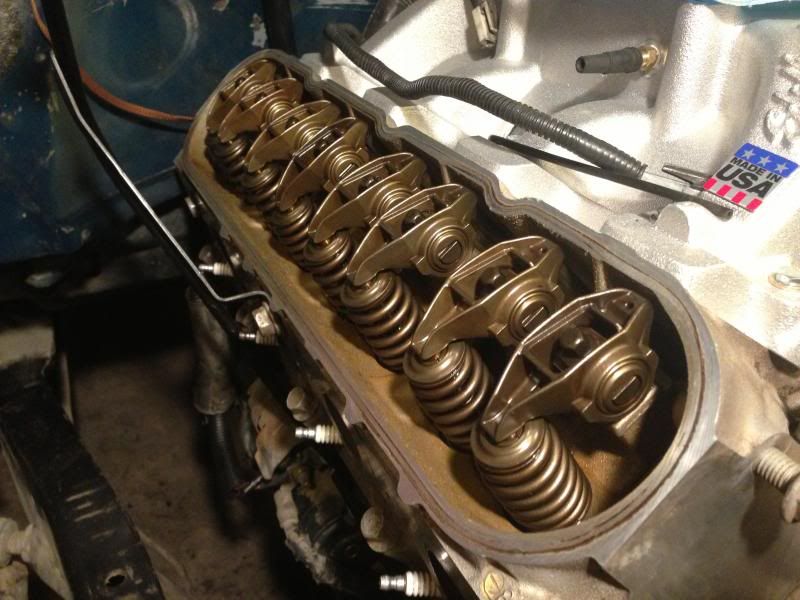
I found a set of radiator brackets and got the radiator bolted down. I got the fittings I needed to run both oil sending units and got them installed. I got a better head shield/wire guide for down near the starter, got the wiring harness cleaned up and routed to my liking, as well as got an extension for the temperature sensor wire to reach the front of the head. I pulled the valve covers to clean them and inspect the top end. Everything was exceptionally clean inside the engine.

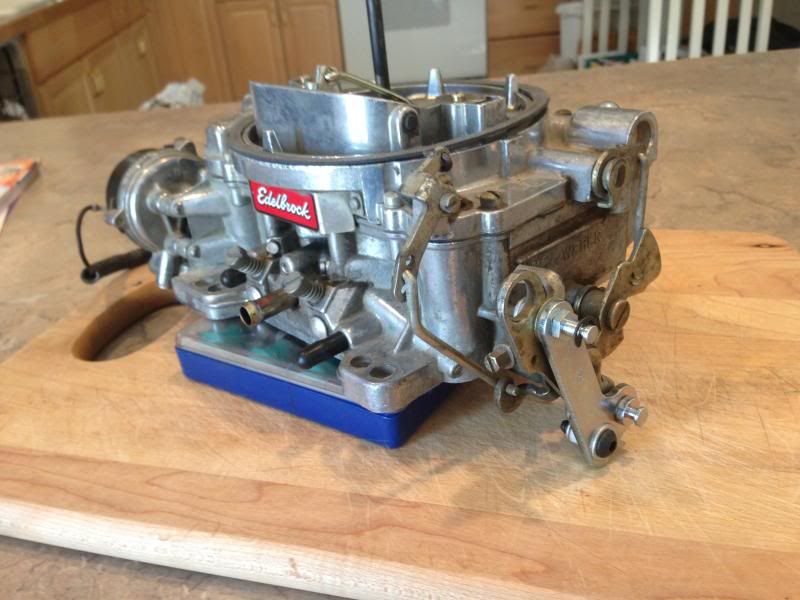
I also test fitted the carburetor and MSD 6010 kit. I will have to call Edelbrock in the morning to see what I can do about the TV cable system, being on an LS engine. I also tried routing the MSD harness with the box mounted on the intake, but couldn't make it fit any way that made me happy. I've decided to instead try and mount inside the cab behind the glove box, where the factory ESC module was mounted (that I just deleted). The firewall grommet should be a perfect size and location, and it would be better for longevity of the system than mounting the box directly on the engine. I think I will still need to extend the crank sensor wiring, but I think everything else will wire up perfectly.
Other than that, I still need to source a radiator shroud, 2010 Camaro exhaust manifolds, radiator hoses, run a fuel pump, and order an alternator adapter harness. Getting close!
I found a set of radiator brackets and got the radiator bolted down. I got the fittings I needed to run both oil sending units and got them installed. I got a better head shield/wire guide for down near the starter, got the wiring harness cleaned up and routed to my liking, as well as got an extension for the temperature sensor wire to reach the front of the head. I pulled the valve covers to clean them and inspect the top end. Everything was exceptionally clean inside the engine.
I also test fitted the carburetor and MSD 6010 kit. I will have to call Edelbrock in the morning to see what I can do about the TV cable system, being on an LS engine. I also tried routing the MSD harness with the box mounted on the intake, but couldn't make it fit any way that made me happy. I've decided to instead try and mount inside the cab behind the glove box, where the factory ESC module was mounted (that I just deleted). The firewall grommet should be a perfect size and location, and it would be better for longevity of the system than mounting the box directly on the engine. I think I will still need to extend the crank sensor wiring, but I think everything else will wire up perfectly.
Other than that, I still need to source a radiator shroud, 2010 Camaro exhaust manifolds, radiator hoses, run a fuel pump, and order an alternator adapter harness. Getting close!
Thread Starter
TECH Regular
Joined: Oct 2011
Posts: 453
Likes: 178
From: Alaska
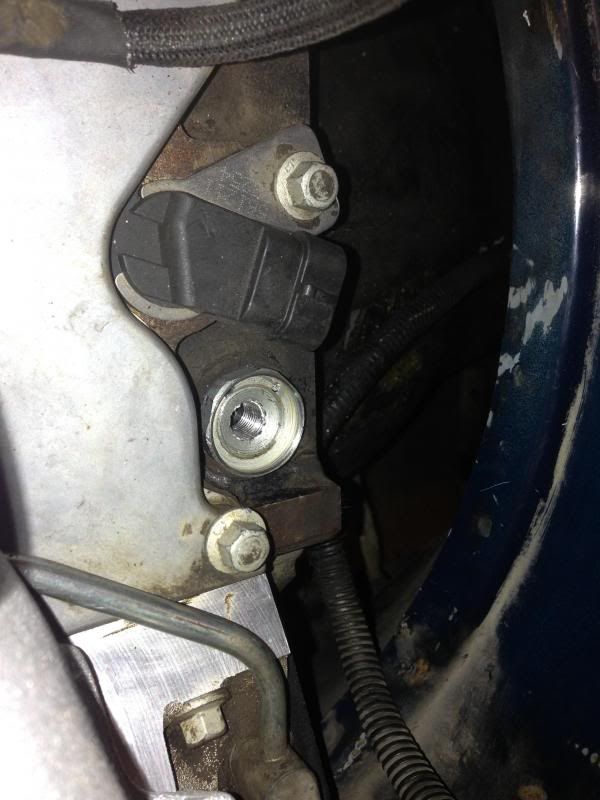
I snapped a picture of the oil sensor setup.
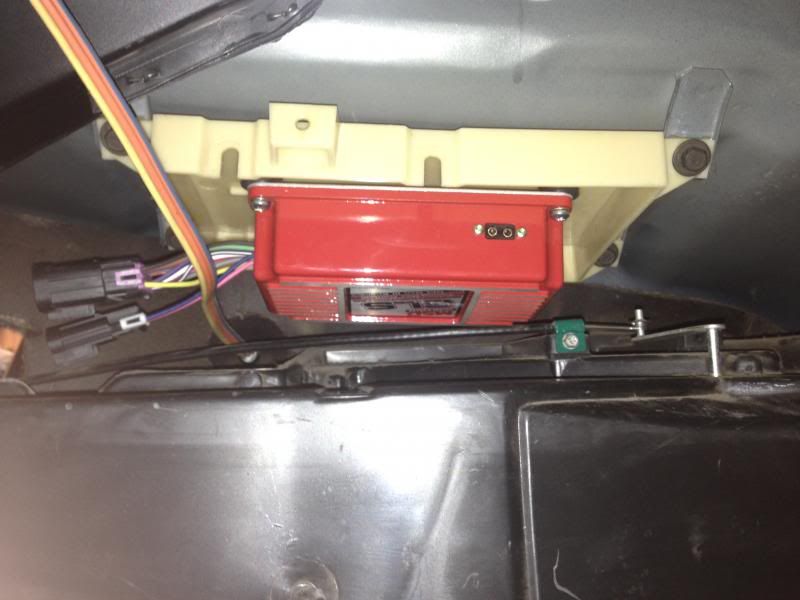
I also modified the ESC mounting bracket for the MSD box and got it bolted up under the dash. I don't really like the fact that it's mounted upside down, but it's the only place I could get it to fit inside and have the harness lay out like I wanted it to. I don't think it will be a problem though, since it's mounted inside and MSD states all the circuitry is sealed anyhow.
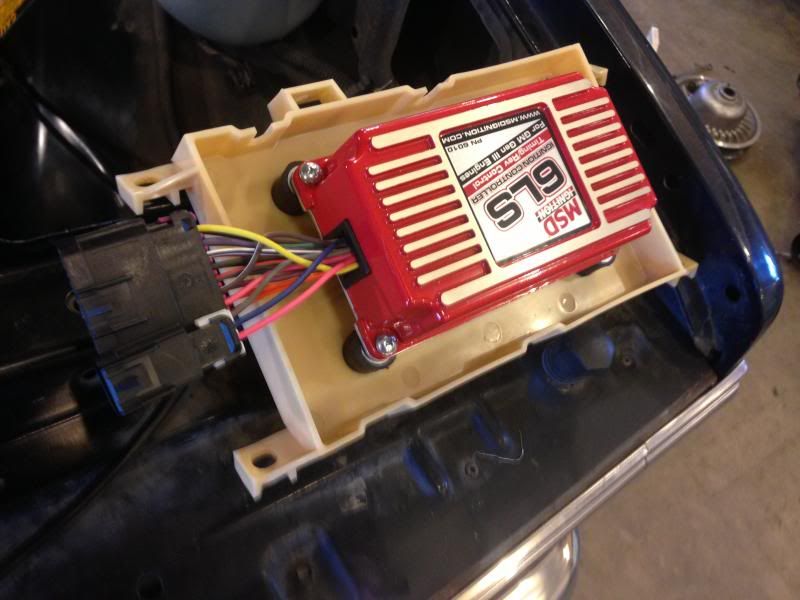
Easy access to the timing pills and serial port this way, too.
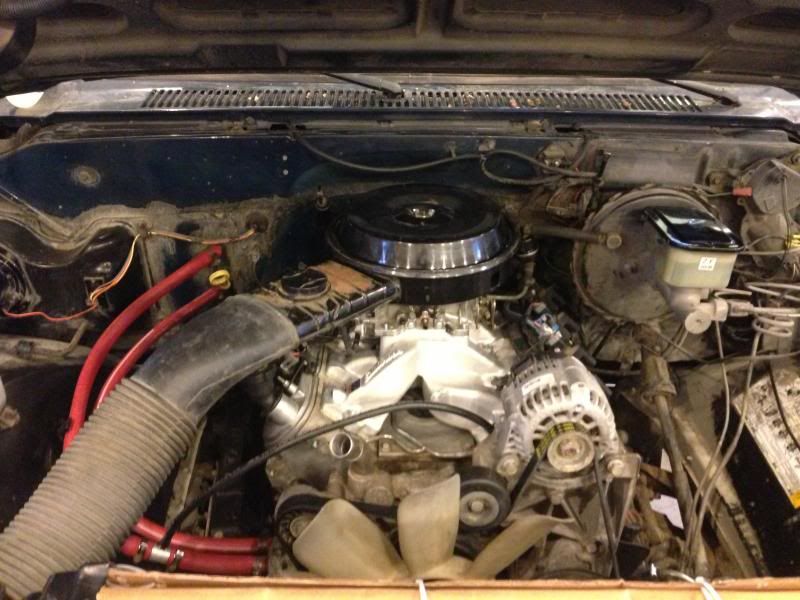
And a mock up just for the hell of it. Got the majority of the wiring taken care of, I just need extensions for the crank and map sensors. I think I will reuse the air cleaner (I like the stock look, don't judge me! ), but "gut" the emissions junk off of it, and repaint it. I did this on my '88 Chevy before I dropped the Cummins in it, and it looked very clean. I still need the Edelbrock TV correction kit. The radiator hoses are on their way, and should be on the truck later tonight. I'm having trouble locating a fan shroud though. Other than that, I still need to run the fuel line for the engine and figure out where to put the fuel pump. I'm talking to another member about a set of 2010 Camaro manifolds. It's getting close!
I also modified the ESC mounting bracket for the MSD box and got it bolted up under the dash. I don't really like the fact that it's mounted upside down, but it's the only place I could get it to fit inside and have the harness lay out like I wanted it to. I don't think it will be a problem though, since it's mounted inside and MSD states all the circuitry is sealed anyhow.
Easy access to the timing pills and serial port this way, too.
And a mock up just for the hell of it. Got the majority of the wiring taken care of, I just need extensions for the crank and map sensors. I think I will reuse the air cleaner (I like the stock look, don't judge me!
), but "gut" the emissions junk off of it, and repaint it. I did this on my '88 Chevy before I dropped the Cummins in it, and it looked very clean. I still need the Edelbrock TV correction kit. The radiator hoses are on their way, and should be on the truck later tonight. I'm having trouble locating a fan shroud though. Other than that, I still need to run the fuel line for the engine and figure out where to put the fuel pump. I'm talking to another member about a set of 2010 Camaro manifolds. It's getting close! Thread Starter
TECH Regular
Joined: Oct 2011
Posts: 453
Likes: 178
From: Alaska
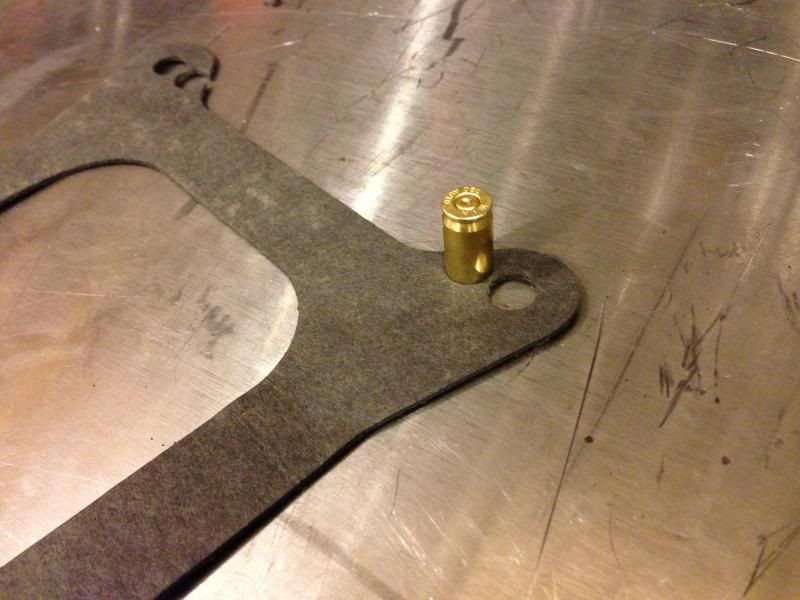
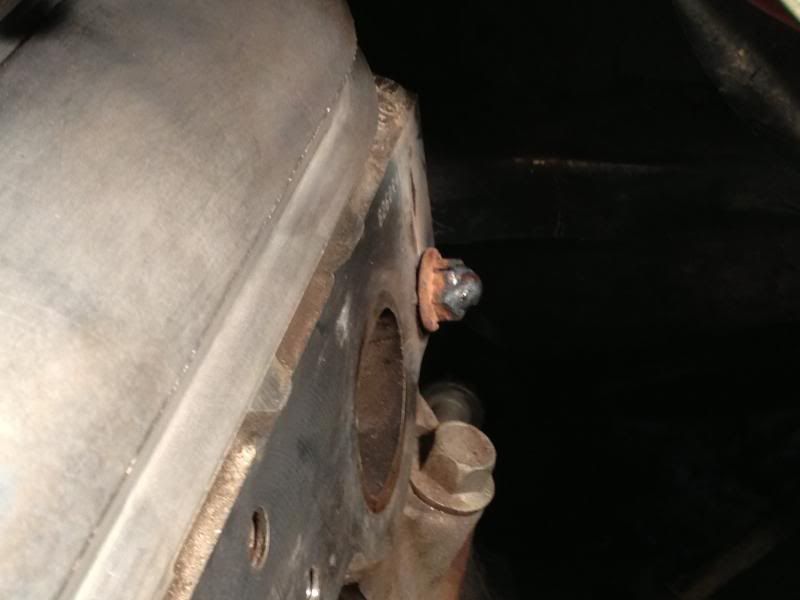
I'm at the point now where I'm just waiting on parts to come in. The throttle bracket that comes with the intake doesn't work for me, so I ordered one from Jegs that bolts to the rear of the carb. I will have to move the rear studs inward, so I modified my carb gasket to work with it. I also ordered the TV cable correction kit, an alternator adapter harness, a map sensor extension, and I'm having a custom crank sensor extension made. I noticed a broken off exhaust bolt too (at the rear, no less!), and had to get that out. I don't know how I missed it!
Here's how you make a gasket without punches!
Radiator hoses are on.
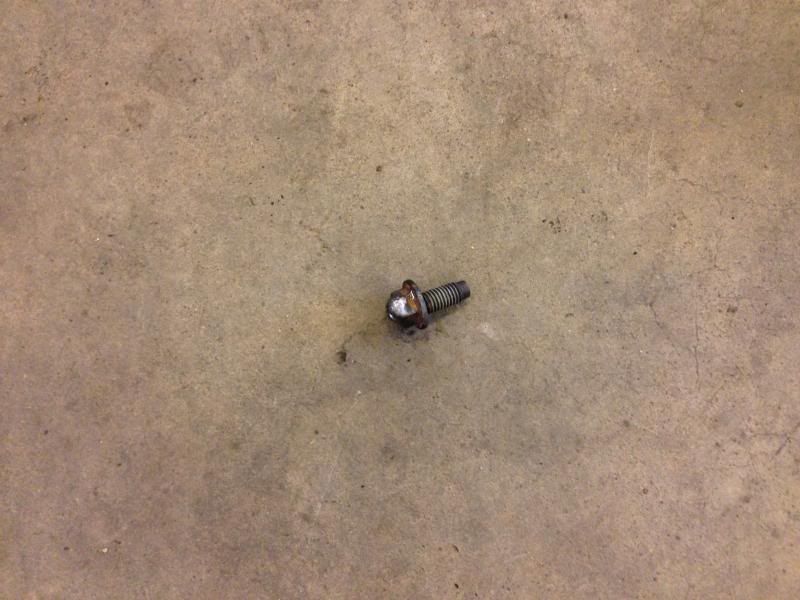
The bolt was broken off flush with the head, and I couldn't reach it with an angle drill. I ended up having to build the bolt back up with the welder, and then weld a nut onto that.
Next step is researching where I want to mount my fuel pump. Dual tanks may make this a bit difficult, but we will see.
LS1 Tech Stories
The Best V8 Stories One Small Block at Time

6 Common C5 Corvette Failures and What's Involved In Repairing Them
Pouria Savadkouei
Retro Modern Bandit Pontiac Trans AM Comes With Burt Reynolds' Autograph
Verdad Gallardo
Top 10 Greatest Cadillac V Series Performance Models Ever, Ranked
Pouria Savadkouei
Top 10 Most Powerful Chevy Trucks Ever Made!

Hennessey's New Supercharged Silverado ZR2 Has 700 HP
Verdad Gallardo
Coachbuilt N2A Anteros Is an LS2-Powered C6 Corvette In Italian Clothes
Verdad Gallardo
Awesome K5 Blazer Restomod Comes With C7 Corvette Power
Verdad Gallardo
10 Camaros You Should Never Buy

10 LS Engine Myths That Refuse to Die
Verdad Gallardo I found a good place on the passenger side frame rail right where the fuel lines hook a 90. Im liking the stock look too and putting your MSD box under the dash is an idea i might try.

Thread Starter
TECH Regular
Joined: Oct 2011
Posts: 453
Likes: 178
From: Alaska
Thread Starter
TECH Regular
Joined: Oct 2011
Posts: 453
Likes: 178
From: Alaska
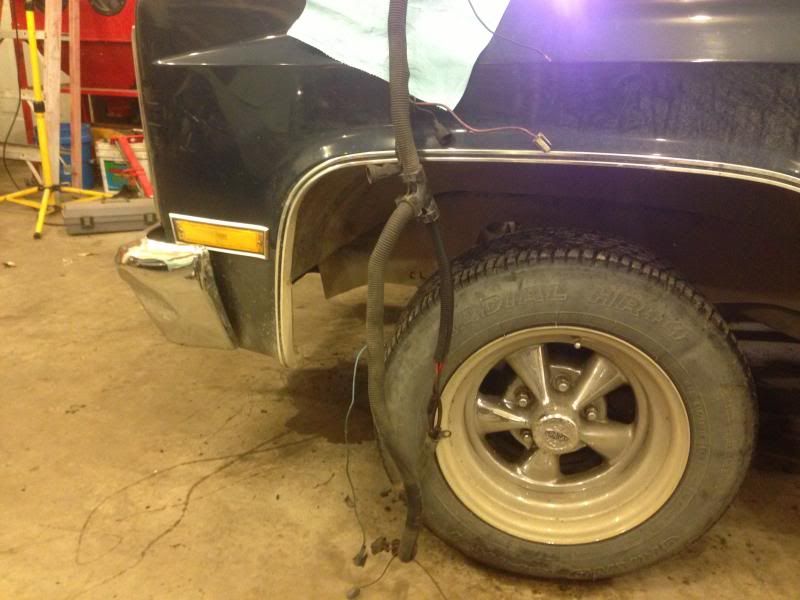
Got exhaust! I was having too much trouble finding a set of Camaro manifolds, so I bit the bullet and bought a set of stainless Ebay 2010+ Camaro long tube headers on Craigslist locally. I know people have good luck with the Shoenfeld 88-98 headers, and I compared pictures of the two and determined that they looked close enough to take the risk.
On the ad:
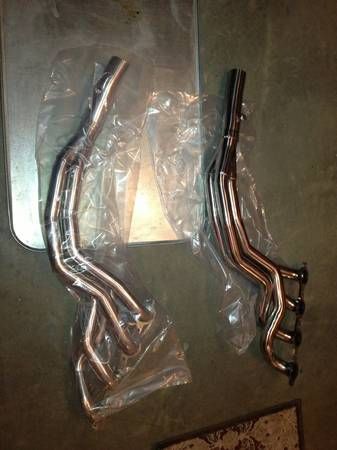
And some quick test fitting:
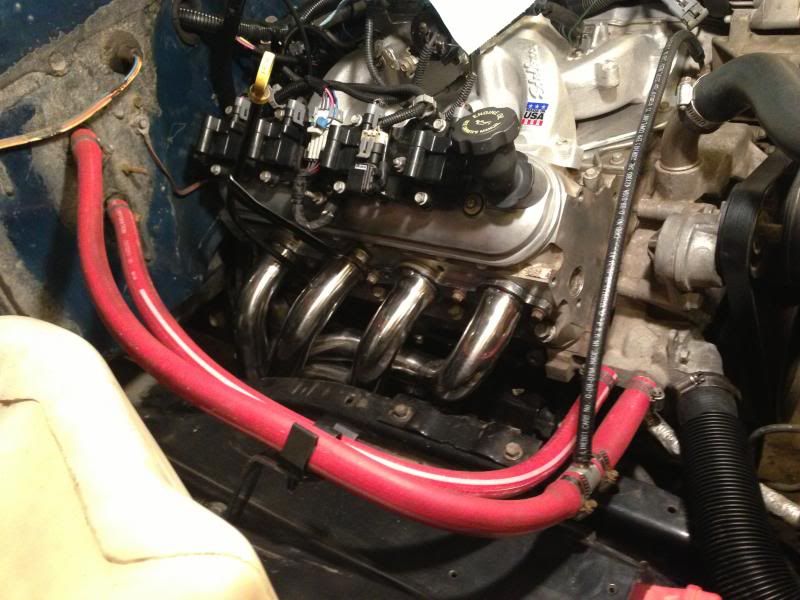
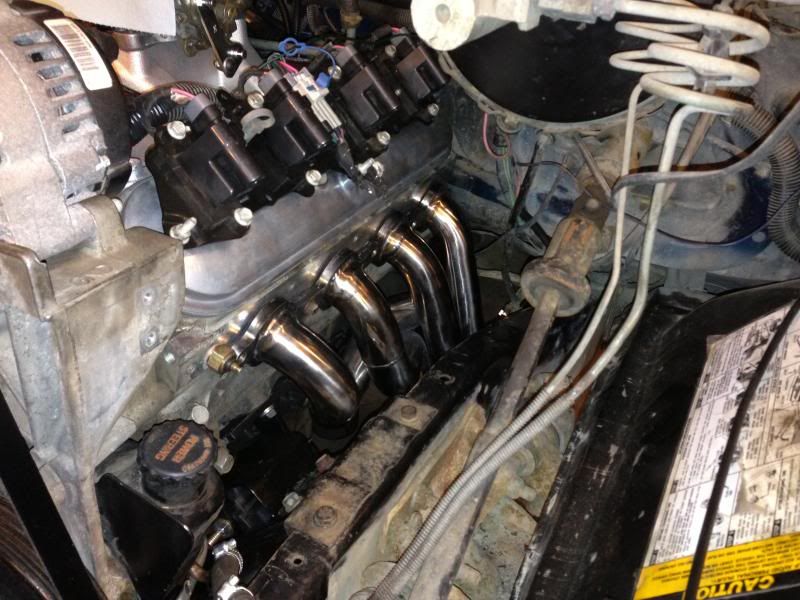
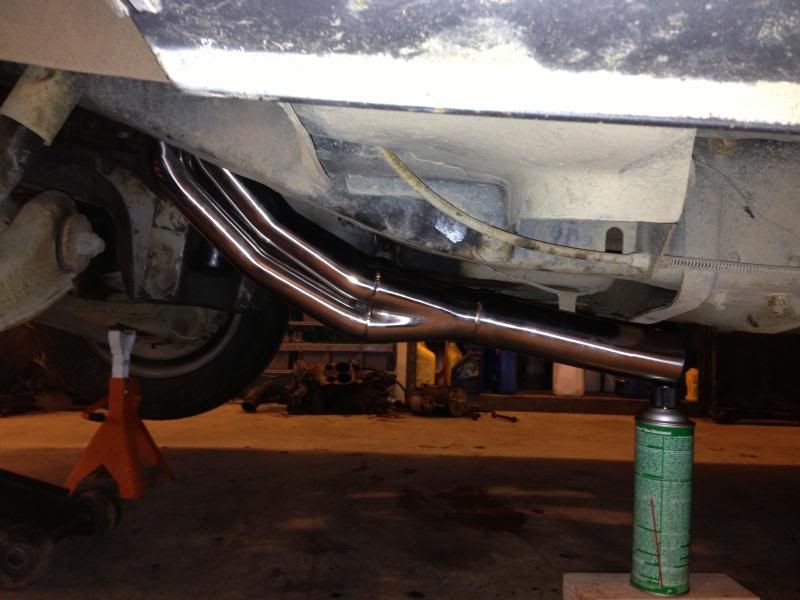
The passenger side fits great, but touches the frame in one spot. I'll pull it back out for some minor clearancing. I'll probably pick up some heat wrap for the starter and wires down there. Clears the crossmember excellently.
The driver side fits even better and clears everything, but the crossmember isn't set up for dual exhaust, typical for the 73-87 trucks. I will probably end up with a 4wd tranny crossmember to solve the problem, or get another 2WD crossmember and cut and mirror the passenger side.
Overall, I'm very happy with the fit for the chance I took!
On the ad:
And some quick test fitting:
The passenger side fits great, but touches the frame in one spot. I'll pull it back out for some minor clearancing. I'll probably pick up some heat wrap for the starter and wires down there. Clears the crossmember excellently.
The driver side fits even better and clears everything, but the crossmember isn't set up for dual exhaust, typical for the 73-87 trucks. I will probably end up with a 4wd tranny crossmember to solve the problem, or get another 2WD crossmember and cut and mirror the passenger side.
Overall, I'm very happy with the fit for the chance I took!
Thread Starter
TECH Regular
Joined: Oct 2011
Posts: 453
Likes: 178
From: Alaska
Another update! I got the passenger side header clearanced to my liking and heat wrapped the wires running near the starter. I'm on the lookout for a dual exhaust crossmember, once I source one of those, I can mount the headers up.
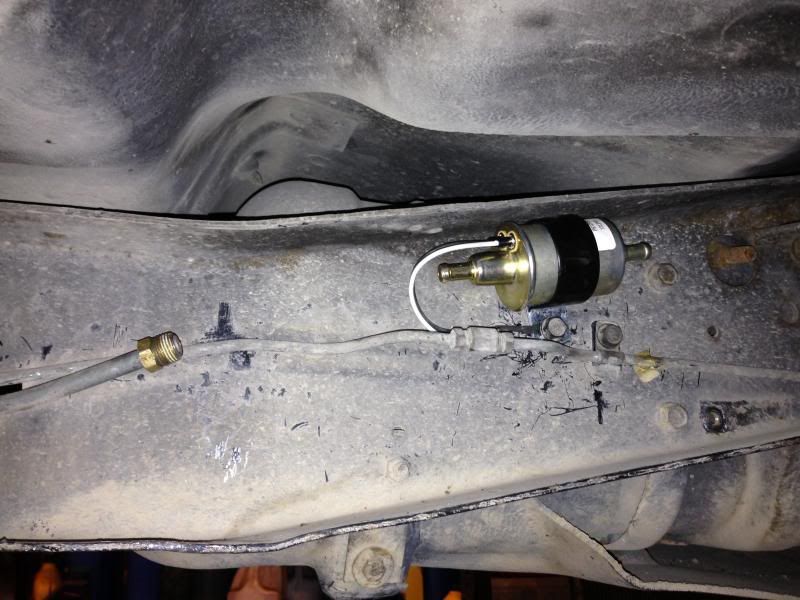
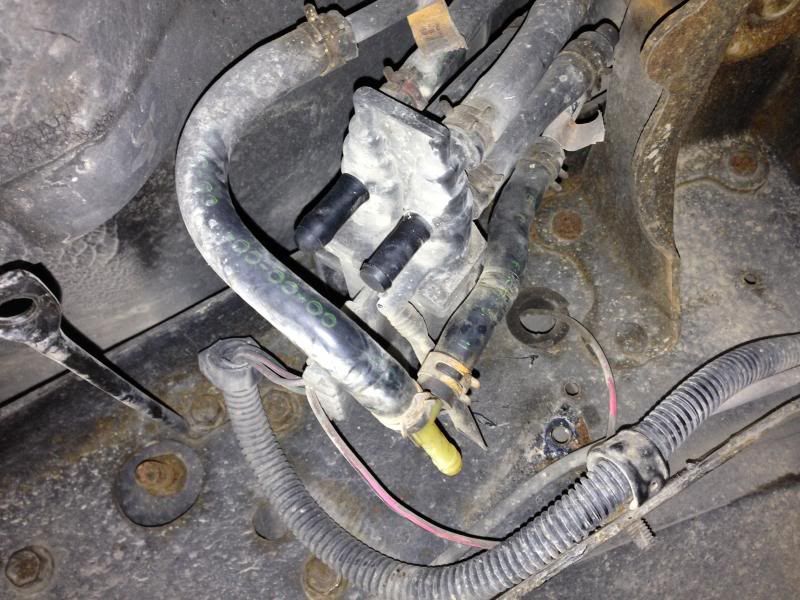
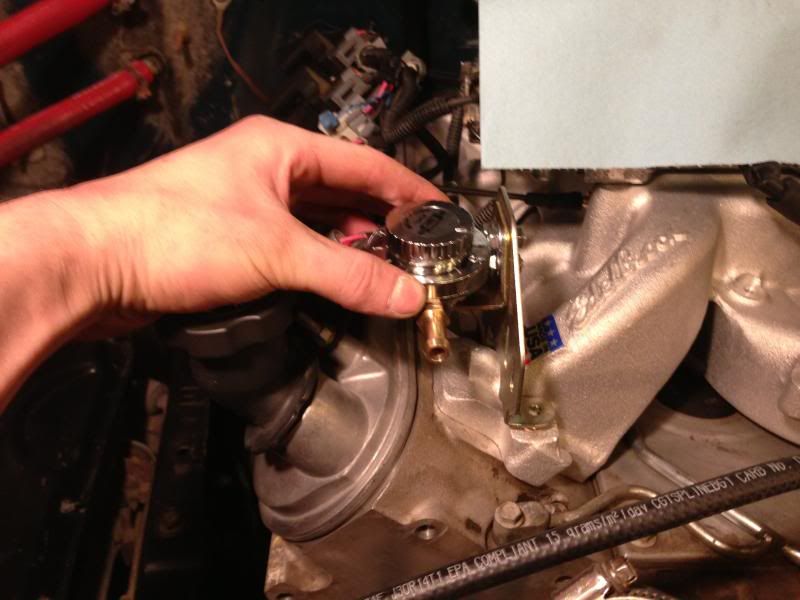
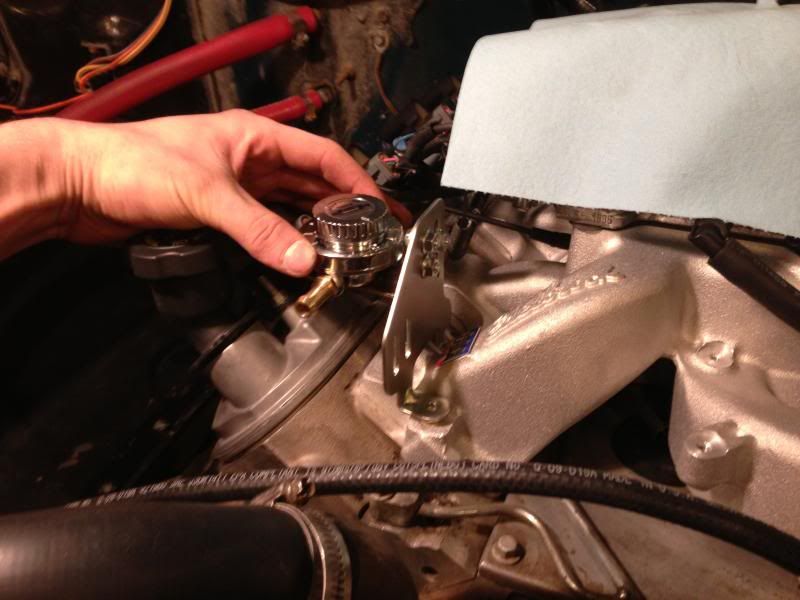
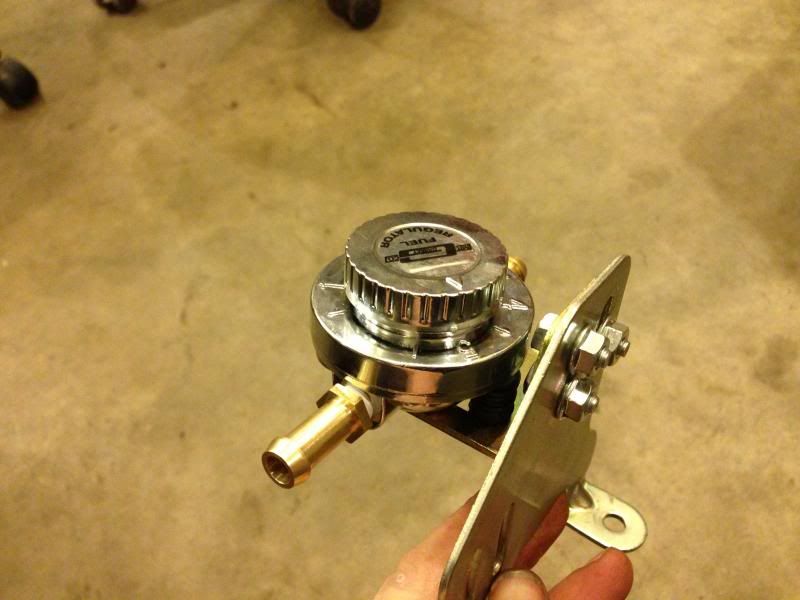
In the meantime, I picked up a Carter fuel pump and a Mr. Gasket adjustable fuel pressure regulator. I cleaned up some of the lines since I've deleted the vapor canister and the fuel return line. I got the pump mounted up underneath the frame right in front of the splitter valve. I got a fitting and flared the fuel line so I can pick up a barb fitting for it soon.
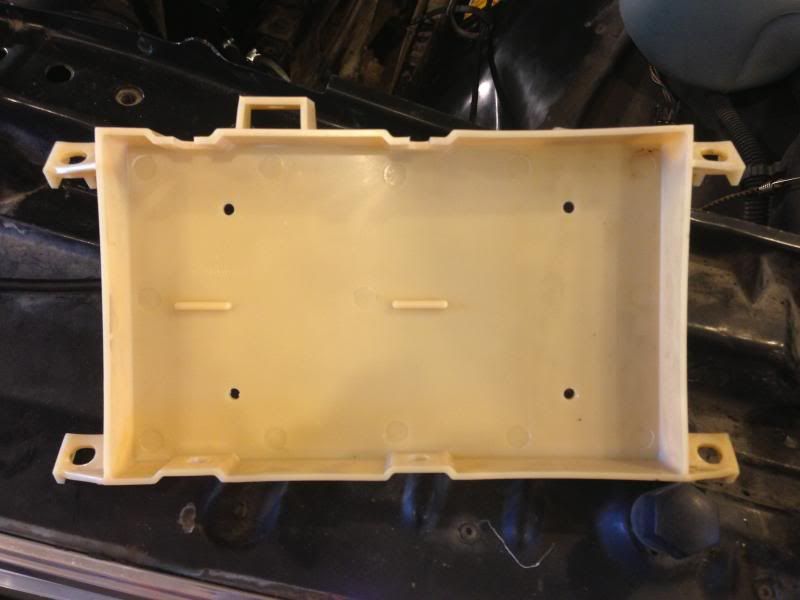
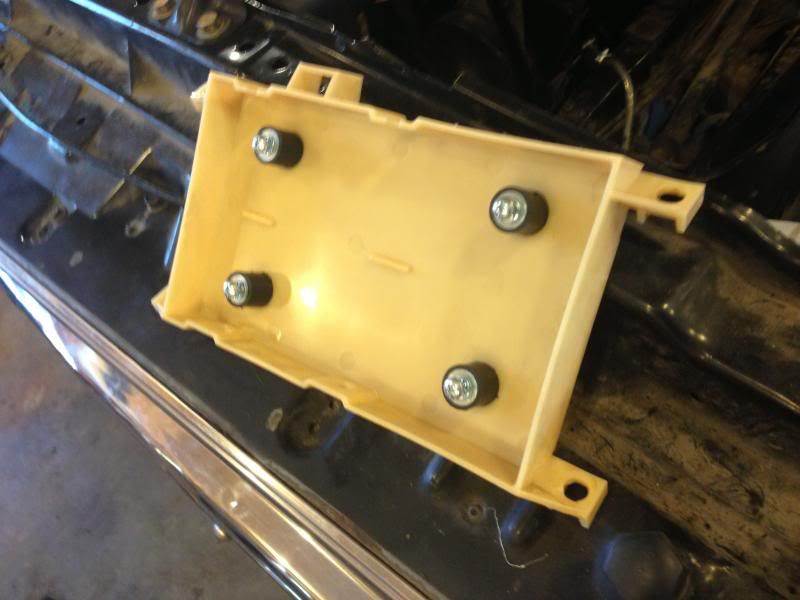
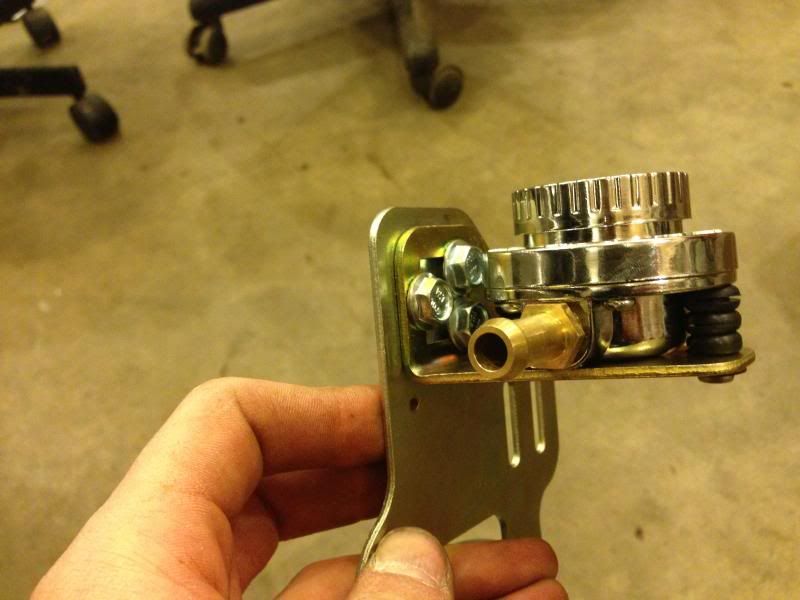
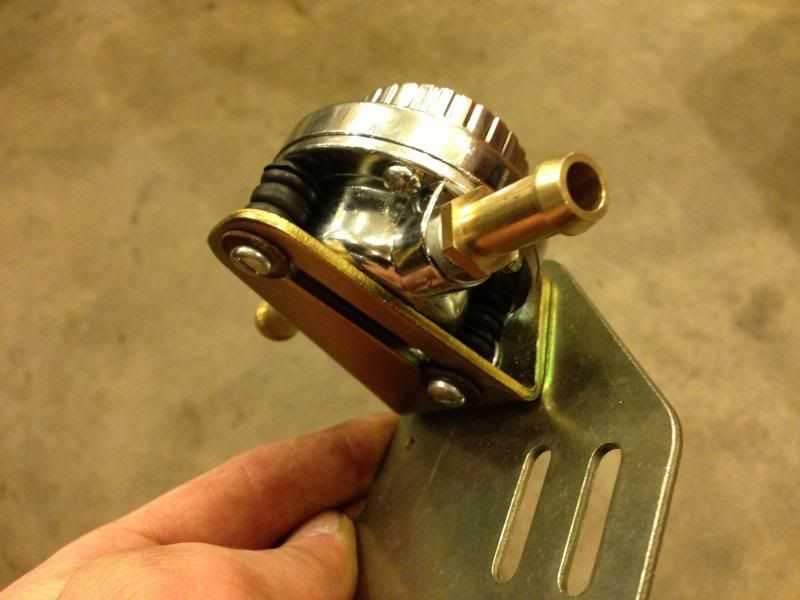
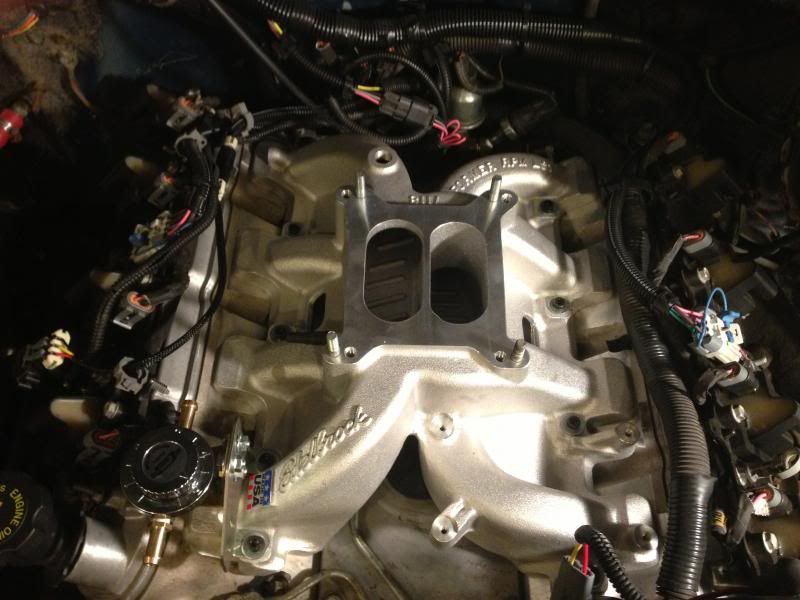
Since I ordered a new throttle bracket that bolts to the back of my carb, I didn't need this bracket that came with the Edelbrock intake. I figured out that it'll bolt to the front passenger side of the intake the same as it does in the normal place, and decided to use it as my regulator bracket. I need to get new mounting screws and spacers tomorrow, but I mocked it up in case anyone would like to use the idea.
In the meantime, I picked up a Carter fuel pump and a Mr. Gasket adjustable fuel pressure regulator. I cleaned up some of the lines since I've deleted the vapor canister and the fuel return line. I got the pump mounted up underneath the frame right in front of the splitter valve. I got a fitting and flared the fuel line so I can pick up a barb fitting for it soon.
Since I ordered a new throttle bracket that bolts to the back of my carb, I didn't need this bracket that came with the Edelbrock intake. I figured out that it'll bolt to the front passenger side of the intake the same as it does in the normal place, and decided to use it as my regulator bracket. I need to get new mounting screws and spacers tomorrow, but I mocked it up in case anyone would like to use the idea.
Thread Starter
TECH Regular
Joined: Oct 2011
Posts: 453
Likes: 178
From: Alaska
It's ~7 psi.
Just a few driveability issues. I ported my dbw tb as far as possible, actually broke through on one spot and had to epoxy it back. And now there is a huge amount of airflow gain from it and 8-10% throttle cruise has suffered. Just need to work out the throttle follower. It was starting up to 2k before due to the xtra air flow, have that fixed now.
Thread Starter
TECH Regular
Joined: Oct 2011
Posts: 453
Likes: 178
From: Alaska
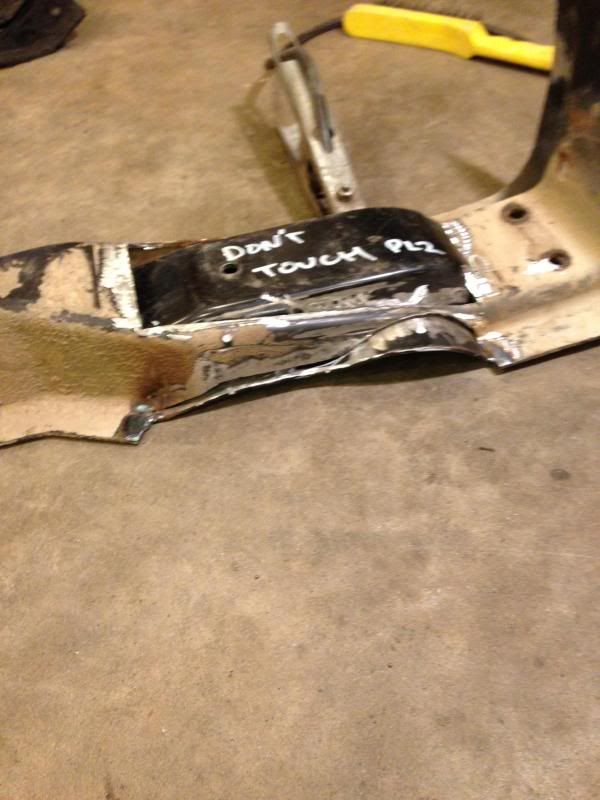
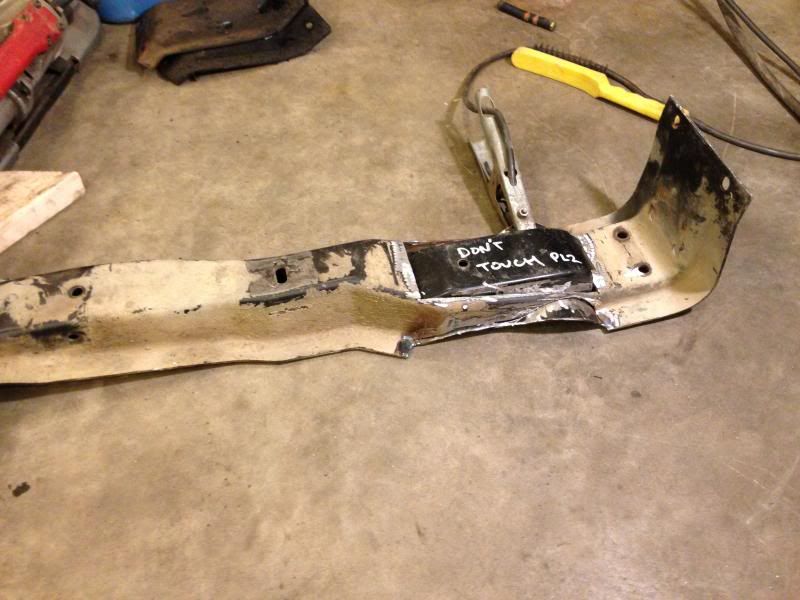
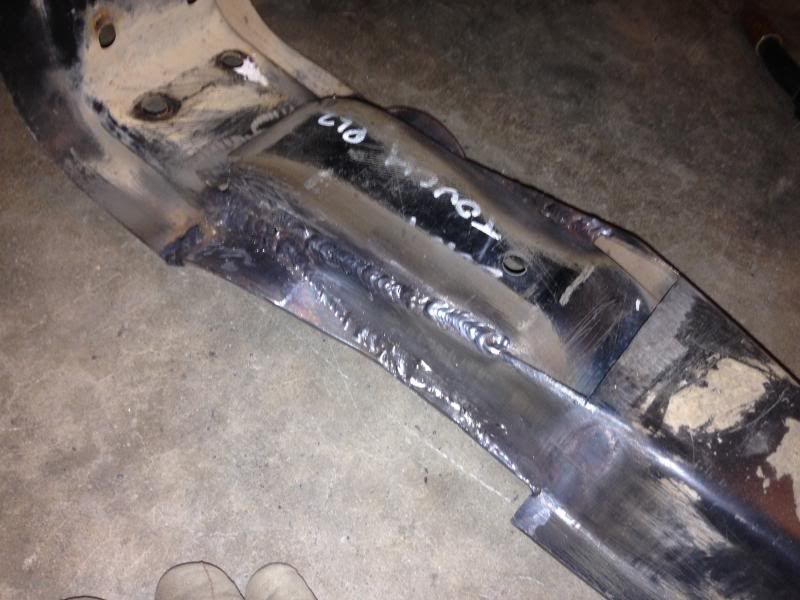
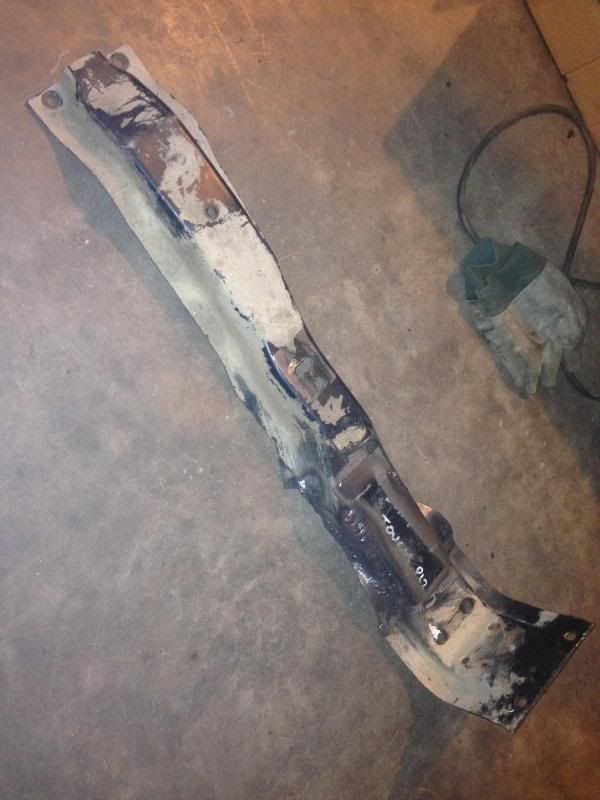
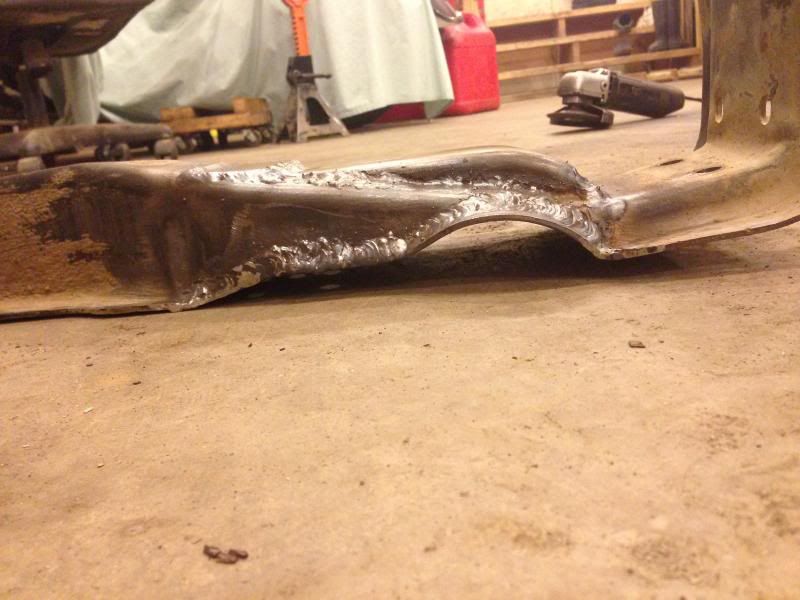
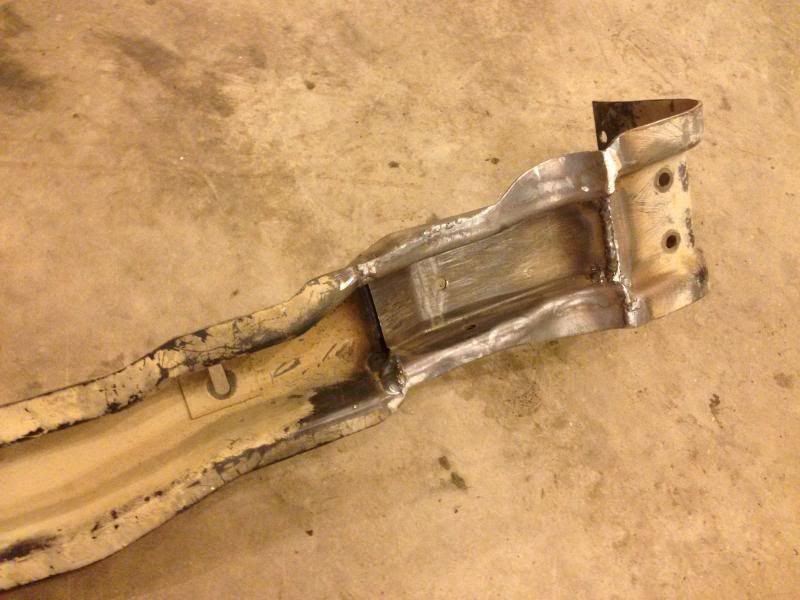
Here's what I've been working on the past couple of days. I've searched everywhere I can think of to find the crossmember I needed, and had zero luck. I found a similar one, same style, but 'taller', out of a 1 ton chassis. I got it for free, so I figured I could make something work. I ended up cutting out the hump from the 1 ton crossmember, notching my stock crossmember, and grafting the piece from the 1 ton in place, making my stock crossmember "dual hump".
It's not totally finished, I still have to patch a few gaps, but the piece itself is welded in and clears the Camaro headers on both sides. Yes, my welding isn't pretty, it's a cheapie 110v wire feed deal.
This is great practice for the floor pans and rockers I'm going to have to replace in the 1962 Mercedes 190Dc 'Fintail' I'm picking up tomorrow morning. I think a new welder (or more tunable setting dials for this one) will be my next investment.
I'll get some better pictures tomorrow once I get it finished up.
Thread Starter
TECH Regular
Joined: Oct 2011
Posts: 453
Likes: 178
From: Alaska
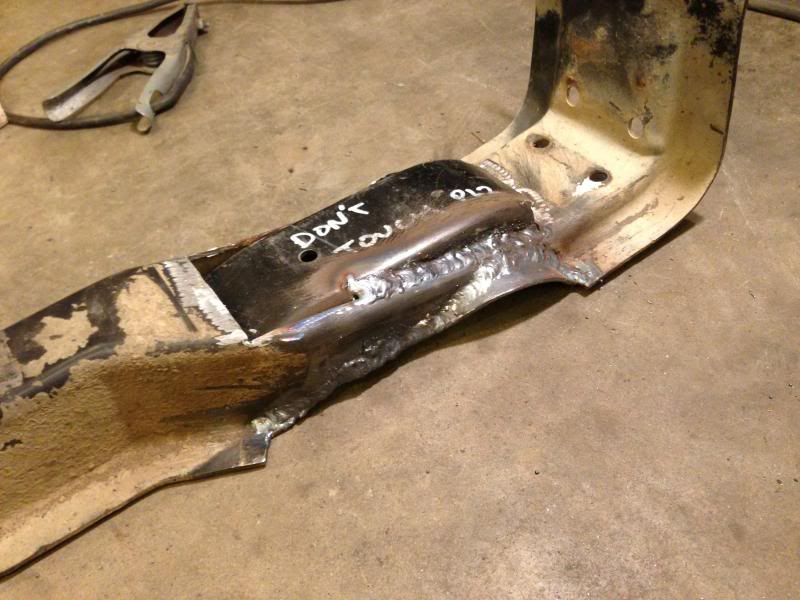
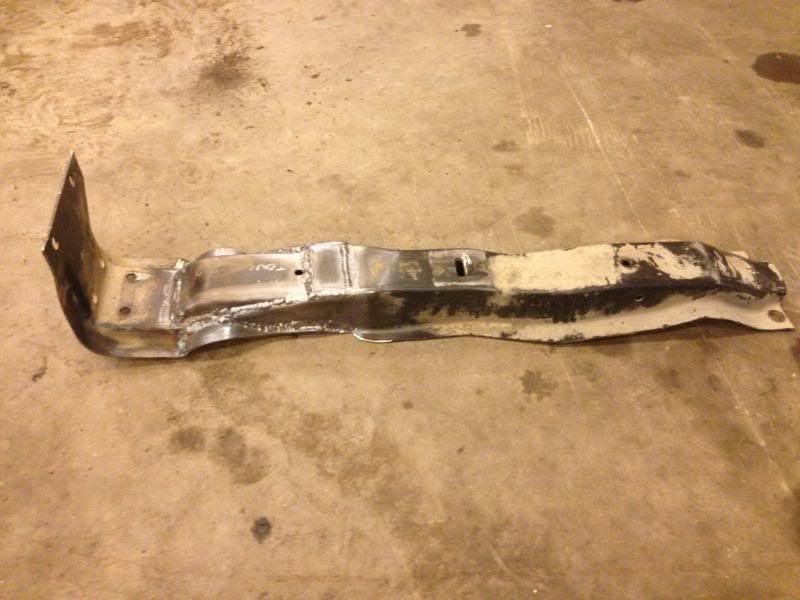
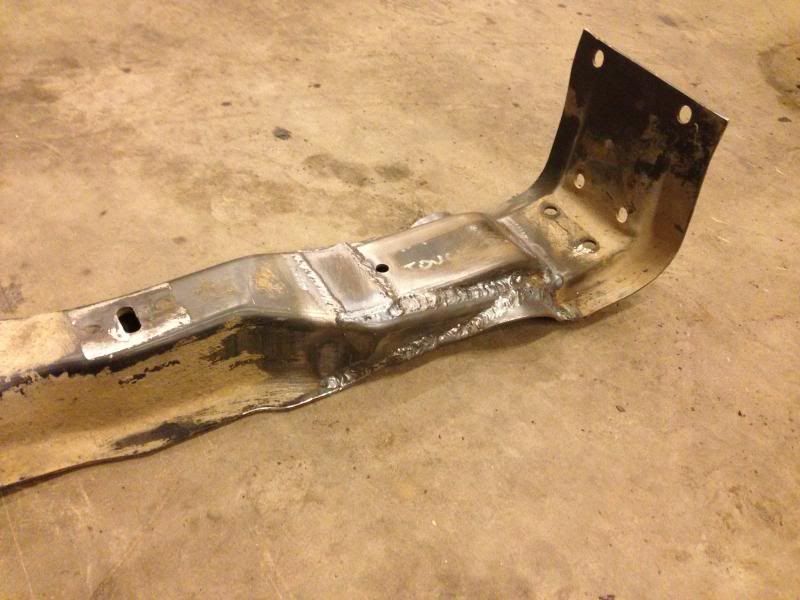
Finished up the welding, just need to clean and paint it!
Also, I picked up some 12.9 Allen head bolts to replace the cheesy ones that came with the intake. One broke when installing the regulator bracket.
Also, I picked up some 12.9 Allen head bolts to replace the cheesy ones that came with the intake. One broke when installing the regulator bracket.