


LS1 1992 TYPHOON project
Thread Starter
Teching In
Joined: Jul 2012
Posts: 49
Likes: 0
From: riyadh
Thread Starter
Teching In
Joined: Jul 2012
Posts: 49
Likes: 0
From: riyadh
Your biggest problem is the oil pan. There are a couple pans out there that have been used. RPM in Cali was selling them, not sure if they are anymore. Otherwise if your helper can weld aluminum that is your next option. I used a hummer pan on my ls swap in the ty. Had to cut it and reweld the bottom and the sump area to clerear the front diff. Your next biggest problem is no money. Getting a exhaust and wiring and a few other items are not free. You might want to check out syty.net or v-8s10.com and see what's going on there.
thanks for the info my bro already has the hummer oil pan and unmodified it didnt fit but as you said there is a way to make it fit.... anyway i heard that there are some oil pans that external tanks .. does anyone know of something like that???
Thread Starter
Teching In
Joined: Jul 2012
Posts: 49
Likes: 0
From: riyadh
 It took me over a year and 6k$ and I have been working on cars for 20 years. I think you bit off more than you can chew. On the other hand my first major undertaking was at 18 I swapped everything including wirring from a 76 Camaro to a 73. There was no internet back then to help me.
 GL
thanks alot for the support i really need it from experienced guys like you...

Thread Starter
Teching In
Joined: Jul 2012
Posts: 49
Likes: 0
From: riyadh
i need that ls1 to 700 transmission adaptor though... got one of those??
Last edited by AlhozamiAutoali; Jul 15, 2012 at 10:37 PM.
Thread Starter
Teching In
Joined: Jul 2012
Posts: 49
Likes: 0
From: riyadh
I finished my first S10 ls1 swap within a couple of months. The biggest issue was money, you never really understand how much money is going to be thrown into a swap project until you start doing it. Don't forget you need to do wiring, exhaust, fuel system, cooling system. If you want power steering and a/c (if applicable) it's also going to cost you.
Your best bet is to take of the radiator support to make it easier on yourself when you put the motor in. If you get the fenders off all it takes is another two bolts to take it off.
Good luck and get a job!!! hahah. I have thrown probably 15 grand into my swap project because I used good parts and took short cuts where safety wasn't an issue!
Thread Starter
Teching In
Joined: Jul 2012
Posts: 49
Likes: 0
From: riyadh
Thread Starter
Teching In
Joined: Jul 2012
Posts: 49
Likes: 0
From: riyadh
my internet was not able to upload videos so i delayed this update ..
anyway day 1 of working i was able to finish steps 1 and 2..
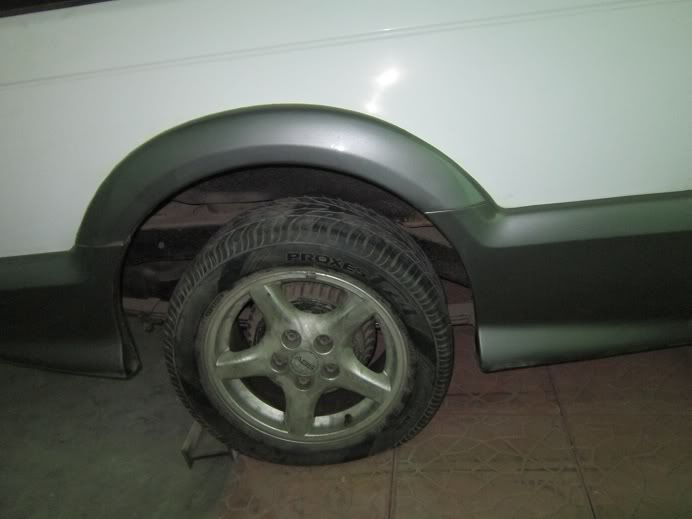
the two front wheels was stolen so the previous owner put in el camino rims for transport and the rears are still the original typhoons anyway it looked undecent so i bought these decent pair of wheels (100$ with tires) and i realized that its made by gm???
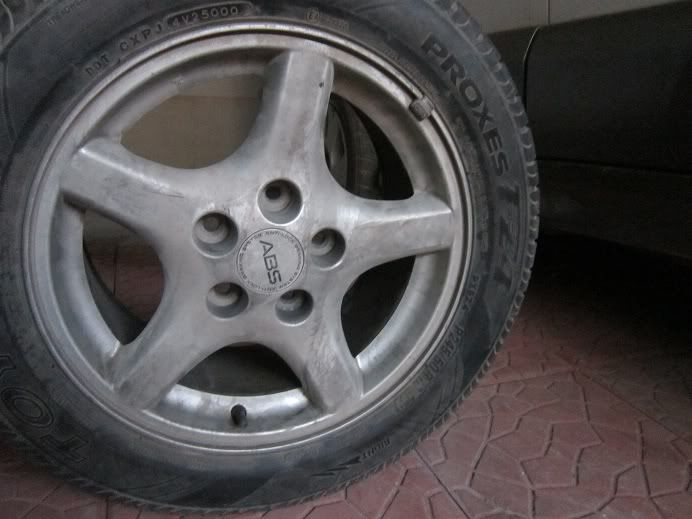
so i looked for it and found alot of camaro's with it.. still not sure though its says abs in the middle and has a GM engraving in the back of the rim ...anyways i installed them and fit perfect my bolt pattern is the same as the camaro's
... after that i wanted to remove whats left of the front drivesystem which is the driveshafts and it only took me around 7 minuits to take the whole system heres a photo of the left wheel hub
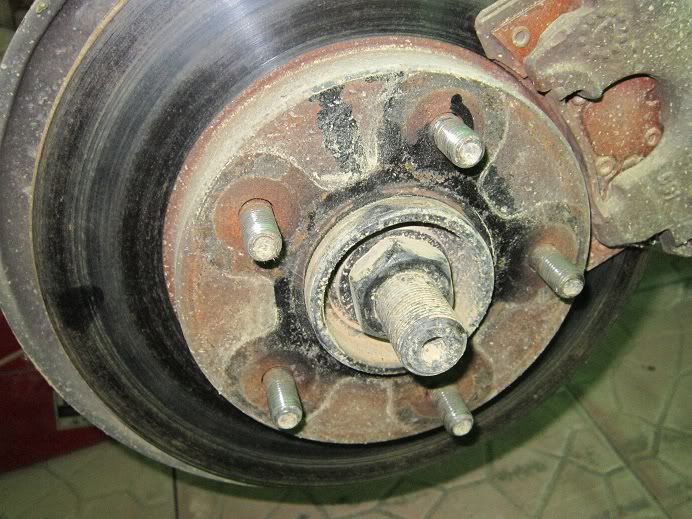
my steps
1.install a wheel that the socket could go through in my case i used the camino rim just to hold the wheel hub in place while unscrewing the nut
2.remove the pin on the driveshaft bolt
3.remove the nut locker it gets loose after you removed the pin
4.remove the nut
5.keep hitting the bolt till its completely loose inside
6.if there is resistance maby its because the driveshaft is hitting the shock mount as shown here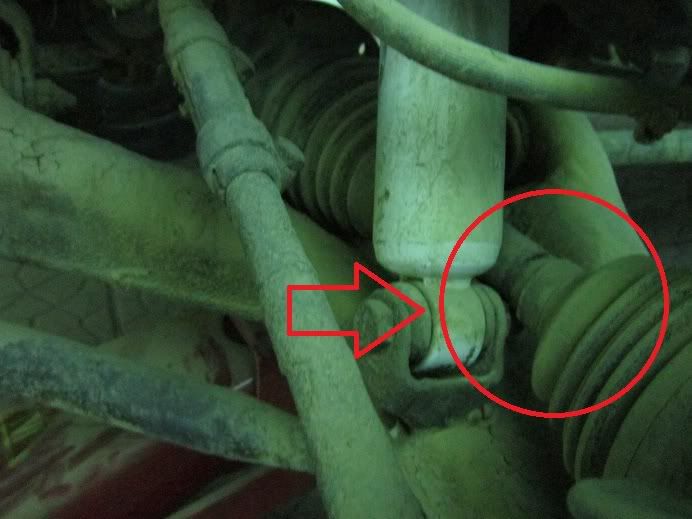
after that pull from this end till its completely out
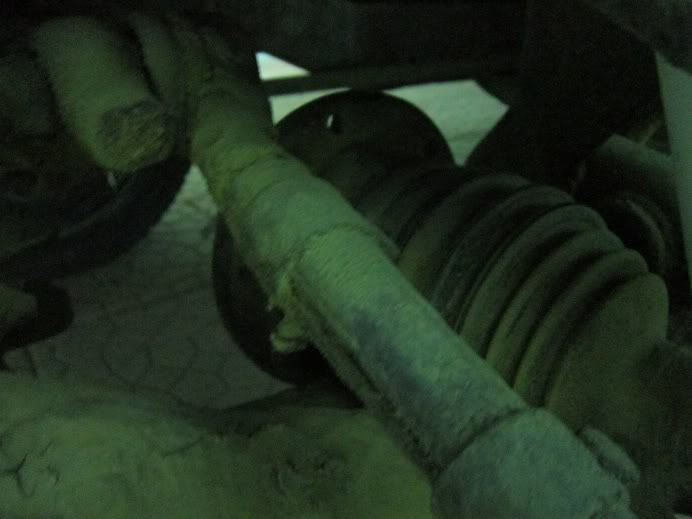
and your done
so that was all that i did in day one anyways i also have a video for the whole process of me removing it here : http://youtu.be/O0wqXE7nnjM forgive my poor literature
anyway day 1 of working i was able to finish steps 1 and 2..
the two front wheels was stolen so the previous owner put in el camino rims for transport and the rears are still the original typhoons anyway it looked undecent so i bought these decent pair of wheels (100$ with tires) and i realized that its made by gm???
so i looked for it and found alot of camaro's with it.. still not sure though its says abs in the middle and has a GM engraving in the back of the rim ...anyways i installed them and fit perfect my bolt pattern is the same as the camaro's
... after that i wanted to remove whats left of the front drivesystem which is the driveshafts and it only took me around 7 minuits to take the whole system heres a photo of the left wheel hub
my steps
1.install a wheel that the socket could go through in my case i used the camino rim just to hold the wheel hub in place while unscrewing the nut
2.remove the pin on the driveshaft bolt
3.remove the nut locker it gets loose after you removed the pin
4.remove the nut
5.keep hitting the bolt till its completely loose inside
6.if there is resistance maby its because the driveshaft is hitting the shock mount as shown here
after that pull from this end till its completely out
and your done
so that was all that i did in day one anyways i also have a video for the whole process of me removing it here : http://youtu.be/O0wqXE7nnjM forgive my poor literature
Thread Starter
Teching In
Joined: Jul 2012
Posts: 49
Likes: 0
From: riyadh
so for day two i had limited time so i thought what was an easy and fast job well the front clip was only held by two bolts on the top for transport and i thought it wasnt that heavy so thats exactly what i invested my time with and i was planning to bring in the ls1 after two days so im installing it with the front clip off... the front clip's condition is not really ''solid'' alot of stuff were cut out specially when they needed to extend space for the radiator when the previous owner tried to install an lt1 so i bought a new front clip which was in great condition but was from an s10 blazer not a typhoon or a syclone so i had to move the front fenders to that one if i was going to intstall it i will have to see if i do need the space cut out for the radiator in the original front clip if not im planning to install the other one.
anyways heres a video of the whole removal as i said it was only held by two bolts so there was no instuctions needed..
http://youtu.be/LO_bBmVraBk
anyways heres a video of the whole removal as i said it was only held by two bolts so there was no instuctions needed..
http://youtu.be/LO_bBmVraBk
LS1 Tech Stories
The Best V8 Stories One Small Block at Time

Topdon ONE vs. Artidiag 800 BT2: Which is the Diagnostic Tablet For You?
Pouria Savadkouei
Gas Monkey Built a 6-Wheel Ferrari Testarossa With a Corvette LT4 Engine
Verdad Gallardo
7 Most Reliable High-Performance Engines GM Has Ever Built
Verdad Gallardo
Amazing '71 Camaro Restomod Is Modern Muscle Car Under the Skin
Verdad Gallardo
6 Common C5 Corvette Failures and What's Involved In Repairing Them
Pouria Savadkouei
Retro Modern Bandit Pontiac Trans AM Comes With Burt Reynolds' Autograph
Verdad Gallardo
Top 10 Greatest Cadillac V Series Performance Models Ever, Ranked
Pouria Savadkouei
Top 10 Most Powerful Chevy Trucks Ever Made!

Hennessey's New Supercharged Silverado ZR2 Has 700 HP
Verdad Gallardo
Thread Starter
Teching In
Joined: Jul 2012
Posts: 49
Likes: 0
From: riyadh
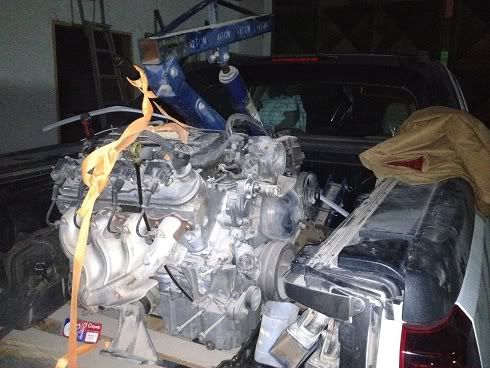
Went to the warehouse last night (me and my brother) to pickup the ls1 and the TH700R4 trans here's the warehouse
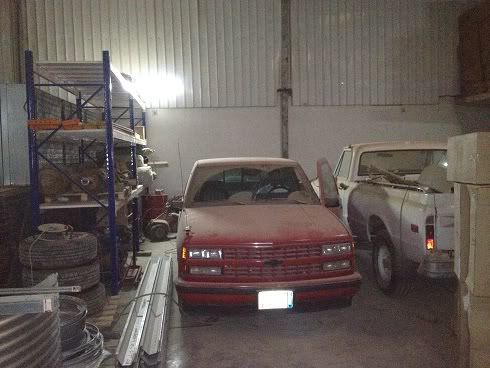
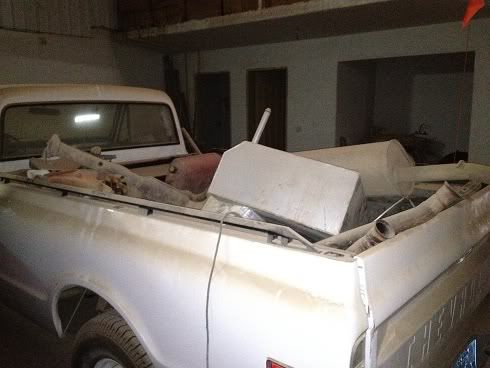
oh yah and the two trucks are a 1993 chevy truck ss454 swapped 8.1 and a 1972 chevy truck c20 stock which has alot of stuff on the bed
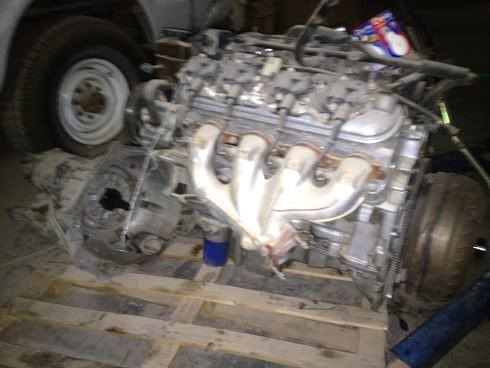
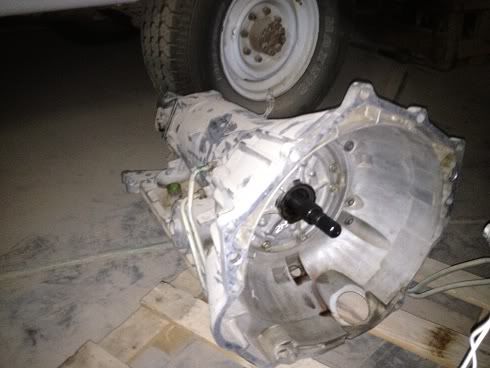
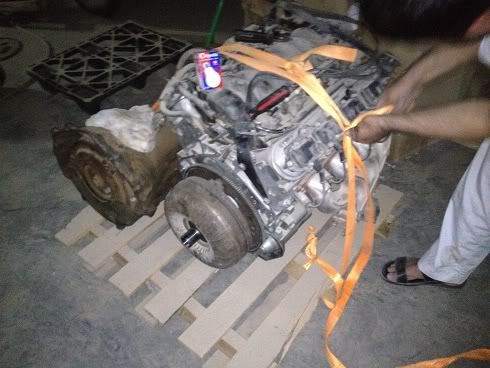
we took the ls1 from a 2001 caprice v8 (in saudi arabia) and it has a 4l60e transmission attached to it so we had to remove that first to install the 700 trans
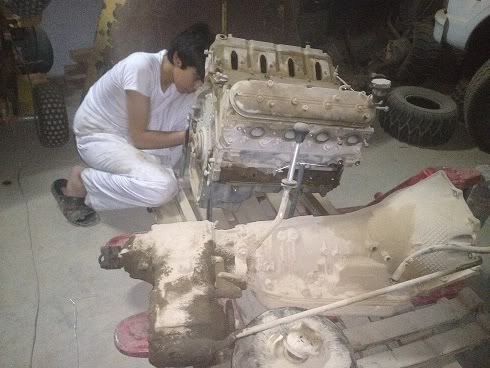
so i took of all the transmission bolts and we started seperating the transmission from the engine

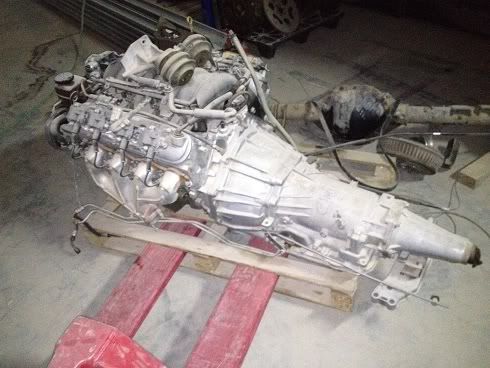
After that we brought out the th700r trans which already had the Borg Warner 4472 transfer case installed to it that we took from an astro van awd
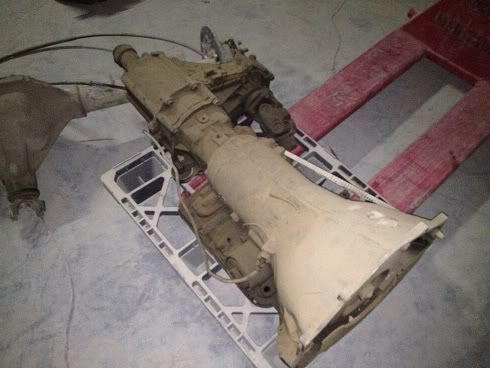
after that we strapped it together with the ls1 for transport
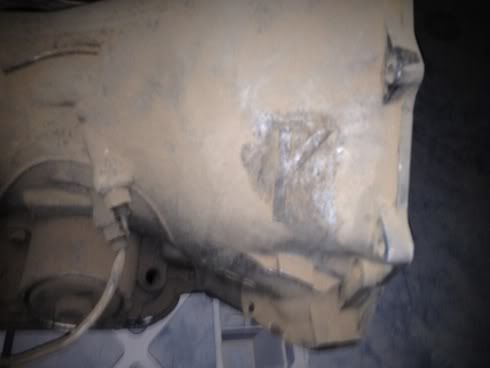
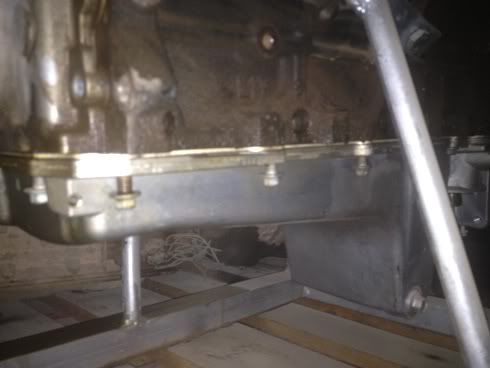
then now we needed the hummer h3 oil pan .. it was already a previous project to intstall a gm 4.8 into the typhoon before so i took it off the old engine
and after that we loaded everything on the truck and went home
oh yah and the two trucks are a 1993 chevy truck ss454 swapped 8.1 and a 1972 chevy truck c20 stock which has alot of stuff on the bed
we took the ls1 from a 2001 caprice v8 (in saudi arabia) and it has a 4l60e transmission attached to it so we had to remove that first to install the 700 trans
so i took of all the transmission bolts and we started seperating the transmission from the engine
After that we brought out the th700r trans which already had the Borg Warner 4472 transfer case installed to it that we took from an astro van awd
after that we strapped it together with the ls1 for transport
then now we needed the hummer h3 oil pan .. it was already a previous project to intstall a gm 4.8 into the typhoon before so i took it off the old engine
and after that we loaded everything on the truck and went home

Why aren't you using the 4L60E transmission? You said you aren't hooking up the front differential which as you already know will kill your transfer case so I don't understand why you wouldn't use the trans that was originally with your engine. Its already programmed for it. You are making your swap much more difficult by not using it. If later on you wanted to try to go AWD you could just as easily get a 4x4 4L60E and AWD transfer case and it would be a direct swap.
i agree with sierra , why not go with the 4L60 trans ( unless your cousing has a "project" lined up for it  )
)
drop that engine and the 4L60 trans , hook up the driveshaft and pcm and you are almost done
and by the way , those wheels are off a firebird if i'm not mistaken.
and i got to give you credit for documenting all your work you will find it comes in handy when you need to check if you did something or not later down the road.
) drop that engine and the 4L60 trans , hook up the driveshaft and pcm and you are almost done
and by the way , those wheels are off a firebird if i'm not mistaken.
and i got to give you credit for documenting all your work
you will find it comes in handy when you need to check if you did something or not later down the road. Thread Starter
Teching In
Joined: Jul 2012
Posts: 49
Likes: 0
From: riyadh
Why aren't you using the 4L60E transmission? You said you aren't hooking up the front differential which as you already know will kill your transfer case so I don't understand why you wouldn't use the trans that was originally with your engine. Its already programmed for it. You are making your swap much more difficult by not using it. If later on you wanted to try to go AWD you could just as easily get a 4x4 4L60E and AWD transfer case and it would be a direct swap.
i agree with sierra , why not go with the 4L60 trans ( unless your cousing has a "project" lined up for it )
drop that engine and the 4L60 trans , hook up the driveshaft and pcm and you are almost done
and by the way , those wheels are off a firebird if i'm not mistaken.
and i got to give you credit for documenting all your work you will find it comes in handy when you need to check if you did something or not later down the road.
) drop that engine and the 4L60 trans , hook up the driveshaft and pcm and you are almost done
and by the way , those wheels are off a firebird if i'm not mistaken.
and i got to give you credit for documenting all your work
you will find it comes in handy when you need to check if you did something or not later down the road. If I were you I would forget about the 700R4 and just get a 4L60E with a AWD transfer case. Something out of an Escalade or a Denali truck would work. I would also look into the Trailblazer SS front differential and oil pan. I bet you could make them work. Might take a little cutting and welding but what swap doesn't?


It's a 20 year old vehicle with zero rust. Oh No! For me, the most important thing is that it's out of the sun.
Now we know it will get done.
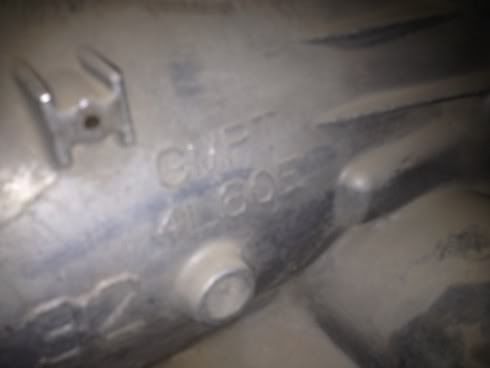
GM 12563532
Only early 4L60-E converters work in the 700-R4 because the TCC system is non-pulse width modulated.
I find myself agreeing with this.
Good luck with your swap and keep documenting the integration of the AWD as you work!
Good luck with your swap and keep documenting the integration of the AWD as you work!