

LQ4/T56 into 2001 BMW 540i
 02-14-2013, 10:44 AM
#121

I thought about that too. There was conversation about that in threads of other people that have swapped before more (I think it maybe was Schitzo or Rao) and they were running a driveshaft that was free to move fore/aft at both ends, and that they hadn’t had problems with it. Ideally you the CSB isn’t designed to see force in that direction, but if it works, I’m not going to worry about it.
The slip yoke (from what I recall) is actually to account for movement in the rear axle under compression and unloading, but that’s more for solid axle setup, where the diff moves with the axles/wheels. On an IRS like mine the diff is hard mounted to the subframe so it sees much less movement.
The slip yoke (from what I recall) is actually to account for movement in the rear axle under compression and unloading, but that’s more for solid axle setup, where the diff moves with the axles/wheels. On an IRS like mine the diff is hard mounted to the subframe so it sees much less movement.
 02-14-2013, 11:16 AM
#122
That was what I was thinking -- with regard to the fore and aft motion and the IRS. Just curious, did you rule out a solution like I am planning? (Firebird one piece slip-yoke with BMW bolt to diff universal joint). If so why? Just trying to add to my knowledge base.
Thanks
-V
Thanks
-V
02-14-2013, 03:15 PM
#124
It bolts up
http://realoem.com/bmw/showparts.do?...21&hg=26&fg=05
It has slip too, but the slip in in the telescoping driveshaft
http://realoem.com/bmw/showparts.do?...21&hg=26&fg=05
It has slip too, but the slip in in the telescoping driveshaft
02-14-2013, 04:11 PM
#125
Teching In
iTrader: (5)
Join Date: Jul 2006
Location: Buford, GA
Posts: 33
Likes: 0
Received 0 Likes
on
0 Posts

Ahh, I wondered if it was like that. The last project I did was a Jaguar and it sounded to me like this setup was similar. I left the two slip-joints on the "front" driveshaft and as far as I know the guy hasn't had any issues. There was a more expensive way of doing things, but it required modifying BOTH shafts in order to "turn the center section around." No one wants to spend money they don't "have to" so we just went the cheap route!
02-14-2013, 04:56 PM
#126
I won't make up my mind until later, but I am planning to using a Firebird one-piece aluminum shaft. I have it, its lighter (I think) and All I would have to do is get it resized and add the bolt up rear to the universal joint...if the car gods are gracious, the shaft length may be in a usable range. All I would have to do is add the bolt plate to the universal joint. I am sure i won't be that lucky
02-15-2013, 07:20 AM
#127
Ahh, I wondered if it was like that. The last project I did was a Jaguar and it sounded to me like this setup was similar. I left the two slip-joints on the "front" driveshaft and as far as I know the guy hasn't had any issues. There was a more expensive way of doing things, but it required modifying BOTH shafts in order to "turn the center section around." No one wants to spend money they don't "have to" so we just went the cheap route!
also (hopefully) avoid any high speed or critical frequency issues by having a 2 piece
02-19-2013, 08:07 PM
#129
pulled the motor, trans, and mounts last night for what should be the final time
replaced the RMS and rear cover gasket on the motor
pulled the slave cylinder, shifter, and bellhousing off the T56, wrapped it up, tomorrow it takes a little trip to Texas to be rebuilt

replaced the RMS and rear cover gasket on the motor
pulled the slave cylinder, shifter, and bellhousing off the T56, wrapped it up, tomorrow it takes a little trip to Texas to be rebuilt
 02-26-2013, 07:23 AM
#131
We’re getting some “nice” weather (not 20*F) this week so I’ll be spending some more time chipping away at things.
Last night I got a few things done.
Removed AC lines, made up a small aluminum block off plate for the lines going into the firewall/evaporator to prevent them getting gunked up with dirt and such. While I was at it I removed the secondary air injection pump and the AC dryer, both in the fenderwell. I’m left with 2 nice big holes there now so I may use one of them for some fresh air to the intake.
I also buttoned up the front accessory drive. I had routed the belt incorrectly, so I fixed that and make sure it all rotated smoothly.
Finished cutting the threads on the shifter with the die, installed the locking nut and ****. If I ever end up with spare time when it’s all done I’m considering making a 2nd shifter handle (same brushed finish, but taller) for fun.
Soaked the engine bay in purple power, gave everything a good scrub. Also cleaned and reinstalled all the heat shields around the front thrust arms that I had removed when pulling the M62.
Cleaned up the valve covers and intake manifold with purple power as well. Halfway through the first valve cover I realized it was started to eat some of the wrinkle finish I put on there, so I may have to respray it.
Installed the rocker pedestals, rockers, pushrods. Gave the engine a few partial turns and they’re all moving smoothly. I didn’t expect any PTV problems with my stock LS2 Vette cam and milled heads but it’s nice to know for certain that I’m good.
My T56 arrives in Texas for the rebuild today, so I’m expecting a call late this week or early next week. In the meantime I still need to buy a pilot bearing (small f-body style one) and new slave cyl, as well as an f-body clutch line since it fits the BMW master with some modification.
In the meantime I may jump in headfirst and start rebuilding my M5 diff. After doing much research I’m more confident about rebuilding the LSD portion. Setting up the ring and pinion is a different story though, I will leave that to a professional.
02-27-2013, 02:04 PM
#132
LQ4,
I am just curious. How long did it take you to get your M60 out of the car. I am taking my time, but I have put in about 10 hours on the uninstall and it is still sitting in the car. I have broken lots of plastic clips and even my Bowden cable (grr) I just wanted to see if I am slow or this is about right? I am now pretty close to having it out.
I am just curious. How long did it take you to get your M60 out of the car. I am taking my time, but I have put in about 10 hours on the uninstall and it is still sitting in the car. I have broken lots of plastic clips and even my Bowden cable (grr) I just wanted to see if I am slow or this is about right? I am now pretty close to having it out.
Last edited by vazfx16; 02-27-2013 at 02:12 PM.
02-27-2013, 02:22 PM
#133
LQ4,
I am just curious. How long did it take you to get your M60 out of the car. I am taking my time, but I have put in about 10 hours on the uninstall and it is still sitting in the car. I have broken lots of plastic clips and even my Bowden cable (grr) I just wanted to see if I am slow or this is about right? I am now pretty close to having it out.
I am just curious. How long did it take you to get your M60 out of the car. I am taking my time, but I have put in about 10 hours on the uninstall and it is still sitting in the car. I have broken lots of plastic clips and even my Bowden cable (grr) I just wanted to see if I am slow or this is about right? I am now pretty close to having it out.
Once you remove all individual systems/accessory connections (power steering lines, oil filter lines, alternator connections, entire cooling system with hoses and etc, as well as all harness pigtails), there should be nothing really left connected to the engine. I thought I had everything removed, unbolted the engine and trans mounts, and started to yank on the crane, but the engine just WOULD NOT come out. I thought that the headers (which are still attached at this point) were getting hung up on something, but it turns out I forgot to disconnect the wire that runs from the battery to the starter. Once I realized my mistake it slid right out.
~Norb
02-27-2013, 09:52 PM
#134
Yes. I have been doing the same, an hour or two here and there. I spent an hour on the starter motor connection last night and still didn't get one of the wires unhooked. It is tight under there. I am about done underneath, so I plan to have the engine out this weekend.
I studied the driveshaft more -- after taking it out -- and I think I am going to get a slip yoke added to the stock BMW shaft, instead of using the GM shaft. I think it will much simpler.
Note all of my labels in my picture. I remember the last time I did and engine swap I tried to do a lot by memory...bad idea for me.
02-28-2013, 08:16 AM
#135
The internals of my M5 diff are fully disassembled. It’s an easy job for anyone undertaking a clutch disc replacement, just go slowly. Cleaned the internal LSD core parts, they’re bagged and tagged, while the spool and spool lid are soaking in Purple power along with the output covers. I was able to remove the output shaft bearings very easily with a cutoff wheel and gentle prying. The inner races were much more difficult, requiring lots of patient grinding and tapping. I was able to eventually get them “thin” enough to where the chisel split them. No damage to the surface that the inner race rides on. Unfortunately I’m at a standstill for rebuilding the diff as I still am waiting on new bearings, races, pinion seals, etc. Also spoke with Jim Blanton and he’s out of stock for clutches and dog ears (#$%^&) so I’ll call up a few other places today and see who has them. My dog ears were worn evenly, no ridges or scars, but the clutches were nearly smooth. I also was able to remove the ring gear by getting creative with my vise and a �” thick rod to brace it. Those bolts are in TIGHT! Tonight I may be able to install the new 3.62 ring gear at the very least.
Regarding the pinion, what’s the procedure for installing the new 3.62 pinion? Removing the old one is not a big deal (mark/paint nut, remove nut, press out old pinion, replace seals and crush sleeve and bearings, replace pinion, re-torque). However, I’d like to know how to set it up with the new pinion. Does the new 3.62 pinion still “re-use” the position of the old one via the paint marks on the nut, aka is it set to the exact same pinion depth? I’m just curious as to what the procedure is. I have no way of checking backlash either (no dial indicator) so I will have to take it somewhere to have them check the mesh pattern for me and adjust if necessary once it’s all assembled.
I also messed around with the pedal assembly in the car. I bought an auto pedal assembly (but DBC) out of a late 90s 528i a few weeks ago, so I spent the last few hours of the evening removing the 6 speed pedals, swapping over the clutch pedal, and transferring over a few other things. In retrospect I “probably” could have just transferred the DBC BMW gas pedal to my set, but my 6 speed pedal bracket was pretty corroded and oxidized, so I’m glad I swapped it. I also removed the connection between the clutch master cylinder and the clutch line, but a good portion of the line is hard underneath the carpet and behind the firewall, and I was too tired to try to pull it out. I won’t need the line again so I may just cut it and pull it out from each side for ease of removal. The E39 is built like a tank under the dashboard. Welded tubular steel dash support, tons of foam throughout to insulate, leather shroud covering the steering shaft cavity so you can’t see into the dash when you adjust the wheel…pretty cool stuff.
03-01-2013, 12:56 PM
#137
So, I stopped into Denny�s Driveshaft on lunch to ask them a few things and get a quote.
http://www.dennysdriveshaft.com/index.html
I was told that they do not modify OEM driveshafts at all, which surprised me, considering how reputable of a shop they are. They said they�d be more than happy to make me a new one, but that doesn�t seem economical to me. It may have something to do with the fact that the money is probably made making new shafts, not doing a quick chop and weld on an existing unit.
Ironically the guy behind the counter is doing a TH350/SBC or LS swap into his �94 325.
He also brought up the fact that even if they could modify the driveshaft, it�s still a slip connection at both ends. I recall reading about this (I think it was Rao�s thread) and remember that apparently it wasn�t causing an issue in street use, but I don�t want to risk anything down the road as the car will see many long trips at sustained speed (85 mph+ for hours at a time). The stock E39 trans had a rigid 3 bolt connection at the front, a CSB in the middle by the u-joint splitting the halves, and a slip connection at the rear into the diff. The new T56 to driveshaft connection is slip joint, and I want to retain the CSB as well as the rear OEM BMW slip joint.
I�ll search for more info on that now, but anyone have any input on this?
03-02-2013, 09:25 AM
#138
removed the stock BMW DBW pedal.

brake and clutch master cylinder connections.
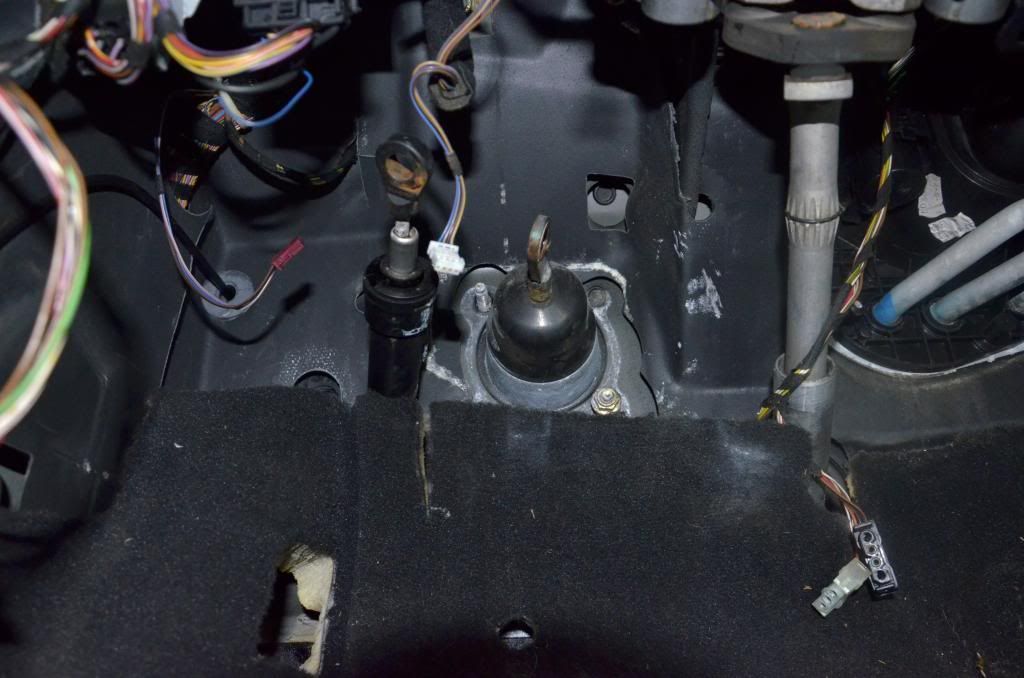
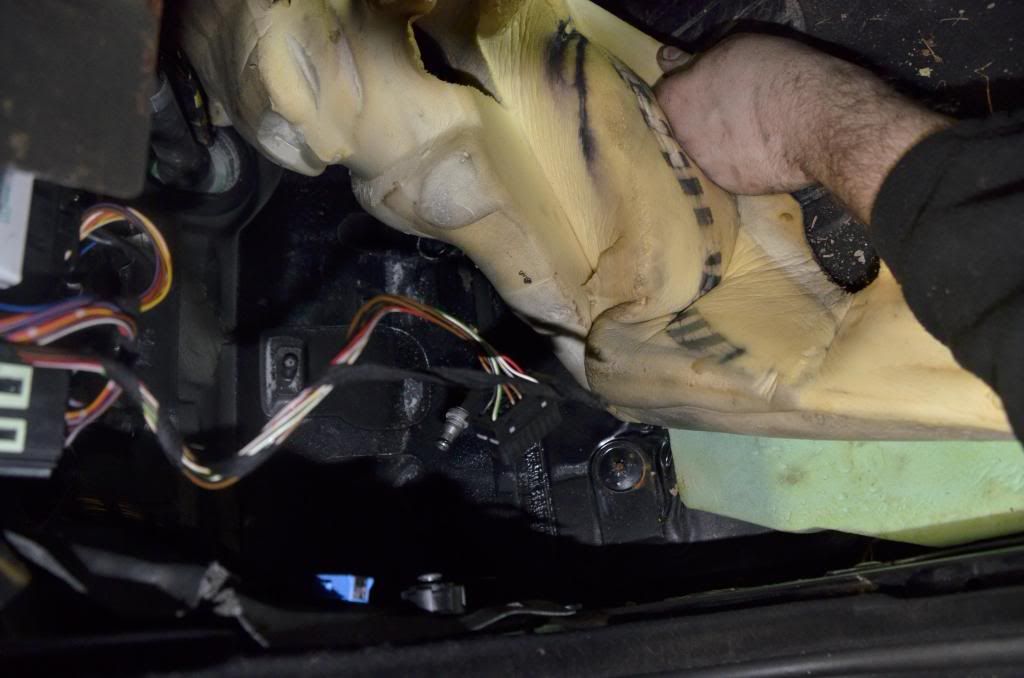
incredible amount of insulation in this car. the carpet is bonded to regular style yellow foam, and underneath is a hard-expanded foam in light green.
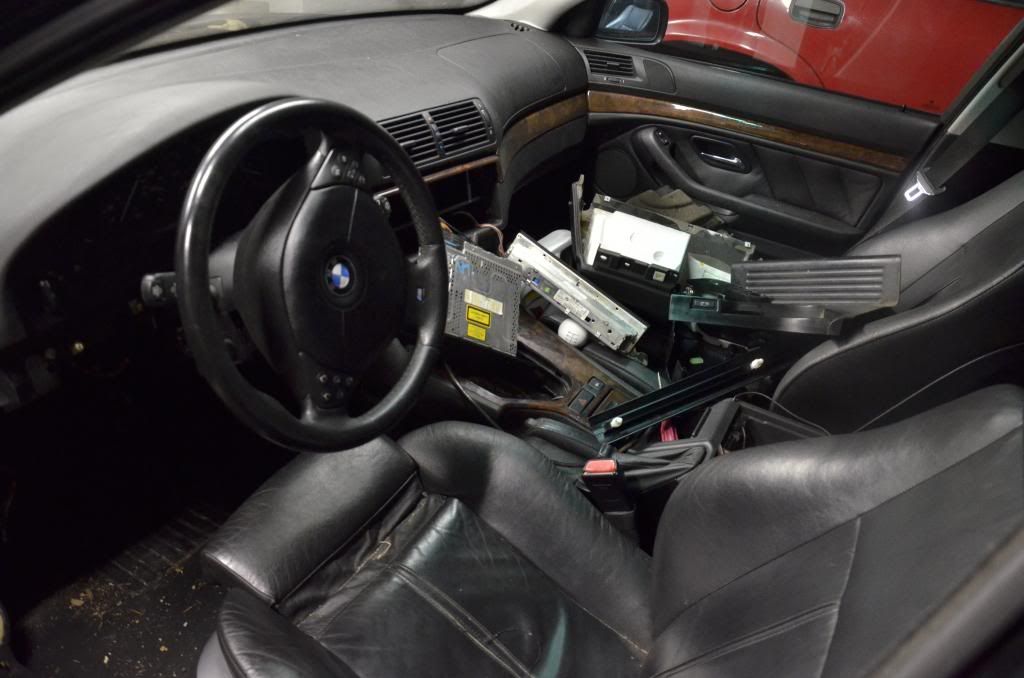
the pile of **** within the car grows...
installed the standard DBC plastic pedal
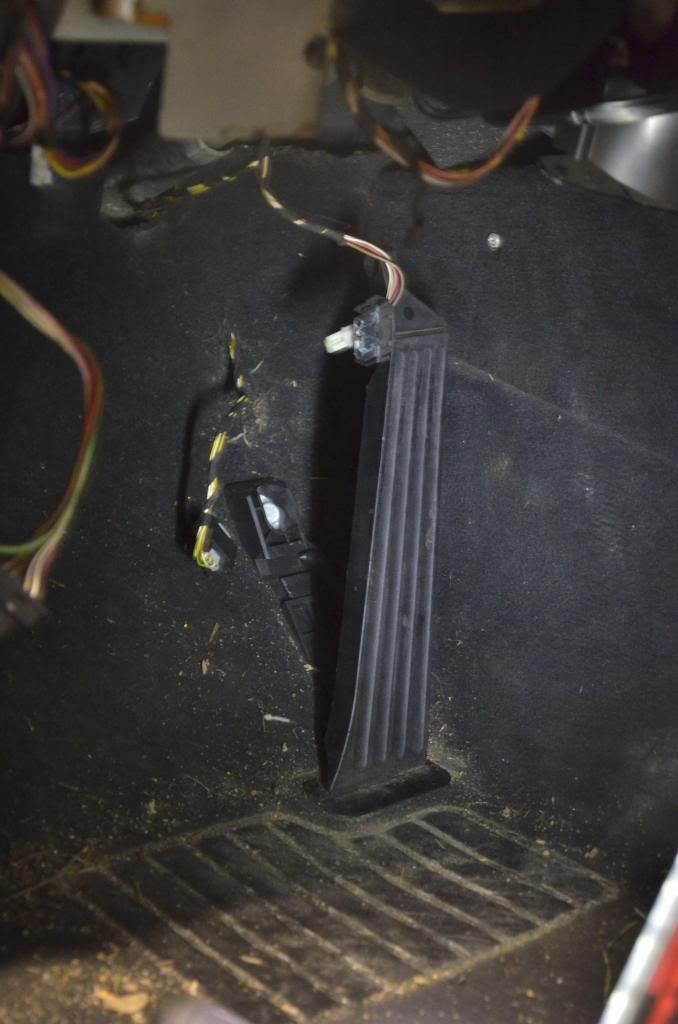
the stock hydraulic connection to the 540 clutch master cylinder.

brake and clutch master cylinder connections.
incredible amount of insulation in this car. the carpet is bonded to regular style yellow foam, and underneath is a hard-expanded foam in light green.
the pile of **** within the car grows...
installed the standard DBC plastic pedal
the stock hydraulic connection to the 540 clutch master cylinder.
03-02-2013, 09:42 AM
#139
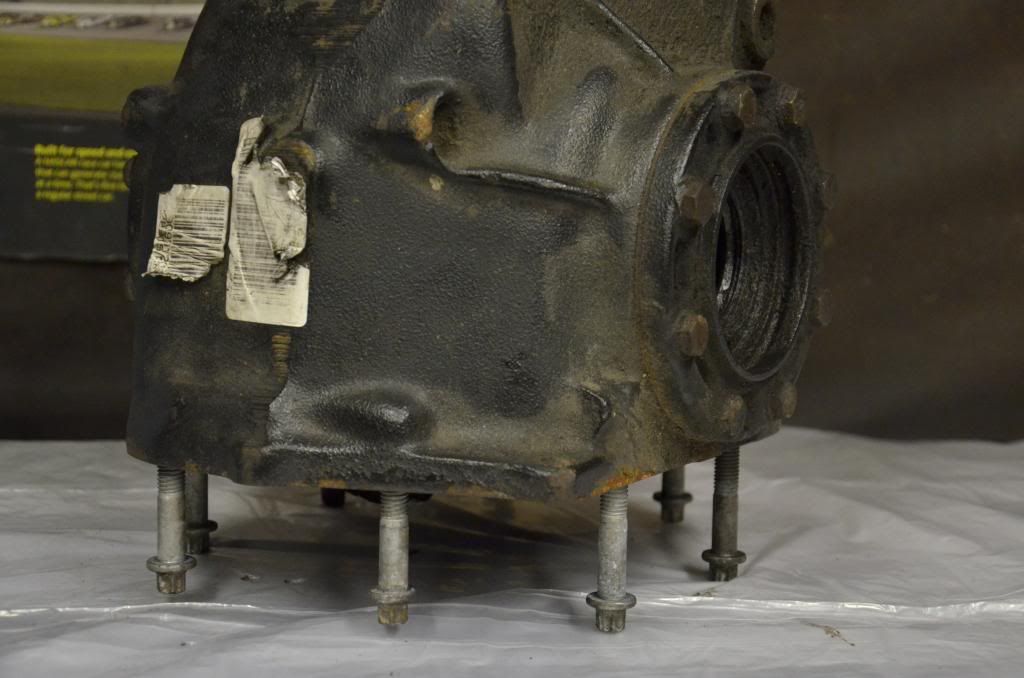
spent the last few days tearing down and cleaning the M5 diff.
the victim. got a good deal on it, but it had no service history, condition was listed as "we left this sitting outside for a year with no output stubs in it, no warranty, etc etc".

whoever pulled the diff didn't unbolt it, they just sheared the mounts. this car was probably in a severe wreck for them not to care like that.
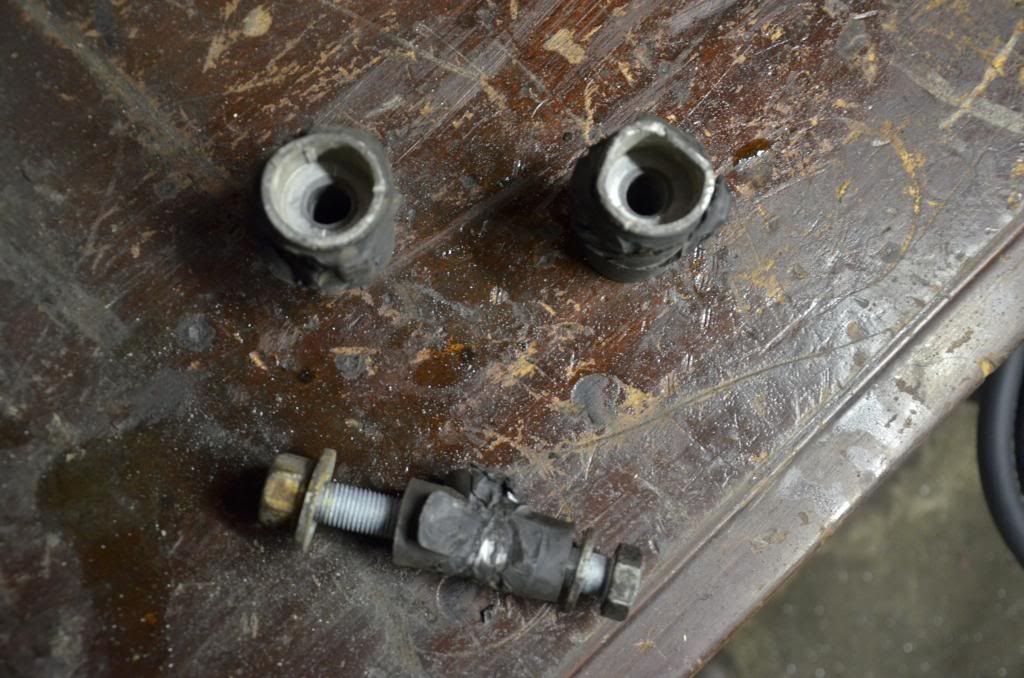
differential side of the driveshaft.
sheared differential end of the driveshaft.

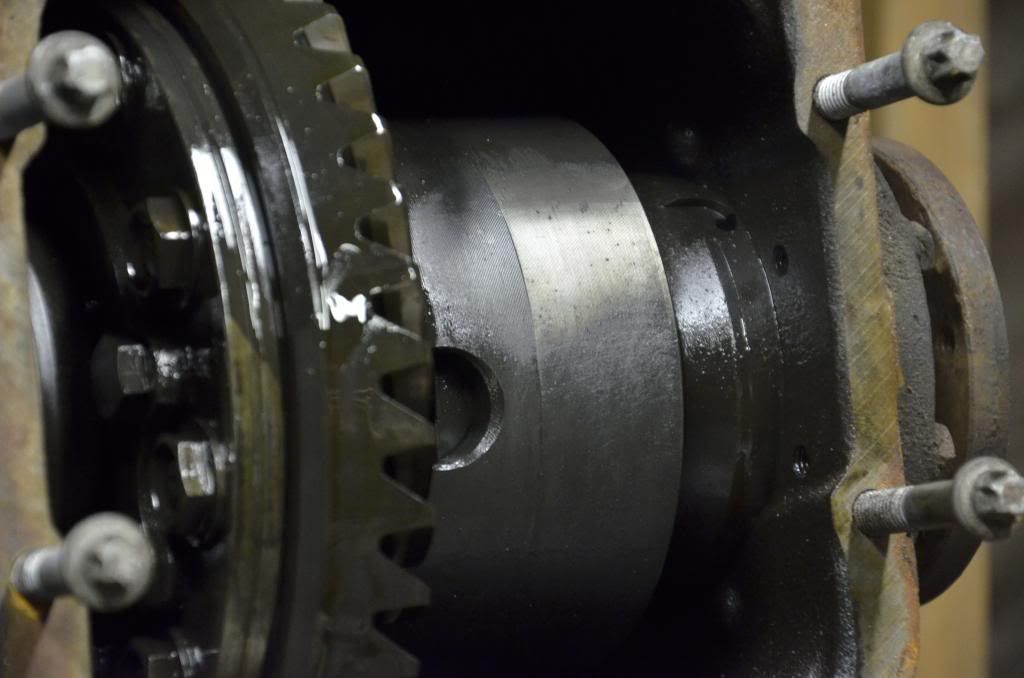
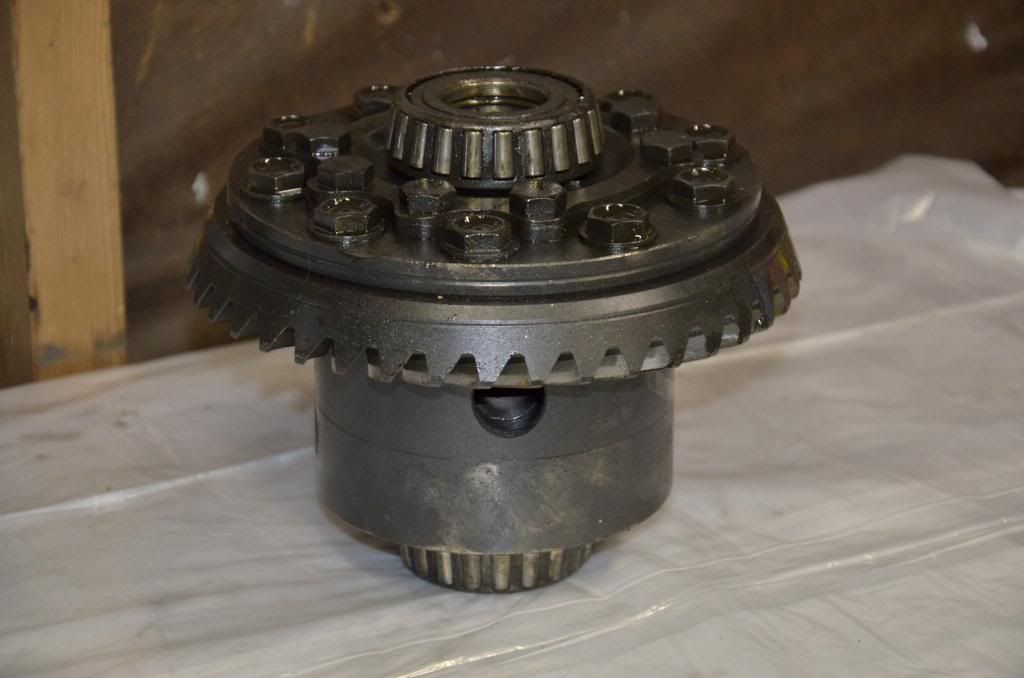
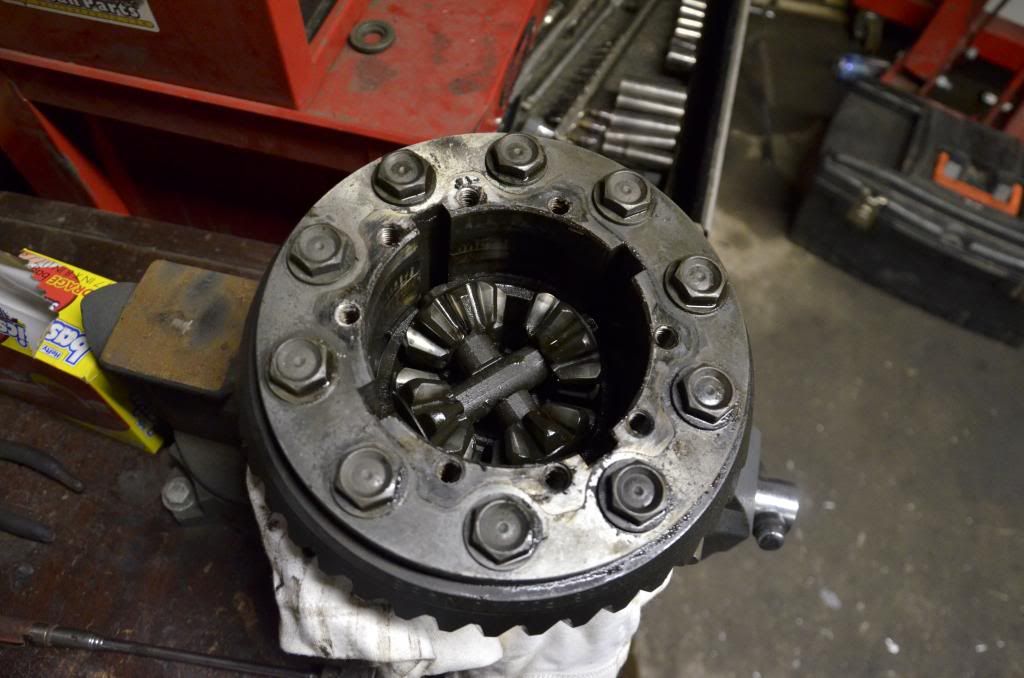
internal spool
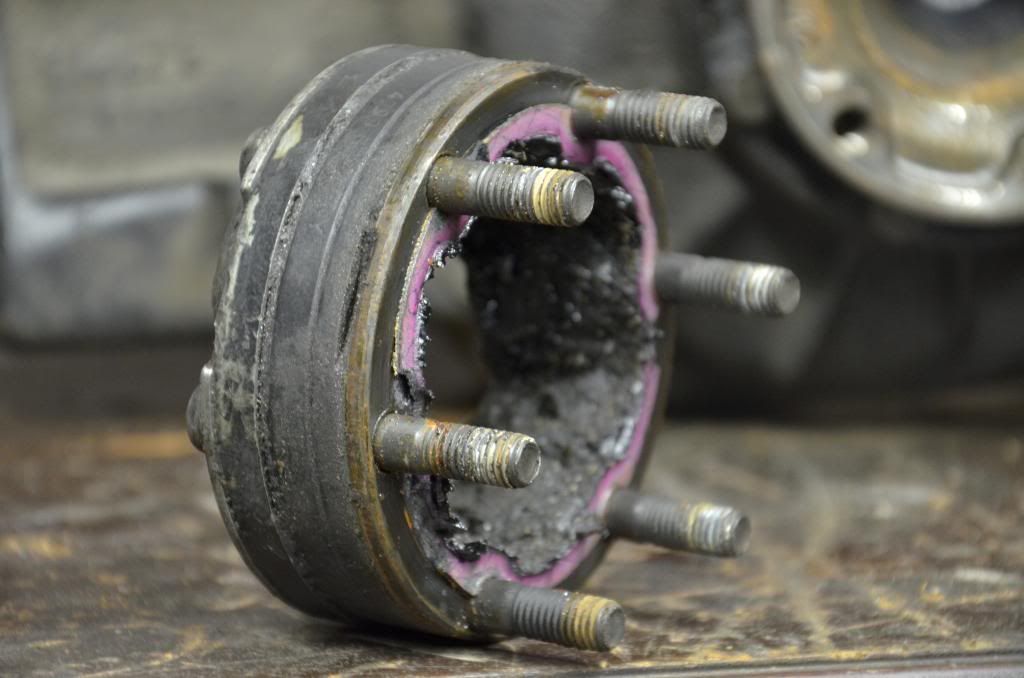
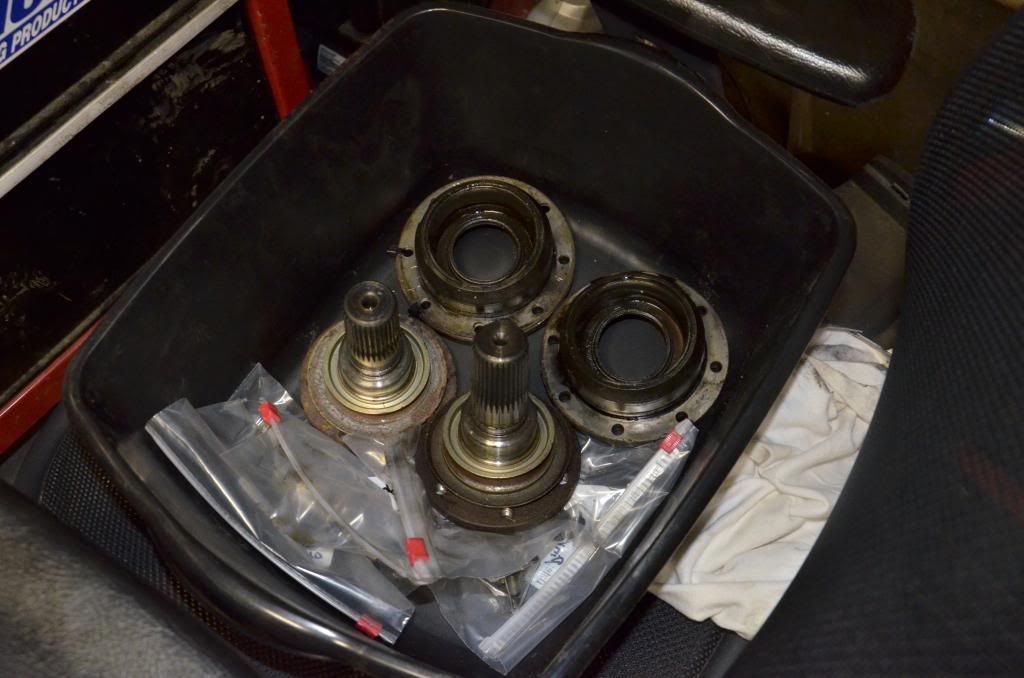
E34 540i flanges
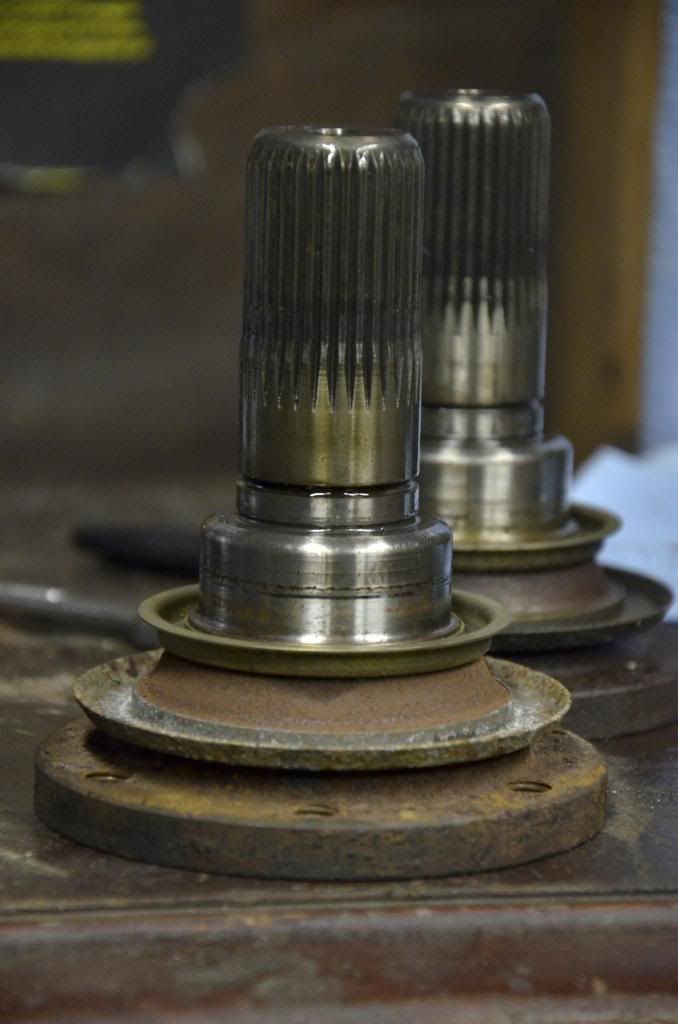
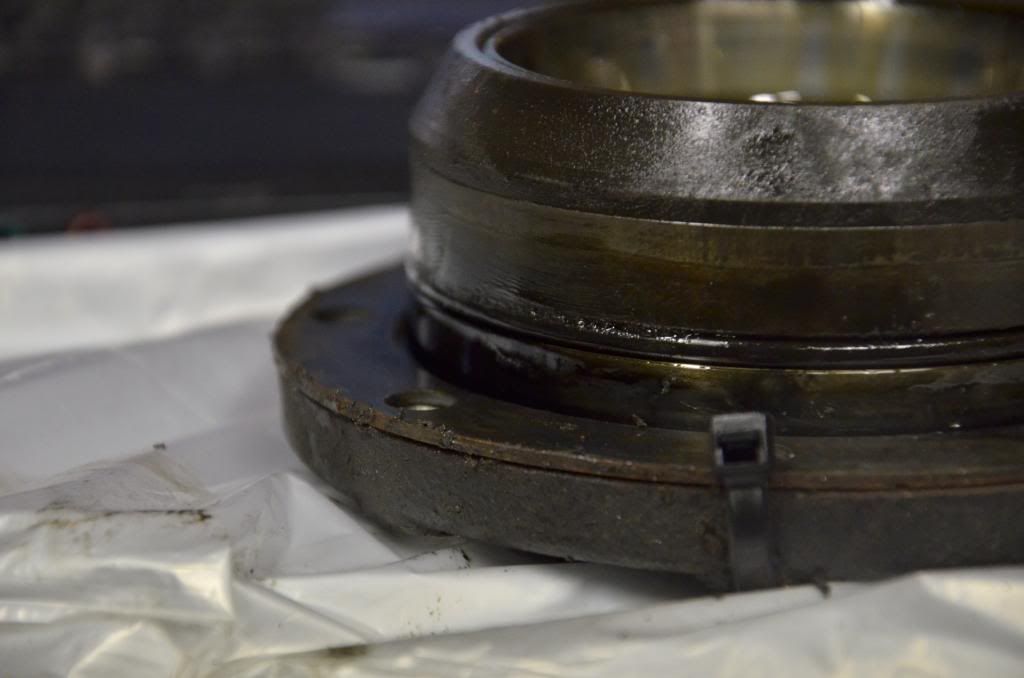
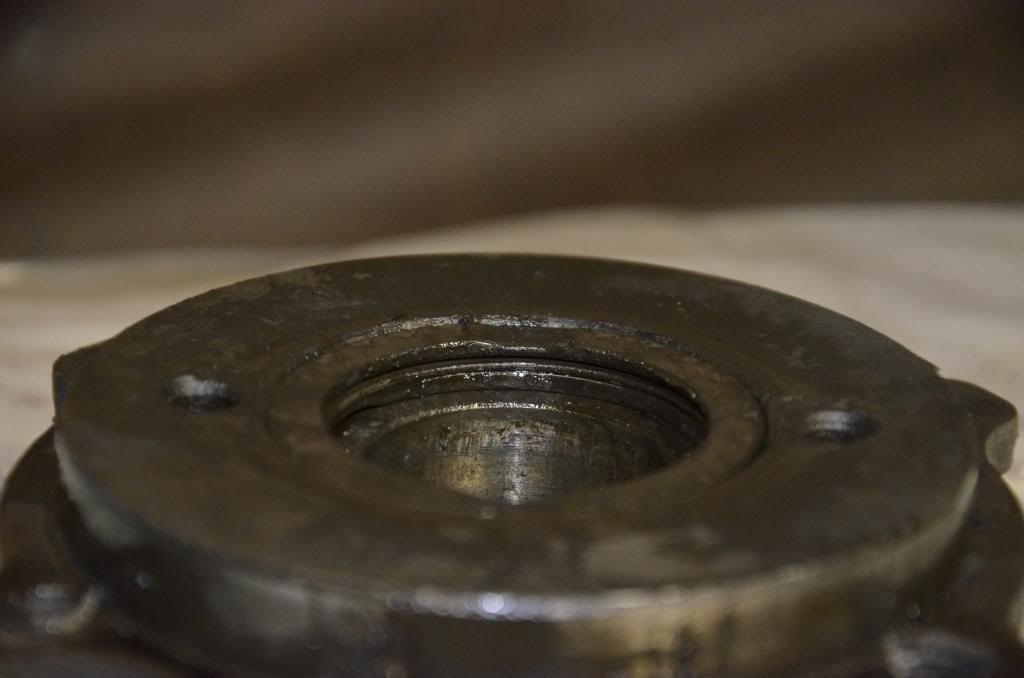
the output covers before removal. output shims are underneath.
keeping each output shim with its respective cover
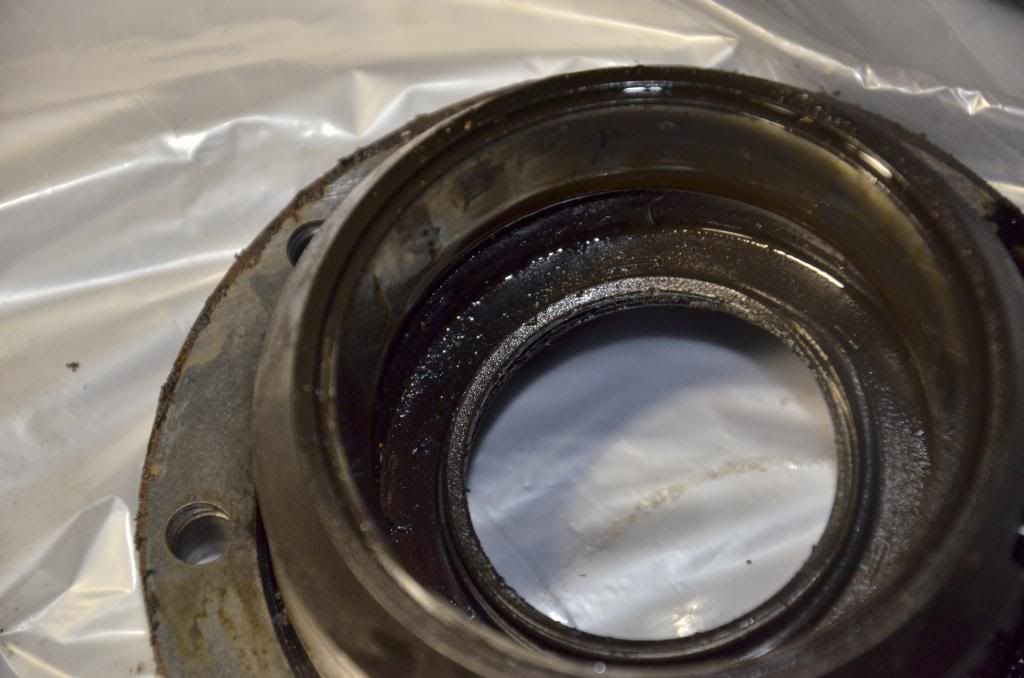
old output seals, to be replaced
internal spool removed
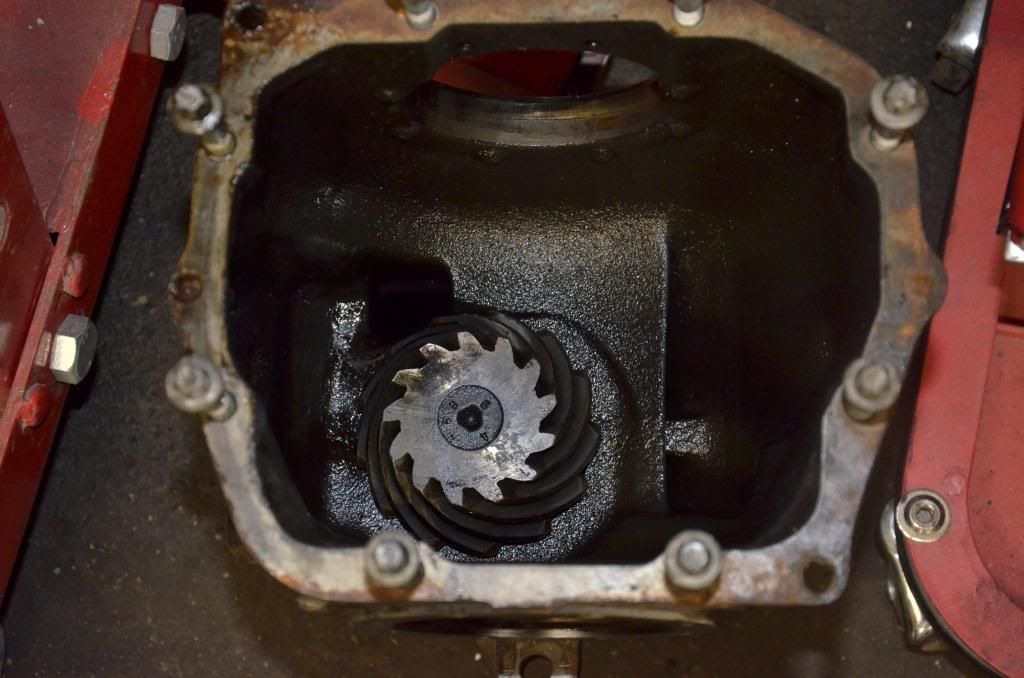
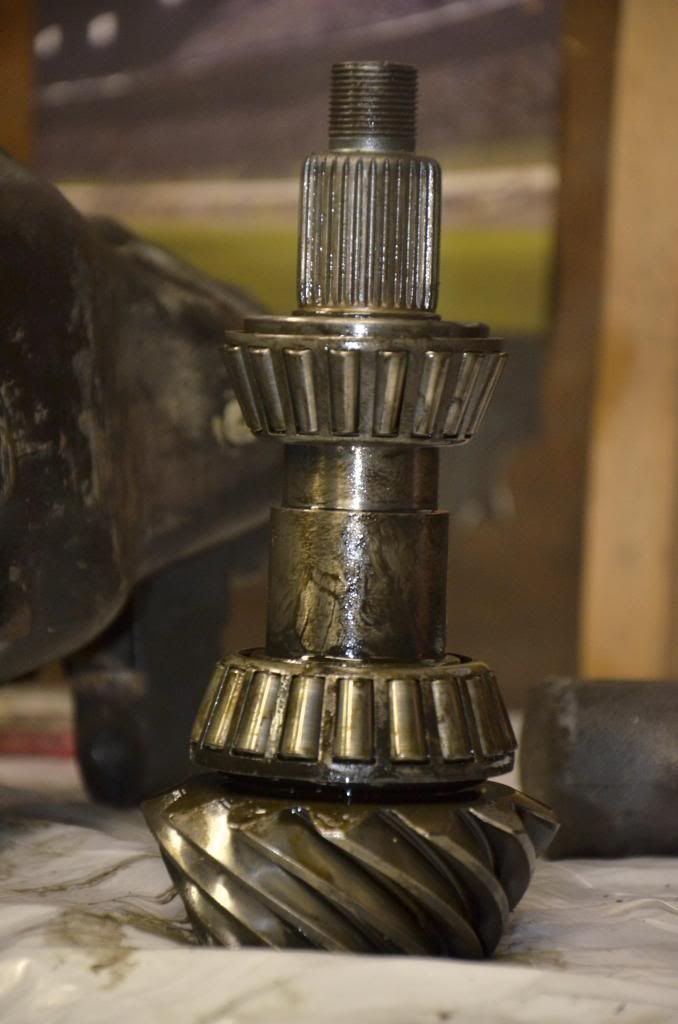
hypoid pinion gear. i thought you needed a press to remove it, but i was able to get it out with a rubber mallet and piece of wood.
the victim. got a good deal on it, but it had no service history, condition was listed as "we left this sitting outside for a year with no output stubs in it, no warranty, etc etc".
whoever pulled the diff didn't unbolt it, they just sheared the mounts. this car was probably in a severe wreck for them not to care like that.
differential side of the driveshaft.
sheared differential end of the driveshaft.
internal spool
E34 540i flanges
the output covers before removal. output shims are underneath.
keeping each output shim with its respective cover
old output seals, to be replaced
internal spool removed
hypoid pinion gear. i thought you needed a press to remove it, but i was able to get it out with a rubber mallet and piece of wood.
03-02-2013, 10:37 AM
#140
Once the spool lid is removed, there�s always the top oil washer that sticks to it.
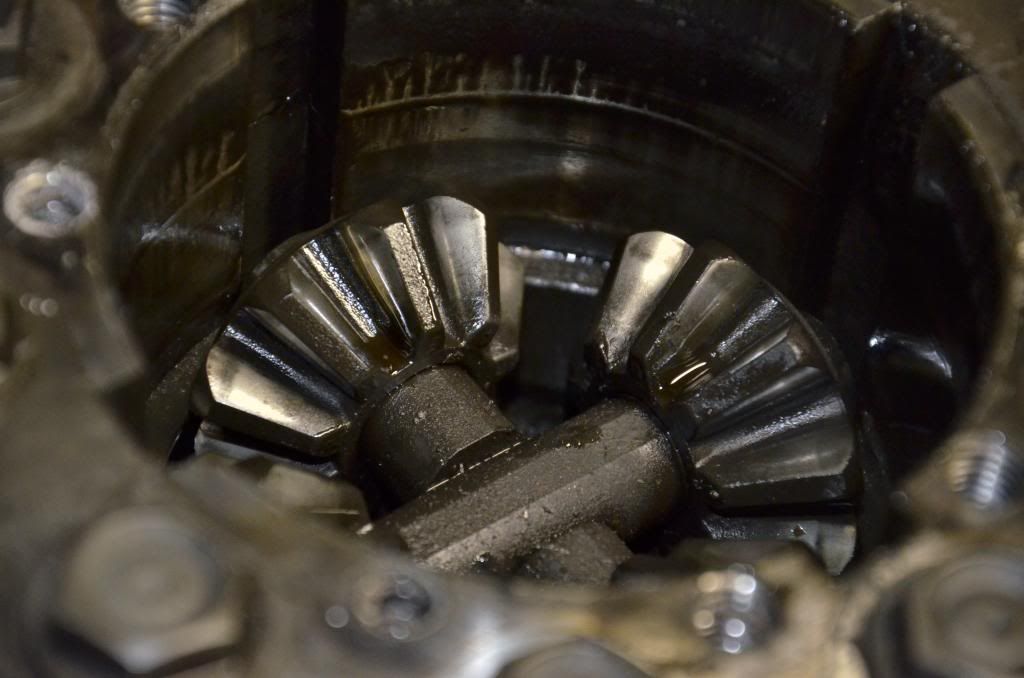
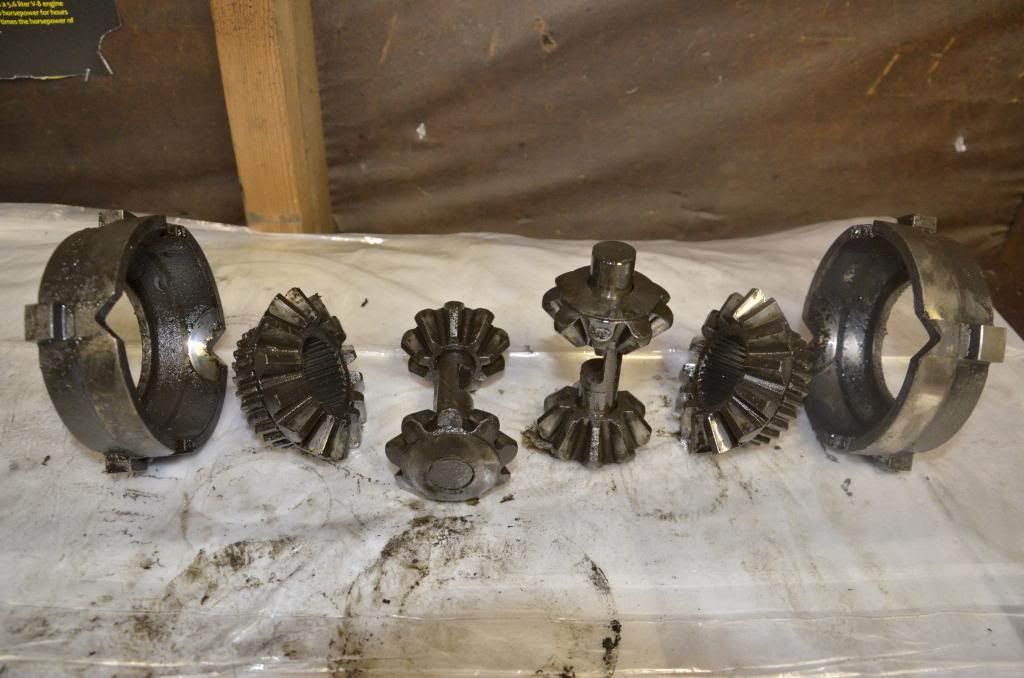
Dog bones and gears.
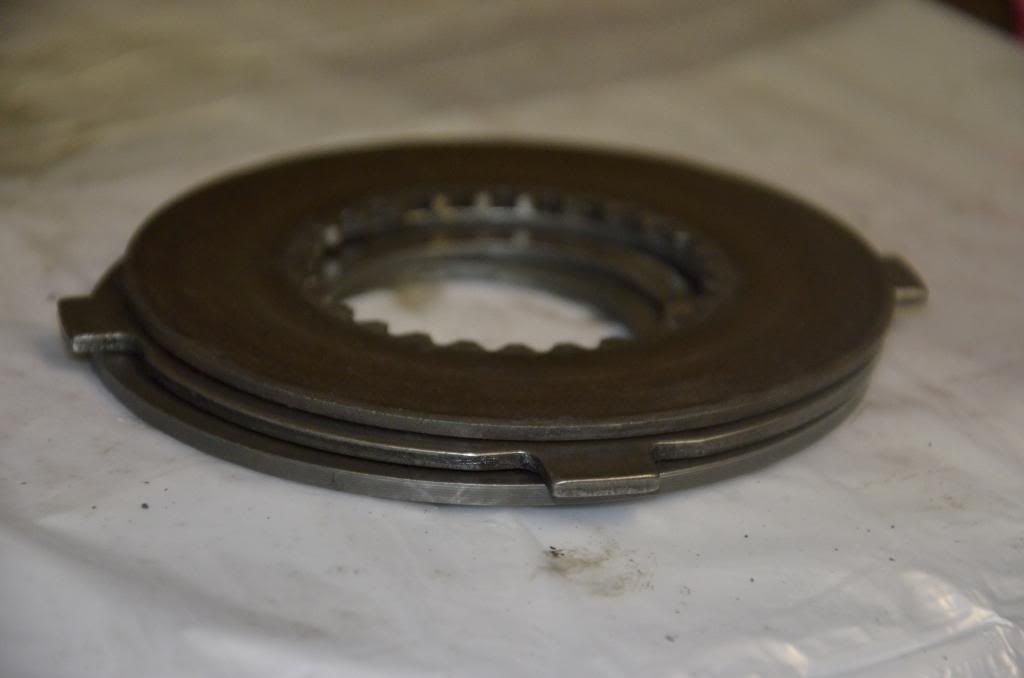
Half of the clutch discs and �pressure plate� as I call it.
Exploded view of the spool internals.
Bagged and tagged.
Spool with all internals removed.
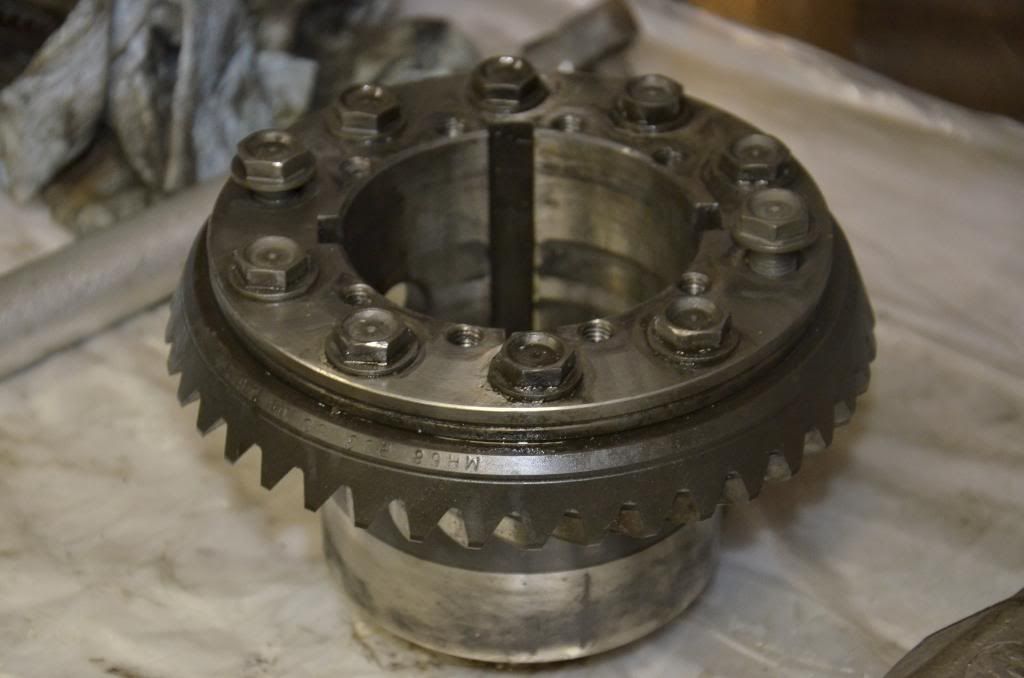
OEM 3.15 ring gear removed.
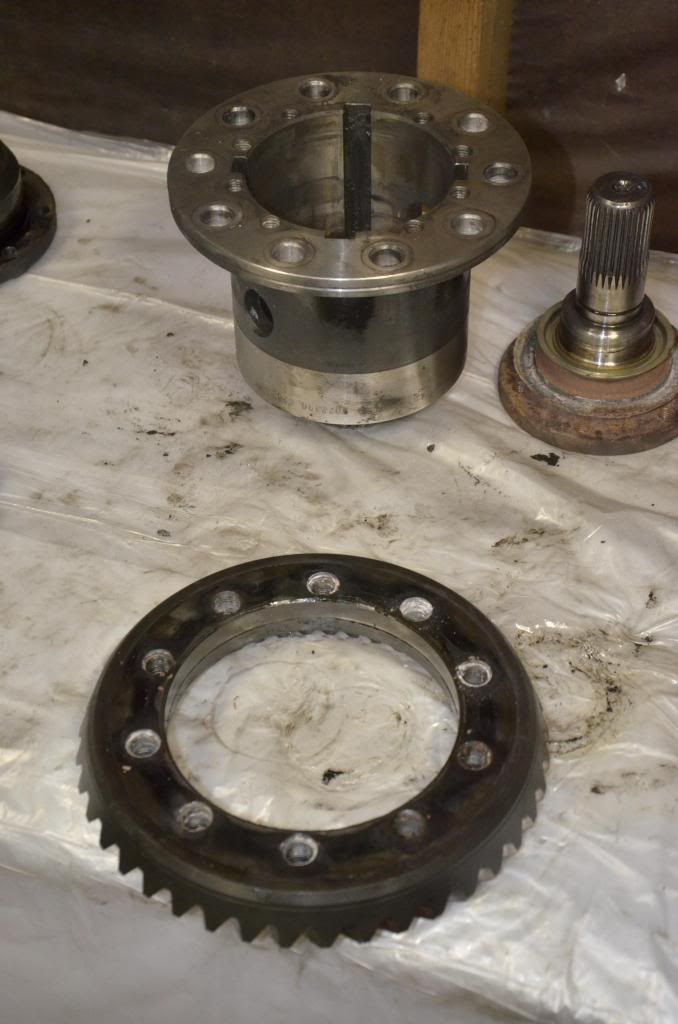
Lots of loctite used in the OEM setup.
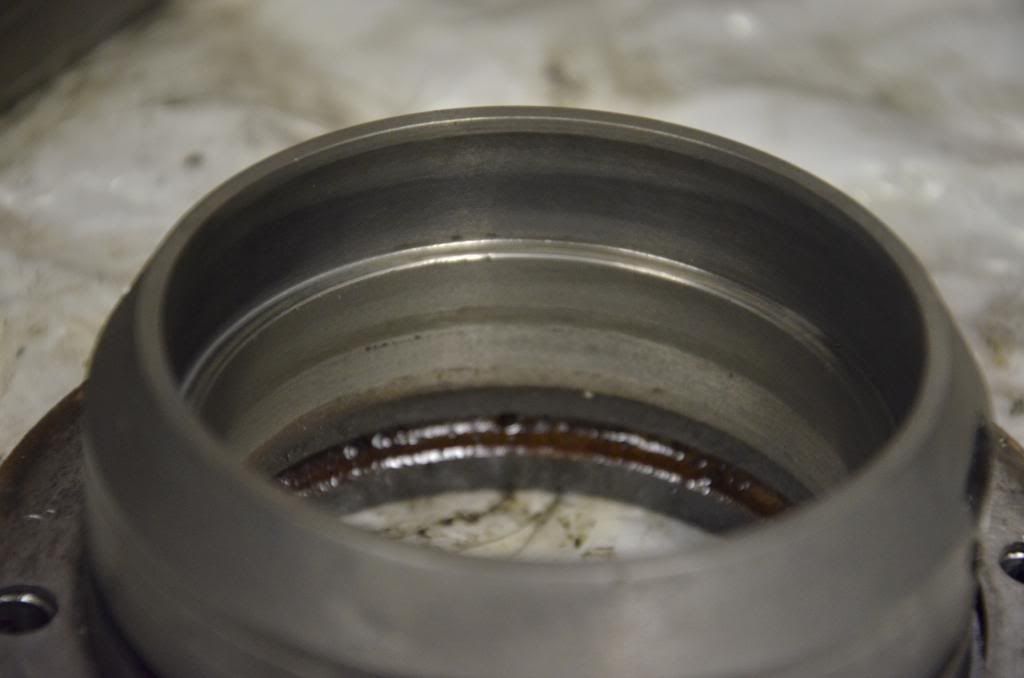
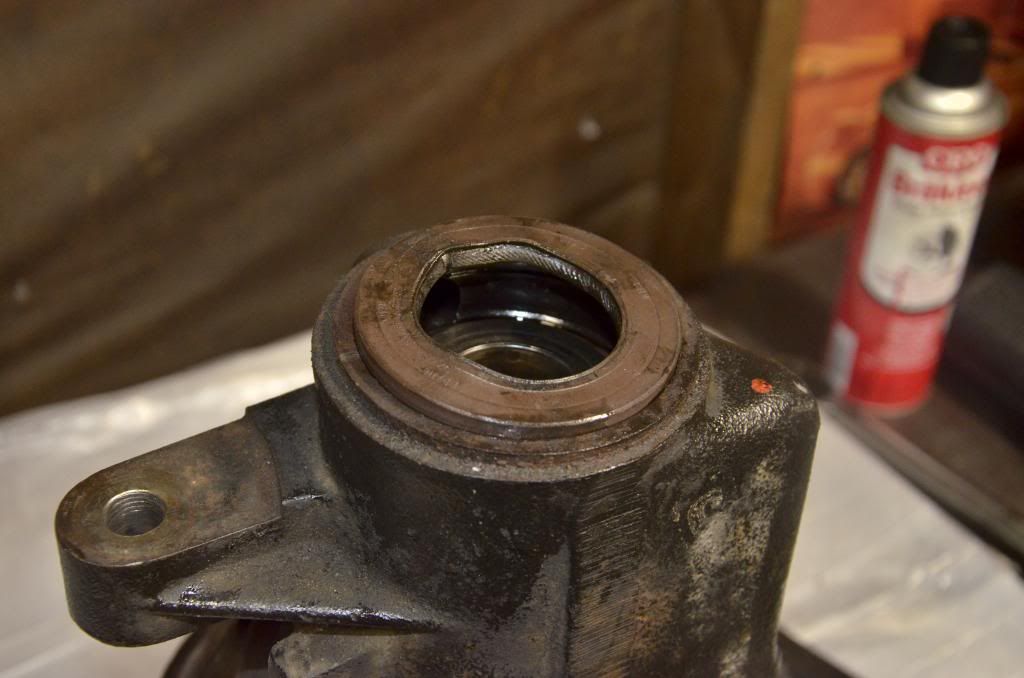
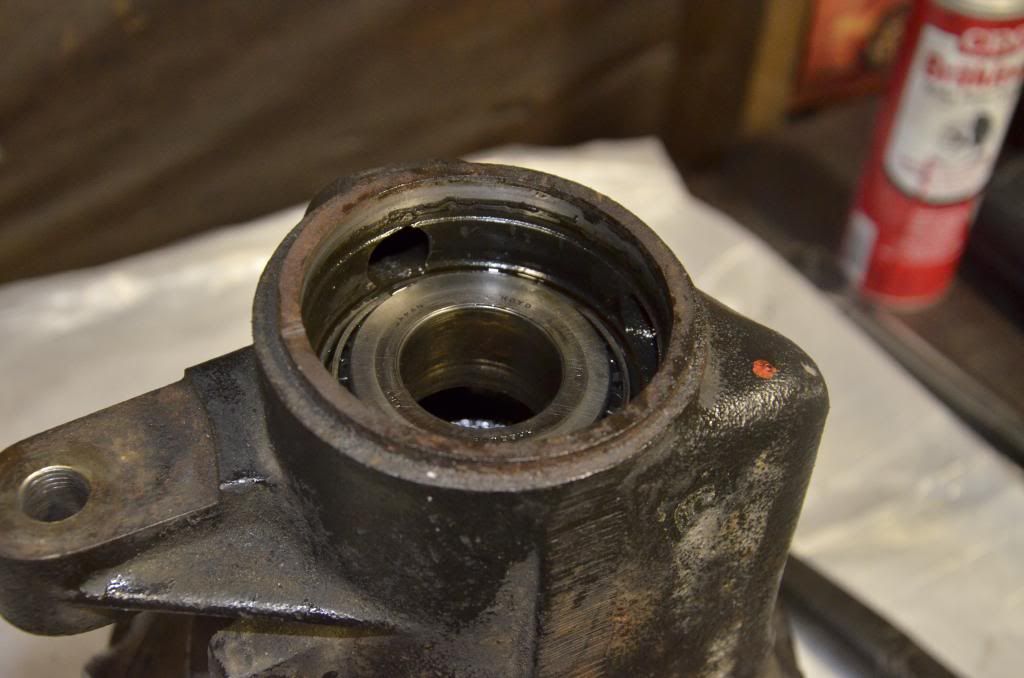
Output cover, bearing race, and seal removed
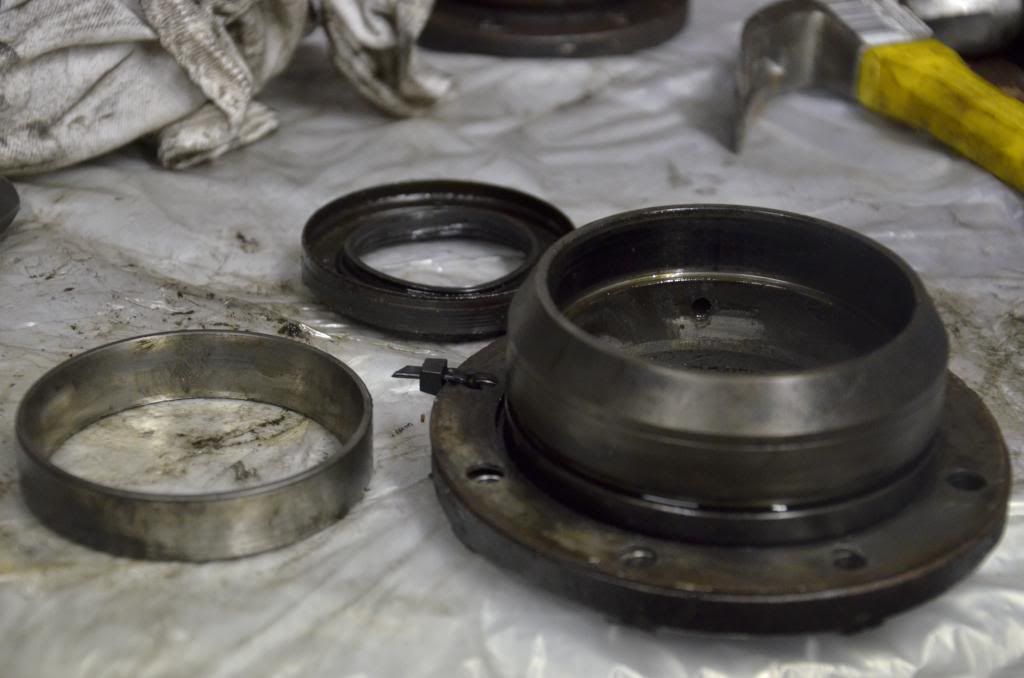
Output cover cleaned up a bit.
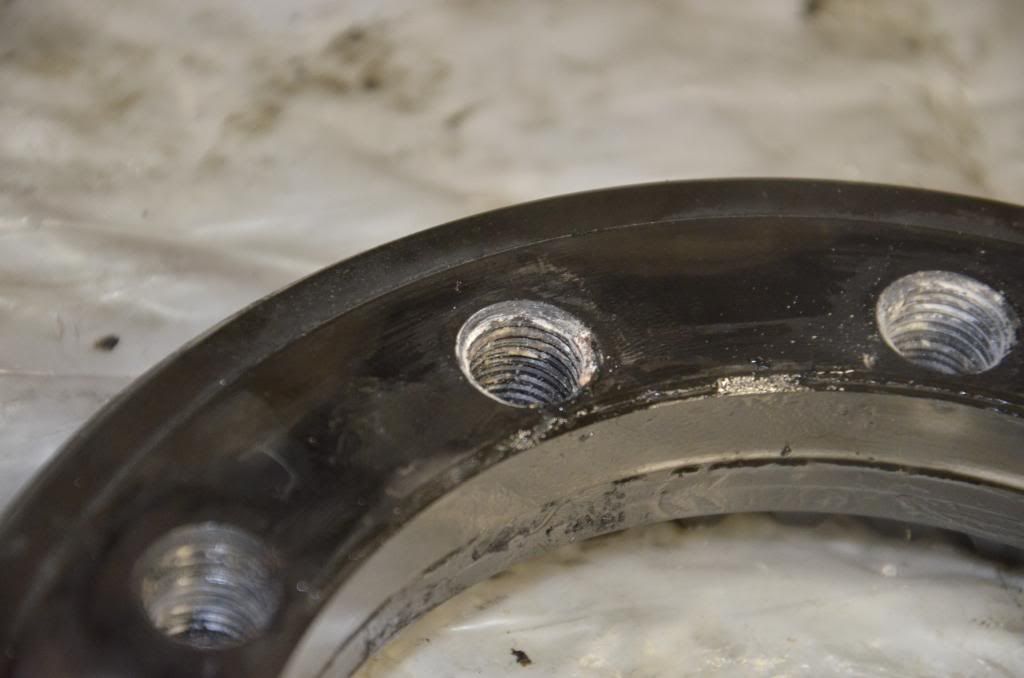
I laid the 3.62 ring gear on the spool case and gently tapped it on with a rubber mallet. It went on about 80% of the way and then just stopped. I used the bolts to pull it fully on in an alternating pattern to avoid cocking it, and then removed the bolts to clean them up.

I laid the case with the cover side down, put a few wood blocks under it to catch the pinion, and tapped the pinion out after removing the nut with the impact.

Pinion seal being removed.
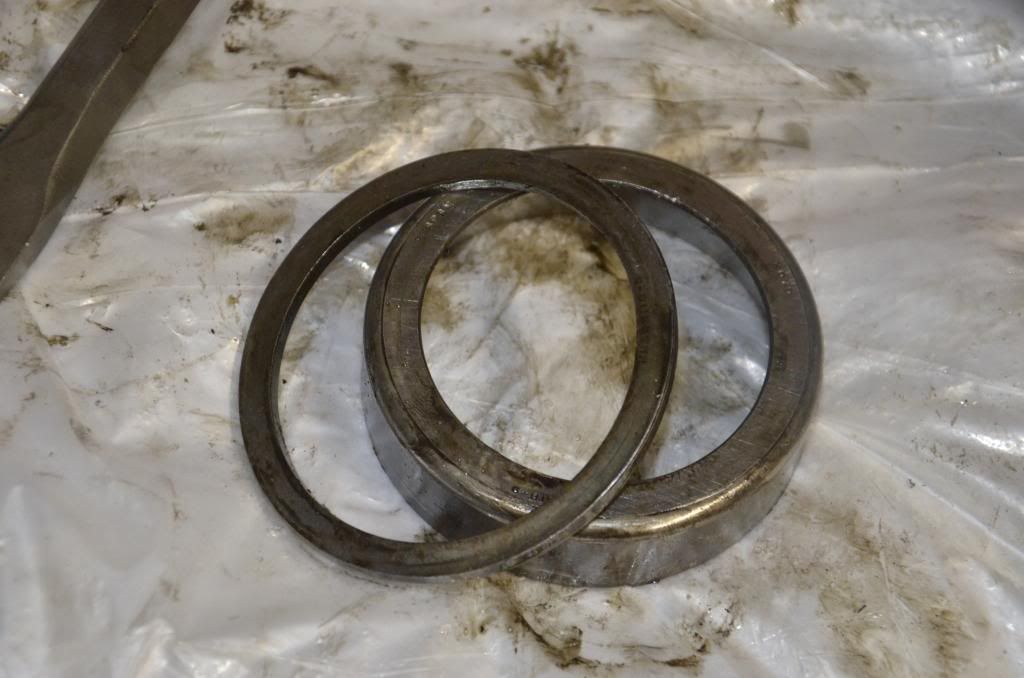
Front pinion bearing
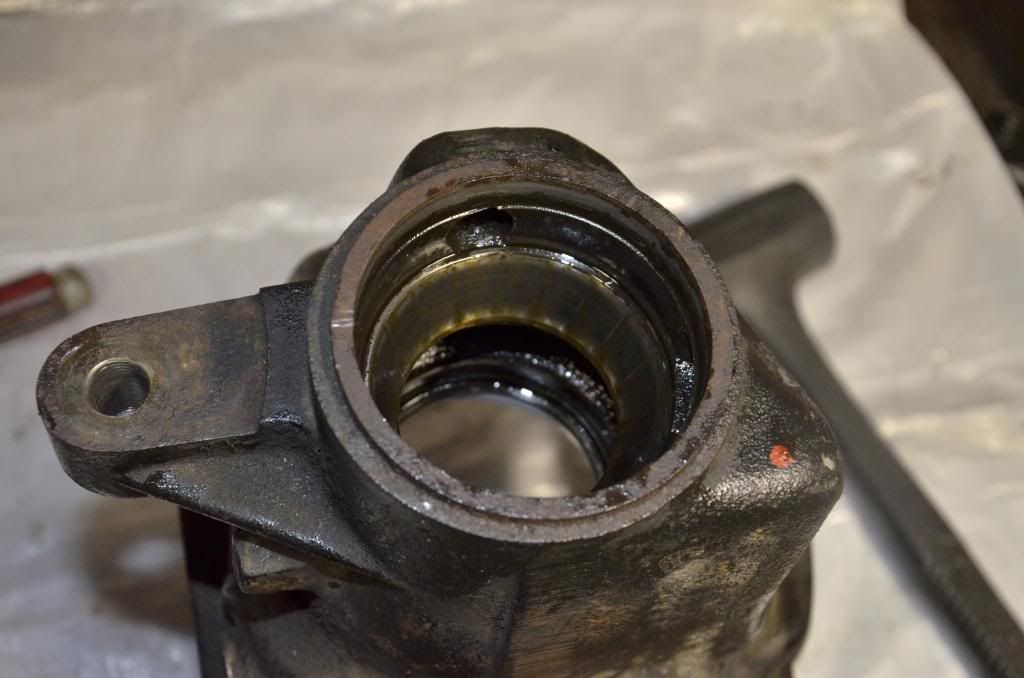
Front pinion race
3.15 pinion shown �as assembled� with old bearings.
Rear pinion race and pinion shim.
Dog bones and gears.
Half of the clutch discs and �pressure plate� as I call it.
Exploded view of the spool internals.
Bagged and tagged.
Spool with all internals removed.
OEM 3.15 ring gear removed.
Lots of loctite used in the OEM setup.
Output cover, bearing race, and seal removed
Output cover cleaned up a bit.
I laid the 3.62 ring gear on the spool case and gently tapped it on with a rubber mallet. It went on about 80% of the way and then just stopped. I used the bolts to pull it fully on in an alternating pattern to avoid cocking it, and then removed the bolts to clean them up.
I laid the case with the cover side down, put a few wood blocks under it to catch the pinion, and tapped the pinion out after removing the nut with the impact.
Pinion seal being removed.
Front pinion bearing
Front pinion race
3.15 pinion shown �as assembled� with old bearings.
Rear pinion race and pinion shim.