


How to make an accessory drive
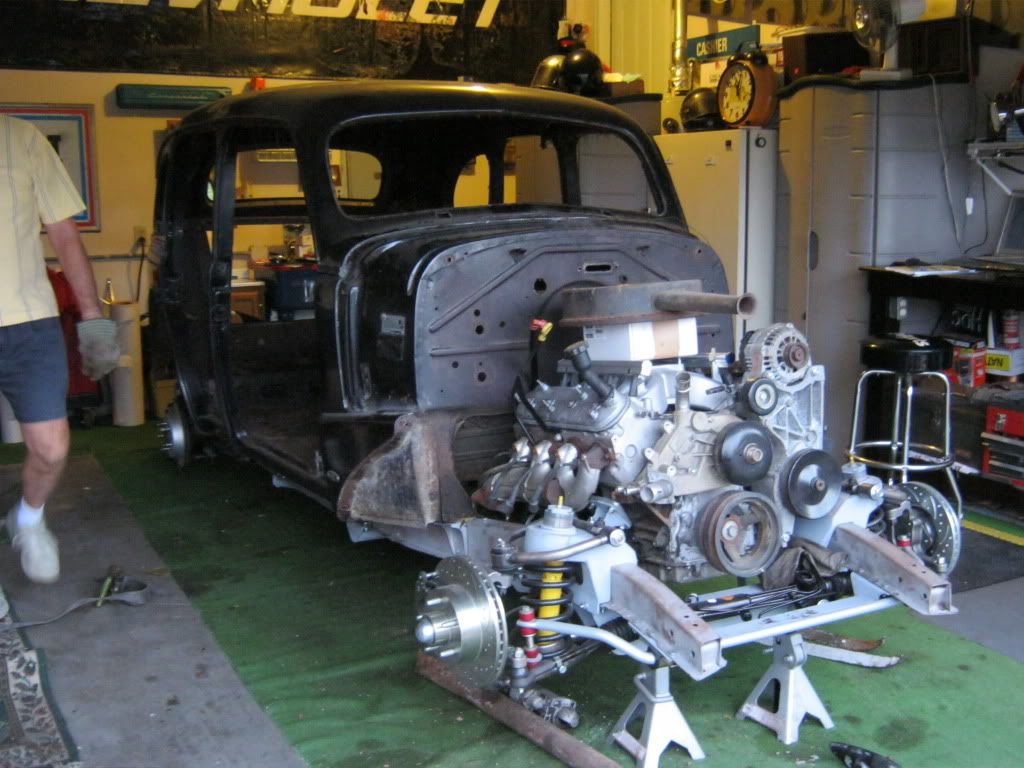
I'm putting a 5.3 LS from a 2003 Silverado into a '37 Chevrolet. I have a sanden compressor and no room to mount it low so I'm going to have to mount it up top. I have seen mount kits from Street and Performance and Vintage Air and these kits are extremely expensive. All I really need to do is mount my compressor, however I'm afraid there may be things I need to know before I attempt to make my own brackets.
I know I'll need a tensioner. Is there a company that makes generic tensioners I can use? Are there certain tension strengths I need to consider? I have looked on the internet and have found people make low mounts, but no high mounts.
Here's a picture of my setup before I put the body on. Could someone inform me of some basics I need to know before I start.
Thanks,
Brandon
You are at the perfect point to do you own accessory drive because the sheet metal is out of the way. 
Keep belt wrap in mind. The first one I designed didn't have enough belt wrap and the pulleys would spin against the belt at WOT.
Keep hoses and other stuff in mind also - how will you change the belt in nowhere-ville if you have to drain the radiator first? Don't paint yourself in a corner.
There is a logic to where the tensioner goes and I think it's on the coast side but can't remember. Look at OEM systems in the yard to see what works.
I also did a google search a long time ago and came up with a white paper on belt wrap and other interesting stuff that makes the OEM systems so reliable.
Last, try to keep the belt length between the pulleys short and the pulley alignment tight - again something the OEM's do.
Last edited by gofastwclass; Aug 28, 2012 at 03:20 PM.
Launching!
Joined: May 2012
Posts: 205
Likes: 2
From: Mobile, Alabama
If you want to build your own, you could copy this one. It is for F body accessories. I am guessing you are using truck, so it would need to be 3/4 inch forward.http://www.ebay.com/itm/Camaro-a-c-S...sories&vxp=mtr
Or this truck model
http://www.ebay.com/itm/Truck-sanden...item2573861e16
Or this truck model
http://www.ebay.com/itm/Truck-sanden...item2573861e16
Last edited by 74modified; Aug 28, 2012 at 04:30 PM.
This is what I did on mine. Used truck accessories and made brackets for the ac. I used a water pump and tensioner from a 2010 camaro. I bought a couple of idler pulleys and mounted them to help guide the belt.
Mike
Mike
Thanks for the advice, I'm going to look into that. Good to have keywords to help do a google search, too.
74modified, that looks like a good setup but I'm not sure how the compressor would mount in relation to that. Unless you meant that was just an option for the tensioner to use in conjunction with my own compressor bracket.
Roadrunner, that would work great, in fact I would probably just buy one from Kwik-performance, but I'm so limited on horizontally on how far I can go that I have to go up instead of out, which eliminates any of the mounts I've seen so far. Well, except maybe for the vintage air, which is $2500 friggen dollars!!
Brandon
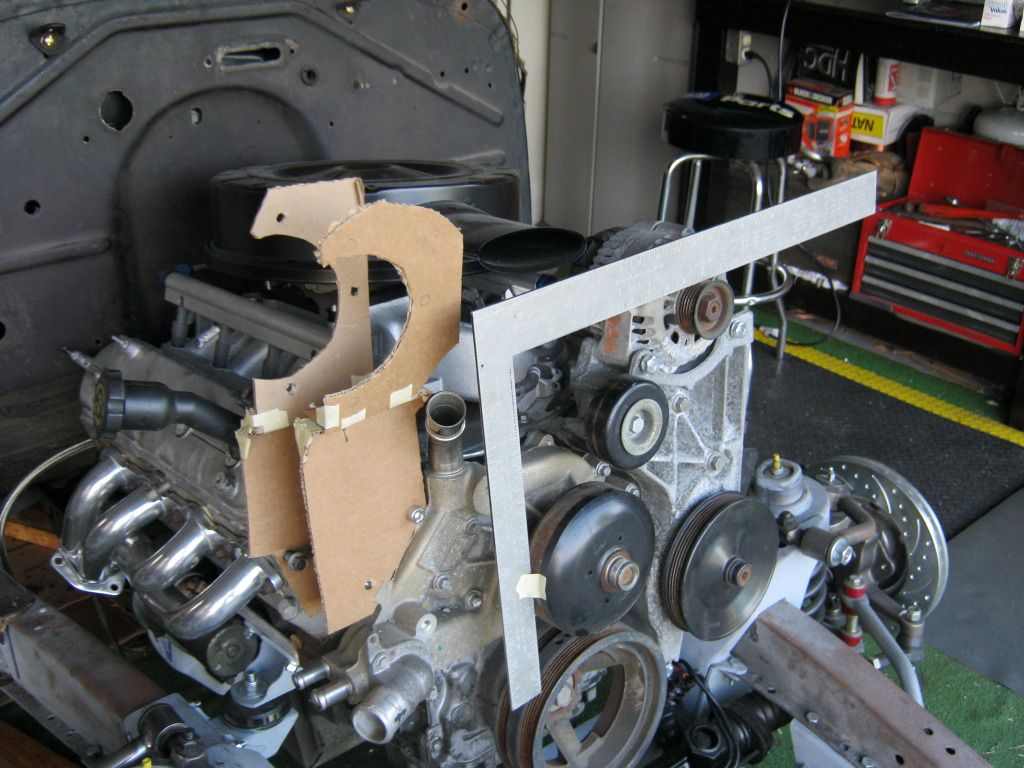
I cut out some cardboard today. Of course it's not finished out as far as smoothing the edges, just a rough cut.
Any opinions so far on what might be good or bad about it?
Thanks,
Brandon
Any opinions so far on what might be good or bad about it?
Thanks,
Brandon
I just skimmed through your pictures from another thread and it looks good. Looks like you are taking time and thinking it through.
I don't know if you have access to a plasma cutter, but I've found it is the easiest way to cut the complex shapes required in one-off brackets.
I don't know if you have access to a plasma cutter, but I've found it is the easiest way to cut the complex shapes required in one-off brackets.
Trending Topics
I built my forst one, link below.
On the second I went with Kwik, about $200 from Kwik, but only $100 when purchased with my classic auto air setup.
Home made:
https://ls1tech.com/forums/conversio...rive-done.html
On the second I went with Kwik, about $200 from Kwik, but only $100 when purchased with my classic auto air setup.
Home made:
https://ls1tech.com/forums/conversio...rive-done.html
LS1 Tech Stories
The Best V8 Stories One Small Block at Time

Topdon ONE vs. Artidiag 800 BT2: Which is the Diagnostic Tablet For You?
Pouria Savadkouei
Gas Monkey Built a 6-Wheel Ferrari Testarossa With a Corvette LT4 Engine
Verdad Gallardo
7 Most Reliable High-Performance Engines GM Has Ever Built
Verdad Gallardo
Amazing '71 Camaro Restomod Is Modern Muscle Car Under the Skin
Verdad Gallardo
6 Common C5 Corvette Failures and What's Involved In Repairing Them
Pouria Savadkouei
Retro Modern Bandit Pontiac Trans AM Comes With Burt Reynolds' Autograph
Verdad Gallardo
Top 10 Greatest Cadillac V Series Performance Models Ever, Ranked
Pouria Savadkouei
Top 10 Most Powerful Chevy Trucks Ever Made!

Hennessey's New Supercharged Silverado ZR2 Has 700 HP
Verdad GallardoLaunching!
Joined: May 2012
Posts: 205
Likes: 2
From: Mobile, Alabama
The one I posted mounts to the compressor with the two bolts at the bottom, same as Gary's. Just my opinion, but your mockup looks a little high. A really long belt and might need another idler to minimize belt flopping. 1/4 inch plywood is good for making mockups, you can actually bolt it together.

Oh, OK, I see. Thanks for the diagram.
I shortened my mount today because I was finally able to use a non-metal hammer and get the upper water neck off of the pump and move it around to face straight forward, which gave me room to move the compressor down.
I went and got a tensioner from a 96 Trans Am today. This is for an LT1, but the tensioner on the LT1 pushes on the outside of the belt rather than the inside like the LS1s. I'm also going to need to get an idler pulley to get the belt away from where the upper radiator hose will go.
Launching!
Joined: May 2012
Posts: 205
Likes: 2
From: Mobile, Alabama
Another idea is to swap in a 2010+ Camaro water pump. Same spacing as the truck, and the outlet is on the other side.
http://www.ebay.com/itm/200782806425...84.m1423.l2649
It might interfere with you alternator mount.
http://www.ebay.com/itm/200782806425...84.m1423.l2649
It might interfere with you alternator mount.
Launching!
Joined: May 2012
Posts: 205
Likes: 2
From: Mobile, Alabama
5th gen Camaro VVT, 6.2 w/ automatic PN 19207665 will line up with the truck crank pulley. The VVT moves the pump out. I am pretty sure the LS3 is short but you can buy/make spacers.
Vettman's alt bracket, to me, still looks like it will be too tight.
Vetteman 61 - Zipster93's photobucket shows the low buck truck WP modification like you started (page 5)
http://s392.photobucket.com/albums/p...cpZZ5QQtppZZ24
Vettman's alt bracket, to me, still looks like it will be too tight.
Vetteman 61 - Zipster93's photobucket shows the low buck truck WP modification like you started (page 5)
http://s392.photobucket.com/albums/p...cpZZ5QQtppZZ24
Last edited by 74modified; Aug 30, 2012 at 10:19 AM.
Check out Kwik performance. I was researching this myself and it seems they have a hot rod kit that looks like it would fit you build perfectly. Don't know how much you are trying to spend though.
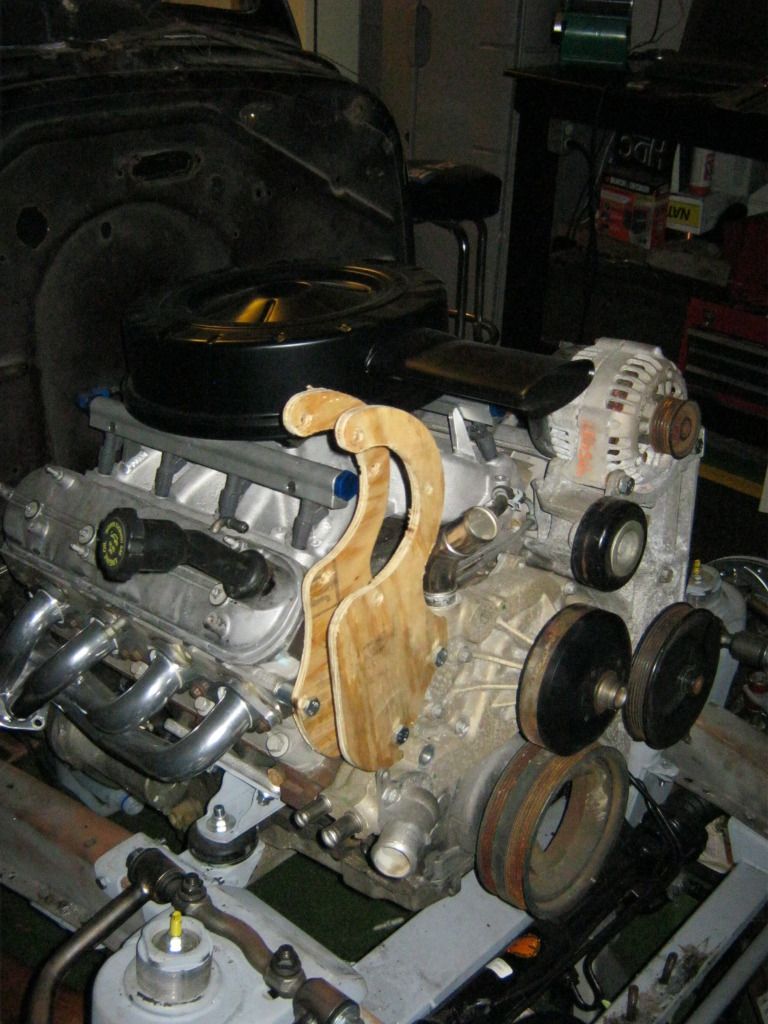
OK, I made some progress today. I borrowed a jigsaw and transferred my rough templates over to some plywood. I have a question but first I'll post the bracket.
It's not finished of course. I'm going to run one of the bolts all the way through both brackets and I'm missing a couple of spacers, but it's getting there.
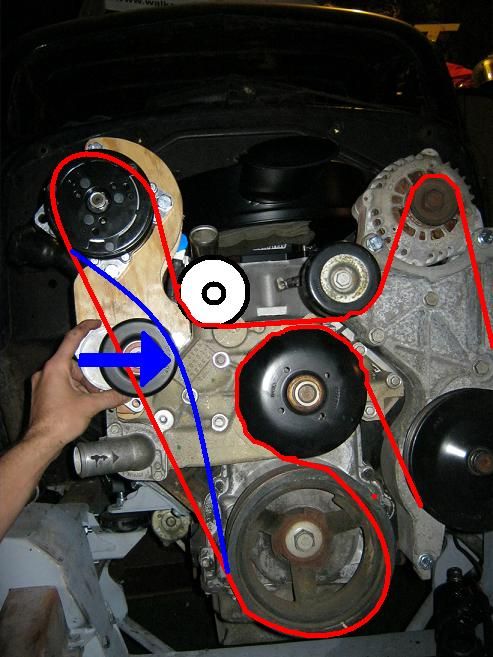
My question is this: I've made this drawing of how my belt set up will be (RED). After I install the tensioner the belt will move inward (BLUE). How do I know how far in to mount the tensioner, or where to mount it, to make sure I get the correct amount of tension on the belt, not too little or too much.
Thanks,
Brandon
It's not finished of course. I'm going to run one of the bolts all the way through both brackets and I'm missing a couple of spacers, but it's getting there.
My question is this: I've made this drawing of how my belt set up will be (RED). After I install the tensioner the belt will move inward (BLUE). How do I know how far in to mount the tensioner, or where to mount it, to make sure I get the correct amount of tension on the belt, not too little or too much.
Thanks,
Brandon

