
5.3 4l60e swap into my RUSTY '71 C-10
 10-05-2012, 10:18 PM
#41
I appreciate the offer Bry, but I think I can use the intake I have since I already removed the pcv line from the throttle body. If for some unforseen reason it doesn't work, I'll give you a shout.
 10-06-2012, 12:48 PM
#42
Thanks Anthony and Eric for the info, I can only imagine how many of these setups I have walked past in the 'yard.
No problem. If you need one, you know where to find it. I'm just using them to organize the fuel injectors that came with them and help keep dust off one of the shelves in the workshop.
No problem. If you need one, you know where to find it. I'm just using them to organize the fuel injectors that came with them and help keep dust off one of the shelves in the workshop.
The following users liked this post:
Cmc Cmc (02-21-2020)
10-06-2012, 05:55 PM
#43

Love the build approach. Thanks for sharing everything with us! THe OPSU mod and the throttle cable were my favorite so far. One question though, what kind of "cable stop" did you use on the end that you cut off?
 10-07-2012, 07:38 AM
#45
TECH Enthusiast
iTrader: (1)

Join Date: Jan 2006
Location: Charlotte, NC
Posts: 581
Likes: 0
Received 0 Likes
on
0 Posts

Eric - been a long time - didnt even know you sold the second truck.
Nice side yard there I see the Nova and the family truckster!
Do you have all these projects hidden behind a fence - or do your neighbors not care?
Good progress on the truck so far - can't wait to see it completed.
Are you doing Power Tour - Texas to NC?
Nice side yard there I see the Nova and the family truckster!
Do you have all these projects hidden behind a fence - or do your neighbors not care?
Good progress on the truck so far - can't wait to see it completed.
Are you doing Power Tour - Texas to NC?
10-08-2012, 10:34 AM
#46
Eric - been a long time - didnt even know you sold the second truck.
Nice side yard there I see the Nova and the family truckster!
Do you have all these projects hidden behind a fence - or do your neighbors not care?
Good progress on the truck so far - can't wait to see it completed.
Are you doing Power Tour - Texas to NC?
Nice side yard there I see the Nova and the family truckster!
Do you have all these projects hidden behind a fence - or do your neighbors not care?
Good progress on the truck so far - can't wait to see it completed.
Are you doing Power Tour - Texas to NC?
Not sure about the Power Tour next year, I'm still in the planning stages for my vacation time next year.
10-08-2012, 04:22 PM
#47

It's the kind you slide the cable through and secure with a set screw. I'll post a pic tonight.
Yes, I still have the orange truck. The guy that made the offer in Ottawa backed out of it. Kind of what I thought would happen! And no, I didn't keep the carb, the whole engine/trans combo is going into a '51 Ford convertible.
The projects are not in really 'hidden', but rather are 'licensed'. My neighbor is a bitch, and has had the city come out and put a tow notice on that brown Nova, the bright orange kind you see on cars left on the side of the highway, it said the car would be towed in 24 hours, (yes, out of my driveway!!!) because the tags were expired. Historic plates put an end to that, but she's still a bitch! Also, that wagon isn't the Truckster, it's a future Truckster, an 80k mile '79 LTD with no rust and tan interior, I bought it because it was cheap and I thought I might make another one. The Nova is just a stocker, that's not had anything done to it yet, looks like a little old lady car, or as my neighbor sees it, an eyesore.
Not sure about the Power Tour next year, I'm still in the planning stages for my vacation time next year.

 10-08-2012, 10:00 PM
#49
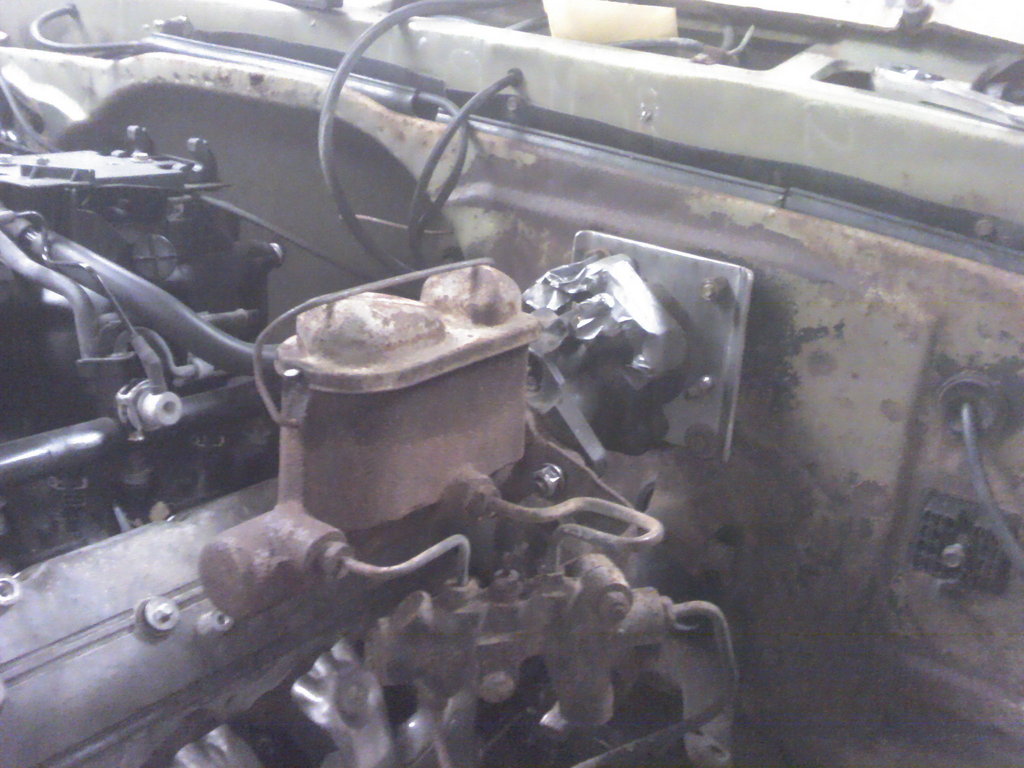
Got most of the hydroboost modifying done. Had to add a little bit to the top of the mounting bracket so I could drill new holes to match the studs that originally held the vacuum booster on. I tried to find one off of a '73-'87 Chevy truck because I think they would work without modification, but couldn't find one to try it out, so I did it the hard way, weld a piece of metal on and grind it smooth!
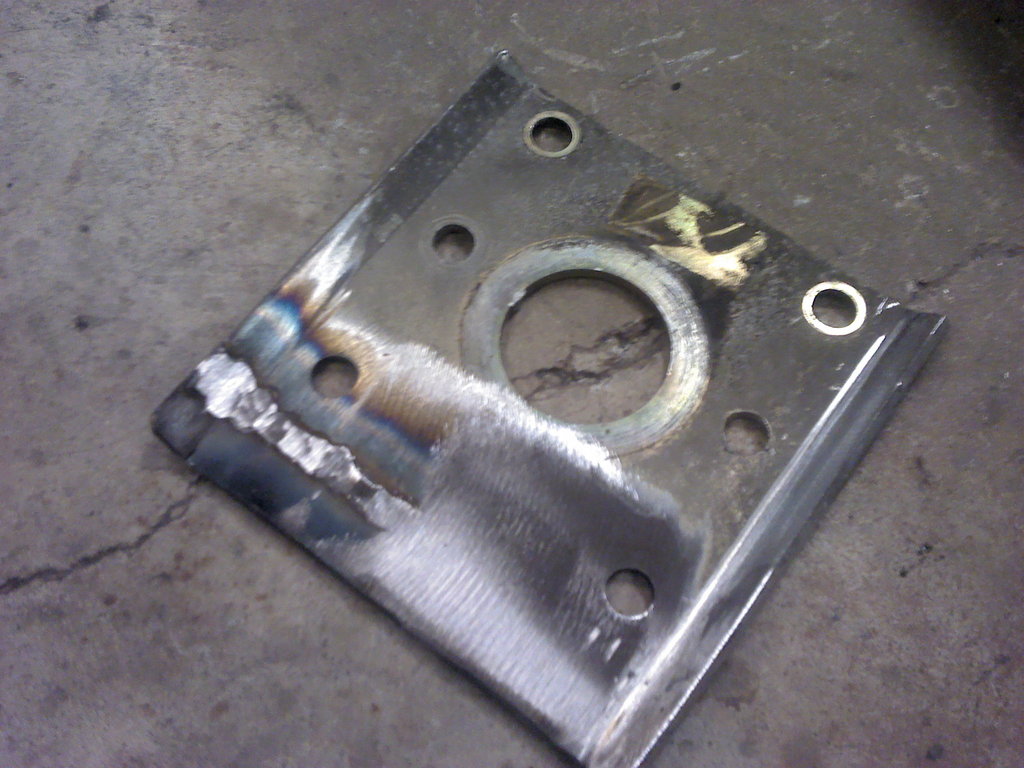
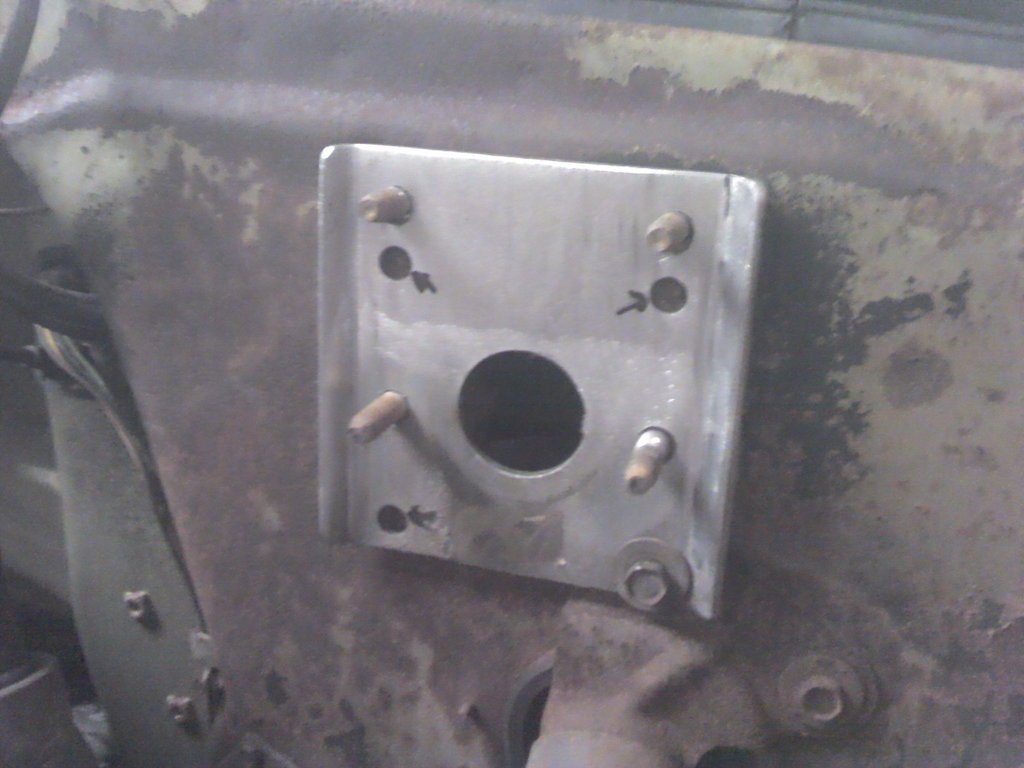
Then drilled some new holes and it fits. Just have to weld up the old holes now.
looking alot better.
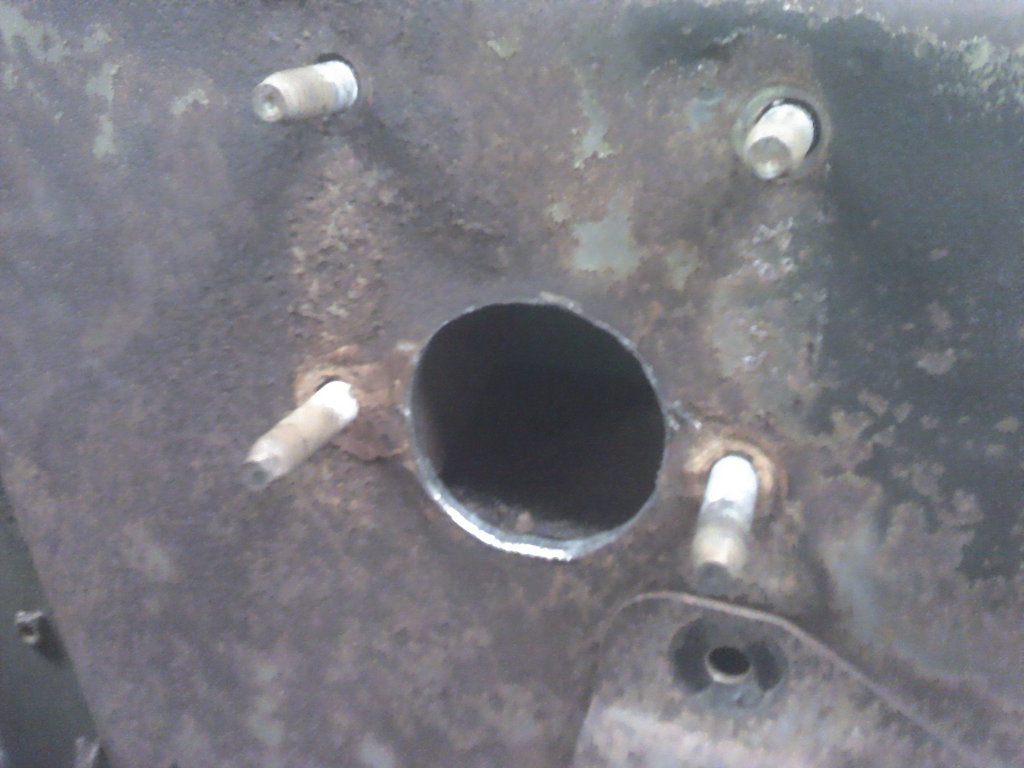
If you mount the hydroboost directly to the firewall, you do need to enlarge this hole a bit, the big nut on the back that holds the booster to the mounting bracket needs to be able to go through so it will sit flush on the firewall.
 .
.
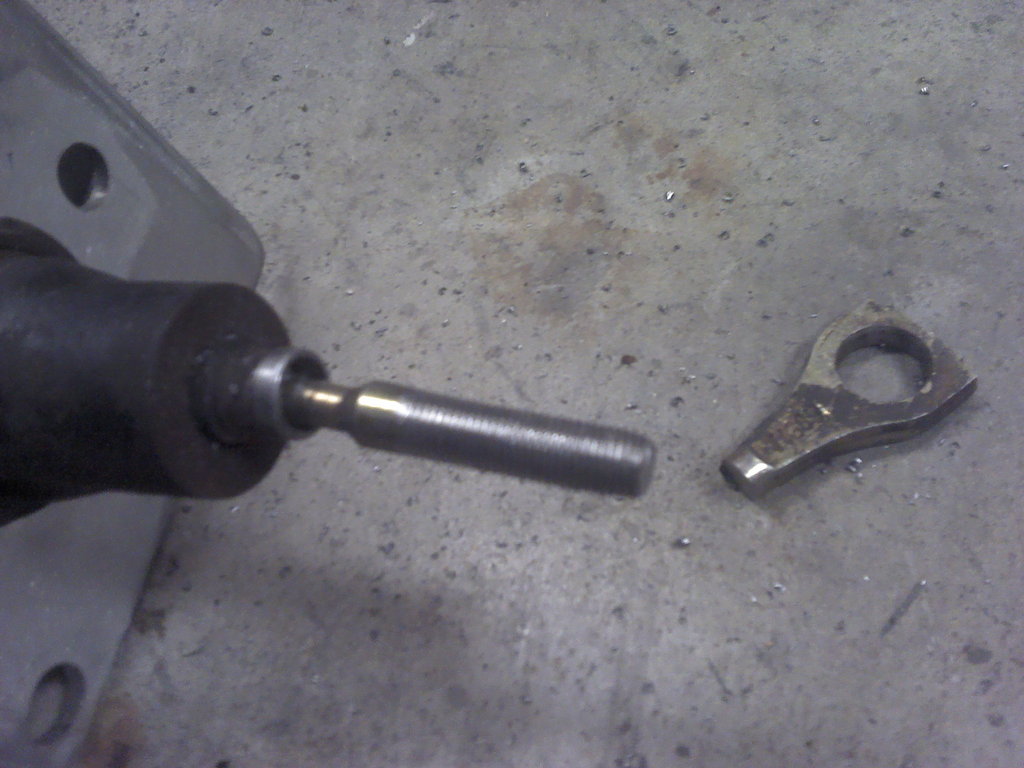
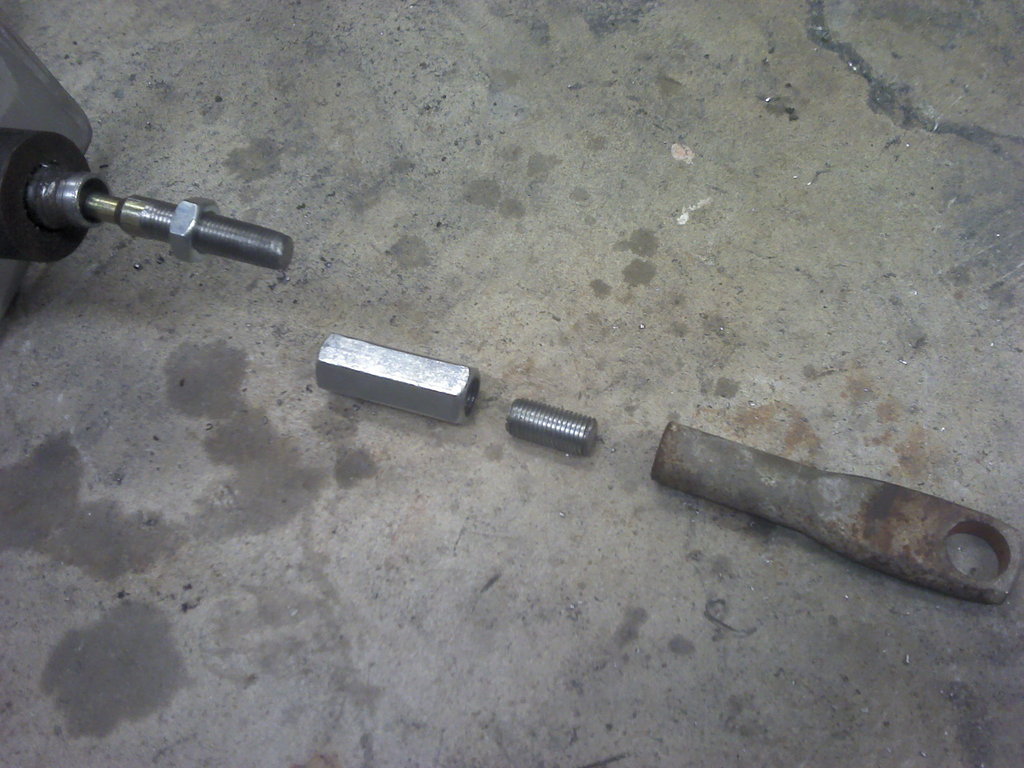
Now that it's mounted, I needed to hook it up to the pedal. To do this, I cut the old end off, and threaded the rod. Then got a coulper that was the same thread as what I just threaded. Pretty sure it was 3/8-24. Then I drilled out the other end of the coupler and tapped it to match the original threads on the piece that attaches to the pedal. I got a bolt with that thread, 7/16-24, and cut the head off of it, threaded it in the coupler, and then threaded on the brake pedal piece.
Then I put a jam nut on the booster rod, and threaded on the coupler so I can adjust it to get the pedal where I want it.

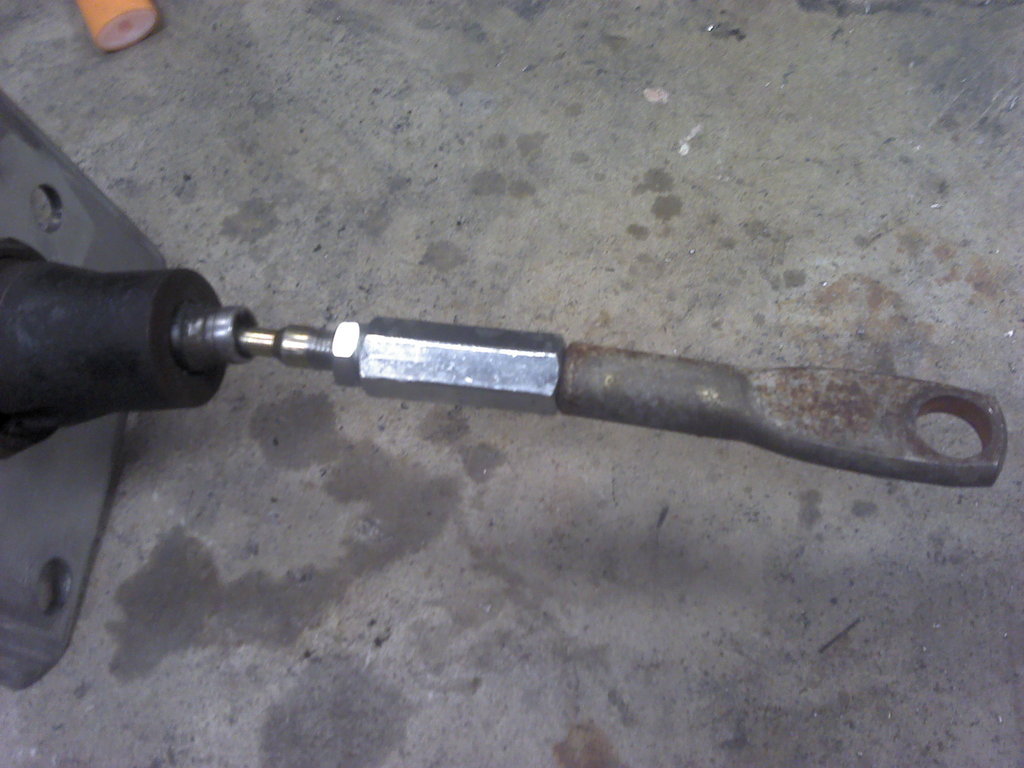
Hooked up it looks like this. (it goes on the other side of the pedal, but this shows what it looks like)
From here it's just a matter of hooking up hoses, and making a spacer to go in the back of the master cylinder since the push rod in the hydroboost isn't as long as the one in the vacuum booster, but that will be another day.
Then drilled some new holes and it fits. Just have to weld up the old holes now.
looking alot better.
If you mount the hydroboost directly to the firewall, you do need to enlarge this hole a bit, the big nut on the back that holds the booster to the mounting bracket needs to be able to go through so it will sit flush on the firewall.
. Now that it's mounted, I needed to hook it up to the pedal. To do this, I cut the old end off, and threaded the rod. Then got a coulper that was the same thread as what I just threaded. Pretty sure it was 3/8-24. Then I drilled out the other end of the coupler and tapped it to match the original threads on the piece that attaches to the pedal. I got a bolt with that thread, 7/16-24, and cut the head off of it, threaded it in the coupler, and then threaded on the brake pedal piece.
Then I put a jam nut on the booster rod, and threaded on the coupler so I can adjust it to get the pedal where I want it.
Hooked up it looks like this. (it goes on the other side of the pedal, but this shows what it looks like)
From here it's just a matter of hooking up hoses, and making a spacer to go in the back of the master cylinder since the push rod in the hydroboost isn't as long as the one in the vacuum booster, but that will be another day.
10-08-2012, 10:24 PM
#50
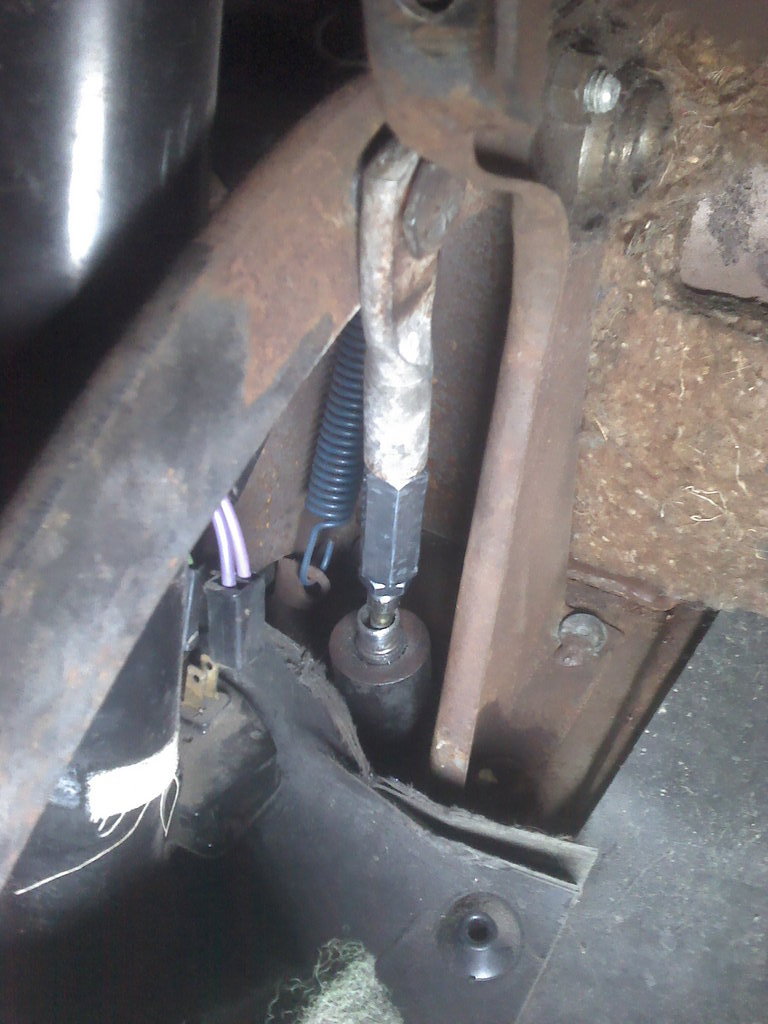
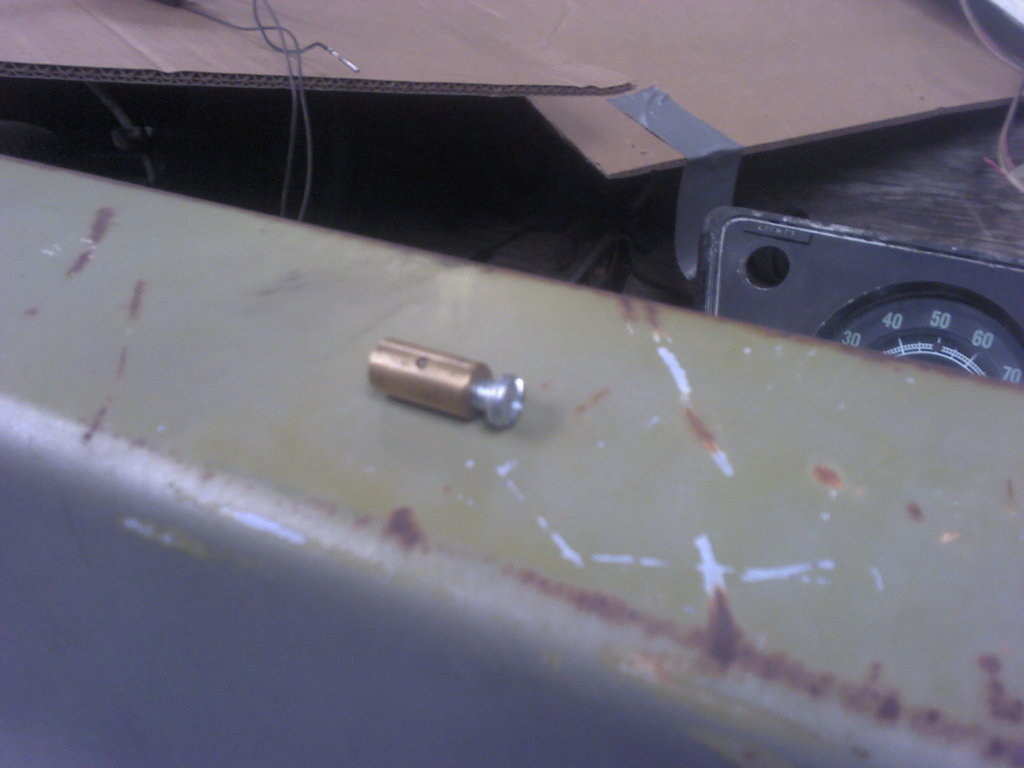
y5mgisi, this is the cable stop I use. I like these because you can thread the cable through then pull the cable snug so the gas pedal is where you want it, then tighten it down and you're done.
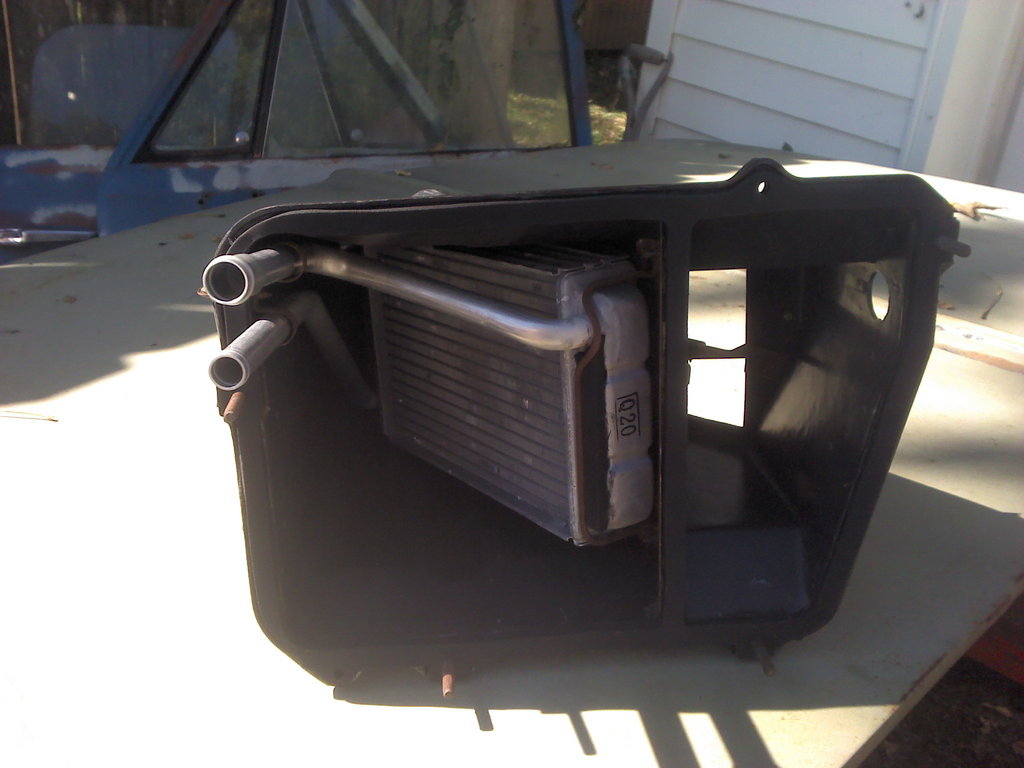
Went to the salvage yard yesterday and got all this for $50. I got the lines and mounting hardware for the condenser and evaporator, and will use them, but the actual condenser and evaporator I will only use for mock up purposes, I'll buy new for final install. I'll take them back and get my store credit, but will keep the lines and mounting stuff.
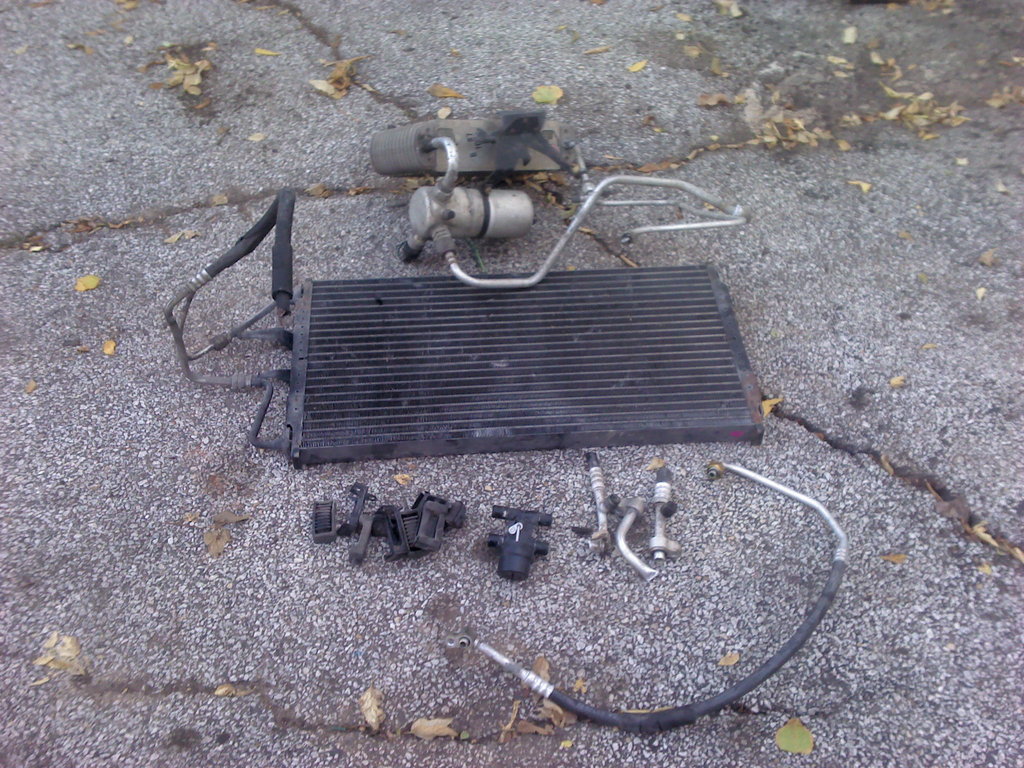
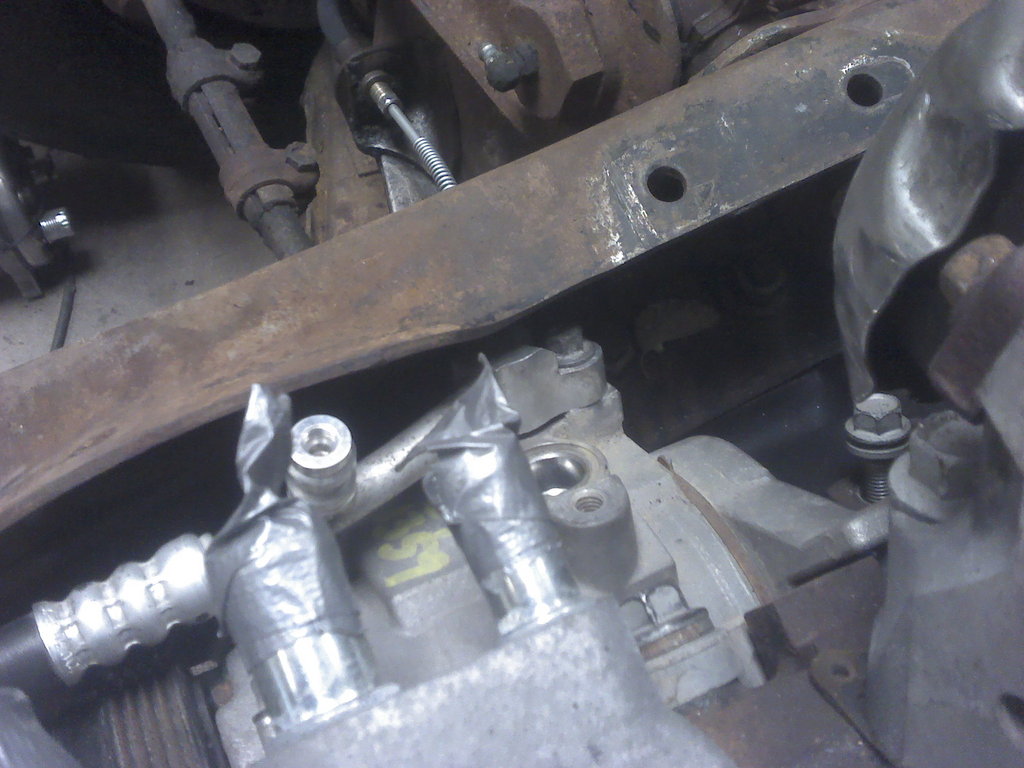
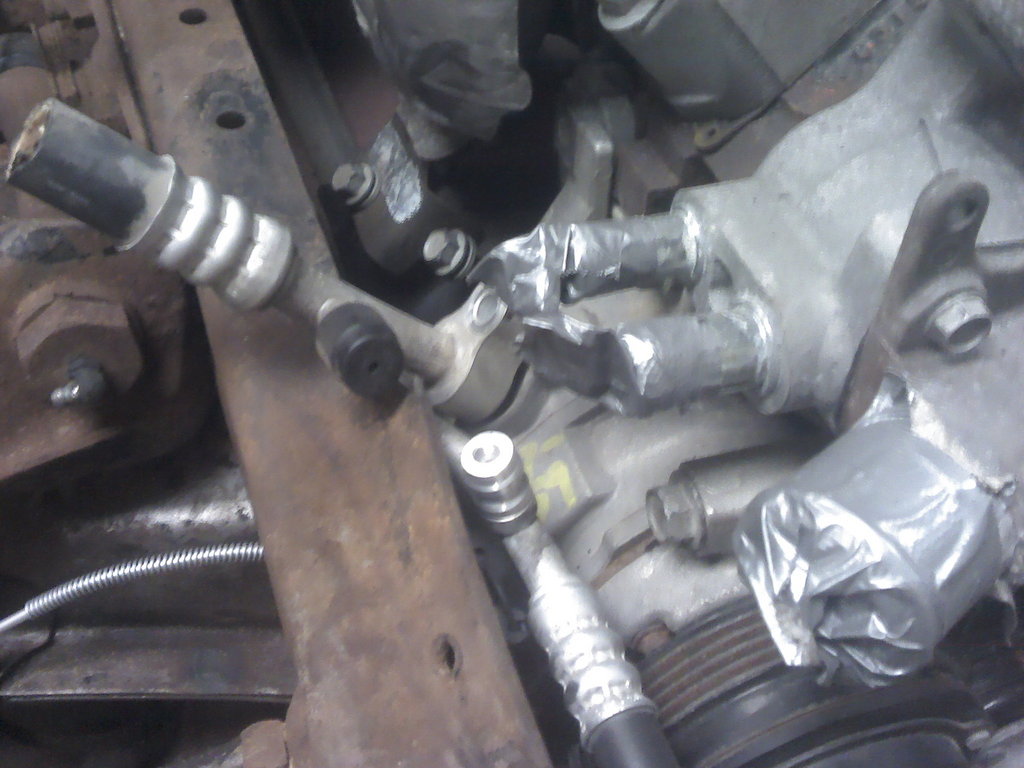
I did find some compressor fittings that I think might work. Going to clearance the frame a bit to give a little more room for the low side line.
Also went to Classic parts and picked up a seal kit for the A/C box. It comes with all the gaskets to put the inner and outter box together, so it shouldn't have any air leaks. Had to buy some weatherstrip adhesive to glue them on with though, my old tube wasn't any good any more.

Then started cleaning the boxes up, and got the new heater core installed.
So money spent...
A/C seal kit.... $22
Weatherstrip adhesive... $12
Heater core.... $32
Misc parts from junk yard will ammount to nothing, so not counting them.
Went to the salvage yard yesterday and got all this for $50. I got the lines and mounting hardware for the condenser and evaporator, and will use them, but the actual condenser and evaporator I will only use for mock up purposes, I'll buy new for final install. I'll take them back and get my store credit, but will keep the lines and mounting stuff.
I did find some compressor fittings that I think might work. Going to clearance the frame a bit to give a little more room for the low side line.
Also went to Classic parts and picked up a seal kit for the A/C box. It comes with all the gaskets to put the inner and outter box together, so it shouldn't have any air leaks. Had to buy some weatherstrip adhesive to glue them on with though, my old tube wasn't any good any more.
Then started cleaning the boxes up, and got the new heater core installed.
So money spent...
A/C seal kit.... $22
Weatherstrip adhesive... $12
Heater core.... $32
Misc parts from junk yard will ammount to nothing, so not counting them.
10-09-2012, 01:26 AM
#51
I used to have a neighbor like yours, crazy, grumpy and hated everyone. Obviously she didn't have any friends for the previously mentioned reasons and even her family stayed away. I think she was waiting on a position in Hell to open up before she died.
The 3M weatherstrip adhesive is awesome stuff. Well worth the investment - until the hardens in the tube.
Nice progress.
The 3M weatherstrip adhesive is awesome stuff. Well worth the investment - until the hardens in the tube.
Nice progress.
10-09-2012, 02:06 AM
#52

Nice work on the swap. Does your truck have a manual op gauge? I used the 5.3 sending unit on mine but its a 82 with an electric gauge. I did the same thing on the coolant temp but I put it in the front of the water pump. Those engine mounts look awesome too, good idea.
You said you went to classic parts. Are you in KC?
You said you went to classic parts. Are you in KC?
10-10-2012, 10:22 PM
#54
Nice work on the swap. Does your truck have a manual op gauge? I used the 5.3 sending unit on mine but its a 82 with an electric gauge. I did the same thing on the coolant temp but I put it in the front of the water pump. Those engine mounts look awesome too, good idea.
You said you went to classic parts. Are you in KC?
You said you went to classic parts. Are you in KC?
10-11-2012, 07:18 AM
#55
I will be following your thread all the way friend. Just put a 6.0 in my '84 C10 and just need to get it wired up, but so unmotivated. Your thread is an inspiration for an ls worn vet...lol
10-11-2012, 10:28 PM
#57
I put the cable stop on the gas pedal side, I think it's just a little too big to fit in the opening in the throttle body, but on the gas pedal it doesn't matter, and plus you cant see it there so it looks cleaner with the factory part on the throttle body.
10-11-2012, 11:01 PM
#58
Today's lesson in shop safety, you can't be too careful! The other day while using my cut off wheel, the wheel came apart, and when I say 'came apart' I really mean 'exploded'! It was a fairly new wheel, but must have been cracked or something, because it did it just out of the blue, I wasn't forcing it or anything. When it came apart it went through one of the flourescent lights in my garage and took out two bulbs. It could have been real ugly, just glad I didn't get hurt. If I'd been leaning over it, it wouldn't have been good. I keep my distance from it now, and check the wheel before using it to make sure it's not damaged.
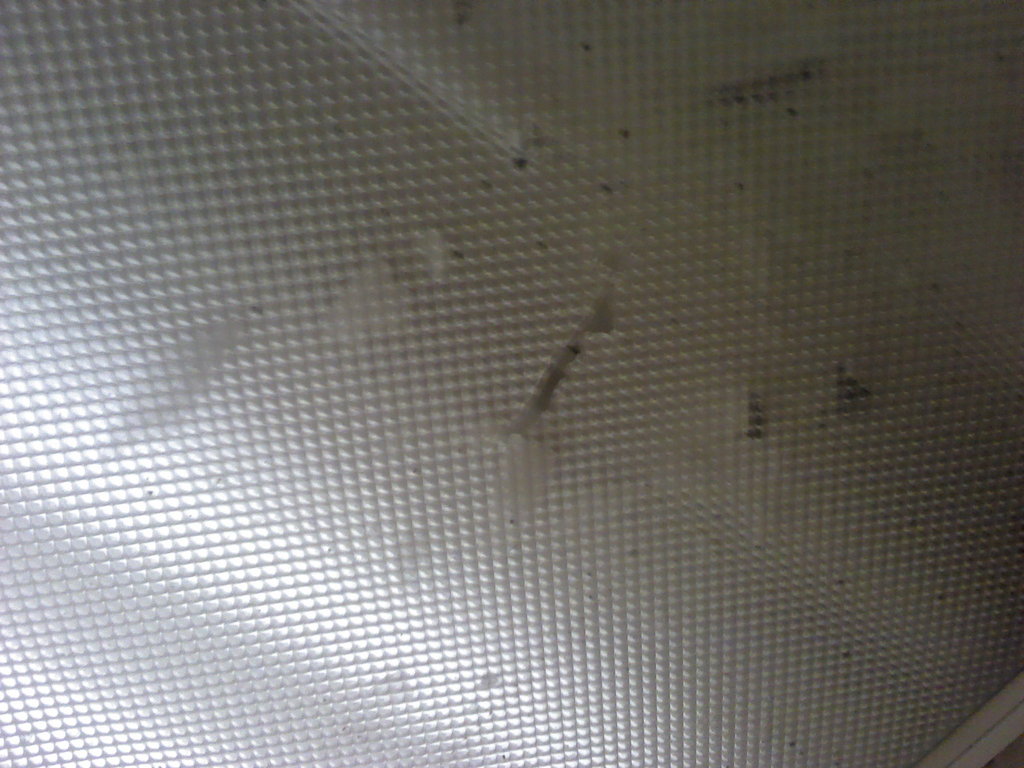
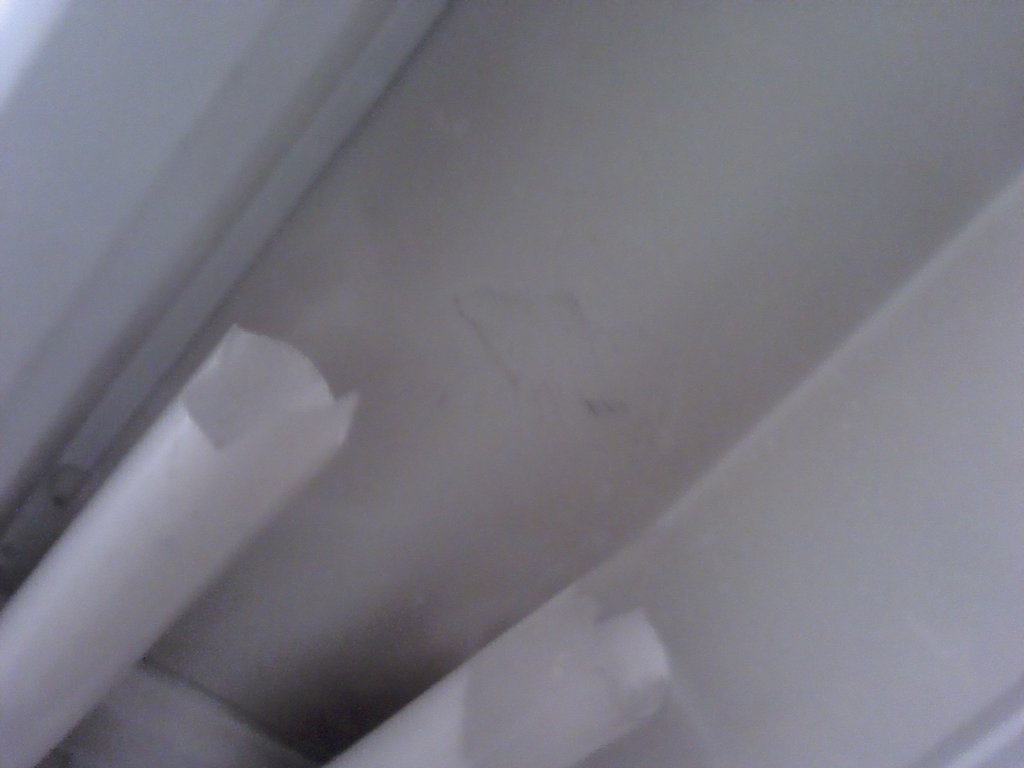
The two bulbs it took out. You can also see a mark where it hit the top of the light after going through the lens part.
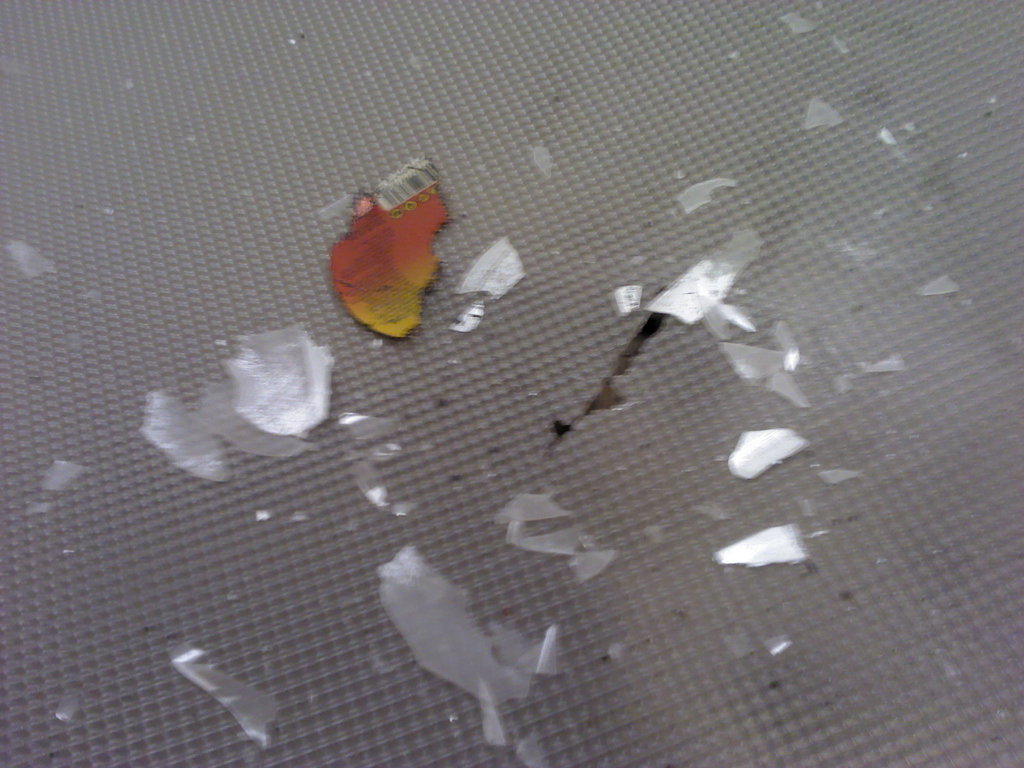
This is what was on top of the lens, broken light bulbs and part of the cut off wheel.
But anyway, that's enough preaching, but do be careful, you never know what could happen!
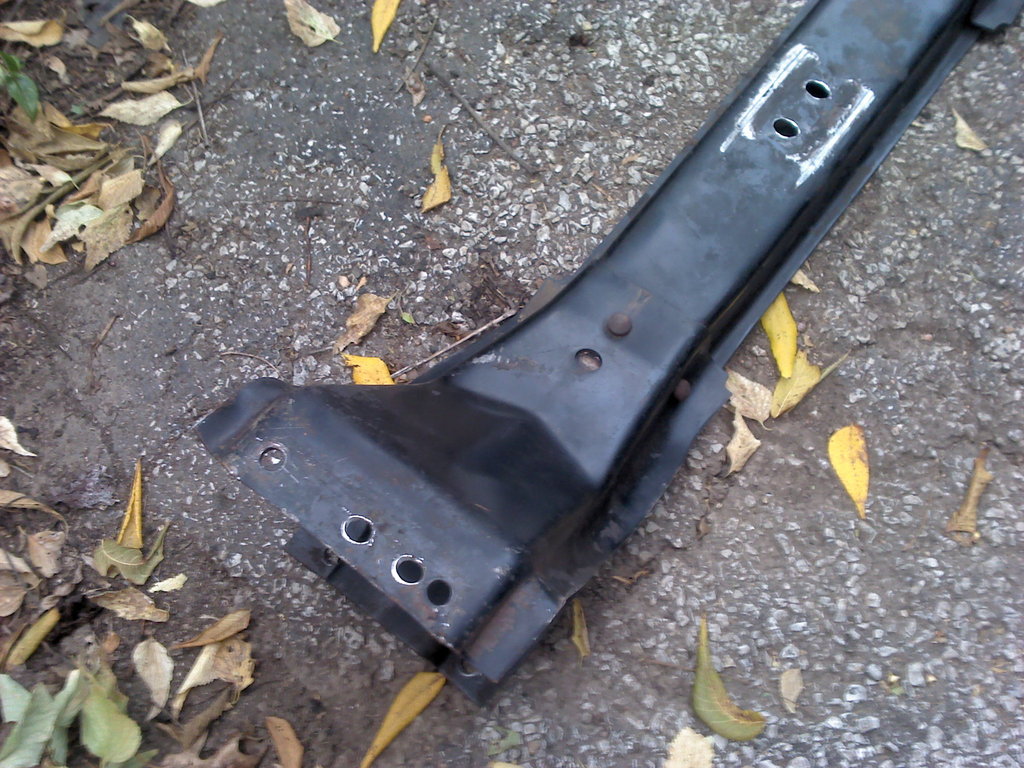
Tonight I drilled some holes in the top of the transmission crossmember. Drilling the new holes in the frame on the bottom is a piece of cake, the upper holes are another story. I found it easier to mark the crossmember for some holes that were already in the frame, remove the crossmember and drill it. Most people probably wouldn't bother bolting the top of the crossmember, and to be honest, it probably doesn't really matter, the lower bolts would hold it in, but I figured the factory had it bolted in on top and bottom so there must be a reason.
Then I went to bolt the transmission up to the new engine and noticed it was missing an alignment dowel, so I hammered one out of the old engine.
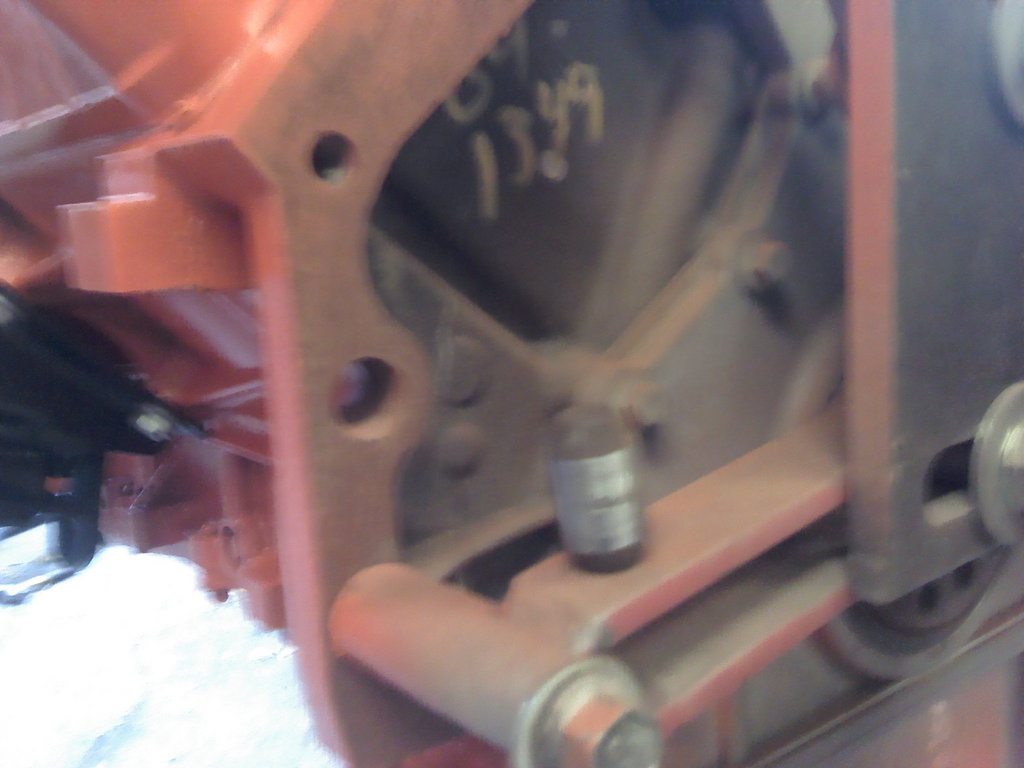
I cleaned up the dowel holes and put a little anti-sieze on them because I didn't think the two were going to come apart the first time I tried to get them apart. Then bolted the two together.
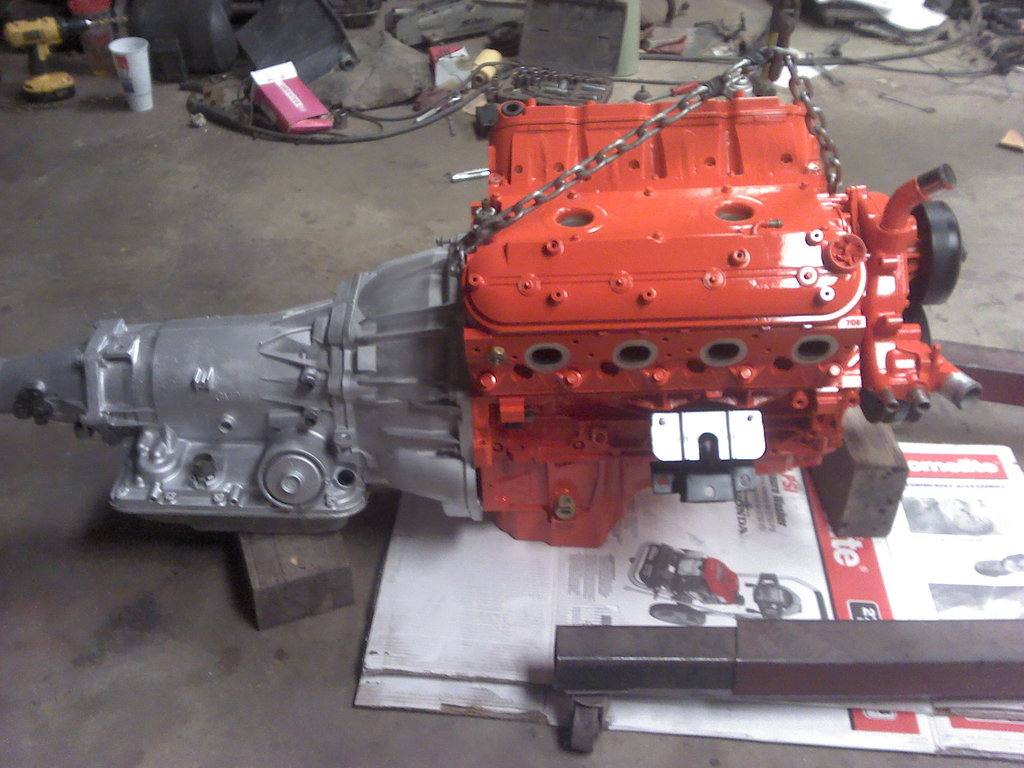
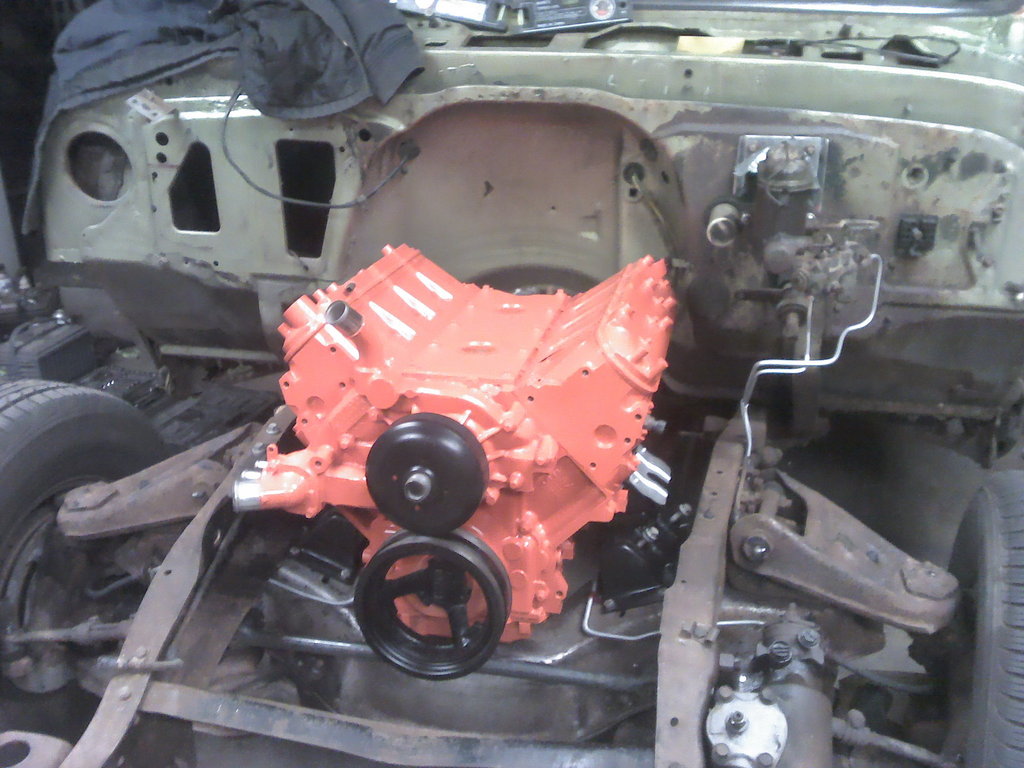
Then I stabbed it back in for hopefully the last time! I did this by myself and didn't even scratch the paint on the engine! Just went slow and steady.
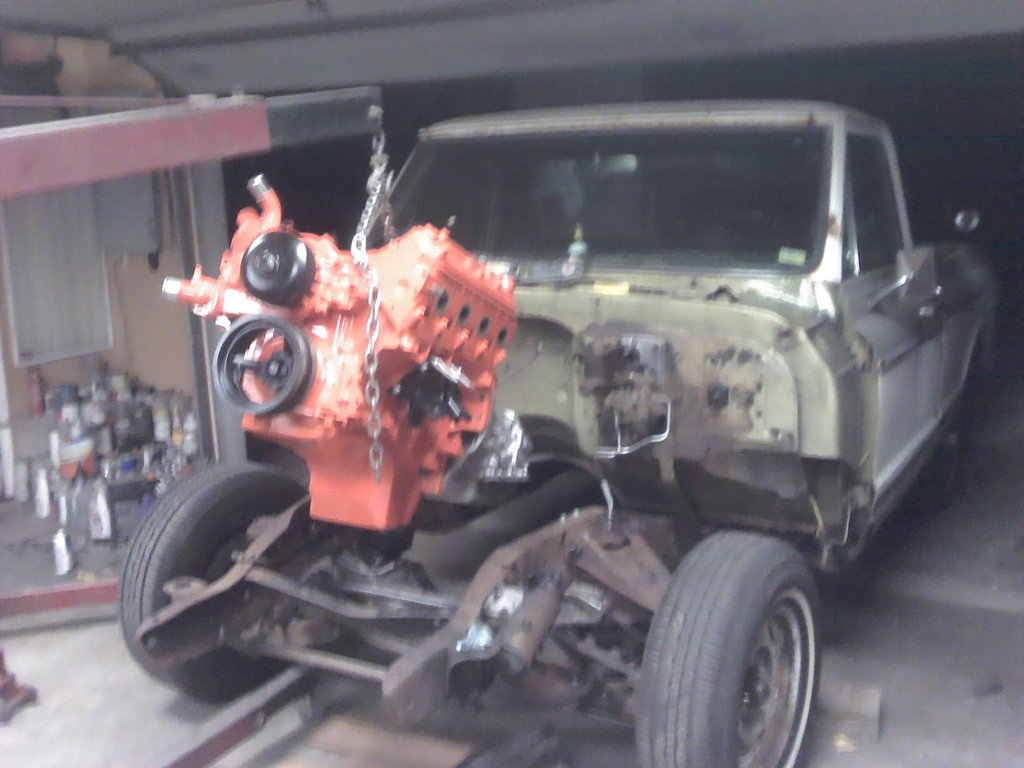
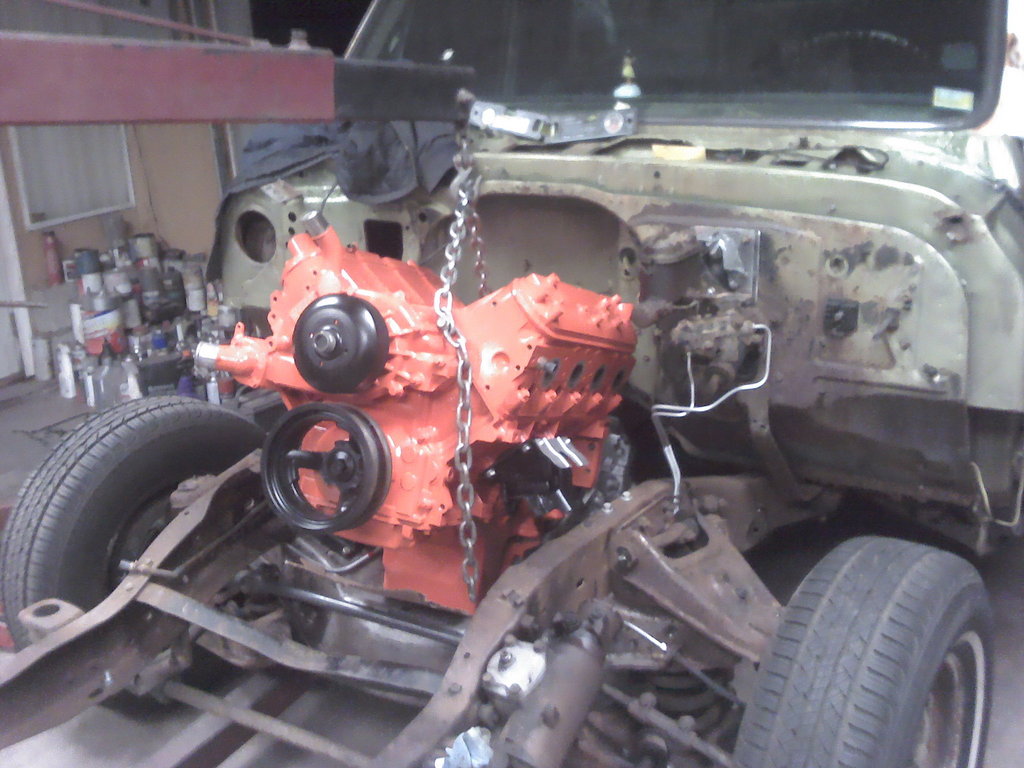
Now we're cooking with gas!! Going to start bolting all the accesories and exhaust manifolds and what not on next.
Before I put the engine back in, I finished up replacing the brake lines to the master cylinder, since once the engine is in it's hard to get to them!
Today I bought some more brake lines and also a case of trans fluid.
Brake lines... $15
Case of trans fluid... $65 is it just me or has this gone way up lately?
The two bulbs it took out. You can also see a mark where it hit the top of the light after going through the lens part.
This is what was on top of the lens, broken light bulbs and part of the cut off wheel.
But anyway, that's enough preaching, but do be careful, you never know what could happen!
Tonight I drilled some holes in the top of the transmission crossmember. Drilling the new holes in the frame on the bottom is a piece of cake, the upper holes are another story. I found it easier to mark the crossmember for some holes that were already in the frame, remove the crossmember and drill it. Most people probably wouldn't bother bolting the top of the crossmember, and to be honest, it probably doesn't really matter, the lower bolts would hold it in, but I figured the factory had it bolted in on top and bottom so there must be a reason.
Then I went to bolt the transmission up to the new engine and noticed it was missing an alignment dowel, so I hammered one out of the old engine.
I cleaned up the dowel holes and put a little anti-sieze on them because I didn't think the two were going to come apart the first time I tried to get them apart. Then bolted the two together.
Then I stabbed it back in for hopefully the last time! I did this by myself and didn't even scratch the paint on the engine! Just went slow and steady.
Now we're cooking with gas!! Going to start bolting all the accesories and exhaust manifolds and what not on next.
Before I put the engine back in, I finished up replacing the brake lines to the master cylinder, since once the engine is in it's hard to get to them!
Today I bought some more brake lines and also a case of trans fluid.
Brake lines... $15
Case of trans fluid... $65
is it just me or has this gone way up lately?
10-12-2012, 01:50 PM
#59
Interesting. That's exactly what I wanted to do with my throttle cable but couldn't figure out how to make the cable stop sit nicely on the little plastic cup thing on the peddle. Maybe I'll try it anyway cause I hate how long my cable is now.