When you click on links to various merchants on this site and make a purchase, this can result in this site earning a commission. Affiliate programs and affiliations include, but are not limited to, the eBay Partner Network.
Which heads are you planning on? 799/243's will give you 9.72 compression with stock .051 gaskets or 9.96 with .040 gaskets.
The above with a decent cam will make that Elko scoot!
Also, Wix over K&N
Which heads are you planning on? 799/243's will give you 9.72 compression with stock .051 gaskets or 9.96 with .040 gaskets.
The above with a decent cam will make that Elko scoot!
Also, Wix over K&N
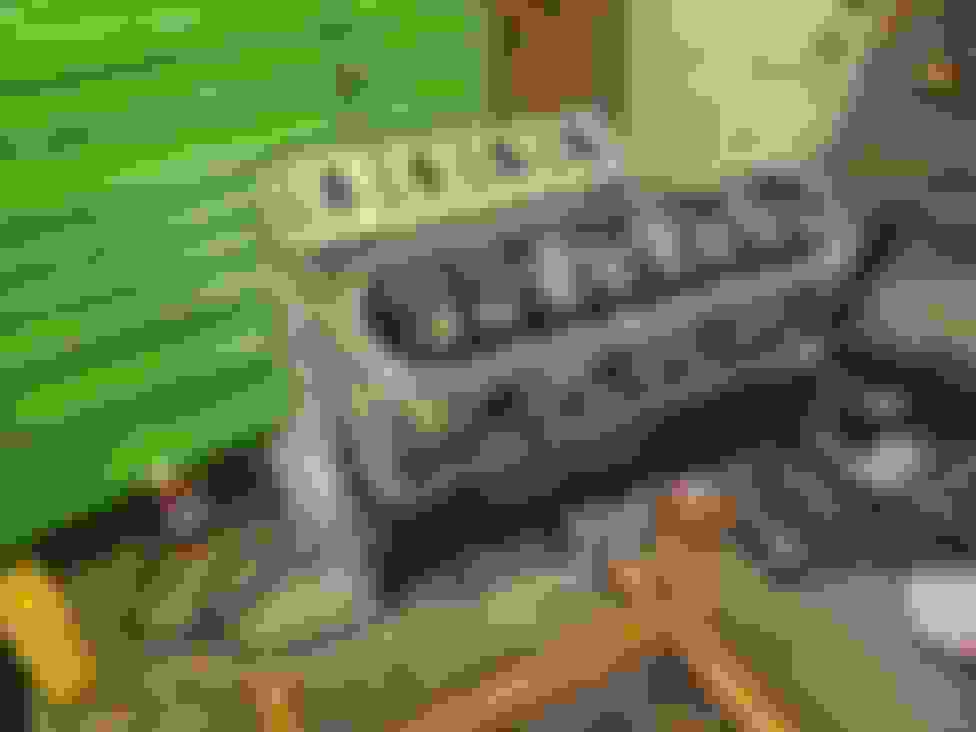
I have a set of 823 heads with new valves and PRC springs as well as an LS3 intake and DBC throttle body. It should be around 10.3:1 they told me with a .051 gasket. The heads and intake were kind of the deciding factor for getting the short block and not using the '99 LQ4 I have (it came with iron heads even). Shrouding the large valves plus the big ports would have been pretty sluggish with the low compression LQ4. I think I'll end up putting the LQ4 in something else with some small chamber cathedral heads or with a turbo. I think a 47-53 ratty panel truck or sedan delivery would be pretty cool if I can find one.
Jessica
Well got distracted. More correctly I guess I got really focused on getting a few house projects done, and other car projects.
You ever feel time is better spent getting the garage cleaned and a few "I'll get that project finished soon" kinda projects finished for good?
Yeah thats what I have been doing. Built my compressor back up and worked on extending my patio/side walk in the back yard to house it in a little box.
I started to work on the dually and the Fiero again. I'm going to try painting the Fiero this summer so I took the wrap off (also why getting the air system figured out at my house).
Working on changing the dually exhaust and making more ground clearance right now though. The pile of parts and pieces for the El Camino is growing, but I'm still missing the cam and torque converter. My friend found me a huge air tank to replace my 60gallon so the whole thing had to go outside. I still need to put the belt guard on though. Built the little shed/box and am almost done with the side walk extension The Harlequin Edition Fiero haha I hated these rusty headers, and they were dragging on the ground Stainless headers are so worth it
I'm hoping I'll get some good solid progress done with the El Camino soon, but heck its feeling like things are coming together.
Jessica
So I spent the long weekend building the full exhaust from the new headers back on my dually. The best part is it sounds great with some dirt cheap single baffle Flowmaster super 10 knock offs and an H pipe.
I got my compressor all sorted, did a ton of yard work and organized my garage while I was waiting for things to get delivered.
I did the trunnion upgrade to my rockers last night and should be getting my cam sometime this week.
I have my torque converter, and all I need to order is the flywheel and I can drop the engine in the car.
Definitely a good upgrade! So much assembly lube New torque converter, should be pretty spicy! Getting ready to put the cam in whenever it shows up
I'm surprised its all finally coming together and I'm getting really excited to finish it. I think I'll end up getting stuck in all the finalizing of the wiring and plumbing but at least its all going in for the last time and not just a test fit!!
Jessica
Lots going on, too bad I don't have an infinite amount of time and money to play with this stuff.
It makes buying expensive parts easier if they come with stickers and in this case a keychain Everything seems to fit and its really easy compared to an old rusty engine! Between google, this forum, and these books I feel like I'm in good hands with the build Front and rear covers installed along with the pan. I ended up finding a shorter one so it doesn't hang below the crossmember anymore. The driveshaft even showed up this last week! I'm so excited to get this thing installed Checking pushrod lengths, because of the smaller base circle of the cam and who knows what other variables I needed slightly longer than the 7.4" ones that came with the heads
Looks good The DS is aluminum? How much is left to do?
Yup the driveshaft is aluminum. I need to finish up a bit of the wiring once the engine is back in the car, and put loom on the rest of it. I have all the big parts but theres tons of little and medium things left. Like tires, a catch can system, maybe a fuel regulator if the corvette filter one doesn't cooperate, maybe new brakes instead of the used parts I got to do the mockup 7 years ago, and then there are the creature comforts like working wipers and a stereo etc.
My Dad likes to say its getting closer, but its not close yet haha
Jessica
So last night I did it! I didn't finish all the bellhousing bolts and didn't even attempt the torque converter yet but its in there! Did it by myself with a borrowed hoist because the 1 ton I have right now won't reach far enough.
I will admit I'm an impatient woman who was tired of waiting for friends or family or anyone to come give me a hand. The nice thing is the car rolls well enough I can push it in and out myself to make room to do all this.
I can't wait to get the rest of this stuff hooked up! I was able to slip the engine in next to the drivers header and the passenger header dropped in from the top after the engine was in place. All the mounts and stuff lined up perfectly and the new oil pan doesn't hang below the cross member! All in all it was probably the simplest engine install I've ever done.
I've got some pretty good momentum on the project, but give me a few days/weeks to get some noticeable progress completed.
Jessica
Baby steps. I know it feels good the first time you get a new engine set into place. Congrats. This should help to fuel you to finish things up.
It might be a good idea to put some sort of valve covers on the engine. You may think the air is pretty clean, but look at that same air in a ray of light or sunlight. Not so clean.
I'm going to have to get a friend or my Dad to come over and help me setup the shifter and fiddle with the engine while I'm under the transmission doing up torque converter bolts.
But I can get most of the stuff ready to go before hand so we're done fast and its super productive.
I had the valve covers off but the engine bagged anytime I wasn't actually working on it. My garage is far from clean and I'd hate anything to get into the engine.
I didn't want to risk lifting the engine with the coils in place either. Then I came to find out the LQ4 valve covers have baffles that don't work with the LS3 rockers. So I had to cut them out. I may get new valve covers someday but for now these will work.
I set the intake on to check if my oil pressure sender will fit on the back of the block, and it doesn't so add that to the list.
I test fit the driveshaft, and it fits! It even clears that X pipe in the exhaust! The problem is the driveshaft loop is a little too close to one side, so instead of fighting with it I'm just going to cut it up and reweld it. I built it without a shaft in the car, and I knew this could be an issue, but I was hoping all my measuring and checking would have worked.
Jessica,
you got a really nice rear end there lol. Is the Elky really as clean as the pics make it look?
Well I had planned to just slap a junk yard 180k mile 6L engine in and do a much simpler build, but I knew my floors had holes and had been repaired badly when I was 16 or 18 so I just happened to pull the carpet and do some inspecting while I had the car up. The rust was worse, the patches were about all that was left of the floor, and it luckily hadn't spread to the rockers or anywhere else. So that kind of made me do the floors. Once those were out and replaced, I couldn't figure out how to truly paint and protect the new floor with the frame in the way, the body is kind of channeled over the frame in the center. So I found a rotisserie used that needed some love, fixed it up, and pulled the body. It took a few years of figuring out how to best clean everything in my garage and how to do all the painting and stuff like that. Plus getting the right tools and I lucked out and got a free 60gal compressor. I blasted the frame, then I boxed the C channel center portion, and built some tubular braces for the frame horns, and I boxed the rear control arm mounting points. Then I got fancy and shaved the firewall and built metal inner fenders using S10 fenders as a starting point. Once it was done I Raptor lined the whole bottom, chassis coated the frame, and did the same with the engine bay. Its really really clean under the car, everything has been replaced or refurbished. The only exceptions are the front and rear control arms are original with poly bushings and I did those probably 15 years ago and I didn't want to freshen them up because I'd like to go with a tubular setup in the near future. Its pretty dusty under there on some of the parts if I haven't been working under there for a bit, but thats about the worst thing under there. Its kind of funny because the outside has a kind of ratty satin black paint job so even when people see it in the garage they think its kind of a mess. I do plan to paint it someday but I'd like to get it on the road and work out some kinks before its too pretty to work on.
Jessica
Slowly making progress. Between the record heat, now wildfire smoke, and a busy work schedule I've been only able to tackle small stuff here and there on the project.
I'm not complaining, its really coming along, its just not the most comfortable days to be doing this stuff. Got the accessories all bolted up and ready to go, and even got a belt that will work! Test fitting some random chimney vent as an intake to mark for cutting the air box open I actually put 50 or so miles on my crew cab this last weekend! My friend followed me and got some shots of it trying to make it over the terrible roads of Sellwood He couldn't believe how low and wide it is, even though he's ridden in it and been around it a ton
I have all the wiring and stuff under the car sorted out (at least enough to get it running and maybe drive it).
So I am jumping into the interior to finish up as much of the wiring as I need to have done for a first start or drive.
Jessica
So things have finally kicked into high gear, or at least I hope thats the case.
I decided to kind of change tactics and get this thing running and worry about a lot of other stuff later.
With that in mind I'm not going to worry any more about the interior, or getting the dash covered. I'm just going to put it in there for now and finish it up after the thing is running. Decided to pull the dash to get to the last of the wiring and vintage air hookups. Figured it was about time to try dying the dash black to match the rest of the interior and I'll deal with the cracks later when I get it covered. The engine is ready to go and I've got fluids going in it now. Just waiting on the Air filter, Battery, Alternator and MAF. The top piece of the dash I had was too brittle and sun damaged so I had been looking for a better one. This one was stowed away in the house for the last couple years. I put panel bond and fiberglass mat on the back to hopefully keep it from cracking while trimming it.
I'm going to get the wiring all checked out, find and put some sort of base tune on the pcm and fire it up this weekend if all goes well.
Before I drive it, I'll need to deal with the completely bald tires and I have used and new brake parts on the car. I had gotten them mostly to use for mockup but that was so long ago. I had planned to get new rotors instead of the used ones and I do have new pads, but now I think I'm better off just getting new calipers and not using these that have been sitting for years.
Any way I think I'll have some good "it runs!" news soon or I'll have some "can you help me, it doesn't want to make any noise" kind of questions haha
Jessica
Well some fun times getting things going! I got a battery for the car and hooked it up so I could check out what works and what doesn't. When I wired the car I did check things system by system, but I'm not perfect and it wasn't even a full car at the time. I also built a lot of the stuff to be modular. For instance the header panel was off a lot when I was doing the core support modifications and the inner fender building. I tried the blinkers and they blink opposite what they should. That cracked me up, plus nothing in the tail lights works. I know the front is just a swapped wire where the plugs come together and the rear is likely not having a ground attached, or the ground is on brand new paint and not actually grounding. I think the parts store fried my starter when I had them load test it, they said it was good and passed, but they also said there was a large spark. Now when I turn the key everything shuts off and its like a short to ground. Its ok, it was from my original 6L, or its something fishy with the wiring, but I kind of doubt that, because I didn't change the wiring for the starter from what it had before. All the little interior stuff like the HVAC, dash lights, dome light, power doors and gauges all seem to work ok though.
Anyways no vroom vroom noises yet, despite my best efforts, maybe later this week or next I'll have a video and stuff.
Jessica
This thing is actually coming along great! I spent a few weeks taking my time with the wiring and getting all of that sorted before putting the interior in for the final time. I also built a hidden hitch for my dually and messed around with that. I think the wiring is all working the way it should, and if there is anything I've missed I think it will be pretty easy to access in the future. Found a filter that fits in the box I made, will be getting an AFE or something else soon, but this was to just make sure it fit and whatever. Basically finished with the wiring and everything is working so far. Still need a head unit and maybe need to change the lights on the vintage air controls to blue Getting closer, but definitely good enough to drive it.
I put new vents in the dash, one was broken when I got it, and I broke another removing it for painting. These were from Billet Specialties and the three centers just drop right into the dash, the two outside ones needed a ring of ABS cut to take up the extra space but it was simple. I'm not done trimming the top trim piece with the defrost vent. I also need to finish making the A pillars match this dash.
The engine cranks over (no fuel or spark because its out of gas and I unplugged the coils), All the gauges are working and the computer fires up and talks to my laptop so that is cool. The fluids aren't leaking, which I take as a huge success because I built all the lines and things. I have had to tighten a few fittings that were seeping, but that was the worst of it. Once the car starts this all may change and it'll spring leaks left and right, but for now I'm taking it as a win.
I've decided to get new brake calipers and rotors so when this thing is fired up I can tune it or break it in like I should by driving it. I think thats about it. I'm going to fiddle around with some stuff on my daily I've neglected and with some new rockers for my dually so I can enjoy it for the rest of the summer/fall.
Jessica
This thing is getting there! I worked on that top trim piece of the dash, and it finally fits, the defrost vents even sit under it and work!
put gas in the tank, then ran it through the lines to hopefully get most all the particles out of them and not have it shoot into the injectors. Its holding pressure and there weren't any leaks (I'm so shocked at how this thing isn't leaking with all new fittings and lines everywhere)
I also started on the subwoofer boxes, and realized yet again, I hate working with wood (in this case its MDF)
I think all my wiring is done, and I started to work on the "tune" mostly I read a few posts and watched some videos about removing the VATs and setting some stuff up so it runs and idles.
Right now it wants to backfire through the intake, so I'm back to square one trying to determine if its a spark timing issue, or if I messed up my timing chain install and its off a tooth or something.
Honestly I'm really happy with how things are coming together, and setbacks are part of the building process. The big thing I'm trying to focus on is that this car hasn't even been able to or tried to start in about 7 years now.
Jessica

 04-23-2021, 02:26 PM