
88 Fiero Formula LS4/F40 6 speed swap
 03-17-2024, 08:31 PM
#521
Launching!

That's a fair bit of beef in the front. You one any weight checks on this? Curious where you're at.
 03-17-2024, 09:07 PM
#522


LF 608 RF 609 = 1217 Front
LR 794 RR 796 = 1590 Rear
Since then, the wheels/tires were upgraded, and now the turbo setup and subwoofer. Really wanted to keep the weight in the 2900 to 2950 lbs, but I need to scale it once it is back together to see how I did.
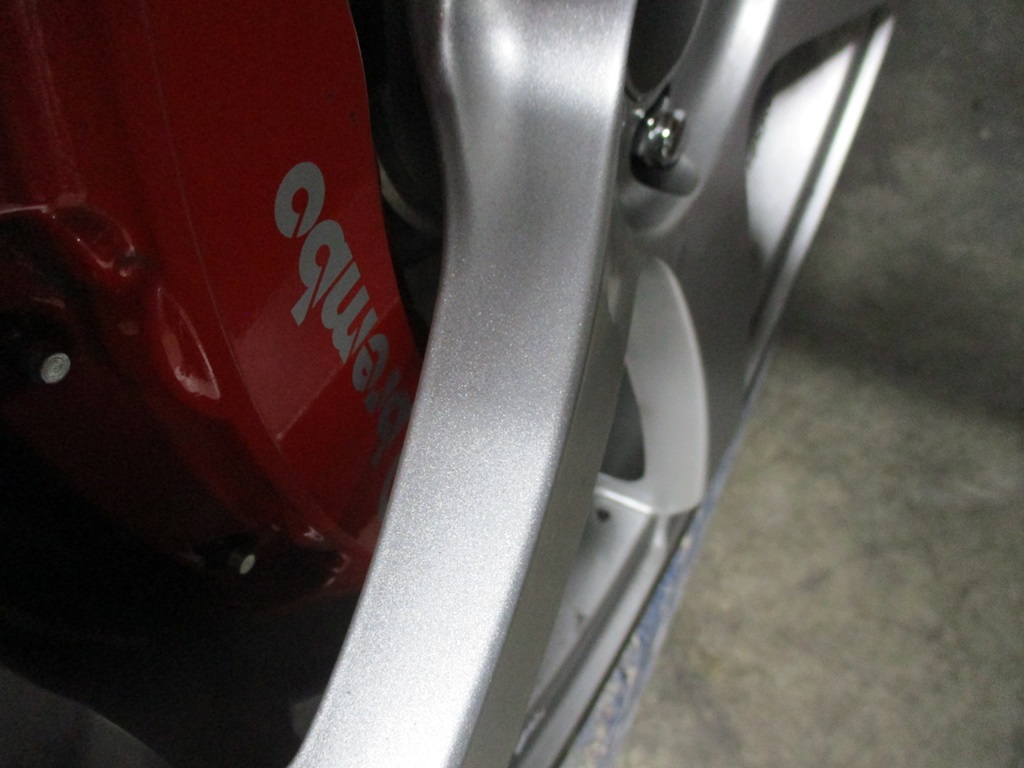
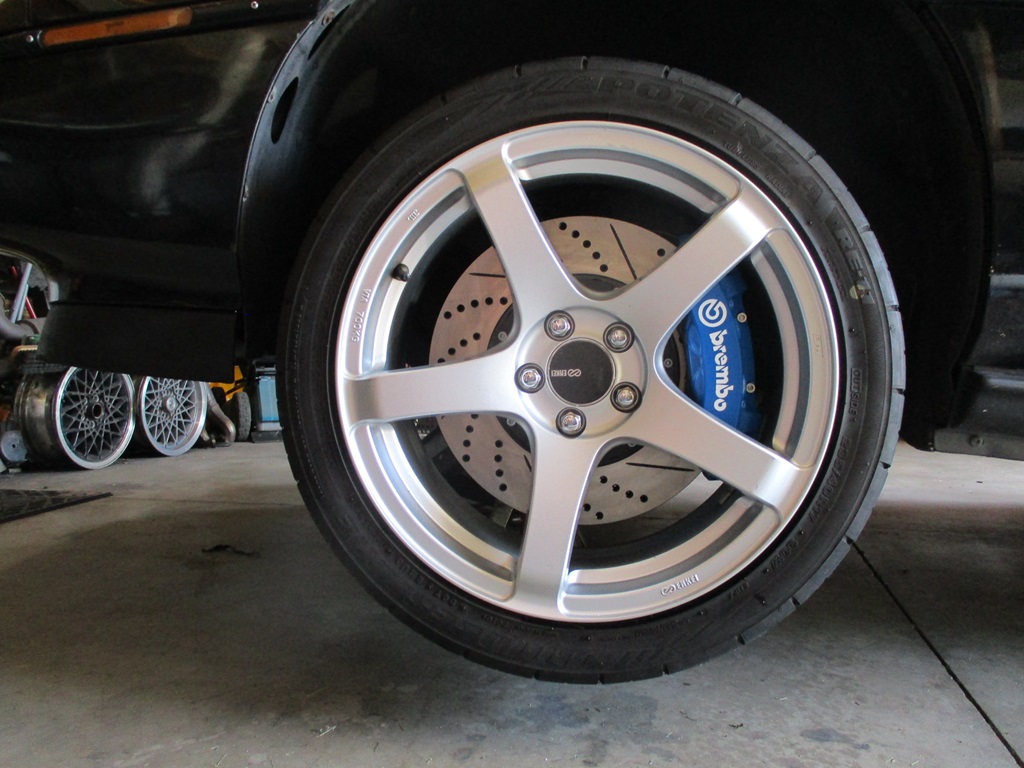
I designed the current brake kit on my car. It reuses all the stock 88 Fiero calipers and parking brake, but the rotors go from 10 1/4 to 13" and results in a 30% increase in braking front/rear while keeping the brake bias stock. The Brembos I am using are some of the smaller ones as they are a hydraulic match to the stock Fiero calipers. So they will look awesome, but not change the overall bias of the current brakes.
The following users liked this post:
JoshHefnerX (03-17-2024)
03-17-2024, 10:09 PM
#523
Launching!
Be interesting to see how that turns out. Hydraulically they should give good feel and bias. Adding almost 30% more diameter/torque may affect it. But lots of things go into that, weight bias transfer ect. But, you know all that. Should definitely help with heat.
Been a good build, watching you run into obstacles and overcome them creativity.
Been a good build, watching you run into obstacles and overcome them creativity.
03-31-2024, 05:27 PM
#524
Finished with adding the sound deadening to the drivers side, installing both carpets, installing both seats, tightening down the steering wheel and connecting the horn so it works.
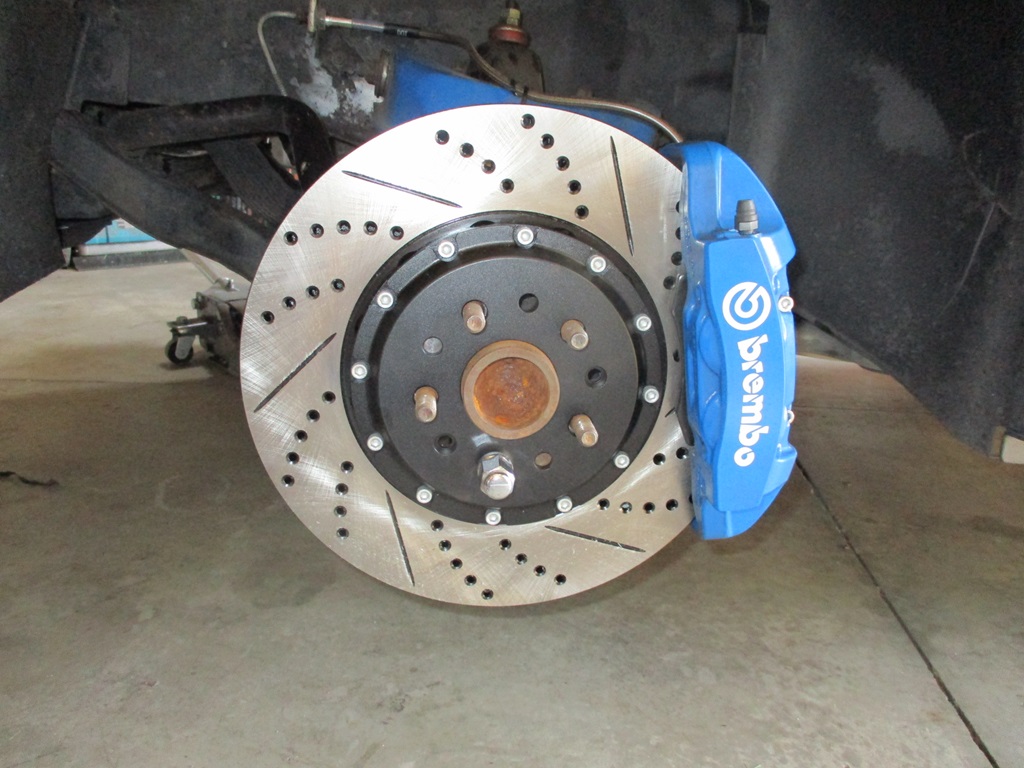
Then I played with the Brembo caliper. Test fit of the rotor on my car and the nose of the a-arm clears the rotor by about 0.10" so that works.
Installed the caliper and bracket with the caliper clocked upward and checked clearance to the upper a-arm - everything cleared with over 1/4" of room to spare.
Checked clearance between the Brembo caliper and my wheels - cleared by about 3/16".
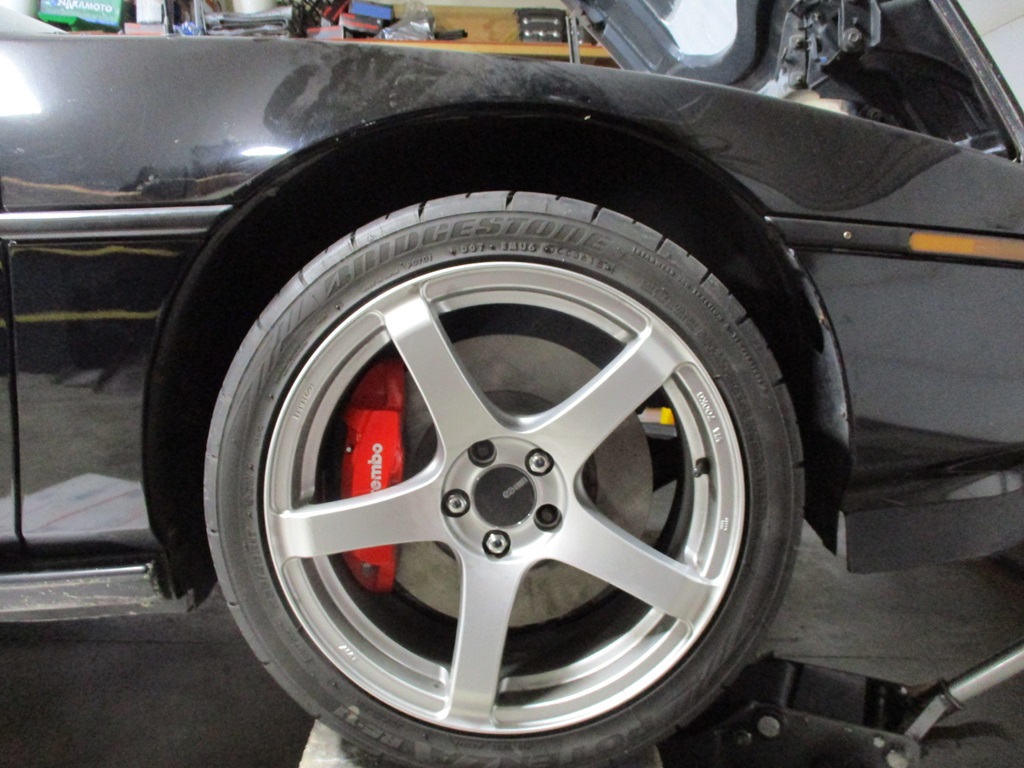
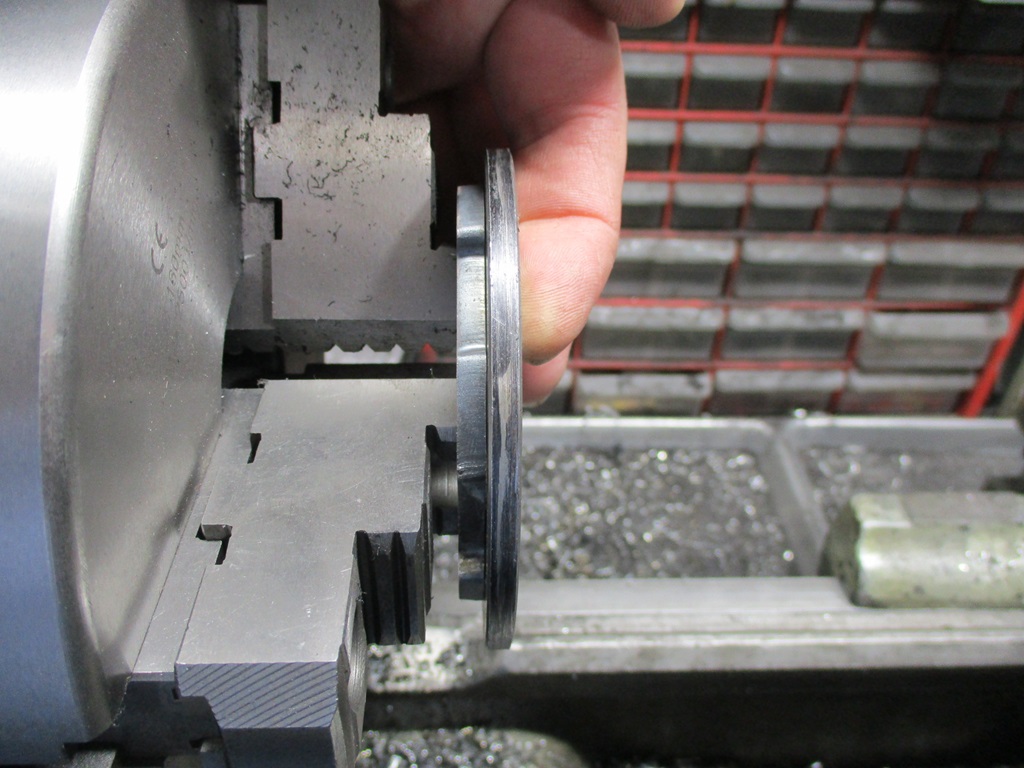
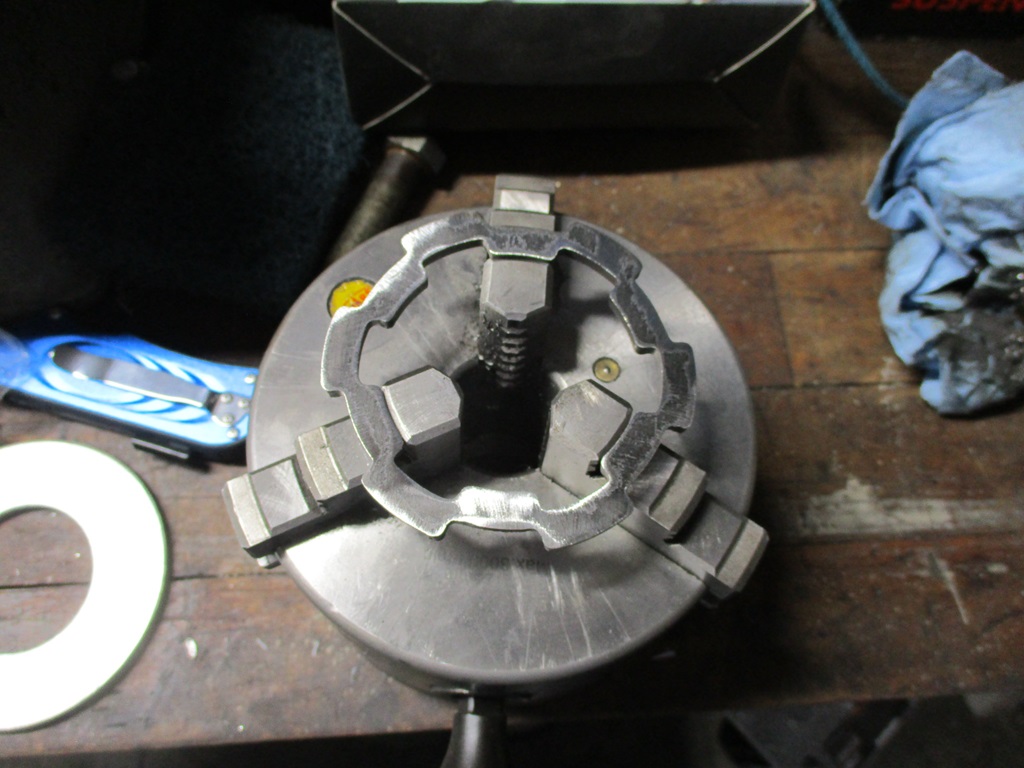
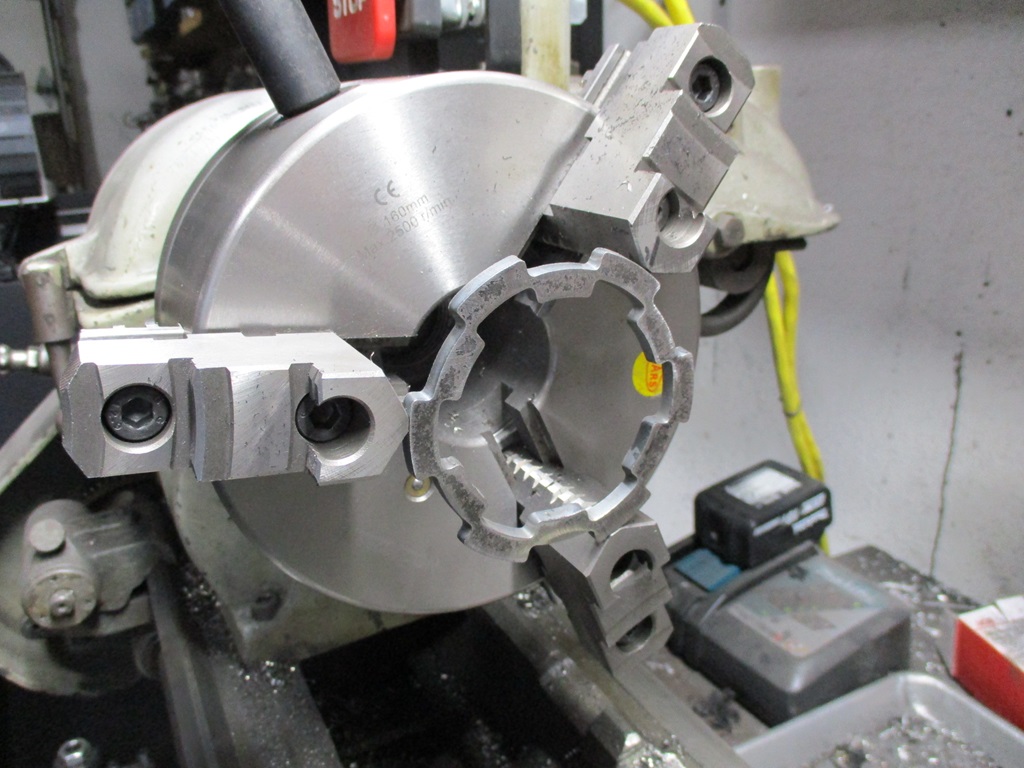
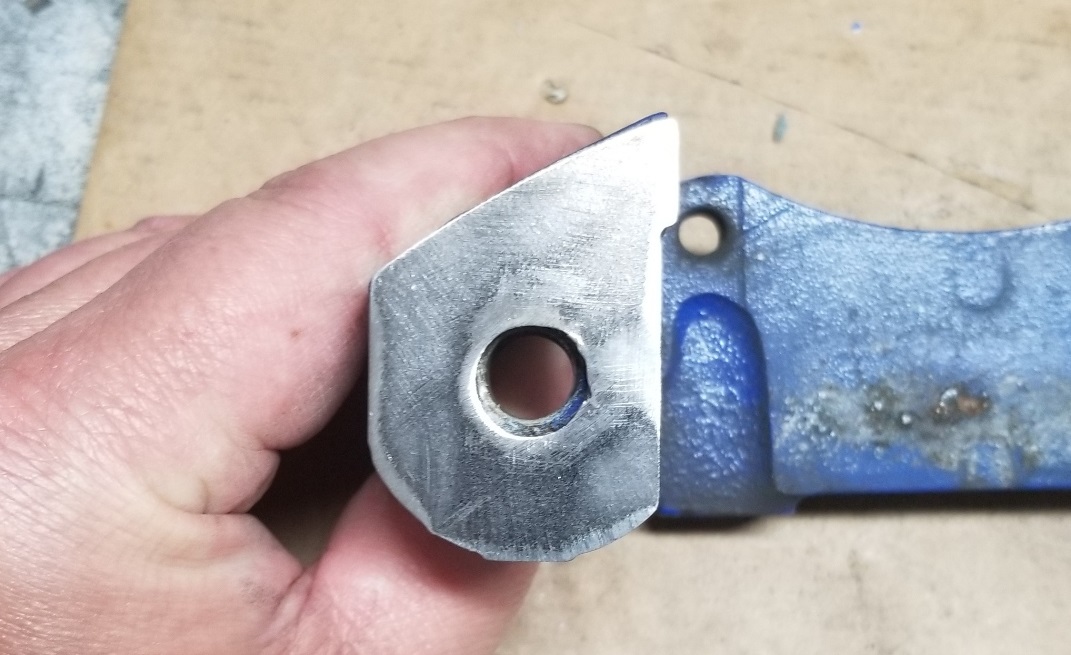
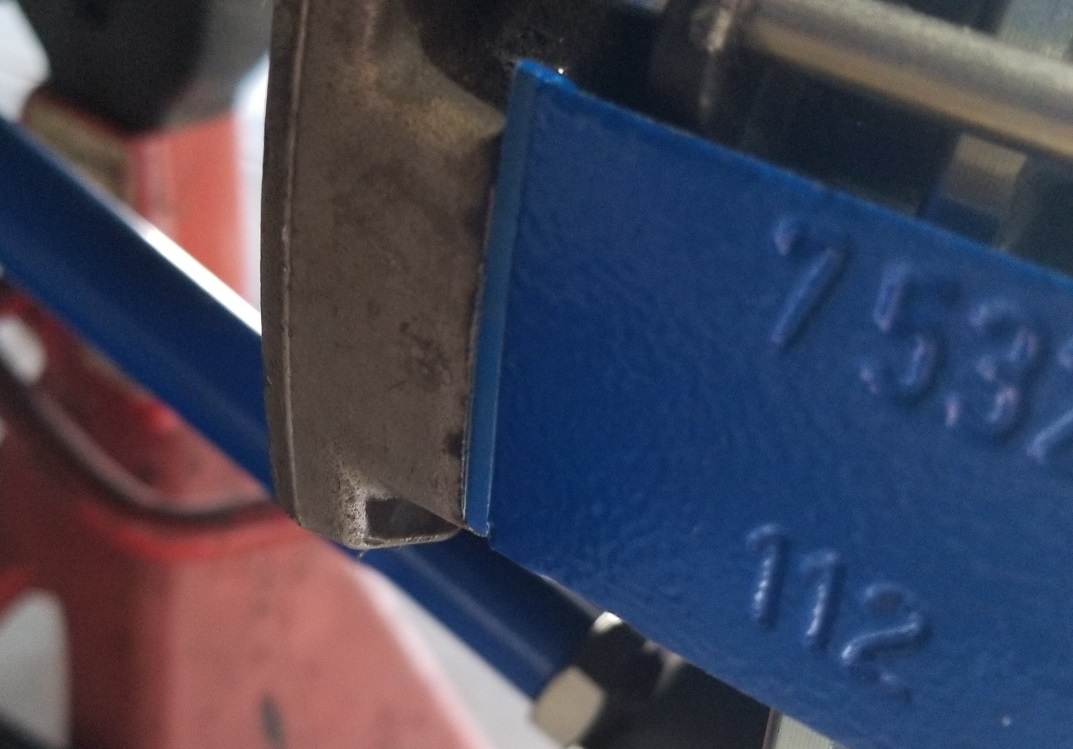
I wasn't having any luck with an off-the-shelf concentric ring, so I made some on the plasma and trued up the ID and OD on the lathe.
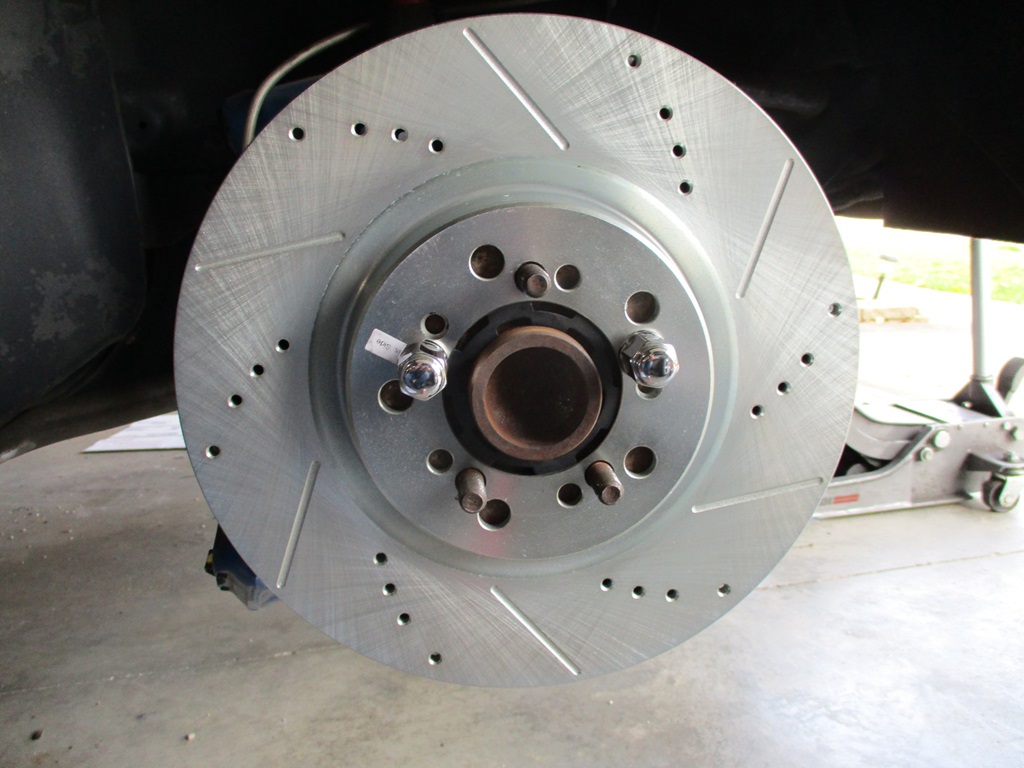
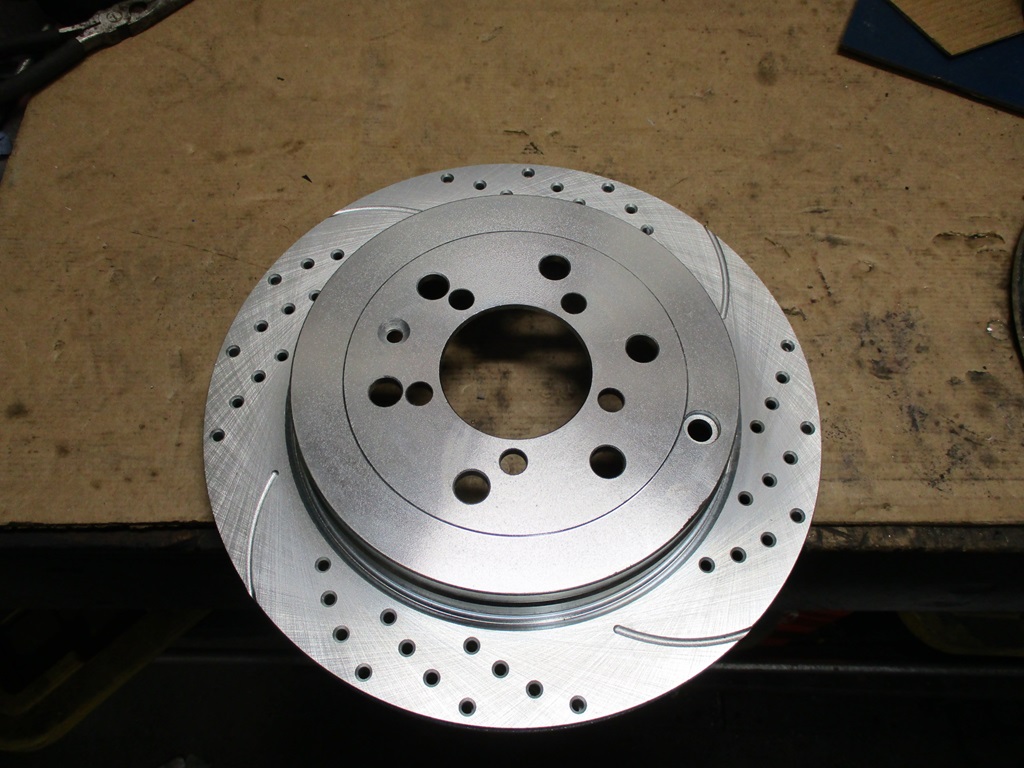
I made 4 of them and used 1 for the drill guide for the 5x100 pattern and then drilled the new rotors. In a month I will have the 2 piece rotors - but I want the car back on the road by the end of next weekend. So these will do for now. Old 13" rotors from 2013 were removed and the new 13" rotors installed.
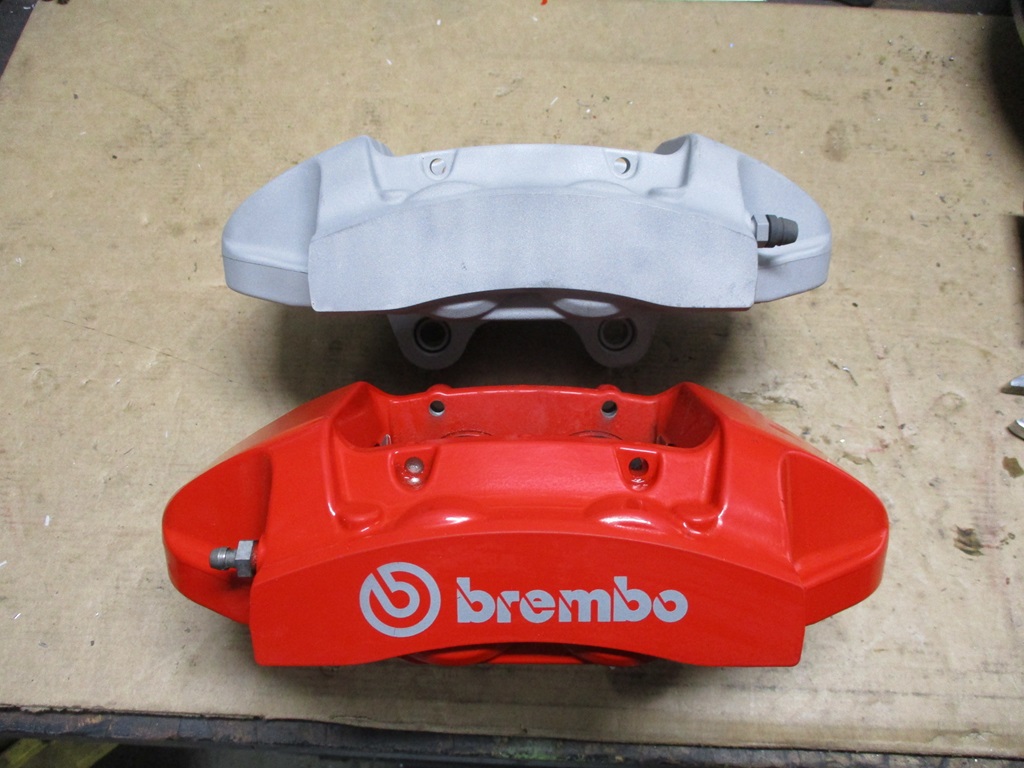
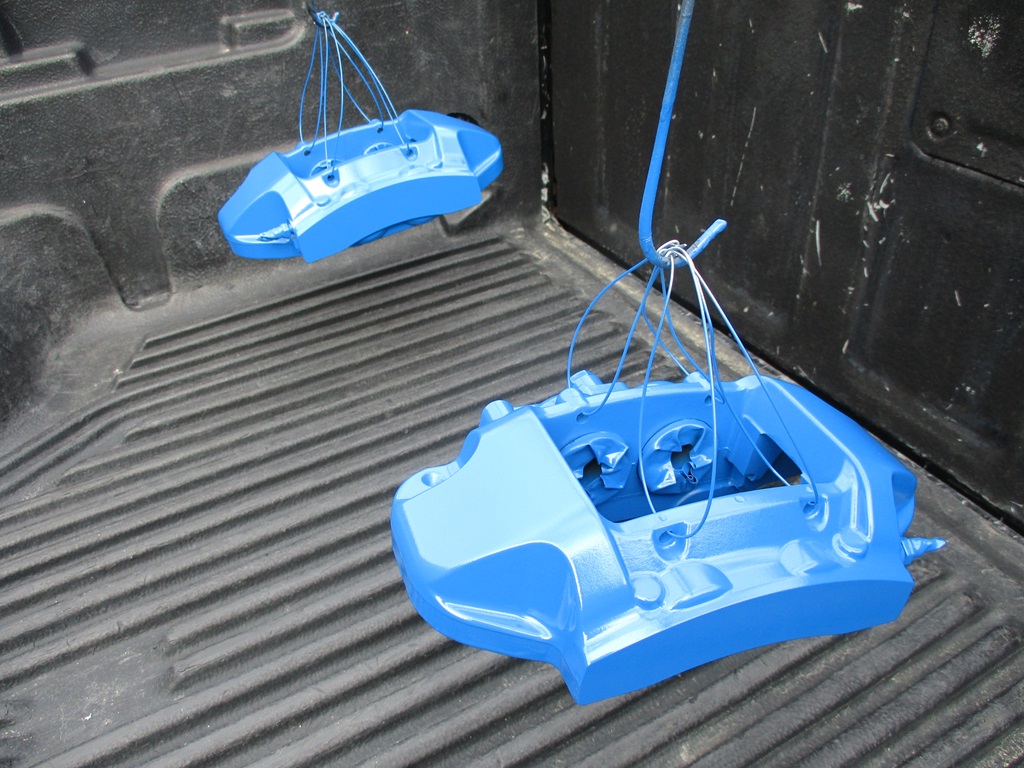
No more red on the Brembos:
Ordered:
Russel DOT brake lines - the ones on the car had been there since 2013.
Hawk Performance pads for front and rear. Between the two caliper designs, I was able to find 2 compounds with very similar coefficient graph. The front are also a low dust compound, which would be a nice change.
The car won't be done by next weekend, but I want to start driving it and most of the remaining items are interior related, so I can do them while putting miles on the car.
Then I played with the Brembo caliper. Test fit of the rotor on my car and the nose of the a-arm clears the rotor by about 0.10" so that works.
Installed the caliper and bracket with the caliper clocked upward and checked clearance to the upper a-arm - everything cleared with over 1/4" of room to spare.
Checked clearance between the Brembo caliper and my wheels - cleared by about 3/16".
I wasn't having any luck with an off-the-shelf concentric ring, so I made some on the plasma and trued up the ID and OD on the lathe.
I made 4 of them and used 1 for the drill guide for the 5x100 pattern and then drilled the new rotors. In a month I will have the 2 piece rotors - but I want the car back on the road by the end of next weekend. So these will do for now. Old 13" rotors from 2013 were removed and the new 13" rotors installed.
No more red on the Brembos:
Ordered:
Russel DOT brake lines - the ones on the car had been there since 2013.
Hawk Performance pads for front and rear. Between the two caliper designs, I was able to find 2 compounds with very similar coefficient graph. The front are also a low dust compound, which would be a nice change.
The car won't be done by next weekend, but I want to start driving it and most of the remaining items are interior related, so I can do them while putting miles on the car.
Last edited by fieroguru; 03-31-2024 at 05:34 PM.
The following 3 users liked this post by fieroguru:
04-01-2024, 07:54 AM
#525
TECH Fanatic
iTrader: (27)

Could you show the fixture that you used to chuck the concentric rings into the lathe? The biggest thing I have trouble with is making sure that after I chuck something up that its square.

The following 4 users liked this post by fieroguru:
BFromTheD (04-02-2024), G Atsma (04-01-2024), Project GatTagO (04-01-2024), ryeguy2006a (04-02-2024)
04-07-2024, 06:58 PM
#528
This weekend was pretty short as we were in Indy to see Hadestown on Saturday and we got back around 10 AM today.
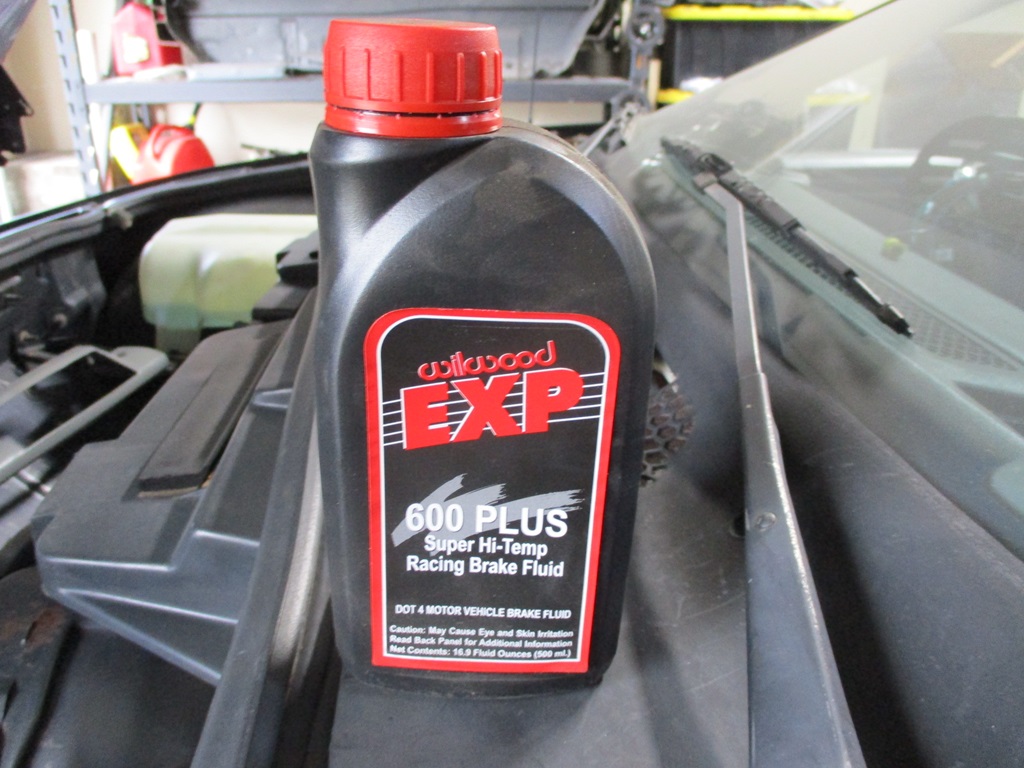
I got the front brakes nearly complete. Trimmed some M6 stainless bolts and lock washers to work for pad pins, pads installed, modified the new brake lines to clock the hose connection so it clears the upper a-arm, flushed the brake fluid, installed the hoses, did a gravity bleed on all 4 bleeders, and installed the Brembo stickers. A final bleed full brake system bleed will be completed once I am done with the rears.

Then I switched my focus to the rears. Jacked the rear of the car up, removed the rear caliper bridges, pads, and rotors and drilled new rotors for 5x100 pattern, and flushed the rear brake system.
Then I got bogged down making the hawks pads for a Wilwood caliper work with an 88 Fiero caliper. The two mods that are needed are:
1. Use a belt sander on the edges to bring the width down from 100.6mm to 100.0mm.
2. Drill out the holes for the pad retaining pin. Since I will be using 6mm stainless bolts for the pins, I drilled them out to 6mm which is slightly smaller than the split roll pin the 88 Fiero calipers use.
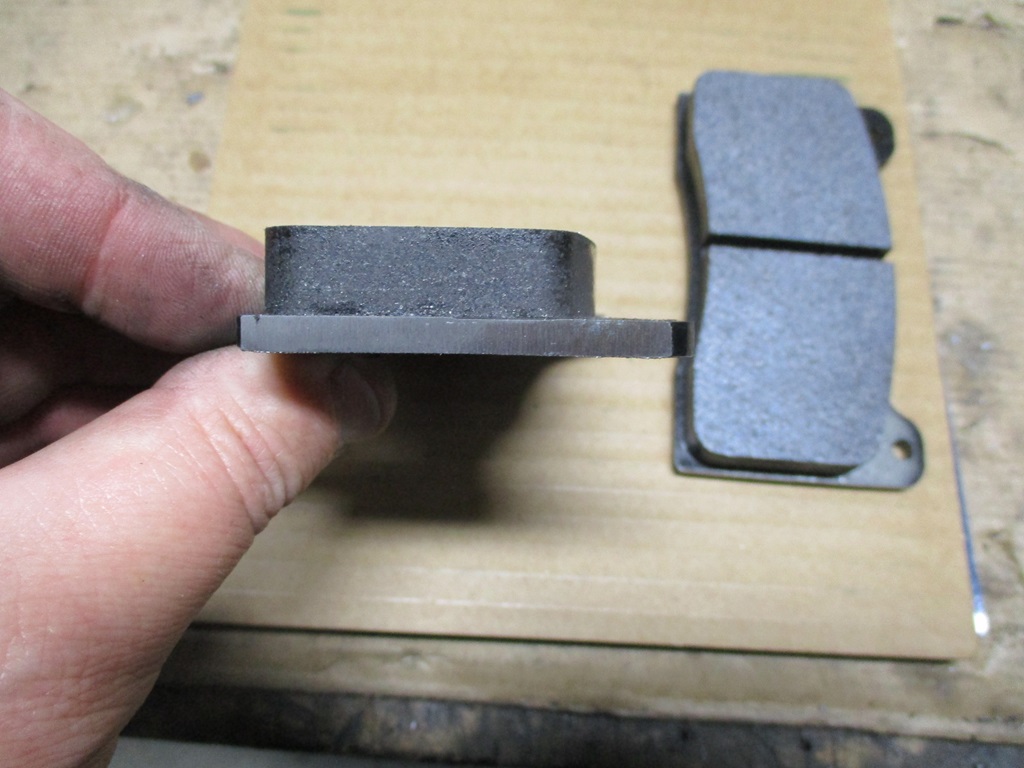
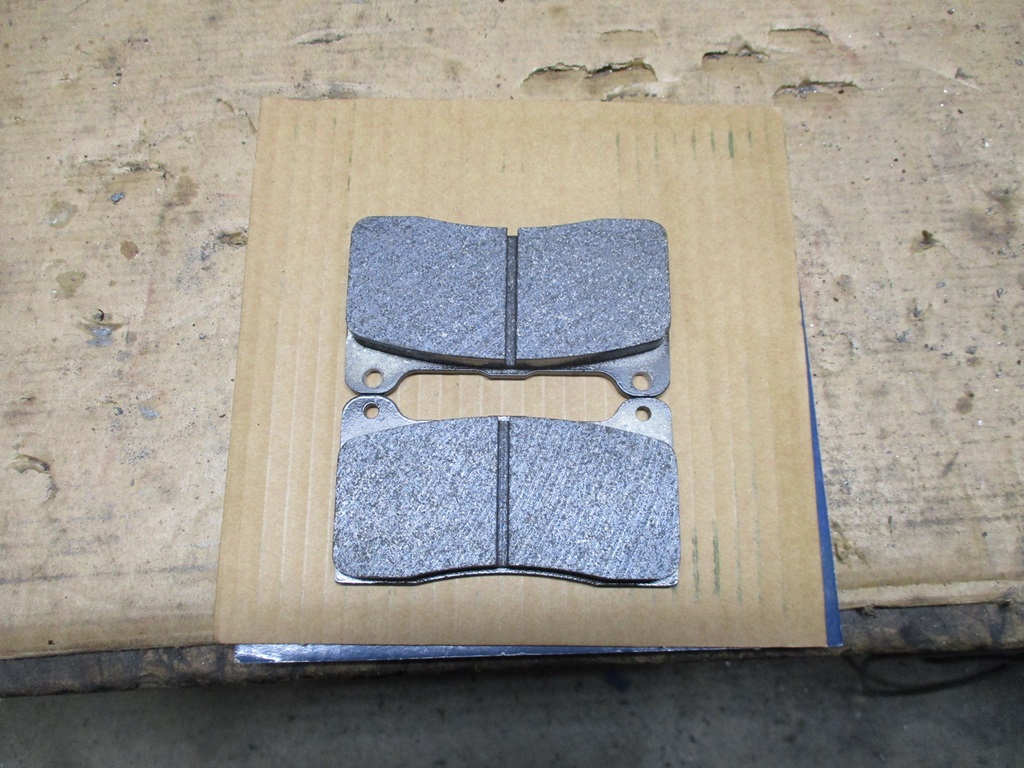
Now I am waiting for the 6mm bolts to arrive (the Fiero calipers need to be 10mm shorter than the Brembos). With the switch to bolts vs. split roll pins, I will be able to install the pad with the bridge installed, so while waiting, I will get the rotor and bridge installed and check to see if I need to make a spacer for the bridge (these pads could be a little too thick).
I got the front brakes nearly complete. Trimmed some M6 stainless bolts and lock washers to work for pad pins, pads installed, modified the new brake lines to clock the hose connection so it clears the upper a-arm, flushed the brake fluid, installed the hoses, did a gravity bleed on all 4 bleeders, and installed the Brembo stickers. A final bleed full brake system bleed will be completed once I am done with the rears.
Then I switched my focus to the rears. Jacked the rear of the car up, removed the rear caliper bridges, pads, and rotors and drilled new rotors for 5x100 pattern, and flushed the rear brake system.
Then I got bogged down making the hawks pads for a Wilwood caliper work with an 88 Fiero caliper. The two mods that are needed are:
1. Use a belt sander on the edges to bring the width down from 100.6mm to 100.0mm.
2. Drill out the holes for the pad retaining pin. Since I will be using 6mm stainless bolts for the pins, I drilled them out to 6mm which is slightly smaller than the split roll pin the 88 Fiero calipers use.
Now I am waiting for the 6mm bolts to arrive (the Fiero calipers need to be 10mm shorter than the Brembos). With the switch to bolts vs. split roll pins, I will be able to install the pad with the bridge installed, so while waiting, I will get the rotor and bridge installed and check to see if I need to make a spacer for the bridge (these pads could be a little too thick).
The following users liked this post:
ryeguy2006a (04-08-2024)
07-14-2024, 09:07 PM
#529
Time to catch up the thread. The swap now has 2797 miles on it, best tank was 27 mph, and it was an unofficial long hauler for the 2024 HRPT. It made it every venue w/o issue, but I didn't register soon enough to be an official long hauler.
Installed the hawk pads in the rear 88 calipers. Had to modify the pads for the larger pins/bolt as well as clearance for the slider mounts. Also the pads were a smidge too thick, so I made some 88 caliper bridge spacers from some 14ga scrap I had laying around.
The front Brembo setup and the hawk pads worked very well! The 2 piece rotors also came in, so I installed them. I ordered them with custom hats with the 5x100 pattern and Fiero hub bore. They are 15 lbs 8oz and the 1 piece rotors are 18lbs 10oz. Not sure 3lb 2oz is worth the $800+ upcharge, but if nothing else, they look cool!
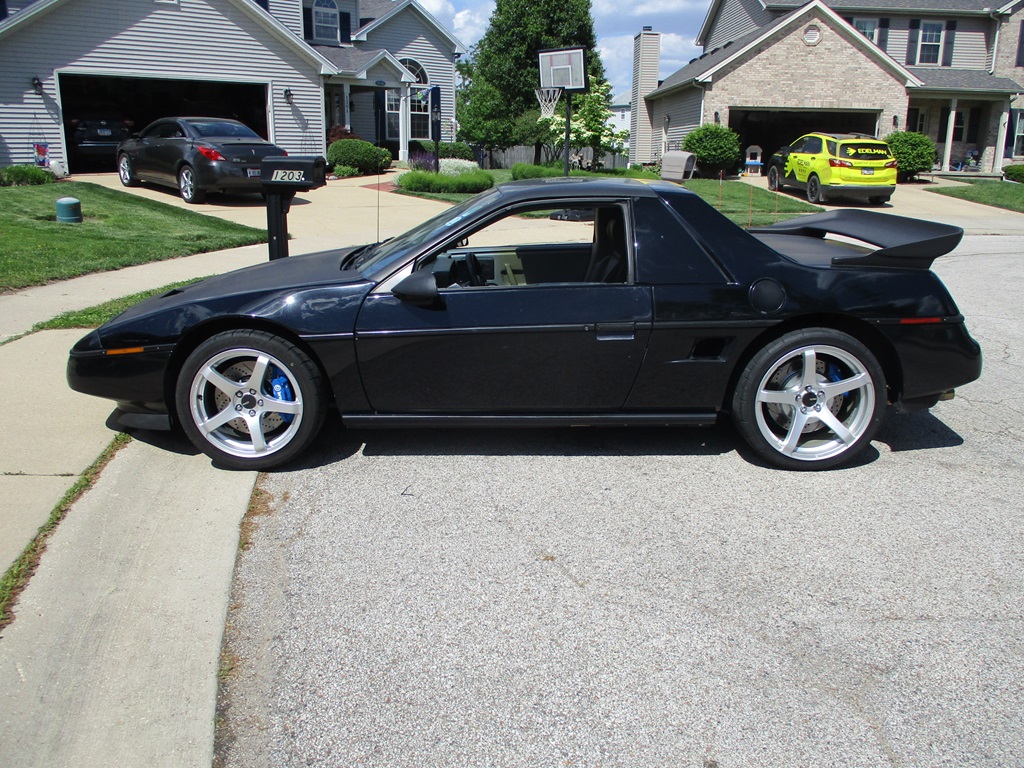
Here is a picture of the car out in front of the house:
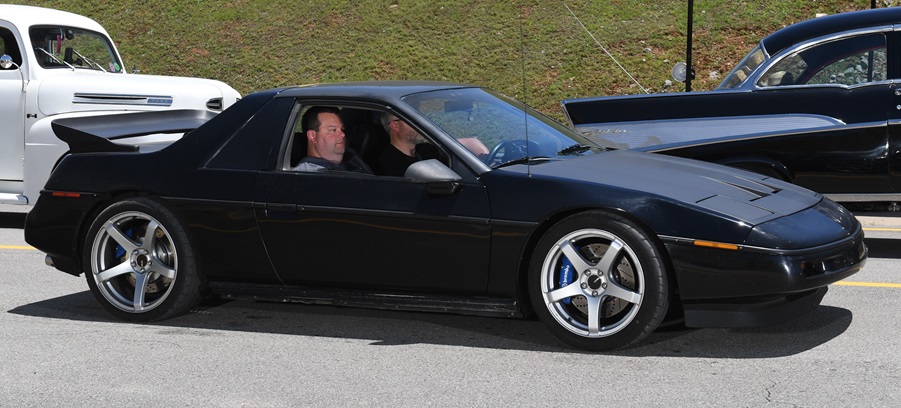
Here is one of the professional photos of Marty and I rolling into one of the HRPT venues:
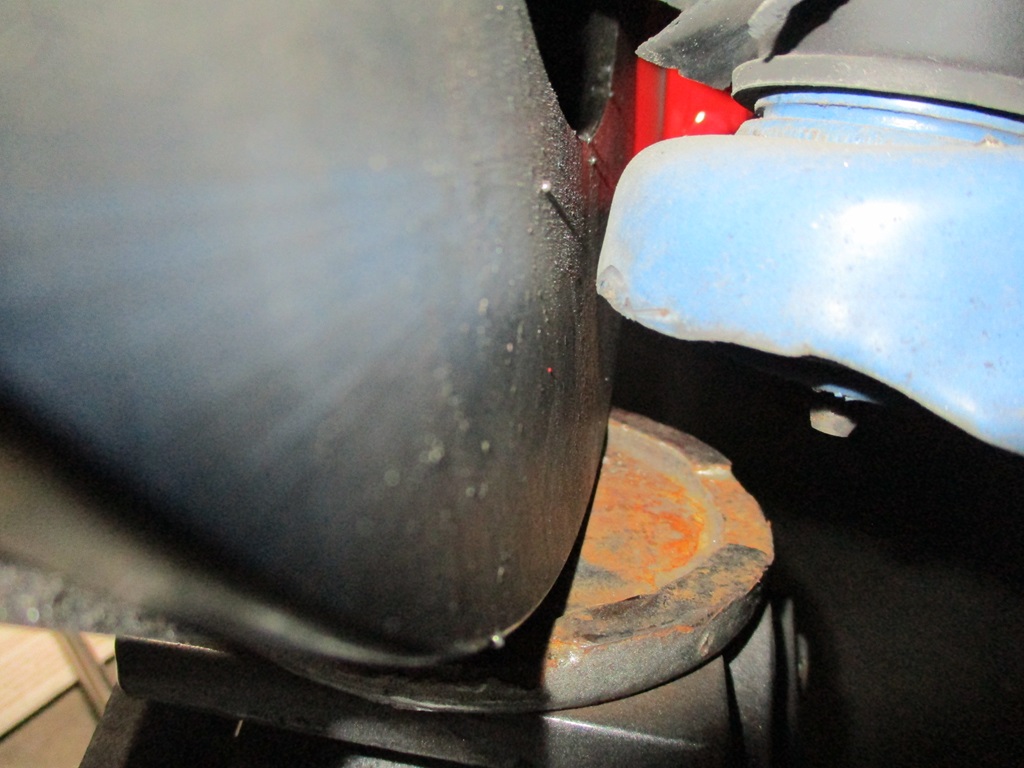
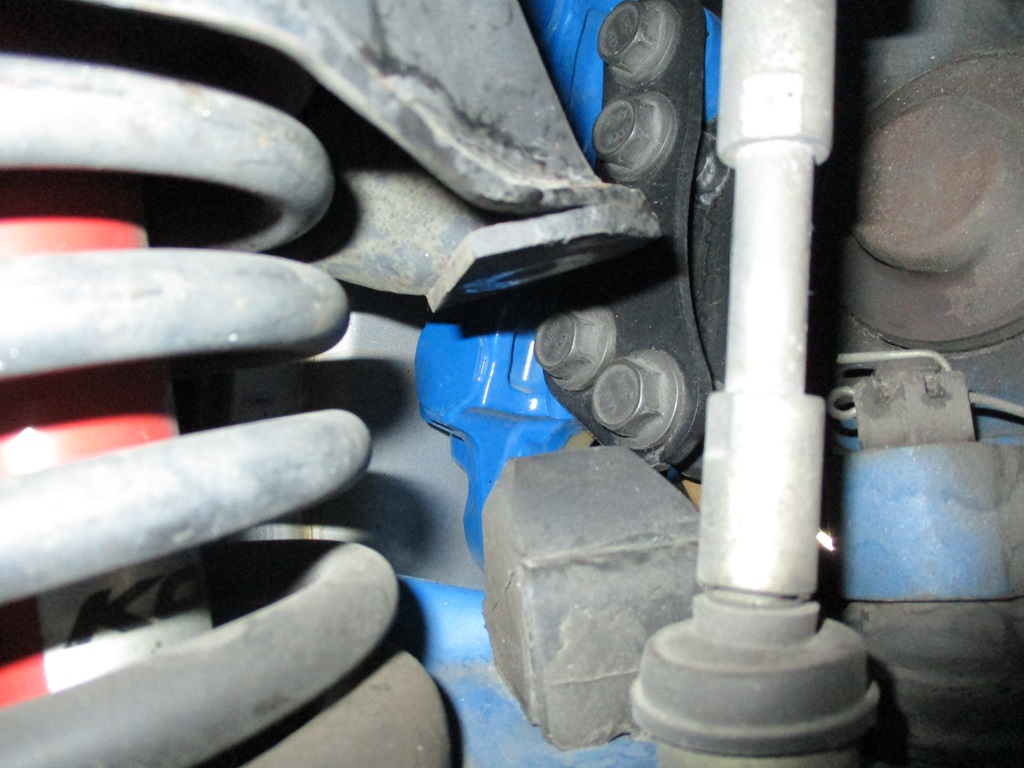
Installed shorter/softer bump stops. On the tour we bottomed out the front about 5-6 times on typical public roads. Here is the clearance to the trimmed down bump stops. It was less then this with the car loaded with 2 people and gear for 6 days.
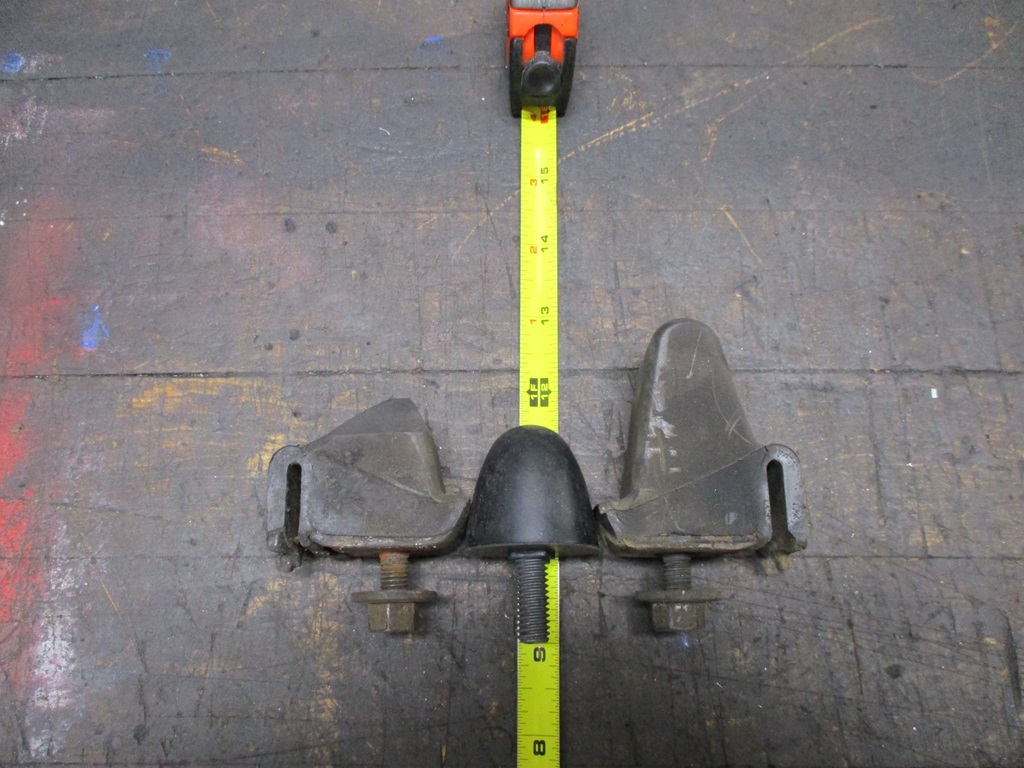
Here is the trimmed bump stop, the new one, and a stock one. To install this one does require drilling out the bump stop hole to 3/8".
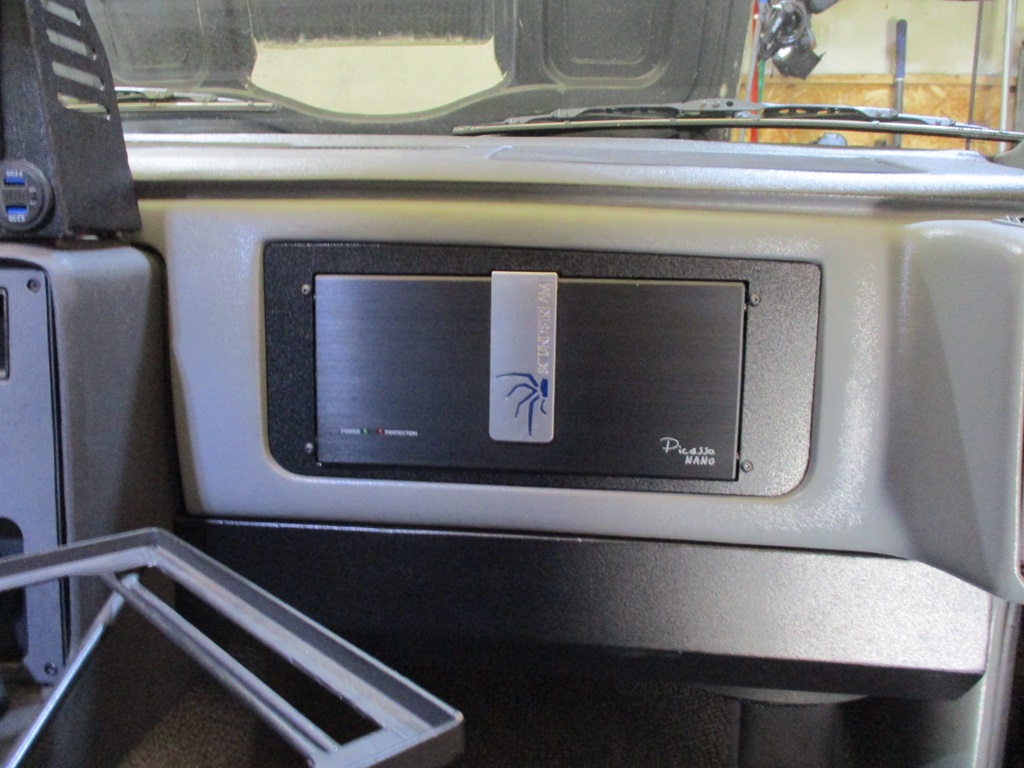
Very happy with the performance of the amplifier and the sub box, so finished up the trim plate to hide all the wires. Given the irregular shape of the opening, I made the first one out of card board, then 2 test plates in 16ga before making the final one.
The shifter pleather boot was severely worn and peeling. Picked up another VW shifter, drilled/tapped for M16x1.5mm and installed it. This is also a general over view pic of the interior with the steering wheel, relocated gauges, and the 2DIN radio/NAV unit. The 2DIN head unit will be getting replaced for several reasons, the main one being the touch screen is a little flakey and makes loading map routes challenging.

Installed new 115/hr @ 58 psi injectors. I had been running decapped injectors that flowed about 85 lb/hr @ 58 psi and suspect they were causing some of the idle quality issues with their flow performance no longer matching the specs in the calibration. These new ones come with all the injector specs to change in the tune and should allow the idle to be more consistent. These are also about the largest ones I can install in the E40 without doing a full scale of all air flow tables within the calibration.
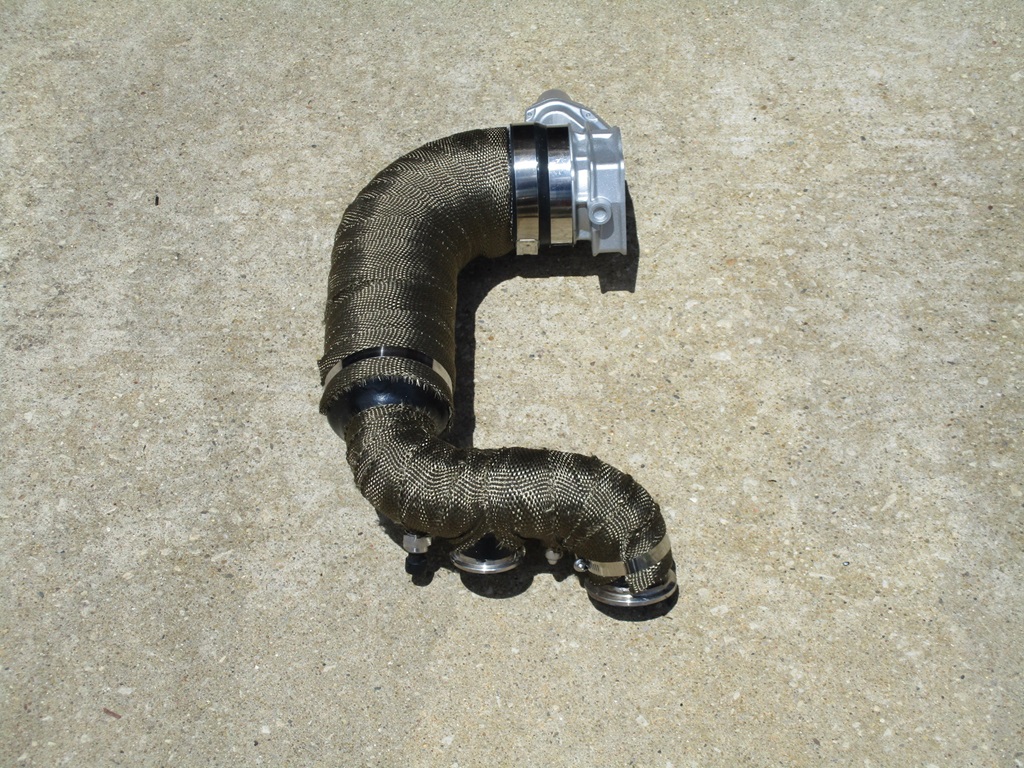
Removed and wrapped the warm air intake. Mainly as a test to see if it will lower the normal IAT temps when cruising and driving around time as the engine bay gets quite hot - probably 165 degrees+. Normal IAT temps during cruise on an 80 degree day are about 115 degrees, in town it climbs to about 125 degrees, and when in stop and go traffic they go up to 145 degrees. The issue is the engine bay is probably about 165 degrees. Under these conditions, the air is flowing slowly through the tubing and picking up the heat. At WOT, the air flow will increase, so there will be less time in the pipe to raise or lower the temps.
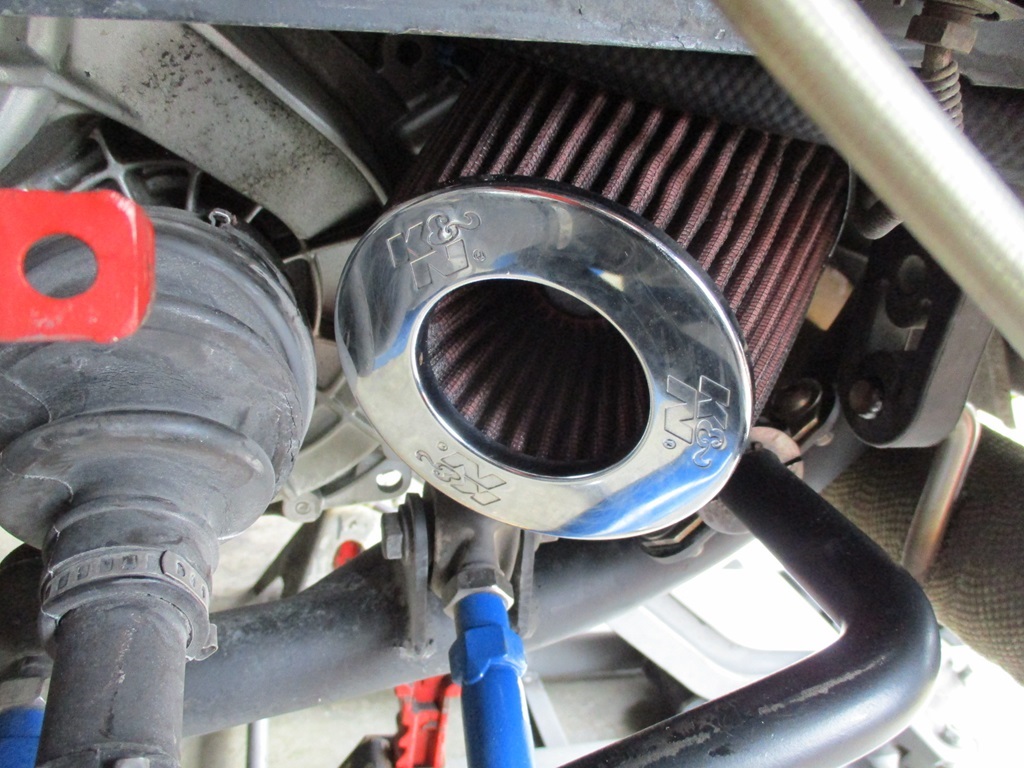
Also in the name of lower IAT temps, relocated the air filter from the compressor housing with a 45 degree piece of aluminum so it is more under the frame rail and further into the wheel well.
Next on the mission to reduce IAT temps, the heat shields around the turbo turbine housing. So the car went on jacks stands, and the cradle was rocked back to gain the needed access.
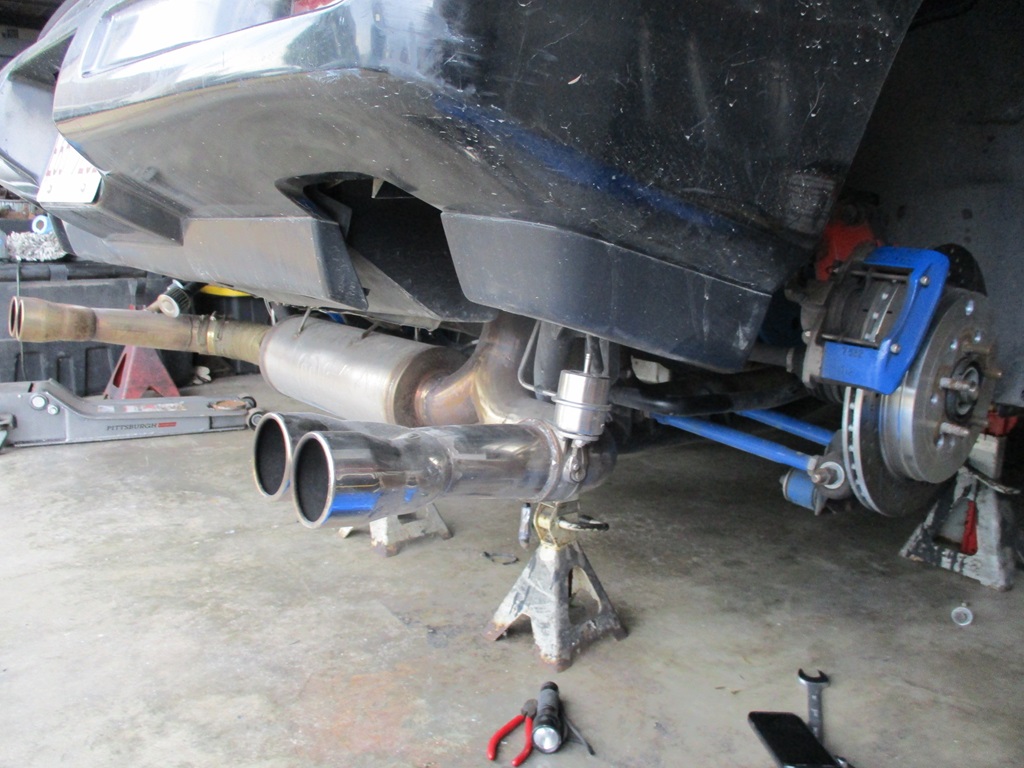
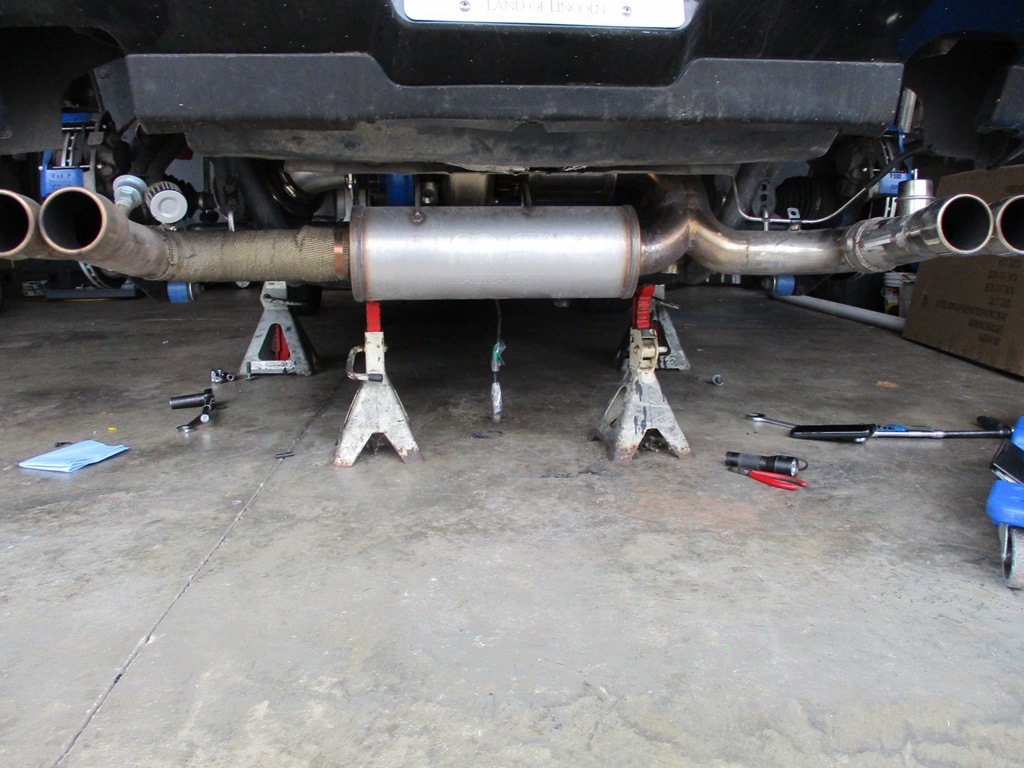
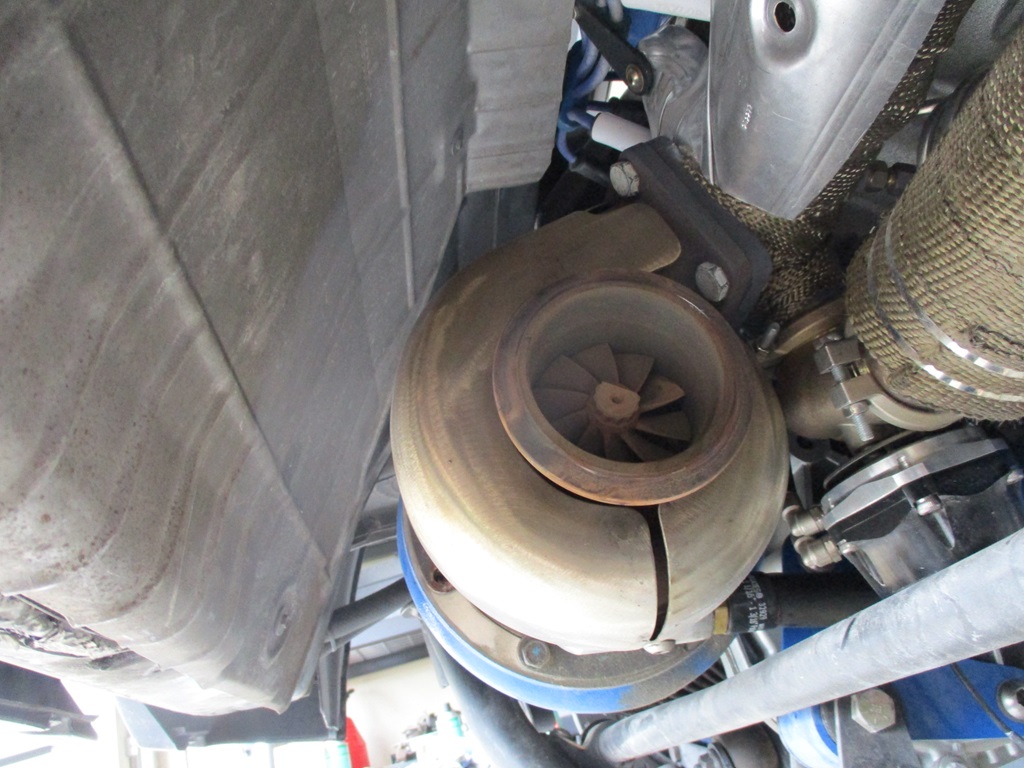
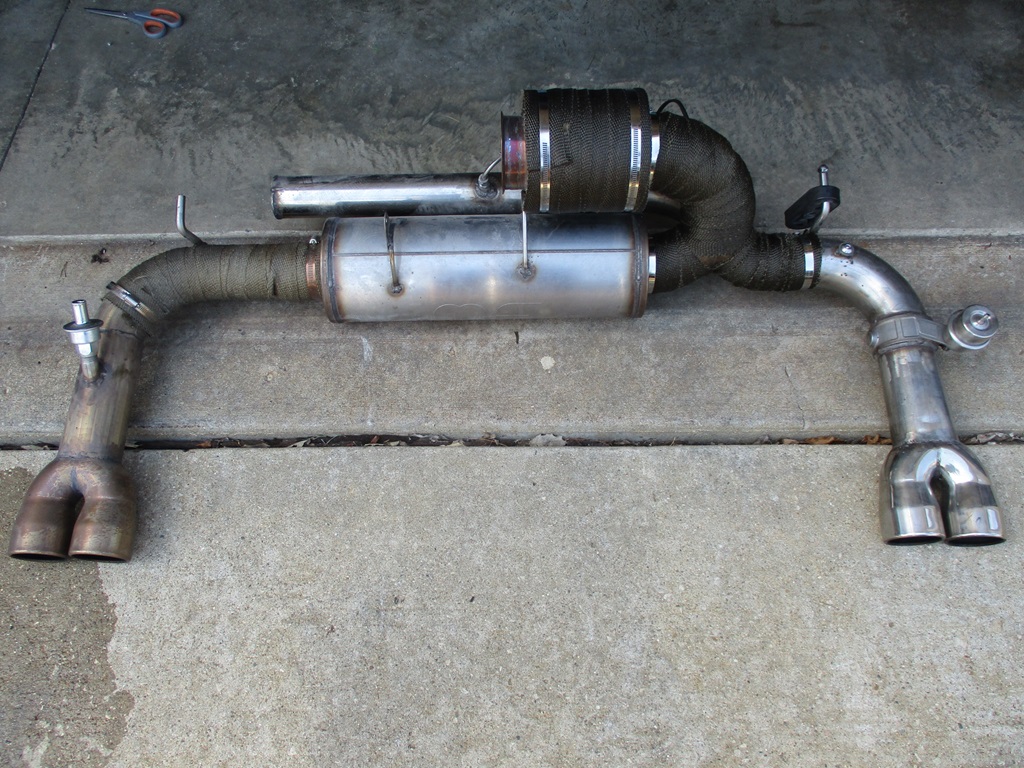
Muffler system out. It is pretty obvious that it has been hot. Some of my tuning runs the EGT reaches 1400 degrees, but quickly drops back down when I get out of it. You can also see where I had previously heat wrapped the tail pipe that is closest to the air filter. You can also see the passenger side tip is rarely used. The cutout opens under boost, so it hasn't seen as many sustained heat runs as the driver side has.

Turbo with the stainless steel heat shields:
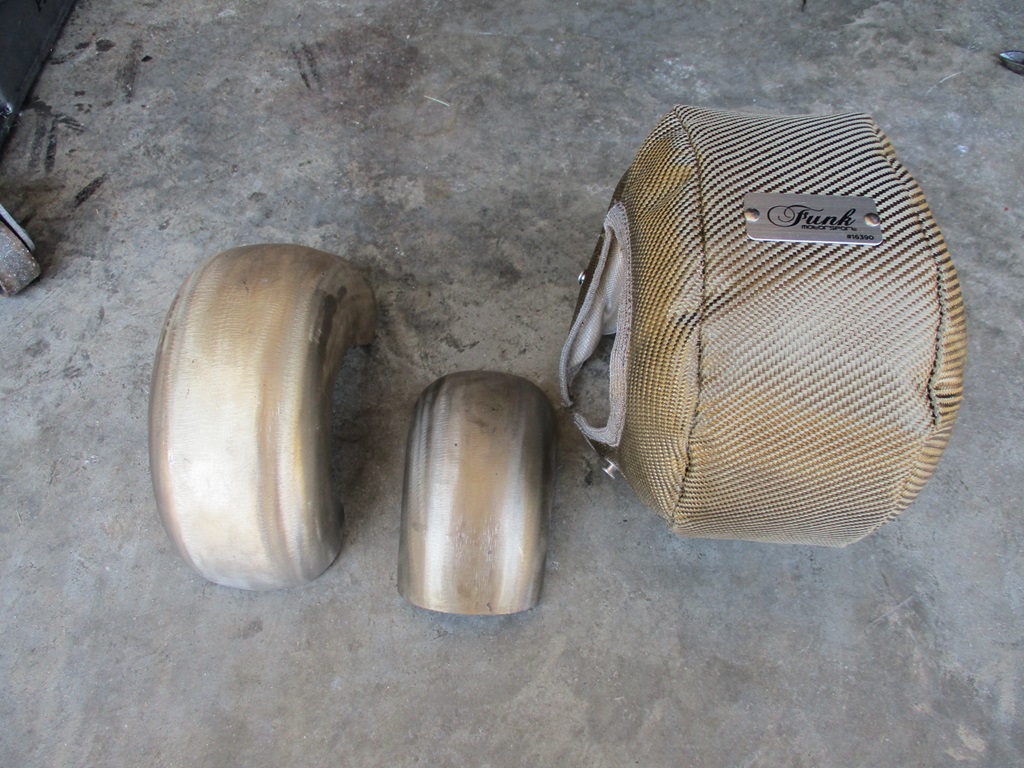
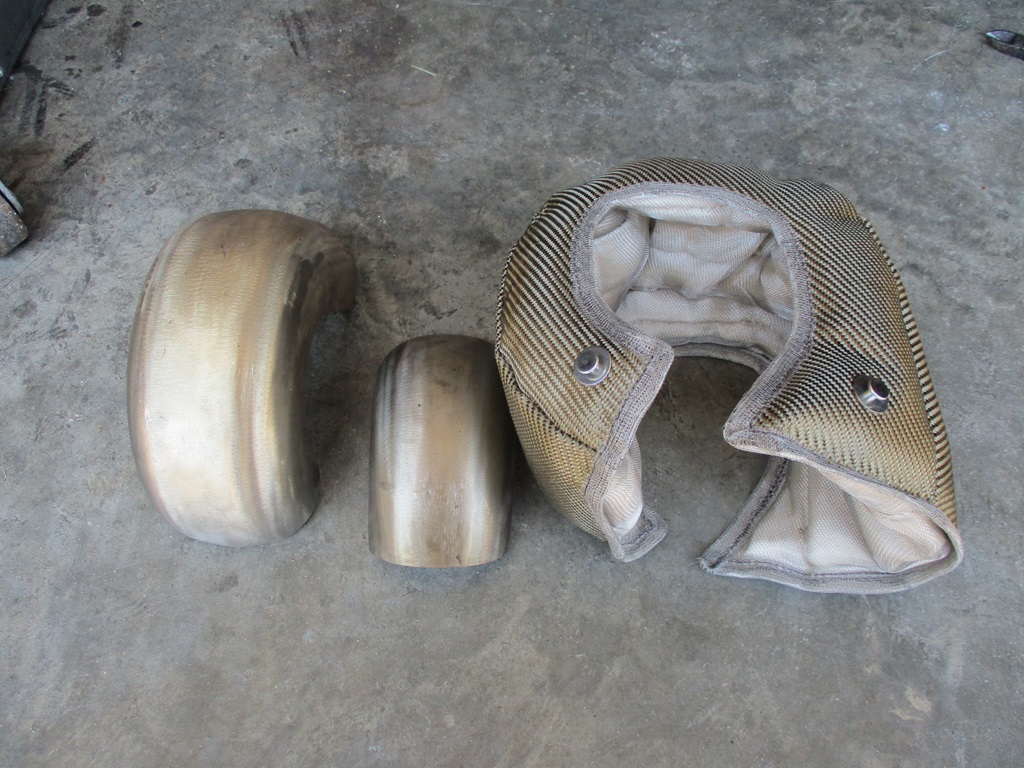
Heat shields removed and next to turbo blanket. The turbo blanket is from Funk Motorsports in the UK. It is about 3 times thicker than the cheap ebay/amazon turbo blankets (and more than 3 times more expensive). You can also see the heat shields had started to discolor, but not near as much as the exhaust pipe.
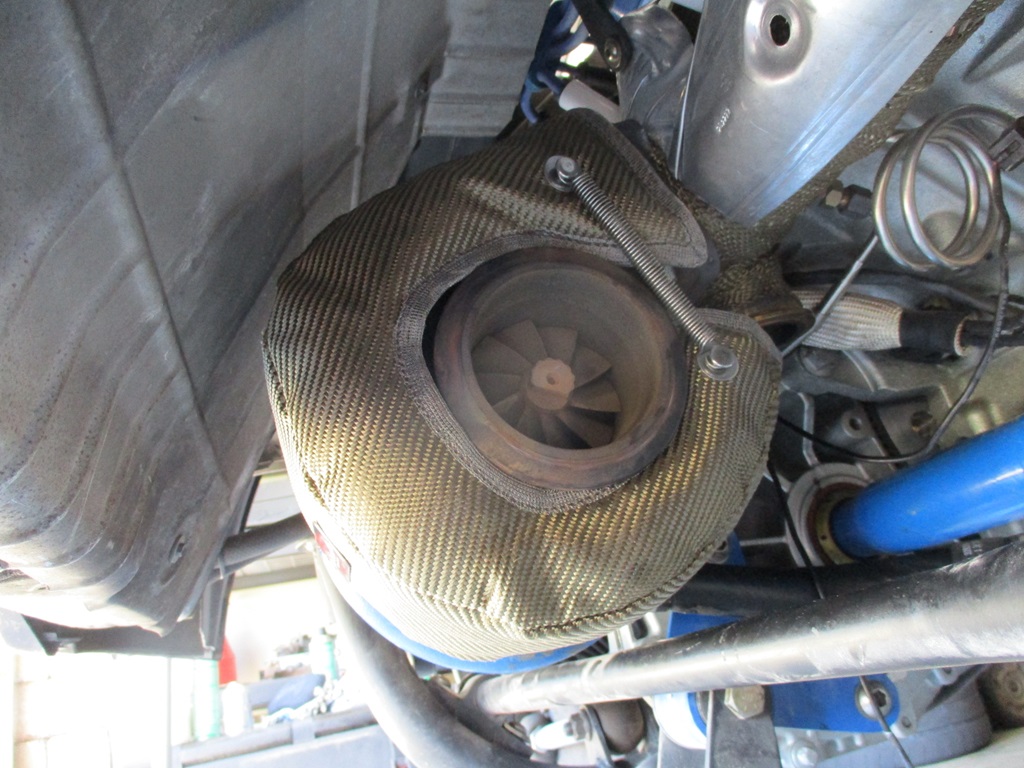
Turbo blanket installed:
Also went ahead and wrapped the 3.5" muffler, the 3 1/2" down pipe to the 3" Y and to the 3" muffler. The body of the 3" muffler doesn't get that hot, so I left it natural. The new heat wrap is darker because it is still wet. I soaked it in water before wrapping.
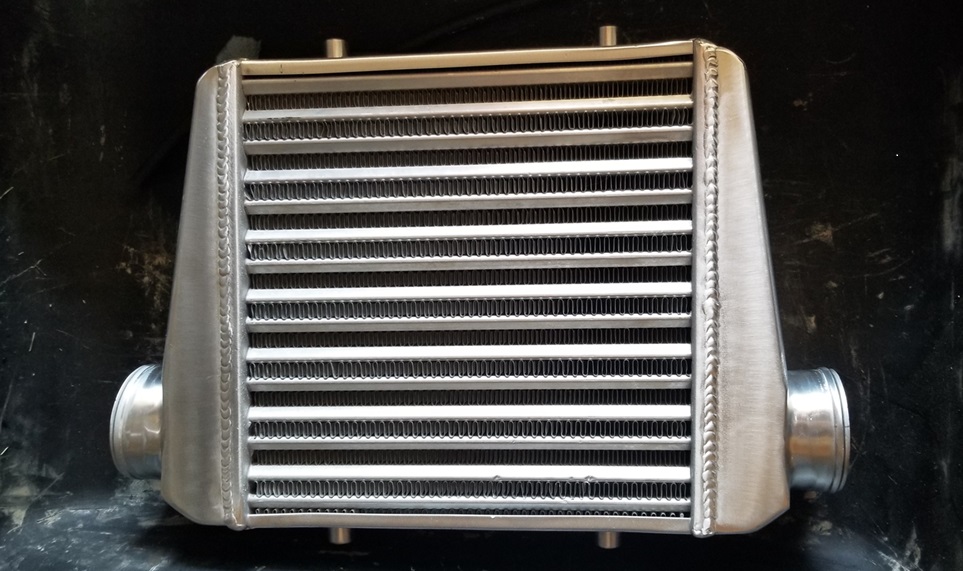
Also picked up a cheap intercooler. The hose nipples need to be cut off and repositioned. Once they are cut off, it will be 15x12x4 and should fit under the driver side decklid vent. Once it is there, I will add a fan plus seal the intercooler from the engine bay. If this works out, I will likely drop the $$$ on a real intercooler core and have it fabricated.
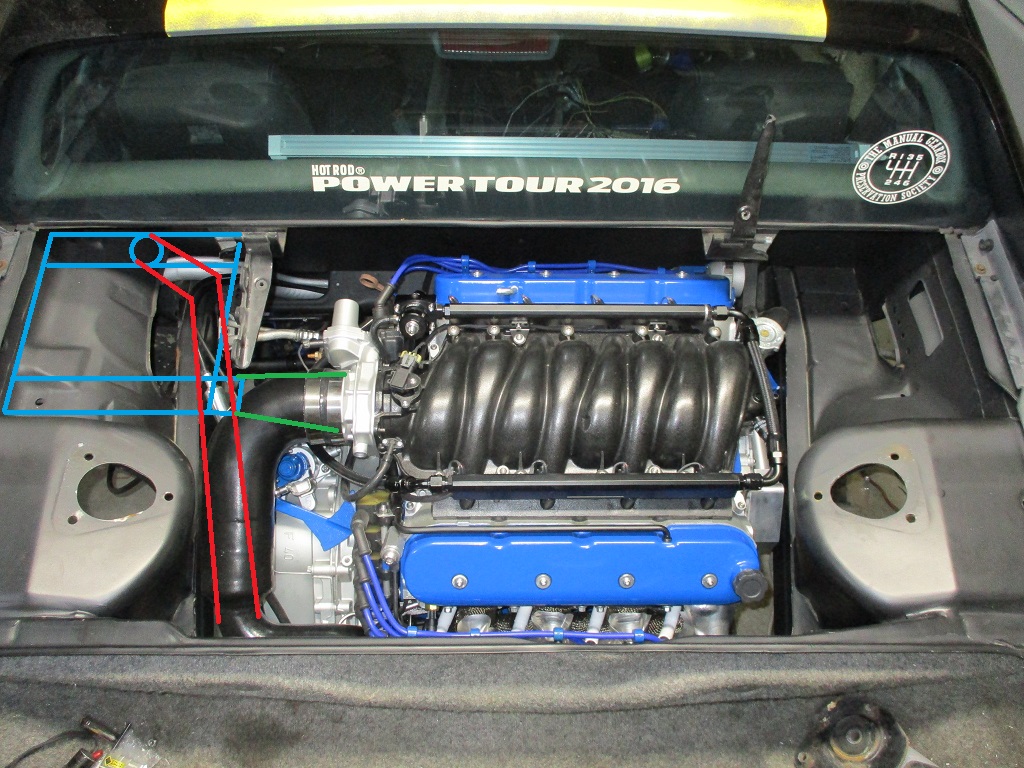
This is the general concept that was discussed several pages back.
Installed the hawk pads in the rear 88 calipers. Had to modify the pads for the larger pins/bolt as well as clearance for the slider mounts. Also the pads were a smidge too thick, so I made some 88 caliper bridge spacers from some 14ga scrap I had laying around.
The front Brembo setup and the hawk pads worked very well! The 2 piece rotors also came in, so I installed them. I ordered them with custom hats with the 5x100 pattern and Fiero hub bore. They are 15 lbs 8oz and the 1 piece rotors are 18lbs 10oz. Not sure 3lb 2oz is worth the $800+ upcharge, but if nothing else, they look cool!
Here is a picture of the car out in front of the house:
Here is one of the professional photos of Marty and I rolling into one of the HRPT venues:
Installed shorter/softer bump stops. On the tour we bottomed out the front about 5-6 times on typical public roads. Here is the clearance to the trimmed down bump stops. It was less then this with the car loaded with 2 people and gear for 6 days.
Here is the trimmed bump stop, the new one, and a stock one. To install this one does require drilling out the bump stop hole to 3/8".
Very happy with the performance of the amplifier and the sub box, so finished up the trim plate to hide all the wires. Given the irregular shape of the opening, I made the first one out of card board, then 2 test plates in 16ga before making the final one.
The shifter pleather boot was severely worn and peeling. Picked up another VW shifter, drilled/tapped for M16x1.5mm and installed it. This is also a general over view pic of the interior with the steering wheel, relocated gauges, and the 2DIN radio/NAV unit. The 2DIN head unit will be getting replaced for several reasons, the main one being the touch screen is a little flakey and makes loading map routes challenging.
Installed new 115/hr @ 58 psi injectors. I had been running decapped injectors that flowed about 85 lb/hr @ 58 psi and suspect they were causing some of the idle quality issues with their flow performance no longer matching the specs in the calibration. These new ones come with all the injector specs to change in the tune and should allow the idle to be more consistent. These are also about the largest ones I can install in the E40 without doing a full scale of all air flow tables within the calibration.
Removed and wrapped the warm air intake. Mainly as a test to see if it will lower the normal IAT temps when cruising and driving around time as the engine bay gets quite hot - probably 165 degrees+. Normal IAT temps during cruise on an 80 degree day are about 115 degrees, in town it climbs to about 125 degrees, and when in stop and go traffic they go up to 145 degrees. The issue is the engine bay is probably about 165 degrees. Under these conditions, the air is flowing slowly through the tubing and picking up the heat. At WOT, the air flow will increase, so there will be less time in the pipe to raise or lower the temps.
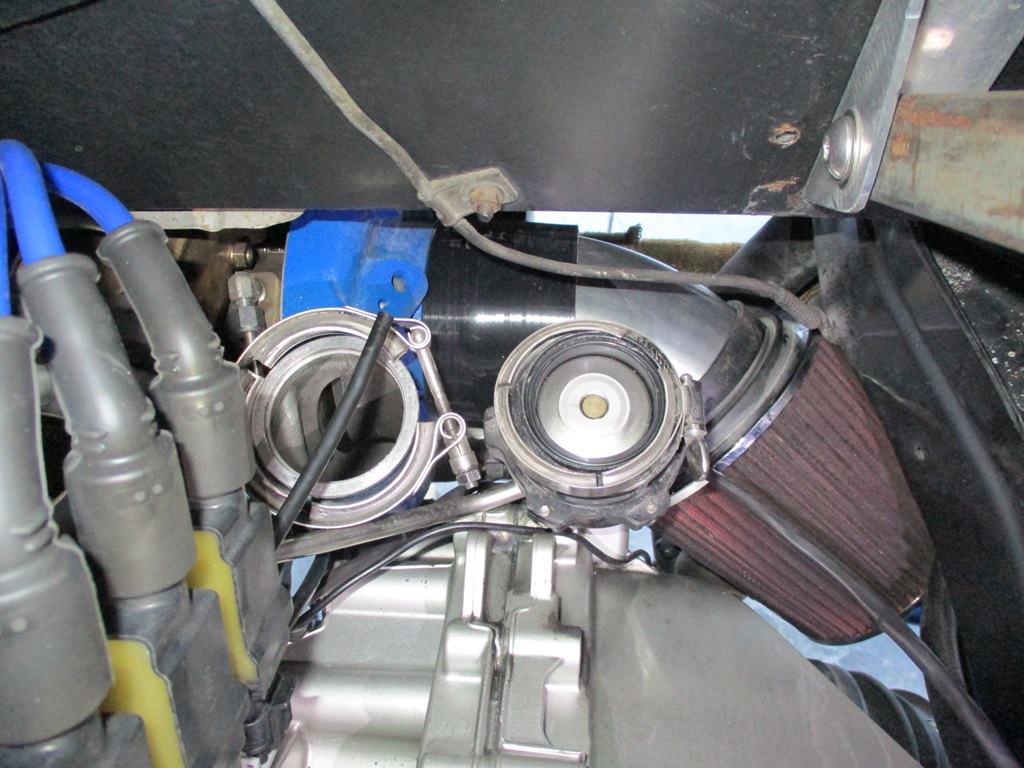
Also in the name of lower IAT temps, relocated the air filter from the compressor housing with a 45 degree piece of aluminum so it is more under the frame rail and further into the wheel well.
Next on the mission to reduce IAT temps, the heat shields around the turbo turbine housing. So the car went on jacks stands, and the cradle was rocked back to gain the needed access.
Muffler system out. It is pretty obvious that it has been hot. Some of my tuning runs the EGT reaches 1400 degrees, but quickly drops back down when I get out of it. You can also see where I had previously heat wrapped the tail pipe that is closest to the air filter. You can also see the passenger side tip is rarely used. The cutout opens under boost, so it hasn't seen as many sustained heat runs as the driver side has.
Turbo with the stainless steel heat shields:
Heat shields removed and next to turbo blanket. The turbo blanket is from Funk Motorsports in the UK. It is about 3 times thicker than the cheap ebay/amazon turbo blankets (and more than 3 times more expensive). You can also see the heat shields had started to discolor, but not near as much as the exhaust pipe.
Turbo blanket installed:
Also went ahead and wrapped the 3.5" muffler, the 3 1/2" down pipe to the 3" Y and to the 3" muffler. The body of the 3" muffler doesn't get that hot, so I left it natural. The new heat wrap is darker because it is still wet. I soaked it in water before wrapping.
Also picked up a cheap intercooler. The hose nipples need to be cut off and repositioned. Once they are cut off, it will be 15x12x4 and should fit under the driver side decklid vent. Once it is there, I will add a fan plus seal the intercooler from the engine bay. If this works out, I will likely drop the $$$ on a real intercooler core and have it fabricated.
This is the general concept that was discussed several pages back.
The following 5 users liked this post by fieroguru:
AAIIIC (Yesterday), Jimbo1367 (Yesterday), JoshHefnerX (07-14-2024), Project GatTagO (07-14-2024), ryeguy2006a (Today)