


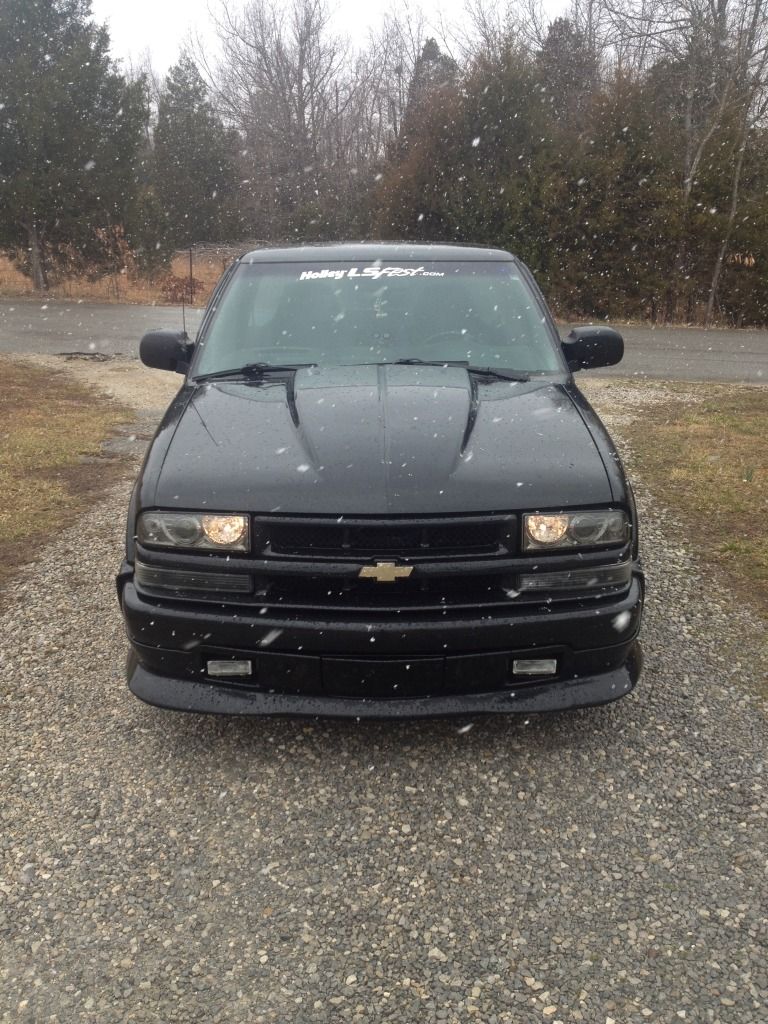
LS1 Swapped 68' Camaro
Great job! Your moving right along. I noticed you've got the driver side fuel rail cover with cut outs for feed and return line and the returnless fuel rail on the motor. Are you changing the rail out? I would return the cover and get the one for that fuel rail. Jegs carries the right corvette cover for you. I just put a set on mine.

Thread Starter
Staging Lane
Joined: Sep 2012
Posts: 87
Likes: 0
From: Kentucky
Great job! Your moving right along. I noticed you've got the driver side fuel rail cover with cut outs for feed and return line and the returnless fuel rail on the motor. Are you changing the rail out? I would return the cover and get the one for that fuel rail. Jegs carries the right corvette cover for you. I just put a set on mine.
Here's a link to the drivers cover from Jegs if you decide you need the single hole cover
http://www.jegs.com/i/Chevrolet+Perf...61503/10002/-1
http://www.jegs.com/i/Chevrolet+Perf...61503/10002/-1
Thread Starter
Staging Lane
Joined: Sep 2012
Posts: 87
Likes: 0
From: Kentucky
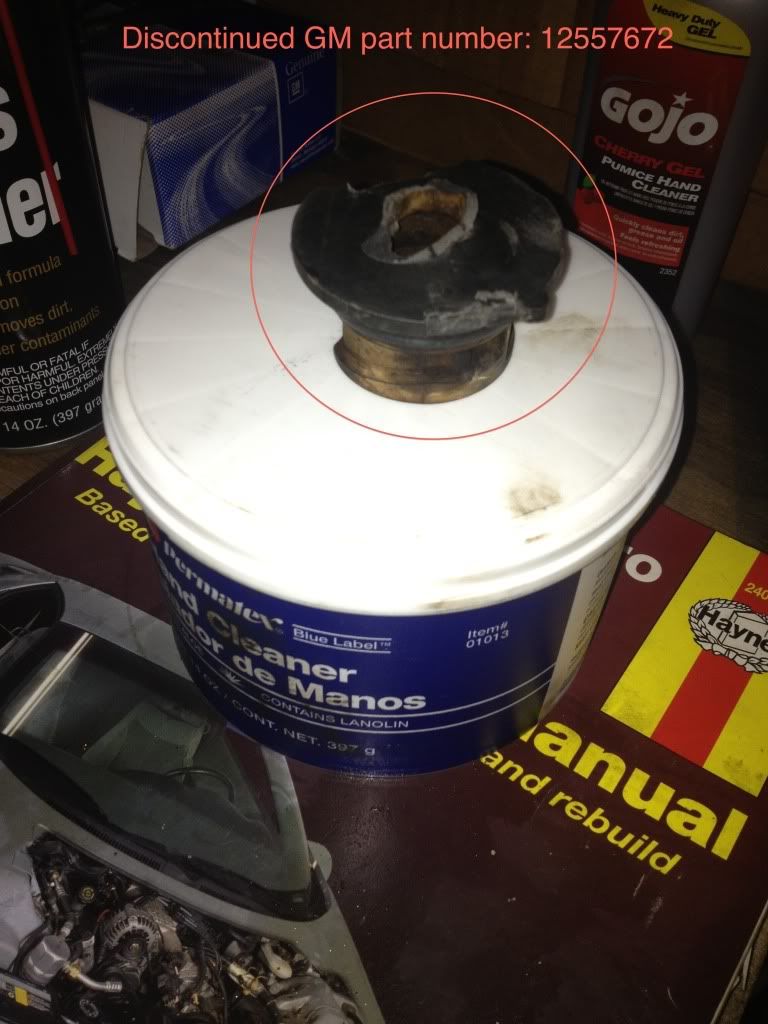
Does anyone know where I can find this PCV piece that comes out the passenger side valve cover? If someone has a spare for sale I would buy it but I haven't found anything. Every GM dealer I have called that I can think of tells me this is discontinued and nobody has it. I broke it and need a new one, or anybody have an idea to substitute something else out? Thanks.
Last edited by BlackLS1Camaro; Aug 4, 2017 at 02:27 PM.
Thread Starter
Staging Lane
Joined: Sep 2012
Posts: 87
Likes: 0
From: Kentucky
Here is a different picture of it, I believe it's number 273 on this GM engine schematic.

Any help at all is very appreciated. I need to find a way to seal this valve cover off by rigging up something different or buying a new PCV piece.
Any help at all is very appreciated. I need to find a way to seal this valve cover off by rigging up something different or buying a new PCV piece.
Last edited by BlackLS1Camaro; Aug 4, 2017 at 02:27 PM.
LS1 Tech Stories
The Best V8 Stories One Small Block at Time

Topdon ONE vs. Artidiag 800 BT2: Which is the Diagnostic Tablet For You?
Pouria Savadkouei
Gas Monkey Built a 6-Wheel Ferrari Testarossa With a Corvette LT4 Engine
Verdad Gallardo
7 Most Reliable High-Performance Engines GM Has Ever Built
Verdad Gallardo
Amazing '71 Camaro Restomod Is Modern Muscle Car Under the Skin
Verdad Gallardo
6 Common C5 Corvette Failures and What's Involved In Repairing Them
Pouria Savadkouei
Retro Modern Bandit Pontiac Trans AM Comes With Burt Reynolds' Autograph
Verdad Gallardo
Top 10 Greatest Cadillac V Series Performance Models Ever, Ranked
Pouria Savadkouei
Top 10 Most Powerful Chevy Trucks Ever Made!

Hennessey's New Supercharged Silverado ZR2 Has 700 HP
Verdad Gallardo
TECH Junkie
Joined: Dec 2005
Posts: 3,092
Likes: 11
You might be able to put a brass barb hose fitting in there. I would cut off the old remaining piece and make it flush with the rest of the part. Then drill and tap a thread for the fitting in the center hole. The thread could be 1/4 pipe or what ever size fits best. It could even be a 90 degree brass barb hose fitting depending on what was in there to begin with.
Thread Starter
Staging Lane
Joined: Sep 2012
Posts: 87
Likes: 0
From: Kentucky
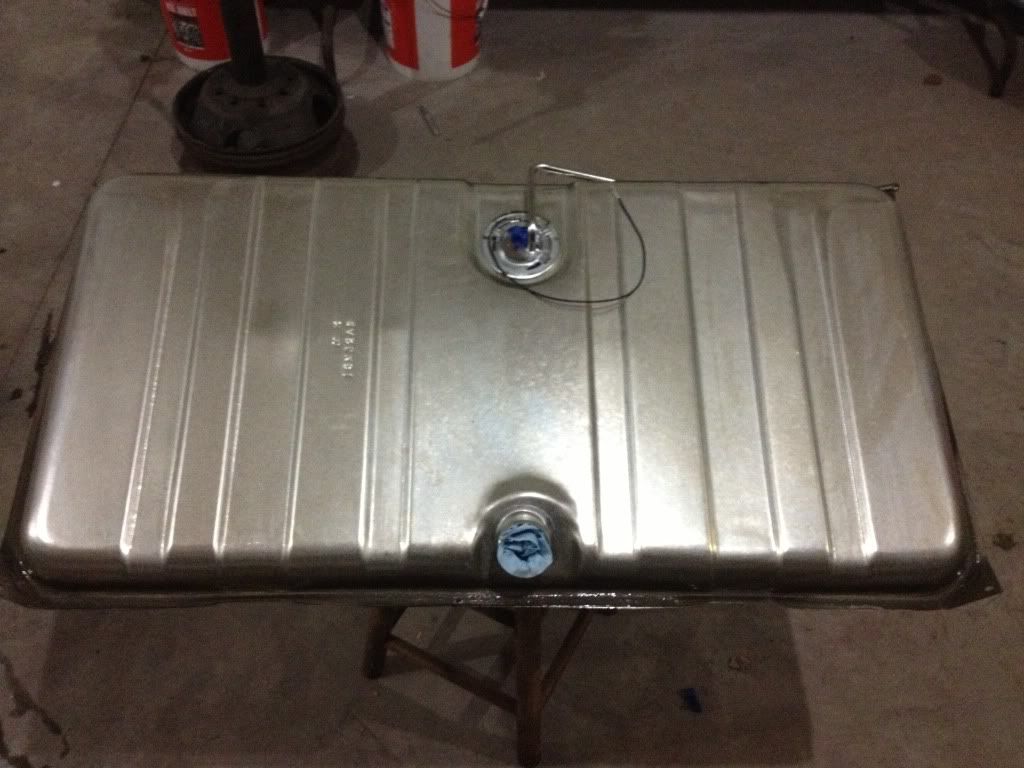
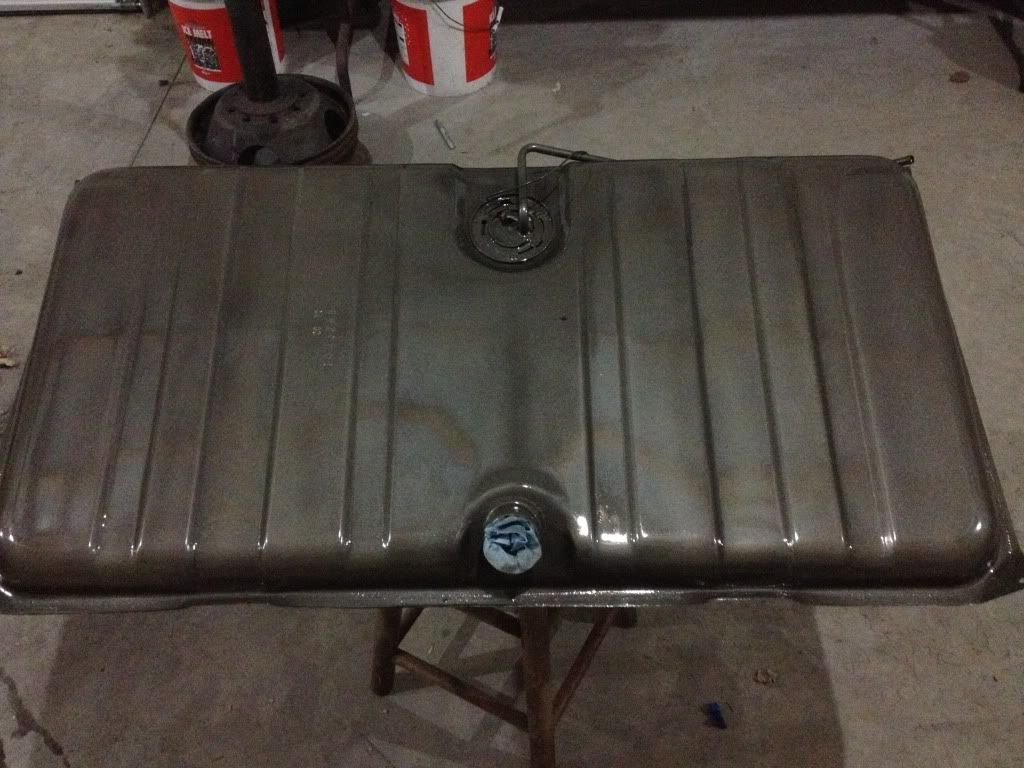
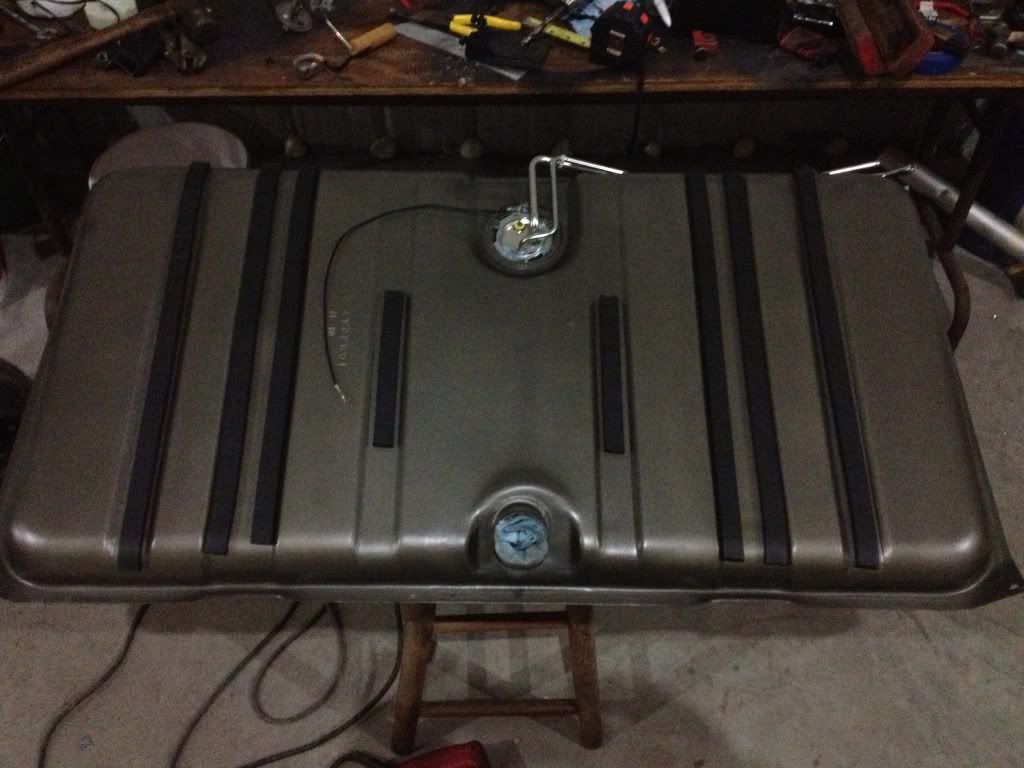
Now that the Radiator was mounted up I started to work on the fuel some... I will really go into detail on my next post but here's what I've started with...
New steel tank... painted with engine enamel.
99' Corvette Filter/Regulator combo.

I didn't feel like buying a male fuel line fitting for $20 so I cut one off of the parts truck S10 I had. Luckily it was 3/8 and had a mounting tab I could use.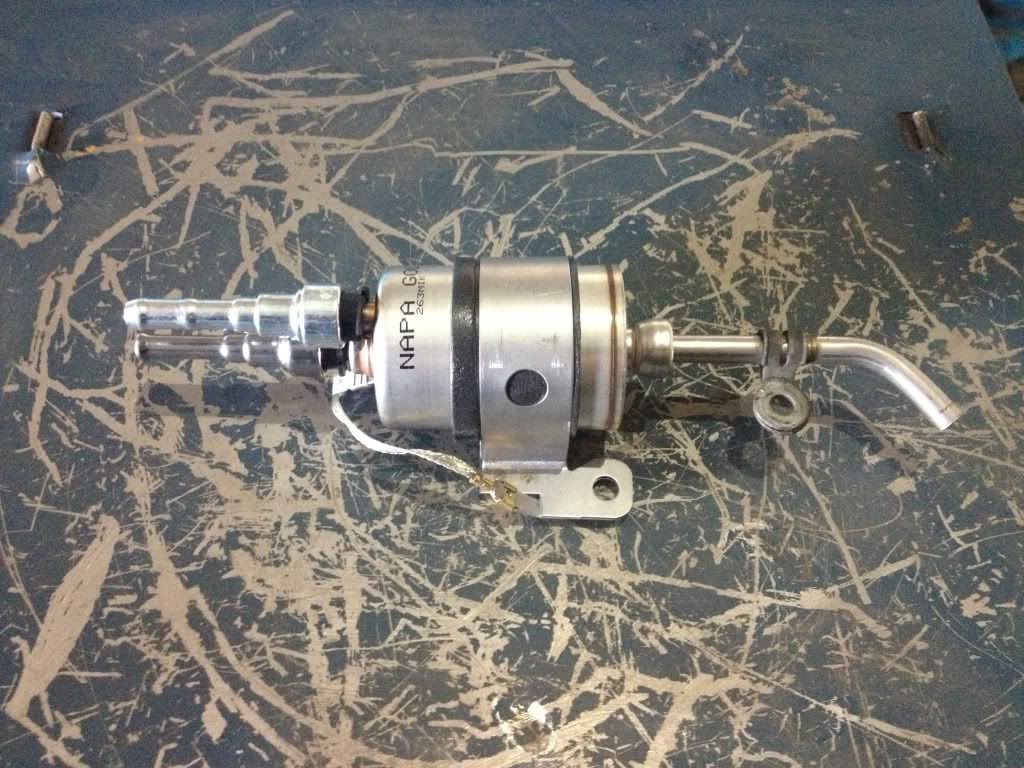
I took apart my old sending unit to see why my gas gauge only partially worked and found the reading pointer was broken at the end. Very neat how the mechanical ones work compared to the chips in the newer model vehicles. Same concept.
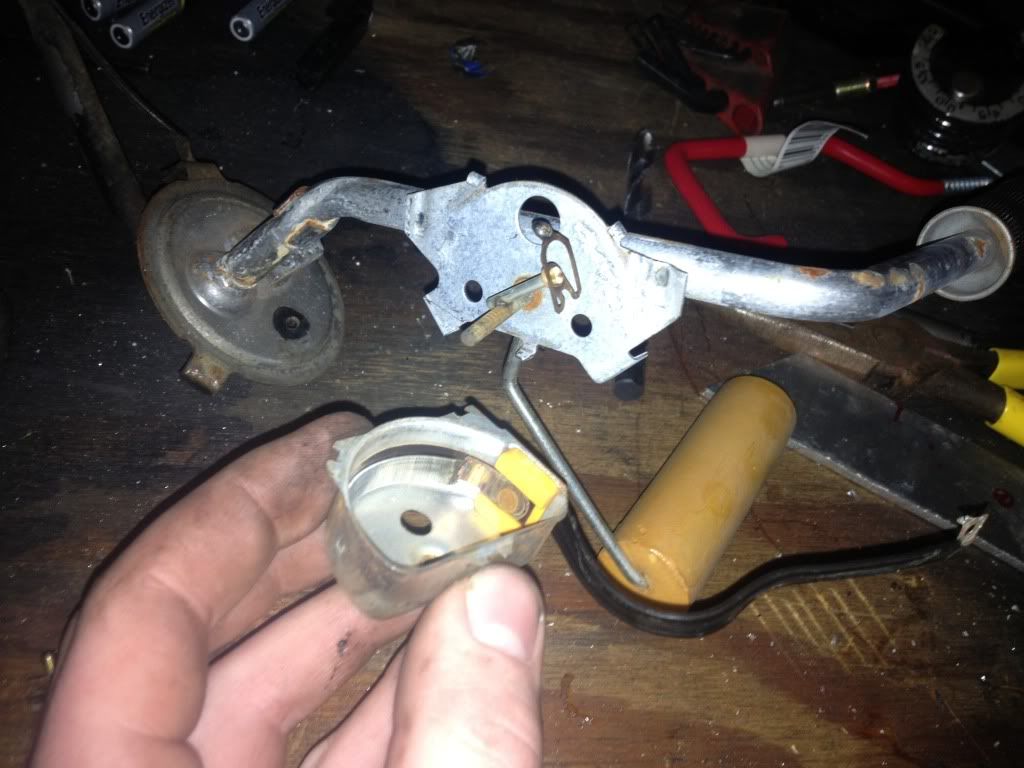
I bought the one feed replacement sending unit to keep the factory gauge and I wish I knew about the duel line unit because I had to make a return for the fuel. My dad helped me try to solder the steel like the otherside was but no luck. I am going to tig weld it and hope for the best. Might end up buying the duel line sending unit.
Like I said, I will go into fuel on the next post so don't be let down. And, as promised I will do a write up on the headers but it's just been several delays. Should be getting back on track soon. Time and money.
New steel tank... painted with engine enamel.
99' Corvette Filter/Regulator combo.
I didn't feel like buying a male fuel line fitting for $20 so I cut one off of the parts truck S10 I had. Luckily it was 3/8 and had a mounting tab I could use.
I took apart my old sending unit to see why my gas gauge only partially worked and found the reading pointer was broken at the end. Very neat how the mechanical ones work compared to the chips in the newer model vehicles. Same concept.
I bought the one feed replacement sending unit to keep the factory gauge and I wish I knew about the duel line unit because I had to make a return for the fuel. My dad helped me try to solder the steel like the otherside was but no luck. I am going to tig weld it and hope for the best. Might end up buying the duel line sending unit.
Like I said, I will go into fuel on the next post so don't be let down. And, as promised I will do a write up on the headers but it's just been several delays. Should be getting back on track soon. Time and money.
Last edited by BlackLS1Camaro; Aug 4, 2017 at 02:30 PM. Reason: Grammar error

Staging Lane
Joined: Oct 2008
Posts: 62
Likes: 0
Great project. Can't wait to see it on the road.
How much firewall clearance do you have with the motor mount adapters you made? Are you able to get a ratchet & short socket on the the bell housing bolts or only a wrench?
I am in the planning stages to do an LS swap into my 68 Camaro instead of spending the money freshening up a tired old 396. I am leaning toward a 5.3 turbo build.
Already started working on making a set of header flanges to convert a set of big block headers to fit and made up some motor mount adapters to work with a set of small block frame stands. Not sure if I will need to make new mount plates or not. I would like to keep the transmission in the same location as stock so I don't have to build a new driveshaft or relocate my transmission crossmember. I build my plates off of some dimensions I found that may not be correct. We will see. Hopefully this summer.
Thread Starter
Staging Lane
Joined: Sep 2012
Posts: 87
Likes: 0
From: Kentucky
Great project. Can't wait to see it on the road.
How much firewall clearance do you have with the motor mount adapters you made? Are you able to get a ratchet & short socket on the the bell housing bolts or only a wrench?
I am in the planning stages to do an LS swap into my 68 Camaro instead of spending the money freshening up a tired old 396. I am leaning toward a 5.3 turbo build.
Already started working on making a set of header flanges to convert a set of big block headers to fit and made up some motor mount adapters to work with a set of small block frame stands. Not sure if I will need to make new mount plates or not. I would like to keep the transmission in the same location as stock so I don't have to build a new driveshaft or relocate my transmission crossmember. I build my plates off of some dimensions I found that may not be correct. We will see. Hopefully this summer.
How much firewall clearance do you have with the motor mount adapters you made? Are you able to get a ratchet & short socket on the the bell housing bolts or only a wrench?
I am in the planning stages to do an LS swap into my 68 Camaro instead of spending the money freshening up a tired old 396. I am leaning toward a 5.3 turbo build.
Already started working on making a set of header flanges to convert a set of big block headers to fit and made up some motor mount adapters to work with a set of small block frame stands. Not sure if I will need to make new mount plates or not. I would like to keep the transmission in the same location as stock so I don't have to build a new driveshaft or relocate my transmission crossmember. I build my plates off of some dimensions I found that may not be correct. We will see. Hopefully this summer.
There's tons of info on here if you have to time and patience to research it, but if you have any questions I'll be glad to help you. I am so glad that I went with a fuel injection LS series instead of building a carbureted 383 like I wanted at first. Fuel injection is nice!

Thread Starter
Staging Lane
Joined: Sep 2012
Posts: 87
Likes: 0
From: Kentucky
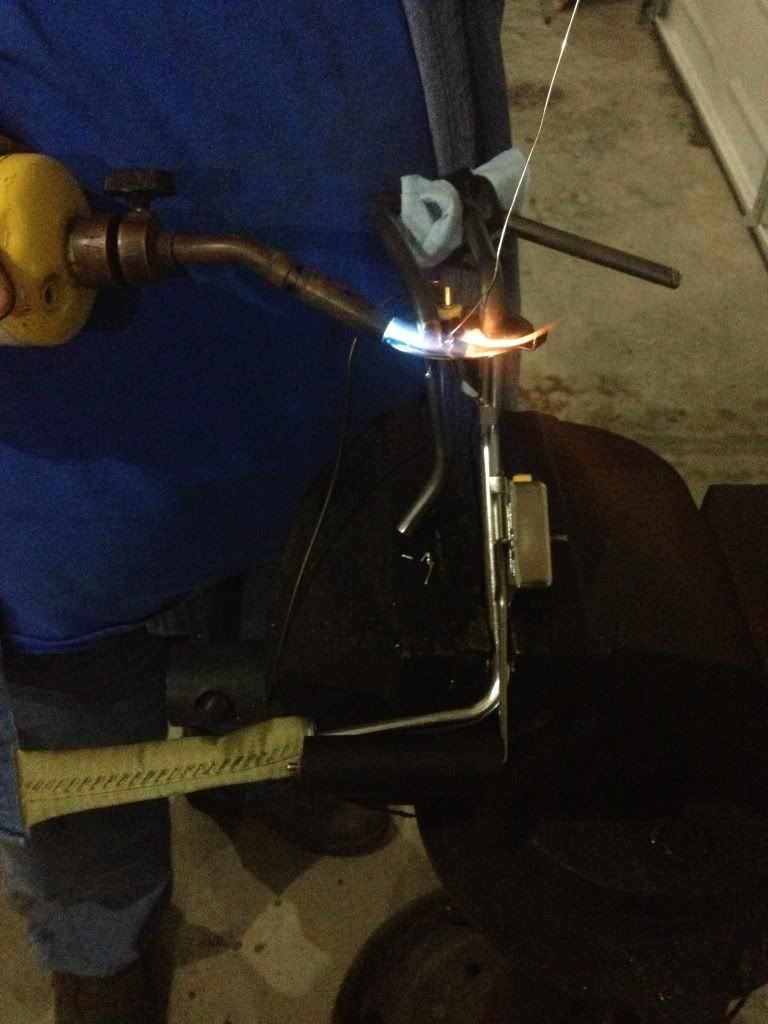
So I tried to tig weld the one line sending unit, and it didn't turn out so well. It warped real bad and blew a hole in the line. I could've probably welded on it some more and got it to suffice but I just didn't want to risk running a sketchy rigged up sending unit so I just bought the one with the duel lines. 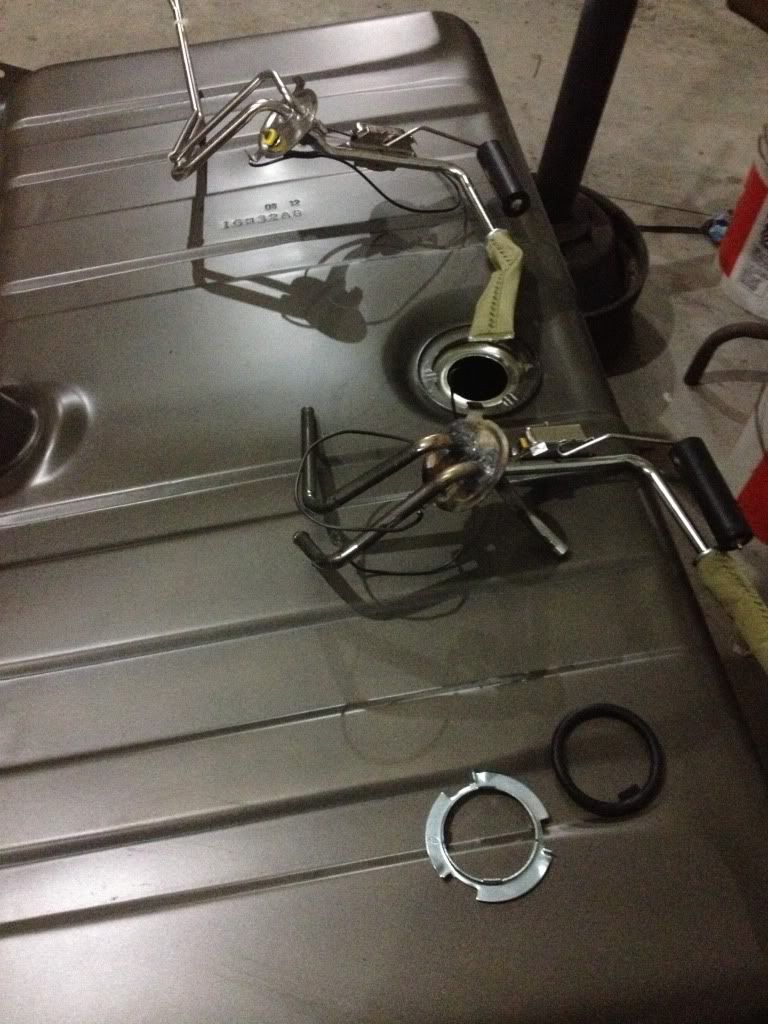
Weatherstripping works really great and keeps the tank from rubbing or squeaking the trunk pan.
I love working with Aluminum since you can just about anything with it.
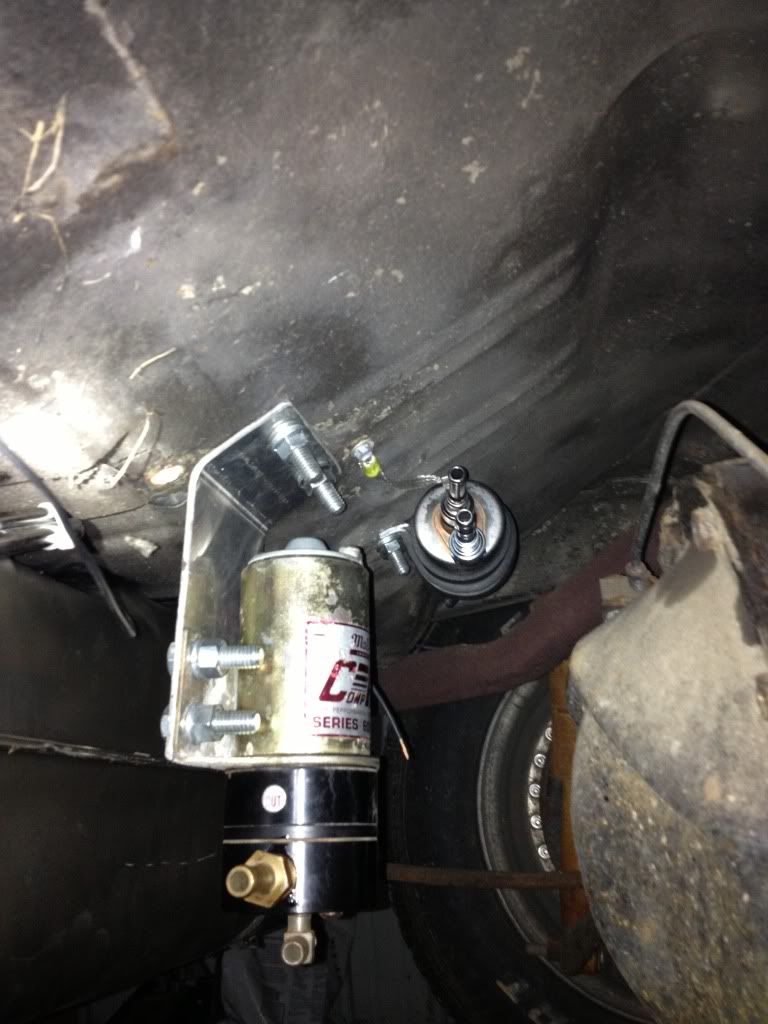
After putting some thread sealant on the fittings I bolted the fuel pump to the bracket I made and fastened it to the trunk pan with bolts and lock washers. The Corvette filter/regular mounting bracket fit loose so I found another circular mount, crimped the ground to a wire fitting and bolted it to the trunk pan as well.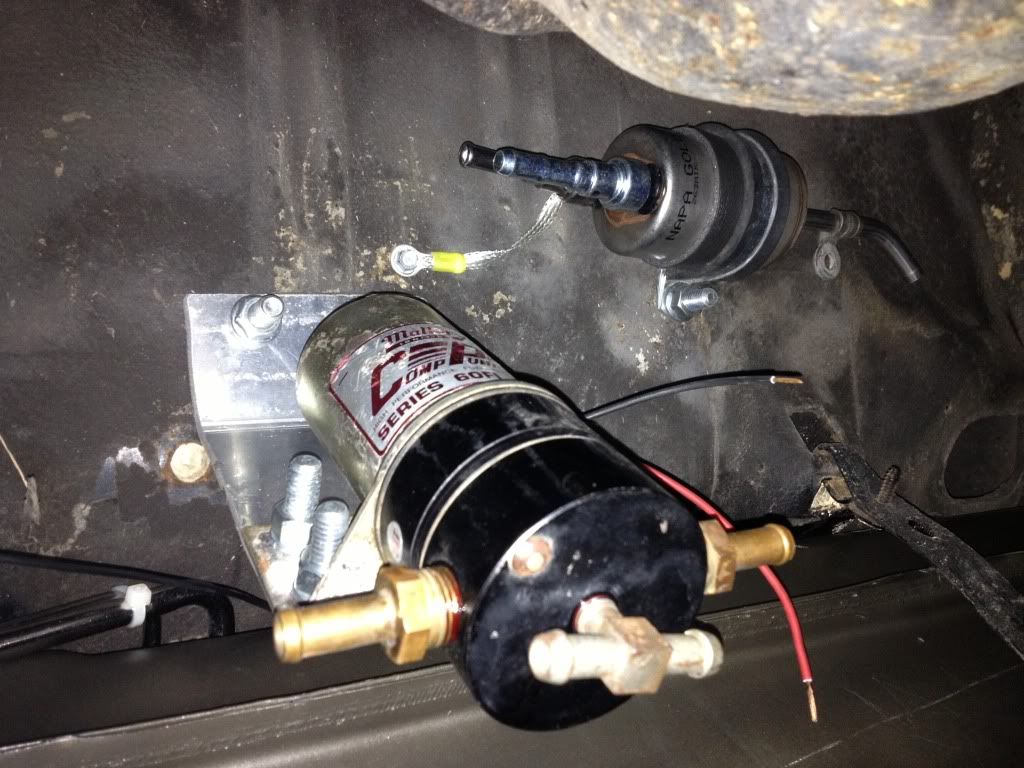
That's about all I did today, not really liking this cold weather. More Soon.
UPDATE: Mallory was tossed, Walbro255 installed and Vette regulator was mounted on the same bracket. New Ny-Cop 3/8 fuel lines were ran after the 4 link suspension was installed. (Page 6+)
Weatherstripping works really great and keeps the tank from rubbing or squeaking the trunk pan.
I love working with Aluminum since you can just about anything with it.
After putting some thread sealant on the fittings I bolted the fuel pump to the bracket I made and fastened it to the trunk pan with bolts and lock washers. The Corvette filter/regular mounting bracket fit loose so I found another circular mount, crimped the ground to a wire fitting and bolted it to the trunk pan as well.
That's about all I did today, not really liking this cold weather. More Soon.
UPDATE: Mallory was tossed, Walbro255 installed and Vette regulator was mounted on the same bracket. New Ny-Cop 3/8 fuel lines were ran after the 4 link suspension was installed. (Page 6+)
Last edited by BlackLS1Camaro; Aug 4, 2017 at 02:30 PM.
Cold weather? Its 3:30am and its 70� outside lol. Gotta love TEXAS!!
Nice project btw, i will be starting on my second attempt at a second gen bird swap soon.
Nice project btw, i will be starting on my second attempt at a second gen bird swap soon.
Last edited by zamora7; Feb 5, 2013 at 03:46 AM.
Thread Starter
Staging Lane
Joined: Sep 2012
Posts: 87
Likes: 0
From: Kentucky
Looking forward to seeing it, I love 2nd gens.
Thread Starter
Staging Lane
Joined: Sep 2012
Posts: 87
Likes: 0
From: Kentucky
Been lurking the forums while I've build up some more money to get this show on the road. Since I haven't been working on the Camaro in a week or so I helped my friend and his brother work on their Yoda's.
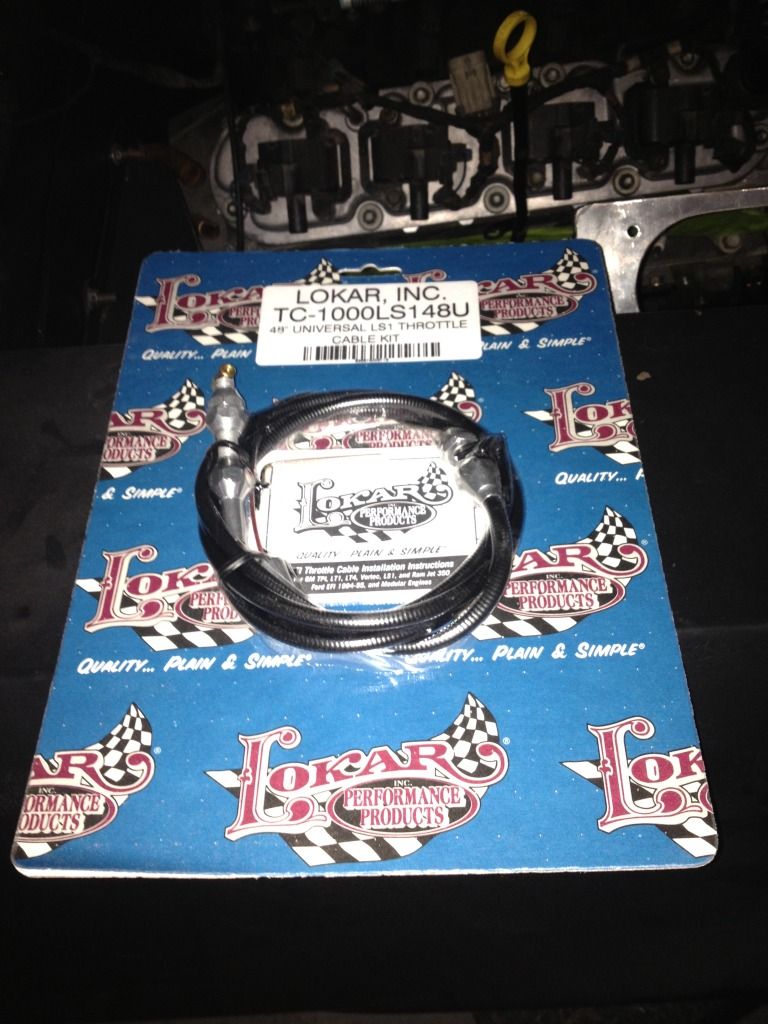
Thank you Summit for the hook up on this Lokar cable!
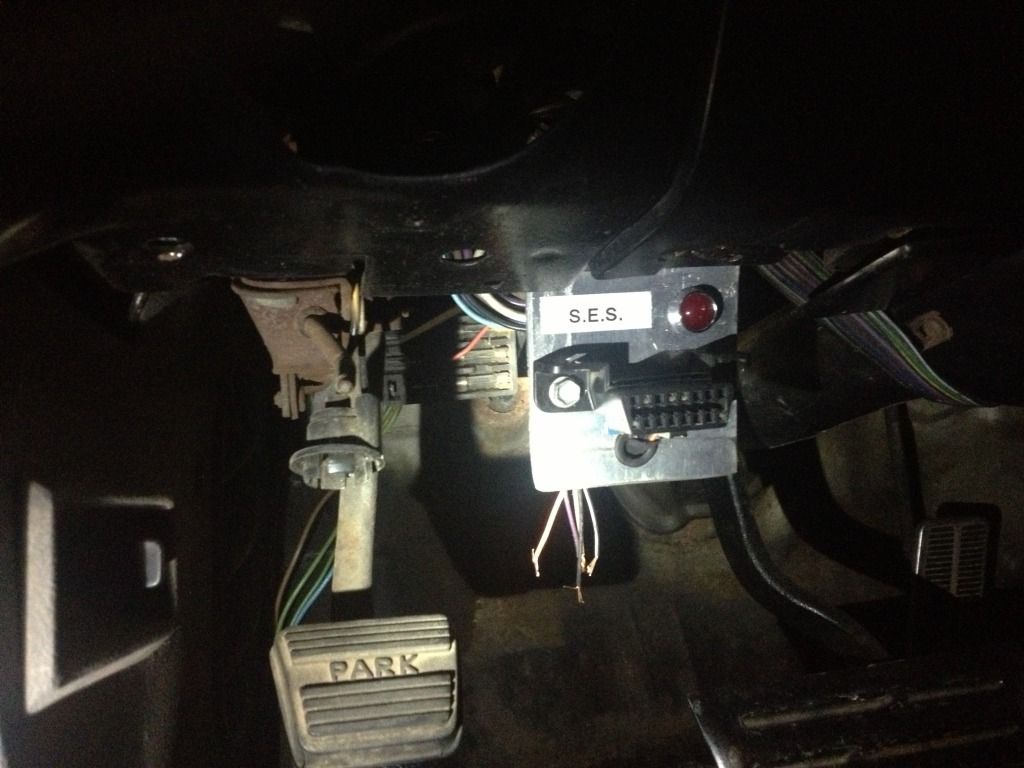
Just an idea, OBDII port is out of a 99 S10
One day it's sunny and the next it's snowing I wish mother nature would make up it's mind!
Me and a few of friends up at work. I plan on getting my Camaro Tattoo touched up when I get my car done.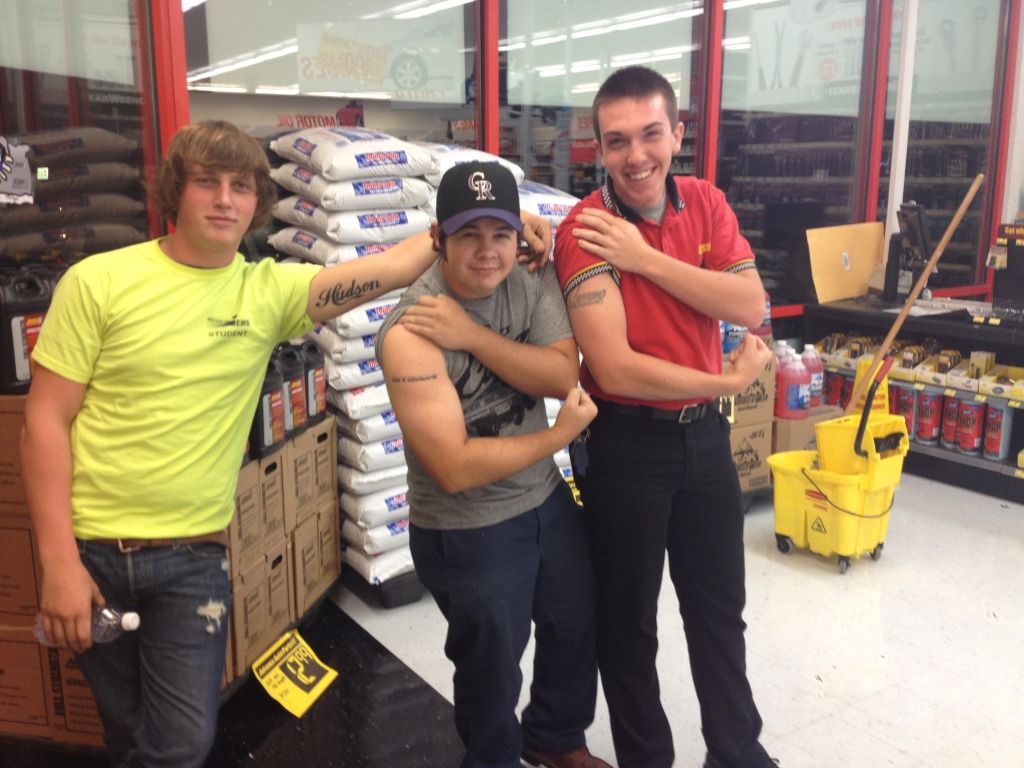
More soon!
Thank you Summit for the hook up on this Lokar cable!
Just an idea, OBDII port is out of a 99 S10
One day it's sunny and the next it's snowing I wish mother nature would make up it's mind!
Me and a few of friends up at work. I plan on getting my Camaro Tattoo touched up when I get my car done.
More soon!
Last edited by BlackLS1Camaro; Aug 4, 2017 at 02:31 PM.