


LS1 Swapped 68' Camaro
Thread Starter
Staging Lane
Joined: Sep 2012
Posts: 87
Likes: 0
From: Kentucky
For your cross member it might be just as easy to make one if you have the resources or buy one. The 4L60e (Auto Tranny) is essentially the same thing as a 700R4 and I know the case lengths and cross members are a little bit different from a 350 turbo.
This thread helped me a lot with LS to other GM transmissions.
https://ls1tech.com/forums/automatic...questions.html
Thread Starter
Staging Lane
Joined: Sep 2012
Posts: 87
Likes: 0
From: Kentucky
Some more updates...
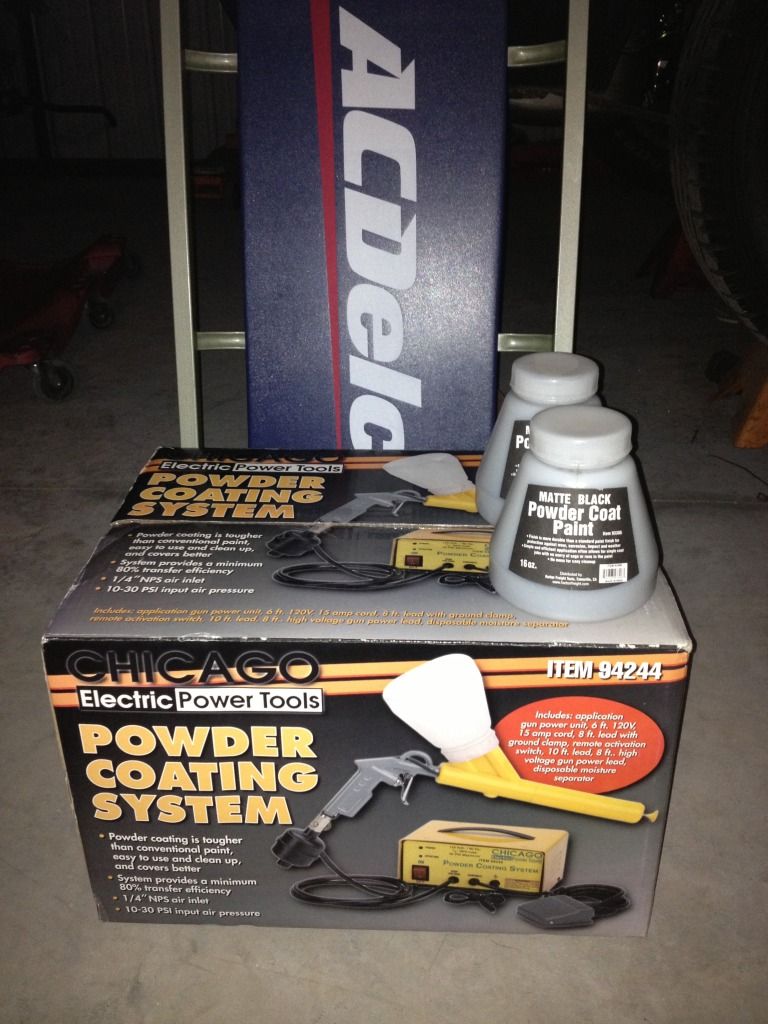
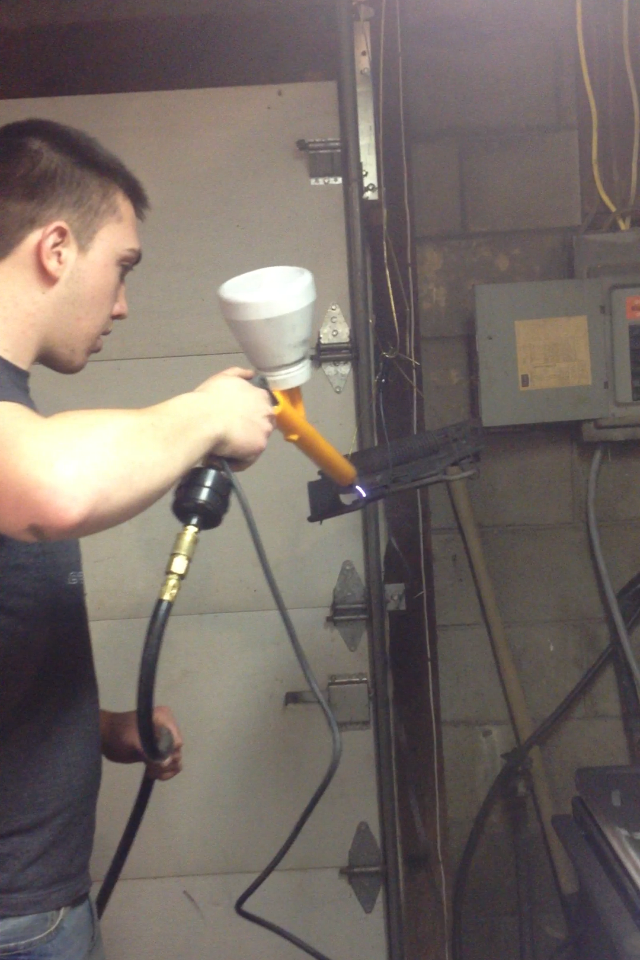
I finally broke down and bought a powder coater from Harbor Freight.
Next it was time to finally started on the headers. I have the steering gear box off now reworking the drivers side but the passenger fit fairly well except for having to cut the tranny ears off.
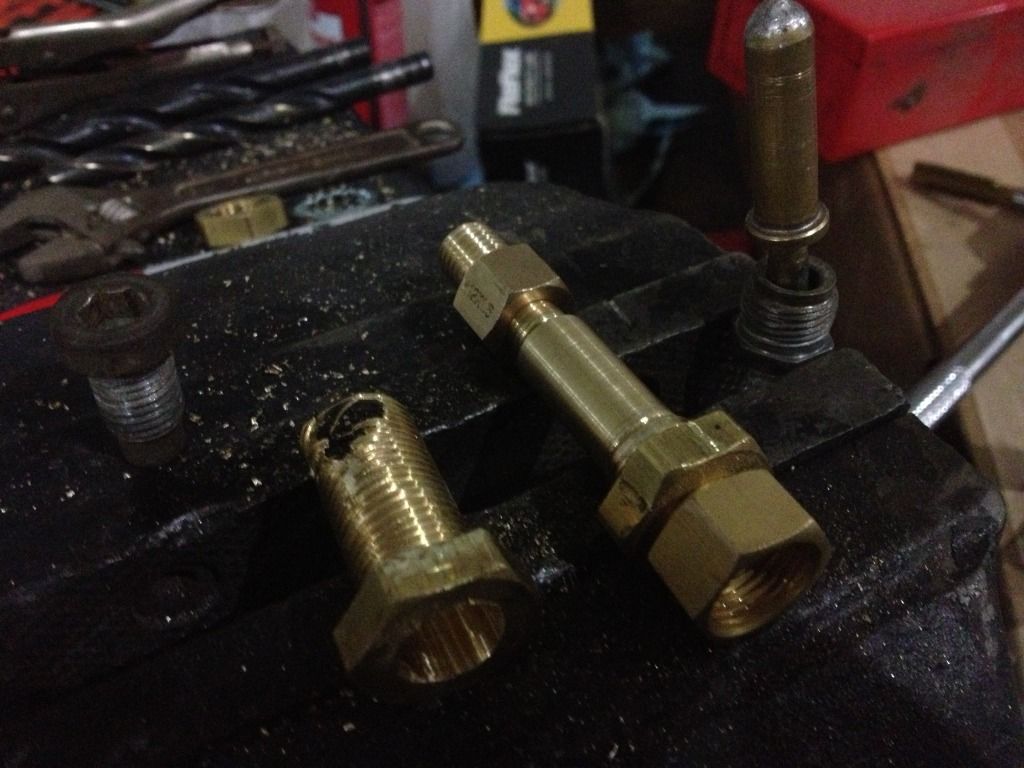
I jimmy rigged this adapter for the passenger side head to adapt the coolant temperature sensor. I ended up trashing this idea and tapping the water pump.
I finally broke down and bought a powder coater from Harbor Freight.
Next it was time to finally started on the headers. I have the steering gear box off now reworking the drivers side but the passenger fit fairly well except for having to cut the tranny ears off.
I jimmy rigged this adapter for the passenger side head to adapt the coolant temperature sensor. I ended up trashing this idea and tapping the water pump.
Last edited by BlackLS1Camaro; Aug 4, 2017 at 02:31 PM. Reason: Correction
Thread Starter
Staging Lane
Joined: Sep 2012
Posts: 87
Likes: 0
From: Kentucky
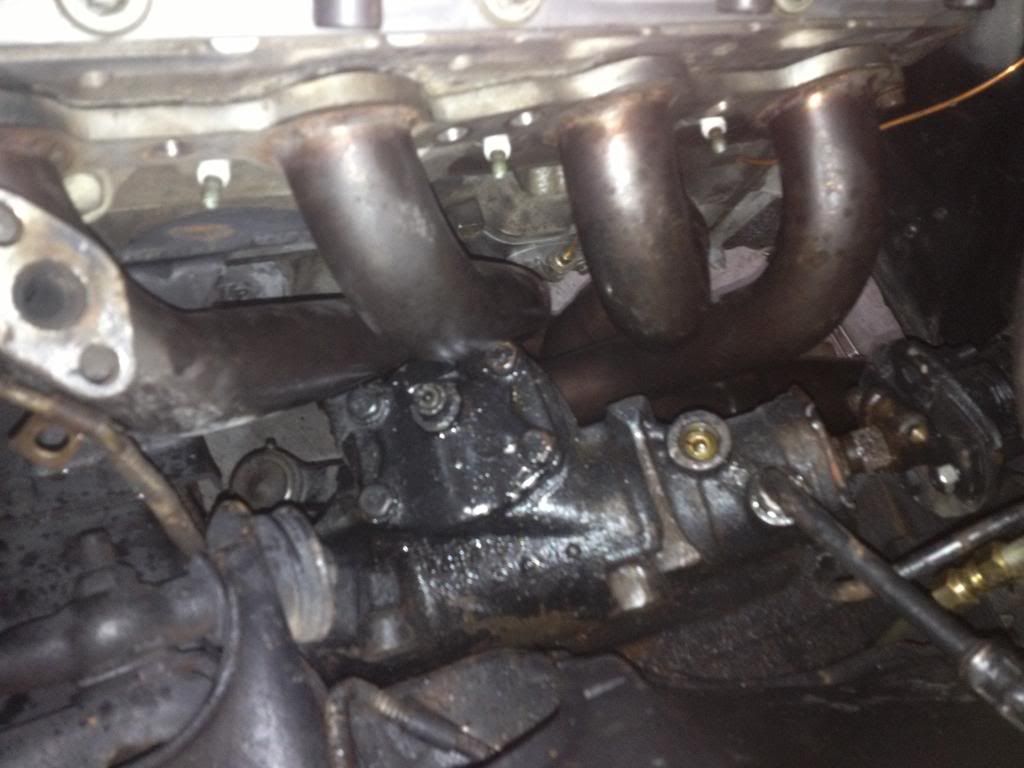
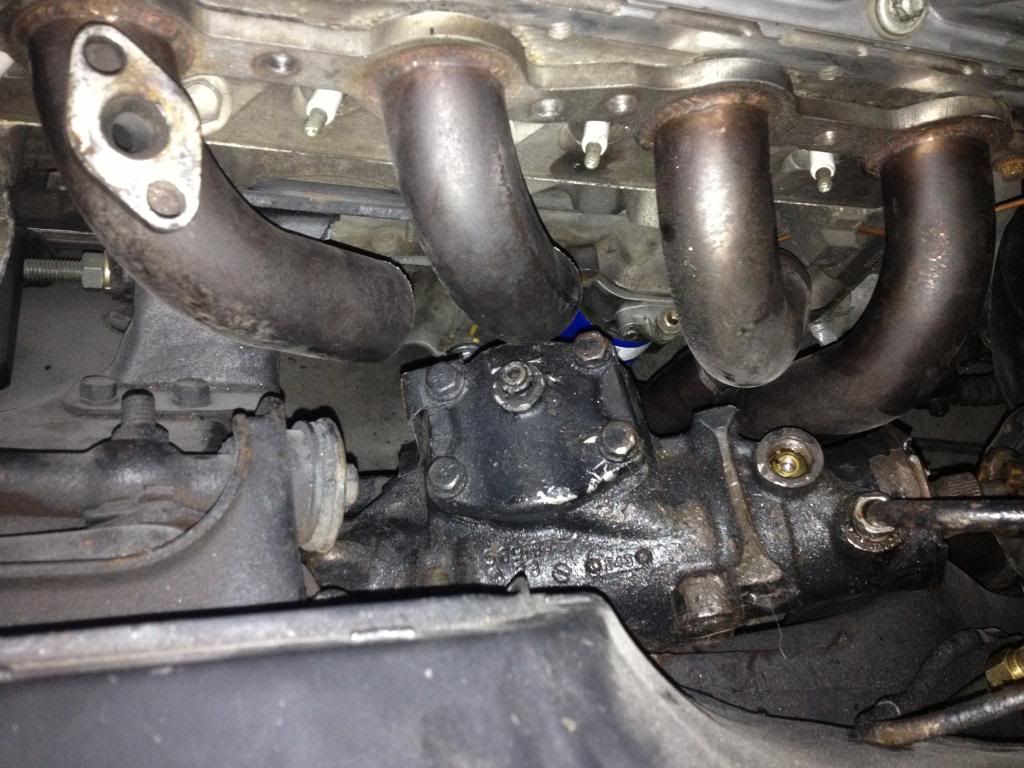
The 98 Camaro chassis is a lot different from the 68, the drivers side header shoots towards the right instead of parallel to the frame. Heres where it wants to hit. 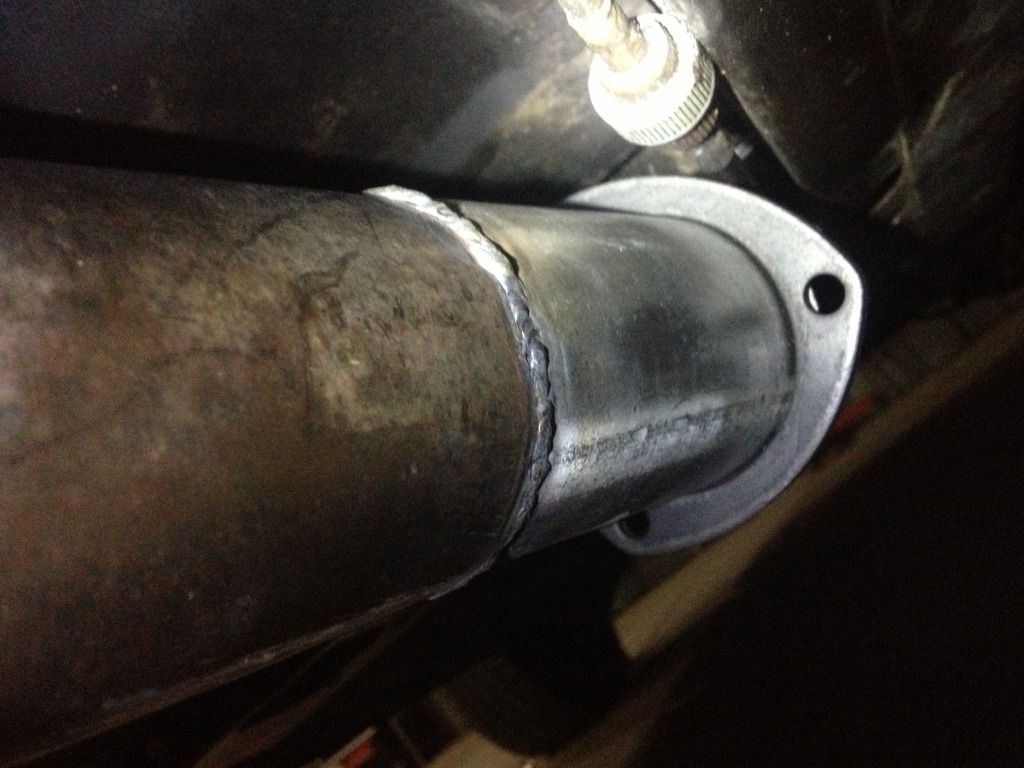
Next I tapped out the oil bung plate that mounts about the oil filter for my mechanical oil pressure gauge.

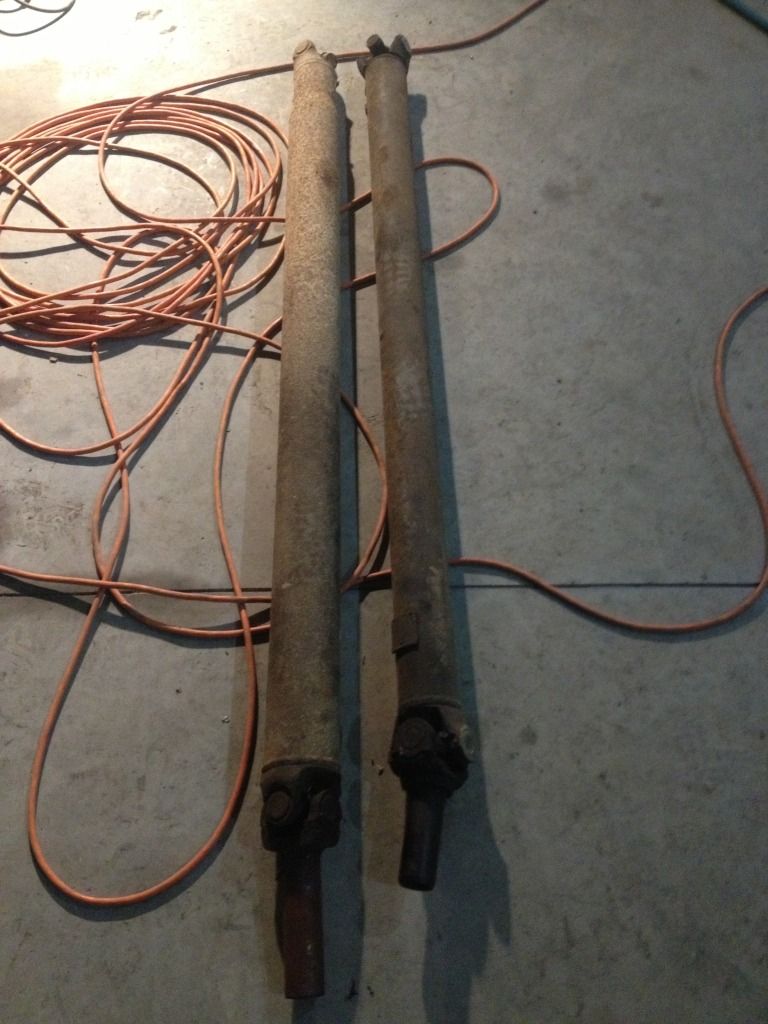
Found an original driveshaft out of a '69 Firebird that I believe will work fine with a little elbow grease.
Can't wait to hear this thing run.
Next I tapped out the oil bung plate that mounts about the oil filter for my mechanical oil pressure gauge.
Found an original driveshaft out of a '69 Firebird that I believe will work fine with a little elbow grease.
Can't wait to hear this thing run.
Last edited by BlackLS1Camaro; Aug 4, 2017 at 02:32 PM.
Wait just a minute.... Your saying the driver side header from a 4th gen Fbody fit? It didn't hit the gear box at all? Can we have a few pics of that? What headers were they? Maybe you found something out for us.
Thread Starter
Staging Lane
Joined: Sep 2012
Posts: 87
Likes: 0
From: Kentucky
Yes, it fit pretty well actually. I believe it was a combination of the engine setting forward an inch and the way the headers were made but it clears just fine. I will try to get around to taking some pictures when I update my post again but I pulled the steering gear box back off to get a pitman arm for it and some custom power steering lines made. I don't know what brand they are is the sad thing. There is no emblems or stamps... they are just stainless long tubes with EGR made onto them for a 98 Camaro.
LS1 Tech Stories
The Best V8 Stories One Small Block at Time

Topdon ONE vs. Artidiag 800 BT2: Which is the Diagnostic Tablet For You?
Pouria Savadkouei
Gas Monkey Built a 6-Wheel Ferrari Testarossa With a Corvette LT4 Engine
Verdad Gallardo
7 Most Reliable High-Performance Engines GM Has Ever Built
Verdad Gallardo
Amazing '71 Camaro Restomod Is Modern Muscle Car Under the Skin
Verdad Gallardo
6 Common C5 Corvette Failures and What's Involved In Repairing Them
Pouria Savadkouei
Retro Modern Bandit Pontiac Trans AM Comes With Burt Reynolds' Autograph
Verdad Gallardo
Top 10 Greatest Cadillac V Series Performance Models Ever, Ranked
Pouria Savadkouei
Top 10 Most Powerful Chevy Trucks Ever Made!

Hennessey's New Supercharged Silverado ZR2 Has 700 HP
Verdad Gallardo
Jake, your work ethic is very inspiring!
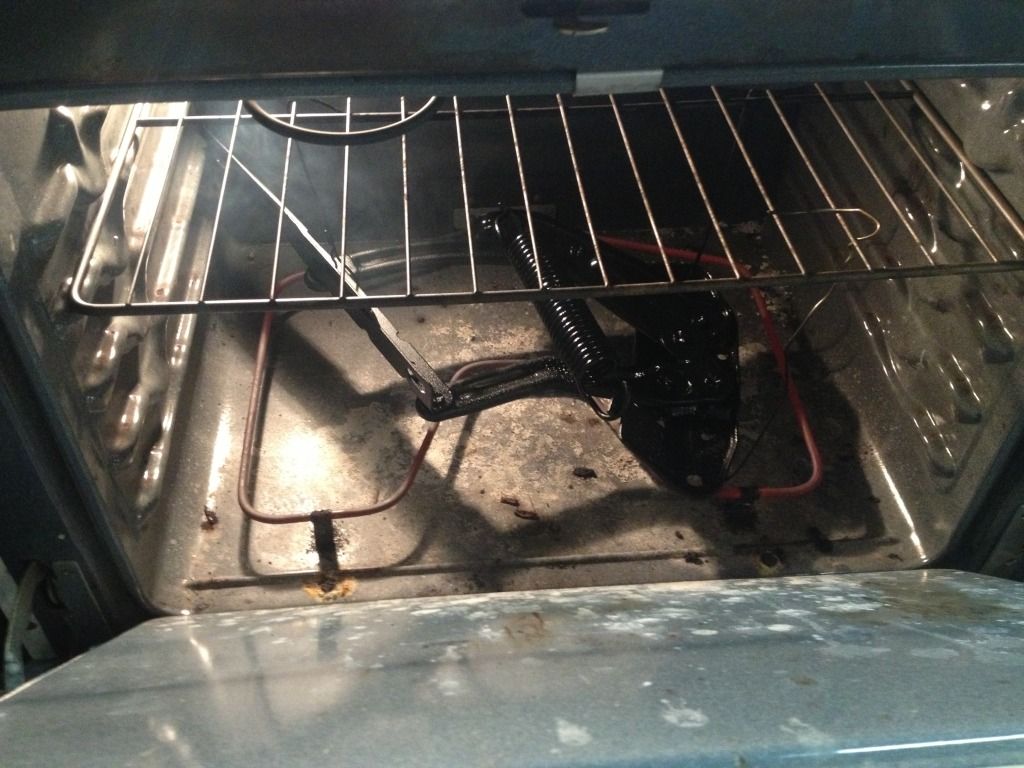
I had to chuckle at the hood hardware in the oven. I have to wait until "Sgt Honey" leaves home, before I dare bake painted parts in the oven.
Great job, and a reminder of how much work goes into one's project!!
Regards, Glenn
I had to chuckle at the hood hardware in the oven. I have to wait until "Sgt Honey" leaves home, before I dare bake painted parts in the oven.
Great job, and a reminder of how much work goes into one's project!!
Regards, Glenn
Thread Starter
Staging Lane
Joined: Sep 2012
Posts: 87
Likes: 0
From: Kentucky
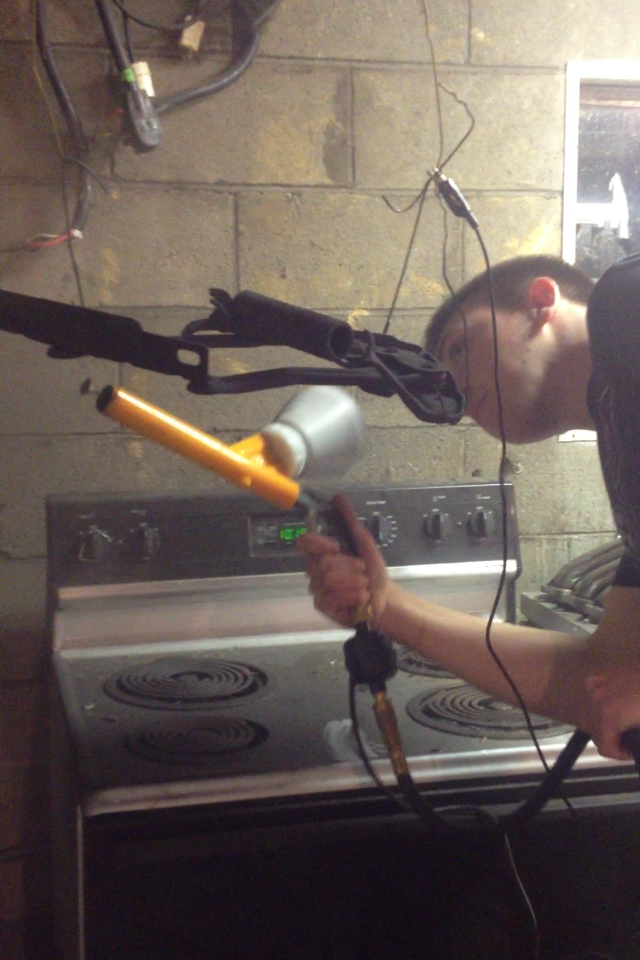
Thanks Glenn, i'm sure powder coated food wouldn't taste very well. It says once you use the stove for powder coating don't ever cook food in it again because the powder coat will contaminate the food. Luckily we had that spare oven at my friends garage
I know I haven't posted in a few months, I've been living from pay check to pay check saving for parts and getting everything wrapped up for the project. But here's some updates.
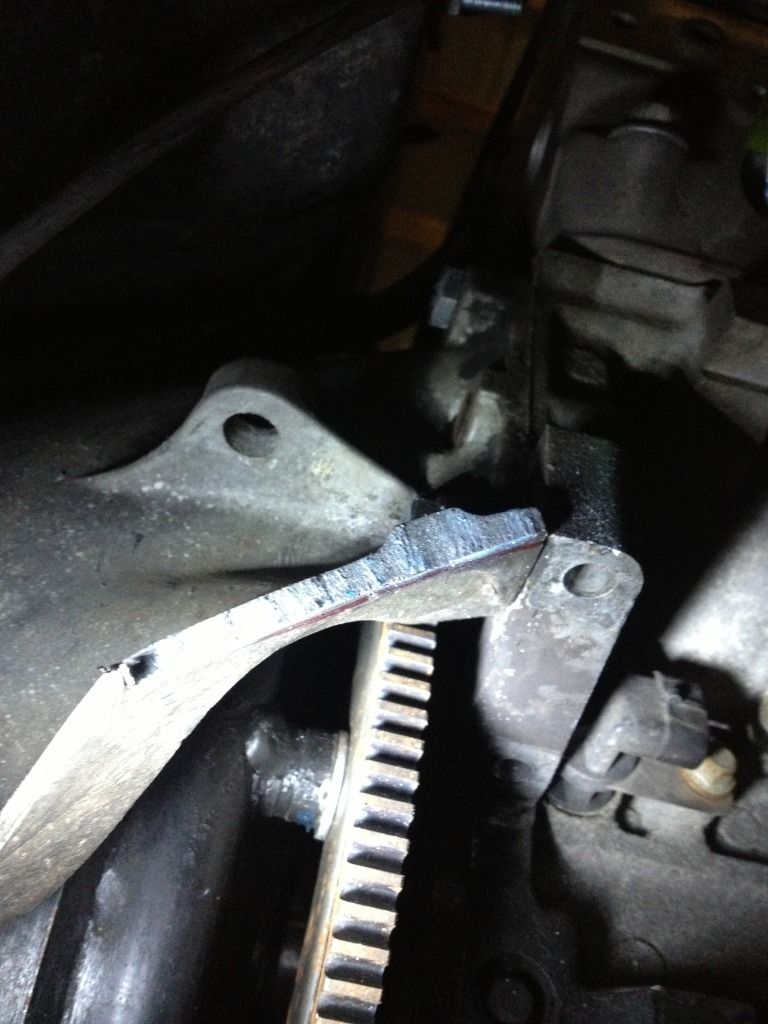
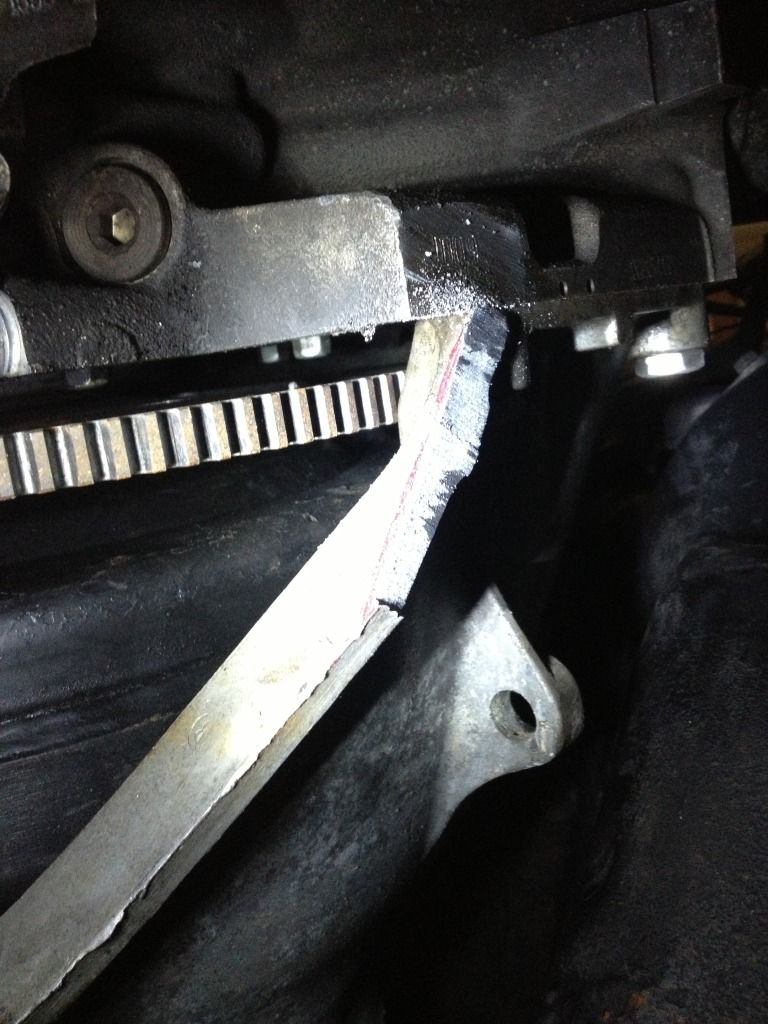
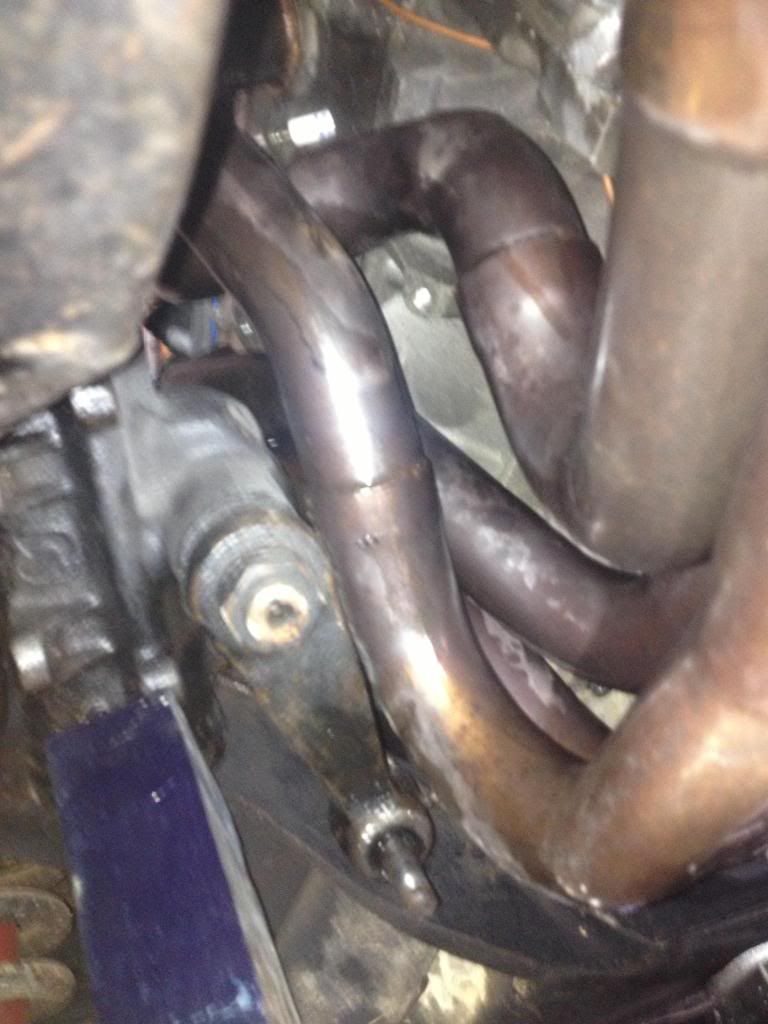
Turns out I was wrong those 98 body long tube headers didn't fit too well. I beat on them to get them to fit around the steering gear box but I realized the pitman arm does not clear. I scratched my head for weeks on what to do... It being stainless NOBODY sold mandrel bent tubing kits unless they were $30 plus dollars a piece. I think speedway was the only place I could find it reasonable... After being turned down by a fabrication shop, and an exhaust shop I decided to hack into them and rework them myself. Turns out that was a bad idea... Here's a few pics.
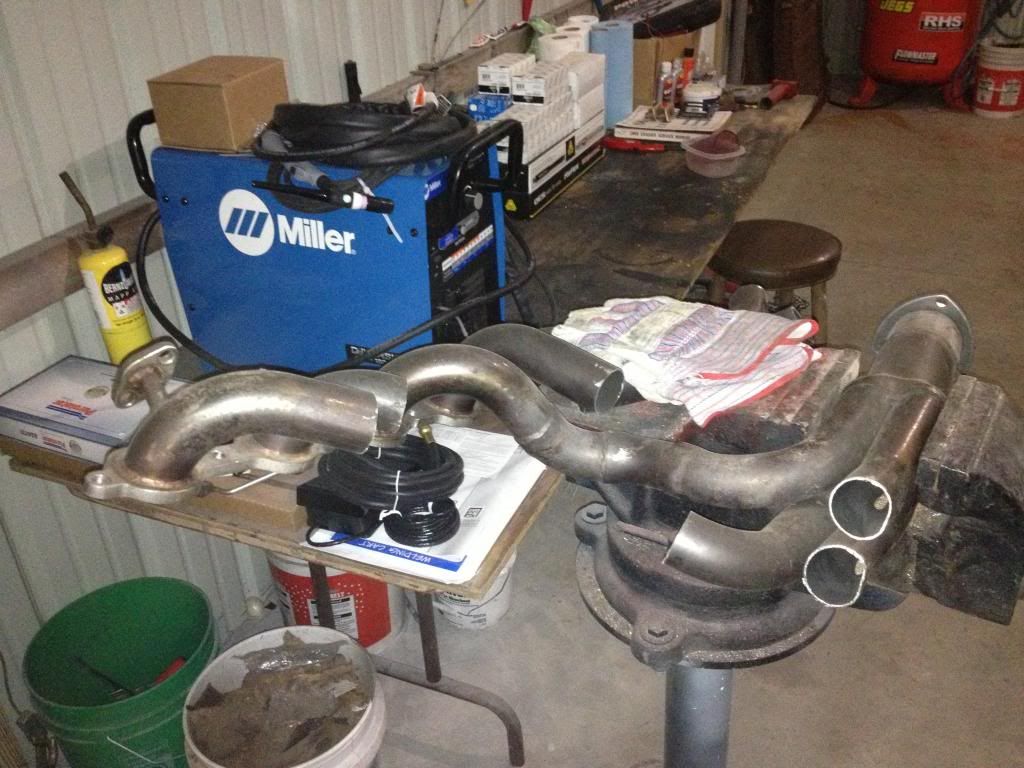
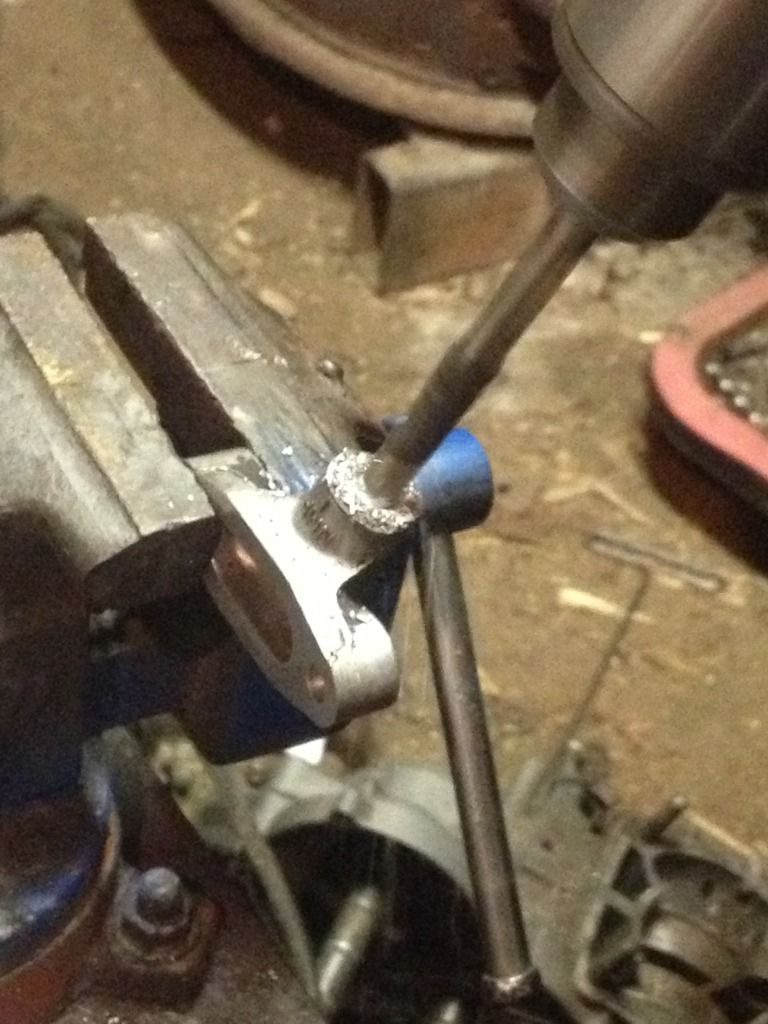
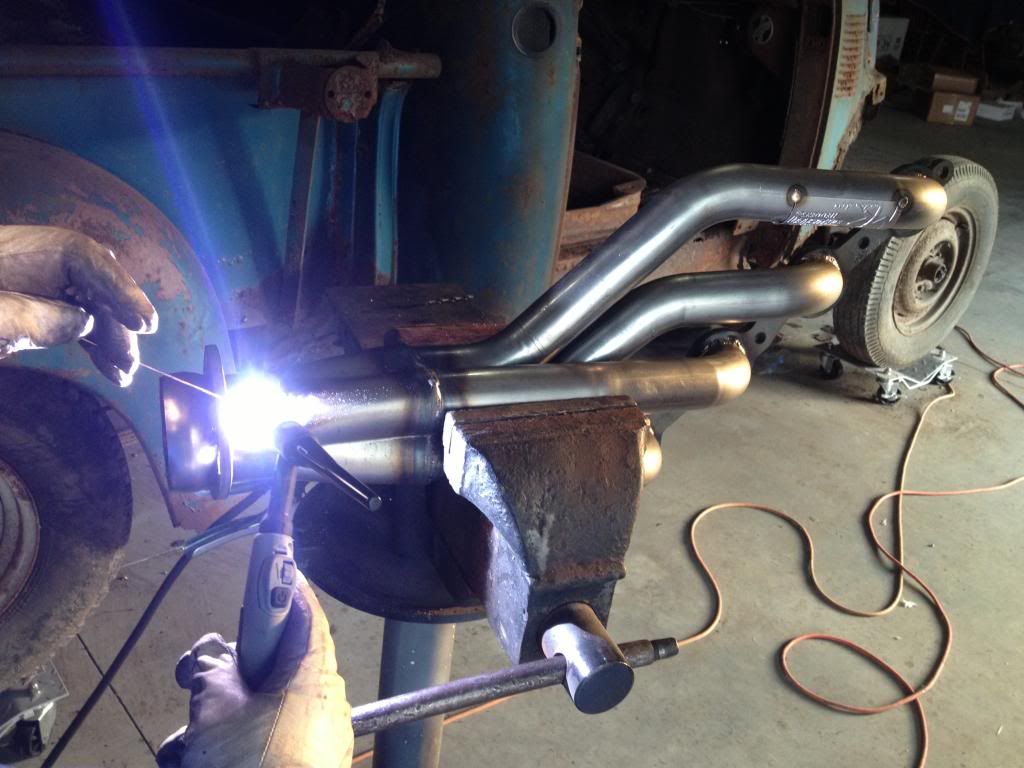
After I sawed into them I just decided it would be easier (and cheaper) to just buy a set of headers. I couldn't find anyone that done ceramic coating near me so I just had to paint them with header paint. Summit had a sell on these Hedman headers, and I purchased them. Here's where I welded the 02 sensor bungs in.
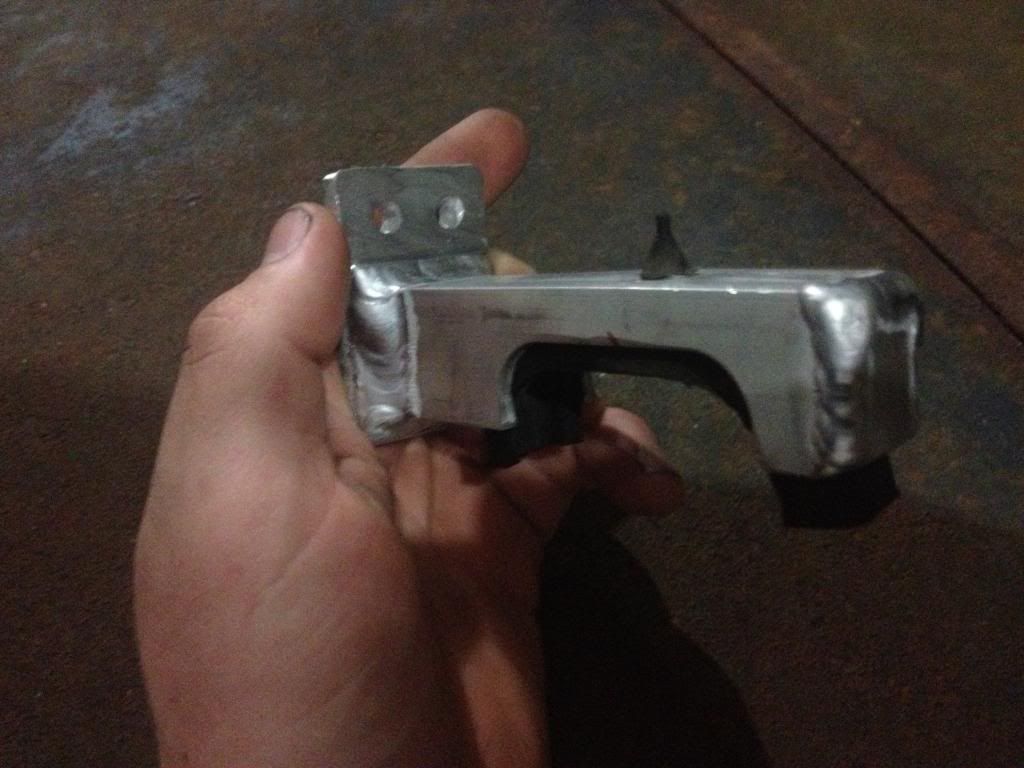
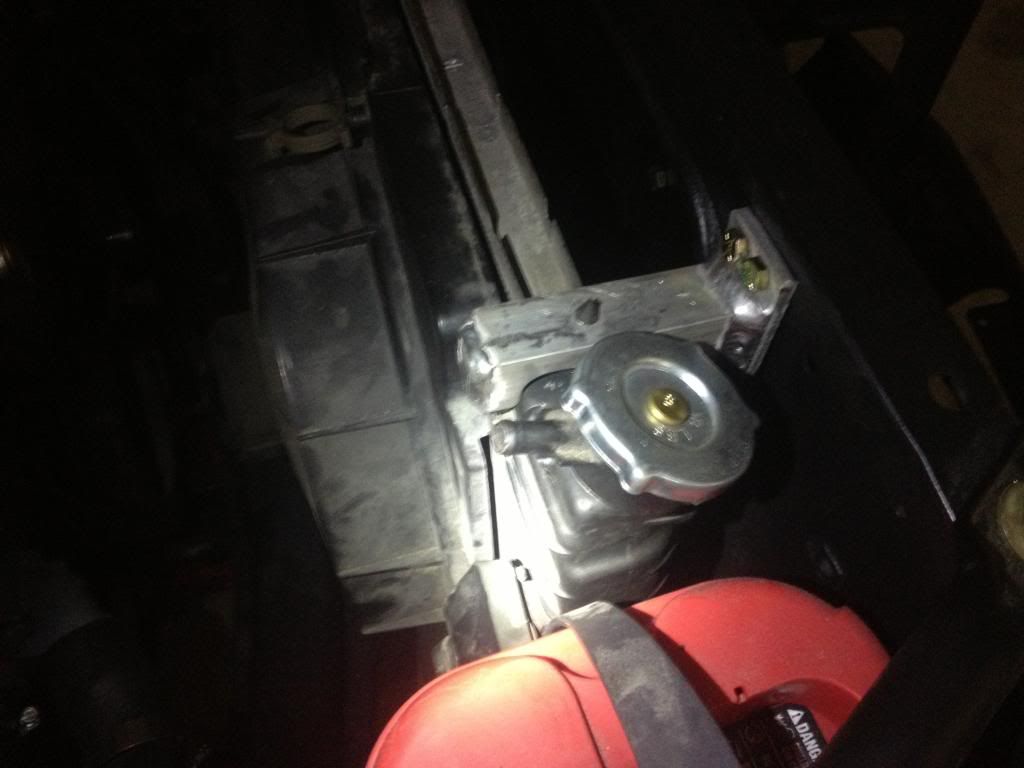
Next I redone my radiator mounts completely. I took square aluminum tubing, used 85 S10 radiator fan shroud bushings, milled the tubing in the lathe, welded it to flat plating and used it to cradle the radiator. Very pleased with the outcome.

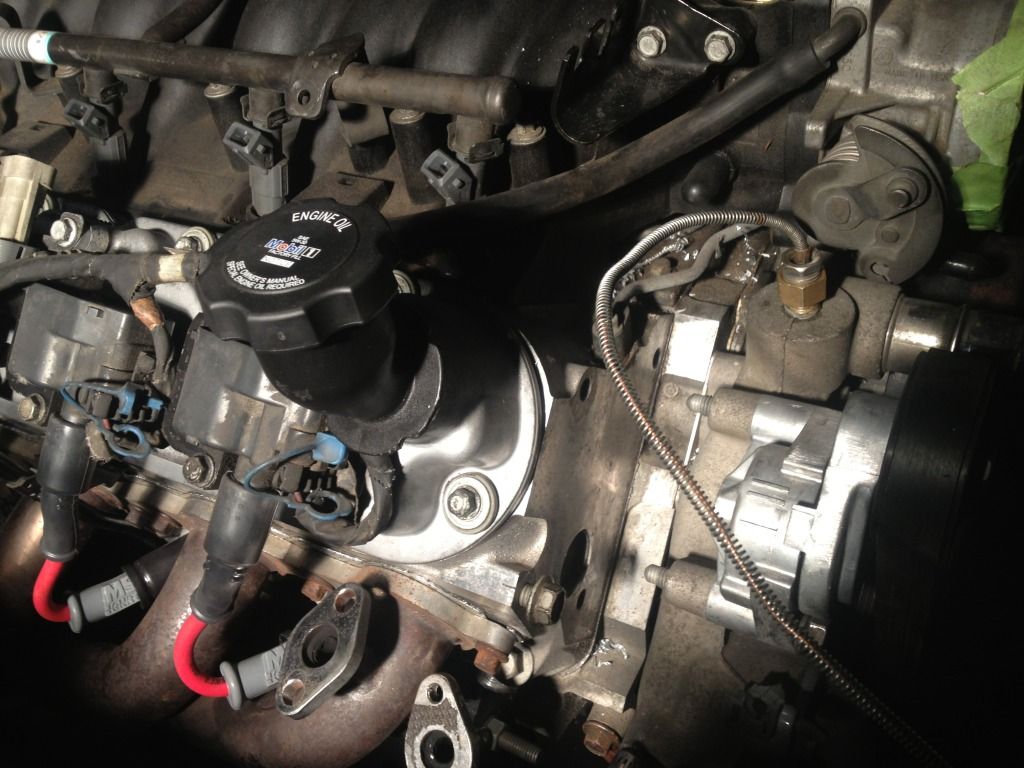
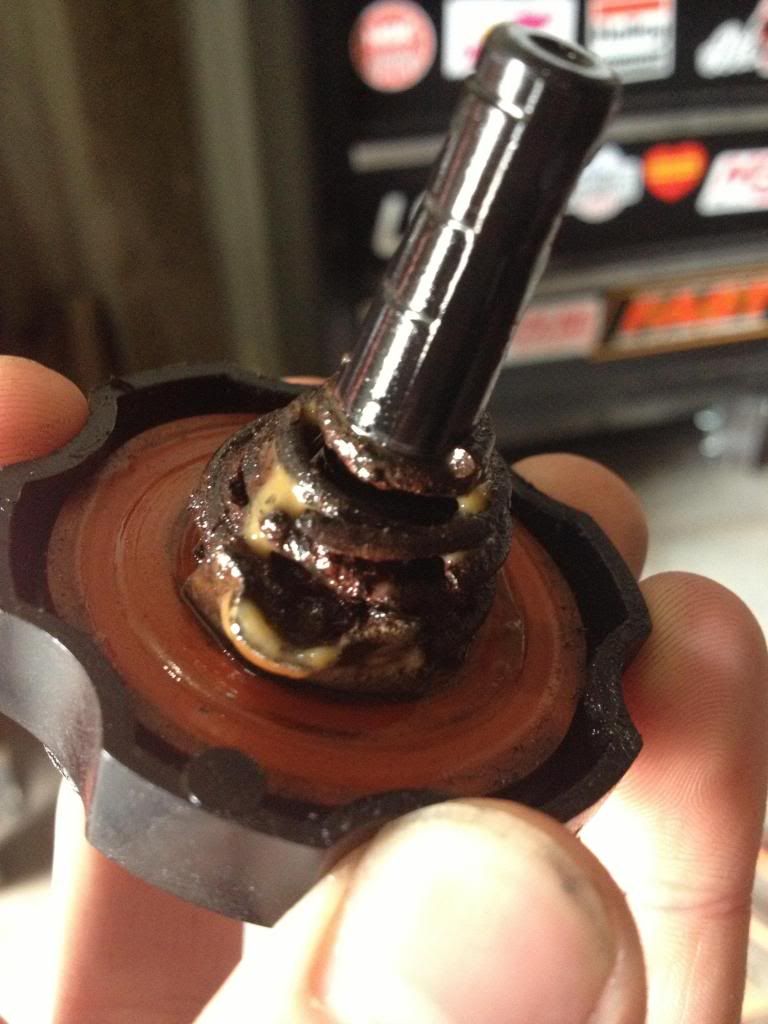
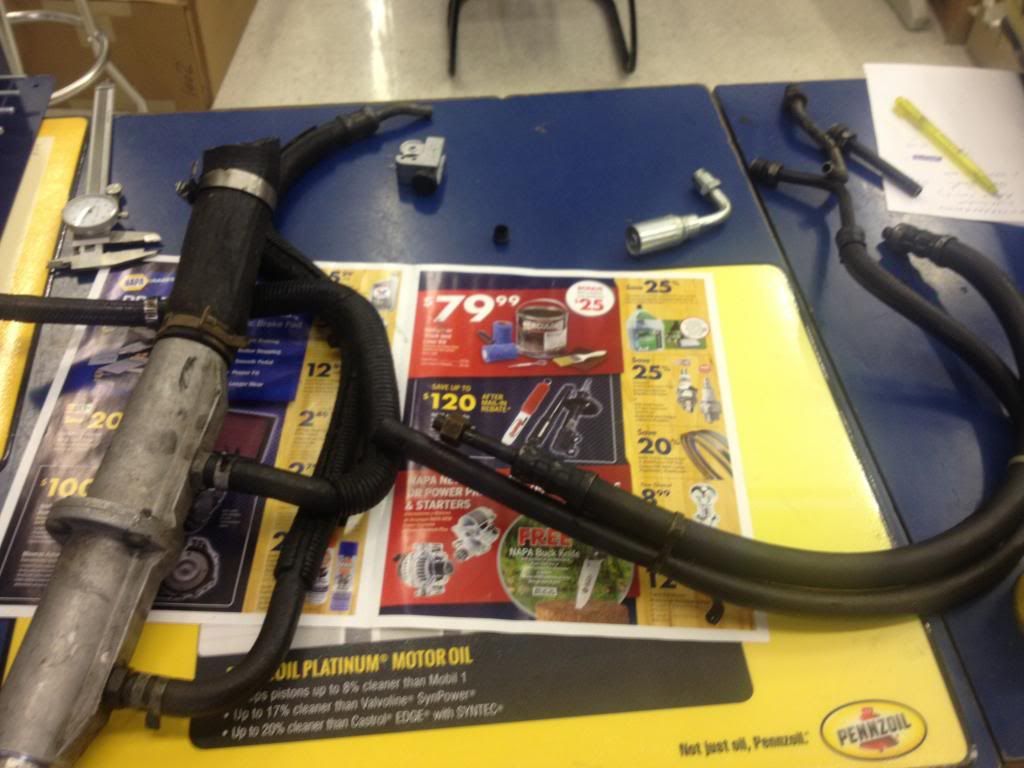
While watching the video of my engine running in the camaro I noticed the power steering pump squalled very bad. I done some research and found that mine came with a power steering oil cooler. From what I've read some of the Z28, SS, WS6 cars in the early years had these and GM realized it was a bad design due to it leaking and mixing coolant with power steering fluid. After I tore mine apart that's what had happened. I put a delete hose on, new GM pulley, and pump. Look at this gunk.
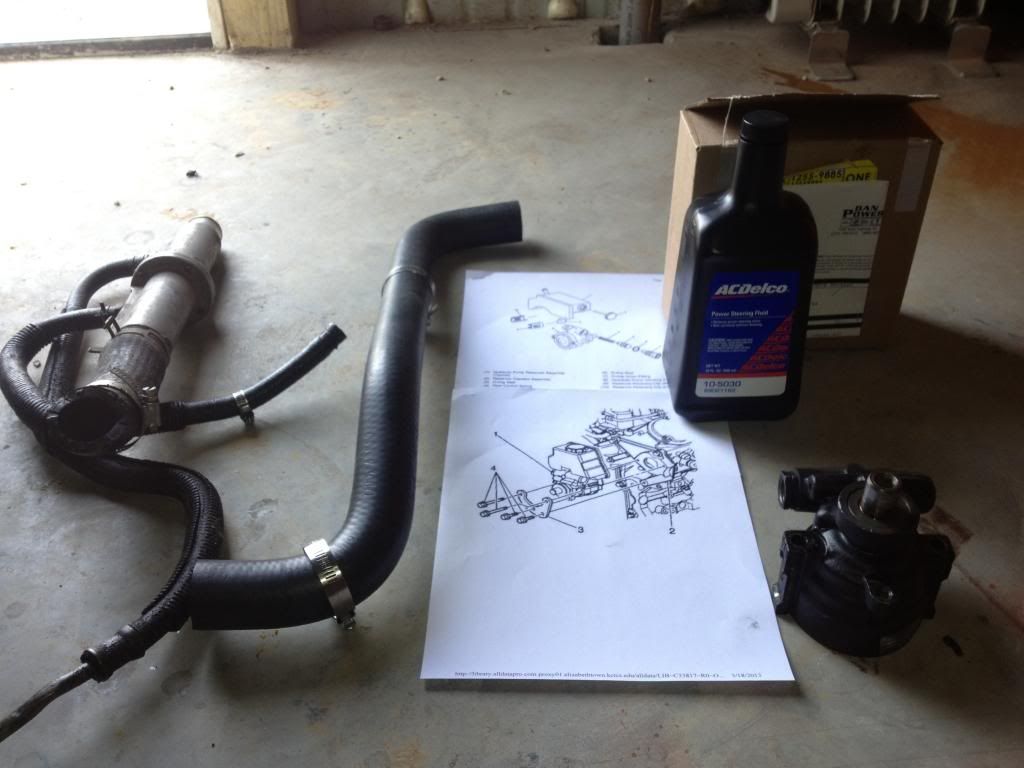
I went into Napa and got some custom power steering hoses made.. They looked at me like I was crazy when I told them I was putting an LS1 into a 68' Camaro.
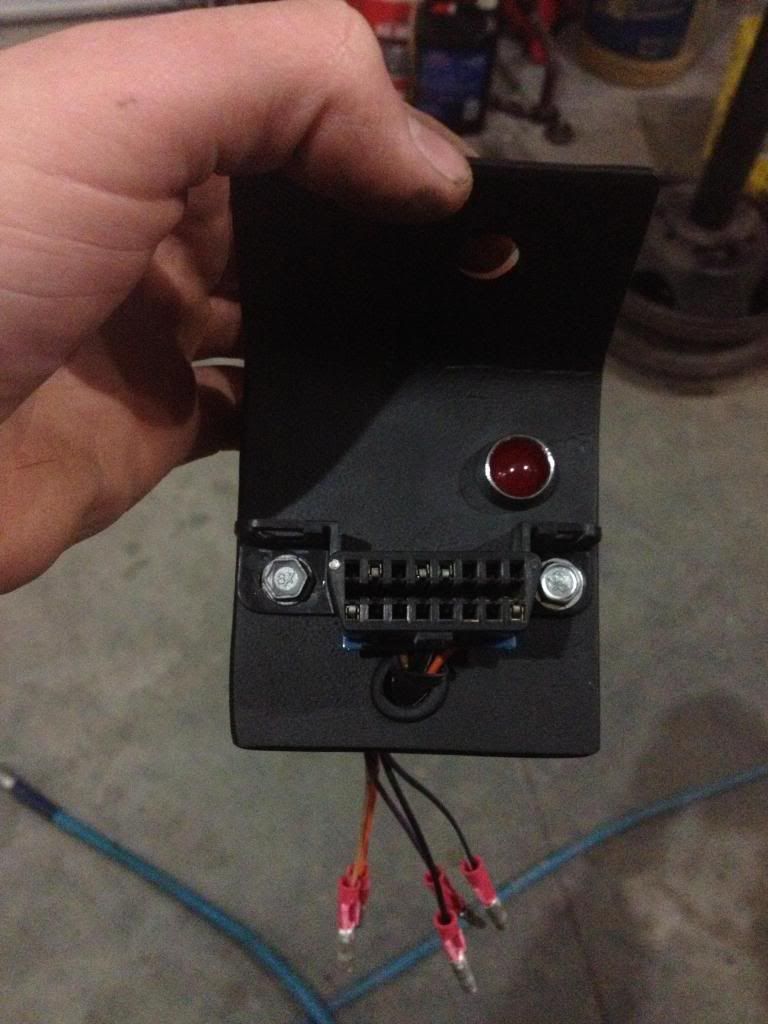
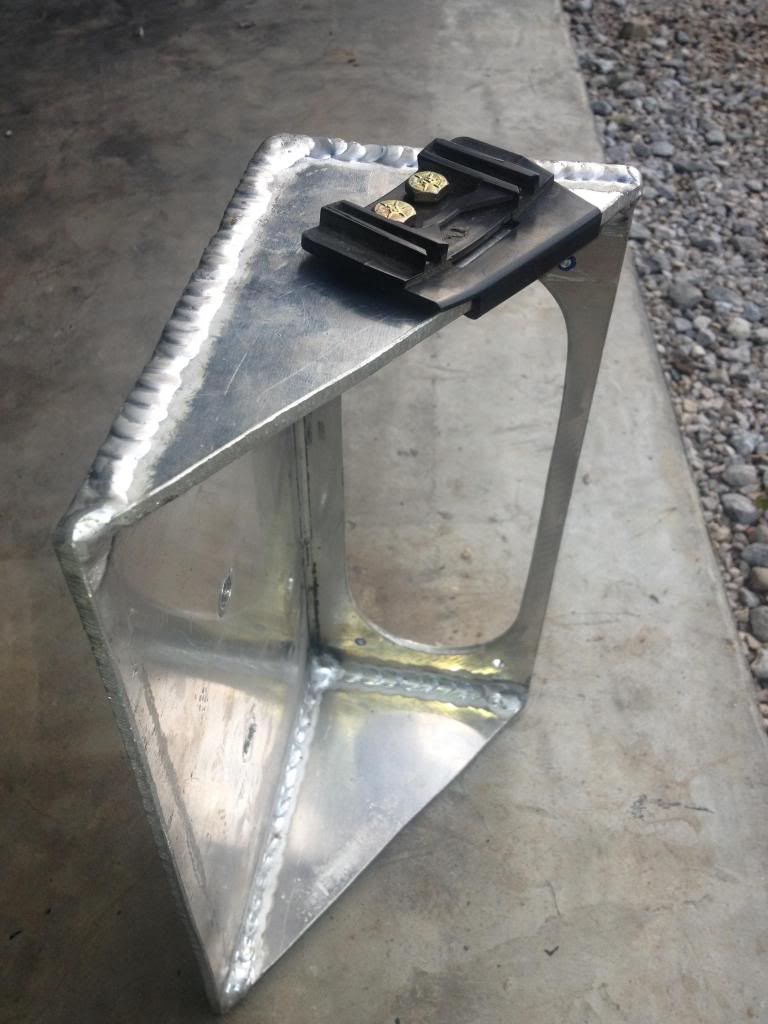
My finished powder coated OBDII port and SES light mount.
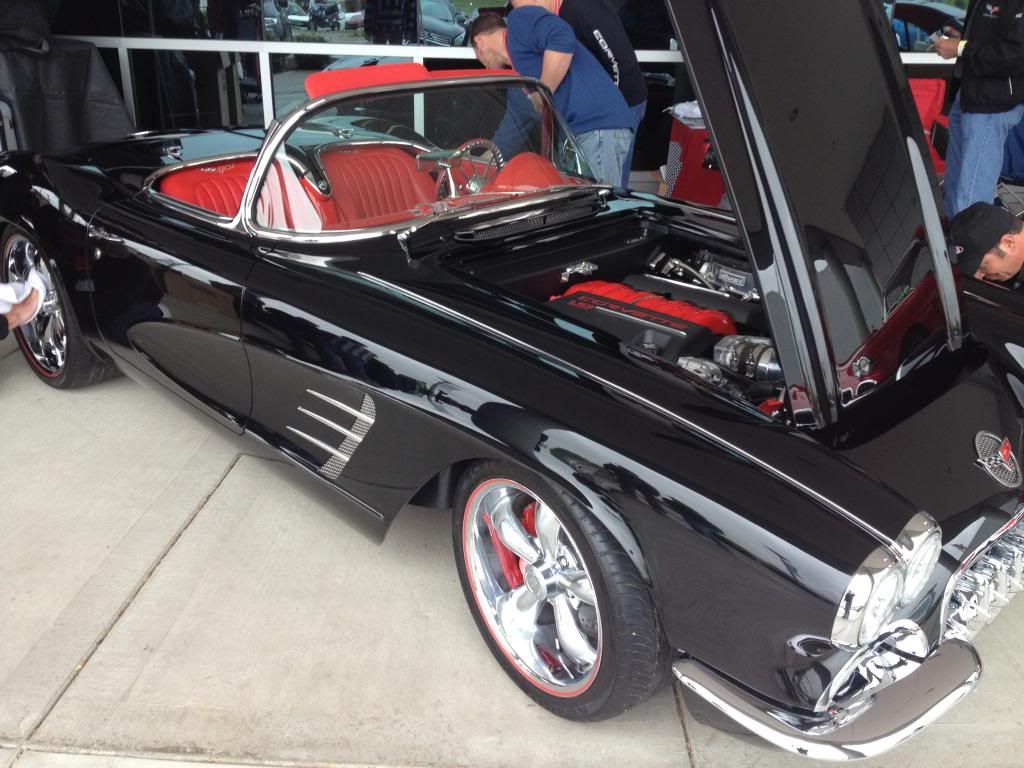
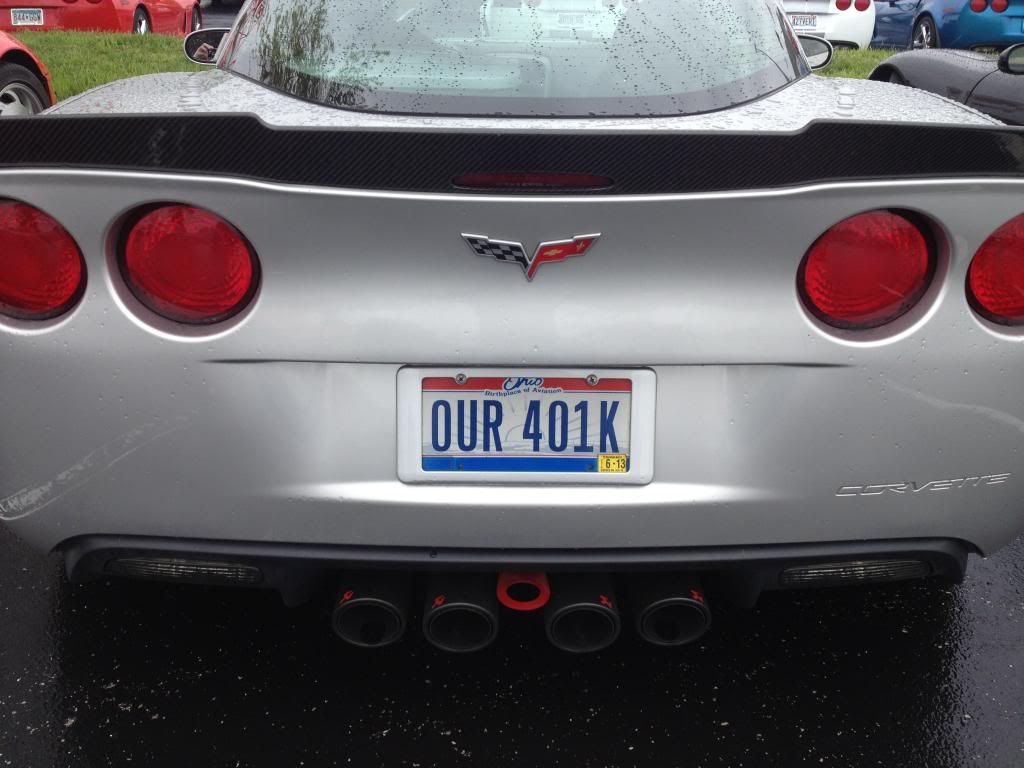
I live about an hour north of Bowling Green KY so I went to the National Corvette Museum for the C7 Release bash and seen some pretty neat stuff.
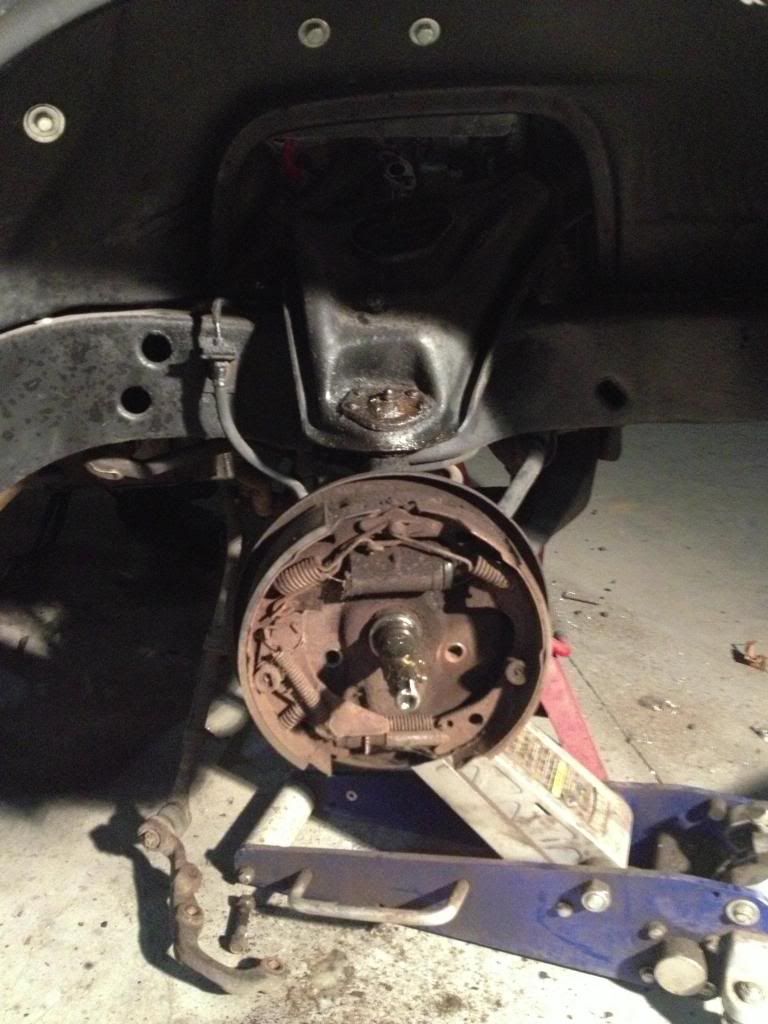
Next, I bought a power disc brake conversion kit from Right Stuff with 2 inch drop spindles. Here's the teardown from the old drum brakes. My balljoints were factory as they were riveted to the control arms.
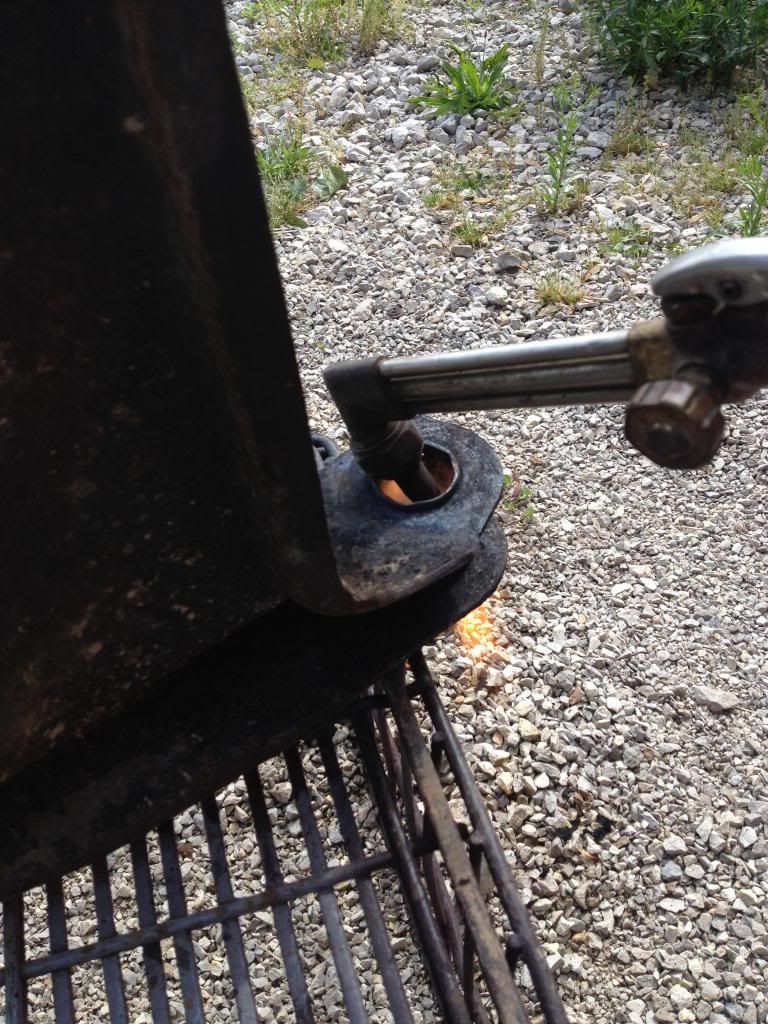
Torching out the 45 year old control arm bushings.
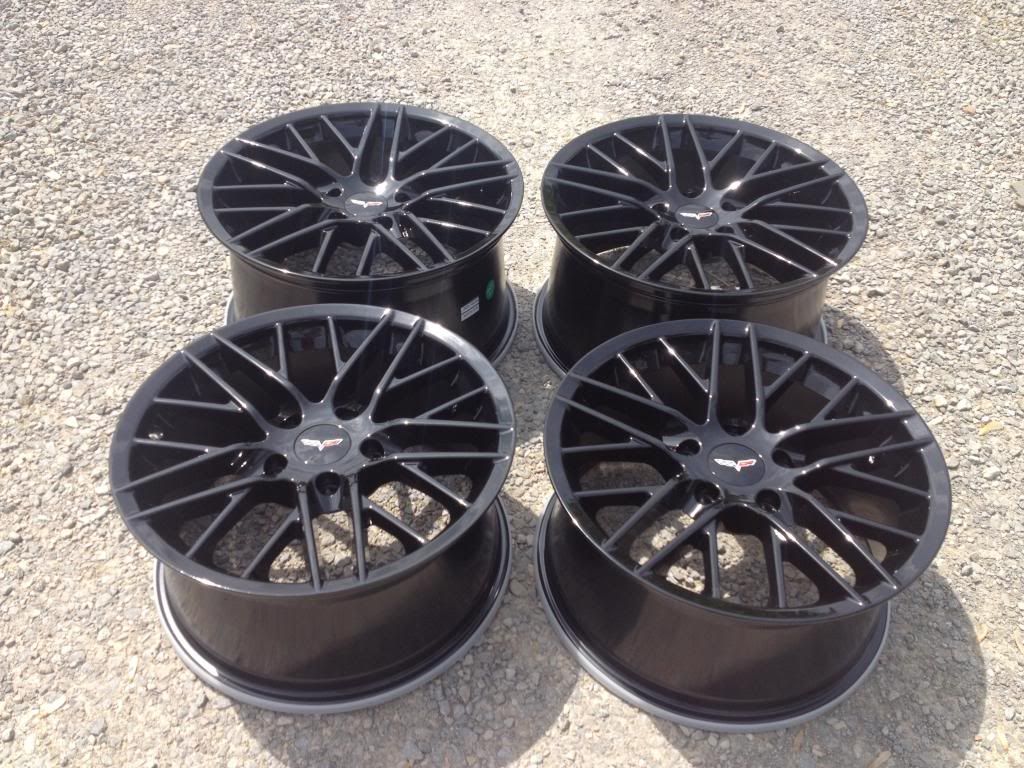
While waiting on my disc brake kit on back order I bought a set of ZR1 style powder coated vette wheels, but they are made to the C5 specs. 17x8.5 & 18x9.5's. Also made this mock up wheel spacer out of wood. "Try before you buy"

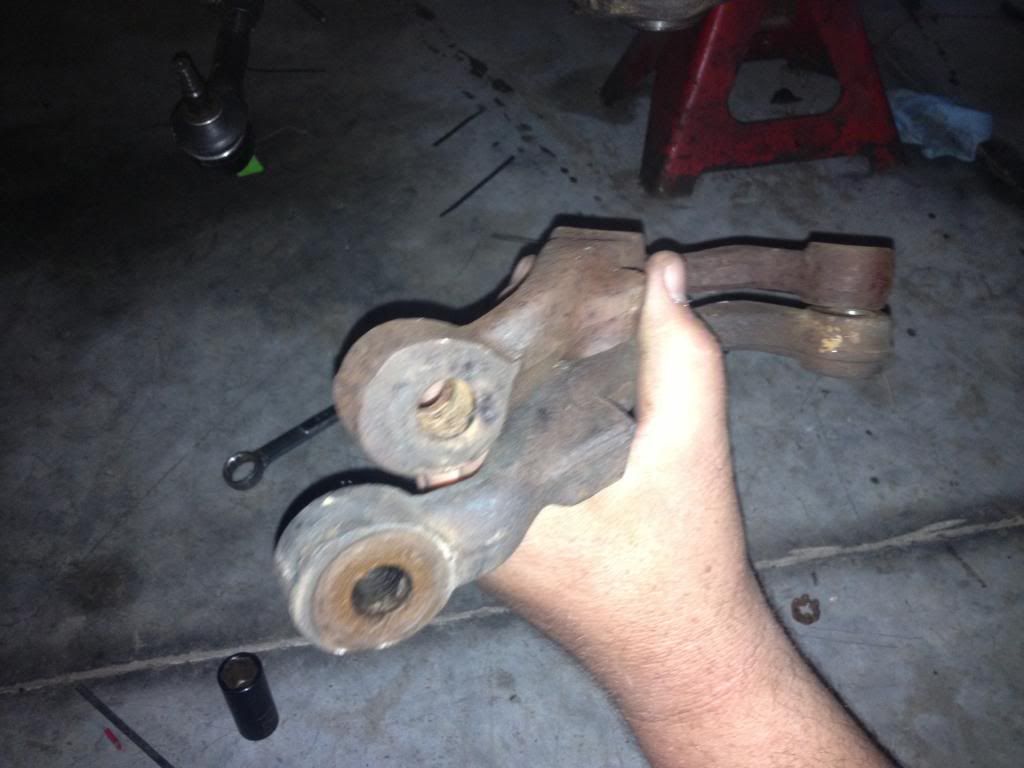
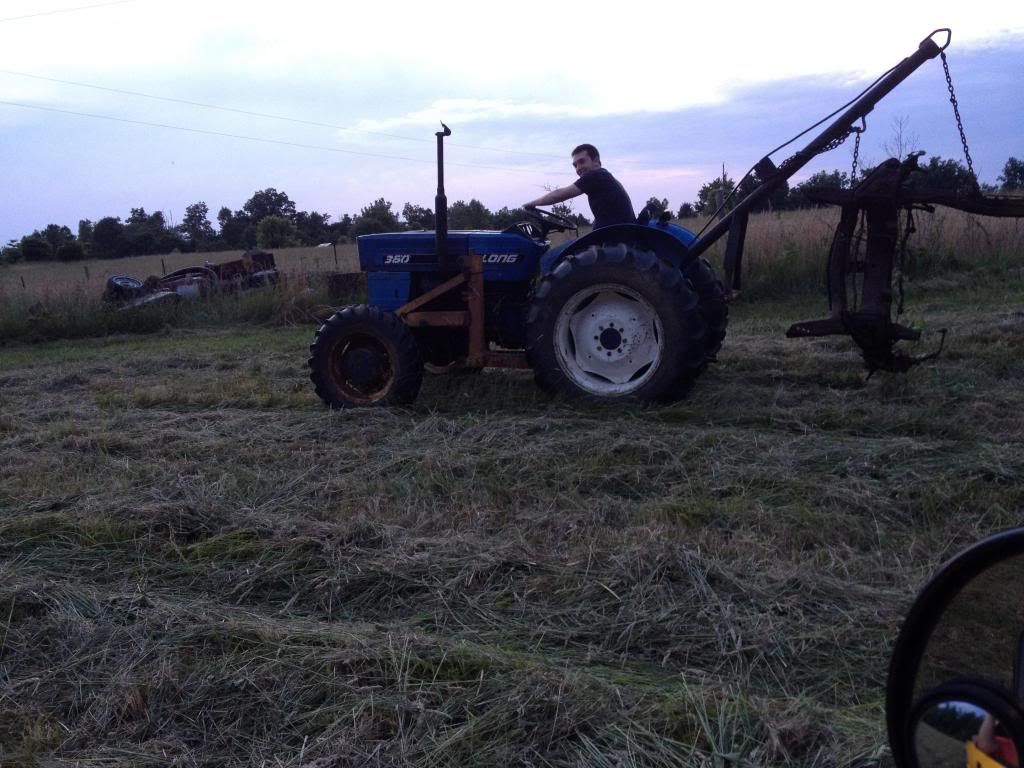
Apparently the 1968 Z28's and stock cars with power steering had different steering arms. Luckily my parts car in the field was an original power steer car and had the smaller steering arms.
This is a VERY helpful article on this..
http://www.pozziracing.com/camaro_steering.htm
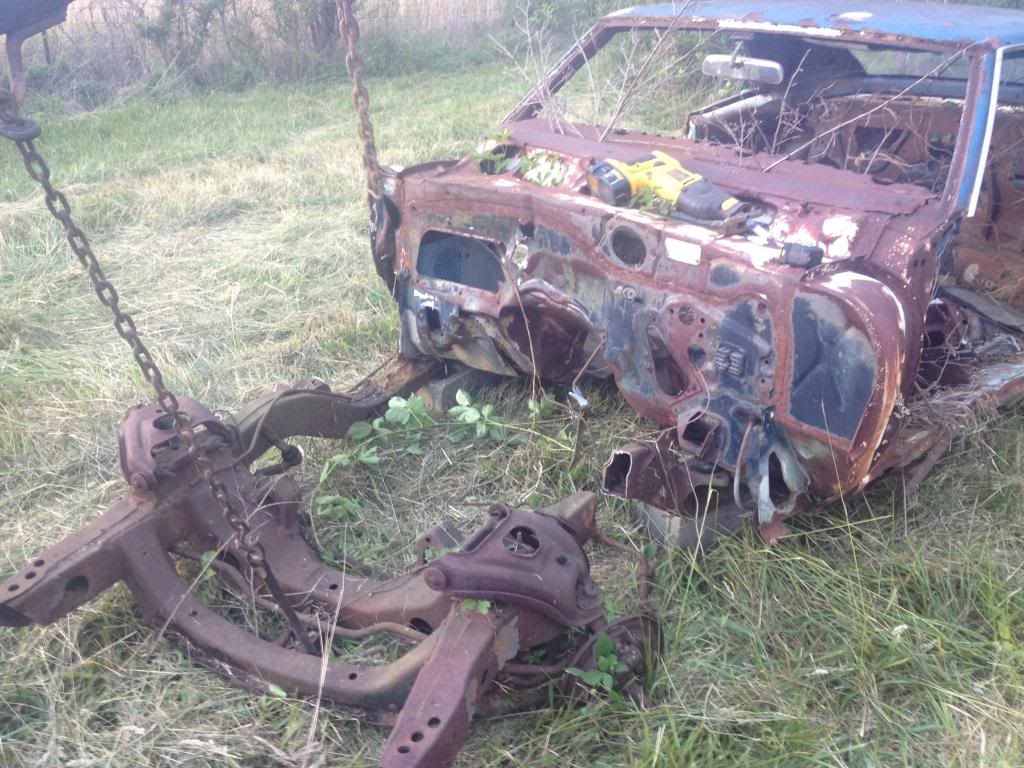
Dragging the wrecked subframe back to get the steering arms.
I've still yet to buy tires, I will post fitment later on. But that's the basics.
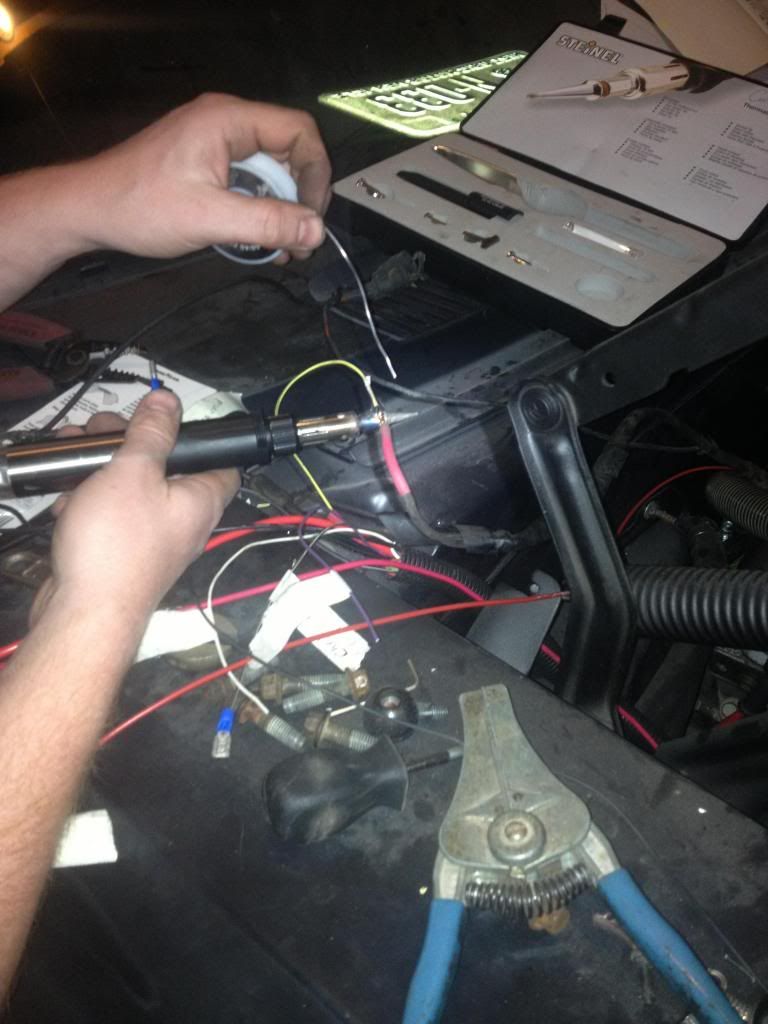
Next I got my wiring harness done, Basically I reworked the stock harness and used everyones help on here on the pinout guides. I have to give credit to my friend who 5.3 swapped his S10 as he basically guided me through most of it. I basically used the stock fuse box and eliminated what I didn't need. This article helped me out A LOT!!
https://ls1tech.com/forums/conversio...ification.html
I done away with the external voltage regulator, hardwired that harness into the ignition wire and it was like it was made for the car.
My PCM is being reprogrammed right now so in a couple more days I will be able to hear this thing run!!
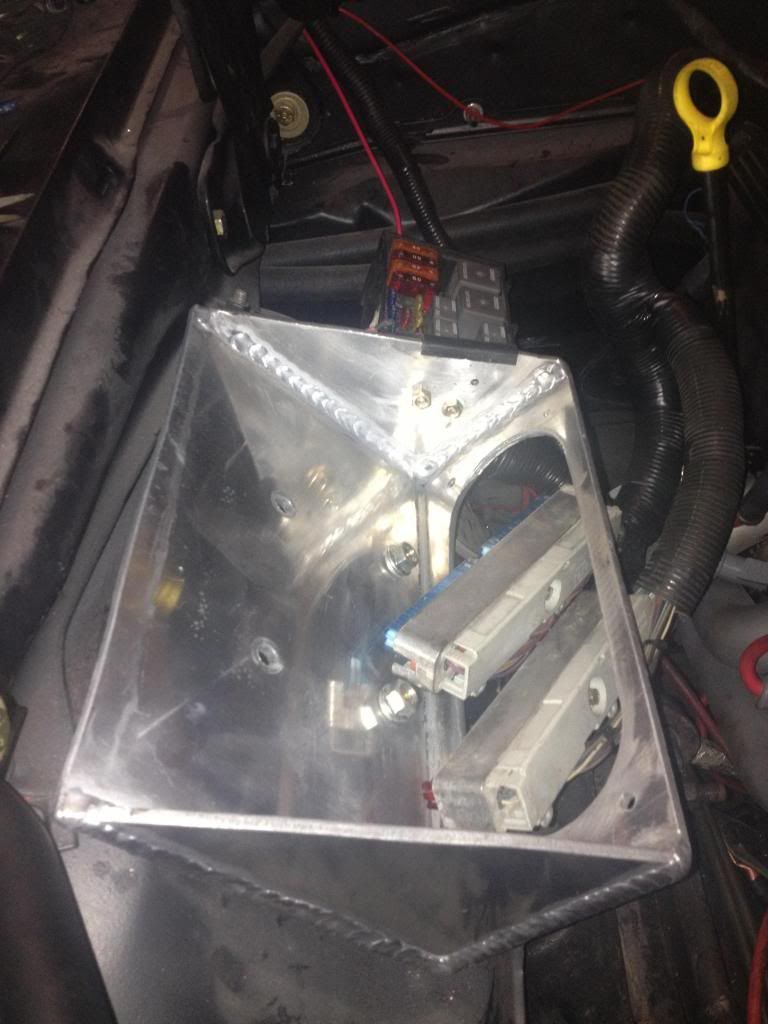
Mounted stock fuse panel to the PCM mount I made..
I really have done so much more work than I have posted but all these late nights out in the garage will be worth it. I should have it running this week and can go into further detail on my wheels and steering & brakes. I haven't given up yet still determined.
I know I haven't posted in a few months, I've been living from pay check to pay check saving for parts and getting everything wrapped up for the project. But here's some updates.
Turns out I was wrong those 98 body long tube headers didn't fit too well. I beat on them to get them to fit around the steering gear box but I realized the pitman arm does not clear. I scratched my head for weeks on what to do... It being stainless NOBODY sold mandrel bent tubing kits unless they were $30 plus dollars a piece. I think speedway was the only place I could find it reasonable... After being turned down by a fabrication shop, and an exhaust shop I decided to hack into them and rework them myself. Turns out that was a bad idea... Here's a few pics.


After I sawed into them I just decided it would be easier (and cheaper) to just buy a set of headers. I couldn't find anyone that done ceramic coating near me so I just had to paint them with header paint. Summit had a sell on these Hedman headers, and I purchased them. Here's where I welded the 02 sensor bungs in.

Next I redone my radiator mounts completely. I took square aluminum tubing, used 85 S10 radiator fan shroud bushings, milled the tubing in the lathe, welded it to flat plating and used it to cradle the radiator. Very pleased with the outcome.


While watching the video of my engine running in the camaro I noticed the power steering pump squalled very bad. I done some research and found that mine came with a power steering oil cooler. From what I've read some of the Z28, SS, WS6 cars in the early years had these and GM realized it was a bad design due to it leaking and mixing coolant with power steering fluid. After I tore mine apart that's what had happened. I put a delete hose on, new GM pulley, and pump. Look at this gunk.


I went into Napa and got some custom power steering hoses made.. They looked at me like I was crazy when I told them I was putting an LS1 into a 68' Camaro.

My finished powder coated OBDII port and SES light mount.

I live about an hour north of Bowling Green KY so I went to the National Corvette Museum for the C7 Release bash and seen some pretty neat stuff.


Next, I bought a power disc brake conversion kit from Right Stuff with 2 inch drop spindles. Here's the teardown from the old drum brakes. My balljoints were factory as they were riveted to the control arms.

Torching out the 45 year old control arm bushings.

While waiting on my disc brake kit on back order I bought a set of ZR1 style powder coated vette wheels, but they are made to the C5 specs. 17x8.5 & 18x9.5's. Also made this mock up wheel spacer out of wood. "Try before you buy"


Apparently the 1968 Z28's and stock cars with power steering had different steering arms. Luckily my parts car in the field was an original power steer car and had the smaller steering arms.

This is a VERY helpful article on this..
http://www.pozziracing.com/camaro_steering.htm

Dragging the wrecked subframe back to get the steering arms.

I've still yet to buy tires, I will post fitment later on. But that's the basics.
Next I got my wiring harness done, Basically I reworked the stock harness and used everyones help on here on the pinout guides. I have to give credit to my friend who 5.3 swapped his S10 as he basically guided me through most of it. I basically used the stock fuse box and eliminated what I didn't need. This article helped me out A LOT!!
https://ls1tech.com/forums/conversio...ification.html
I done away with the external voltage regulator, hardwired that harness into the ignition wire and it was like it was made for the car.
My PCM is being reprogrammed right now so in a couple more days I will be able to hear this thing run!!
Mounted stock fuse panel to the PCM mount I made..


I really have done so much more work than I have posted but all these late nights out in the garage will be worth it. I should have it running this week and can go into further detail on my wheels and steering & brakes. I haven't given up yet still determined.
Last edited by BlackLS1Camaro; Aug 4, 2017 at 02:34 PM. Reason: Addition


Launching!
Joined: Aug 2012
Posts: 203
Likes: 2
From: harrisville R.I
I too know that feeling for me it was about 2 years but when you turn that key for the first time and it fires yaaaaafinhooooooo you thought the guys at the auto parts looked at you funny when you told them what you were doing they didn't believe me when I told them I was putting a ls1 in a 1974 MGB you know when she hit the road I went there first good luck and awesome job

Thread Starter
Staging Lane
Joined: Sep 2012
Posts: 87
Likes: 0
From: Kentucky
I really appreciate the support everyone. It feels great to set it on the ground. I ended up having to trash that mallory fuel injection pump and run a Walbro 255. I am hoping to get the exhaust and alignment on it soon as well as the fresh coat of flat black and i'm ready to drive it


