
86 Monte SS. 5.3, Single turbo, Megasquirt II. Lots of pics


 04-28-2013, 09:51 PM
#63
Teching In
iTrader: (1)
Join Date: Aug 2012
Location: Sherman, TX
Posts: 41
Likes: 0
Received 0 Likes
on
0 Posts
LOL, Excuse the VERY poor Photoshop skills, or rather lack thereof.

It may not work, but I thought another suggestion couldn't hurt.
-Aaron
04-29-2013, 09:35 AM
#64
On The Tree

Join Date: Jul 2012
Location: Bowling Green, Missouri
Posts: 120
Likes: 0
Received 0 Likes
on
0 Posts
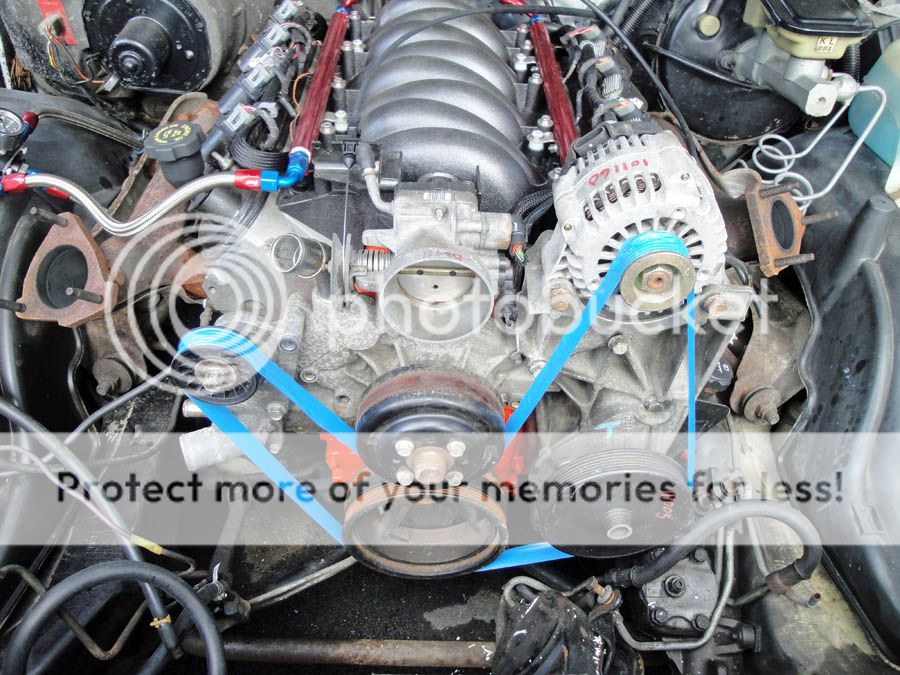
Can you not route the belt like this and have more wrap on the crank ? It is hard to tell due to the angle on the photo you took, but the belt might go over the top of the throttle body and miss whatever you end up using for an air intake
LOL, Excuse the VERY poor Photoshop skills, or rather lack thereof.
It may not work, but I thought another suggestion couldn't hurt.
-Aaron
LOL, Excuse the VERY poor Photoshop skills, or rather lack thereof.
It may not work, but I thought another suggestion couldn't hurt.
-Aaron
04-29-2013, 11:17 AM
#65
I chose to run one of these on my build. It will fix the belt routing problem your having. You will need the belt to wrap around the crank more to spin all the accessories. I bought the belt and idle relocation bracket through them.
http://dirtydingo.com/store/product_...=1371&CDpath=8
http://dirtydingo.com/store/product_...=1371&CDpath=8
04-29-2013, 08:53 PM
#66
Teching In
iTrader: (1)
Join Date: Aug 2012
Location: Sherman, TX
Posts: 41
Likes: 0
Received 0 Likes
on
0 Posts
Eh, back to the drawing board. LOL
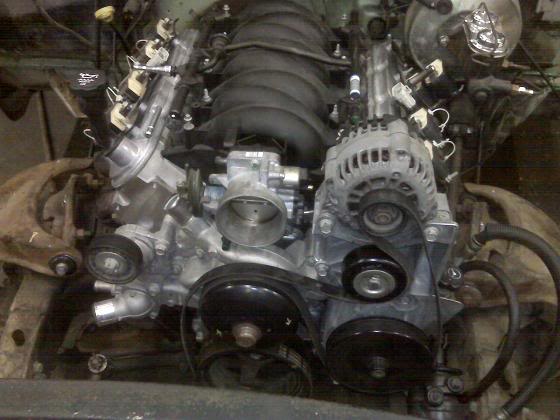
What about this setup, with a stationary idler pulley under the alternator ? This is on my buddy John's '60 Chevy wagon with an LS2/76mm turbo.
 04-29-2013, 08:55 PM
#67

Yeah, I wasn't sure if it would go over the throttle body or not. It was a bit tough for me to get an idea of how close the throttle body would be because of the angle of the photo.
Eh, back to the drawing board. LOL
What about this setup, with a stationary idler pulley under the alternator ? This is on my buddy John's '60 Chevy wagon with an LS2/76mm turbo.

Eh, back to the drawing board. LOL
What about this setup, with a stationary idler pulley under the alternator ? This is on my buddy John's '60 Chevy wagon with an LS2/76mm turbo.
Doug
04-30-2013, 01:38 AM
#72
TECH Enthusiast
iTrader: (9)
Join Date: Mar 2008
Location: IL
Posts: 698
Likes: 0
Received 0 Likes
on
0 Posts

Nice build I am also planning on using a bulkhead connector to use for the PCM harness but am using a weatherpack terminal. Why didn't you put the bulkhead connector underneath the heaterbox like the CCC G-bodies had their PCM harness routing?
04-30-2013, 02:26 AM
#73

Hey nice build! I have a question for you. I have megasquirt 2 running a 4.8 in my 86 camaro and it seems to be a little finicky on when it decides to sync during cranking. Sometimes it will cra k 10 times in a row and then go the rest of the day without syncing the crank, then randomly will start syncing again.
Have you experienced this at all? If not out of curiosity what is the opamp p/n on your board? This is the 8 prong chip u7. Word is that lm2904 is causing some issues for some people. Anyways keep up the good work, hope to hear from you!
Have you experienced this at all? If not out of curiosity what is the opamp p/n on your board? This is the 8 prong chip u7. Word is that lm2904 is causing some issues for some people. Anyways keep up the good work, hope to hear from you!
05-02-2013, 05:46 AM
#75
On The Tree
Thread Starter

Join Date: Nov 2012
Posts: 101
Likes: 0
Received 0 Likes
on
0 Posts
Wow this thread came back to life haha! I'm on my phone now but will answer all questions tonight. Particularly about the MS and how finicky it is on the ignition signal from the LS and how to cure it.
05-02-2013, 07:45 PM
#76
On The Tree
Thread Starter
Join Date: Nov 2012
Posts: 101
Likes: 0
Received 0 Likes
on
0 Posts
The older style head gaskets had the rubber sealing ring formed around the notch where the new head gaskets have the rubber sealing ring straight across where the notch is. Supposedly it will leak coolant straight out of the notch and I can clearly see that it would. I'm glad I found out before I filled it up with coolant!
Mainly because the 3" exhaust will come off the the turbo and be routed down the passenger side. It will be close to the firewall and I don't want to melt anything if I can avoid it, particularly my wiring harness!
I went through the SAME thing when I attempted to get my engine running initially. I fiddled with mine for days before finally getting a stable signal that would start the engine. But then I found that the VR pots (R52 and R56) had about 1/16th of turn between synced and unsynced. So I did some reasearch and found that my U7 was an LM2904. I replaced it with a TLC2272AIP that I got from Digi-Key. What an improvement, much easier starting now. Syncs up quickly and reliably every time. Granted I have only idled the engine so far but I was ready to toss the whole works when the LM2904 was in there.
Thanks for the tip! I am going to give it a go like this. If it works then great, it only cost me a new belt. If it doesn't then no harm done!
More work and lots more parts are here! Expect a big update with lots of pics and the like soon.
Thanks to everyone following along still!
Hey nice build! I have a question for you. I have megasquirt 2 running a 4.8 in my 86 camaro and it seems to be a little finicky on when it decides to sync during cranking. Sometimes it will cra k 10 times in a row and then go the rest of the day without syncing the crank, then randomly will start syncing again.
Have you experienced this at all? If not out of curiosity what is the opamp p/n on your board? This is the 8 prong chip u7. Word is that lm2904 is causing some issues for some people. Anyways keep up the good work, hope to hear from you!
Have you experienced this at all? If not out of curiosity what is the opamp p/n on your board? This is the 8 prong chip u7. Word is that lm2904 is causing some issues for some people. Anyways keep up the good work, hope to hear from you!
More work and lots more parts are here! Expect a big update with lots of pics and the like soon.
Thanks to everyone following along still!
05-15-2013, 06:50 PM
#77
On The Tree
Thread Starter
Join Date: Nov 2012
Posts: 101
Likes: 0
Received 0 Likes
on
0 Posts
Okay a little bit to report. I am progressing but it is taking some time.
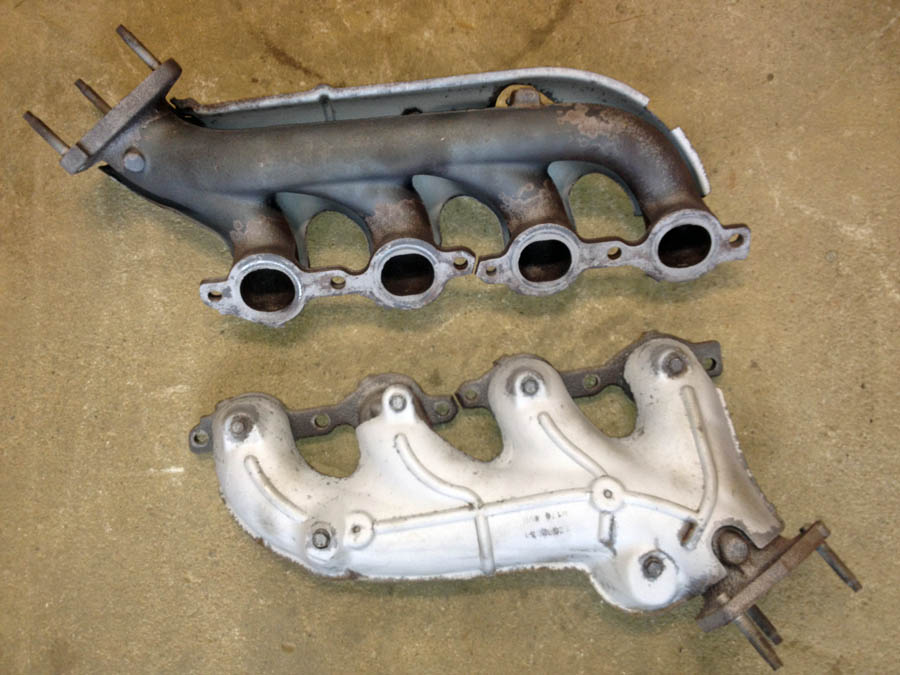
I took the manifolds back off because I thought they needed to be cleaned up and it would make my life easier with some of the turbo work.
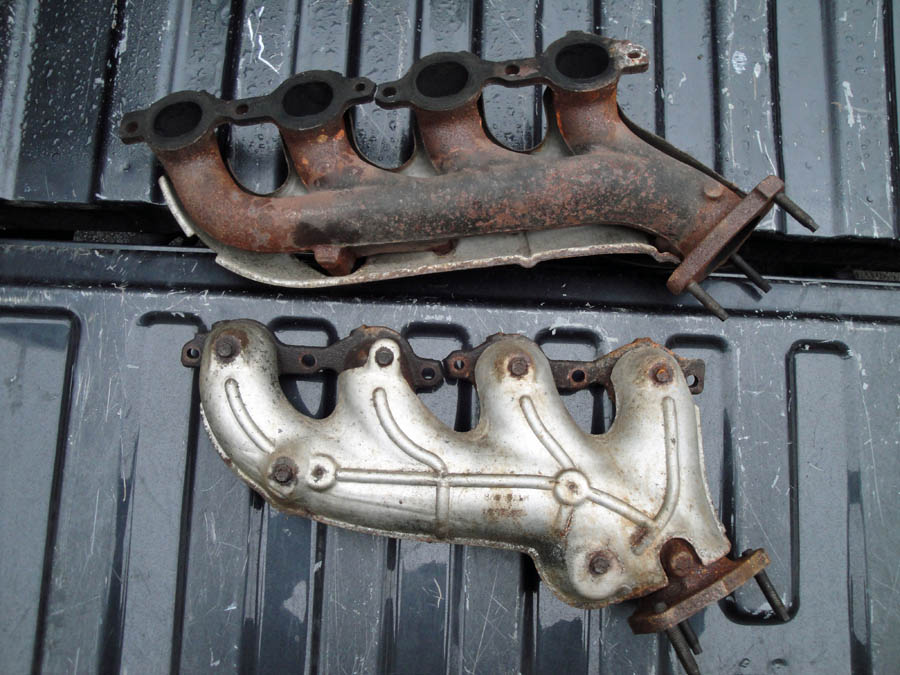
I took them to work and put them in the sandblasting cabinet and they sure cleaned up nice.
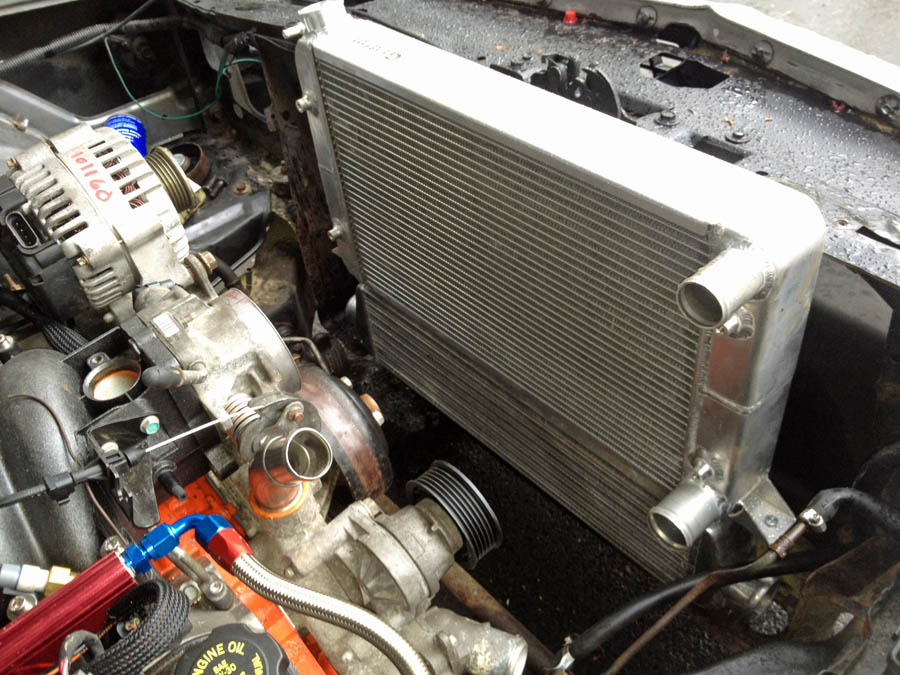
Nice big Griffin aluminum radiator and a little intercooler. For the boost I am planning on running this intercooler should be more than adequate.
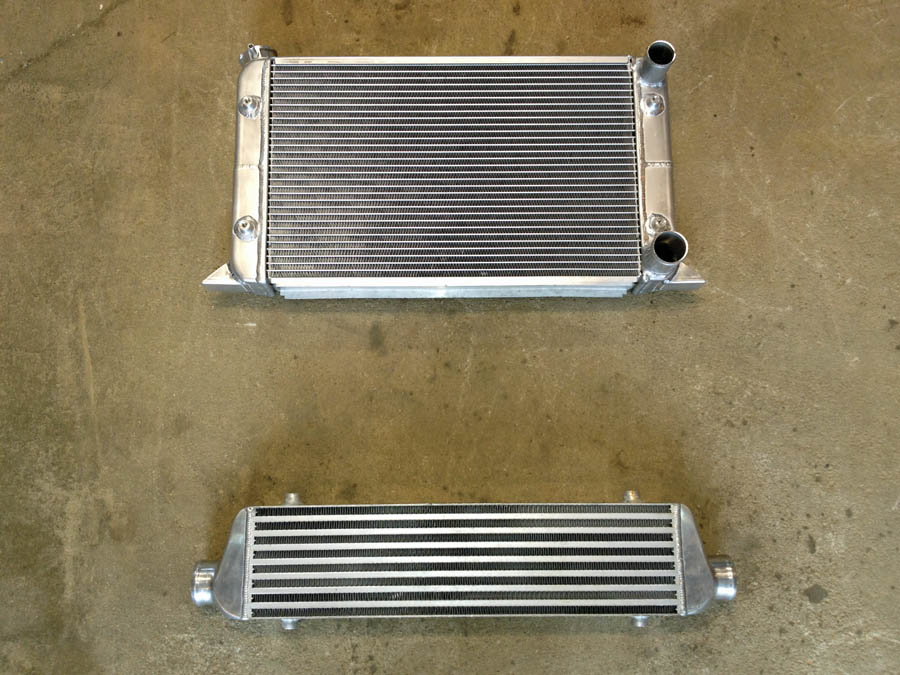
I decided to mate the radiator and intercool together and install them as a unit in place of the factory radiator. So with some strap iron I attached them.
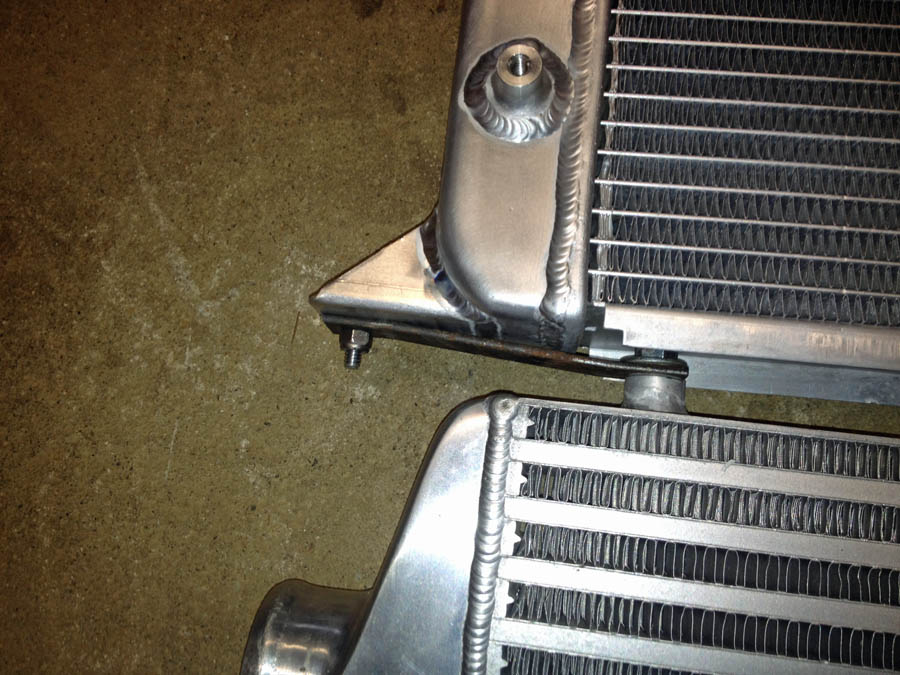
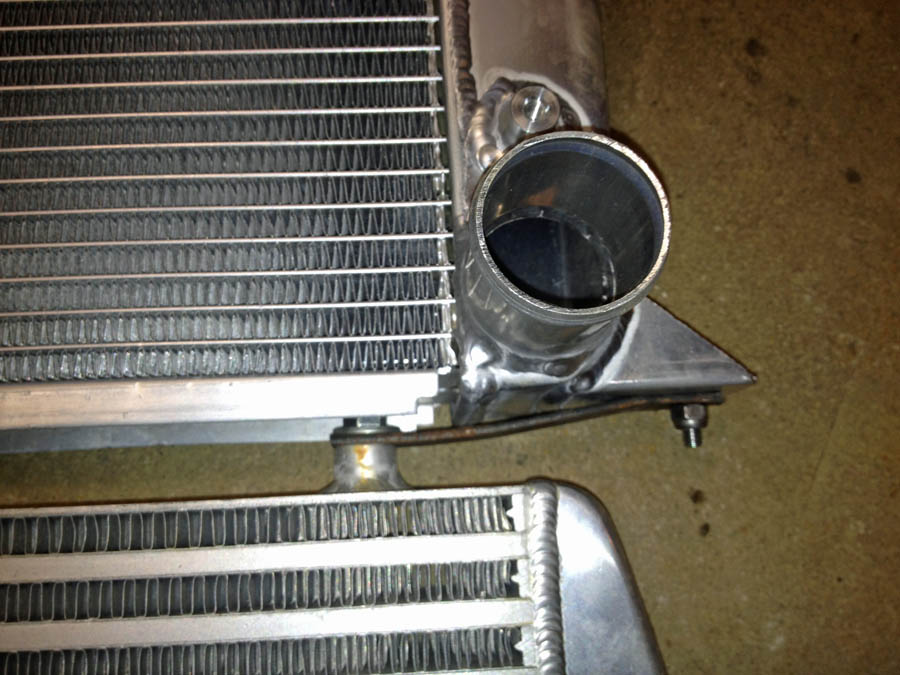
The whole thing bolted together, I think it looks awesome.
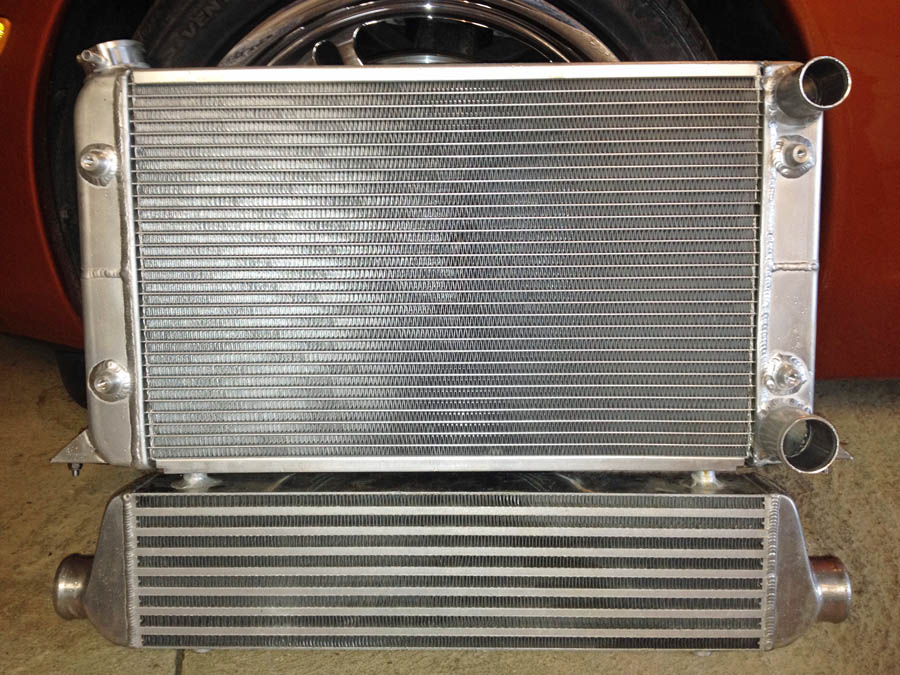
Trial fit to the car. Obviously too tall! I'm gonna have to notch the lower radiator support to get it in place.
Everything fits pretty as a picture now! Some hoses from NAPA have connected everything up nice and neat, and the heater hoses are connected as well now too. Flat bar was formed for the lower mounts as well as the struts up at the top.
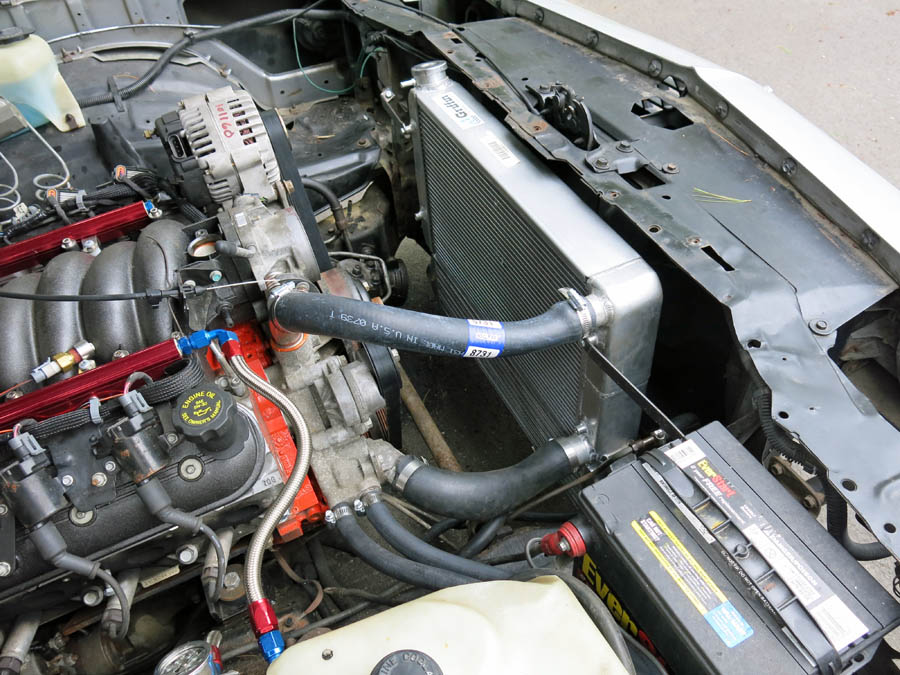
From the drivers side, I think it looks great personally.
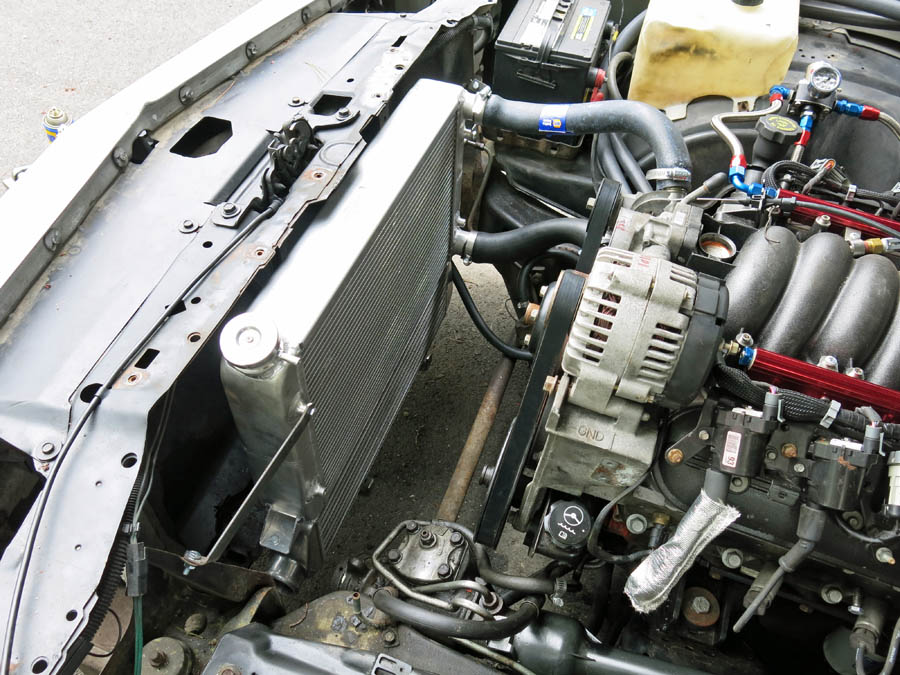
After two trips to NAPA I had the right length serpentine belt. I think this is going to work to be honest. But only time will tell.
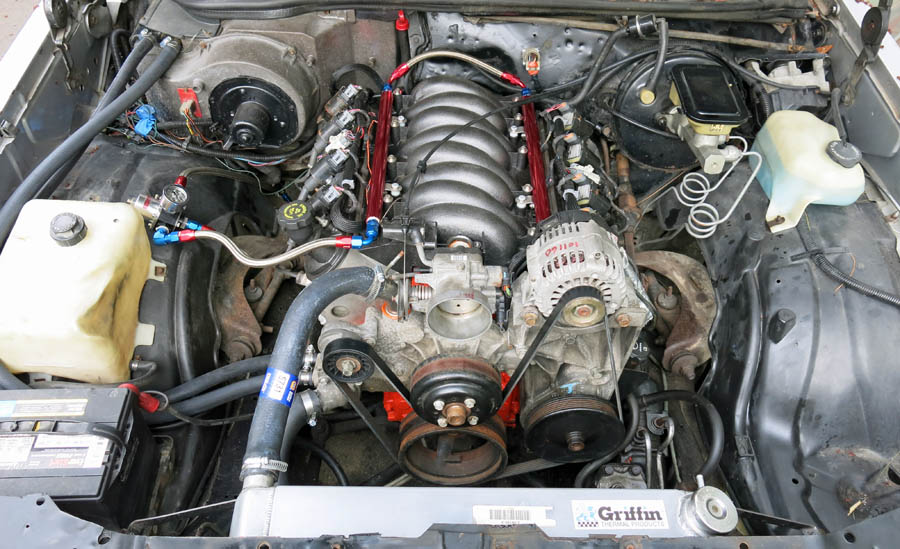
More parts have shown up, wastegate, blow off valve, and a whole bunch of exhaust parts including bends as well as really nice water cut flanges. I have been dying to get started on this part of the project and it is finally time! More to come soon.

I took the manifolds back off because I thought they needed to be cleaned up and it would make my life easier with some of the turbo work.
I took them to work and put them in the sandblasting cabinet and they sure cleaned up nice.
Nice big Griffin aluminum radiator and a little intercooler. For the boost I am planning on running this intercooler should be more than adequate.
I decided to mate the radiator and intercool together and install them as a unit in place of the factory radiator. So with some strap iron I attached them.
The whole thing bolted together, I think it looks awesome.
Trial fit to the car. Obviously too tall! I'm gonna have to notch the lower radiator support to get it in place.
Everything fits pretty as a picture now! Some hoses from NAPA have connected everything up nice and neat, and the heater hoses are connected as well now too. Flat bar was formed for the lower mounts as well as the struts up at the top.
From the drivers side, I think it looks great personally.
After two trips to NAPA I had the right length serpentine belt. I think this is going to work to be honest. But only time will tell.
More parts have shown up, wastegate, blow off valve, and a whole bunch of exhaust parts including bends as well as really nice water cut flanges. I have been dying to get started on this part of the project and it is finally time! More to come soon.
 05-25-2013, 09:01 PM
#80
On The Tree
Thread Starter
Join Date: Nov 2012
Posts: 101
Likes: 0
Received 0 Likes
on
0 Posts
Thanks, it is definitely coming along!
Well it doesn't look nearly as nice as most of the builds on here but I think it is pretty good.
I do have an update tonight though. I am getting there!
A rainy Saturday was the perfect chance to do a little more work.
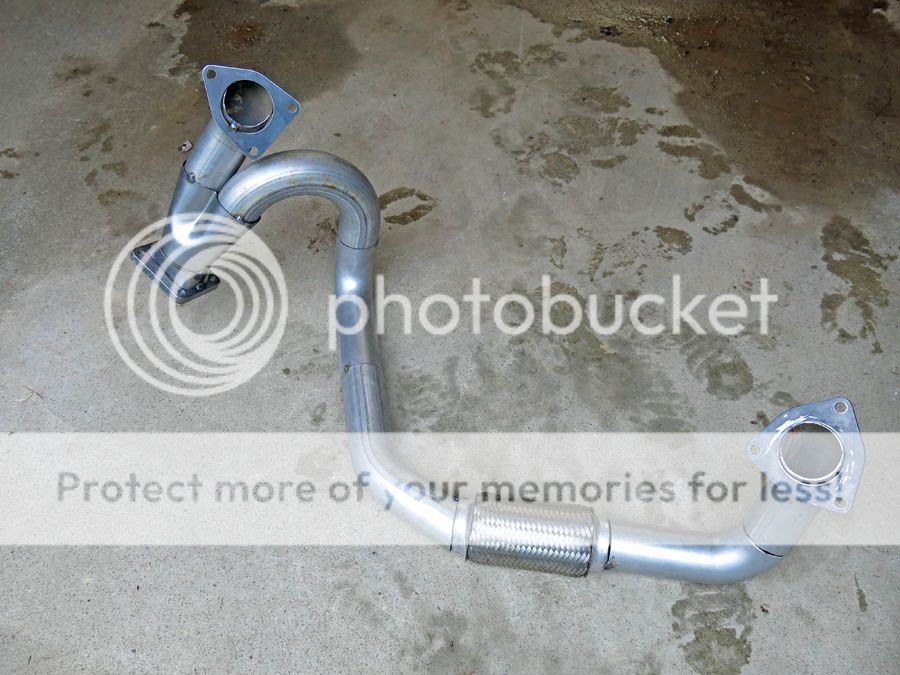
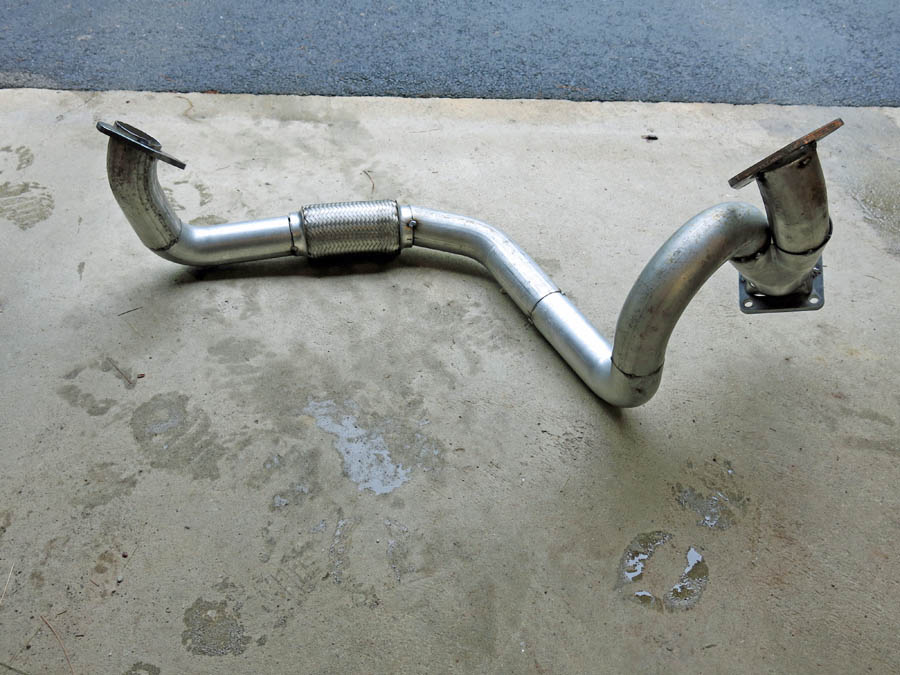
The turbo hotside is all cut up and tacked together now. I'm sure it looks ugly to some but I am happy with it.
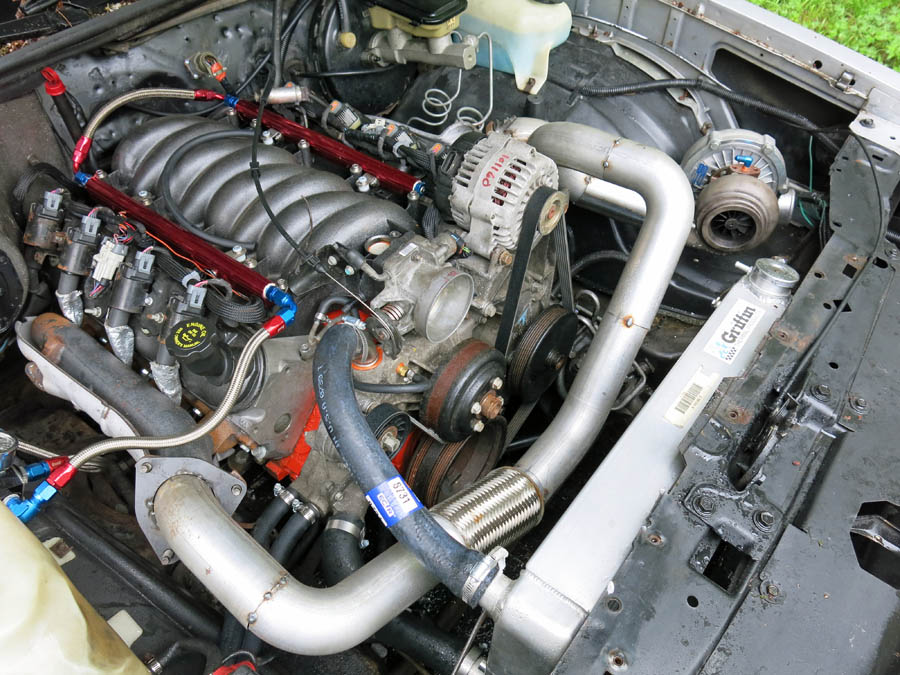
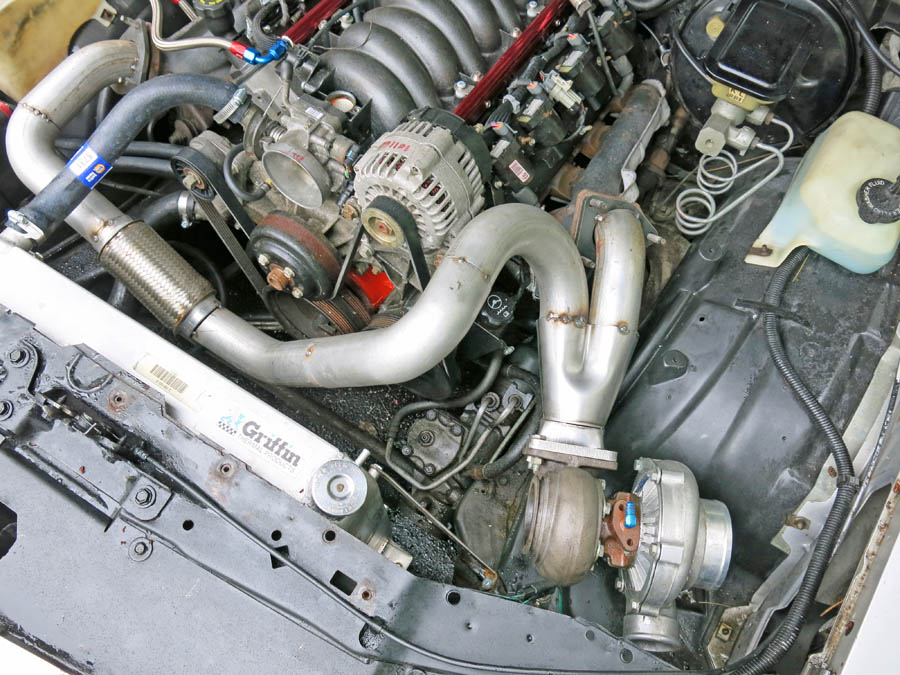
Fitted to the belly of the beast! I am a bit concerned about the pipe coming around by the alternator. It is only 1 inch from the insulation on the hood. I will probably put a heat shield on it if I don't wrap the whole hotside. Or maybe I will decide to redo that portion before I weld everything up. I don't know. But I ran out of steam after spending the afternoon out there so this is where I am at. Notice also that the turbo is hanging in there as well. Woohoo!
I should be firing this thing up soon and building the base tune. I'm so close I can taste it now. Stay tuned!!
Well it doesn't look nearly as nice as most of the builds on here but I think it is pretty good.
I do have an update tonight though. I am getting there!
A rainy Saturday was the perfect chance to do a little more work.
The turbo hotside is all cut up and tacked together now. I'm sure it looks ugly to some but I am happy with it.
Fitted to the belly of the beast! I am a bit concerned about the pipe coming around by the alternator. It is only 1 inch from the insulation on the hood. I will probably put a heat shield on it if I don't wrap the whole hotside. Or maybe I will decide to redo that portion before I weld everything up. I don't know. But I ran out of steam after spending the afternoon out there so this is where I am at. Notice also that the turbo is hanging in there as well. Woohoo!
I should be firing this thing up soon and building the base tune. I'm so close I can taste it now. Stay tuned!!