When you click on links to various merchants on this site and make a purchase, this can result in this site earning a commission. Affiliate programs and affiliations include, but are not limited to, the eBay Partner Network.
.....draggin *** again on it but got a few things done
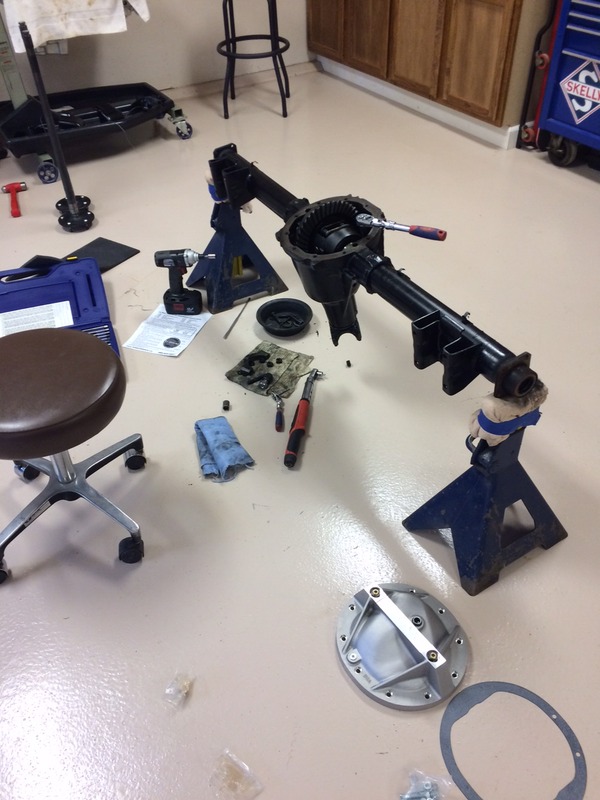
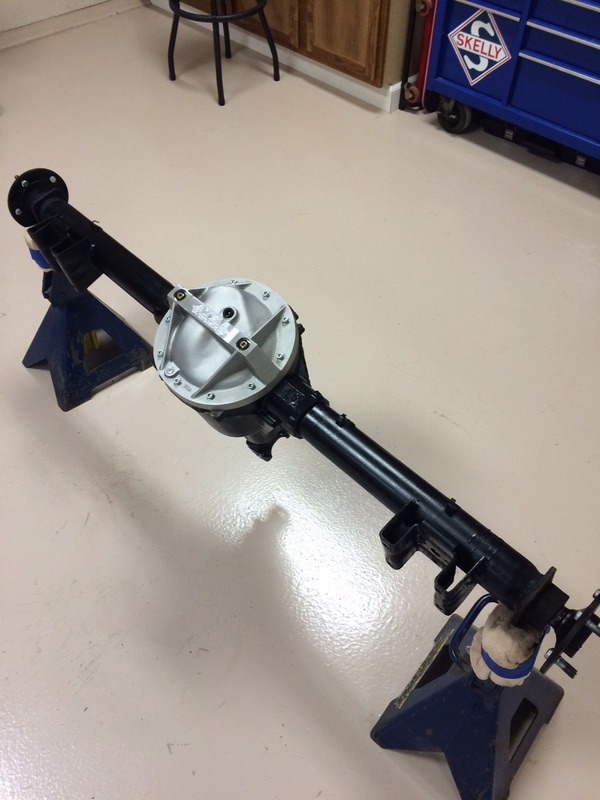
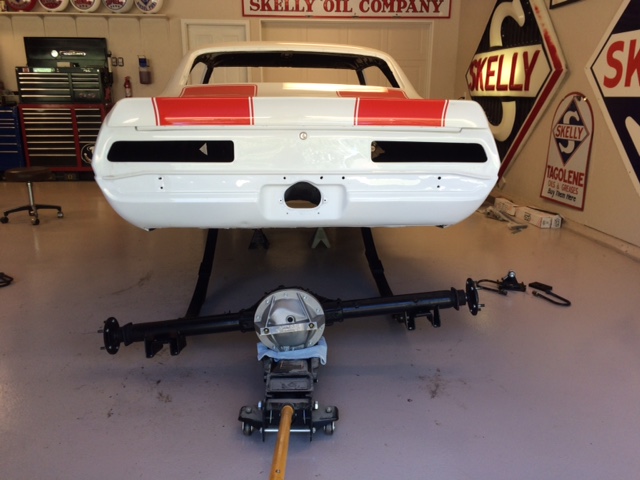
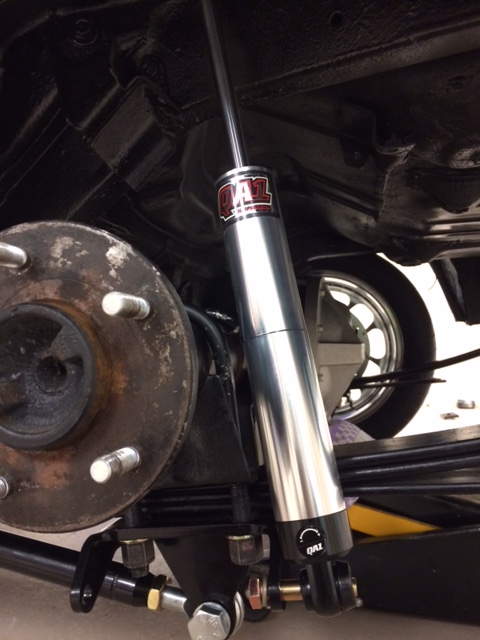
Rear axle is back together. Had a small issue when installing the studs for the bearing caps. Got both left side and top right in, went to install the bottom right and it would only thread half way down. Tried the other studs in that hole with the same results. No pulled threads. The factory cap bolts would thread down alright. Ran a bottom tap down the hole and the stud now goes right in and torques down. Had me concerned for a few seconds. Had to walk away, suck down a couple Steveweisers, and pondered on it for a few. Sometimes walking away really helps and is sometimes hard to do when you are in a groove.
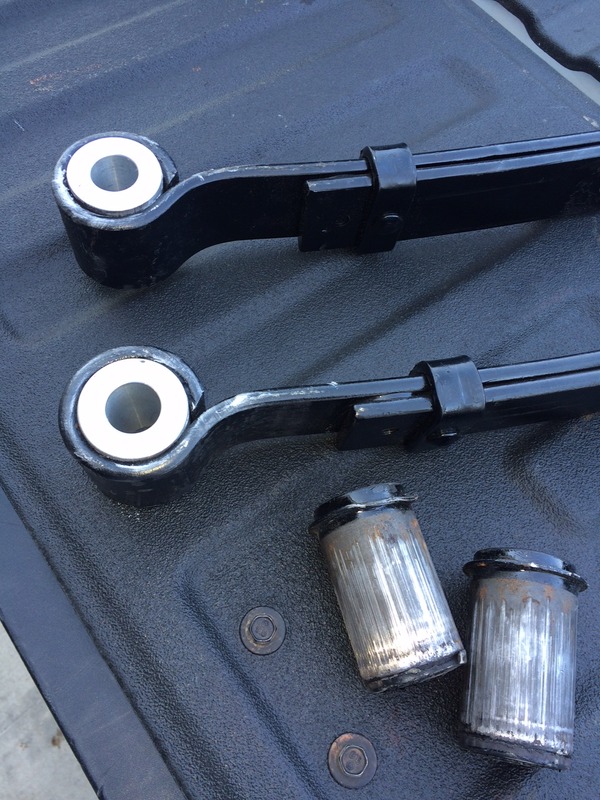
Also got the rubber leaf bushings pressed out and pressed in the aluminum bushings for the Cal Trac bars
Now to get the axle back under the car along with the new suspension and brakes. More to come
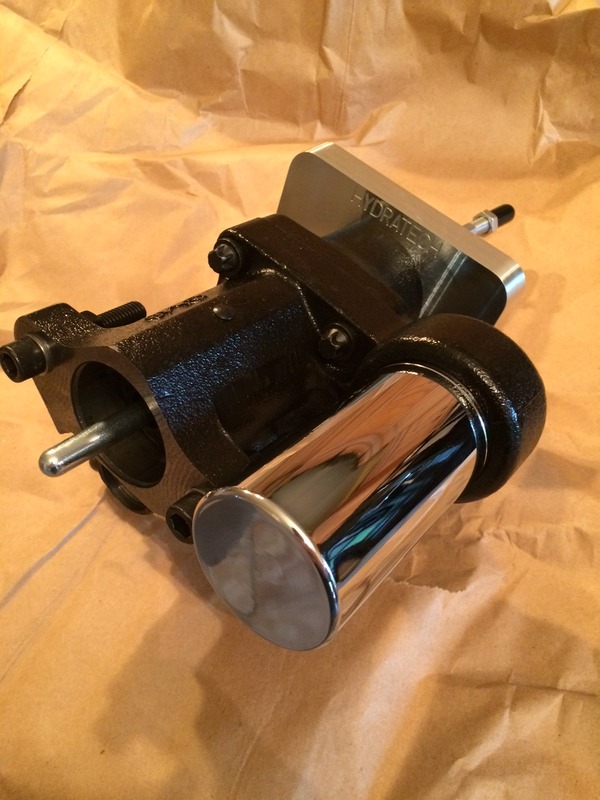
Forgot, this little gem showed up also. If anyone out there is thinking about going hydroboost, Hydratech is the place to go. Your gonna pay for it, but the quality and customer service is great. I was impressed when I pulled it out of the box. Top notch. AND, this isn't even their show quality option believe it or not
What rear brakes are you going with? sorry if I missed it. Great looking build. Currently im trying to put on 98-02 brakes. Needing two l/h backing plates to make it work due to my staggered shocks.
What rear brakes are you going with? sorry if I missed it. Great looking build. Currently im trying to put on 98-02 brakes. Needing two l/h backing plates to make it work due to my staggered shocks.
CPP Stage III kit. Sure its not over the top, but they will work fine for what the car will be used for.
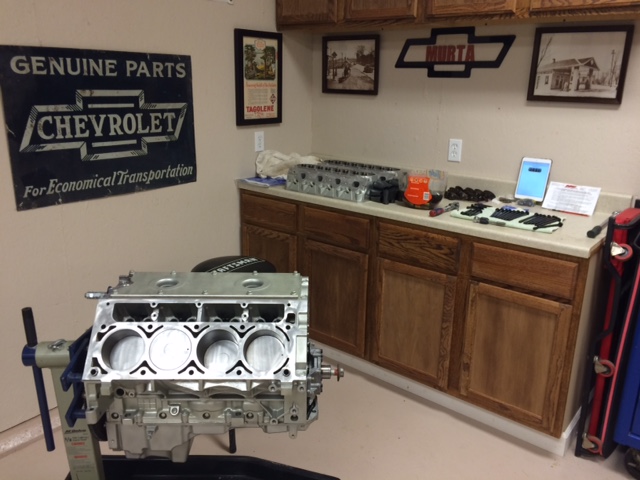
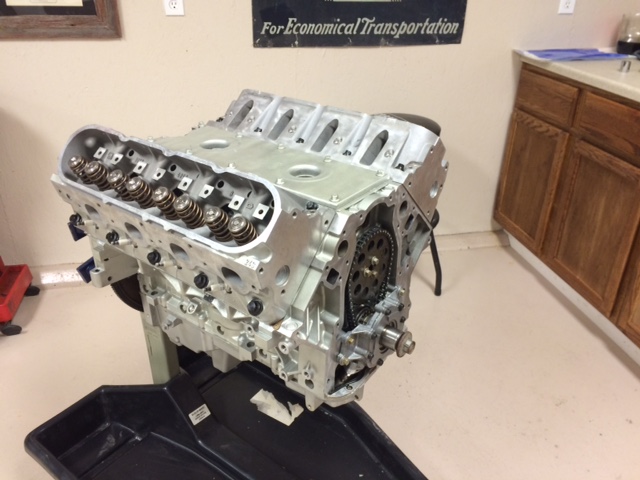
Measured for the pushrods, gotta get them on order. Also borrowed some valve covers and timing cover to use when setting in the engine and trans. Don't want to nick/scratch the polished ones.
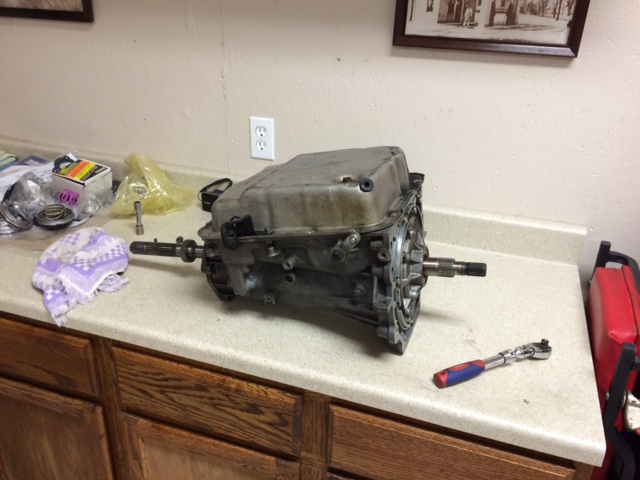
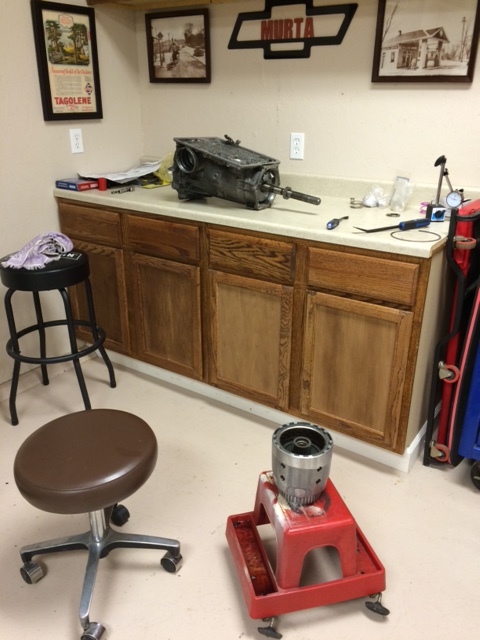
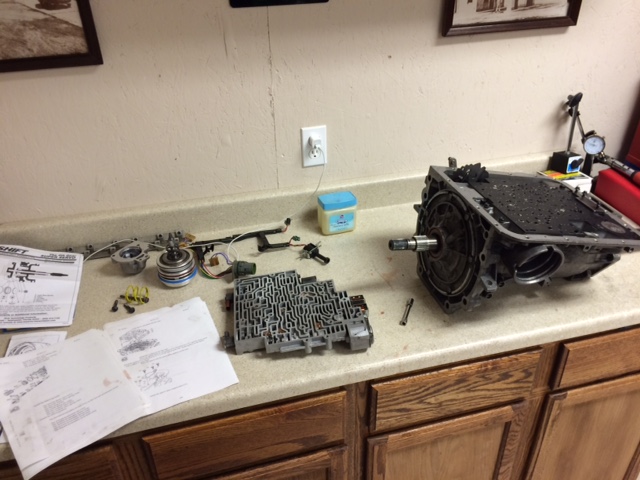
Did a little trans work tonight. 2 years ago when we moved, I had this trans completely apart. So I quickly put it together so I didn't have to move all of the pieces and take a chance of losing one or more. With that said, I wasn't very confident that I had everything setup the way I wanted it especially the valve body. Well its a good thing I did, cause I had the forward sprag in backwards and had about .035" clearance in the 3/4 clutch pack. I really want it setup at .015-.025". I might have to swap the apply plate from a "B" to a "C" plate to make up clearance and maybe a thinner snap ring. Ill just have to play around with it to get it in the window.
I applied air to the 3/4 feed hole and air checked the 3/4's instead of relying on feel. I had .025" clearance and I also checked with a feeler gauge. I can live with that. Im glad I went back through the trans, I found a few things that I missed when I was in a hurry a couple years ago before the move.
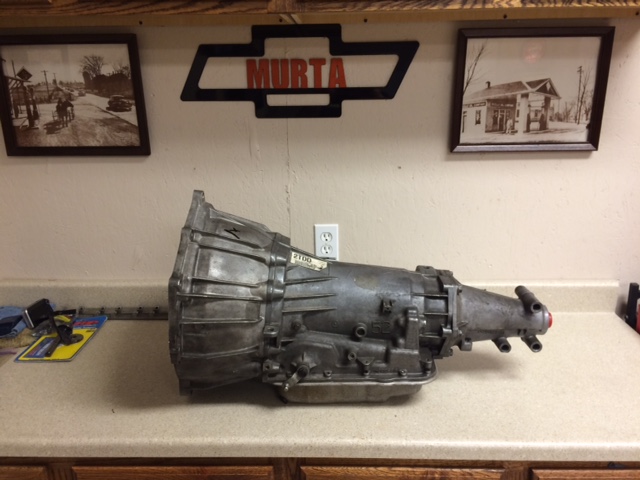
Ready for paint
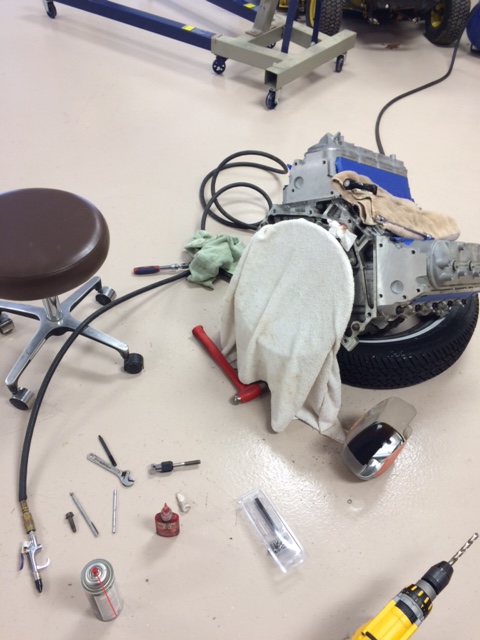
When I originally separated the engine and trans, the bellhousing bolts didn't seem right when they were coming out. And one almost pulled out by hand. Looks like whoever had this tranny out last got happy with the bolts and galled 5 of the 6 top bolt hole threads all to hell. I ended up heli-coiling all 6.
Get the tranny painted, new converter in, motor mounts on the engine, and set it in the car.
We installed the motor & trans after heli coil. Found another problem. The ports for the power steering lines are right next to the block.
I called the manufacturer of the rack. They said its not designed for an LS engine and to send them the rack, mark where I need the ports and they will turn the pump on the rack to where it needs to be. Got it back and in stalled and ran into another small snag before I would put the motor & trans back in for another fitment. Needed to notch the crossmember a bit to gain some room for the fitting and also the motor mount plate to allow the line to be able to screw on the fitting.
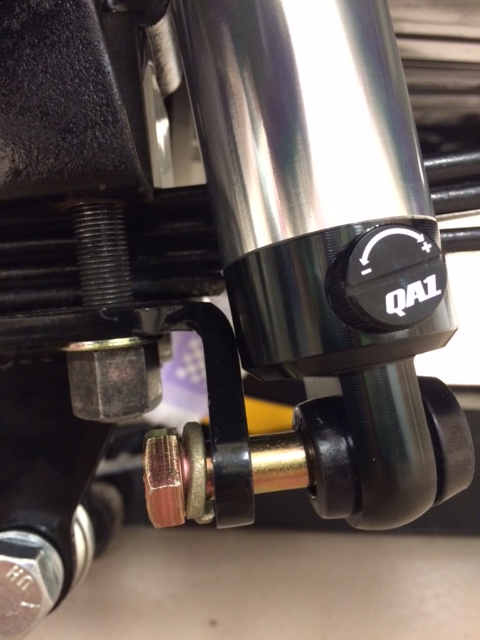
I also got the shock issue taken care of. I drilled another hole right above the provided one on the bottom of the ear. Bent the ear which ever way the shock angles (back on drivers, forward on passenger), trimmed a little off the shoulder and they are going to fit fine. I also had to get steel sleeves for the shock bushings so now the bolts fit nice and snug.
Next on the agenda is to pull the engine & trans, paint the trans, install the Circle D converter, and set them back in the car and bolt them down for good hopefully. Make sure pinion angles are ok then measure for the driveshaft.
I also ordered the exhaust yesterday. Ordered Magnaflow kit 15899 for 69 Camaro. 3" and I also ordered V bands to tig on all the joints. Once I hang the Aeromotive tank then we can start getting the kit fitted. Then the plan is to start running fuel lines then brake lines.
In the mean time, I pulled out the front accessories and temporarily them on just to see if I had any snags there. So far so good
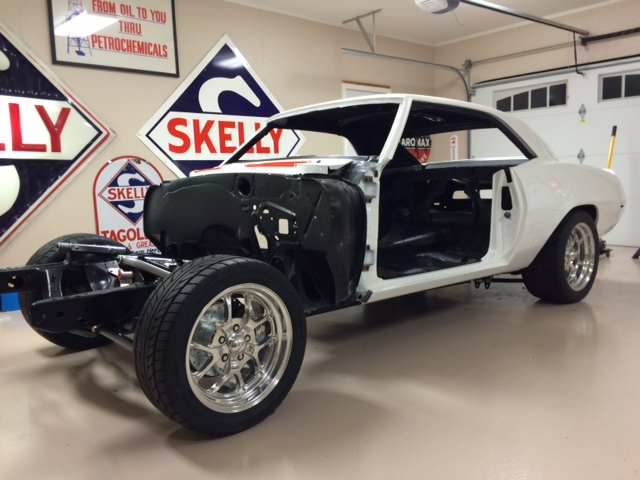
....back in the saddle. After having a rear leaf spring bushing issue, and another steering rack issue the motivation went back down the drain. Finally got the bushing I needed and installed and all rear suspension torqued. Got the engine trans back in hopefully this time for good. Also slipped the headers on again. In between the additional hiatus and now I bought the BB steering kit from Uni Steer to make sure it was going to clear the headers. It appears its going to. BUT, I will have to send the rack back off again to see about tilting the gear on the rack back towards the firewall now because the joint wont clear the motor mount bolt head. I really hope trying to run this rack and pinion pays off...cause it sure has been in a PITA. And its really not a Uni Steer issue....its fitting it for the LS engine. Also got the front steering & suspension torqued down as well as the subframe. Getting ready to measure for the driveshaft to get it made.


 09-05-2015, 09:26 AM