E36 M3 - LS3/TR6060 Swap
 04-08-2013, 08:13 PM
#61

Engine back out so I can make the New Shifter carrier.
Also got a 2010 camaro short shifter from LSR Performance. Has an adjustable height level too (not attached in the pics)
Here is where it needs to go. Round part will come up through the hole in the body.

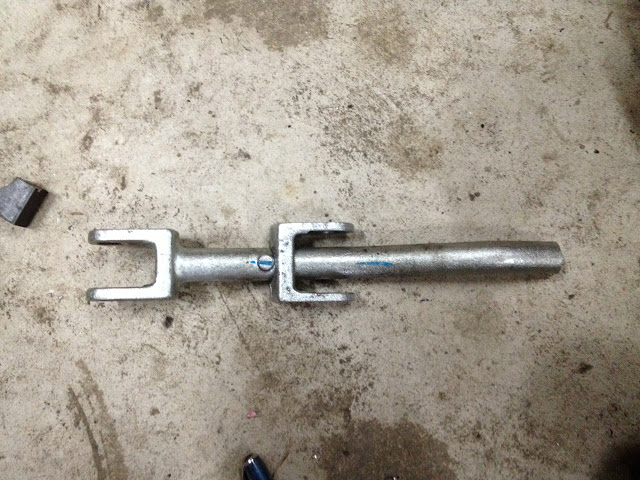
Something like this will attach from the trans up to the carrier.....out of metal not wood sticks

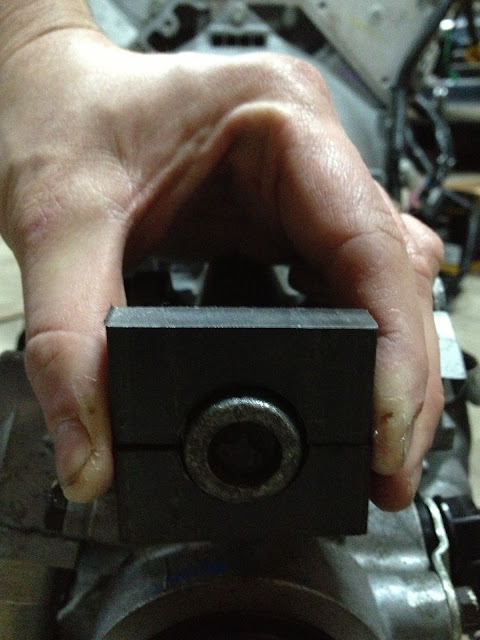
I have to make a bushing that will fit in the spot on the trans and use the stock rubber insulator.
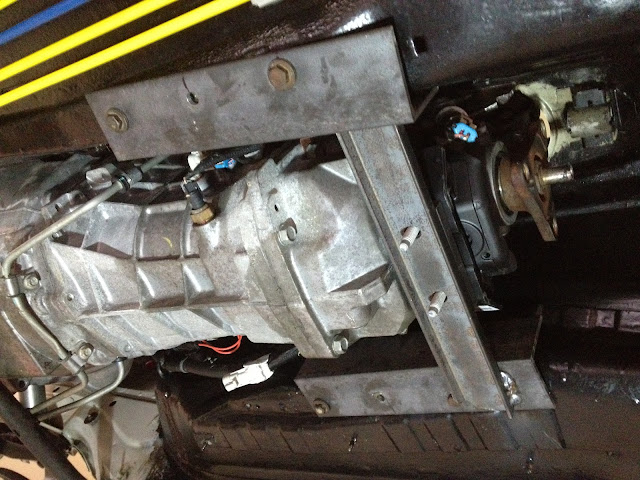
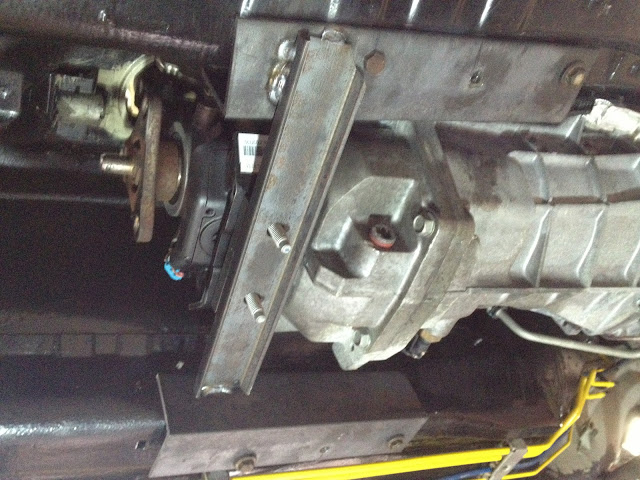
Debating if the carrier back mount should hook to the trans tunnel (like stock) or mount to the trans.
Also got a 2010 camaro short shifter from LSR Performance. Has an adjustable height level too (not attached in the pics)
Here is where it needs to go. Round part will come up through the hole in the body.
Something like this will attach from the trans up to the carrier.....out of metal not wood sticks
I have to make a bushing that will fit in the spot on the trans and use the stock rubber insulator.
Debating if the carrier back mount should hook to the trans tunnel (like stock) or mount to the trans.

 04-15-2013, 07:29 PM
#63
Made "bushings" for the shifter carrier to hook to.
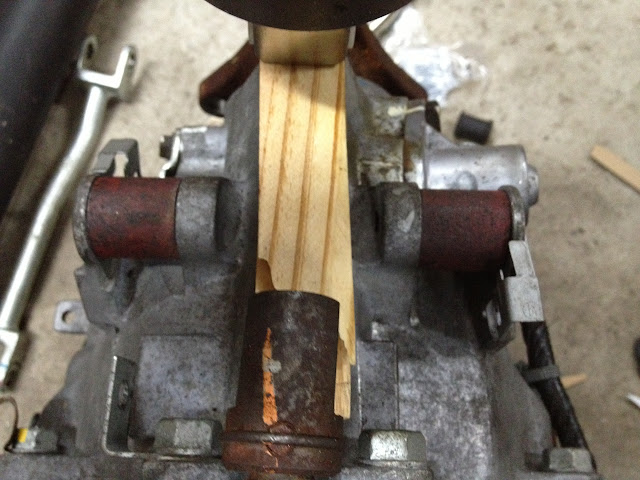
Template out of paper
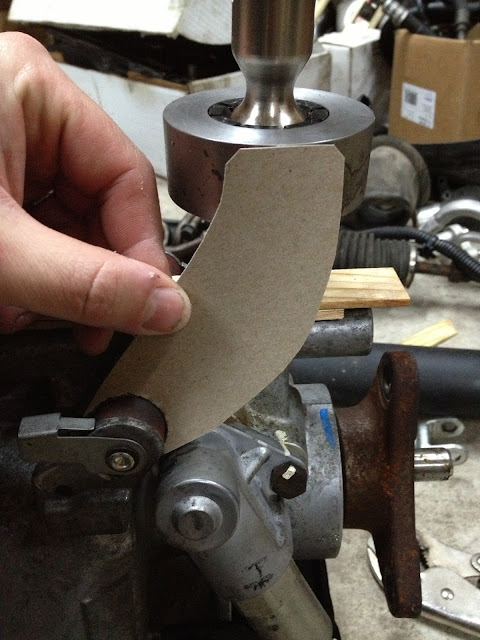
I will make the same thing on 1/4" steel and weld to the carrier and bushings. There will be a matching one on the other side. I am still not sure if the rear of the carrier will mount direct to the trans or the bottom of the trans tunnel. Stock it is to the trans tunnel but everything might be more solid connected direct to the trans.
Does anyone have any suggestions going either way?
Template out of paper
I will make the same thing on 1/4" steel and weld to the carrier and bushings. There will be a matching one on the other side. I am still not sure if the rear of the carrier will mount direct to the trans or the bottom of the trans tunnel. Stock it is to the trans tunnel but everything might be more solid connected direct to the trans.
Does anyone have any suggestions going either way?
 04-16-2013, 07:11 PM
#66
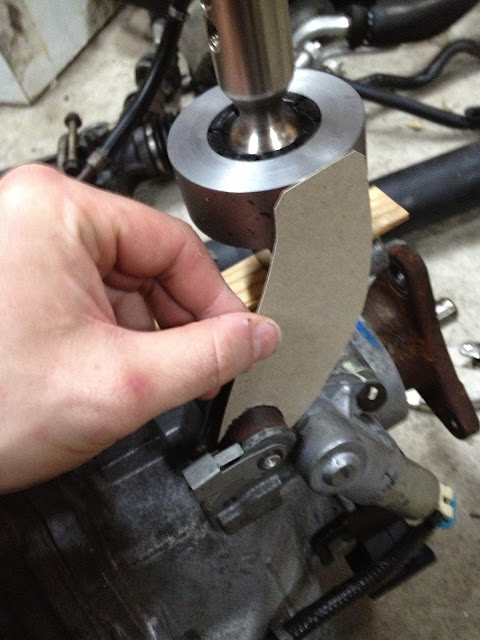
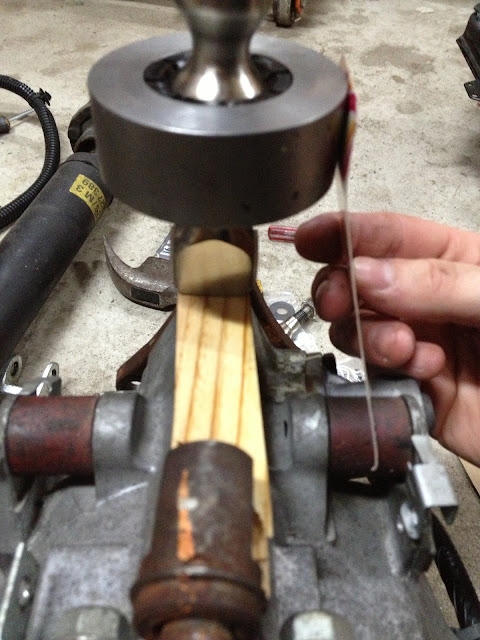
Turn cardboard into metal...


Rear will mount off the trans... something like this

This piece of metal will be cut where the line is after I drill a hole on each side of the big hole going up from the bottom. Then I will tap the upper half so it is easier to take the entire assembly in and out.
The entire thing will be powder coated.
Rear will mount off the trans... something like this
This piece of metal will be cut where the line is after I drill a hole on each side of the big hole going up from the bottom. Then I will tap the upper half so it is easier to take the entire assembly in and out.
The entire thing will be powder coated.
04-18-2013, 07:57 PM
#67
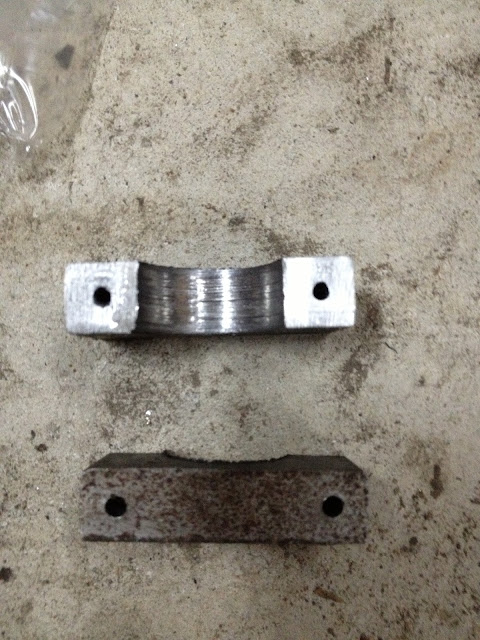
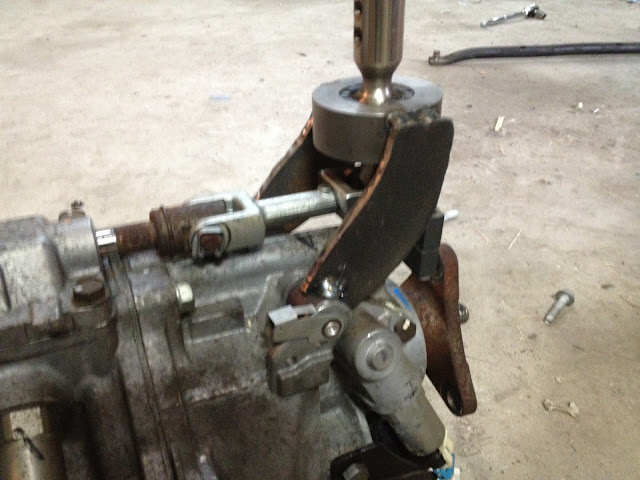
Cut down the back mount to make the entire shifter easy to remove.
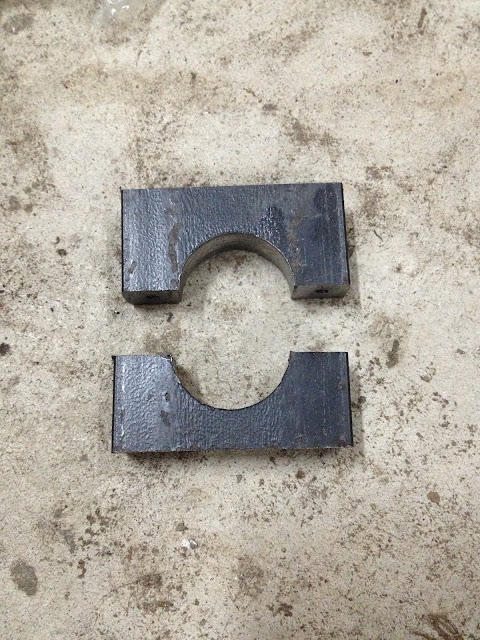
Before cutting it apart i drilled holes. These will be drilled bigger and tapped to m6.
How it will fit
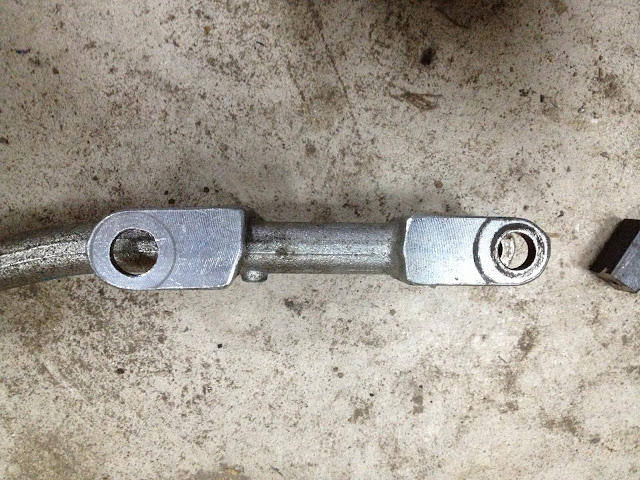
Removed the linkage that hooks to the shifter rod and then drilled a hole through it.

That way the rod will go through the linkage end
About where it will end up
Excess will get cut off and then the two pieces will be welded together. I might have a one piece linkage cut out on the water jet. Will see how the modded one turns out first.
Before cutting it apart i drilled holes. These will be drilled bigger and tapped to m6.
How it will fit
Removed the linkage that hooks to the shifter rod and then drilled a hole through it.
That way the rod will go through the linkage end
About where it will end up
Excess will get cut off and then the two pieces will be welded together. I might have a one piece linkage cut out on the water jet. Will see how the modded one turns out first.
04-19-2013, 08:35 PM
#68
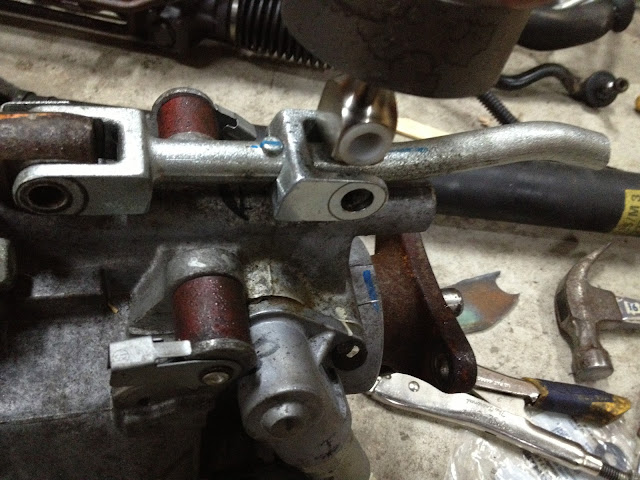
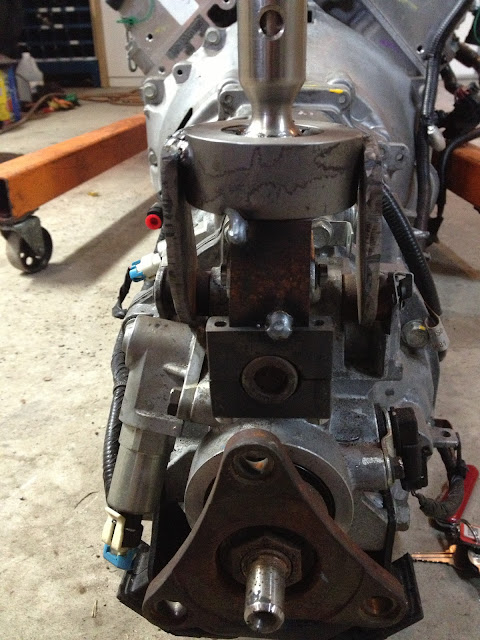
Shifter all done (needs to be cleaned up a little bit and then coated) - Only tacked in the pics
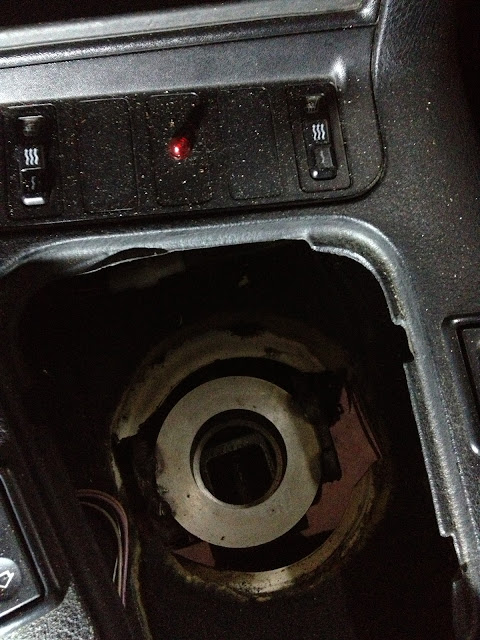
Inside the car
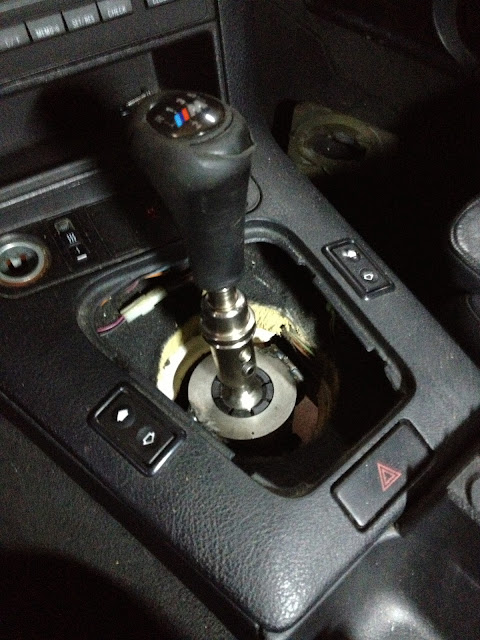
old shifter ****.... This shows 3rd gear. The shifter is height adjustable. It is at it's lowest point right now.
Trans mount (needs to be fully welded and a gusset or two added)

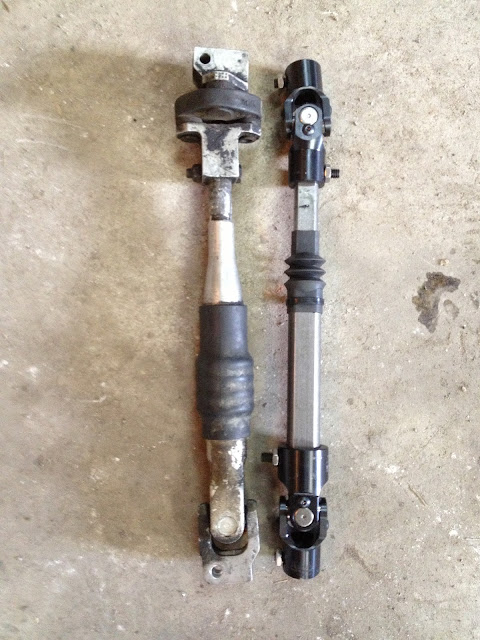
Flaming river Ujoints / Borgeson DD sliding steering shaft...next to the stock one
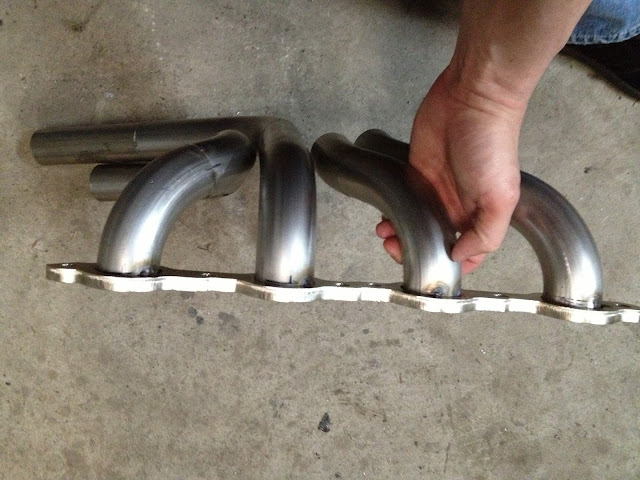
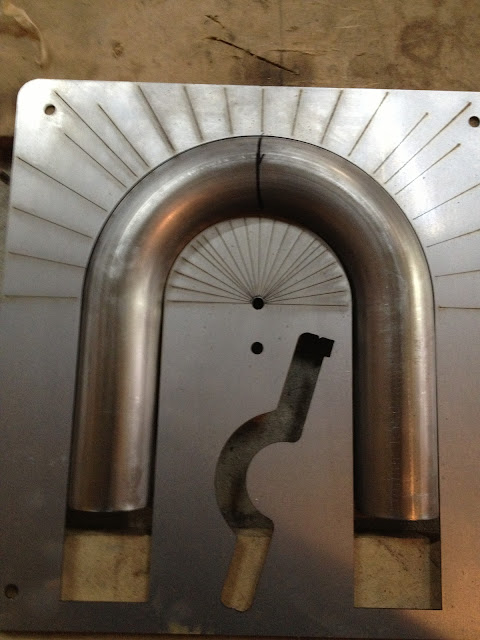
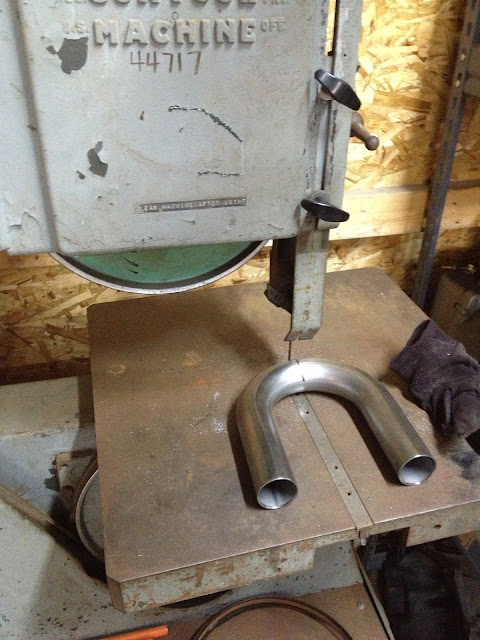
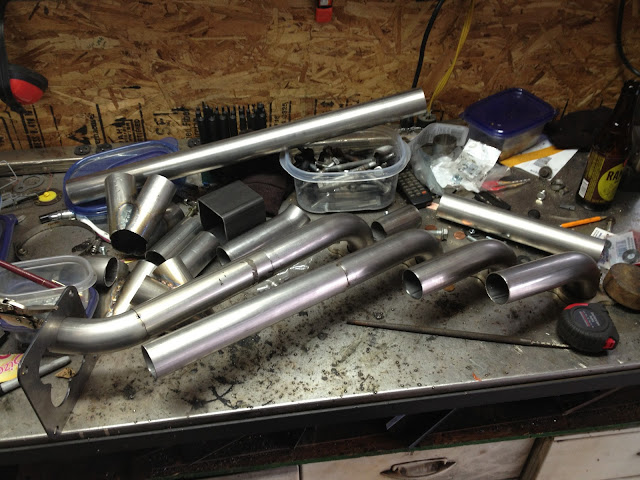
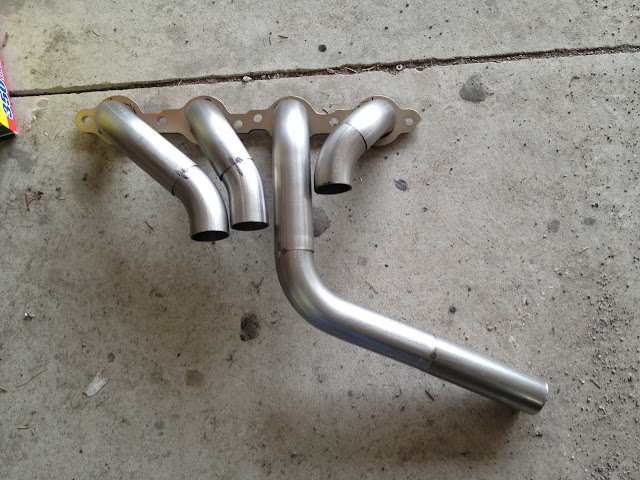
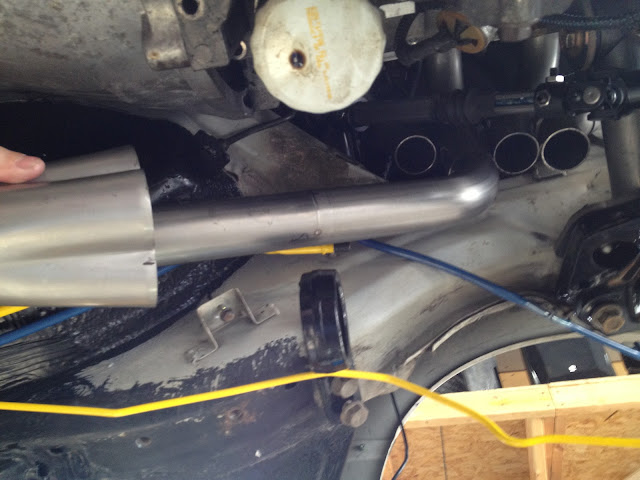
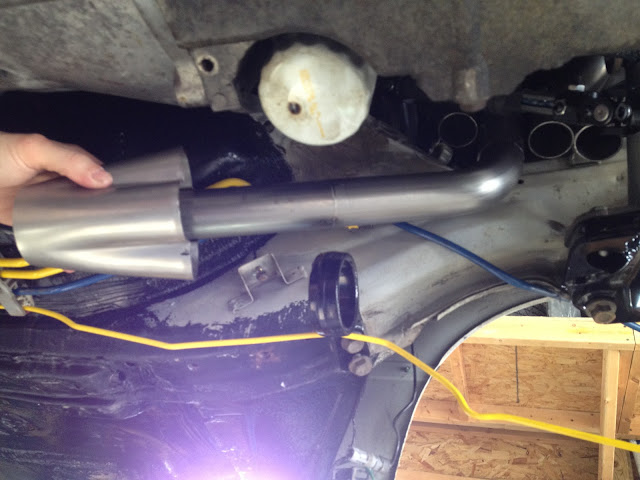
Starting work on the headers. New little tool to make sure the cut is across the radius.
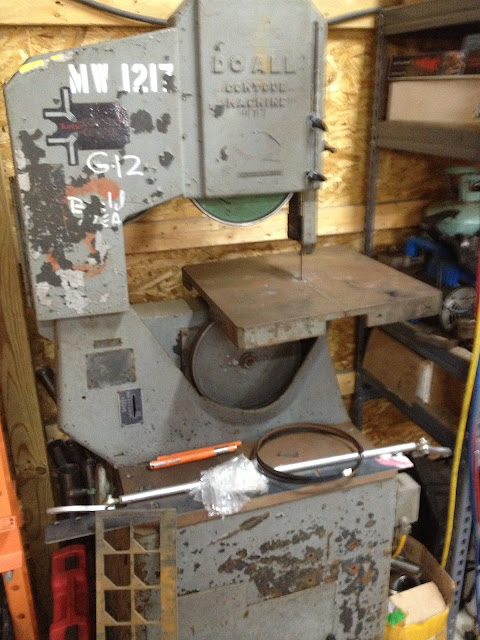
I posted a pic of a converted wood saw to cut metal but I wasn't happy with it so it got returned after I found this big ole machine on craigslist. Made in 1937...made to cut only metal. Makes cutting stainless U bends easier. Not to mention old machines like this are cool.
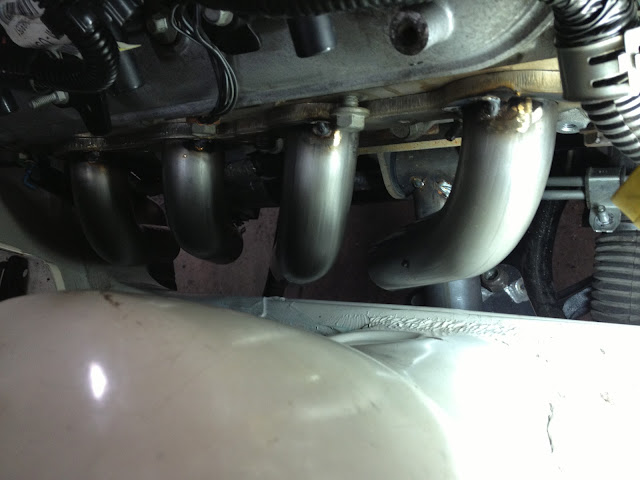
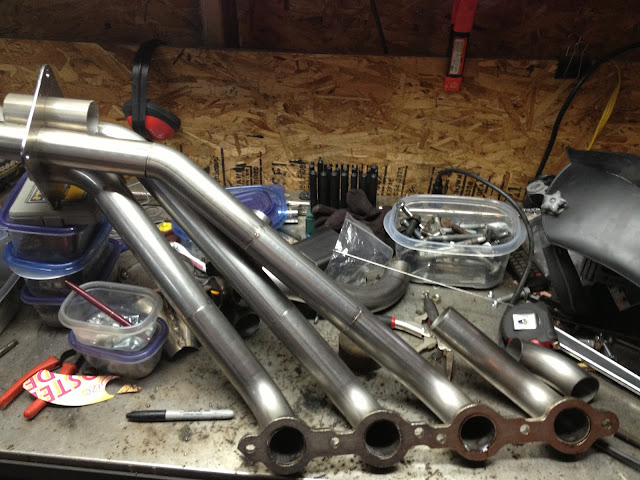
Passenger side header started
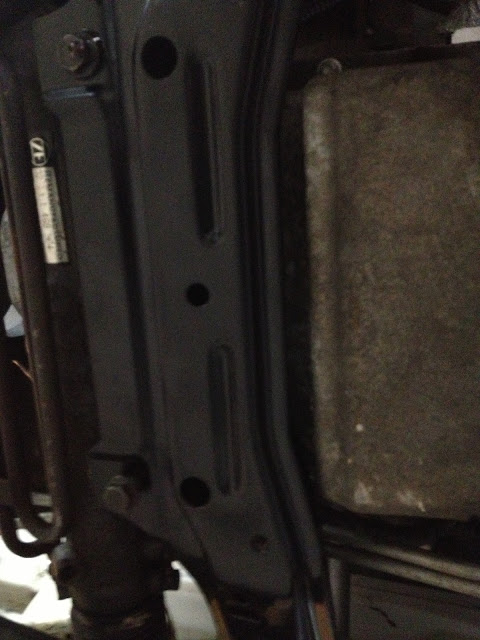
Pan to subframe clearance..
Inside the car
old shifter ****.... This shows 3rd gear. The shifter is height adjustable. It is at it's lowest point right now.
Trans mount (needs to be fully welded and a gusset or two added)
Flaming river Ujoints / Borgeson DD sliding steering shaft...next to the stock one
Starting work on the headers. New little tool to make sure the cut is across the radius.
I posted a pic of a converted wood saw to cut metal but I wasn't happy with it so it got returned after I found this big ole machine on craigslist. Made in 1937...made to cut only metal. Makes cutting stainless U bends easier. Not to mention old machines like this are cool.
Passenger side header started
Pan to subframe clearance..


 04-29-2013, 10:05 PM
#72
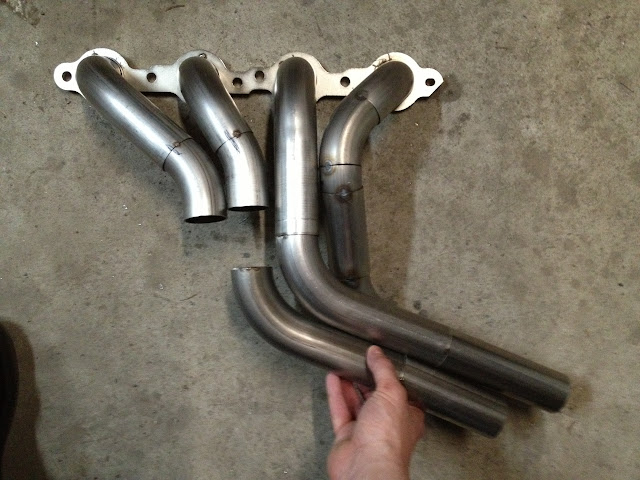
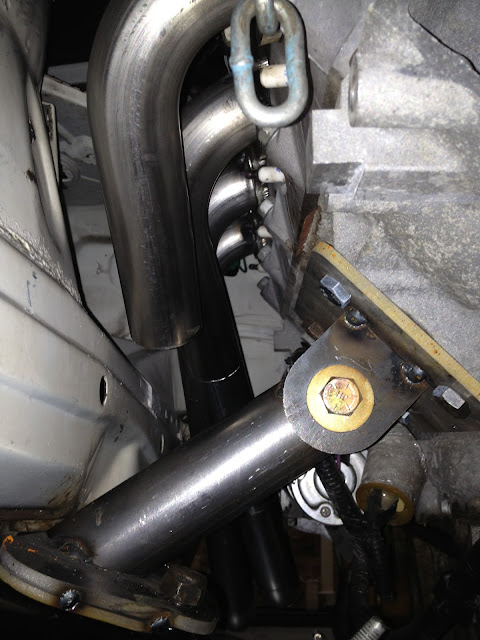
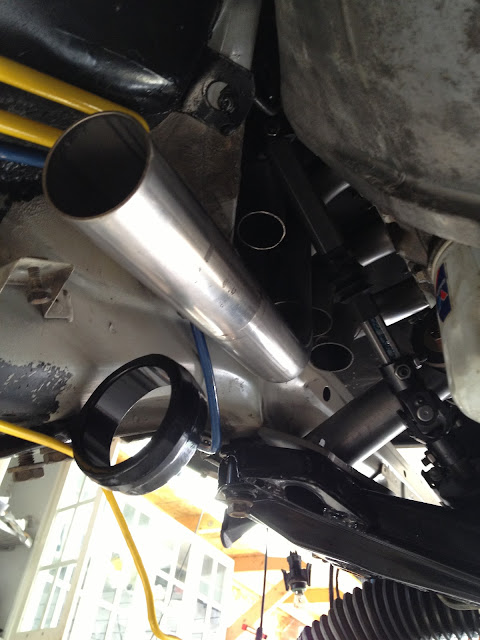
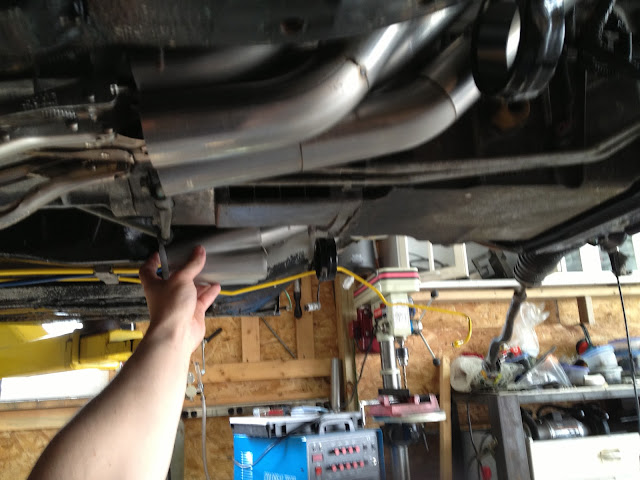
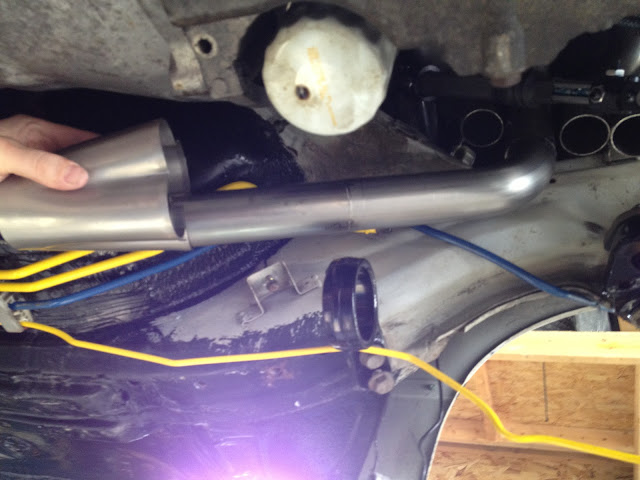
I was actually able to install the header from the top. Not sure how that will be once all the runners are on but...we will see.
Started on one runner...
It's hard to get a picture of how it routes...
Where the collector will go..
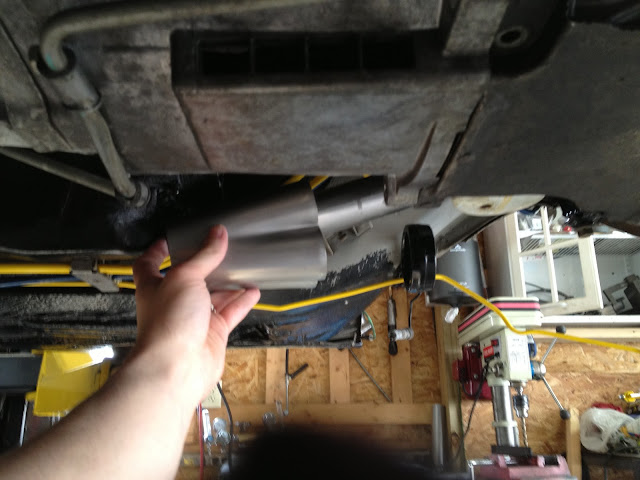
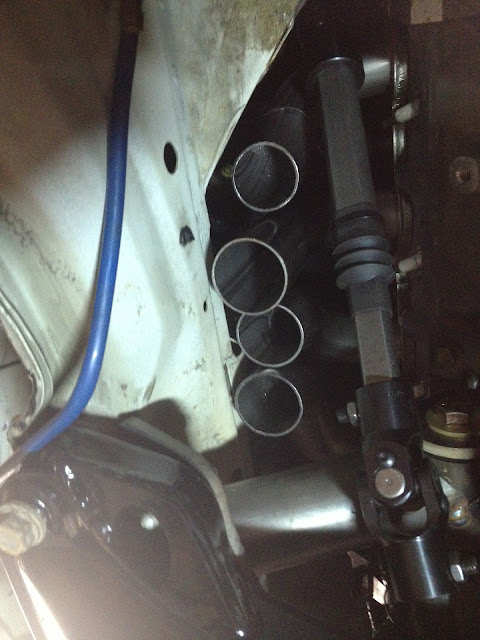
From farther away
Another angle
Collector could still go a couple different ways....
Started on one runner...
It's hard to get a picture of how it routes...
Where the collector will go..
From farther away
Another angle
Collector could still go a couple different ways....
04-29-2013, 10:05 PM
#73
I was actually able to install the header from the top. Not sure how that will be once all the runners are on but...we will see.
Started on one runner...
It's hard to get a picture of how it routes...
Where the collector will go..
From farther away
Another angle
Collector could still go a couple different ways....
Started on one runner...
It's hard to get a picture of how it routes...
Where the collector will go..
From farther away
Another angle
Collector could still go a couple different ways....
04-30-2013, 01:17 PM
#74
Teching In
iTrader: (2)

Join Date: Nov 2012
Location: Frederick, CO
Posts: 29
Likes: 0
Received 0 Likes
on
0 Posts
Awesome build! I like the attention to detail.
Your motor mounts look very similar to mine. Just out of curiosity, are you using the Liquid Iron pieces?
Jealous of that notcher, BTW...i used an angle grinder and a half-round file to notch mine. Took forever!
Your motor mounts look very similar to mine. Just out of curiosity, are you using the Liquid Iron pieces?
Jealous of that notcher, BTW...i used an angle grinder and a half-round file to notch mine. Took forever!
04-30-2013, 10:38 PM
#76
Teching In
iTrader: (2)
Join Date: Nov 2012
Location: Frederick, CO
Posts: 29
Likes: 0
Received 0 Likes
on
0 Posts
Liquid Iron Industries is where I got my engine mount components. They have a very reasonably priced kit that basically consists of the parts that mount to the block and the bushings. It's a "you-weld-it" type of kit...you fab the rest yourself.