
E36 M3 - LS3/TR6060 Swap
 06-25-2013, 08:45 PM
#121

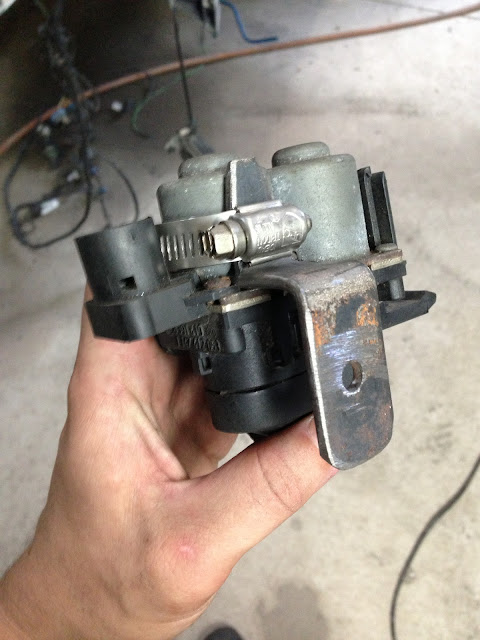
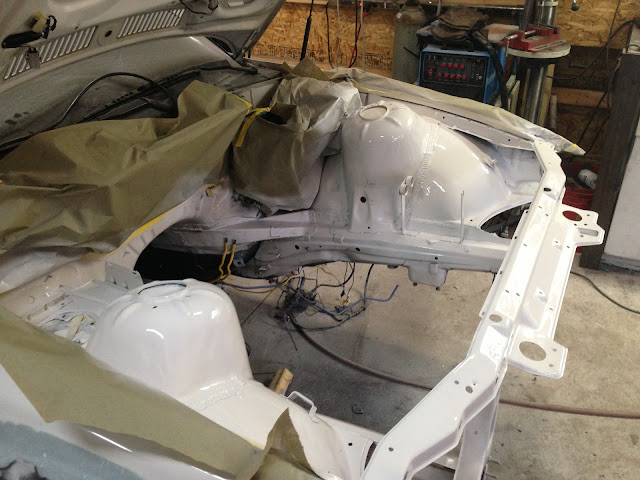
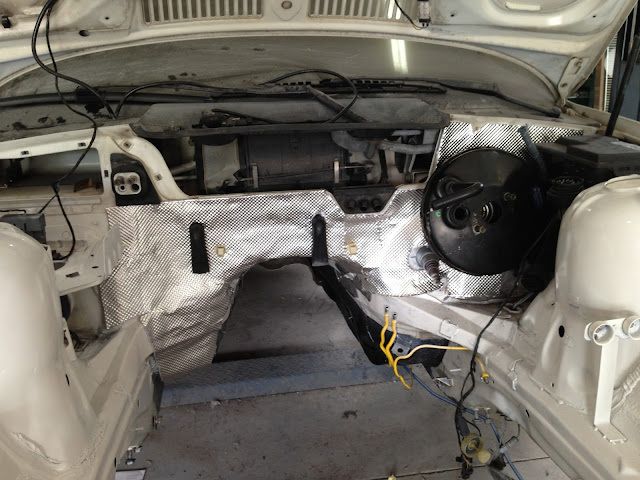
New location for the heater valve
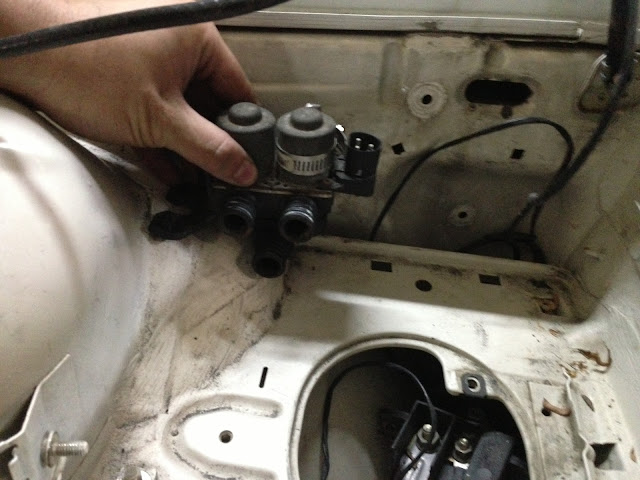
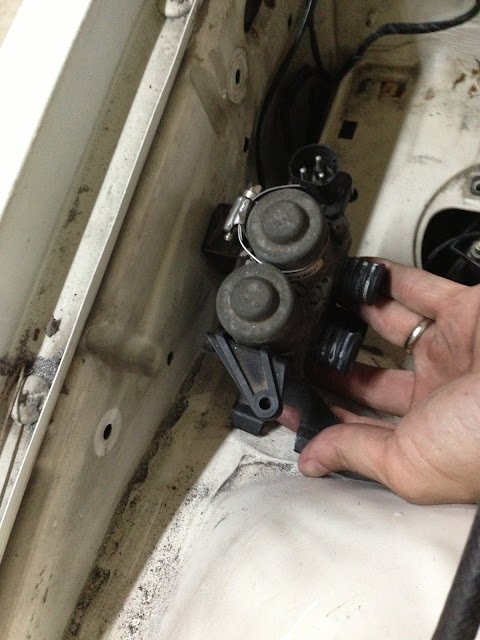
The bracket that will hold it to the inner fender...this will get painted or coated
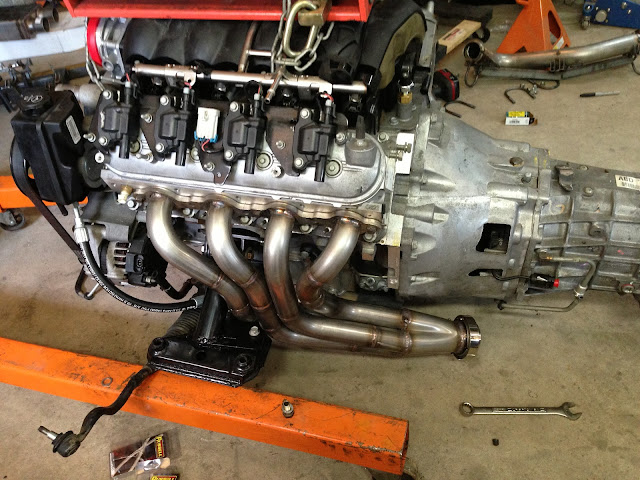
The LS3 uses a Drive by Cable throttle body so the stock throttle pedal was removed.
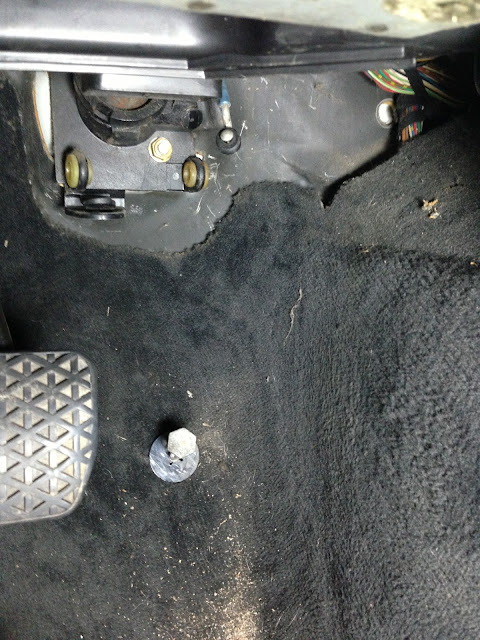
New pedal will go somewhere in this area...

I really need to roll the car off the lift to place the pedal. I can't get the door open enough to get down in the footwell.
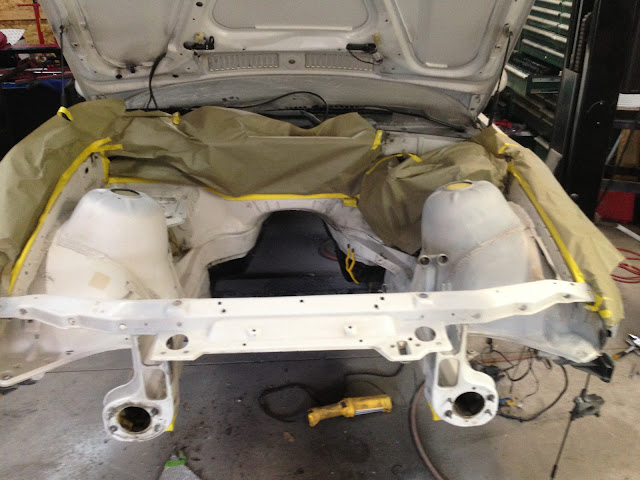
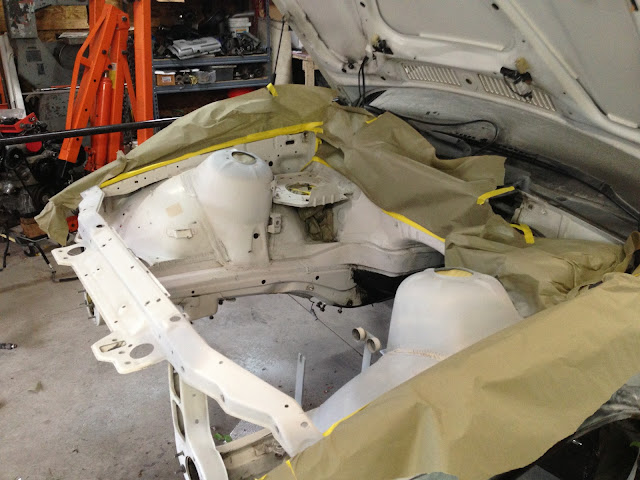
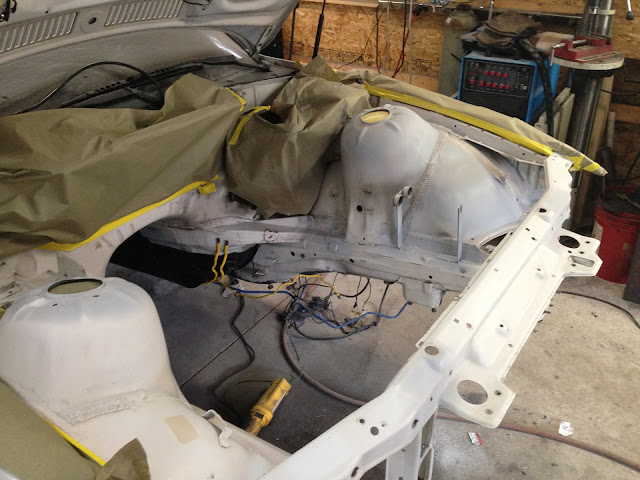
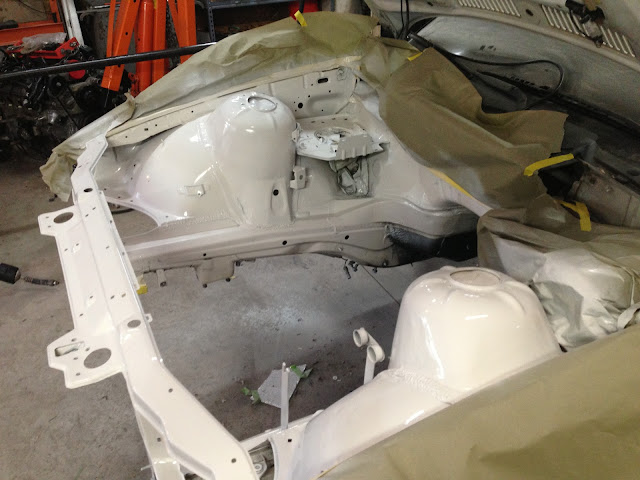
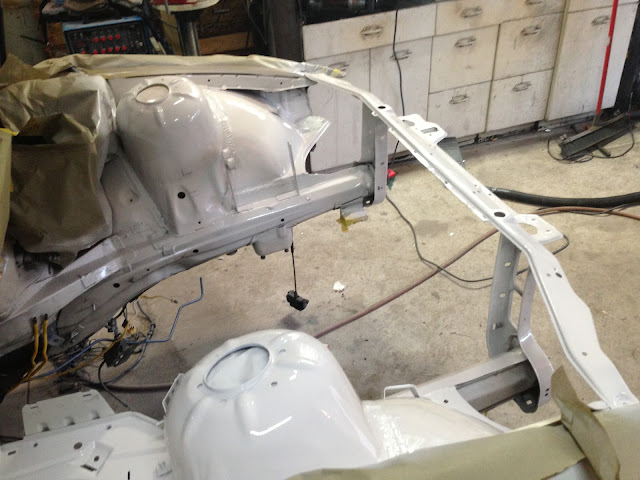
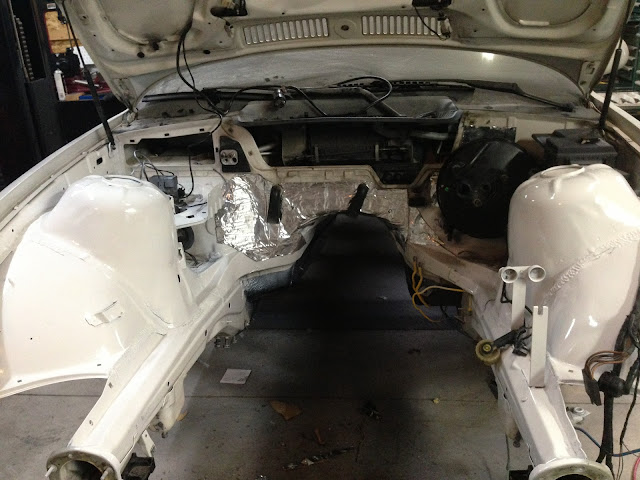
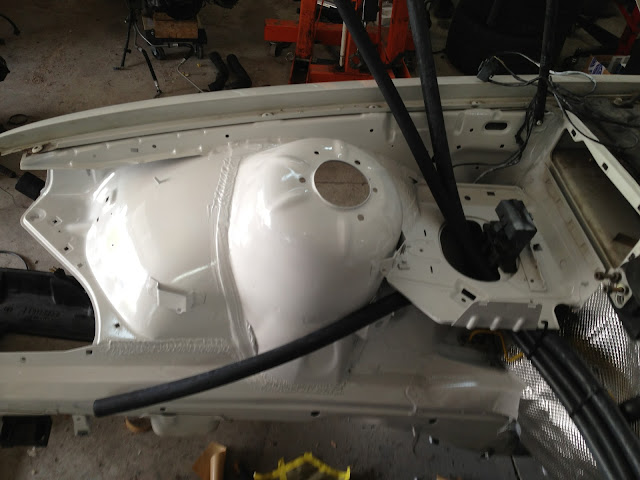
Getting the engine bay ready to paint.
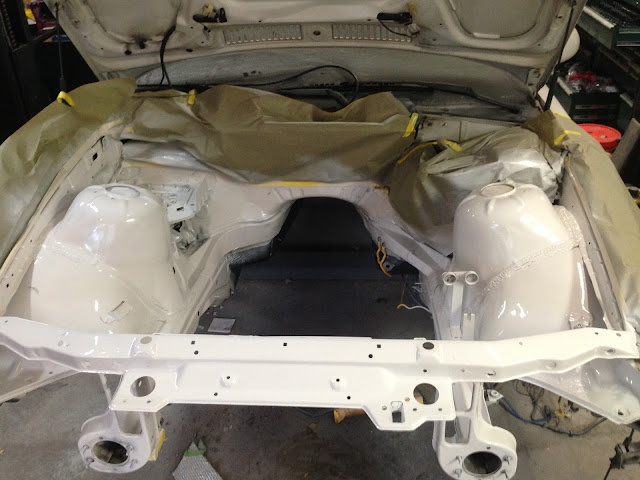
Fresh Paint....

The bracket that will hold it to the inner fender...this will get painted or coated
The LS3 uses a Drive by Cable throttle body so the stock throttle pedal was removed.
New pedal will go somewhere in this area...
I really need to roll the car off the lift to place the pedal. I can't get the door open enough to get down in the footwell.
Getting the engine bay ready to paint.
Fresh Paint....
 06-25-2013, 09:45 PM
#122

Replace your hose clamp
With a stainless steel T bolt clamp.They look more like a factory item and never rust.I get mine at McMaster-Carr for a few dollars shipped.They also hold better.

With a stainless steel T bolt clamp.They look more like a factory item and never rust.I get mine at McMaster-Carr for a few dollars shipped.They also hold better.
06-27-2013, 09:37 PM
#123
good idea, thanks
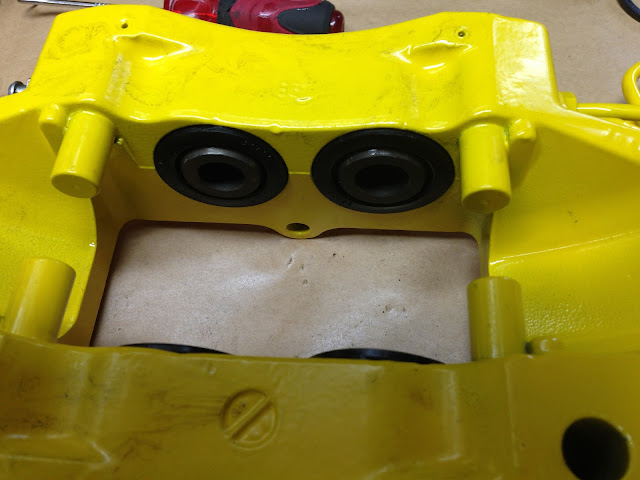
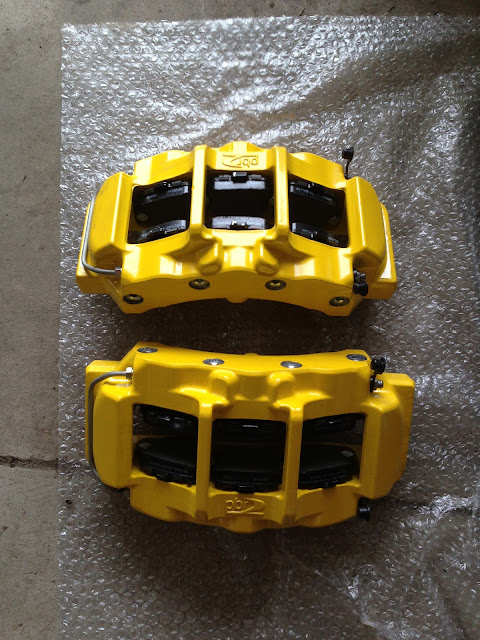
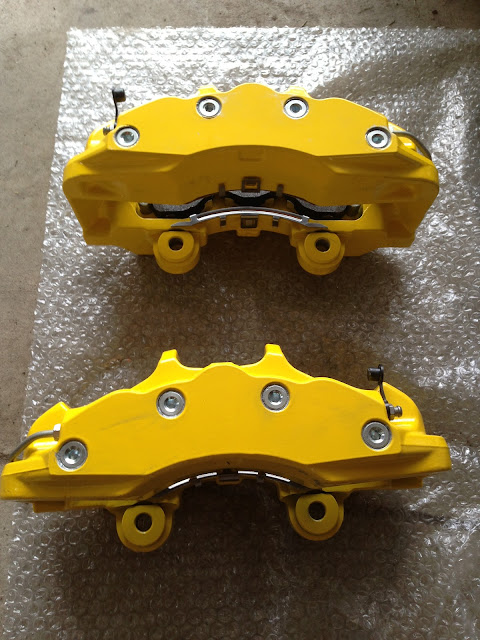
Put the rear calipers back together after coat.
Thought I had more sound deadening....nope. Have to order some more. Then it is get covered with DEI heat shield.
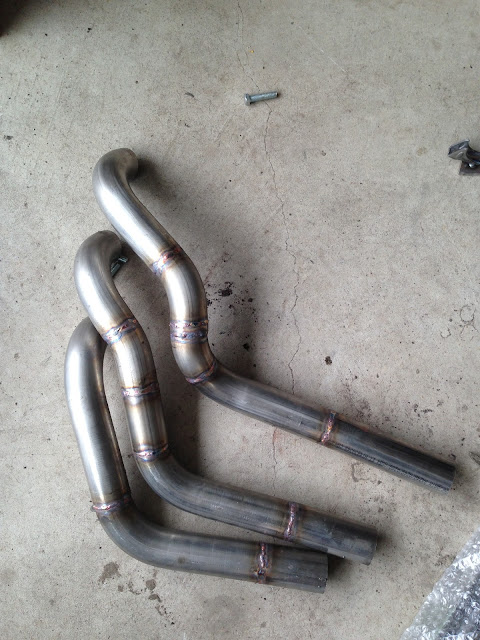
The plan was to fully weld the headers today but I couldn't find the big cups for my tig welder the other day....I was hoping they would be here today, nope. Maybe tomorrow.
Put the rear calipers back together after coat.
Thought I had more sound deadening....nope. Have to order some more. Then it is get covered with DEI heat shield.
The plan was to fully weld the headers today but I couldn't find the big cups for my tig welder the other day....I was hoping they would be here today, nope. Maybe tomorrow.
07-01-2013, 01:09 PM
#124
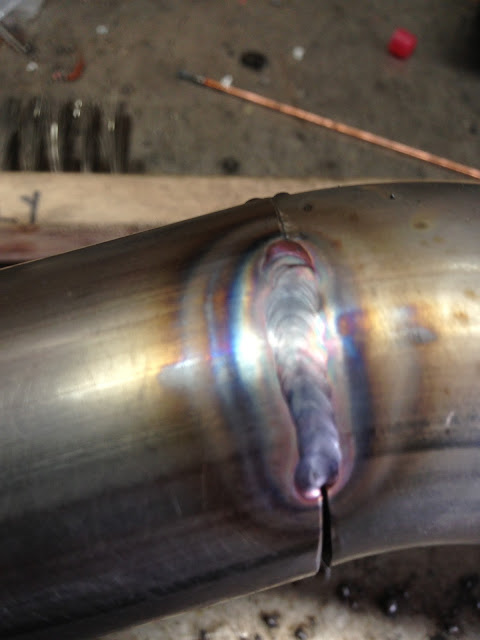
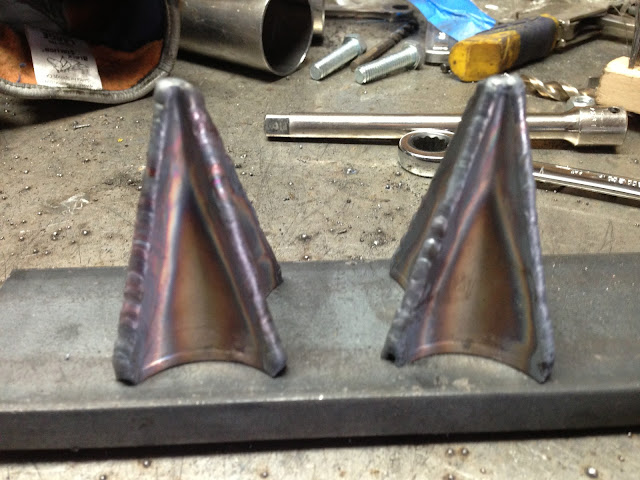
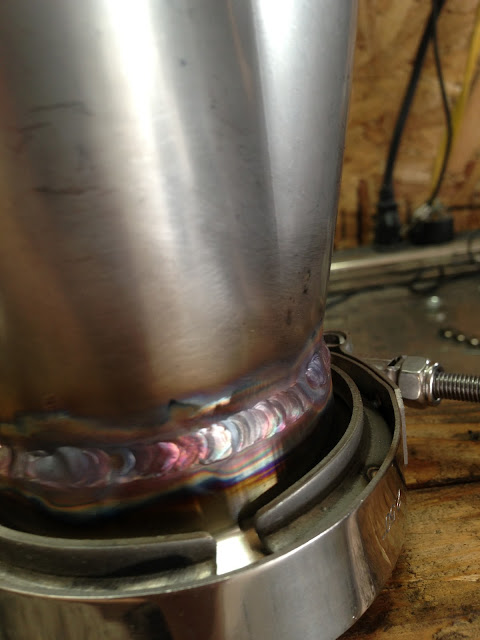
Today is tig welding day....welding headers and waiting on UPS.
Sorry for the bad picture...not sure what happened here. Anyway the headers are stainless so they need to be back purged with argon.
Here is my back purge setup for a single tube.
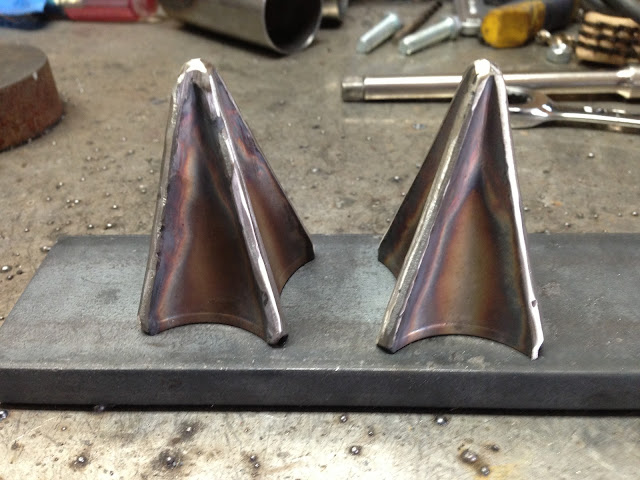
Passenger side tubes all welded
A bead shot...might be a tad hot here.
On to the drivers side. Doesn't look like much but it's slow moving work. FUn stuff tho
Sorry for the bad picture...not sure what happened here. Anyway the headers are stainless so they need to be back purged with argon.
Here is my back purge setup for a single tube.
Passenger side tubes all welded
A bead shot...might be a tad hot here.
On to the drivers side. Doesn't look like much but it's slow moving work. FUn stuff tho
07-01-2013, 04:21 PM
#125
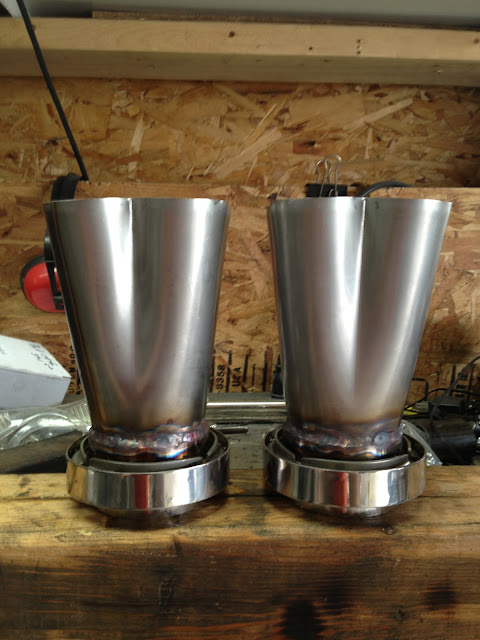
Better picture of the back purge...argon comes in the left and then there is a stopper in the right side of the tube.
I use a small torch but a Large Gas lens with the biggest cup I can get so that the weld has a nice blanked of argon.
Drivers side runners...all but one are done. I ran out of Argon....already have a filled tank but no more time today.
I use a small torch but a Large Gas lens with the biggest cup I can get so that the weld has a nice blanked of argon.
Drivers side runners...all but one are done. I ran out of Argon....already have a filled tank but no more time today.
07-02-2013, 10:37 AM
#126
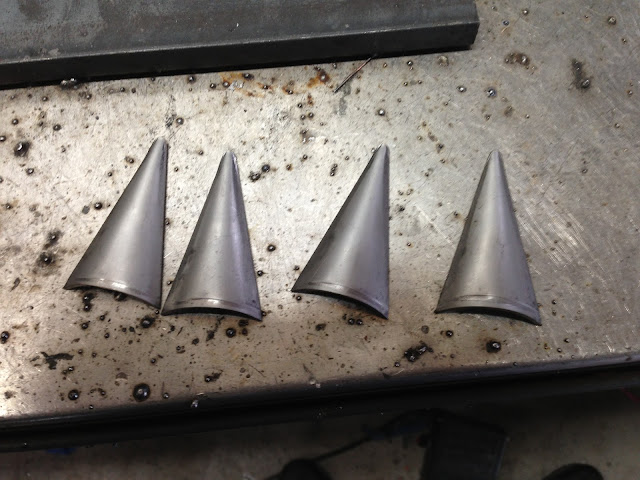
More welding today...all the runners are done and putting the headers back together. Inside the collector gets a merge bullet.
They start with 4 little peices
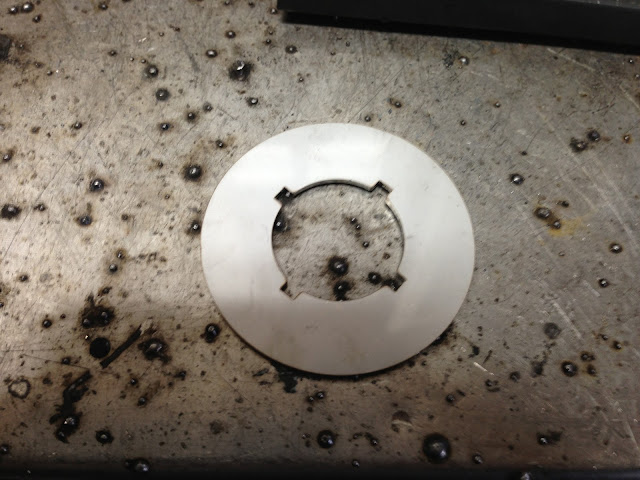
Go into this little jig
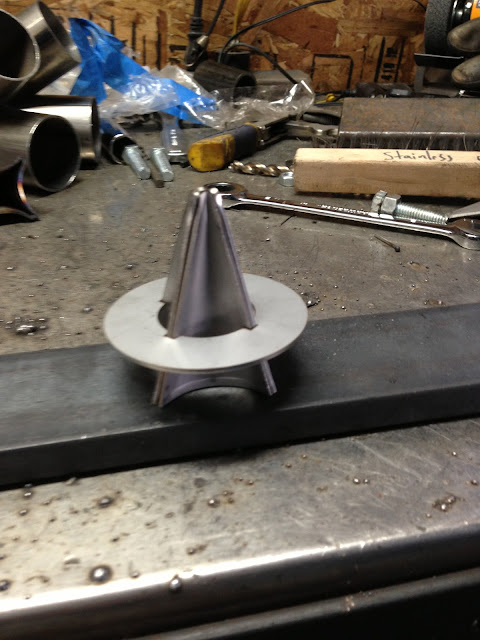
Tacked
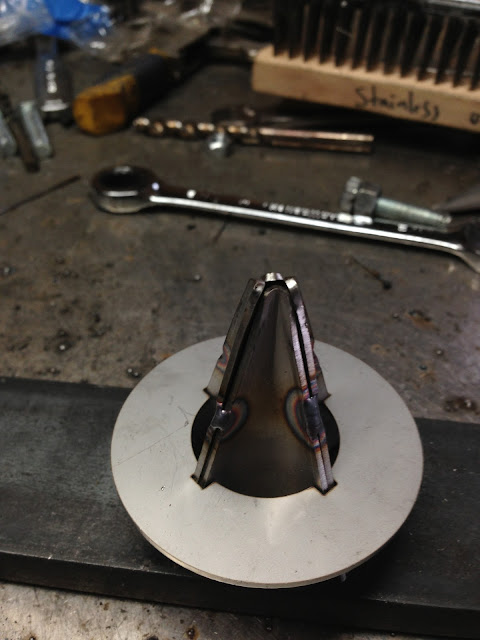
Welded
cleaned up
I forgot to snap a pic of the bullet on the header...inside for lunch at the moment. I'll get some more in a bit.
Runner welded to the flange. They will get fully welded inside the flange for the most part.
That little drop must be from the end of the filler...that will get knocked off there.
They start with 4 little peices
Go into this little jig
Tacked
Welded
cleaned up
I forgot to snap a pic of the bullet on the header...inside for lunch at the moment. I'll get some more in a bit.
Runner welded to the flange. They will get fully welded inside the flange for the most part.
That little drop must be from the end of the filler...that will get knocked off there.
07-02-2013, 12:57 PM
#127
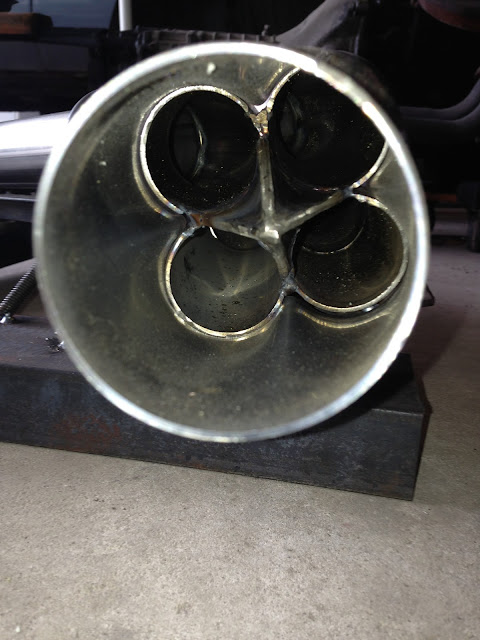
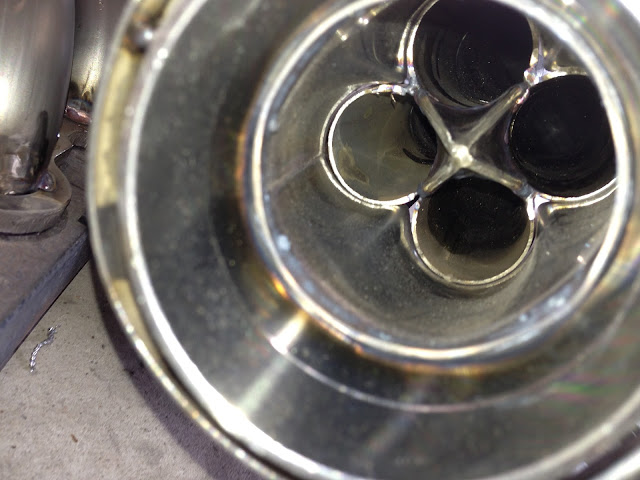
The Merge Bullet on the header
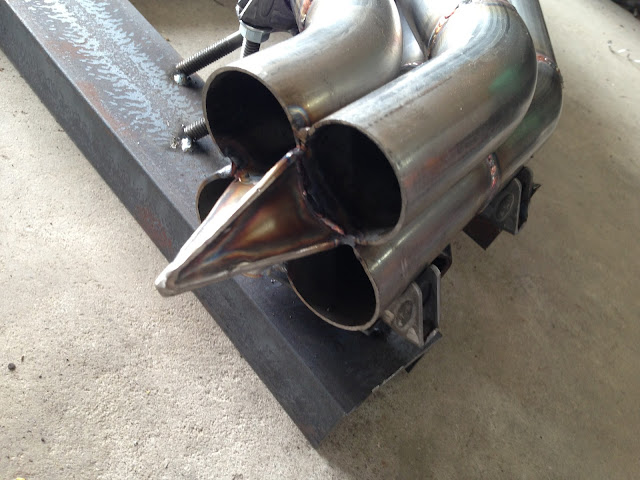
Collector isn't welded yet but just to get the idea..
Welding for hours on end gets a little boring so I changed it up....also bending over the bench gives you a sore neck. I need something to raise the work piece higher when welding.
Anyway...first a sound deadening material went on the firewall.
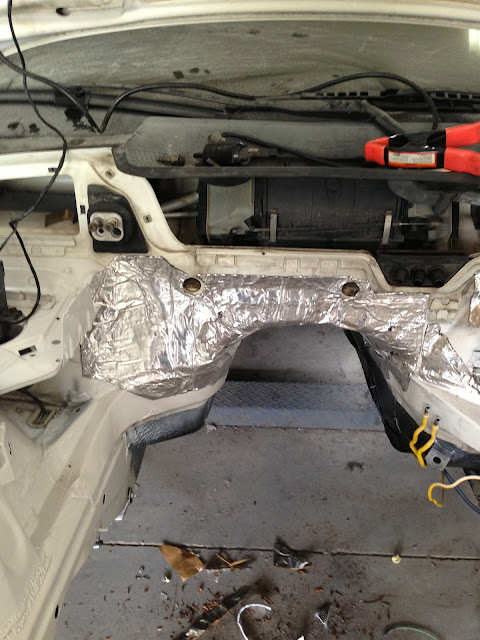
Then a heat shield material. I have done this same setup on 2 cars before this and it has worked great.
Bad picture but heater hoses going to their new homes. Brake lines back in place.
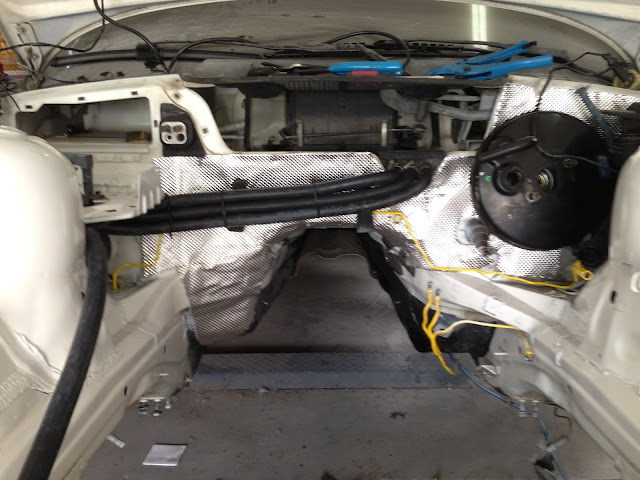
Still unsure if I will come up through the battery tray for the heater hoses or not but this does look to be the cleanest route.
Collector isn't welded yet but just to get the idea..
Welding for hours on end gets a little boring so I changed it up....also bending over the bench gives you a sore neck. I need something to raise the work piece higher when welding.
Anyway...first a sound deadening material went on the firewall.
Then a heat shield material. I have done this same setup on 2 cars before this and it has worked great.
Bad picture but heater hoses going to their new homes. Brake lines back in place.
Still unsure if I will come up through the battery tray for the heater hoses or not but this does look to be the cleanest route.

 07-03-2013, 11:56 AM
#130
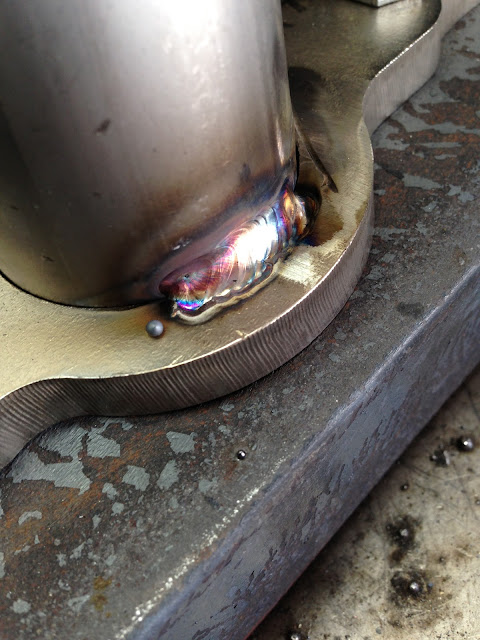
Welding the Vbands to the collectors
Showing the bead
Headers just about done...just need to weld the collectors on. That might wait until they are back in the car so I can get the angle I want.
Merge Bullet on the drivers side
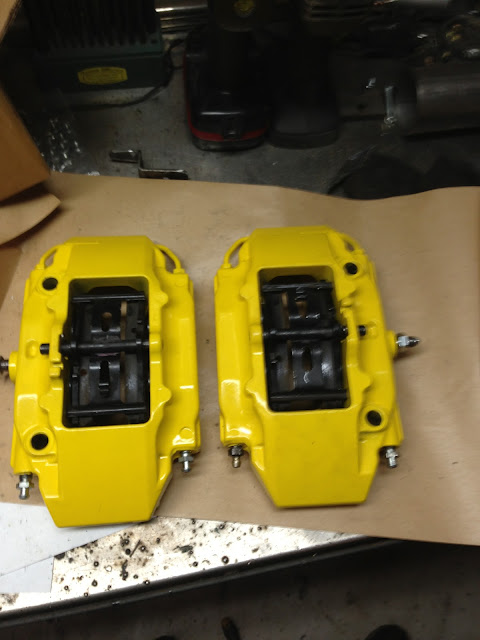
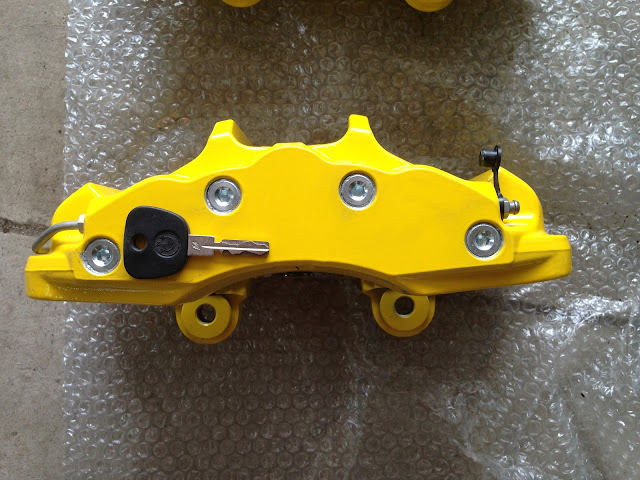
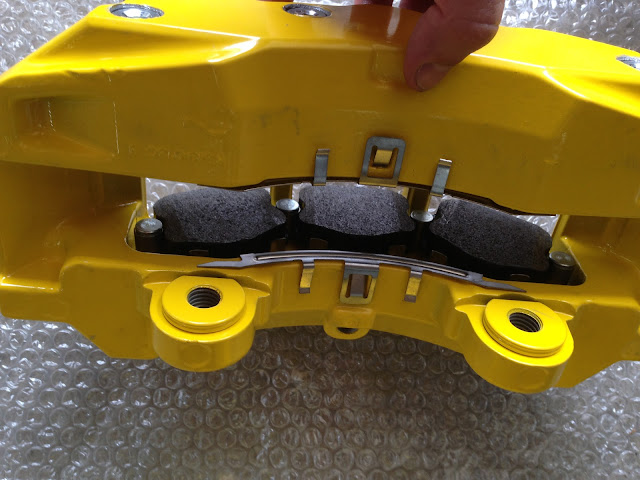
Put the front calipers all back together
Showing the bead
Headers just about done...just need to weld the collectors on. That might wait until they are back in the car so I can get the angle I want.
Merge Bullet on the drivers side
Put the front calipers all back together
Last edited by jakeb; 07-03-2013 at 04:32 PM.
 07-09-2013, 08:15 PM
#134
Long weekend away at tedfest vintage BMW show near Toronto. Back at the e36...hoping to have it running early next week. Getting very close!
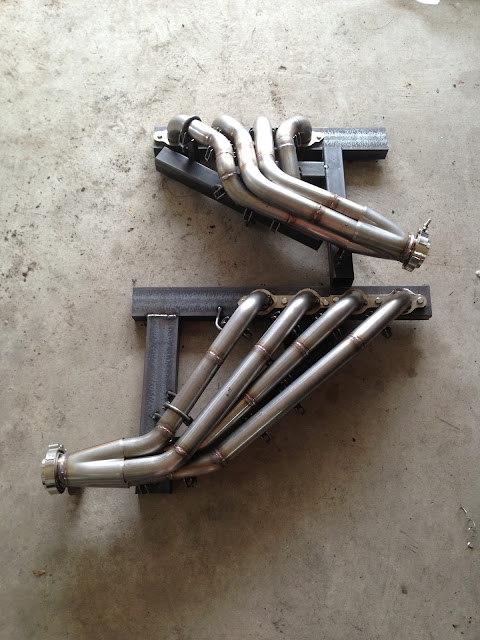
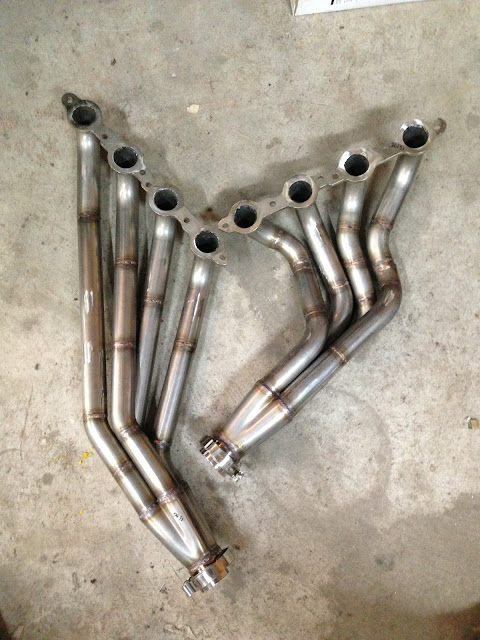
Headers on the engine so I can get the collectors in just the right spot.
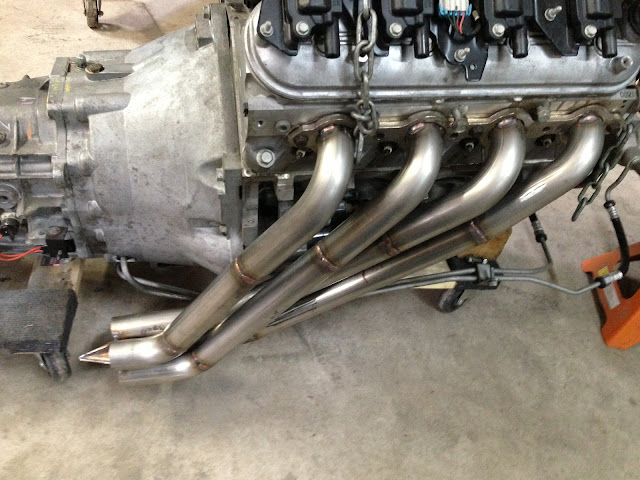
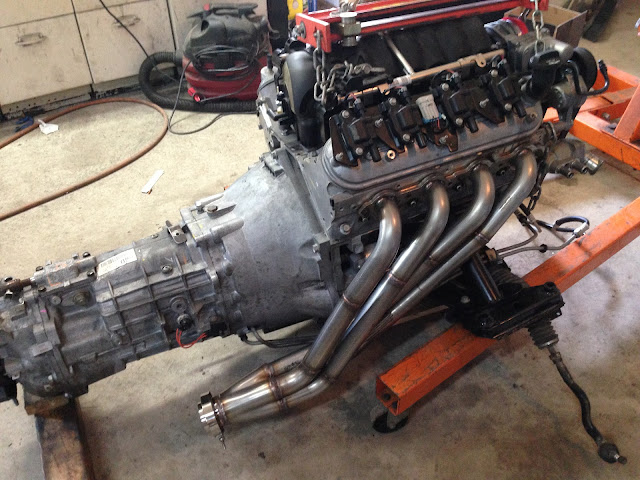
Engine back in the car to figure out collectors...forgot to get a pic with the collectors on there.
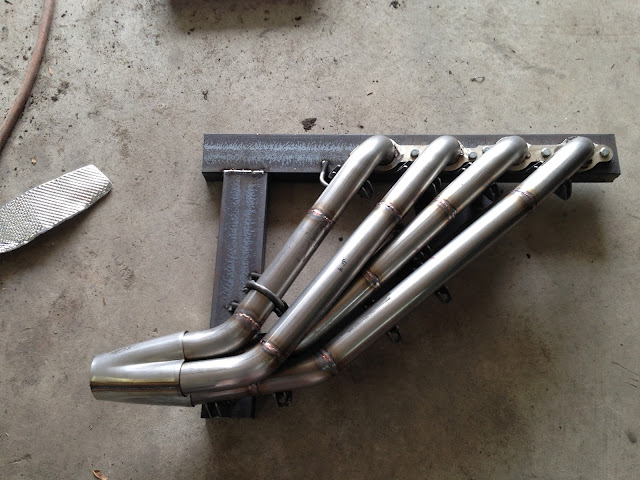
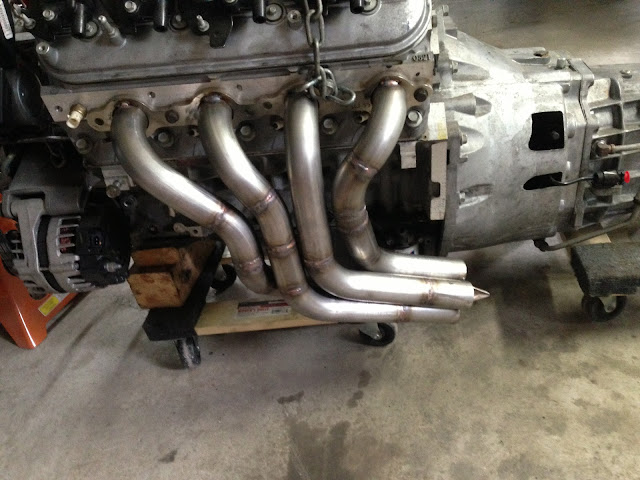
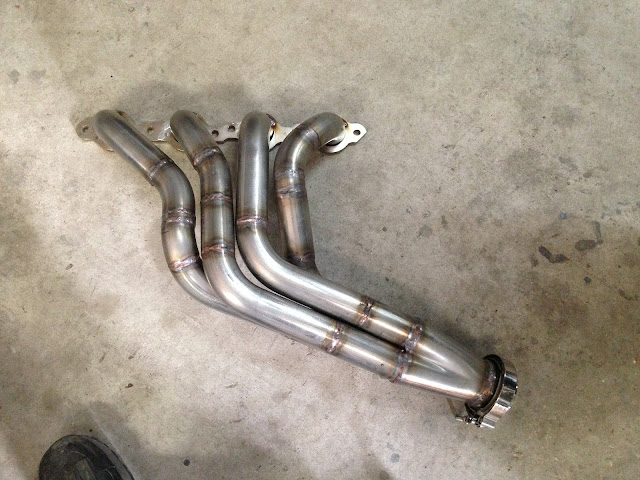
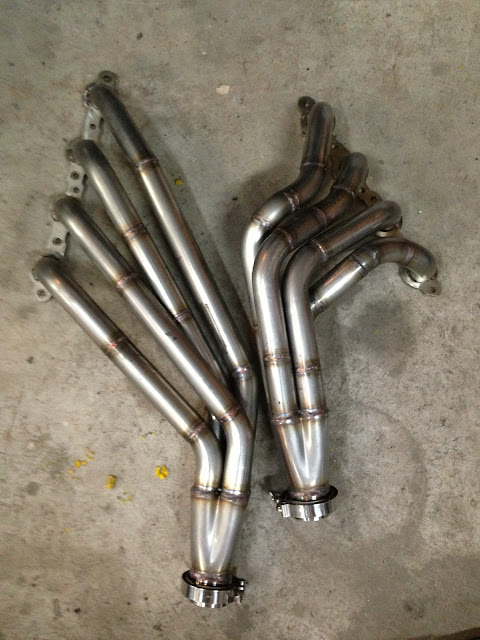
Drivers side header all welded up and ready to go
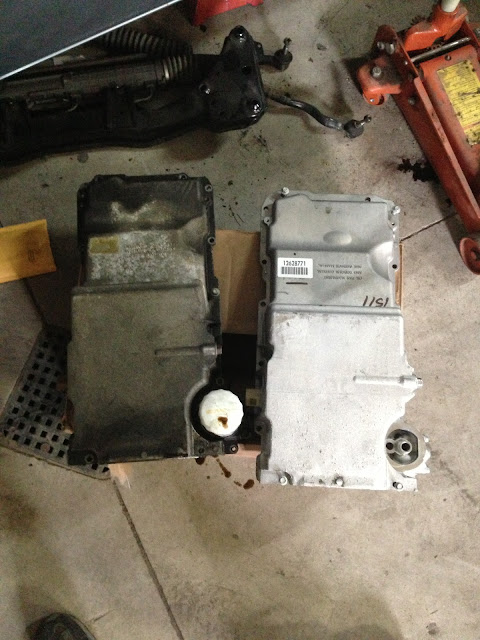
Swapped to a new oil pan rather than my mock up pan
New windage tray and oil pickup
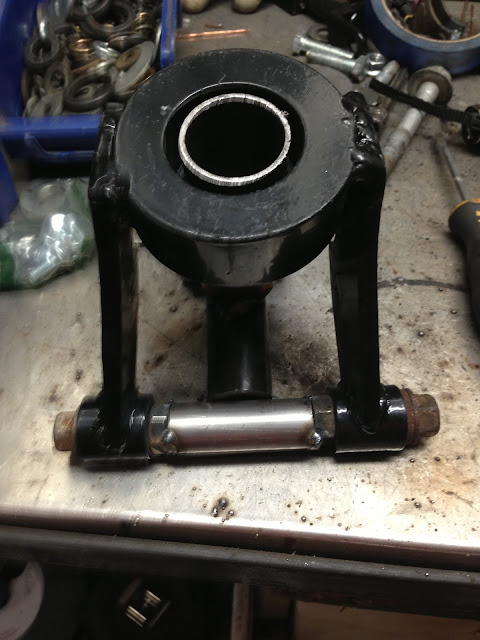
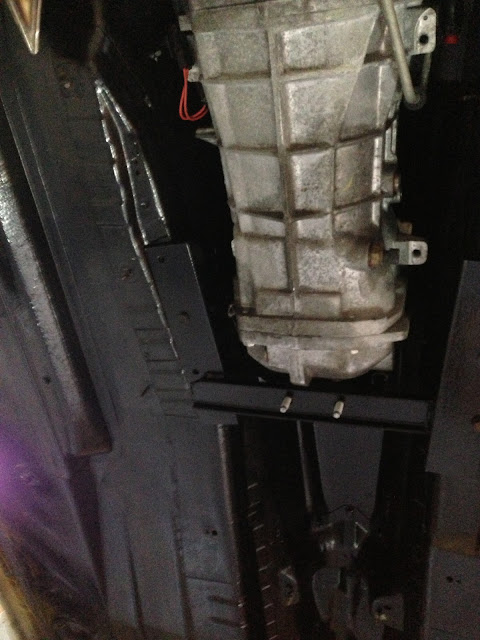
Jigging the mounts
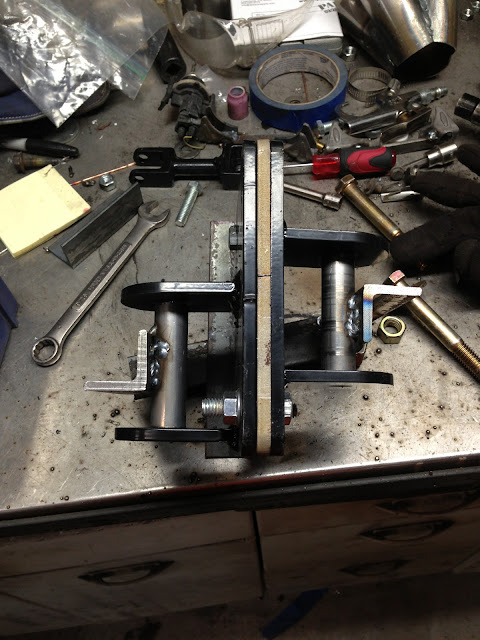


Jigging the shifter carrier
This isn't a very good picture but I really like how stock everything is looking.
Headers on the engine so I can get the collectors in just the right spot.
Engine back in the car to figure out collectors...forgot to get a pic with the collectors on there.
Drivers side header all welded up and ready to go
Swapped to a new oil pan rather than my mock up pan
New windage tray and oil pickup
Jigging the mounts
Jigging the shifter carrier
This isn't a very good picture but I really like how stock everything is looking.
07-10-2013, 04:28 PM
#135
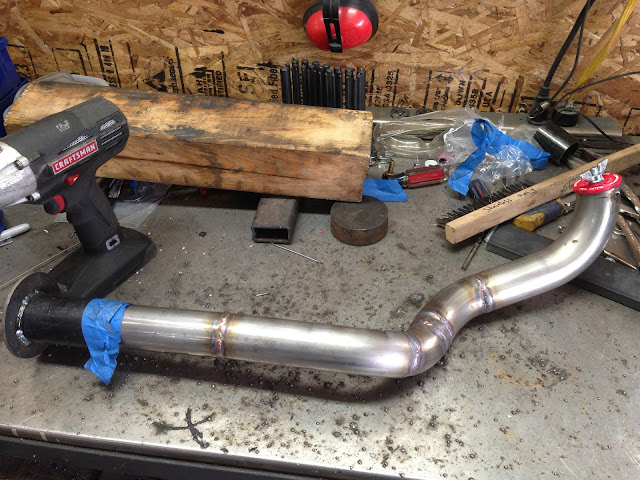
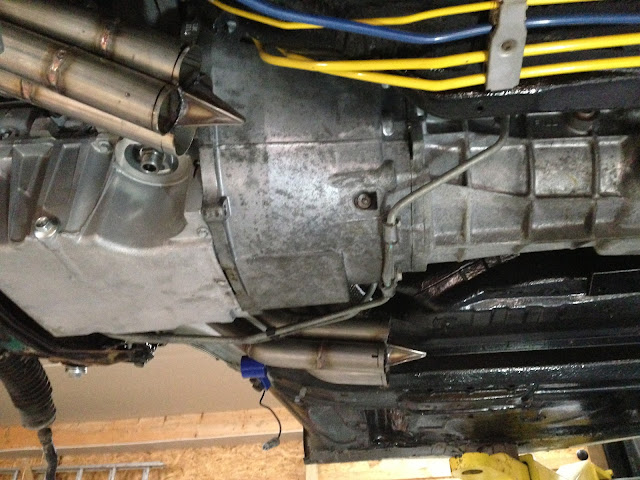
Headers are FULLY welded now.
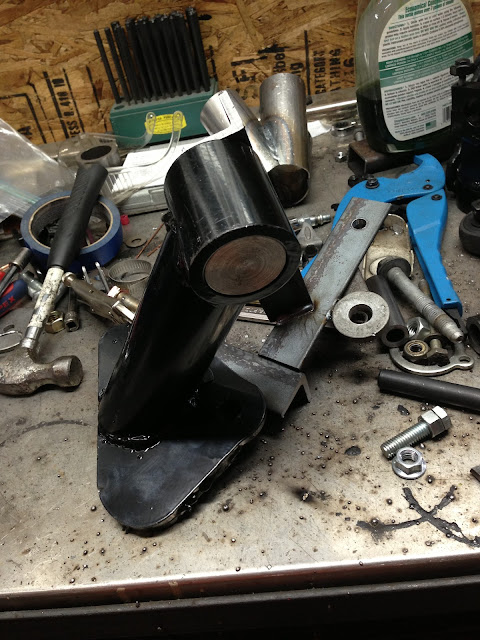
Simple little power steering line made
Fitting at the rack
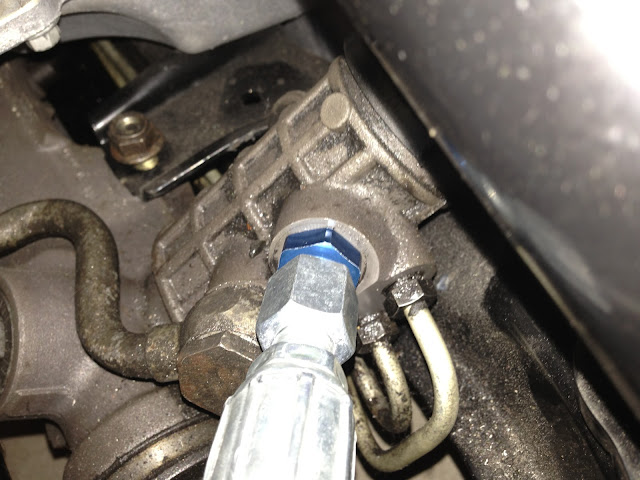
Guess I didn't get a pic of the fitting at the pump.
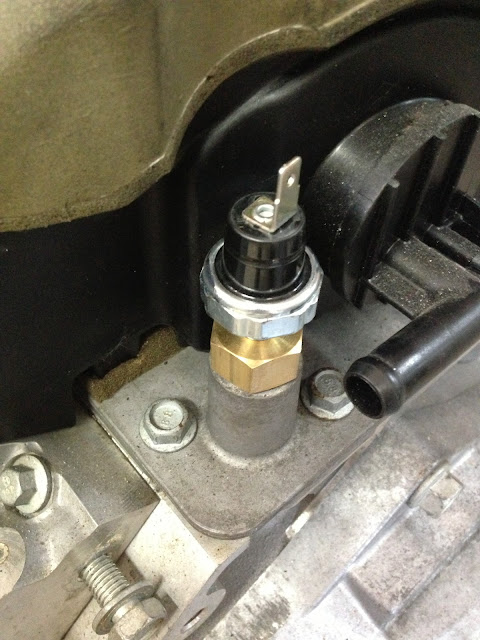
Oil PSI sensor
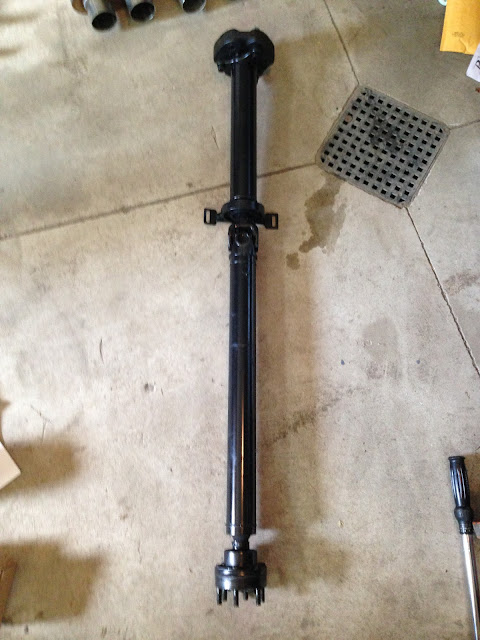
Driveshaft showed up...m3 rear section, camaro front section, new ujoints, etc etc
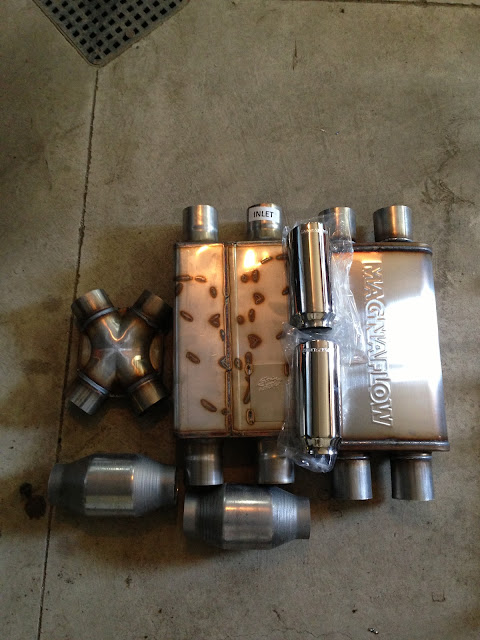
All the exhaust supplies...minus the tubing. All stainless
Simple little power steering line made
Fitting at the rack
Guess I didn't get a pic of the fitting at the pump.
Oil PSI sensor
Driveshaft showed up...m3 rear section, camaro front section, new ujoints, etc etc
All the exhaust supplies...minus the tubing. All stainless
07-11-2013, 08:36 PM
#137
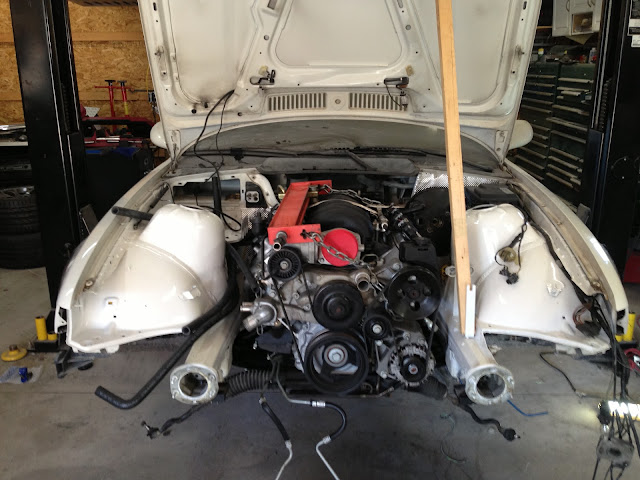
Looking so nice in the freshly painted bay
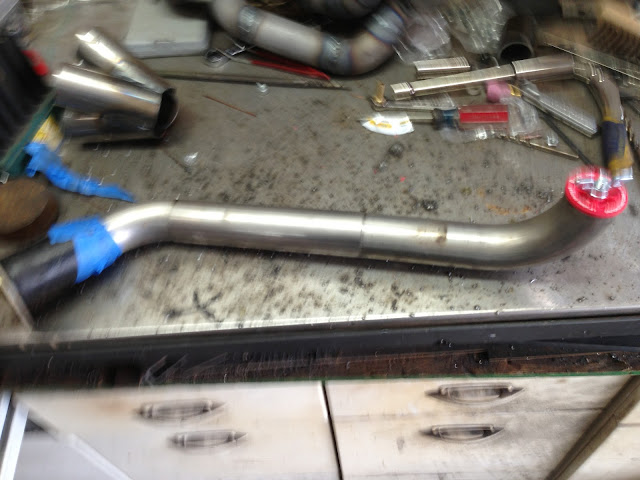
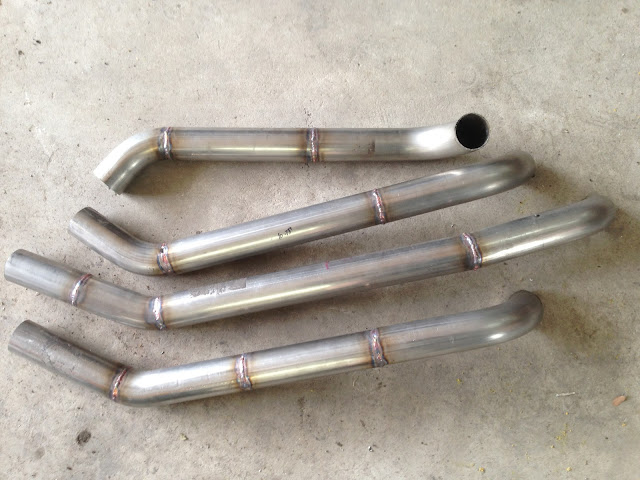
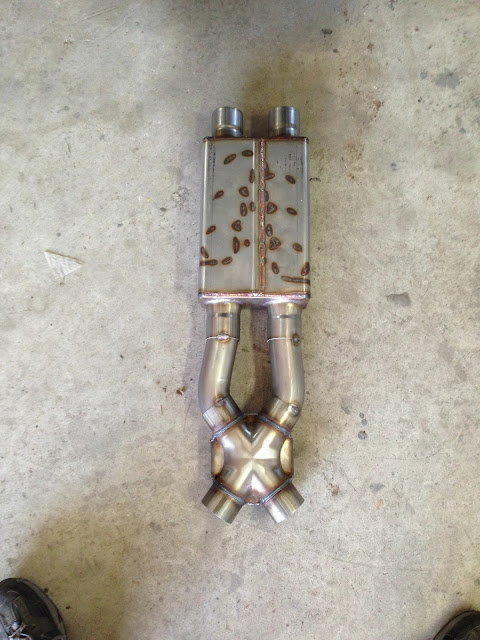
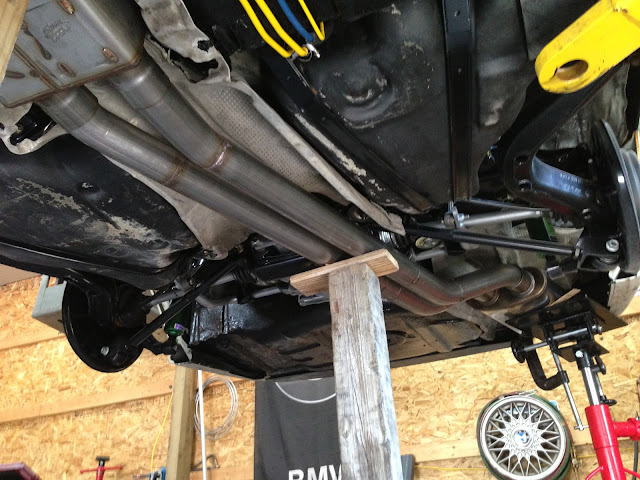
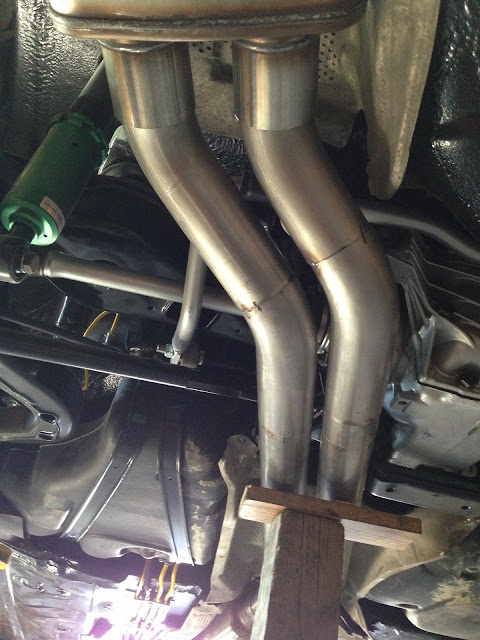
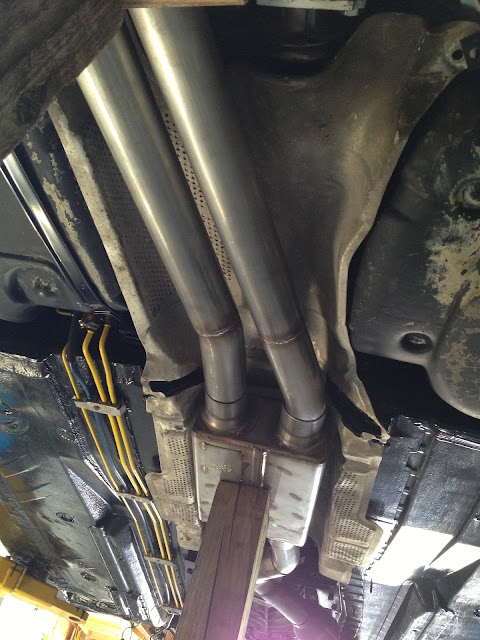
Today was spent building the exhaust...
X-pipe into Spintech
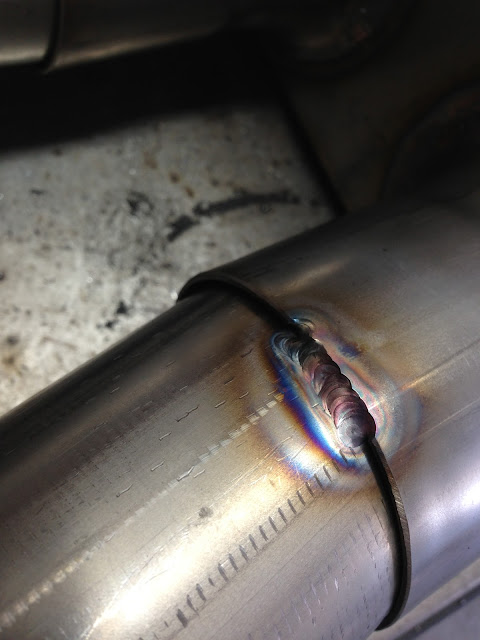
Sure is fun to tig...
From the headers it goes to magnaflow metallic cats, X pipe, then a spintech
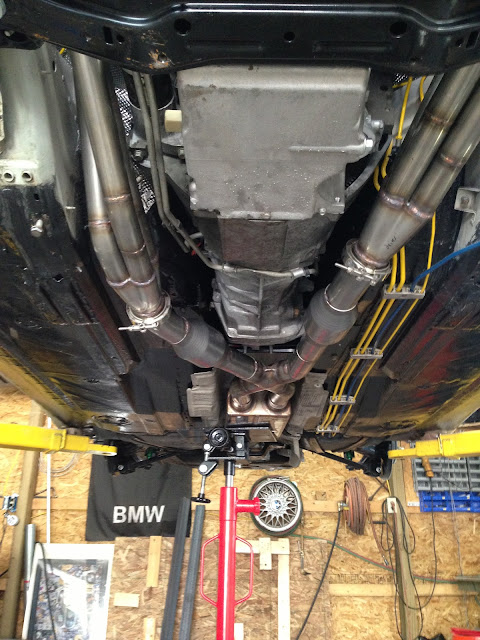
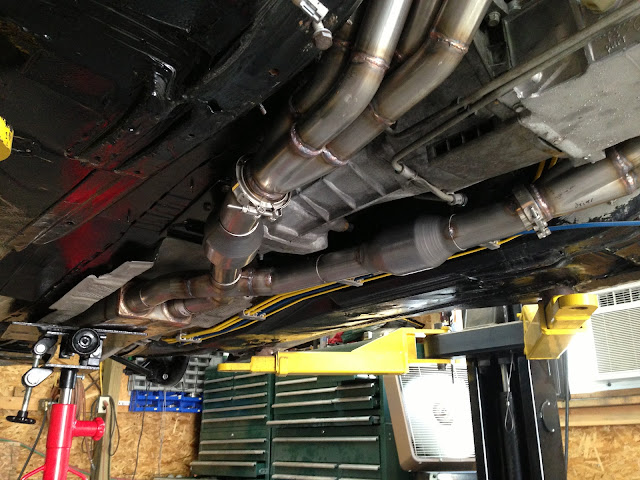
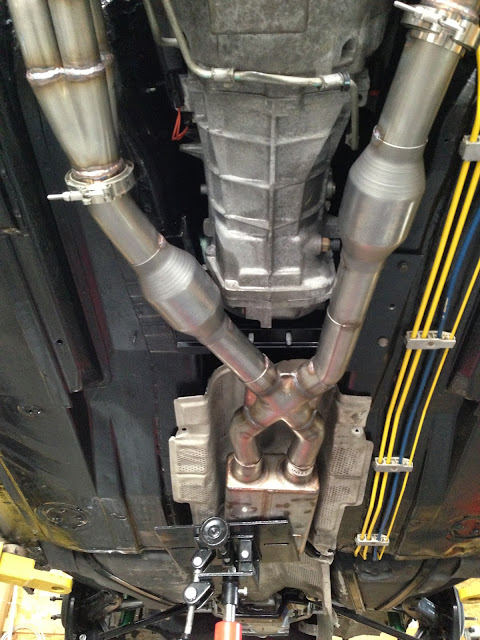
Back half...at the back of the car before the tips is a dual in dual out magnaflow.

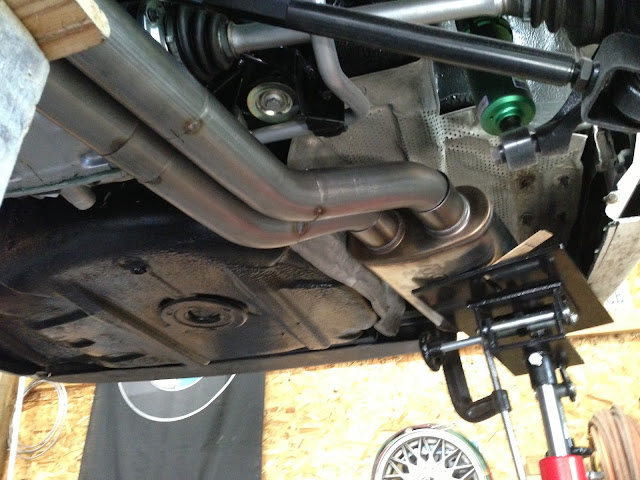
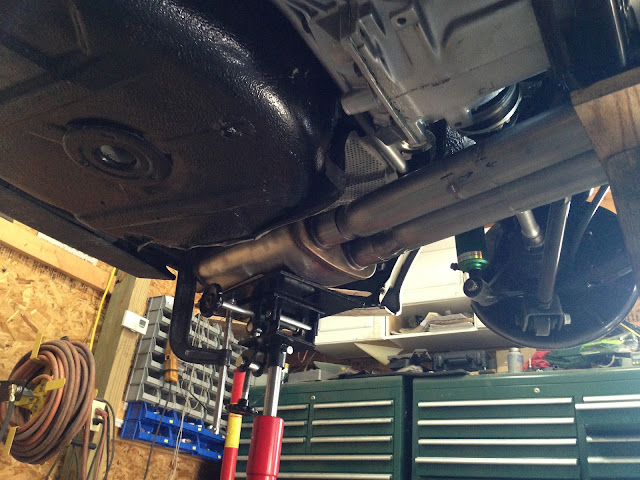
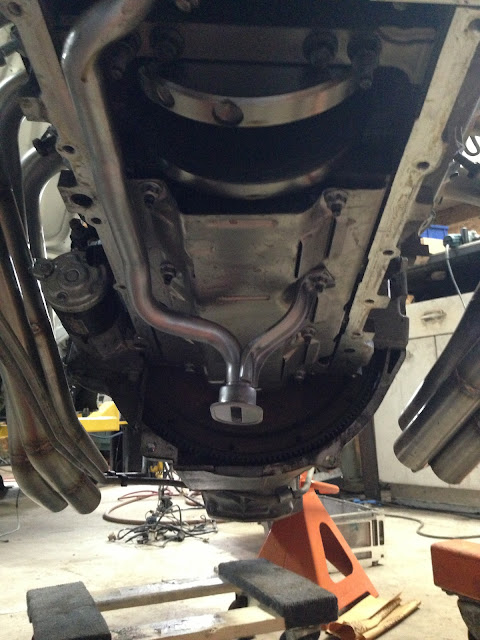
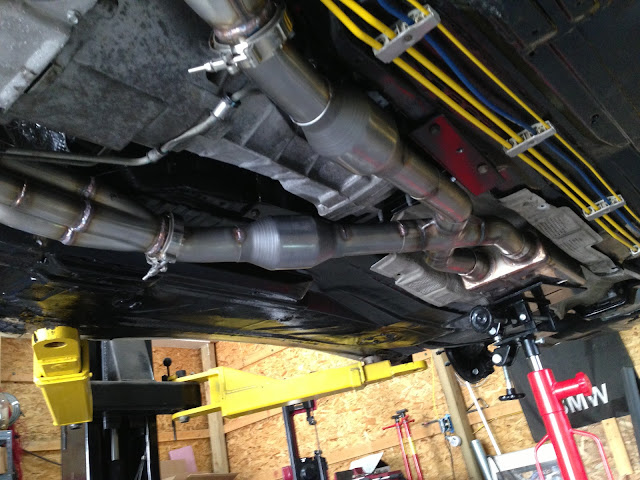
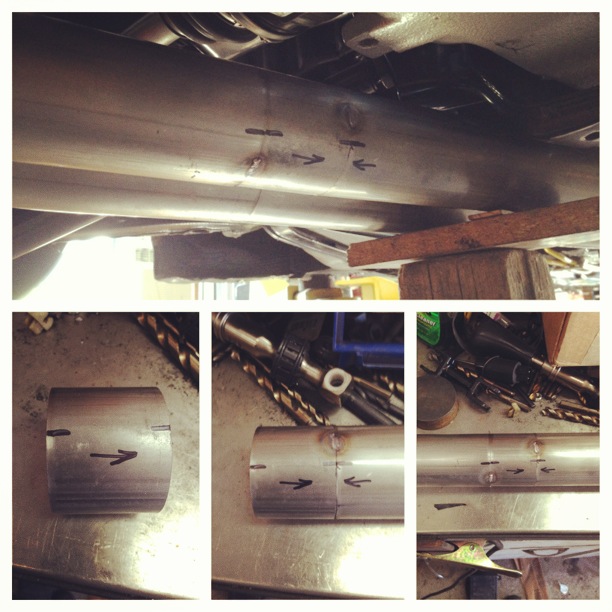
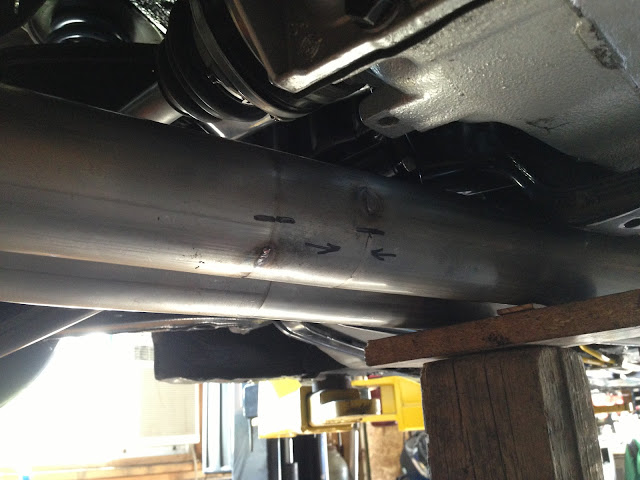
This was the LAST piece that went in to make it all work. Had to do this runner a few times before I was happy with it.
I must say this is the BEST exhaust system I have ever built. I am blown away every time I look at it. REALLY happy with how it all came together. I wish I had some hangers to get some better pictures rather than things being held up with jacks, etc. Next step everything will be fully welded. the two pipes from the spintech to the magnaflow need to be welded apart from the system as they are pretty close to each other in a couple spots and won't be able to get the tig torch in there. Everything will get fully welded then go back up and hangers will be added. Along with the tips.
Shooting to be firing her up next week.
Today was spent building the exhaust...
X-pipe into Spintech
Sure is fun to tig...
From the headers it goes to magnaflow metallic cats, X pipe, then a spintech
Back half...at the back of the car before the tips is a dual in dual out magnaflow.
This was the LAST piece that went in to make it all work. Had to do this runner a few times before I was happy with it.
I must say this is the BEST exhaust system I have ever built. I am blown away every time I look at it. REALLY happy with how it all came together. I wish I had some hangers to get some better pictures rather than things being held up with jacks, etc. Next step everything will be fully welded. the two pipes from the spintech to the magnaflow need to be welded apart from the system as they are pretty close to each other in a couple spots and won't be able to get the tig torch in there. Everything will get fully welded then go back up and hangers will be added. Along with the tips.
Shooting to be firing her up next week.