

Another Nova swap- 70' LQ4/ T56


An LS/4L60 combo is installable in a 3rd gen Nova without cutting the floor and being able to acheive 2.5-3 degrees eng/trans inclination angle...but not with the Holley oil pan, which is more than an inch deeper across the front of the pan than a stock F-body pan.
If you are willing to notch the front crossmember, then the Holley pan can be used successfully. Others here have used the Holley pan in a Nova swap without notching the crossmember, but I assure you their U-joint working angles are nowhere near what you can acheive if you start out with the standard 3 degree engine inclination being your objective, which also means you're less likely to need to shim your rear end to adjust pinion angle.
As a side note, with the engine low enough to obtain a 3 degree inclination angle a low-mount F-body alternator will not install with this setup unless you notch the crossmember or move the engine forward 3/4"-1" from the stock position, which I am against from a handling perspective and from reducing the area available in front of the engine for radiators, fans, intake tubing etc... You can keep the the motor in a low/rear position and use low-cost bracket options available from Holley and others to upper-mount the alternator while using either the stock truck or F-body balancer/water pump spacings.
There's also A/C compressor relocation brackets for upper mounting the compressor high on the passenger head if you want to run A/C. Things have really improved over the last few years from an affordable parts supply standpoint and will make your swap much easier than those done previously by others here.
Another variable that occured to me was that the pinion centerline on my Ford 9" is actually significantly lower than on a 10/12 bolt or a dana. You have made me really curious as to what my angle is.
I do eventually want to run a vintage air setup, but I decided that when the time comes that will be the holley bracket with a sanden compressor and I am not going to bother with a low mount compressor. Since the entire heating system on this car was removed in its drag racing days, I am not even going to attempt to get that functional untill I pull the trigger on the VA stuff.
I measured the angle at the transmission u-joint and got between 3.5-4.2 degrees using the shifter base as a my zero reference. I realized that the car has very little weight on it right now- no interior, front clip, bumpers, seats, radiator ect, so the angle will probably change. I also have between 1/4"-1/2" to space the transmission up before the reverse solenoid is hitting the floor.
I was planning on shortening my existing driveline and changing the 32 spline TH400 yoke for the 27 spline T56 since it was recently built and has new spicer joints, but I am rethinking this. The front joint is a 1310 to GM 3R combination joint, and the other joint is a Ford specific 1330. The Strange yoke I bought is a 1350, which I dont want to adapt to. I can use a 1350 to 1310 combo joint, but from what I have been reading 1310 joints with a stick above 400HP get "less predictable". Decisions decisions.
I was planning on shortening my existing driveline and changing the 32 spline TH400 yoke for the 27 spline T56 since it was recently built and has new spicer joints, but I am rethinking this. The front joint is a 1310 to GM 3R combination joint, and the other joint is a Ford specific 1330. The Strange yoke I bought is a 1350, which I dont want to adapt to. I can use a 1350 to 1310 combo joint, but from what I have been reading 1310 joints with a stick above 400HP get "less predictable". Decisions decisions.


Other than using the shifter base and output shaft to measure the angle... you can also use the front of the Crank.. as that is also inline with the Trans output shaft..
That way you can have the car on the ground (weighted would be nice) and not have to crawl under the car to measure.
BC
That way you can have the car on the ground (weighted would be nice) and not have to crawl under the car to measure.
BC

Banned
Joined: Feb 2013
Posts: 3,540
Likes: 207
Your measured angles are not usable unless your car is sitting at the ultimate ride height that you are going to be running. The engine angle is just a reference to ground with the vehicle at it's normal (factory or modified) ride height so don't read too much into that lone number. What is important is that your final U-joint working angles (not inclination angle) are less than 3 degrees and that the inclination angle of the eng/trans and differential pinion are the same within half a degree. This gets tougher to do the more you lower the rear of your car due to the pinion axis moving away from the crankshaft axis. On pro-chassis cars that are extremely lowered you'll seeeng/pinion inclinations angles that are 2 degrees or less to get working U-joint angles in an acceptable range. If you are running a leaf spring drag car, it's common to add an extra degree or two of pinion down angle to compensate for spring wrap on acceleration, but you shouldn't do it on a street car.
It has been a while since the last update, but I have been picking away at it. Repairs to the daily driver fleet and shop organization projects seem to be displacing Nova time lately.
I picked up some new take off CTS-V LSA exhuast manifolds for $37 at a swapmeet last weekend to see if they would clear on the the drivers side, but they dont.
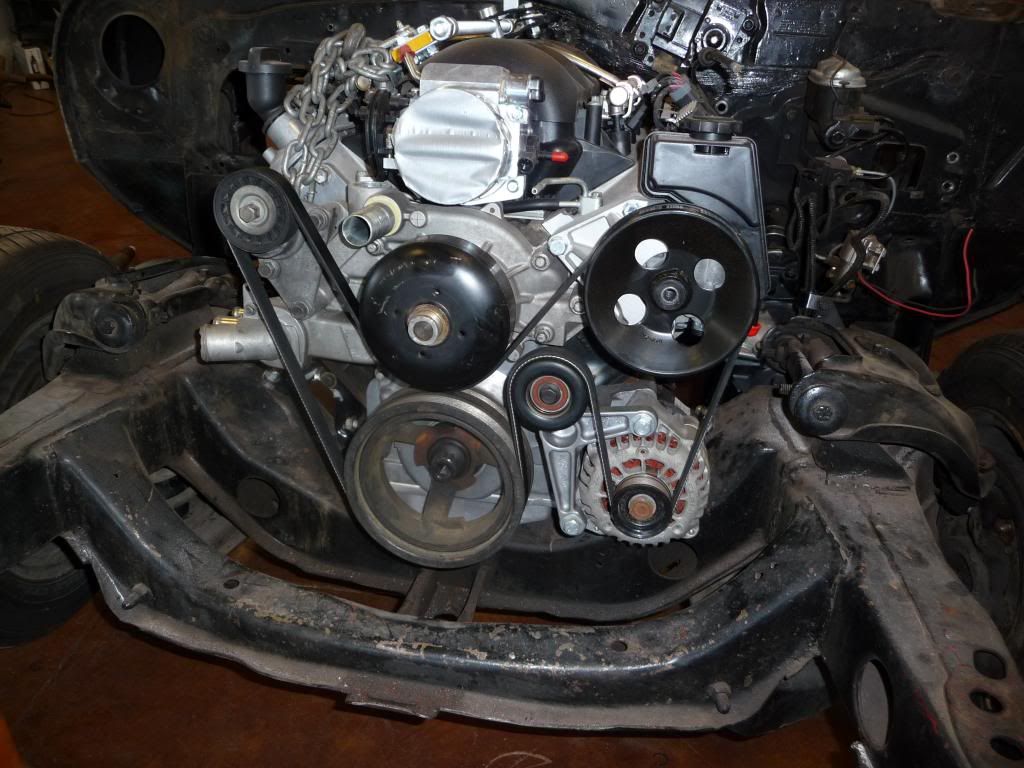
I also drilled and tapped the block for the F-body alt bracket and machined some .750" thick spacers out of 3/4" AL round bar. I think I may need to take some more material off, the alignment with the other pulleys still looks to be about 1/32-1/16" too far from the block.
I also started modifying my truck water pump. Still need to order a freeze plug to finish it up, but once I get a belt and the freeze plug I should be done with the accessory drive. If I did it again I would have pressed the truck pulley onto an F-body pump, just didnt know it was an option at the time. This thread has details if anybody cares: https://ls1tech.com/forums/conversio...-f-body-3.html
The other work on the car has all been restoration oriented so I wont bother the LS1 tech crowd with the details. But basically I pulled the windshield and rear window. Found some rot in the deck lid filler panel at the rear window, so I removed that peice, sandblasted, painted and now have the new AMD part ready to plug/ spot weld in. It was alot more time consuming than it sounds.
My plan for this weekend is to finish the tweaking with the accessory drive, measure and pick up a belt, and install the $20 68' Camaro power steering box I got last weekend to see if it clears the exhaust.
I picked up some new take off CTS-V LSA exhuast manifolds for $37 at a swapmeet last weekend to see if they would clear on the the drivers side, but they dont.
I also drilled and tapped the block for the F-body alt bracket and machined some .750" thick spacers out of 3/4" AL round bar. I think I may need to take some more material off, the alignment with the other pulleys still looks to be about 1/32-1/16" too far from the block.
I also started modifying my truck water pump. Still need to order a freeze plug to finish it up, but once I get a belt and the freeze plug I should be done with the accessory drive. If I did it again I would have pressed the truck pulley onto an F-body pump, just didnt know it was an option at the time. This thread has details if anybody cares: https://ls1tech.com/forums/conversio...-f-body-3.html
The other work on the car has all been restoration oriented so I wont bother the LS1 tech crowd with the details. But basically I pulled the windshield and rear window. Found some rot in the deck lid filler panel at the rear window, so I removed that peice, sandblasted, painted and now have the new AMD part ready to plug/ spot weld in. It was alot more time consuming than it sounds.
My plan for this weekend is to finish the tweaking with the accessory drive, measure and pick up a belt, and install the $20 68' Camaro power steering box I got last weekend to see if it clears the exhaust.
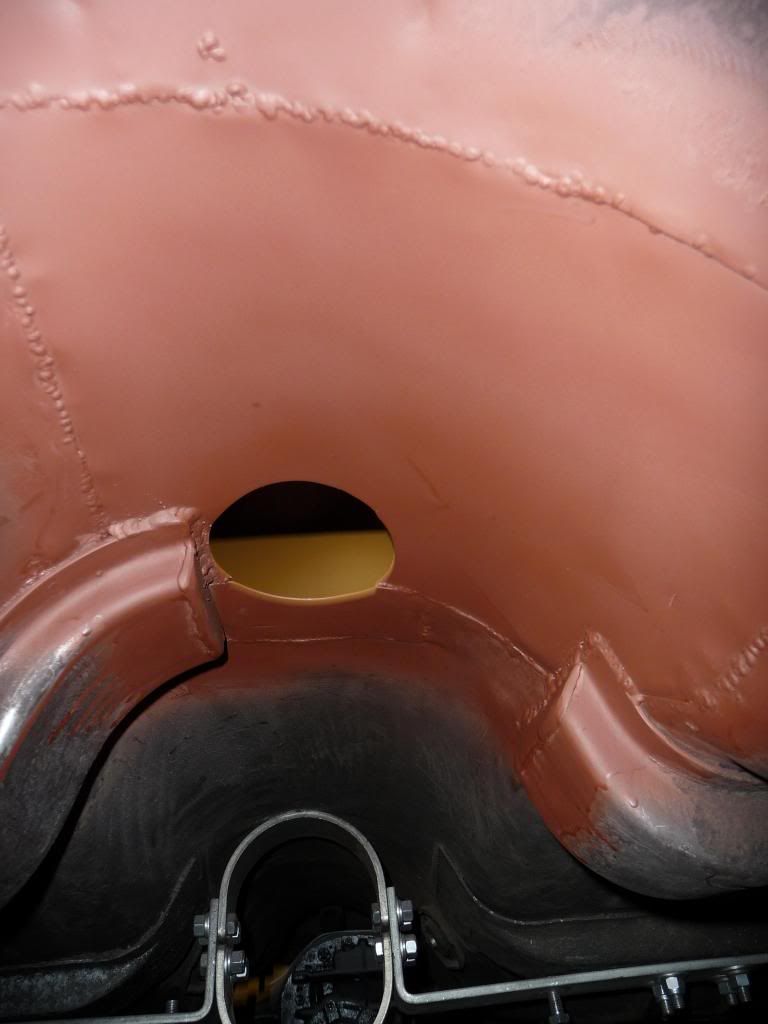
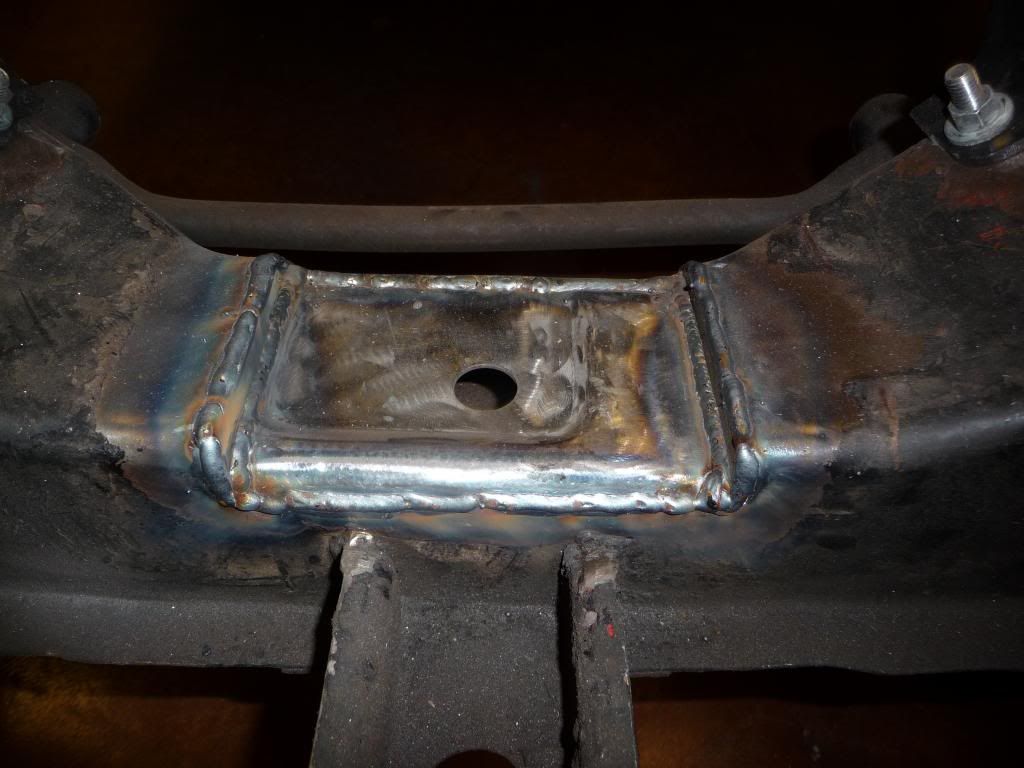
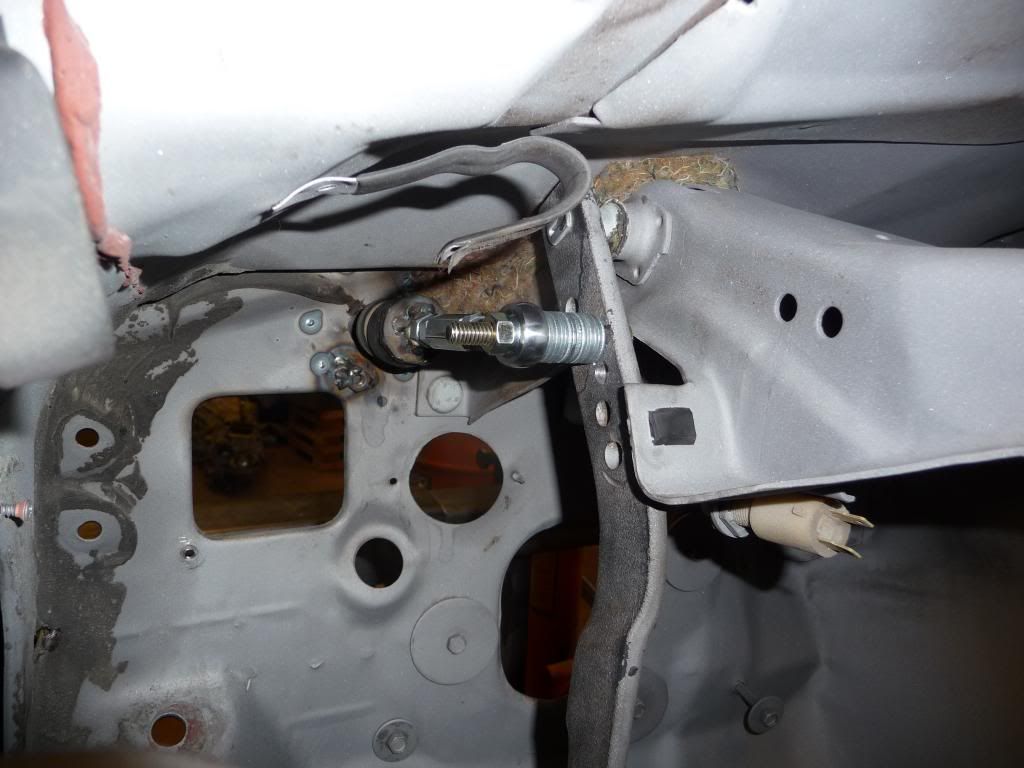
Finished a few things on the car. I think the accessory is 100% done. Famous last words. Finally found a freeze plug that works. Dorman 555-014 was the ticket. $.64 at Oreillys in stock. Also finished patching and cutting the floor for the T56 now the only holes are for the seats and the shifter. I also notched the cross member for the oil pan. The pan was just barely touching in one spot. The notch is way bigger than it needs to be but I didn't want to do it twice.


Wow it has been long time since I updated this post. No real "motor swap" stuff happening, but tons of restoration stuff. The cliff notes:
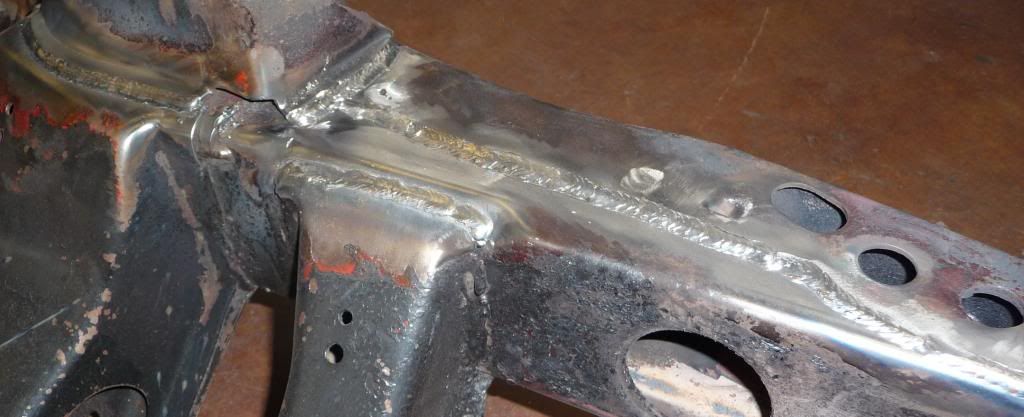
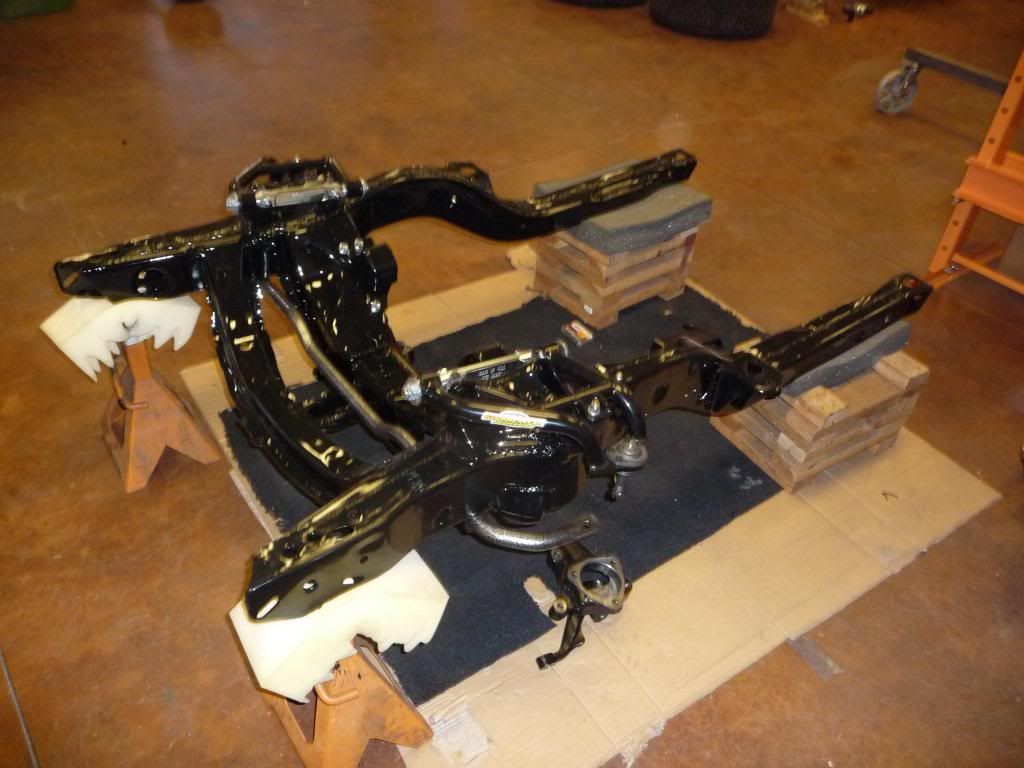
Pulled the subframe out, welded up the seams, heat and beat the major dings out:
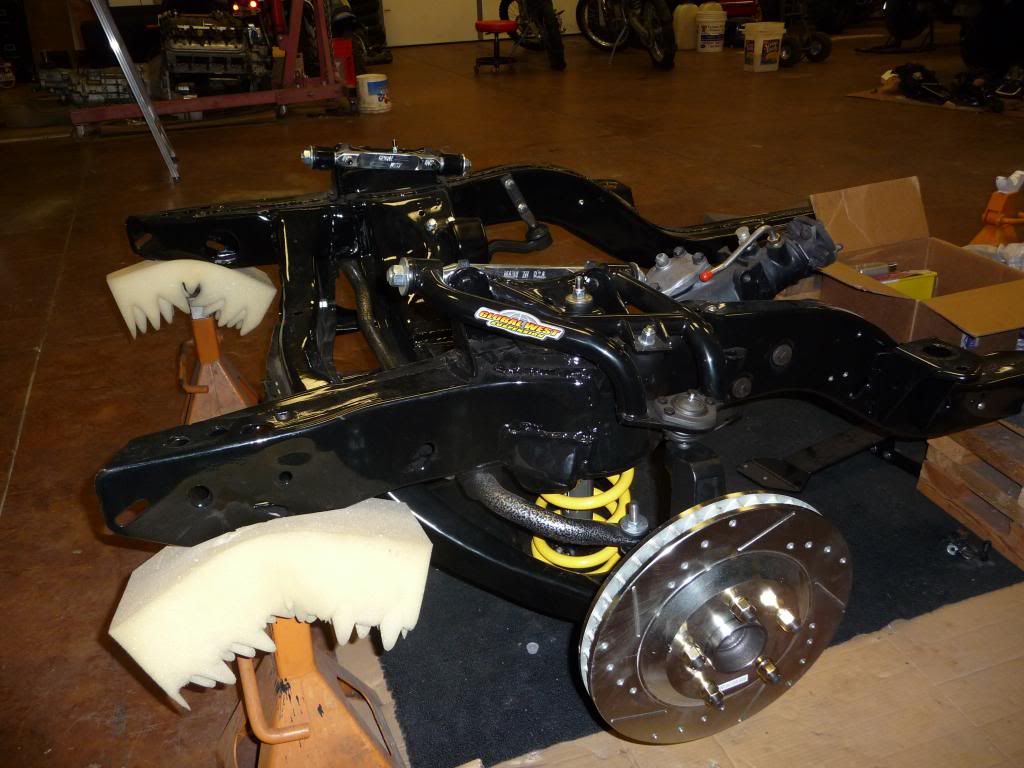
Got it powdercoated, started assembling the suspension and brakes. Still need calipers and shocks, and the lower control arms back from the powder coater, but its a start:
Got one wheelhouse and quarter panel done:

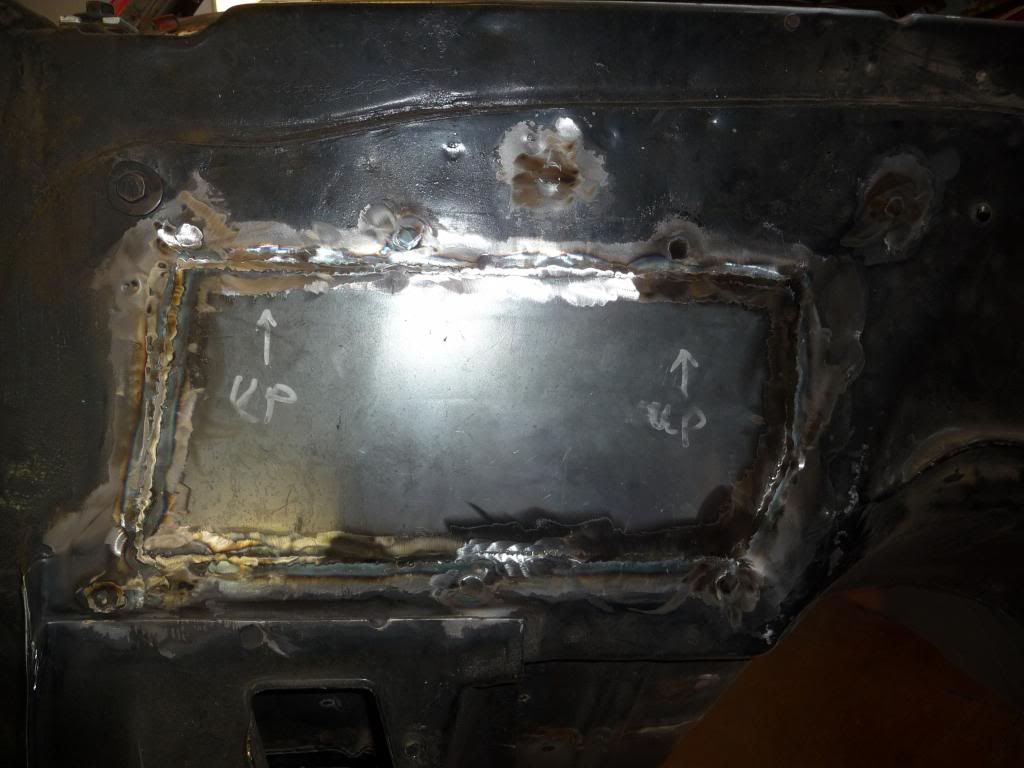
Started filling the firewall:
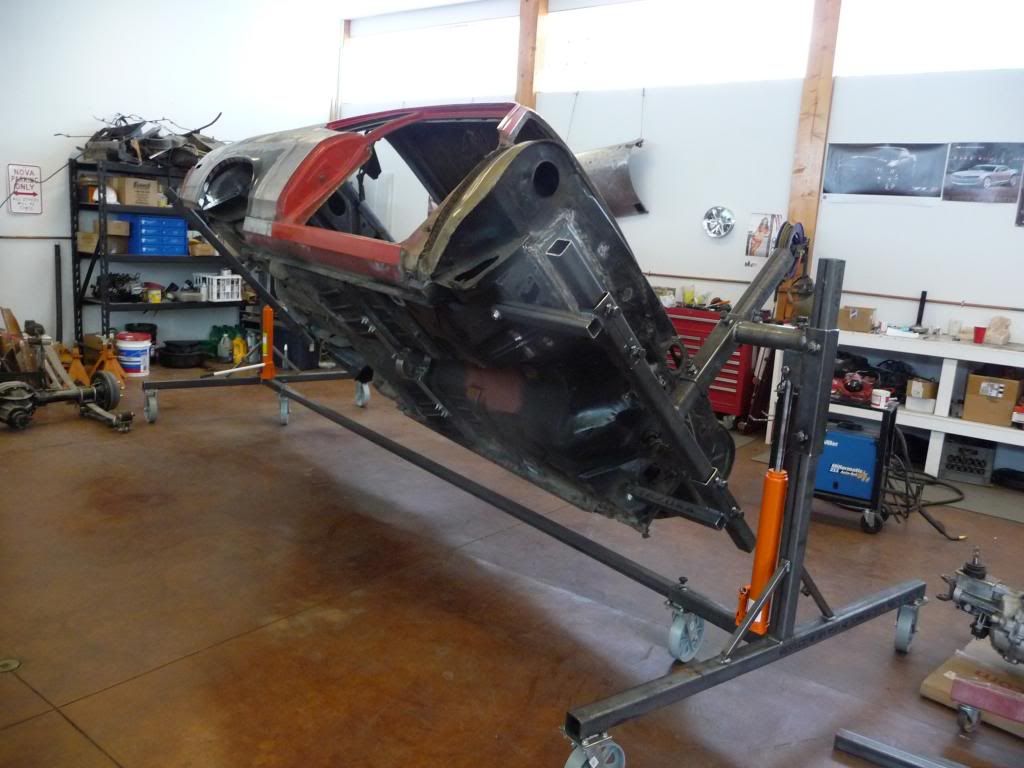
Built a rotisserie:
Got the car media blasted and started priming.

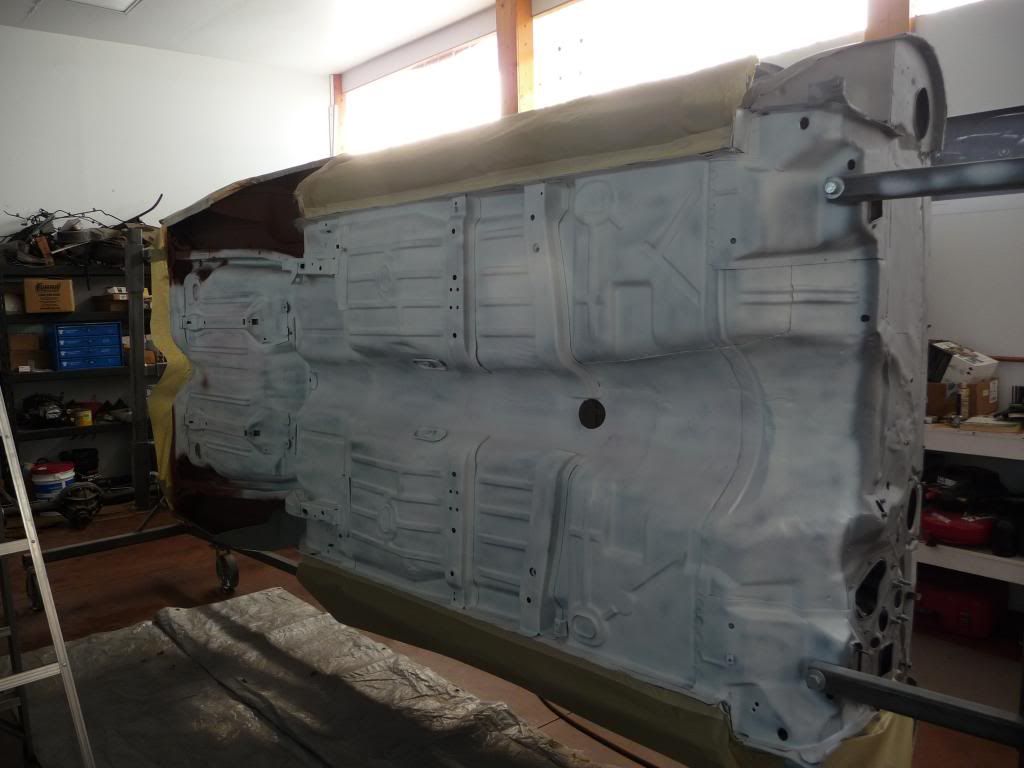
And that catches us up. Hopefully I can get the floor and firewall finshed up soon and turn the car back into a roller. Still have a quarter panel and the dash panel near the window that I thought was solid, is swiss cheese.
Pulled the subframe out, welded up the seams, heat and beat the major dings out:

Got it powdercoated, started assembling the suspension and brakes. Still need calipers and shocks, and the lower control arms back from the powder coater, but its a start:

Got one wheelhouse and quarter panel done:

Started filling the firewall:

Built a rotisserie:

Got the car media blasted and started priming.


And that catches us up. Hopefully I can get the floor and firewall finshed up soon and turn the car back into a roller. Still have a quarter panel and the dash panel near the window that I thought was solid, is swiss cheese.

Hey Turtle,
this is the same RedMan* from Steves....
Glad you found a local guy for you to do the sand/media blasting.
Sounds like you will be taking more stuff to him and from what I have seen they did a great job for ya.
LS swap looks awesome, I might have to get in touch with you for some pointers since I just picked up my first LS engine.
Here is my "slow" progress on my Chevy II Wagon: https://ls1tech.com/forums/carburete...cs-inside.html
Thanks,
Stu

I didn't realize you're in TC. I've got family in Yakima, and our boat's in Kennewick. Nice to see another central washingtonian with a Nova.
One question - what spindles are those? EDIT: Found it in your Steve's thread.
One recommendation: Ditch the rear drums if you're going C5 front brakes. You might as well put C5 or F-body rear discs on while you've got easy access. They're an easy swap, and the f-bodies have a built-in e-brake (same size as C5s otherwise).
One question - what spindles are those? EDIT: Found it in your Steve's thread.
I decided to try the CPP C5 spindles with the corrected geometry.
That is a really nice rotisserie! Great work.
Have you ever run across someone with failed subframe welds? I know they look like snot from the factory, but I've never seen actual failures. I cleaned some of mine up a long time ago (mostly splatter areas and the big boogers), but didn't grind them out and reweld everything.
Have you ever run across someone with failed subframe welds? I know they look like snot from the factory, but I've never seen actual failures. I cleaned some of mine up a long time ago (mostly splatter areas and the big boogers), but didn't grind them out and reweld everything.
I didn't realize you're in TC. I've got family in Yakima, and our boat's in Kennewick. Nice to see another central washingtonian with a Nova.
One question - what spindles are those? EDIT: Found it in your Steve's thread.
One recommendation: Ditch the rear drums if you're going C5 front brakes. You might as well put C5 or F-body rear discs on while you've got easy access. They're an easy swap, and the f-bodies have a built-in e-brake (same size as C5s otherwise).
One question - what spindles are those? EDIT: Found it in your Steve's thread.
One recommendation: Ditch the rear drums if you're going C5 front brakes. You might as well put C5 or F-body rear discs on while you've got easy access. They're an easy swap, and the f-bodies have a built-in e-brake (same size as C5s otherwise).
That is a really nice rotisserie! Great work.
Have you ever run across someone with failed subframe welds? I know they look like snot from the factory, but I've never seen actual failures. I cleaned some of mine up a long time ago (mostly splatter areas and the big boogers), but didn't grind them out and reweld everything.
Have you ever run across someone with failed subframe welds? I know they look like snot from the factory, but I've never seen actual failures. I cleaned some of mine up a long time ago (mostly splatter areas and the big boogers), but didn't grind them out and reweld everything.
I havent even checked the bolt pattern yet, I hope its not 4.5"
FYI, there is no appreciable difference between the 4th-gen F-body and C5 brakes, save the e-brake (and the fact that C5s rotors are slotted). Here's some info I put together. You can pick up a set of rear F-body hardware for a couple hundred - in fact, I probably spent $350 total on mine, with $100 of that for Kore3 stainless adapter hoses. Something to think about.
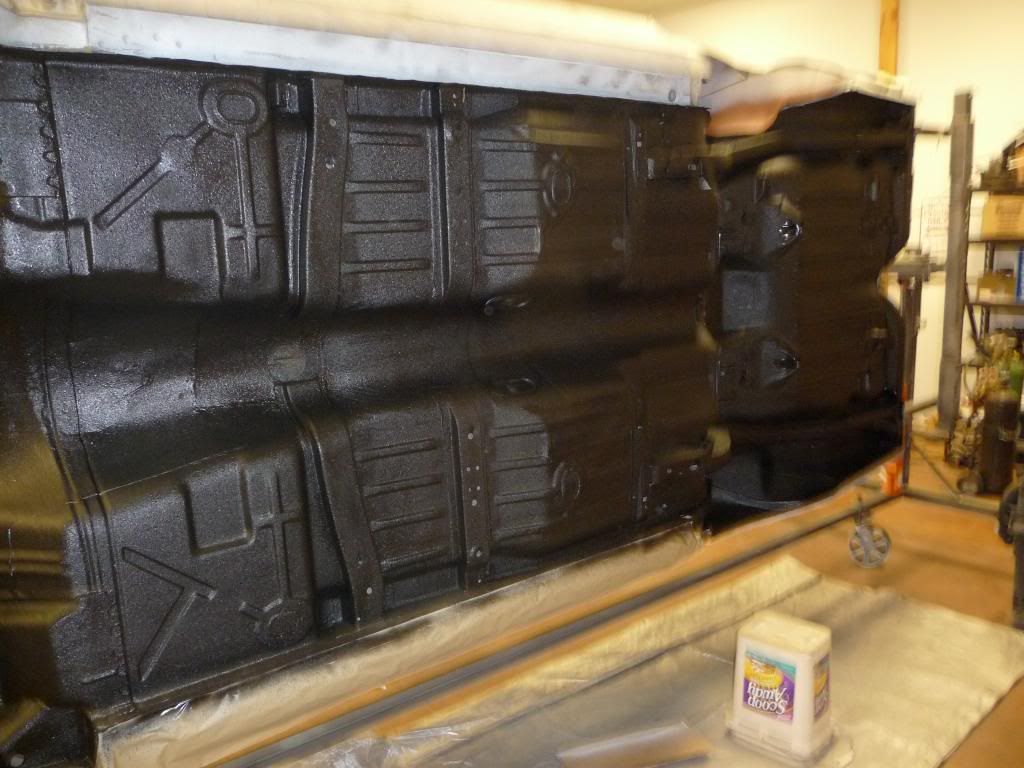
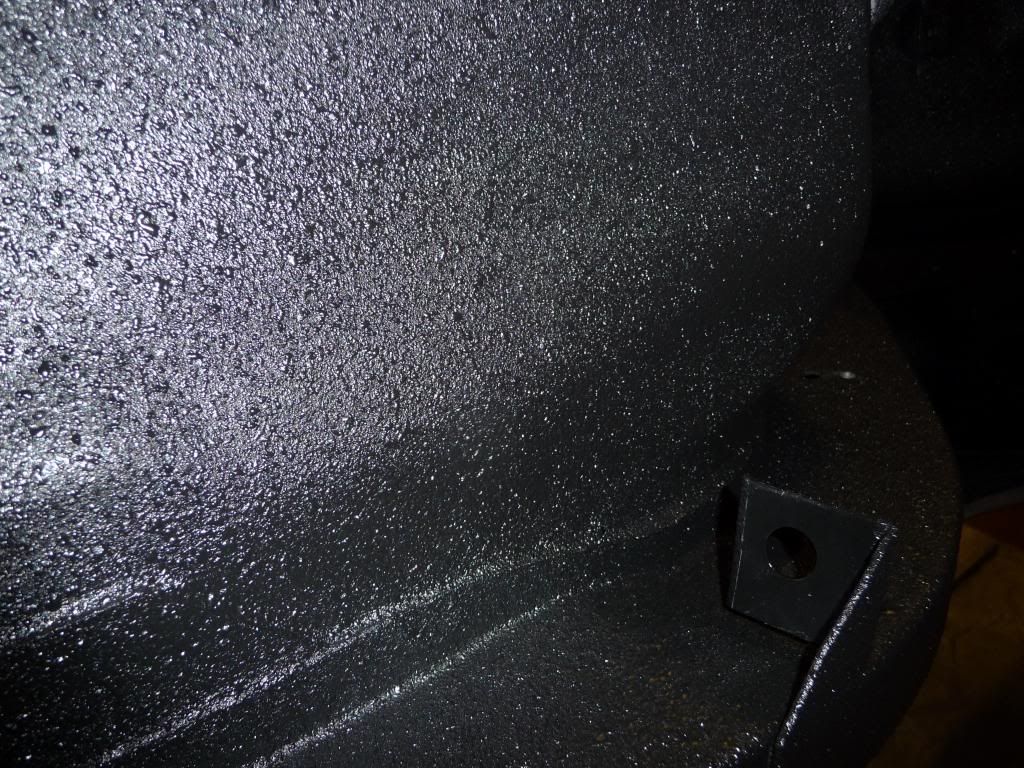
Still working on this thing believe it or not. Seam sealed, primed, painted, and applied raptor liner to the floor. Really like this stuff so far.
Also been working on finishing the subframe. Still need to finish the steering, buy some brakelines, put the new pitman arm, etc.
Oh, and the rearend is 4.5" bolt pattern. I will put that one on the back burner, dont really want to redrill the front hubs and rotors, I dont like adapters, and I am cheap. Going to have to came on one those.


Also been working on finishing the subframe. Still need to finish the steering, buy some brakelines, put the new pitman arm, etc.

Oh, and the rearend is 4.5" bolt pattern. I will put that one on the back burner, dont really want to redrill the front hubs and rotors, I dont like adapters, and I am cheap. Going to have to came on one those.


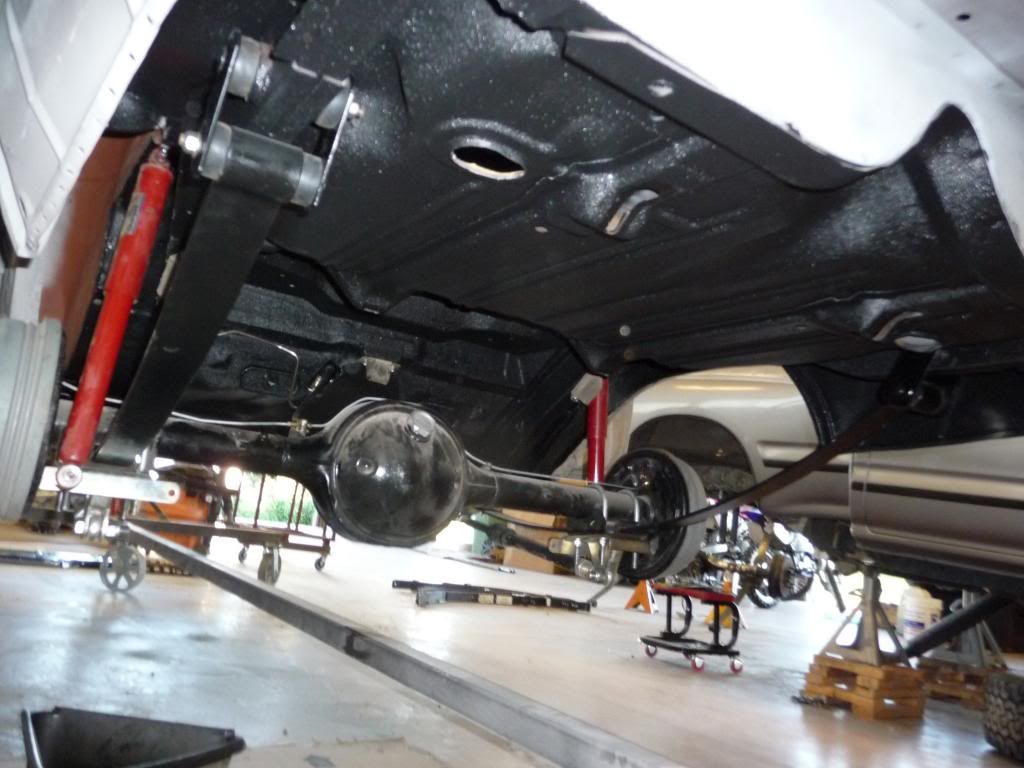
Thanks Jimbo. Still working on this hoopty. All the front steering and stainless brakelines are together. I got the rear suspension rebuilt also and back together. Everything except the rear end has new hardware and is repainted.
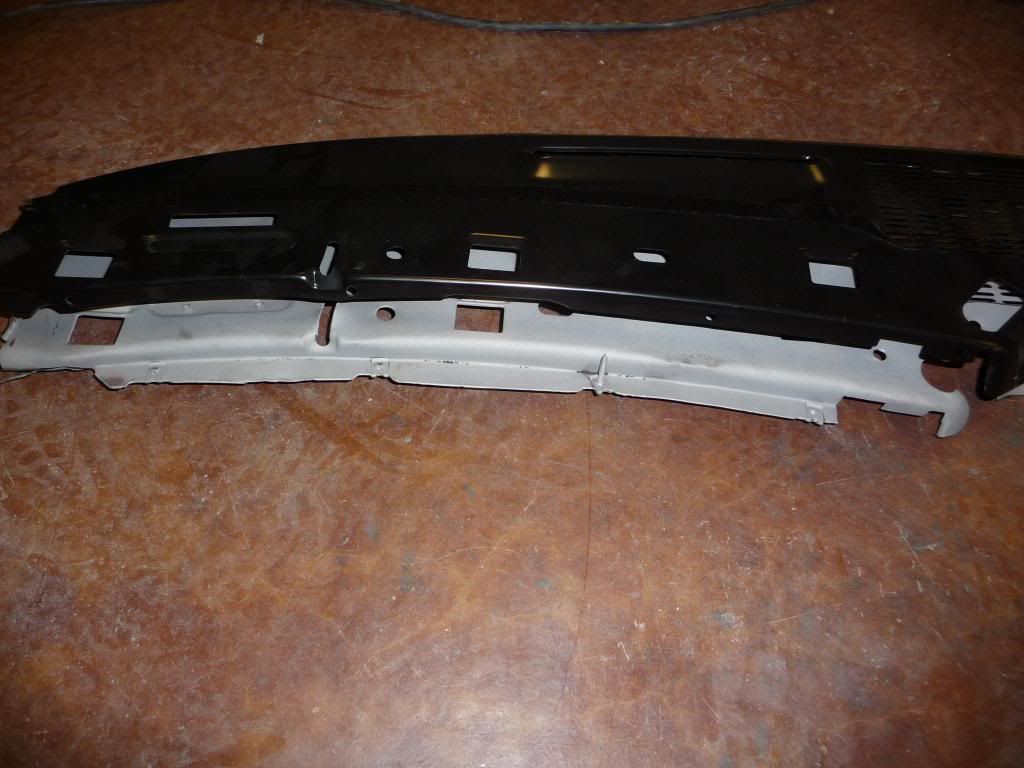
I also started replacing the dash top.
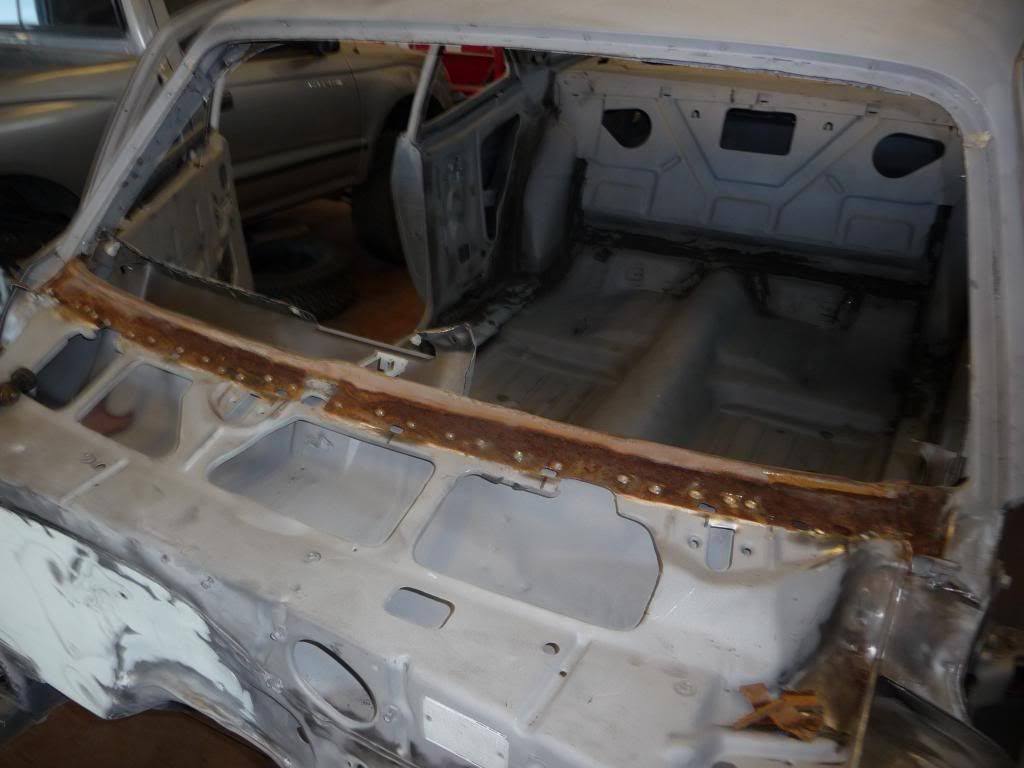
The replacement part is actually for a 69' Camaro. You can see the flange that needs to be cut off the original and welded on to the replacement. Otherwise it is the same.
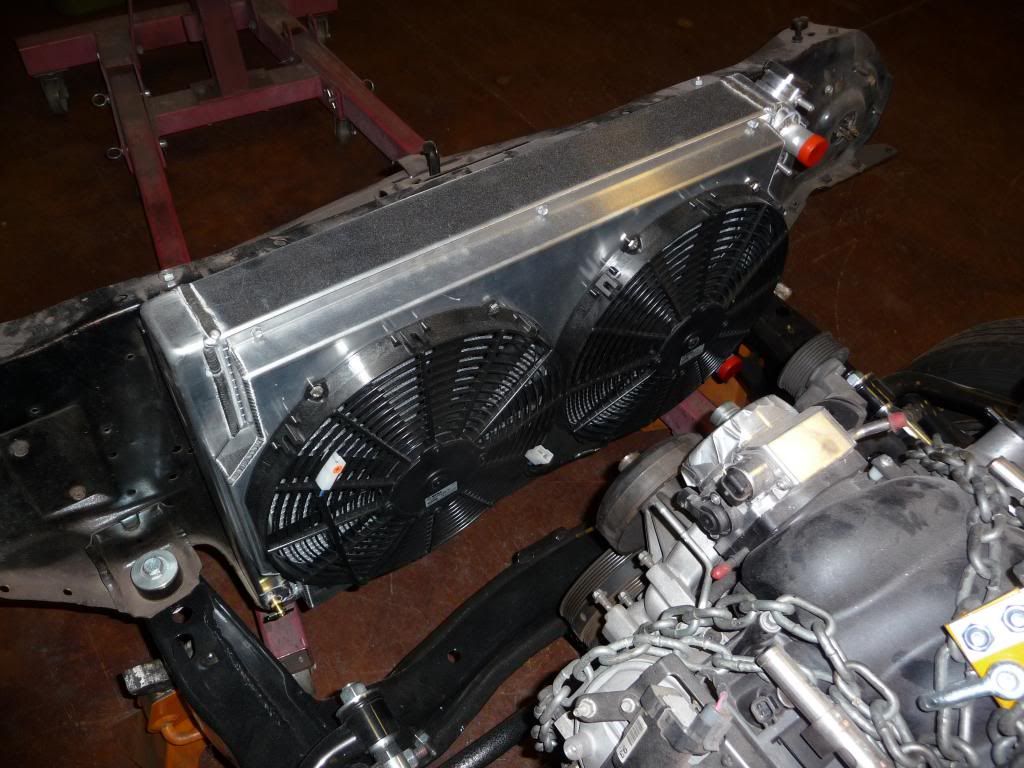
I also splurged on a radiator and fan setup. I think it is really nice. The outlets are both on the passenger side and there is a bung for the steam port. Even came with a fan controller. Its a griffin.
I also picked up a used clutch and got that on the car. I ordered up a remote bleeder and fittings from Speedway to convert the clutch line to braided AN. Once I get those pieces, the transmission can get mated to the motor for good.

I also started replacing the dash top.

The replacement part is actually for a 69' Camaro. You can see the flange that needs to be cut off the original and welded on to the replacement. Otherwise it is the same.

I also splurged on a radiator and fan setup. I think it is really nice. The outlets are both on the passenger side and there is a bung for the steam port. Even came with a fan controller. Its a griffin.

I also picked up a used clutch and got that on the car. I ordered up a remote bleeder and fittings from Speedway to convert the clutch line to braided AN. Once I get those pieces, the transmission can get mated to the motor for good.
Made a mount for the clutch master cylinder. I didn't really like the DSE adapter plate and I didn't want to shell out the $$$ for a Keisler. The angle of the rod stays nice and flat and it uses all of the master cylinder travel. I used some leftover sway bar bushings for the pedal stop.
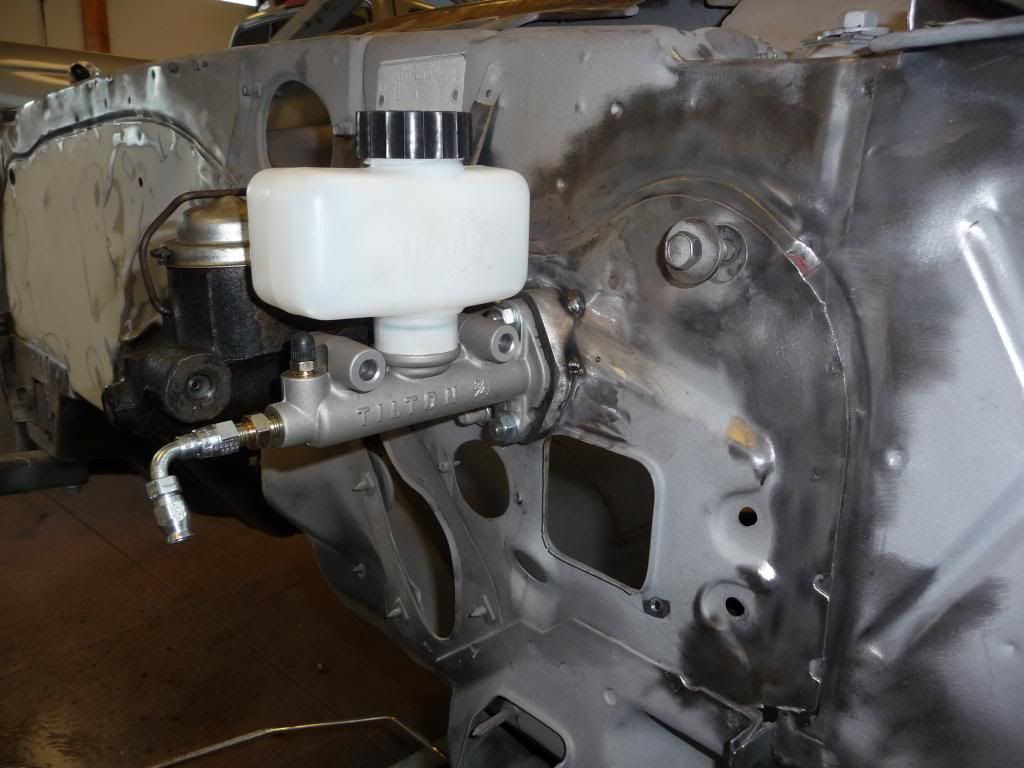
Its pretty tight to the brake master but you can get the fittings in. I think I am going to test it out since I got the fittings and lines for the slave cylinder.


Its pretty tight to the brake master but you can get the fittings in. I think I am going to test it out since I got the fittings and lines for the slave cylinder.

Registered User
Joined: Feb 2021
Posts: 1
Likes: 0
I am working on this LS swap on this 65' nova and need exhaust manifold replacement. The stock 5.3l manifolds aren't even close to fitting and i need something that is possibly just shorter than the stocks. It has a tci front end so anything that would fit could be helpful. Thanks.