
69 Chevelle - LS1 T56 Swap
 10-10-2013, 07:27 PM
#21
On The Tree
Thread Starter
iTrader: (4)

Join Date: Dec 2011
Location: San Francisco
Posts: 134
Likes: 0
Received 0 Likes
on
0 Posts
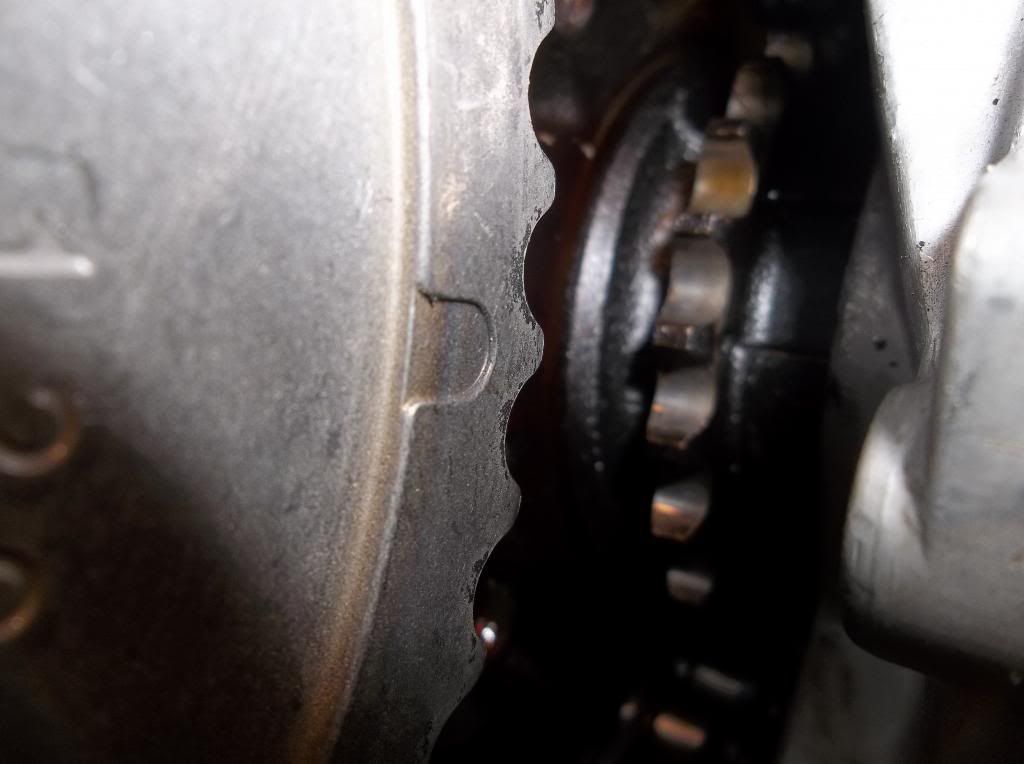
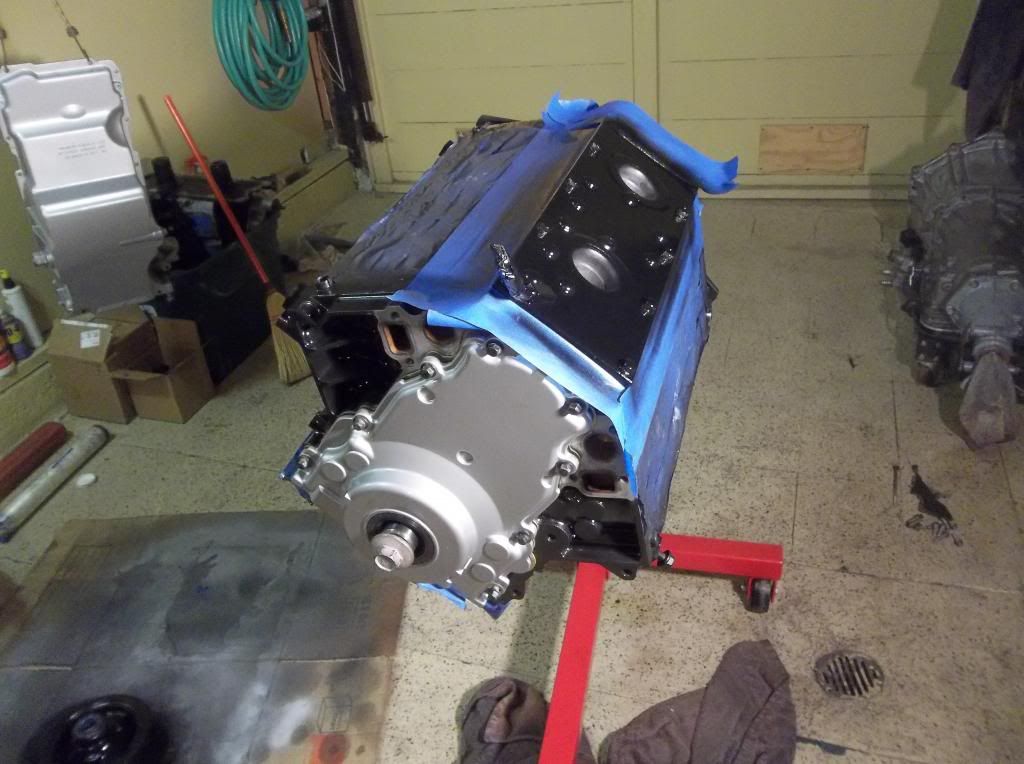
At this point, before reinstalling all the front parts since I was waiting for my new cam retainer to come, I painted my LS6 valley cover and bolted it up without the knock sensors and harness. The notch was fine that I made before wiith the dremmel so it all looked great.
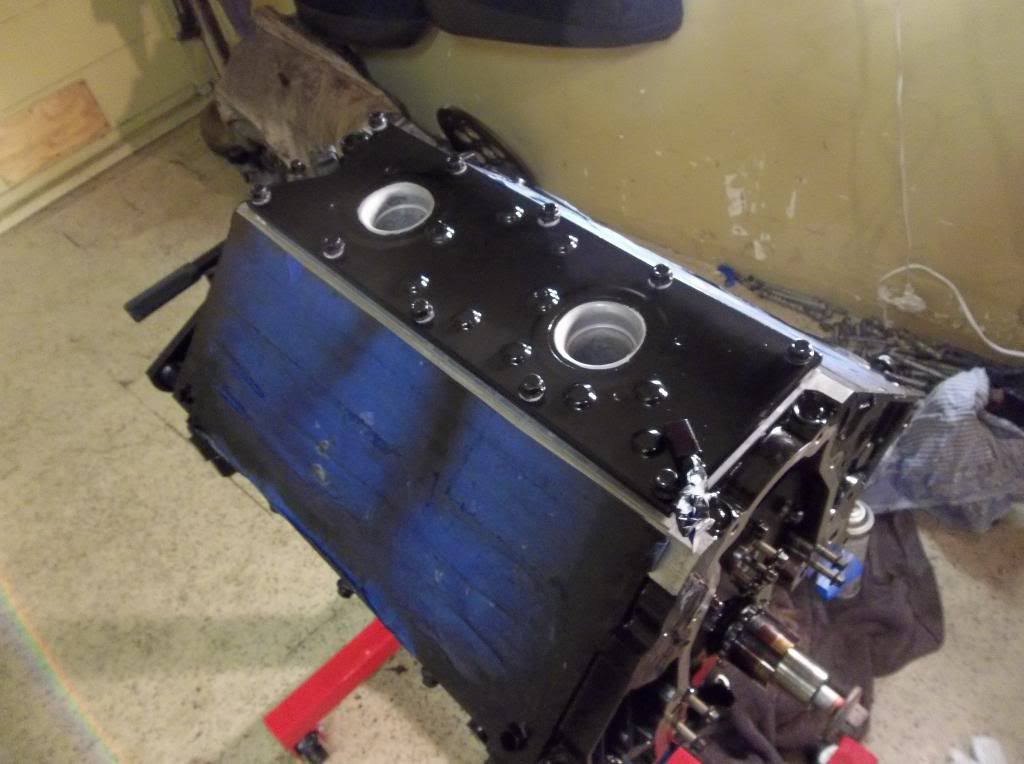
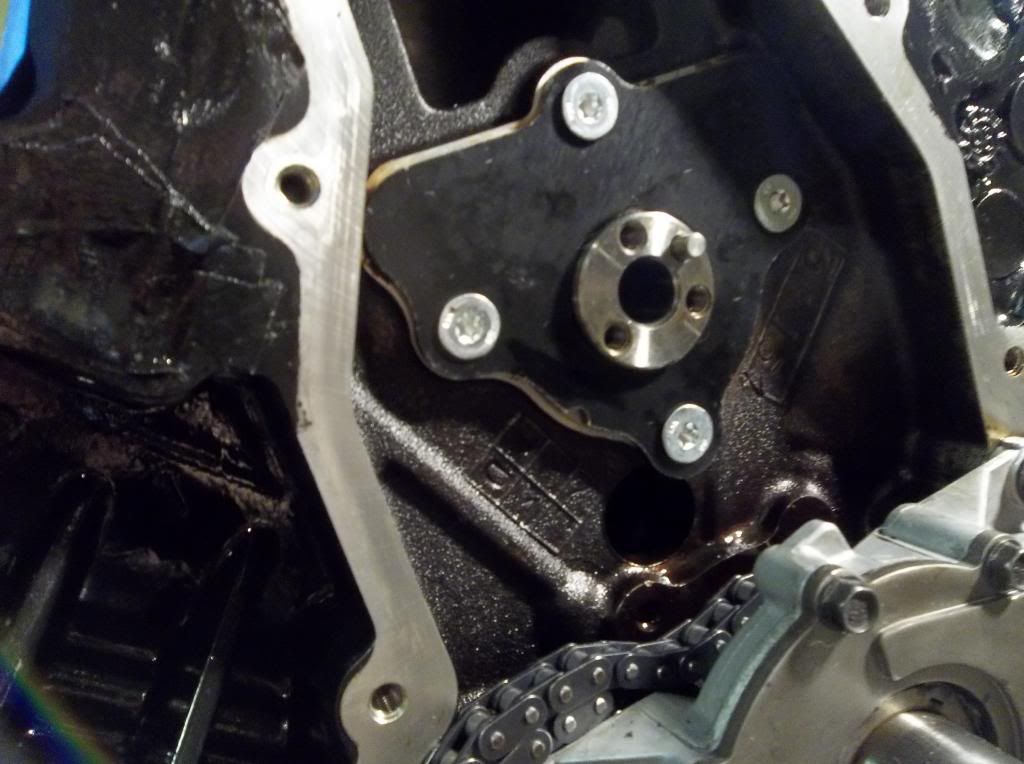
Then I went back and bolted up the oil pump. MAKE SURE YOU DON�T FORGET TO PUT THE CHAIN BACK ON FIRST, I BOLTED THE PUMP ON AND REALIZED I LEFT THE CHAIN OFF SO I HAD TO DO THAT STEP TWICE.
Gathered some parts to add to my CL sale ad.
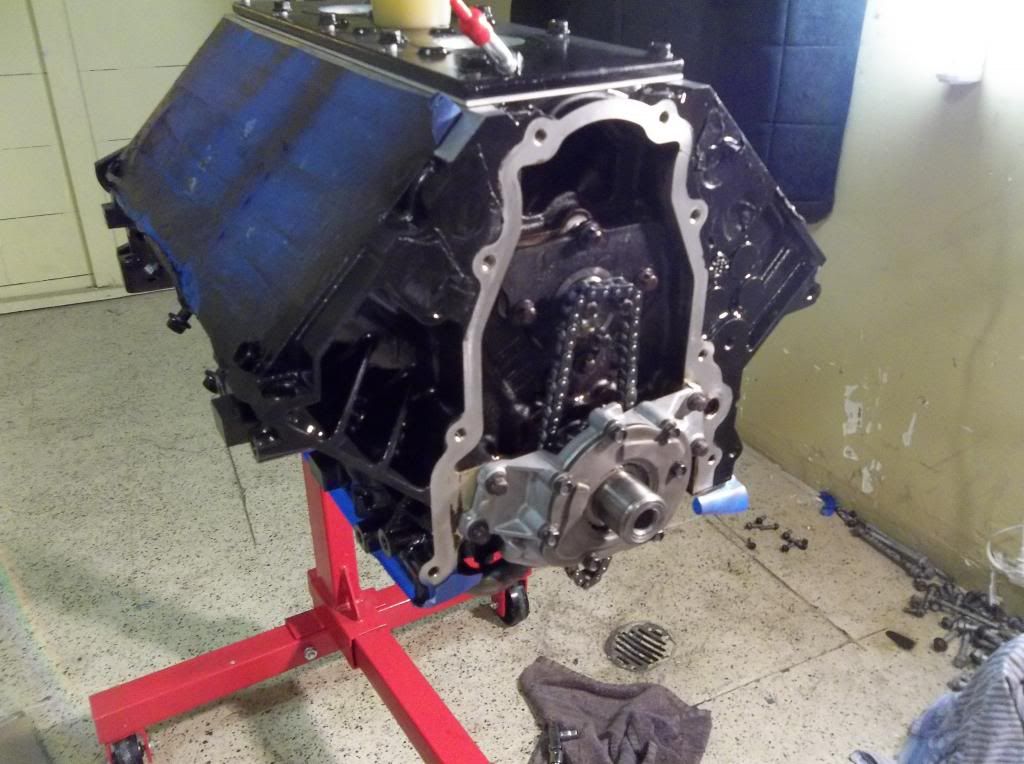
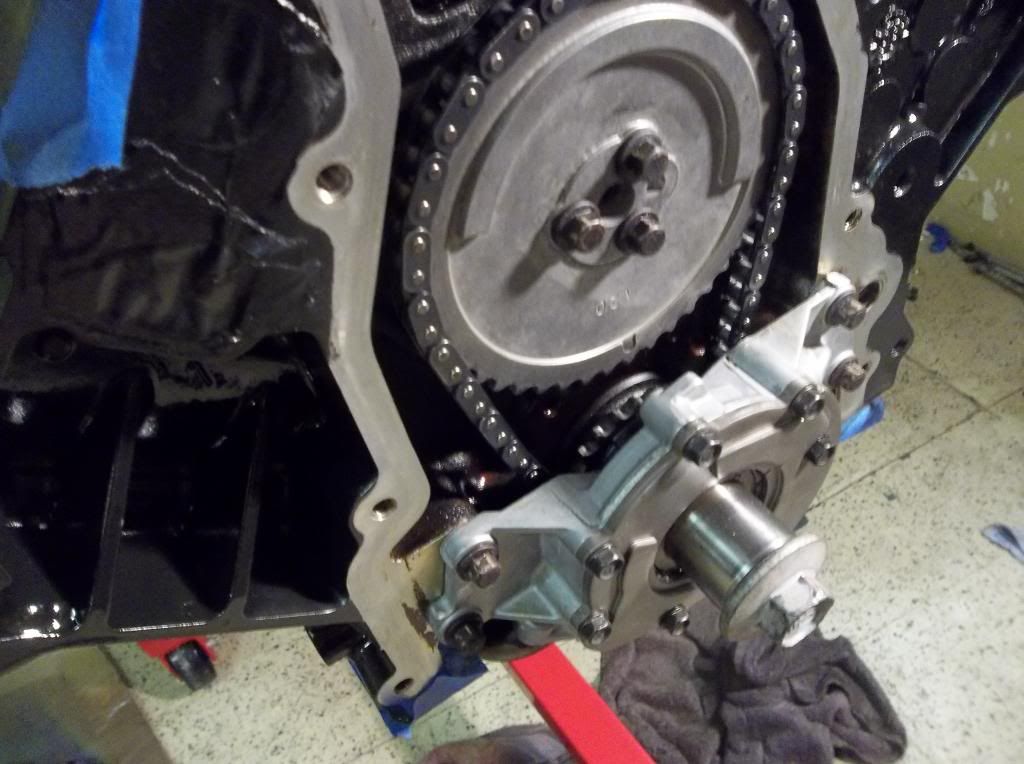
After my new cam retainer plate came in I was able to put the rest together. With the new replacement cam plate, you will get the new bolts from TSP. the bolts and their heads are different. The gasket on the new one was great of course so I bolted it all up.
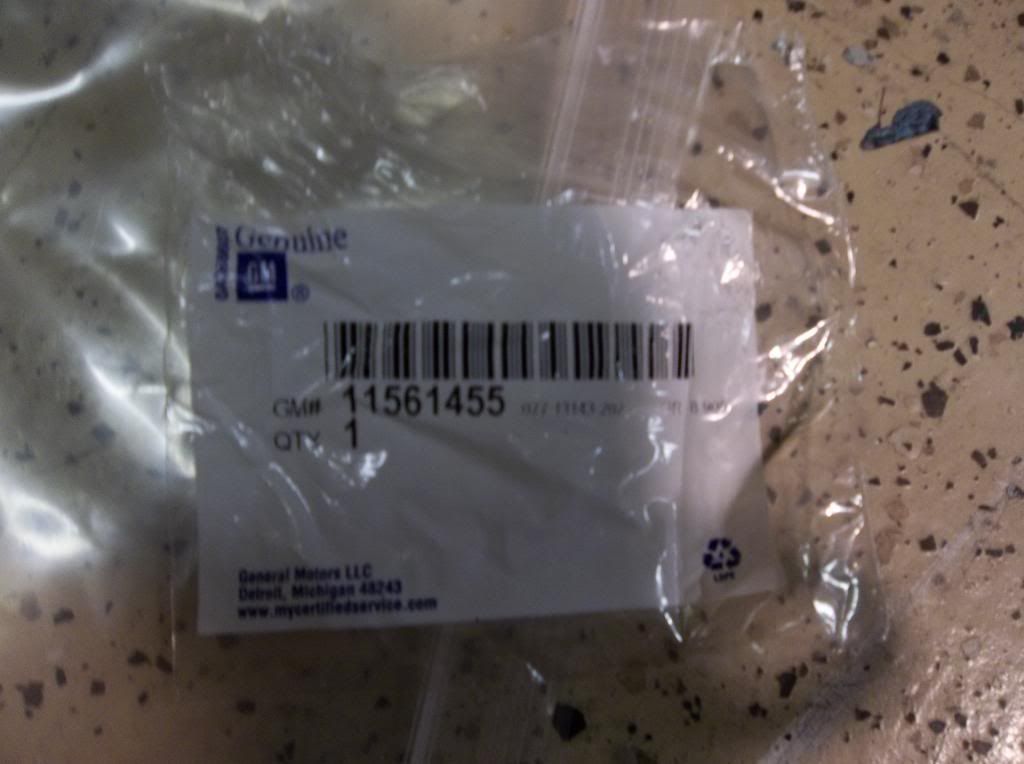
Here is the part number for the bolts
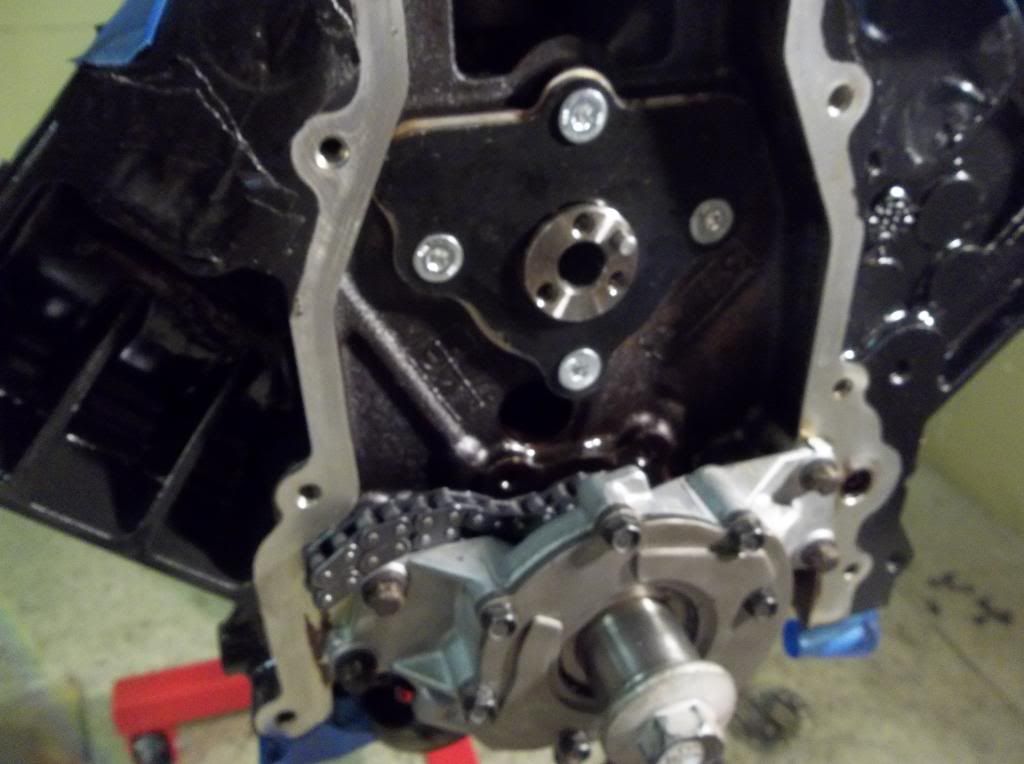
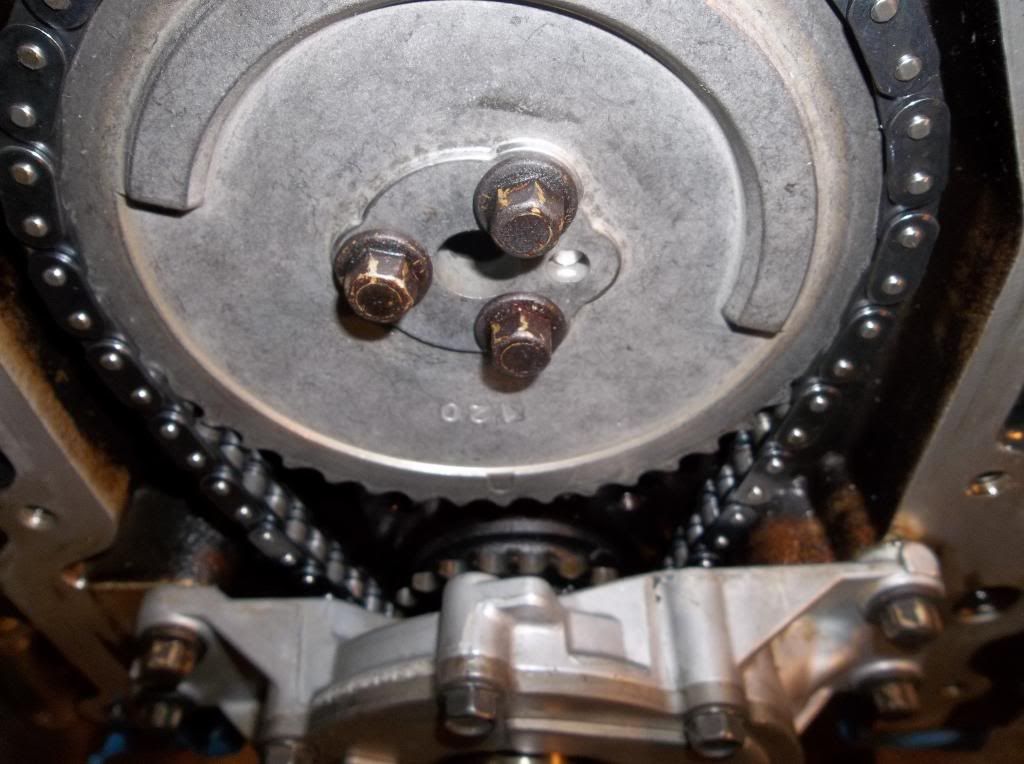
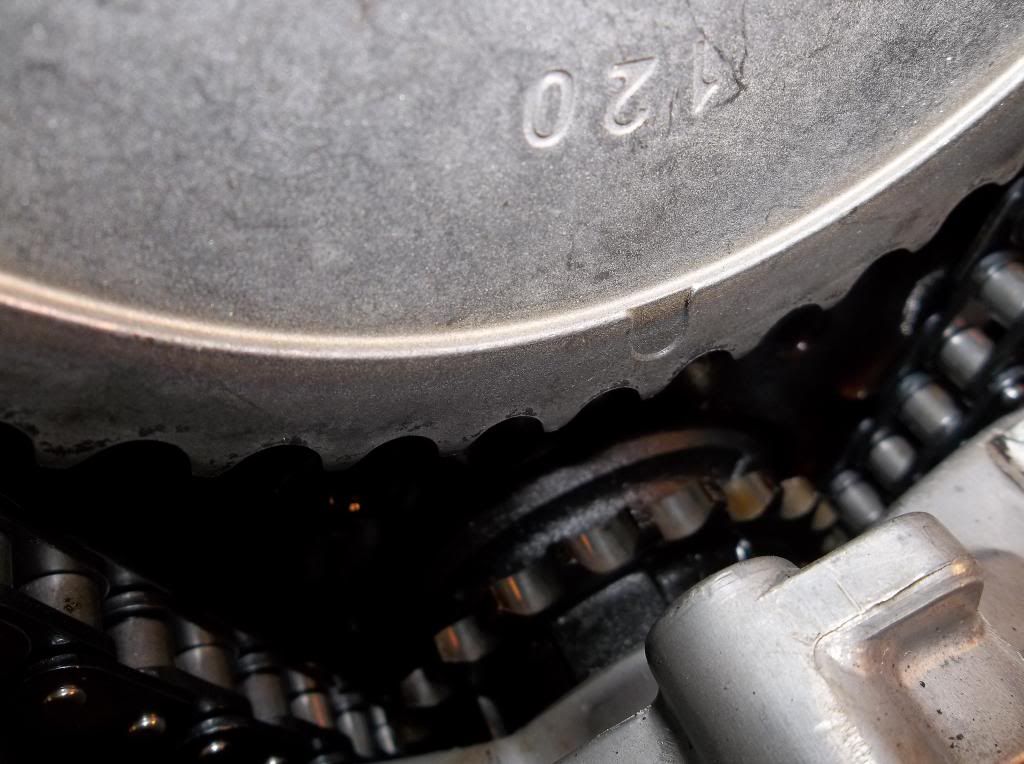
The next part was also a little time consuming, pulling the chain up around the cam gear, bring the crank gear to the point where the dot (marker) is directly centered and at the top (top dead center), then move the chain around the cam gear and turn it until it finally matches up dot-to-dot with the crank gear. The pictures are hard to tell but you get it.
Lookin pretty

Then I went back and bolted up the oil pump. MAKE SURE YOU DON�T FORGET TO PUT THE CHAIN BACK ON FIRST, I BOLTED THE PUMP ON AND REALIZED I LEFT THE CHAIN OFF SO I HAD TO DO THAT STEP TWICE.

Gathered some parts to add to my CL sale ad.

After my new cam retainer plate came in I was able to put the rest together. With the new replacement cam plate, you will get the new bolts from TSP. the bolts and their heads are different. The gasket on the new one was great of course so I bolted it all up.


Here is the part number for the bolts

The next part was also a little time consuming, pulling the chain up around the cam gear, bring the crank gear to the point where the dot (marker) is directly centered and at the top (top dead center), then move the chain around the cam gear and turn it until it finally matches up dot-to-dot with the crank gear. The pictures are hard to tell but you get it.


Lookin pretty

 10-10-2013, 07:29 PM
#22
On The Tree
Thread Starter
iTrader: (4)
Join Date: Dec 2011
Location: San Francisco
Posts: 134
Likes: 0
Received 0 Likes
on
0 Posts
On to the next upgrade: LS7 lifters, LS2 trays
For this portion I used the link below as my �how to�, there is 4 pages of info:
http://www.autoserviceprofessional.c...lifters?Page=1
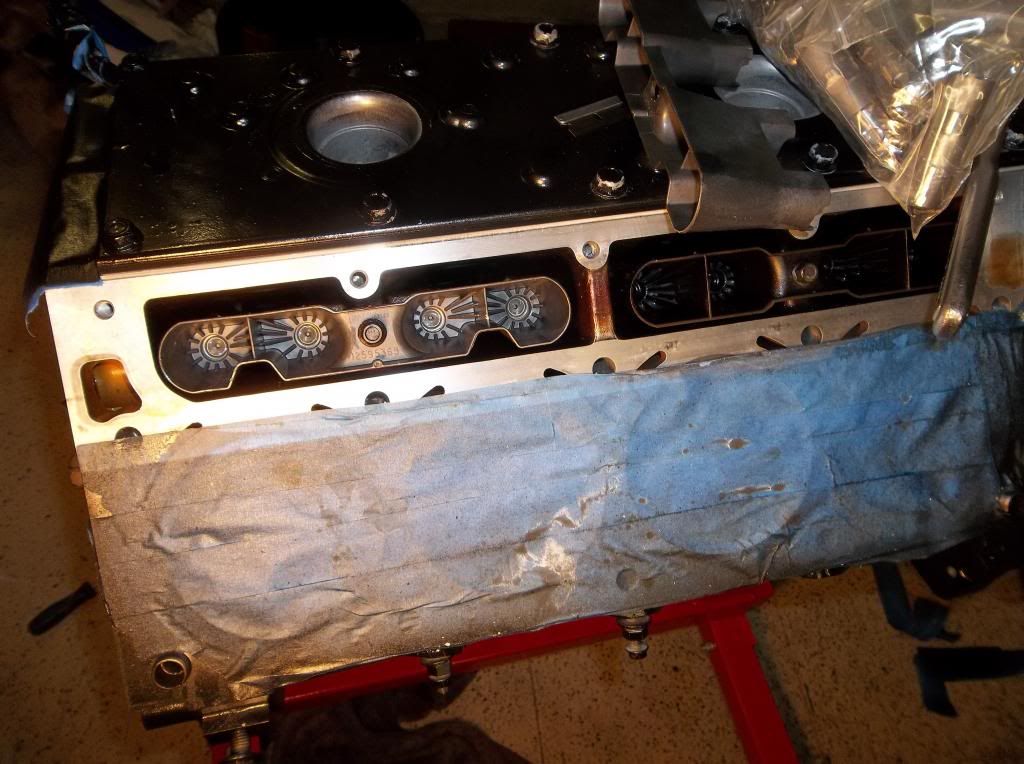
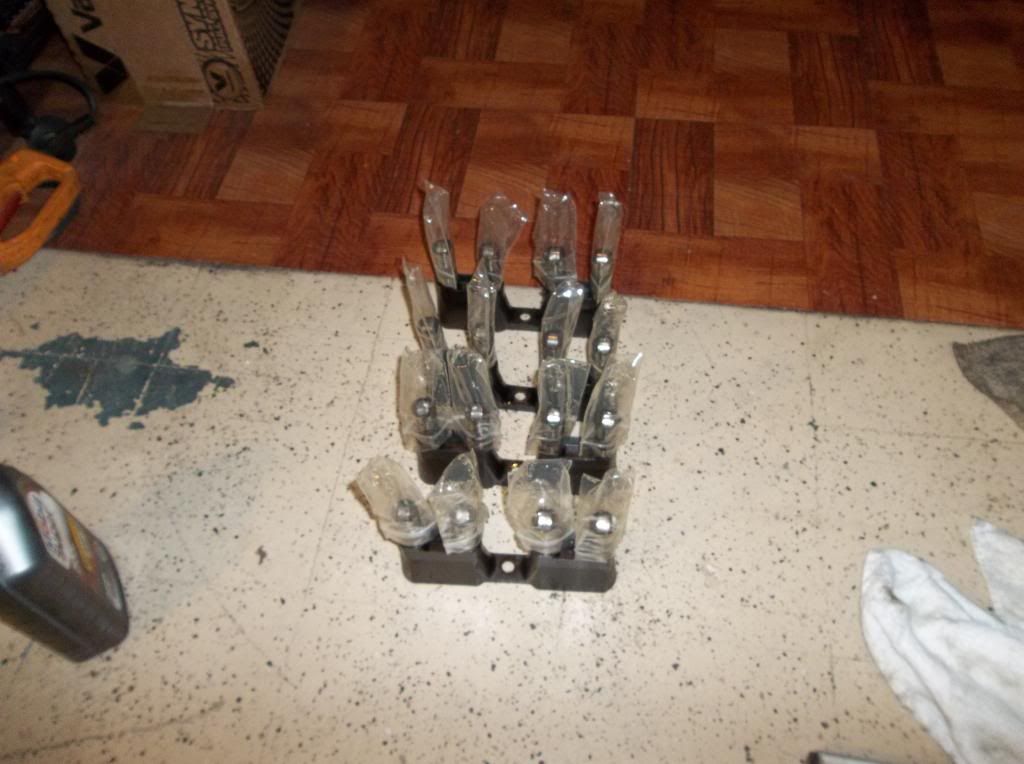
you can see the trays are slightly different since they have notches but it all worked out fine. The lifters were each individually wrapped and lubed. The lifters were identical to me.


One down and a few more to go, all following the same steps�
Ready to sell the old lifters and trays if I can!
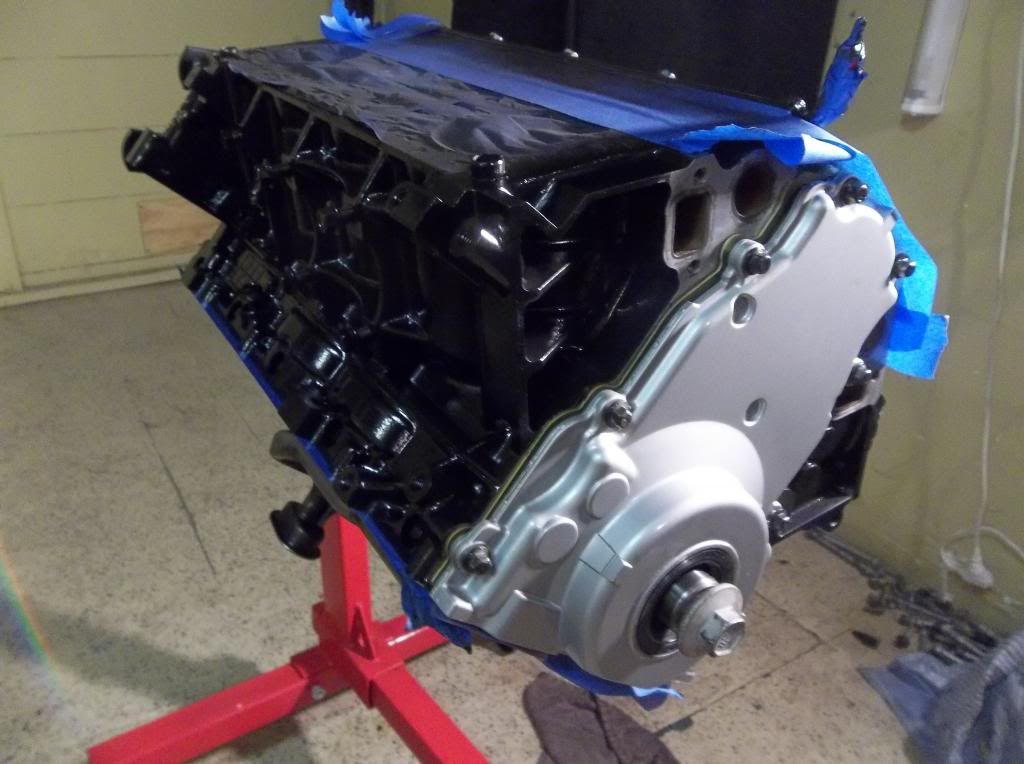
Then I covered the lifters back up for now, re-sprayed the valley cover and clear coated it all as well as the block. Then I followed the same �LS how to� as before for the timing cover, just line up the gasket, there is a right and wrong way since its not symmetrical. Then put the bolts on but haven�t tightened them down yet.
Now its time to celebrate my bday weekend, more updates hopefully next week/weekend. Ill be stopping by the paint shop this weekend while I am in the area to check on my chevelle. Pretty excited!
For this portion I used the link below as my �how to�, there is 4 pages of info:
http://www.autoserviceprofessional.c...lifters?Page=1
you can see the trays are slightly different since they have notches but it all worked out fine. The lifters were each individually wrapped and lubed. The lifters were identical to me.


One down and a few more to go, all following the same steps�

Ready to sell the old lifters and trays if I can!

Then I covered the lifters back up for now, re-sprayed the valley cover and clear coated it all as well as the block. Then I followed the same �LS how to� as before for the timing cover, just line up the gasket, there is a right and wrong way since its not symmetrical. Then put the bolts on but haven�t tightened them down yet.


Now its time to celebrate my bday weekend, more updates hopefully next week/weekend. Ill be stopping by the paint shop this weekend while I am in the area to check on my chevelle. Pretty excited!
 10-16-2013, 02:49 PM
#25
On The Tree
Thread Starter
iTrader: (4)
Join Date: Dec 2011
Location: San Francisco
Posts: 134
Likes: 0
Received 0 Likes
on
0 Posts
Yup! ordered your pump directly from ebay, which reminds me i havent left the feedback yet 
update: went to see the chevelle and its still behind where i want it to be but hoping for some new pics soon. also, changed my mind on the LS2 chain and gears and just ordered a double roller. once i get that back and install it ill be able to move forward again. also ordered a c-clamp valve spring compressor so i can swap my springs and hopefully get going on putting this beauty back together.
so more than likely ill be selling my brand new LS2 timing chain and gears since i took it out of the package and probably cant return it.
10-16-2013, 02:52 PM
#26
On The Tree
Thread Starter
iTrader: (4)
Join Date: Dec 2011
Location: San Francisco
Posts: 134
Likes: 0
Received 0 Likes
on
0 Posts
Thanks for bringing this to my attention because i had not soaked them, looks like ill be taking those back out to do that as well. I was told just put them in a bowl of oil basically. Its weird that when i was looking at how to install them I never saw any mention of soaking them. I did end up finding later that its also bad to install them and let them sit and not run the engine. So ill be trying to get this thing in a position to turn over pretty fast to avoid any deterioration of all my new parts 

 10-17-2013, 11:20 AM
#29
Staging Lane

Join Date: May 2003
Posts: 66
Likes: 0
Received 0 Likes
on
0 Posts

Here is some pics of my buds Chevelle I built way back in 2000. It has been on several Hot Rod power tours and many a mile around home. Rock Valley modified a stock gas tank and I had to gain some clearance around the trans in the tunnel. All in all it was a fairly easy swap. If you have any questions just ask Joe
10-19-2013, 01:15 PM
#30
On The Tree
Thread Starter
iTrader: (4)
Join Date: Dec 2011
Location: San Francisco
Posts: 134
Likes: 0
Received 0 Likes
on
0 Posts
Yea i have seen your thread on TC before, i like going into the Projects and Builds section every now and then. That Kinsler looks great though. looking forward to seeing the final product.
10-20-2013, 11:24 PM
#31
On The Tree
Thread Starter
iTrader: (4)
Join Date: Dec 2011
Location: San Francisco
Posts: 134
Likes: 0
Received 0 Likes
on
0 Posts
Here is a small update�
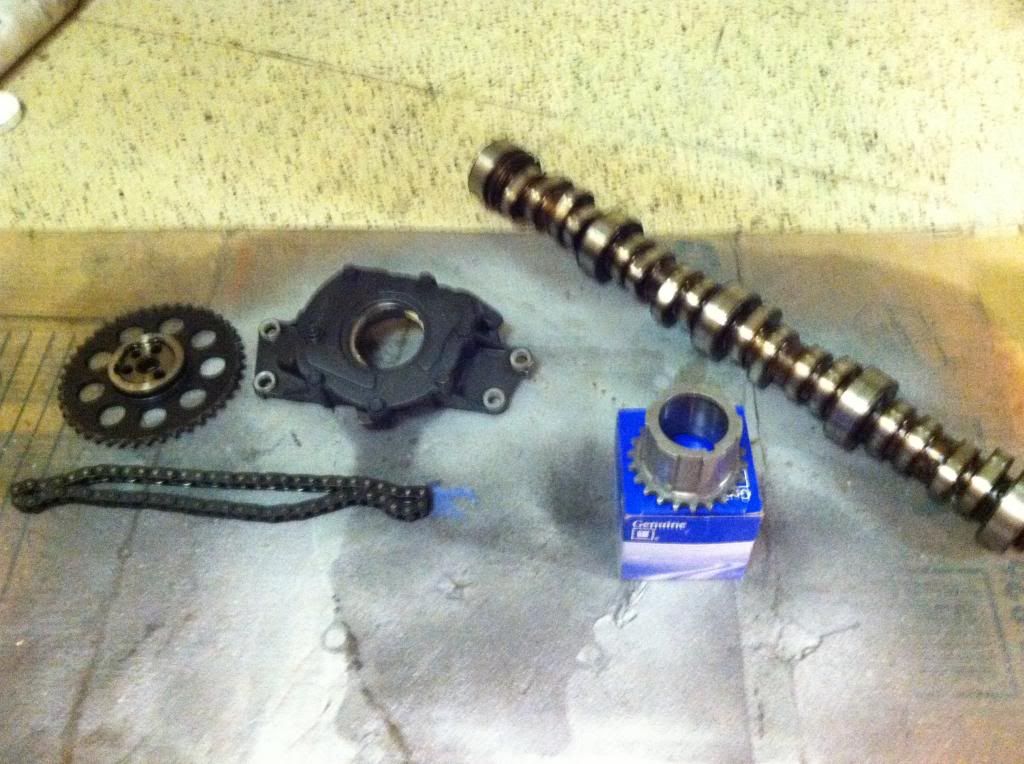
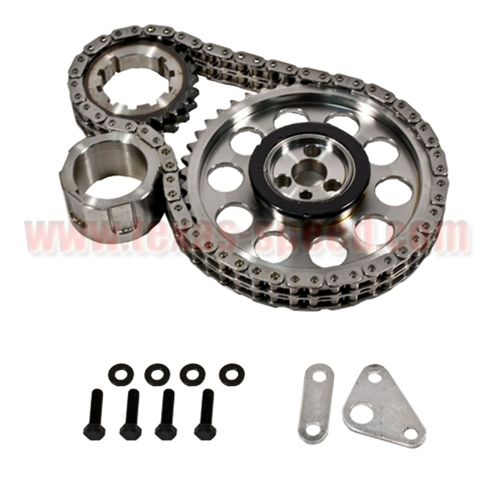
Seems like I took a couple steps back but they were important ones. So after being informed that I should have taken the lifters and soaked them in oil, I took them back off and dropped them in a bowl of oil overnight. Also changed my mind after reading some threads etc and sent TSP the new LS2 timing/gear kit I ordered and got a refund (minus restocking fee) and purchased the double roller kit which was only $10 more to begin with :/ oh well. It should be here in the next couple days so I can install it and move on to bolting up the bottom end.
Here is the �Rollmaster LS1 Double-Roller Adjustable Timing Set� � about $135 shipped from TSP
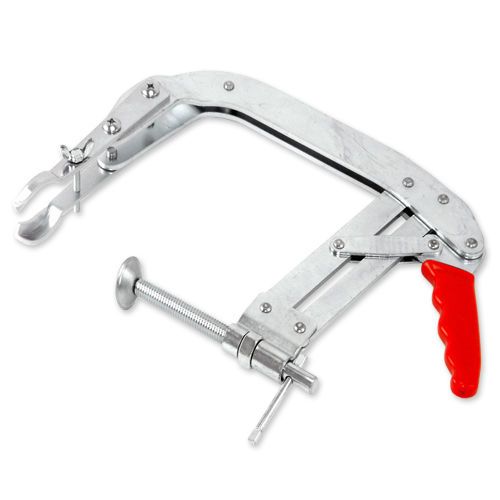
In the meantime I got the valve spring removal tool I ordered which when I received had �MADE IN TAIWAN� on the side. Need I say more? DON�T use this too, waste of $26. It bends and flexes and just pops of. Basically useless! I was lucky to have �spec134� (Joe), a member of TC and LS1tech message me that he was local and wanted to share projects. So he ended up having the correct tool which he used on his LS3 heads. I think the same tool is also sold specific for LS1 but it ran him about $80 from SUMMIT. He let me swap the springs at his place with the tool in exchange for some good ol-fashioned IN-N-OUT. Thanks again, good guy building a similar project so well be connected. Here is a pic of the C-clamp style to NOT use and the Summit to that you DO use. It can be used with the heads on or off, we did off. Takes a couple to get in a groove but its straight forward. When you tighten it down you may need to tap the valve from the bottom because it will start to push through. Once you tap it, be ready for the spring seats to pop out, the magnet was useful to grab them. Also be careful when taking the tool off that your bolt isn�t turning or it will all come shooting off in your face as it did once for me, you will see as you go. Just be patient and cautious and use a clean work space where you can find the parts.

 10-20-2013, 11:27 PM
#32
On The Tree
Thread Starter
iTrader: (4)
Join Date: Dec 2011
Location: San Francisco
Posts: 134
Likes: 0
Received 0 Likes
on
0 Posts
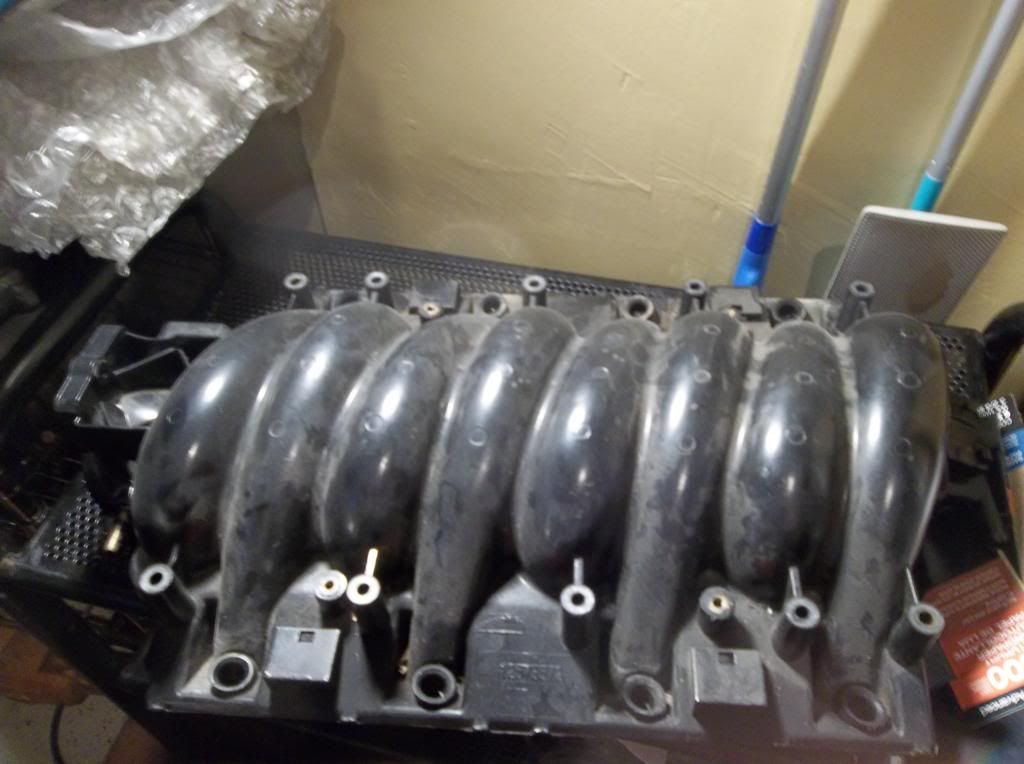
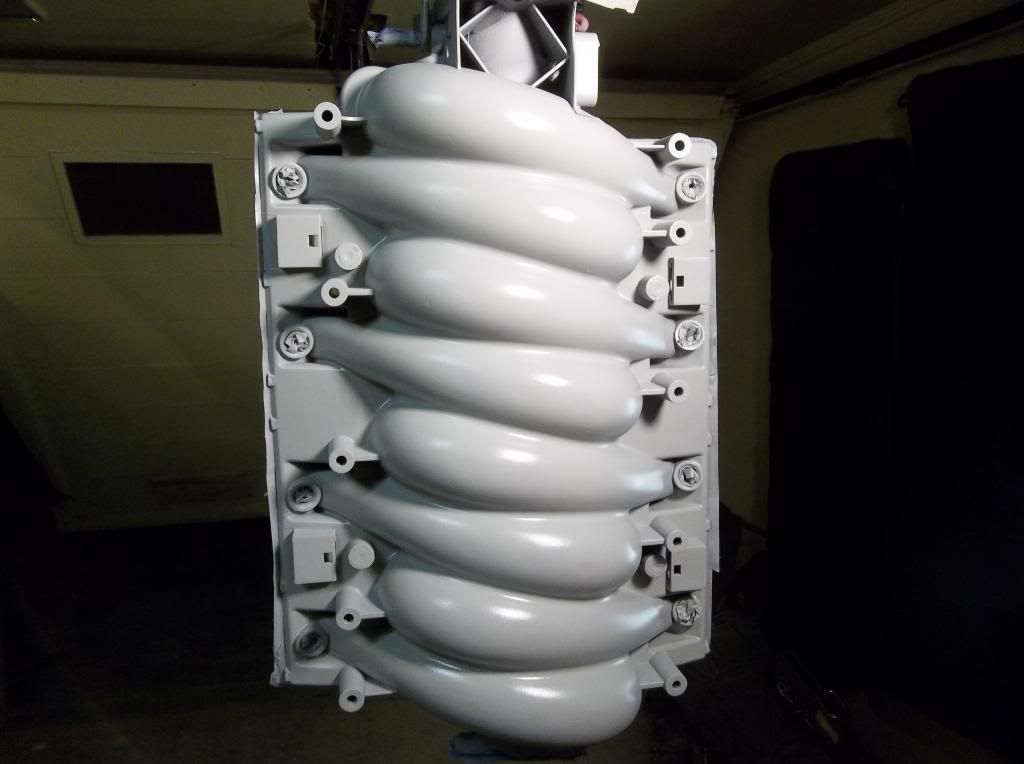
I also took some time to sand my LS6 intake (until I even got a blister) and then painted it. Basically followed this other members thread step by step and it turned out great. Much better than leaving it stock. Took me more paper and time I think cus I realized the previous owner may have painted it black at first. Had to break through that paint first. Heres the thread�
https://ls1tech.com/forums/appearanc...-thoughts.html
It started off like this, dirty and painted�
Then I sanded it with some 100 and 180 grit paper to get the marks and parts numbers. Then I went over it with some 400. After sanding it I washed it nice and thorough in the kitchen sink lol with dish soap. Making sure not to get any on the inside. In this picture you can see the paint products used in the background.
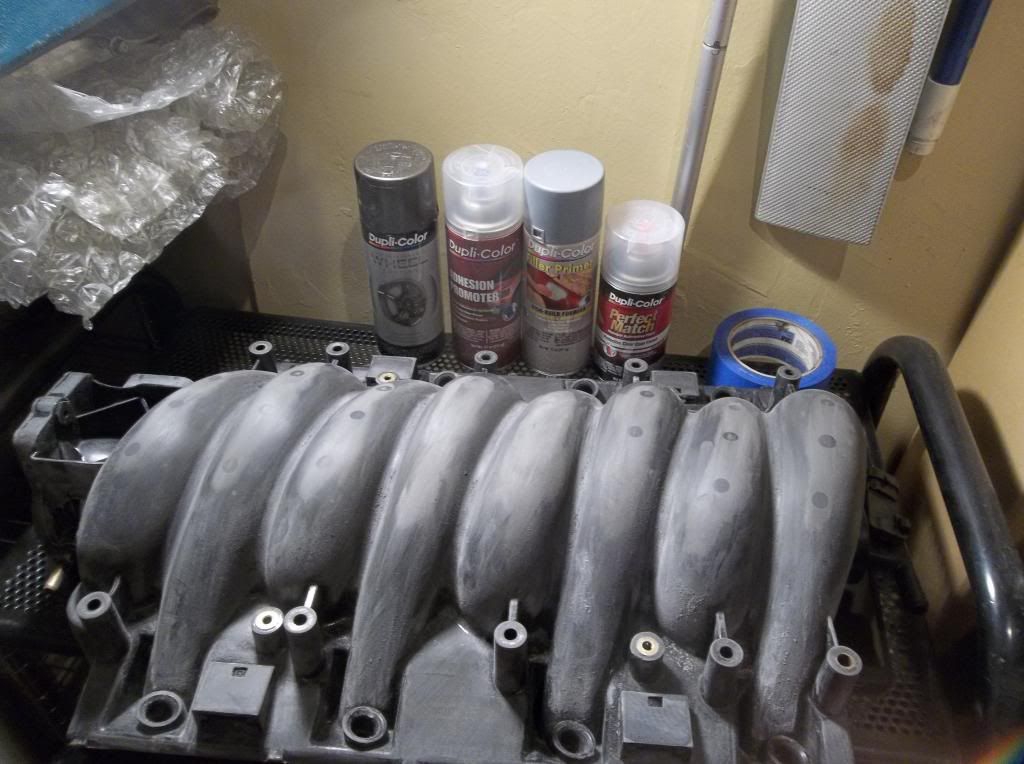
Next I let it dry and used the Duplicolor adhesion promoter, followed by the Duplicolor filler primer. After priming it, I sanded it down with 600 and then 1000 grit. Wiped it down again and painted it with the Duplicolor metallic gray rim paint followed by the Duplicolor clear coat.
Sprayed with adhesion promoter�
Now primed�
Before clear coat�
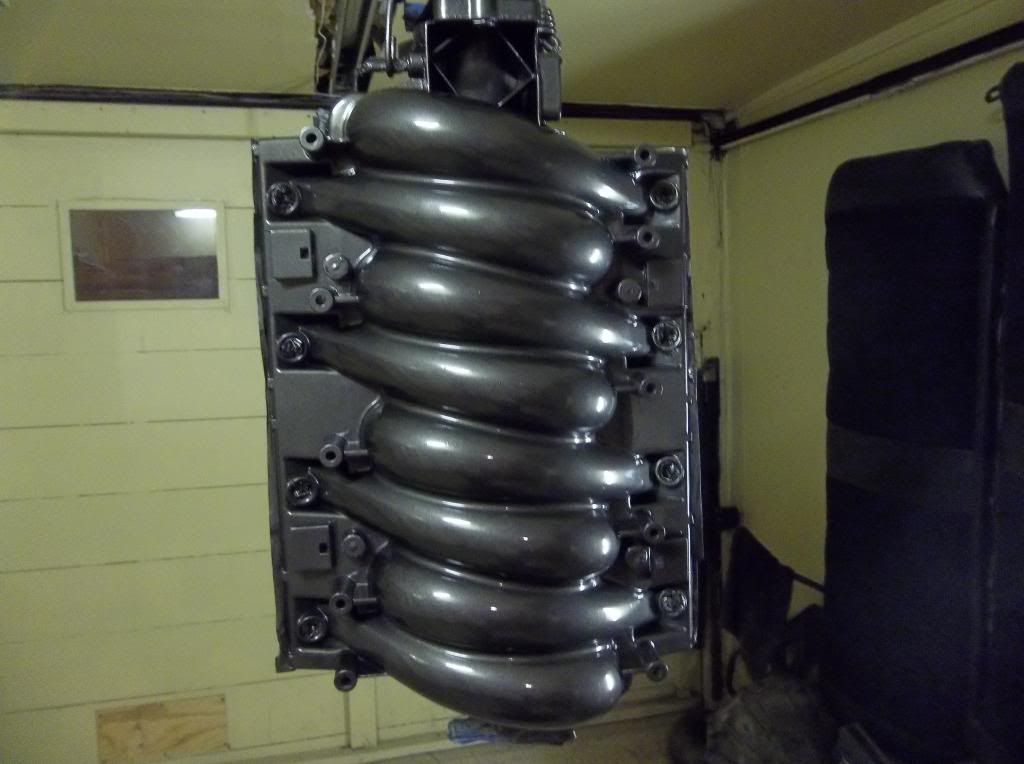
After the clear�
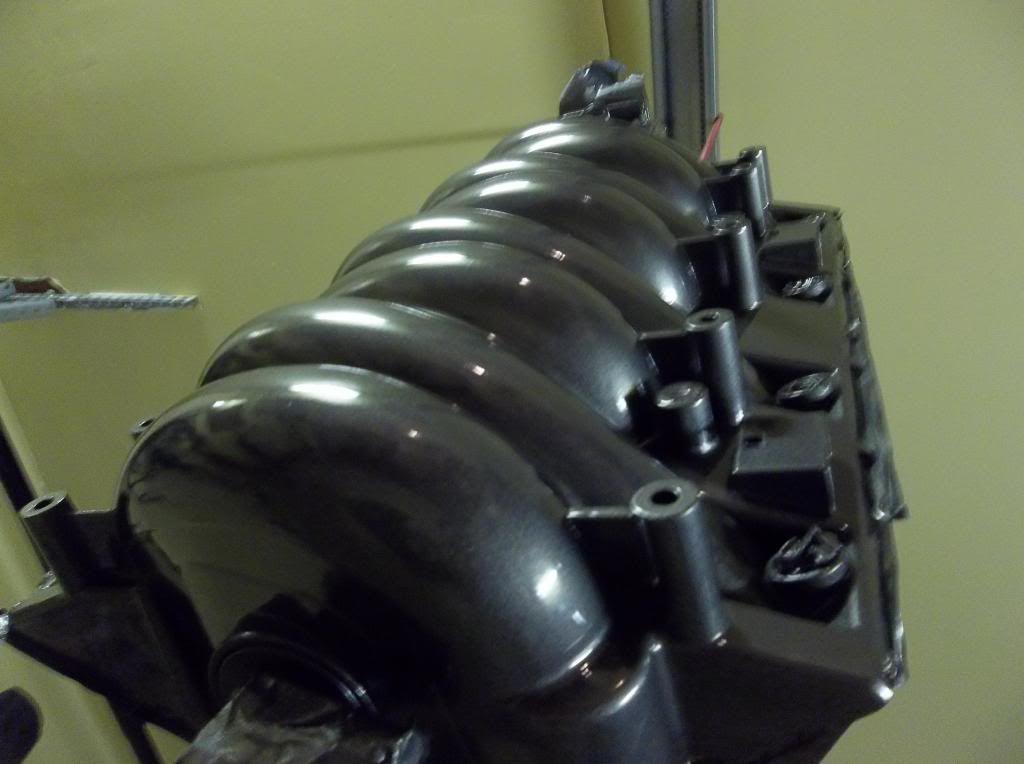
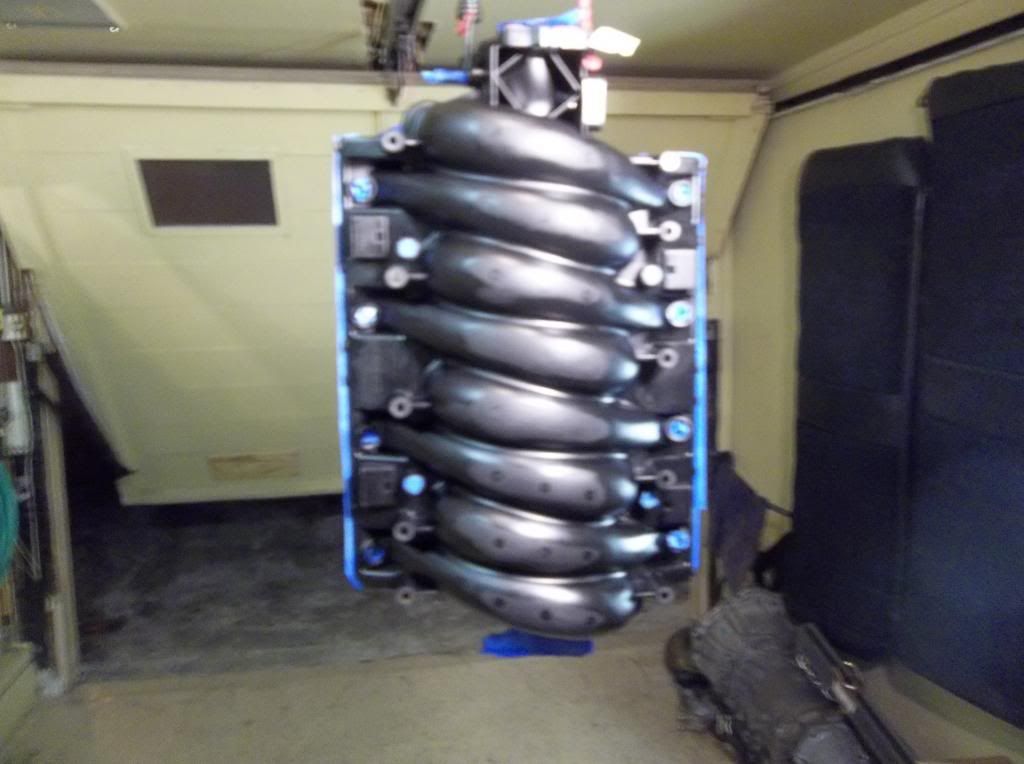
Had to set everything up to see what it looks like of course�
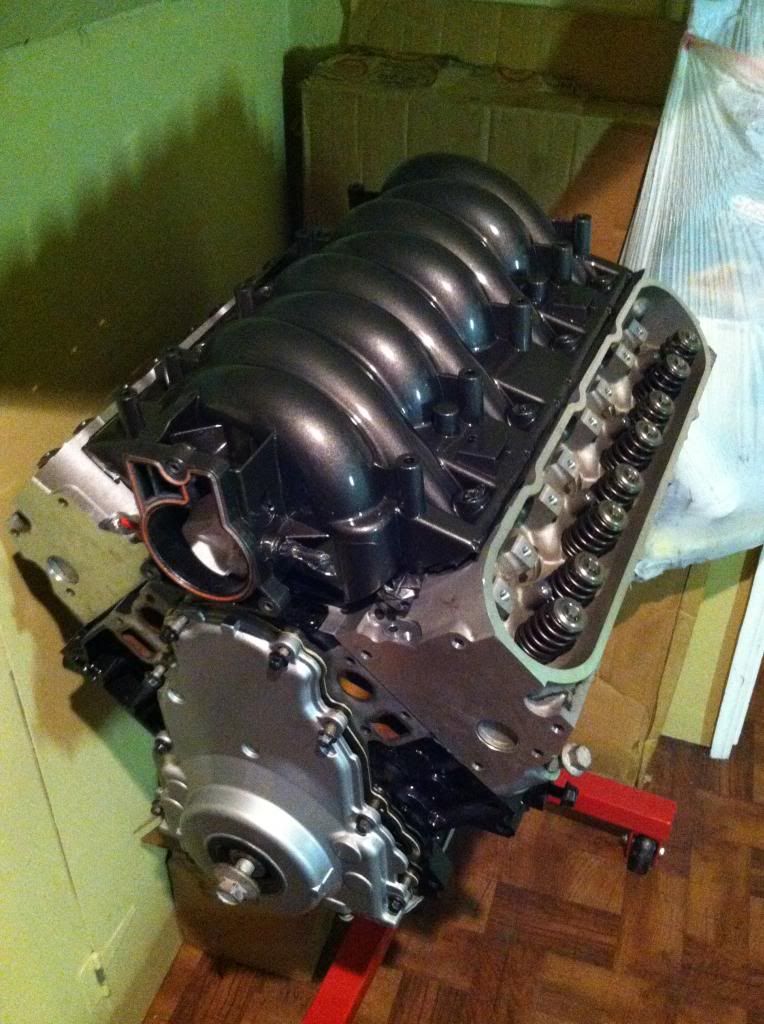
Next ill be looking to install the new timing set up, bolt up the bottom end, order some ARP head bolts so I can bolt up the top end. Also will need the new knock sensors and harness before strapping on the intake. Ill probably be cleaning up and painting all the front accessories in the process.
https://ls1tech.com/forums/appearanc...-thoughts.html
It started off like this, dirty and painted�

Then I sanded it with some 100 and 180 grit paper to get the marks and parts numbers. Then I went over it with some 400. After sanding it I washed it nice and thorough in the kitchen sink lol with dish soap. Making sure not to get any on the inside. In this picture you can see the paint products used in the background.

Next I let it dry and used the Duplicolor adhesion promoter, followed by the Duplicolor filler primer. After priming it, I sanded it down with 600 and then 1000 grit. Wiped it down again and painted it with the Duplicolor metallic gray rim paint followed by the Duplicolor clear coat.
Sprayed with adhesion promoter�

Now primed�

Before clear coat�

After the clear�

Had to set everything up to see what it looks like of course�


Next ill be looking to install the new timing set up, bolt up the bottom end, order some ARP head bolts so I can bolt up the top end. Also will need the new knock sensors and harness before strapping on the intake. Ill probably be cleaning up and painting all the front accessories in the process.
10-23-2013, 12:23 AM
#33
On The Tree
Thread Starter
iTrader: (4)
Join Date: Dec 2011
Location: San Francisco
Posts: 134
Likes: 0
Received 0 Likes
on
0 Posts
missed the delivery of the timing chain today so will be here tomoro...
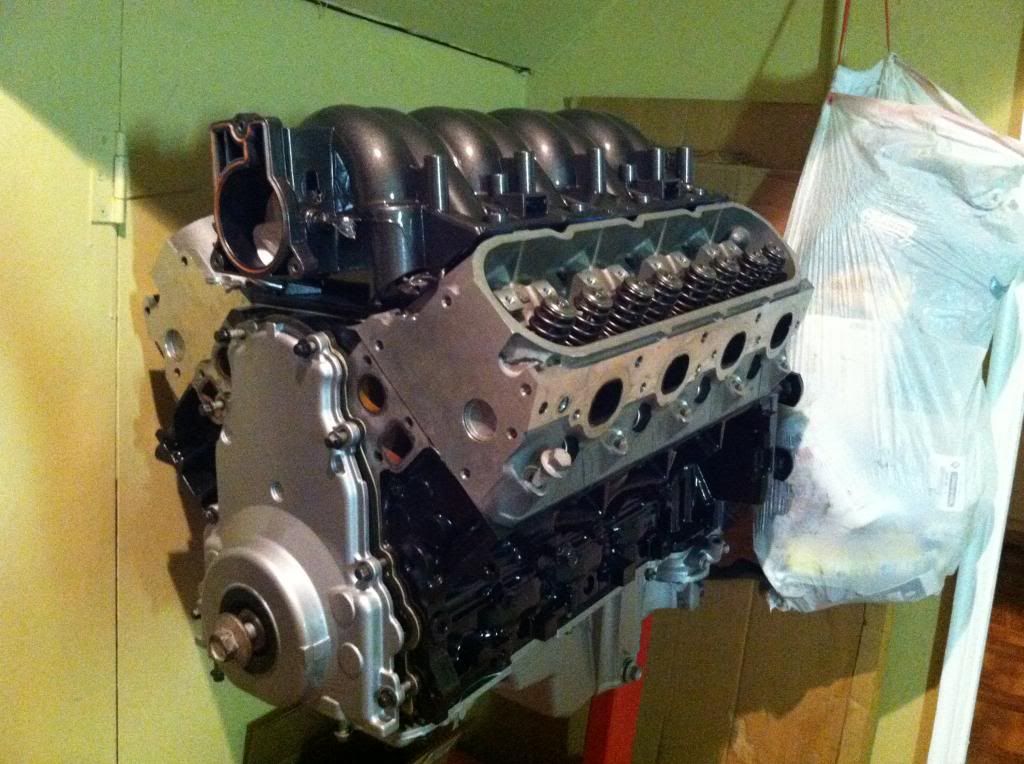
ok guys i need some OPINIONS, yes i wanna hear them lol looking at the pics above, and knowing that ill probably have a little chrome/aluminum here and there under the hood, the compartment will be the intake color which is the color of the car, polished headers to come, regular grey accessories like the timing cover etc.
what anodized color fuel rails would look best...?? ill probably get a matchin catch can too...
1. gunmetal grey
2. black
3. polished (chrome look)
4. red
Thanks in advance!
10-23-2013, 12:10 PM
#34
I feel like the gunmetal grey will be too many different grey/silver colors, unless they match the intake....I would either go with black or the gunmetal if it matches...
10-23-2013, 04:42 PM
#35
On The Tree
Thread Starter
iTrader: (4)
Join Date: Dec 2011
Location: San Francisco
Posts: 134
Likes: 0
Received 0 Likes
on
0 Posts
Hey thanks for the opinion, personally i think red is too common, and i feel the same about gunmetal so i was leaning toward chrome or black. which do you think. black will look sleek and hide, chrome will pop a little and make the rest of any chrome i add pop. not planning to add much chrome though although the brake booster and master cylinder already are.
10-23-2013, 08:58 PM
#36
I always side with black over chrome....every time....but that is just the way I am....in my build I don't even plan on using stainless fuel lines...planning on keeping everything as blacked out as possible....
10-23-2013, 10:09 PM
#37
That first tool from summit is crap, I had one once. The "jakes tool" or whatever some guy here sells in the classifieds is also garbage. The best one I've found is the lingenfelter one, makes swapping springs a breeze.
But black fuel rails would look good. Unless you're building a show car with hidden wires and whatnot probably not a big deal no matter what you do. The intake looks good.
But black fuel rails would look good. Unless you're building a show car with hidden wires and whatnot probably not a big deal no matter what you do. The intake looks good.
10-24-2013, 03:16 AM
#38
On The Tree
Thread Starter
iTrader: (4)
Join Date: Dec 2011
Location: San Francisco
Posts: 134
Likes: 0
Received 0 Likes
on
0 Posts
ok i think im am going with black, i realize its not hard to change down the road if i want somethin else lol damn decisions. well tonite i got my RollerMaster double roller set up (TSP $140 shipped) and my ARP head bolts (ebay $165 shipped) but i need a couple things from the parts store which had closed before i can finish it up so ill post the pics tomoro night hopefully. looks great and has gone on ok so far, havent got the oil pump or timing cover back on yet tho...im scared 
thanks for following!
thanks for following!
10-24-2013, 04:51 PM
#40
On The Tree
Thread Starter
iTrader: (4)
Join Date: Dec 2011
Location: San Francisco
Posts: 134
Likes: 0
Received 0 Likes
on
0 Posts
1. slightly bend the oil pump pick up tube,
2. grind-on/mod the timing cover, and/or
3. change the oil pump gear because their crank pulley wouldnt set on all the way. some even grinded the crank pull snout down to go on further.
my directions will come soon and hopefully i have NONE of these issues. I dont know much so if i did it wrong my hopes are that someone on here will read my thread and tell me or ill just post it in a separate thread as well.