
2nd Gen Camaro Hooker Motor and Trans Mounts
 07-08-2013, 09:31 PM
#1
TECH Apprentice
Thread Starter
iTrader: (50)

Join Date: Jun 2007
Posts: 359
Likes: 0
Received 0 Likes
on
0 Posts

Here are the Hooker motor mounts and trans crossmember designed to be used with their new line of 2nd gen swap headers. These are for the 75-81 cars.
Here is a pic of the car the parts are install on. My 1979 Z28.

Shown here with the stock mounts and my home made adapter plates.
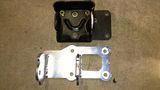
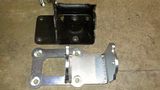
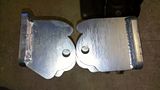
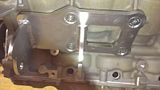
Here you can see the difference in the left and right sides to center the motor in the subframe.
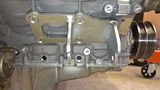
Installed on the motor.
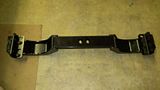
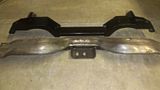
T56 crossmember
Another pic next to my modified stock crossmember.
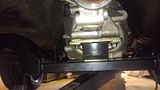
Installed
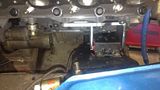

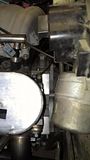
Here you can see how the motor sits to the firewall.
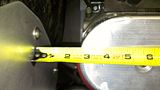
And for comparison, a pic with my adapter plates. I also redrilled the subframe to move the motor back 3/4".
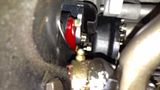
Wiper motor clearance. I had to remove it to install the motor. Maybe not required with stock valve covers.
Modified alternator plastic shroud to clear subframe/motor mount.

Modified alternator installed.
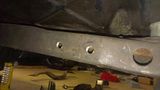
Getting the crossmember in place.
With the crossmember in place and the side mounting brackets bolted on, I transfer punched the holes to be drilled in the frame.
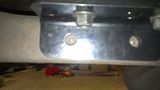
Holes drilled.
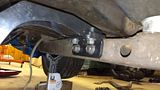
Bolted in place.
Here is a pic of the car the parts are install on. My 1979 Z28.

Shown here with the stock mounts and my home made adapter plates.


Here you can see the difference in the left and right sides to center the motor in the subframe.

Installed on the motor.


T56 crossmember

Another pic next to my modified stock crossmember.

Installed


Here you can see how the motor sits to the firewall.

And for comparison, a pic with my adapter plates. I also redrilled the subframe to move the motor back 3/4".
Wiper motor clearance. I had to remove it to install the motor. Maybe not required with stock valve covers.

Modified alternator plastic shroud to clear subframe/motor mount.

Modified alternator installed.

Getting the crossmember in place.

With the crossmember in place and the side mounting brackets bolted on, I transfer punched the holes to be drilled in the frame.

Holes drilled.

Bolted in place.

Last edited by nobreaks254; 07-13-2013 at 07:52 AM.
 07-08-2013, 10:39 PM
#3

Though we would love for these crossmembers to work for other mounts, their chassis-centered geometry that is shared with our engine mounts and headers prevents that from being even a remote possibility without the user being willing to weld up the center mount holes in the crossmember and then re-drill them with the stock offset (still not a guarantee of good fitment). All the other aftermarket mounts use the factory 3/8" passenger side offset, so installing one of our crossmembers with another brand of swap mounts will produce non-parallel engine and transmission alignment with the rear pinion and will result in driveline vibrations. The chassis-centered nature of our system components follows that which is used by popular aftermarket subframe manufacturers such as DSE, Art Morrison, Martz and others.
07-09-2013, 06:06 AM
#4
TECH Apprentice
Thread Starter
iTrader: (50)
Join Date: Jun 2007
Posts: 359
Likes: 0
Received 0 Likes
on
0 Posts
I am using F body accessories and oil pan. Clearance with the F body pan is great. The only issue I had with the F body accessories is you have to trim some of the plastic shroud on the back of the alternator or remove it all together to clear the subframe/motor mount. I will add pics of that.
07-09-2013, 06:29 AM
#5
I am using F body accessories and oil pan. Clearance with the F body pan is great. The only issue I had with the F body accessories is you have to trim some of the plastic shroud on the back of the alternator or remove it all together to clear the subframe/motor mount. I will add pics of that.
07-10-2013, 06:24 AM
#7
Trending Topics
07-10-2013, 09:13 AM
#8
Here's a photo of the Holley high-mount alternator bracket along with the Holley high-mount R4 A/C compressor bracket. These brackets are compatible with the Corvette, F-body truck or truck water pump and balancer offsets by using the appropriate spacer kits we make for each. There's more information available on the Holley website.
