
Not an LSx...but S85 V10 BMW E30 M3 Build
 02-14-2014, 05:32 AM
#21

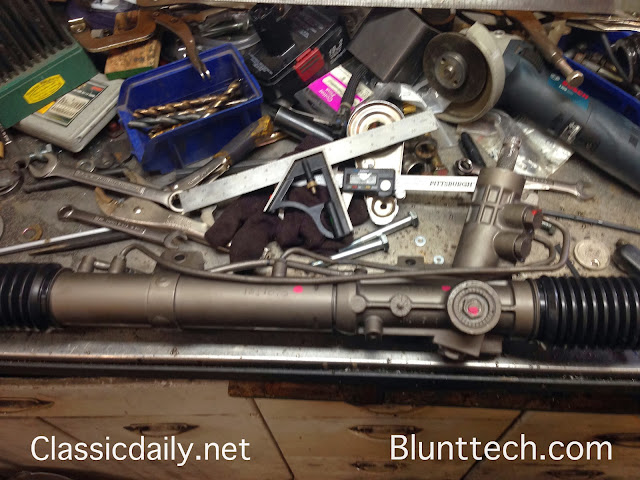
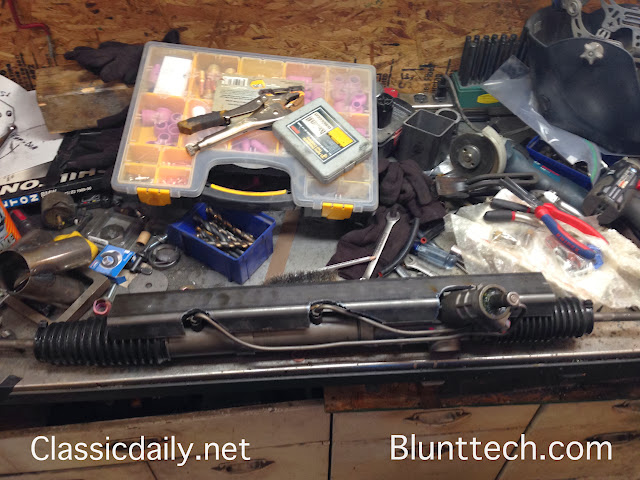
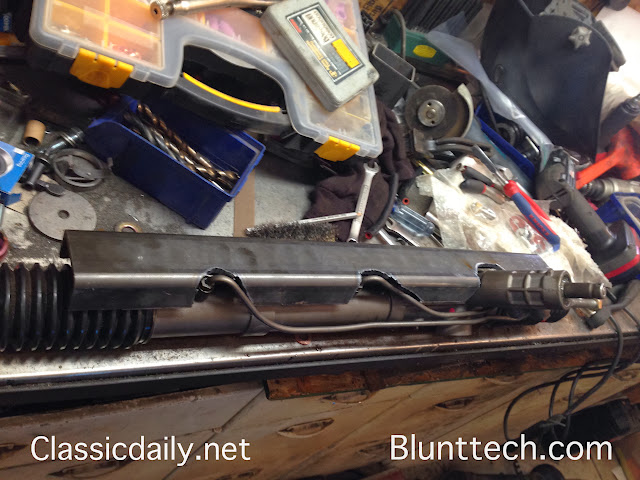
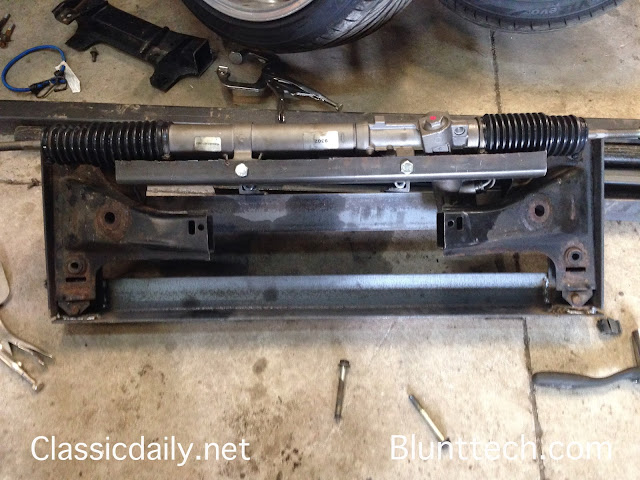
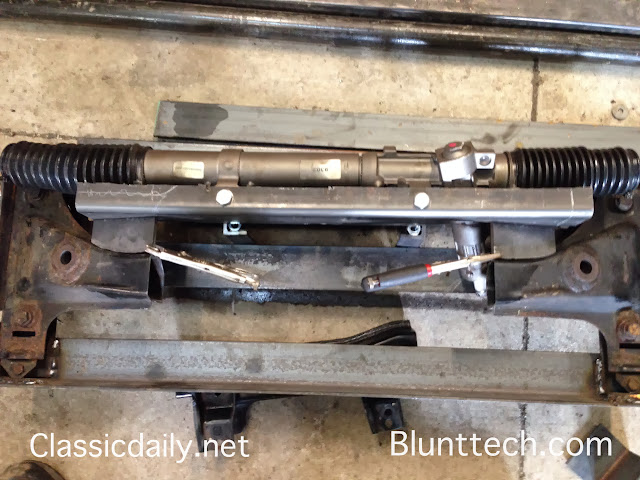
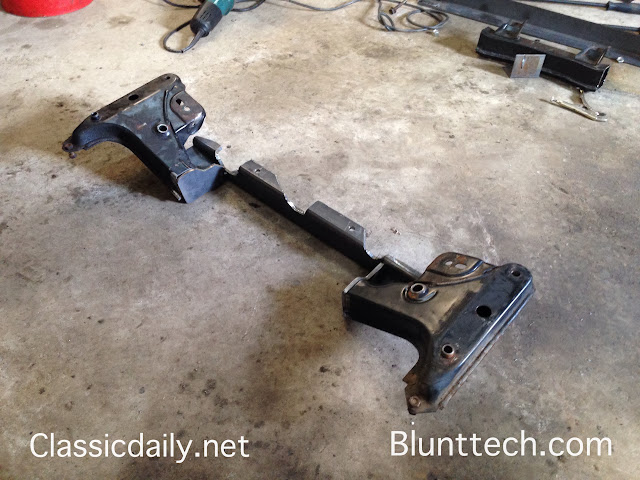
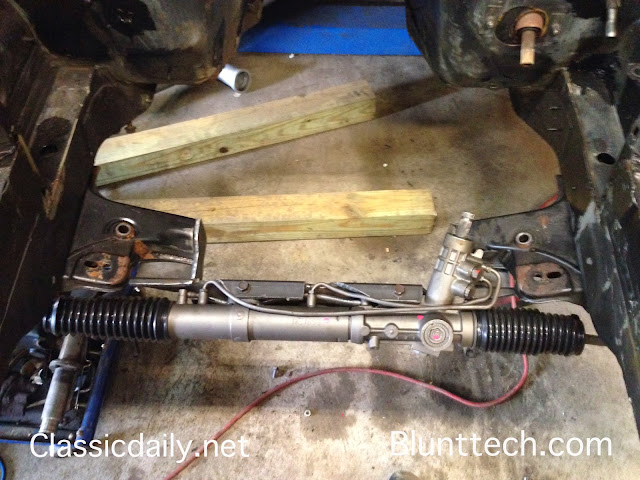
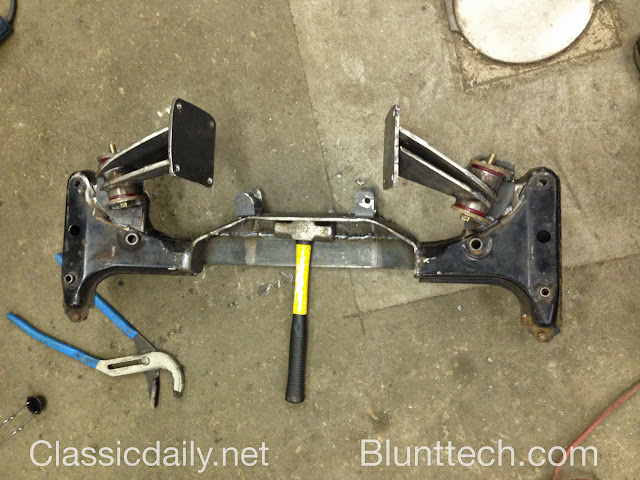
So to limit the amount of oil pan that has to be cut we are going to mount the steering rack as tight as possible. We are using a 2.7 turn Z3 rack and moved the lines to the top/front of the rack rather than the front. As seen here.
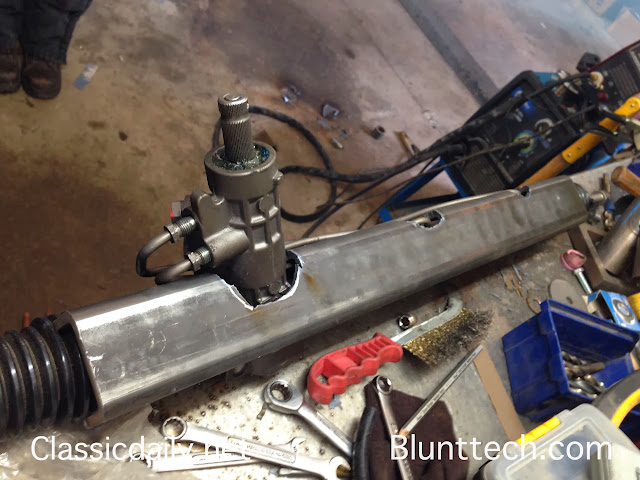
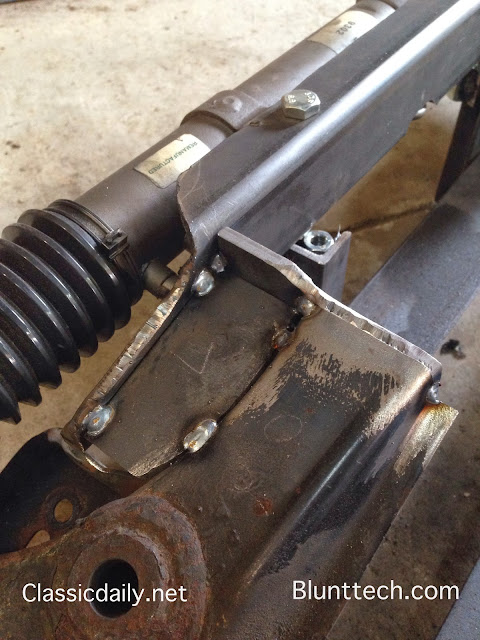
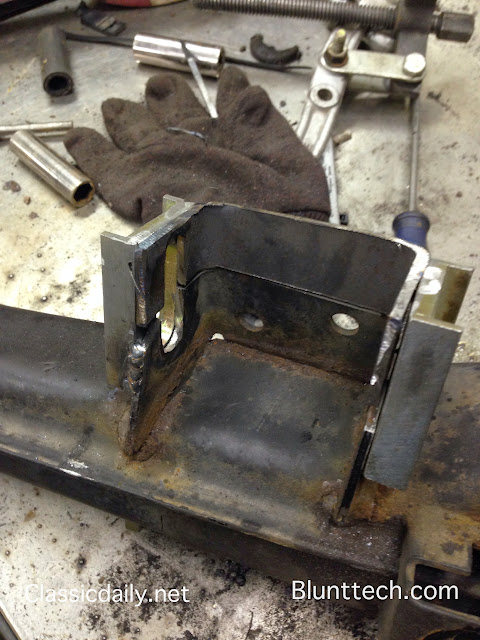
To mount the rack tight as possible the subframe is also the mounting spot. This started as 2" - 0.25 wall box and was cut down into a C. A few spots had to be notched out to make it all fit around the rack. This was cut witha plasma and still needs to be cleaned up a little.
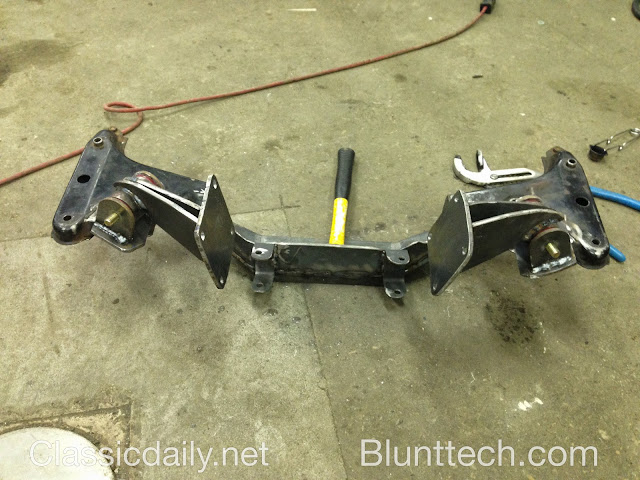
Bolted to the jig
Starting to connect the dots
Trimmed down and more pieces tacked in.
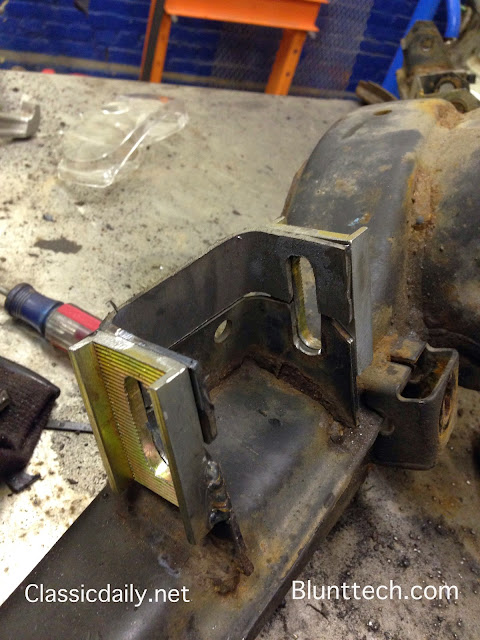
Out of the jig
In the car
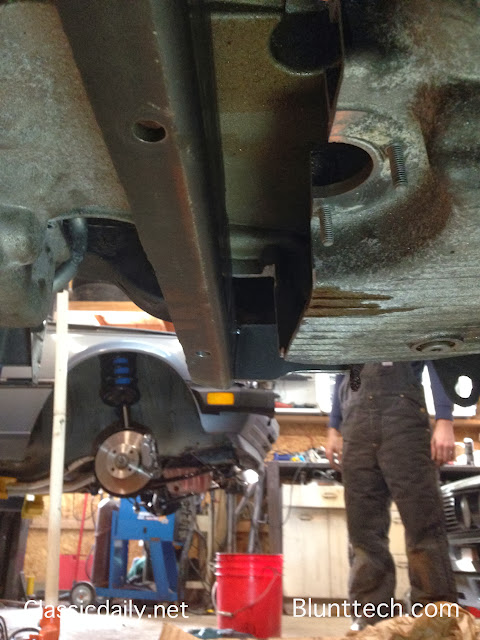
About how much will need to be trimmed from the pan.
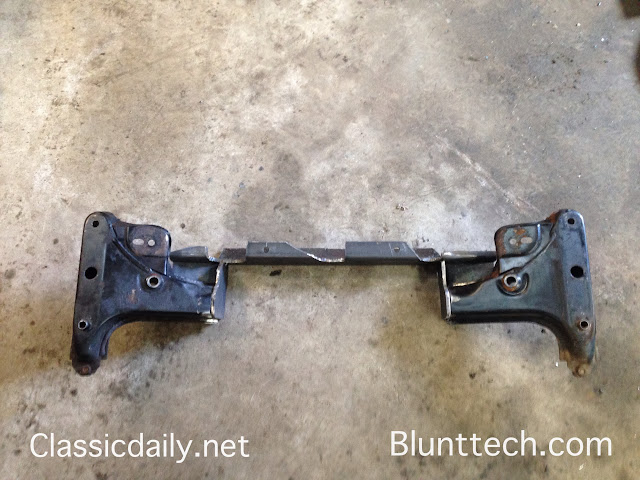
Now this subframe is FAR from done. It will get a lot more reinforcements but we are still at the, "lets make it all fit" stage.
To mount the rack tight as possible the subframe is also the mounting spot. This started as 2" - 0.25 wall box and was cut down into a C. A few spots had to be notched out to make it all fit around the rack. This was cut witha plasma and still needs to be cleaned up a little.
Bolted to the jig
Starting to connect the dots
Trimmed down and more pieces tacked in.
Out of the jig
In the car
About how much will need to be trimmed from the pan.
Now this subframe is FAR from done. It will get a lot more reinforcements but we are still at the, "lets make it all fit" stage.
 02-16-2014, 09:01 PM
#22
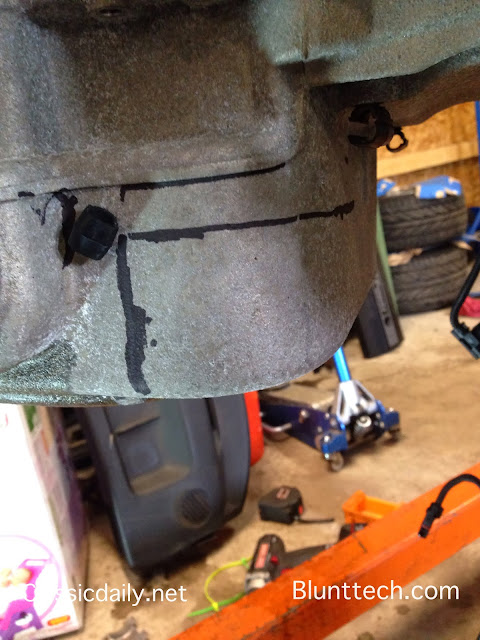
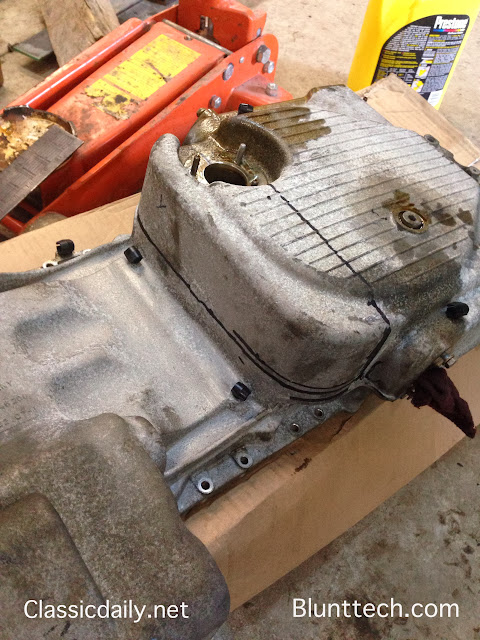
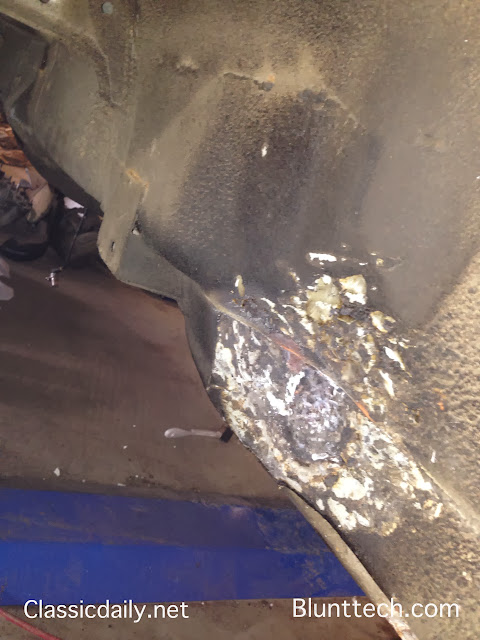
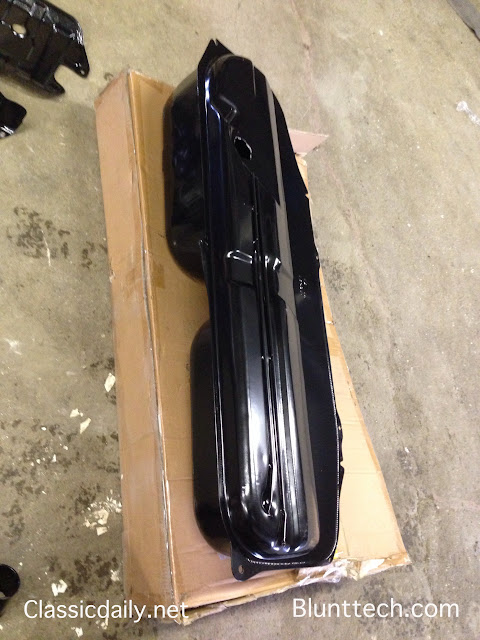
Pulled the pan to cut it apart.
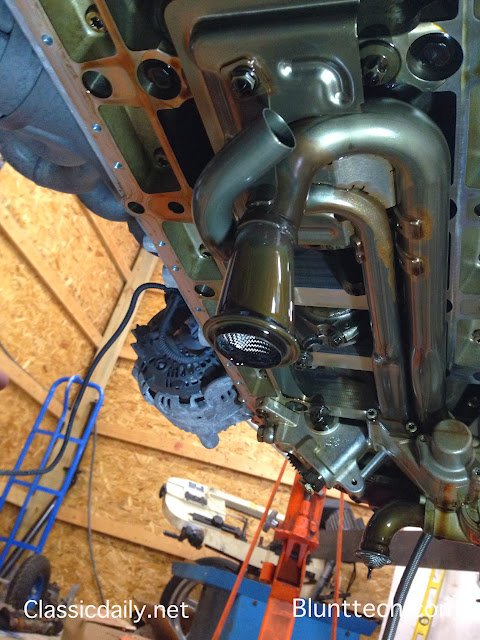
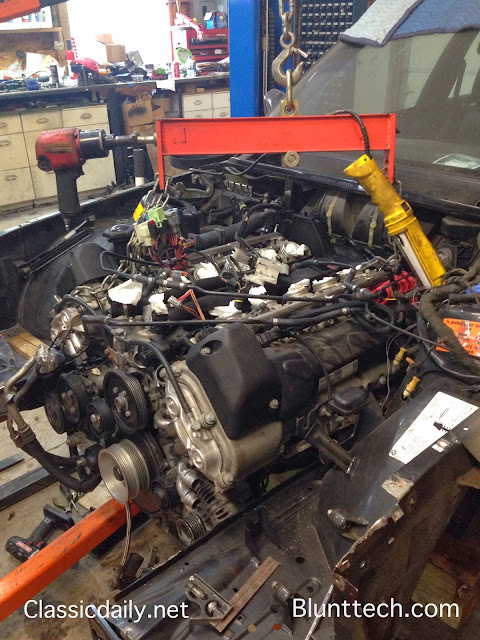
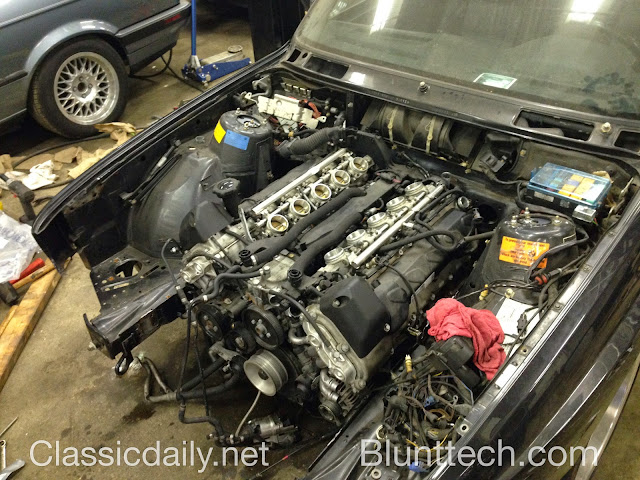
Engine is VERY clean inside.
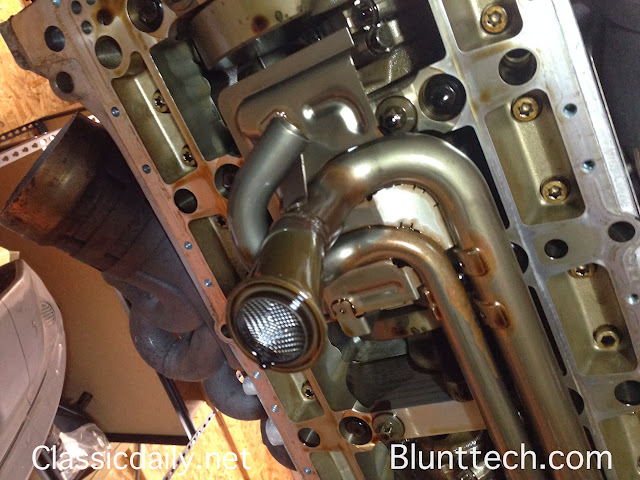
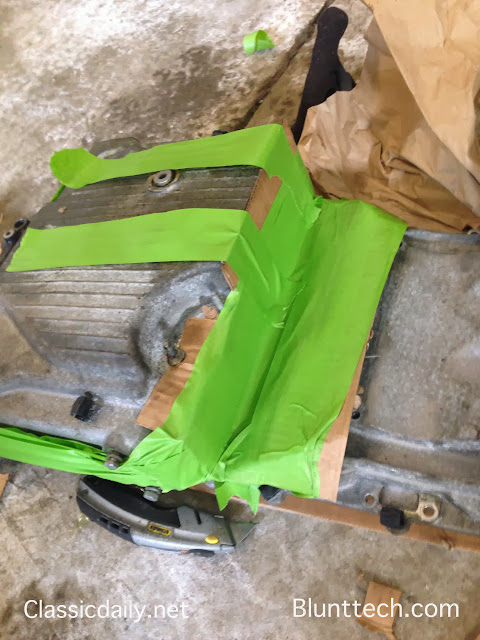
Time to cut the pan...
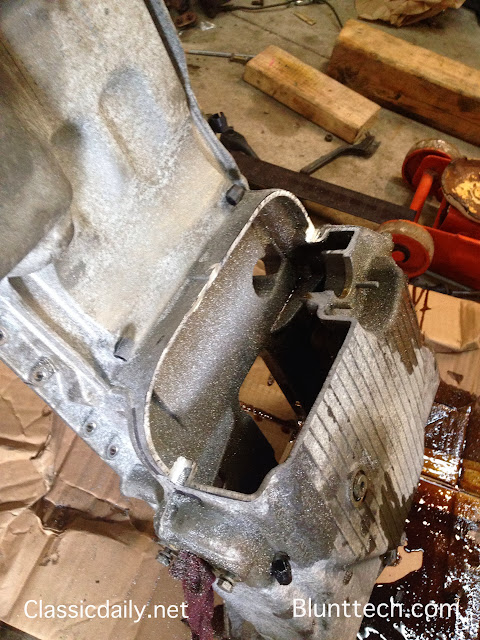
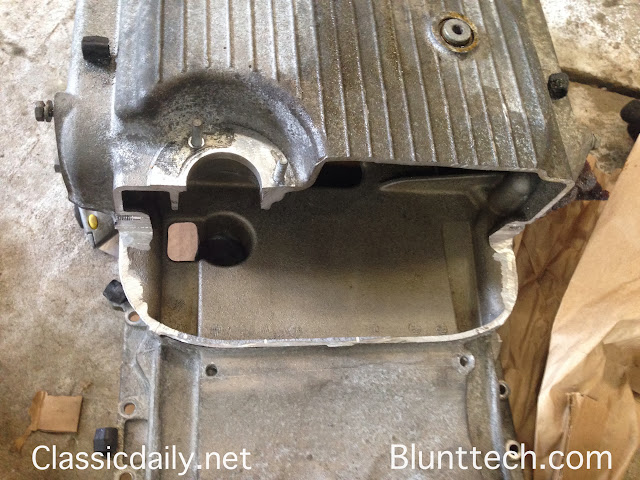
To keep it sealed up
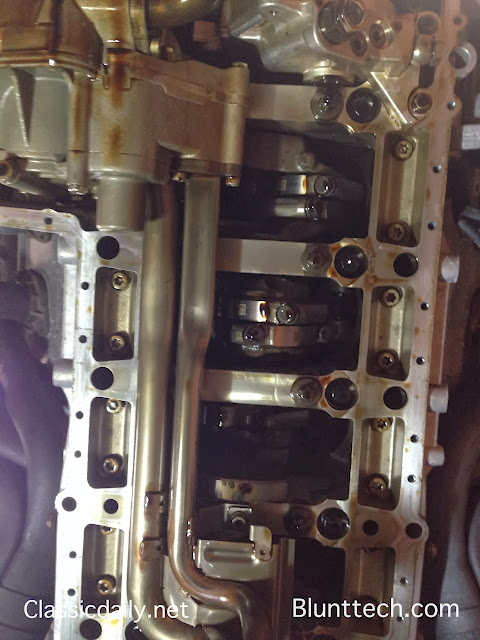
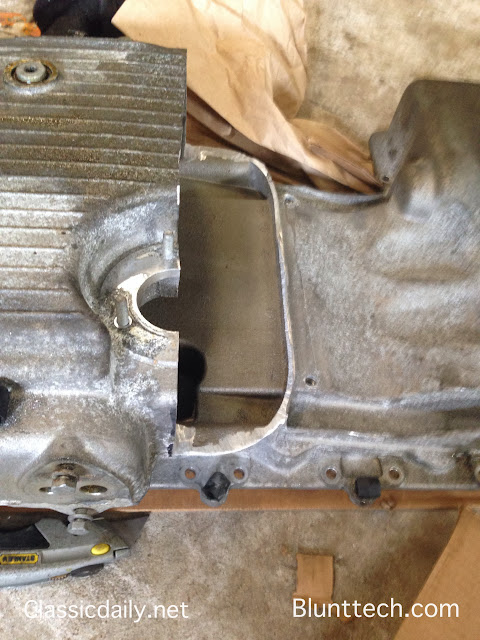
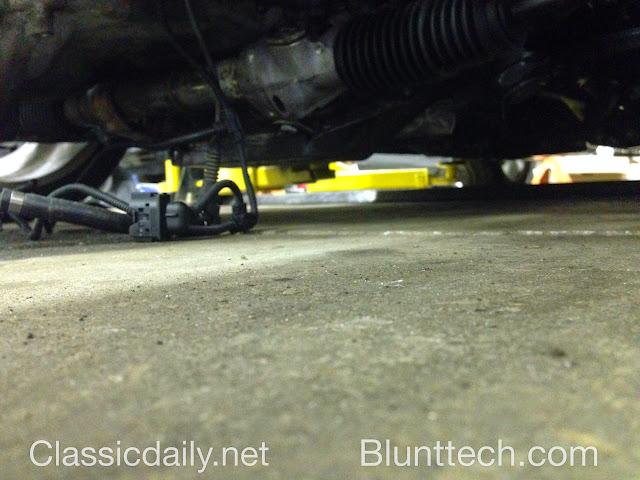
This picture is without the trans on. The pan actually sits closer than this to the subframe/rack mounting.
The trans tunnel had to be opened up in one spot to get things to fit better.
A little bit of heat and a hammer did the job.
Getting closer to it's final home
Engine is VERY clean inside.
Time to cut the pan...
To keep it sealed up
This picture is without the trans on. The pan actually sits closer than this to the subframe/rack mounting.
The trans tunnel had to be opened up in one spot to get things to fit better.
A little bit of heat and a hammer did the job.
Getting closer to it's final home
03-28-2014, 08:25 PM
#23
A bit of a slow down with all my projects while I was moving to my new shop. Things are finally moving ahead again so it's time I update some build threads...
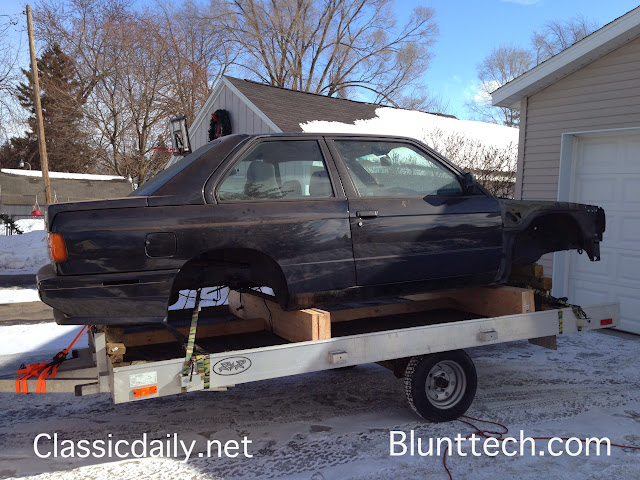
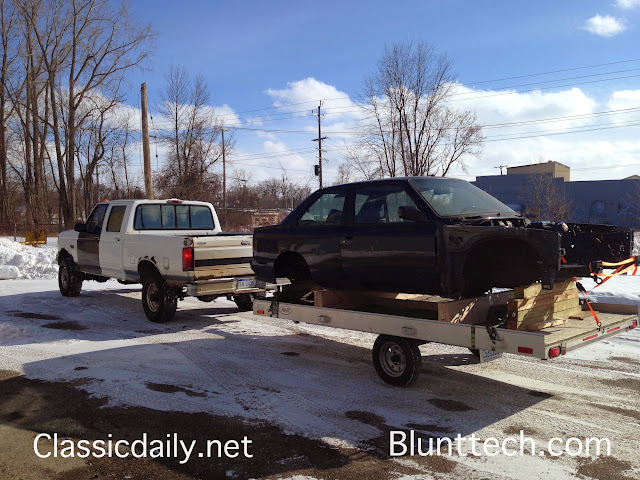
First of all the shell was moved from my home shop to a much bigger space. Let me tell you moving this car was nothing sort of scary. I am sure it was well more secure and nothing was going to happen.
Some pics of it's trip.
made it....
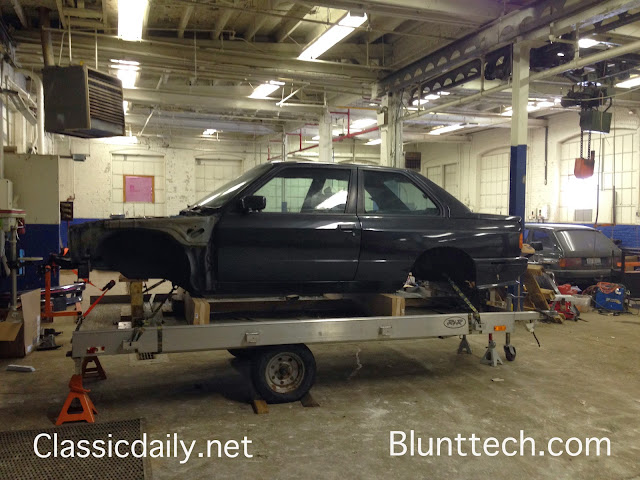
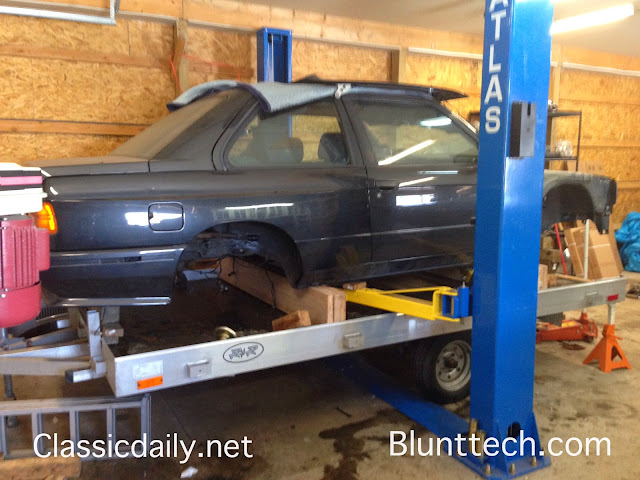
Back on a lift..

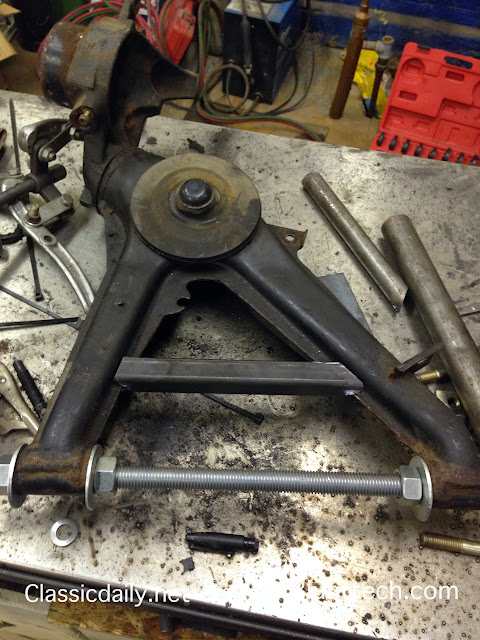
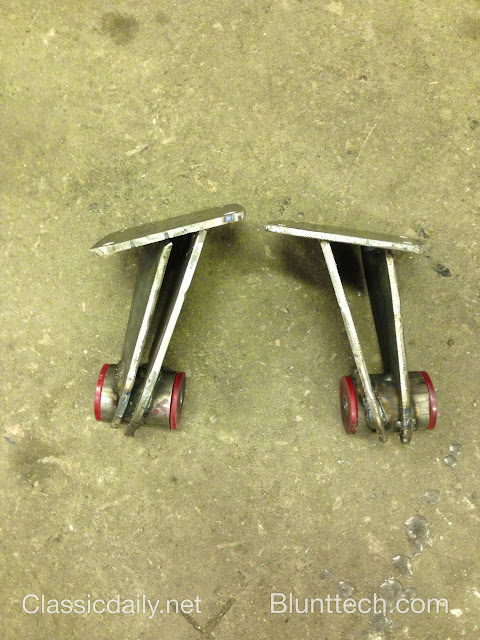
Working on the toe and camber adjusters on the rear subframe.
I didn't like how much was unsupported so I extended it some.
Freshly powdercoated bits
reinforcing trailing arms
A couple pictures of what has been holding things up...
New shop
and a new toy...
First of all the shell was moved from my home shop to a much bigger space. Let me tell you moving this car was nothing sort of scary. I am sure it was well more secure and nothing was going to happen.
Some pics of it's trip.
made it....
Back on a lift..
Working on the toe and camber adjusters on the rear subframe.
I didn't like how much was unsupported so I extended it some.
Freshly powdercoated bits
reinforcing trailing arms
A couple pictures of what has been holding things up...
New shop
and a new toy...
Last edited by jakeb; 03-28-2014 at 08:33 PM.
04-07-2014, 08:23 PM
#24
Steve flew in to do some work on the M3 last week....
Got the bottom all re undercoated.
Before
After

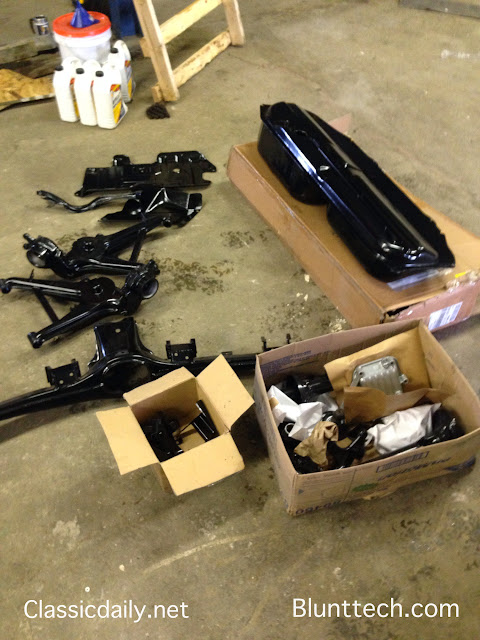
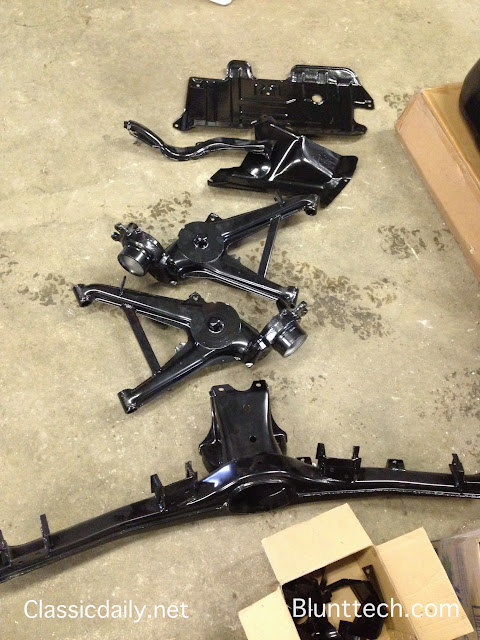
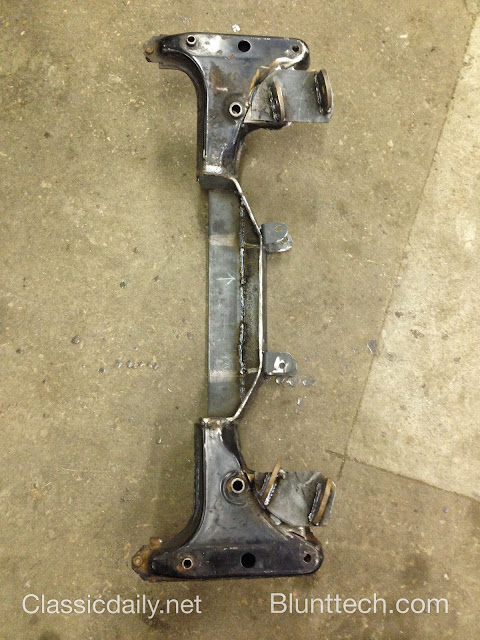
Fresh rear subframe and painted diff bolted up.

Subframe in and trailing arms bolted up..new bushings, bearings, etc etc etc

undercoated in the wheel wells too


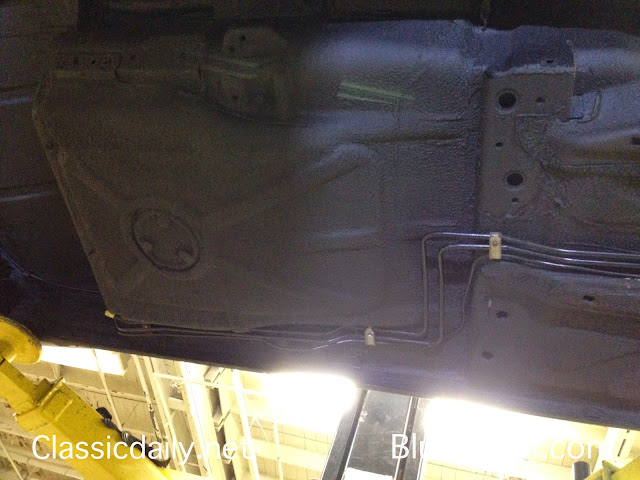
New brake and fuel lines run

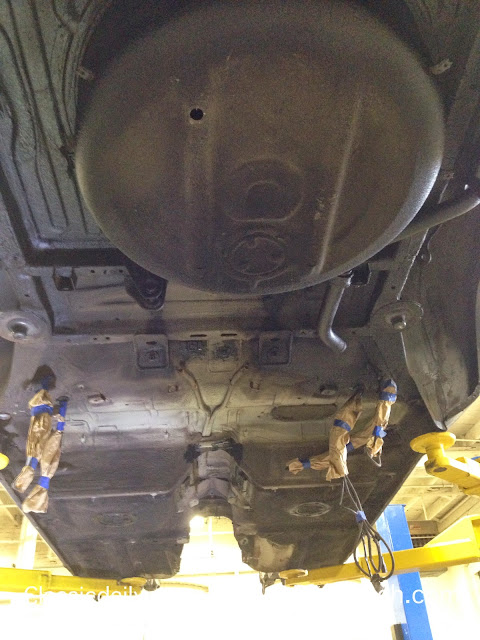
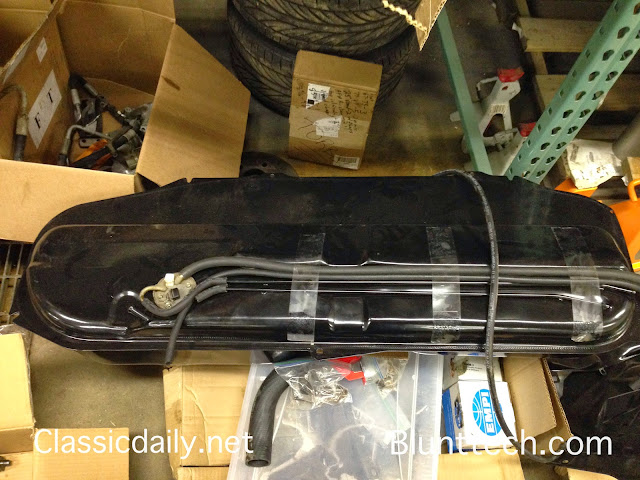
Gas tank ready to go in
Got the bottom all re undercoated.
Before
After
Fresh rear subframe and painted diff bolted up.
Subframe in and trailing arms bolted up..new bushings, bearings, etc etc etc
undercoated in the wheel wells too
New brake and fuel lines run
Gas tank ready to go in
04-07-2014, 11:56 PM
#25

Trying to remember the big brake setup used on an old iX trackcar my old shop did. E32 brake booster for sure.
Looks like you got it figured out but its going to bother me not remembering the trick setup 10 years later.
That the old Ireland Engineering rear camber/toe kit?
Looks good so far. Any thoughts on the rest of the suspension/spring rates yet?
Looks like you got it figured out but its going to bother me not remembering the trick setup 10 years later.
That the old Ireland Engineering rear camber/toe kit?
Looks good so far. Any thoughts on the rest of the suspension/spring rates yet?
06-06-2014, 08:54 PM
#26
This update is from a few weeks ago but just finally getting around to uploading all the pics and posting.
Welding the new subframe up.
Starting on mounts
drivers side
These will be fully boxed and also a new set of plates will be drawn and then water jetted. These are the mock ups.
Subframe with mounts welded on
And with both mounts connected. All this will be powder coated
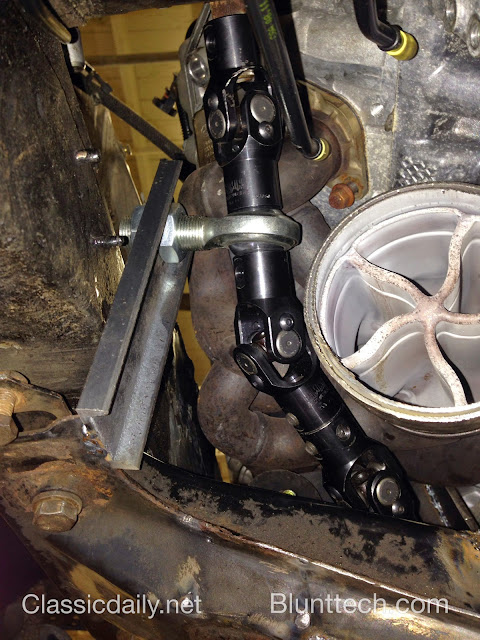
Steering clearance
Adding another joint
And a locator
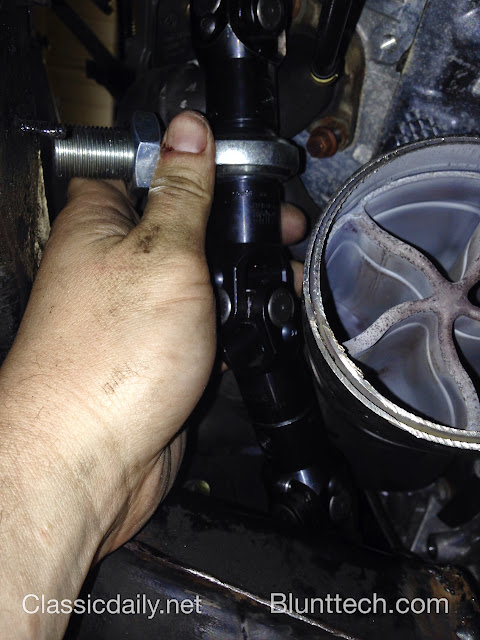
This is JUST a MOCK up. We needed to have the car movable to take to a show so this locator mount was just tacked on so the car can steer. There will be a stronger more elegant solution once the engine comes back out.
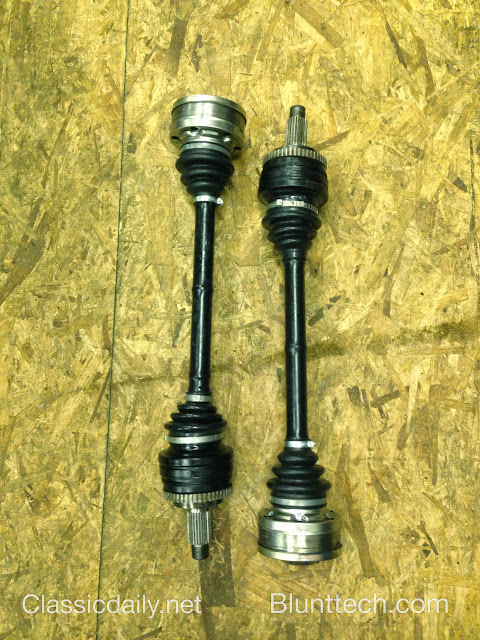
Rebuilt rear axles
A quick shot from the front.
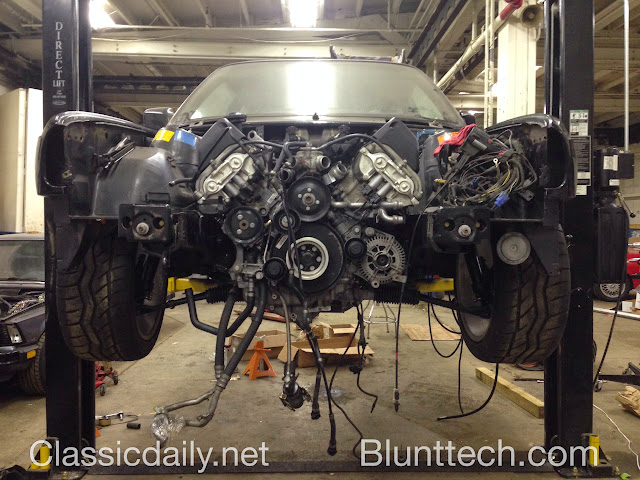
The coilovers are turned all the way down here and there is about 3-3.5" here. Yes it is close but the air boxes are about a 1/4" from the hood.
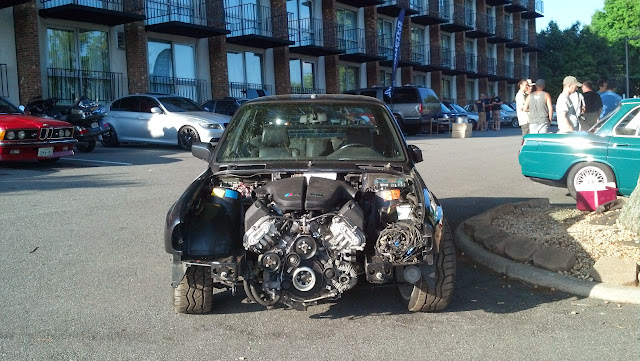
Here it is at the vintage in NC a couple weeks ago.
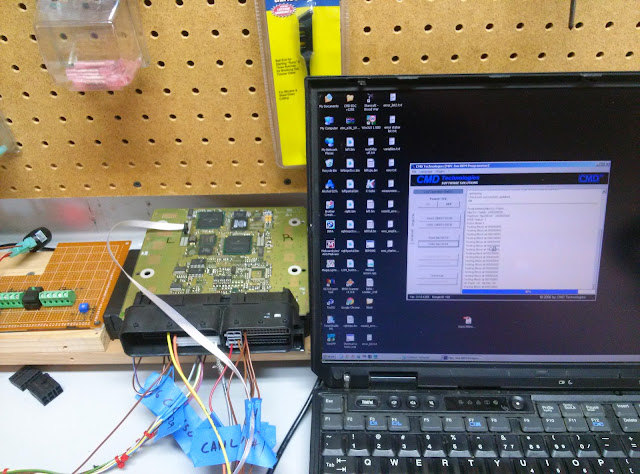
Also it is looking VERY good that we will be using the stock DME. nando has been working on cracking it and it's looking like it's gonna happen.
Welding the new subframe up.
Starting on mounts
drivers side
These will be fully boxed and also a new set of plates will be drawn and then water jetted. These are the mock ups.
Subframe with mounts welded on
And with both mounts connected. All this will be powder coated
Steering clearance
Adding another joint
And a locator
This is JUST a MOCK up. We needed to have the car movable to take to a show so this locator mount was just tacked on so the car can steer. There will be a stronger more elegant solution once the engine comes back out.
Rebuilt rear axles
A quick shot from the front.
The coilovers are turned all the way down here and there is about 3-3.5" here. Yes it is close but the air boxes are about a 1/4" from the hood.
Here it is at the vintage in NC a couple weeks ago.
Also it is looking VERY good that we will be using the stock DME. nando has been working on cracking it and it's looking like it's gonna happen.
07-10-2014, 02:17 PM
#27
Not a huge update but something none the less.
We had found some rotors that were going to work for the brake setup but they were not ideal. So we got some hats from Ireland and then had some rotors made custom from coleman eng.
Here are the rotors when they showed up.
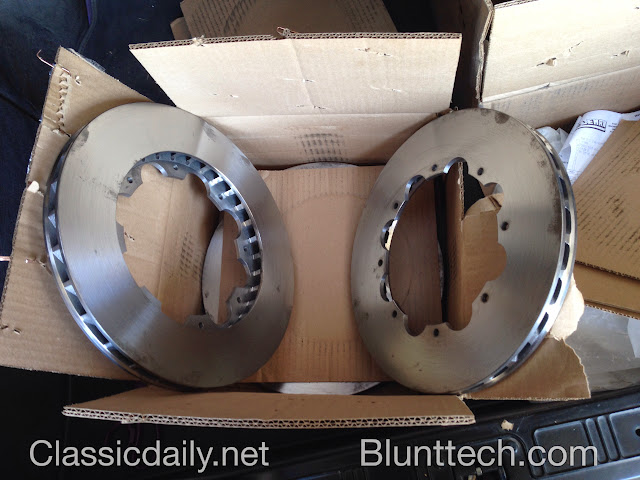
Fronts
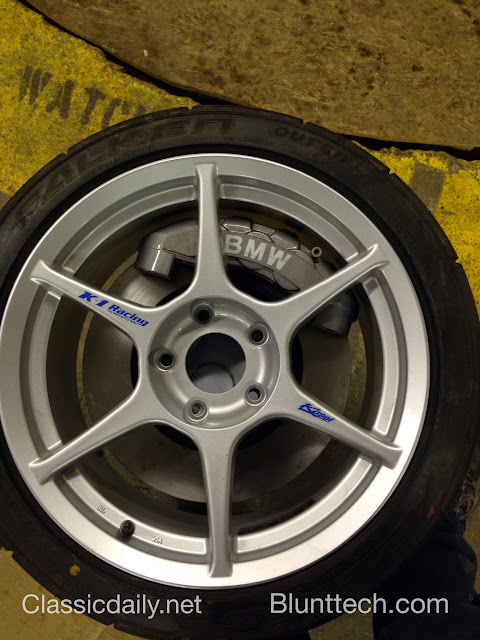
Starting to mock stuff up
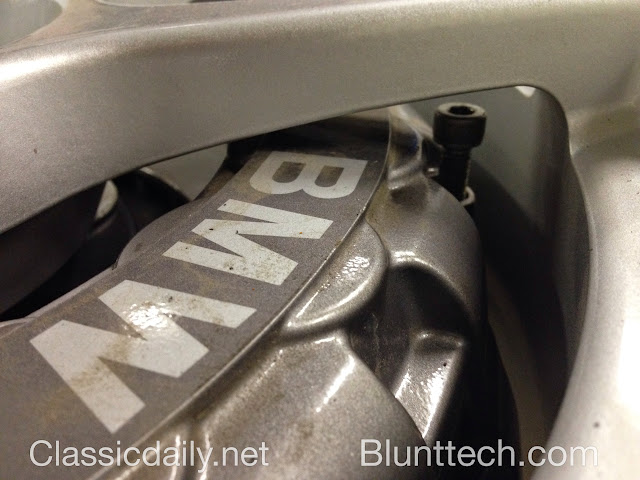
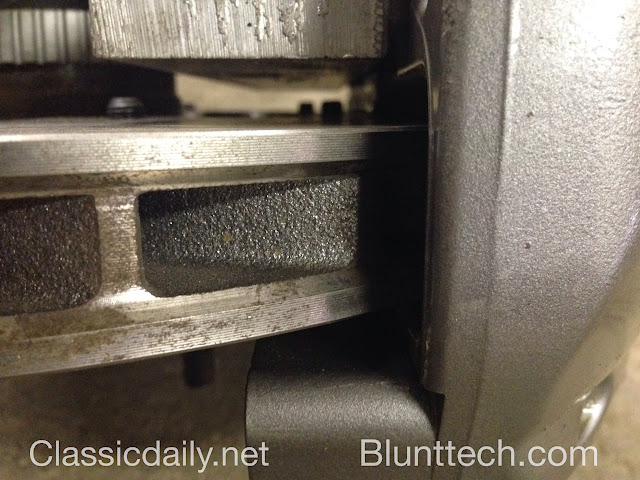
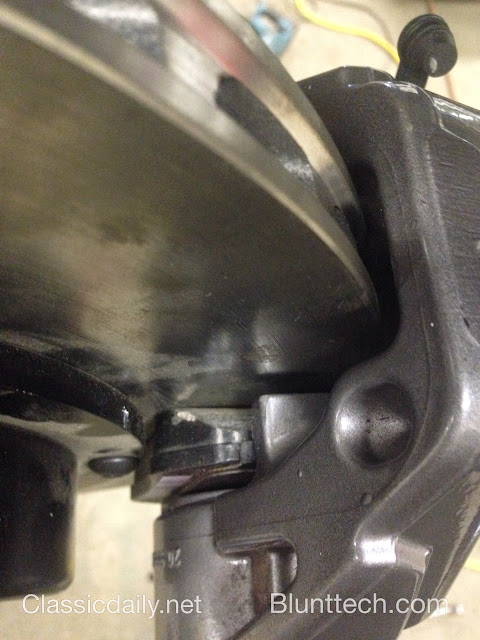
These are just sorta stuck in there...if you look to the left of the caliper it looks like they are hitting the wheel. The caliper is nut but there is a washer in there to keep the caliper clamped to the rotor. There is room all around.
clearance between wheel and caliper
rear rotor....nothing that exciting here.
[img[https://lh5.googleusercontent.com/-DqJ97ieM94Y/U77S8FHKt_I/AAAAAAAAMIU/xwqWJID7drY/s640/IMAGE_1830.jpeg[/img]
rear compared to front
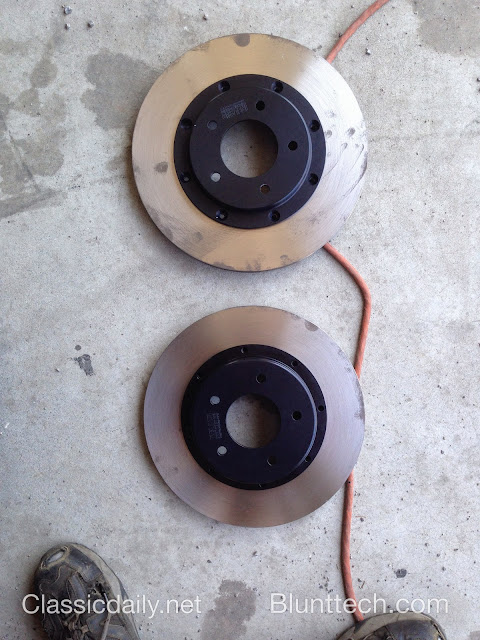
We had found some rotors that were going to work for the brake setup but they were not ideal. So we got some hats from Ireland and then had some rotors made custom from coleman eng.
Here are the rotors when they showed up.
Fronts
Starting to mock stuff up
These are just sorta stuck in there...if you look to the left of the caliper it looks like they are hitting the wheel. The caliper is nut but there is a washer in there to keep the caliper clamped to the rotor. There is room all around.
clearance between wheel and caliper
rear rotor....nothing that exciting here.
[img[https://lh5.googleusercontent.com/-DqJ97ieM94Y/U77S8FHKt_I/AAAAAAAAMIU/xwqWJID7drY/s640/IMAGE_1830.jpeg[/img]
rear compared to front
07-10-2014, 02:19 PM
#28
Not a huge update but something none the less.
We had found some rotors that were going to work for the brake setup but they were not ideal. So we got some hats from Ireland and then had some rotors made custom from coleman eng.
Here are the rotors when they showed up.
Fronts
Starting to mock stuff up
These are just sorta stuck in there...if you look to the left of the caliper it looks like they are hitting the wheel. The caliper is nut but there is a washer in there to keep the caliper clamped to the rotor. There is room all around.
clearance between wheel and caliper
rear rotor....nothing that exciting here.
[img[https://lh5.googleusercontent.com/-DqJ97ieM94Y/U77S8FHKt_I/AAAAAAAAMIU/xwqWJID7drY/s640/IMAGE_1830.jpeg[/img]
rear compared to front
03-08-2015, 02:41 PM
#29
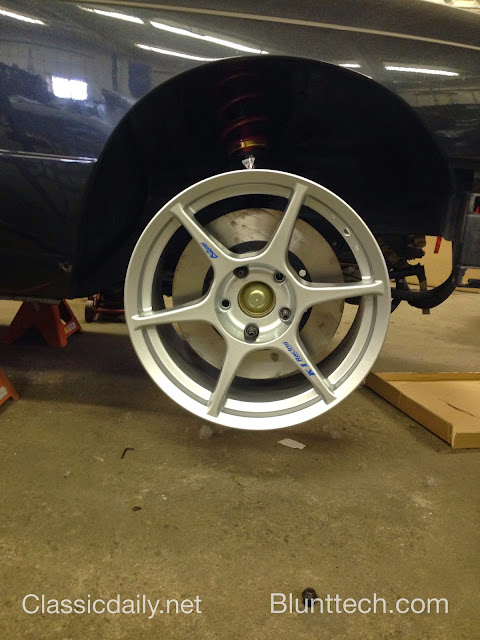
Been spending some time on the brakes recently.
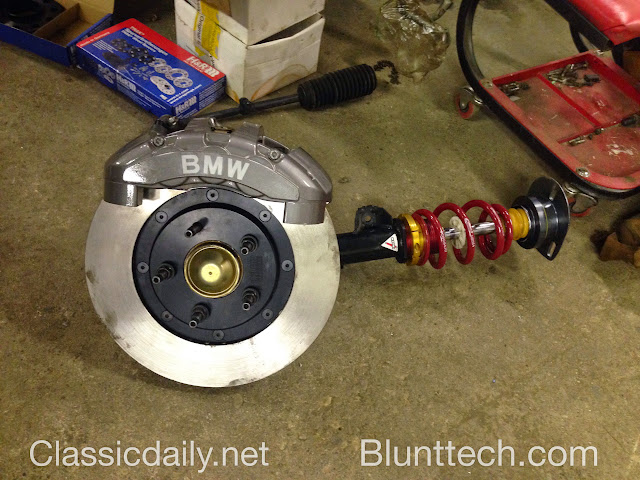
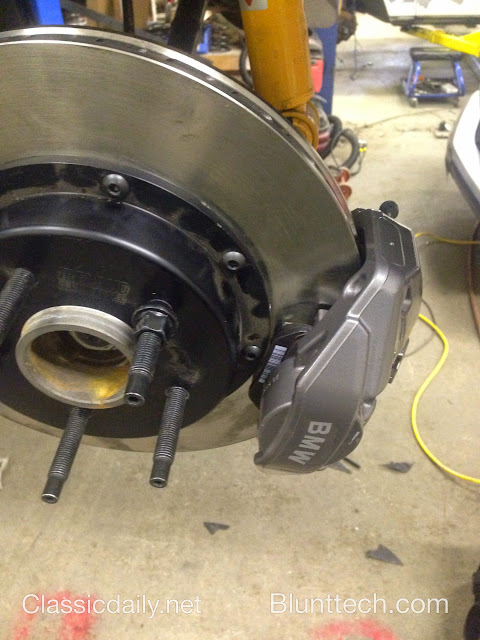
Will be running 135 brakes front and rear.
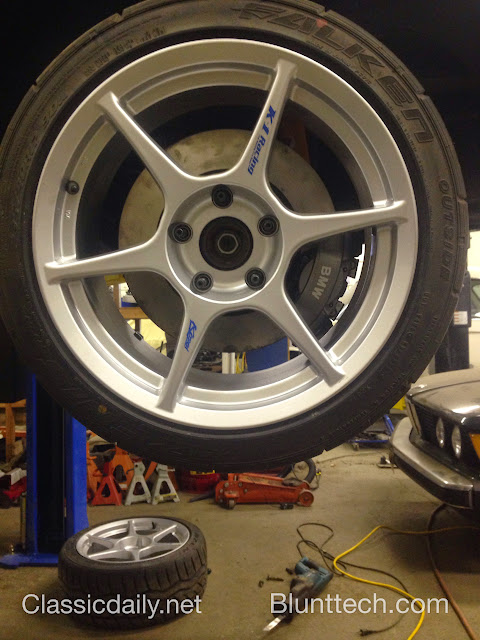
We bought e36 fitment wheels so we could space to fit and clear the brakes.
This is with about 12mm of spacing.
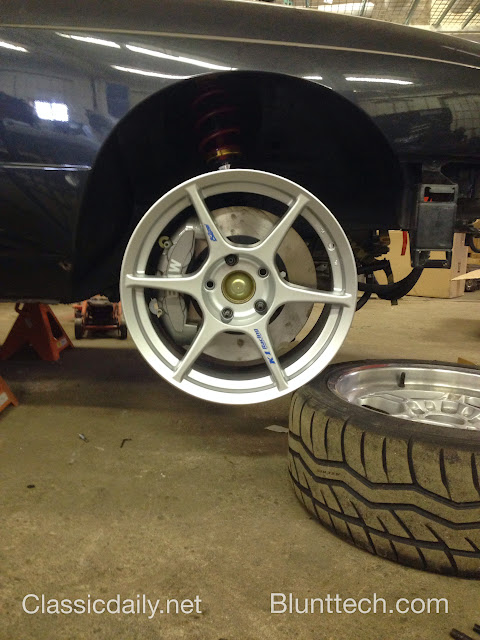
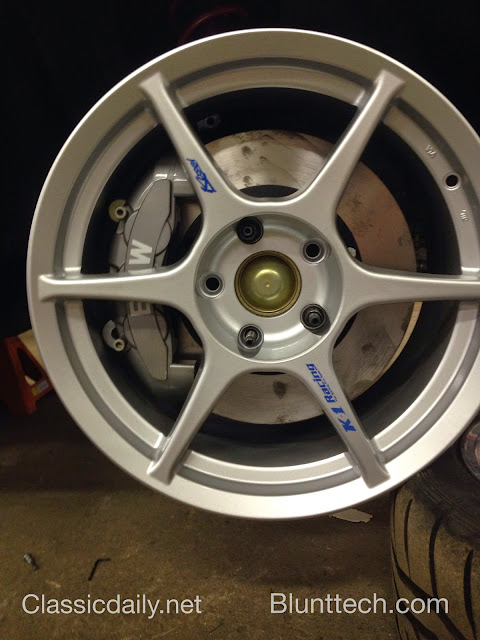
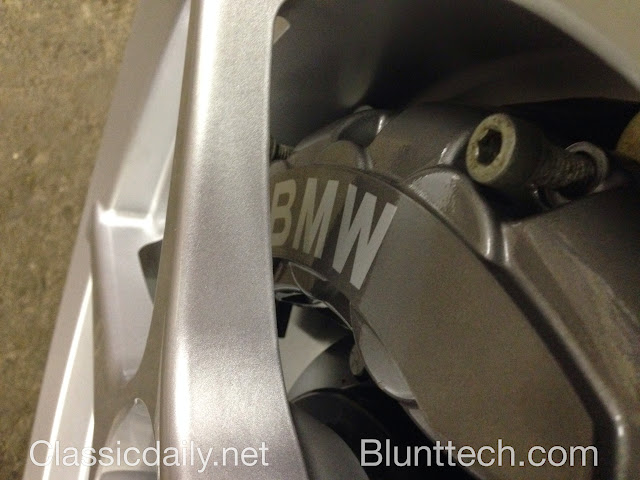
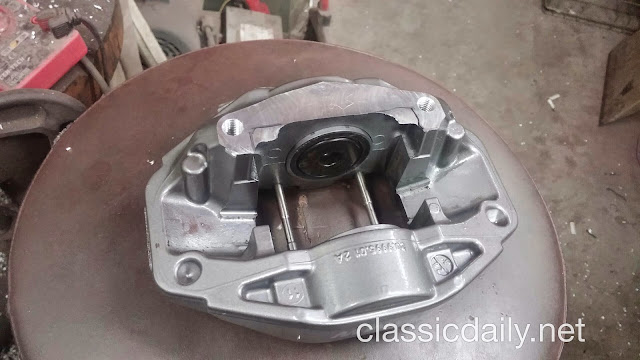
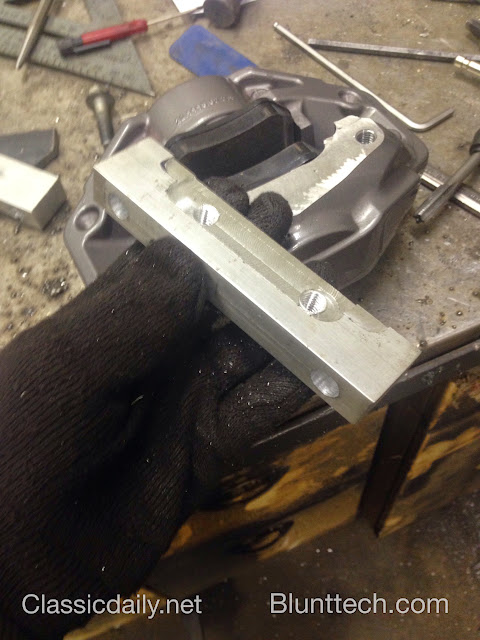
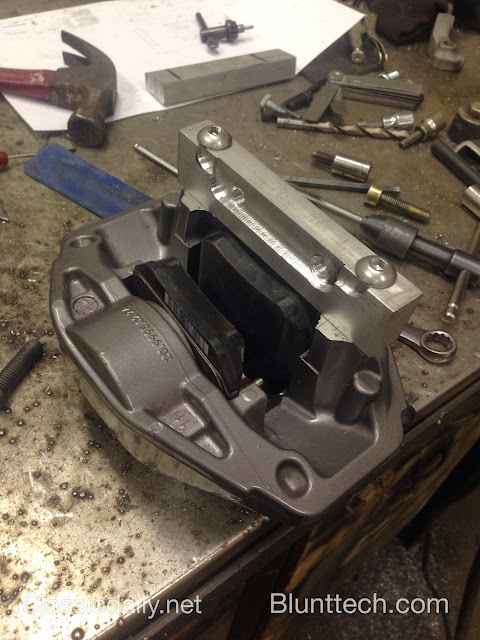
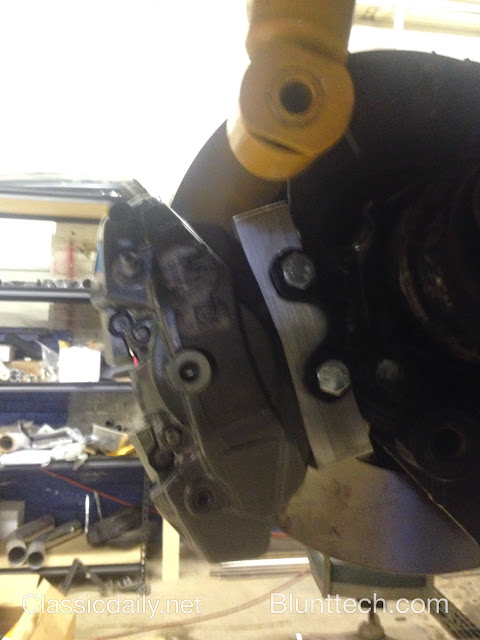
Front brackets were not to bad to make. Piece of 6061 aluminum... Stacked washers just used do to lack of hardware at the time. Brackets will be cleaned up some....edges rounded, etc.
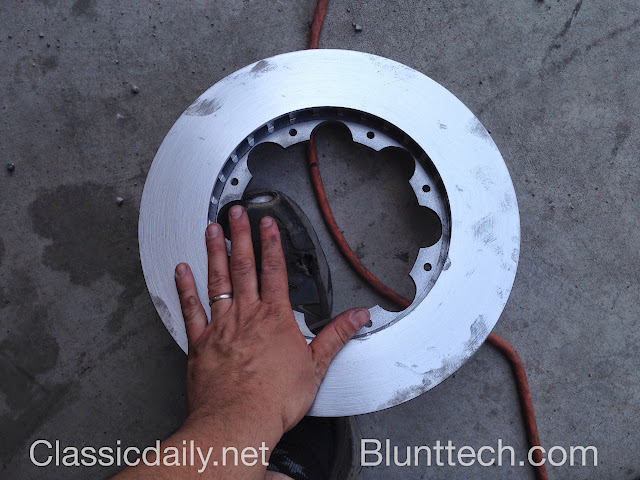
We are using hats from IE with custom rotors from coleman. The hats have been installed INSIDE the rotors to give more clearance at the control arm ball joint.
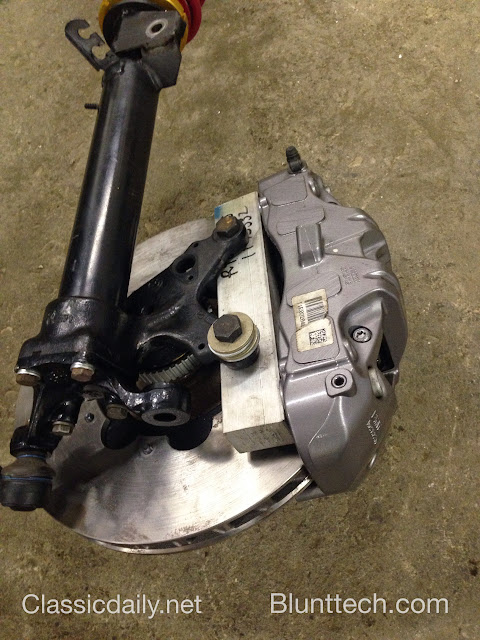
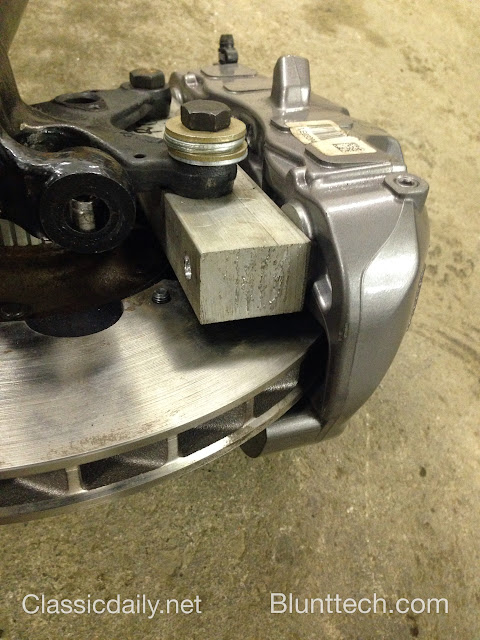
Kinda hard to tell but nice and centered.
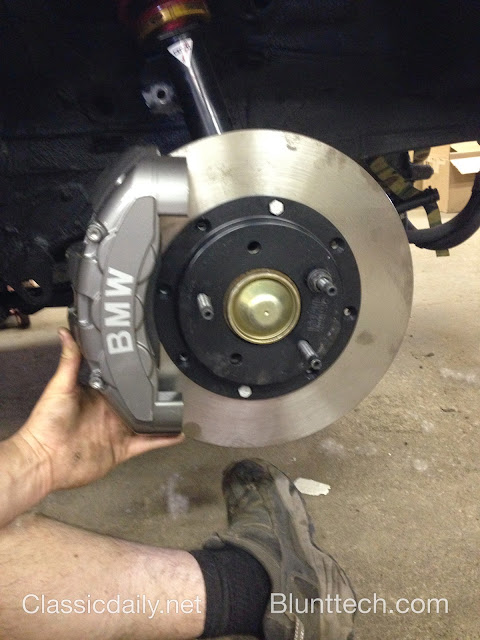
All mounted up.
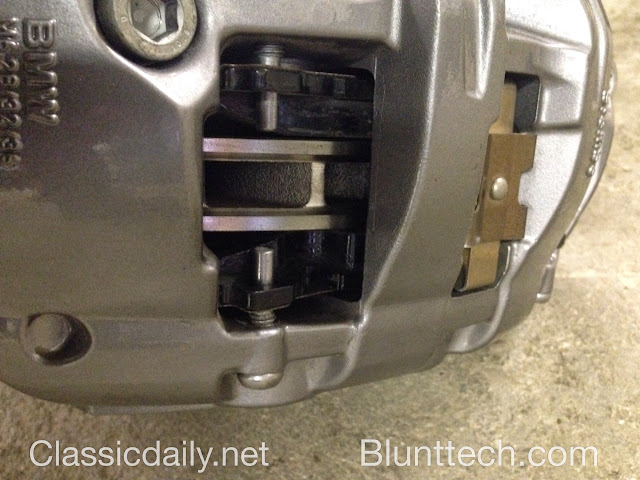
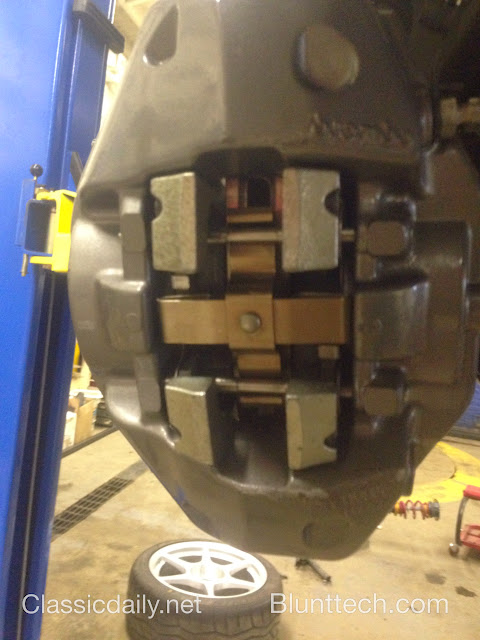
Now the rears were a MUCH different story. We machined the calipers and removed the mounting ears.
There was VERY little room between the mounting bracket and the backing plate. To keep enough material left in the bracket some was machined out to give clearance at the backing plate.
mounted
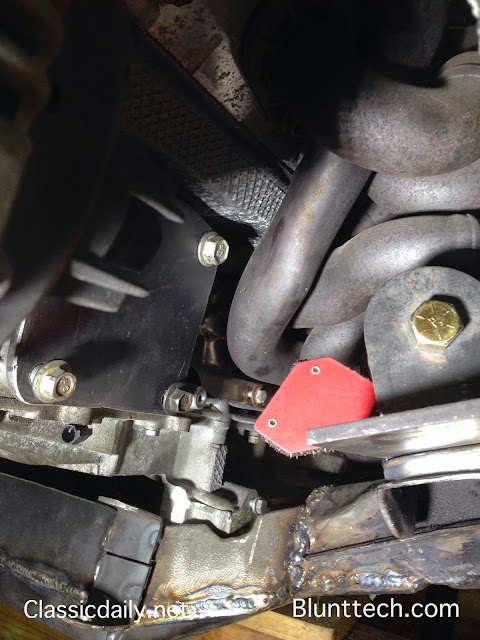
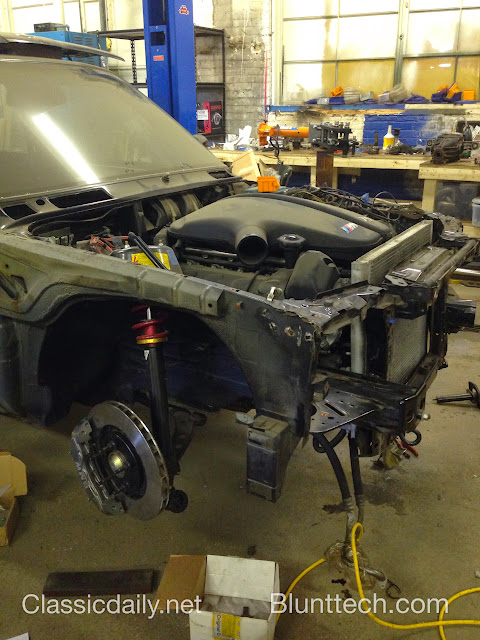
The m5 uses a very odd radiator as it is actually two radiators stacked on top of each other. If BMW designed it that way we would love to keep it. But one issue is the m5 radiator is too wide.

Sometimes you have to cut...

The cut part will be completely boxed in.
And there we go...

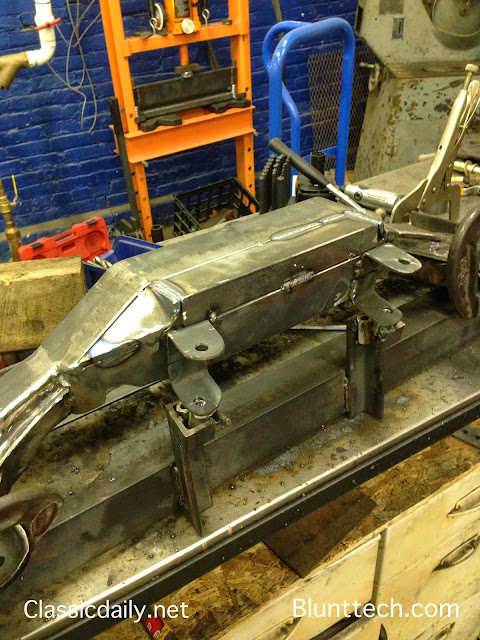
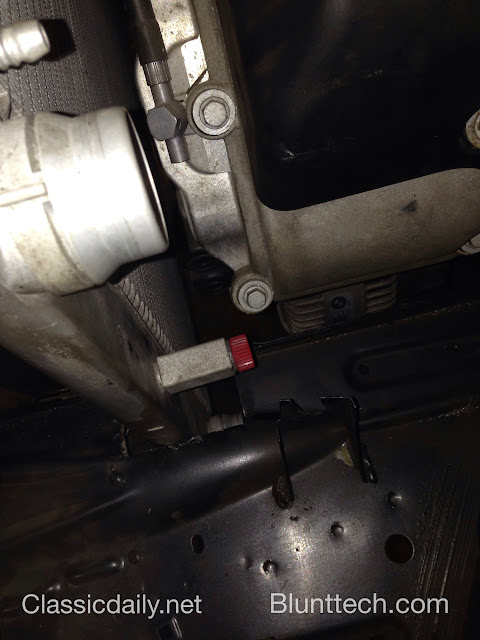
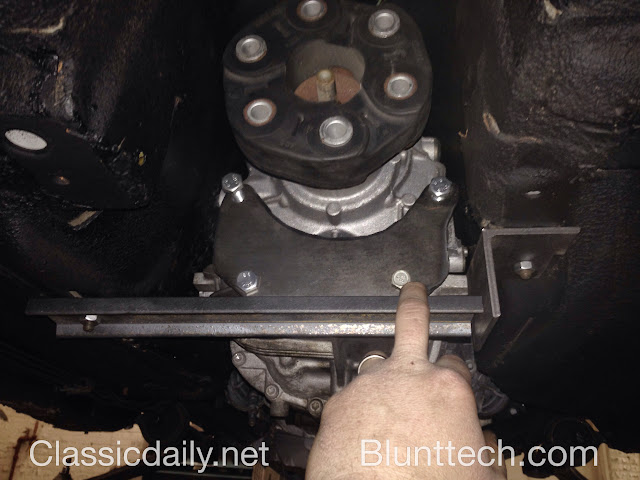
The engine has been mounted but the trans has had a VERY temp mount. But that needs to change. So...getting going on that.
Just to show how big the e60 guibo is.
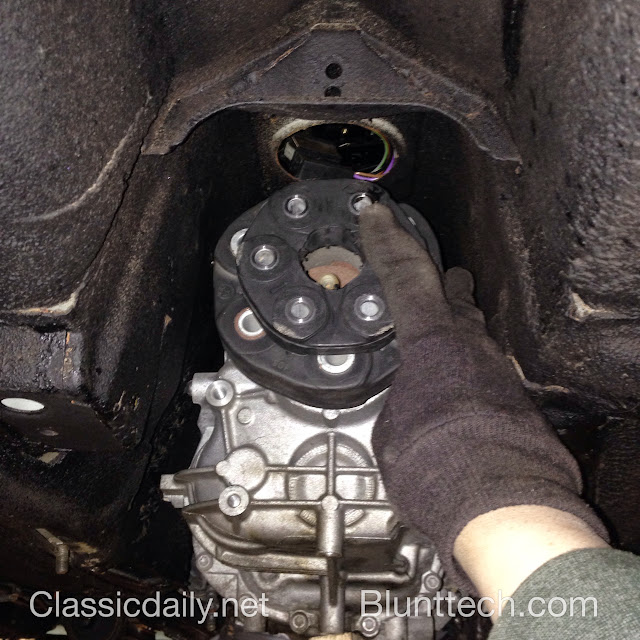
Mount will be two parts.
One that bolts to the trans (flat part in picture below) and then the cross brace. There will be a poly bushing in between (update on that when it shows up Tuesday)
Will be running 135 brakes front and rear.
We bought e36 fitment wheels so we could space to fit and clear the brakes.
This is with about 12mm of spacing.
Front brackets were not to bad to make. Piece of 6061 aluminum... Stacked washers just used do to lack of hardware at the time. Brackets will be cleaned up some....edges rounded, etc.
We are using hats from IE with custom rotors from coleman. The hats have been installed INSIDE the rotors to give more clearance at the control arm ball joint.
Kinda hard to tell but nice and centered.
All mounted up.
Now the rears were a MUCH different story. We machined the calipers and removed the mounting ears.
There was VERY little room between the mounting bracket and the backing plate. To keep enough material left in the bracket some was machined out to give clearance at the backing plate.
mounted
The m5 uses a very odd radiator as it is actually two radiators stacked on top of each other. If BMW designed it that way we would love to keep it. But one issue is the m5 radiator is too wide.
Sometimes you have to cut...
The cut part will be completely boxed in.
And there we go...
The engine has been mounted but the trans has had a VERY temp mount. But that needs to change. So...getting going on that.
Just to show how big the e60 guibo is.
Mount will be two parts.
One that bolts to the trans (flat part in picture below) and then the cross brace. There will be a poly bushing in between (update on that when it shows up Tuesday)