

My First BMW – My First Swap – LS2/T56 into an E36
 06-03-2014, 07:36 PM
#41


check out:
http://www.emachineshop.com/
download their software, design the part, and it will quote price and expected delivery time on having it made.
http://www.emachineshop.com/
download their software, design the part, and it will quote price and expected delivery time on having it made.
There's a guy on eBay who makes/sells mounting plates for a bunch of different applications. He's never made one for an E36 but we're working on a design. It won't be aluminum but it should do the trick. Something like this:
Last edited by TipsyMcStagger; 06-03-2014 at 08:25 PM.
 06-04-2014, 01:14 PM
#42
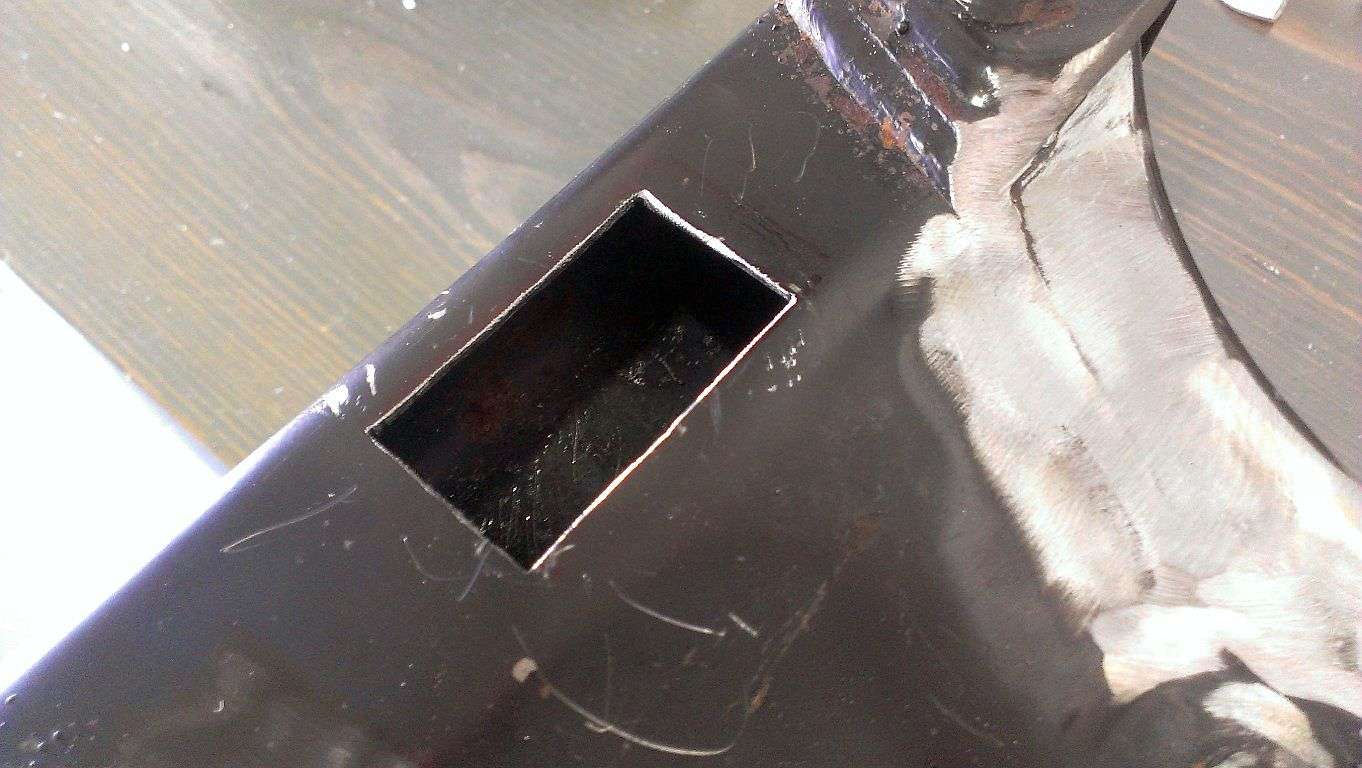
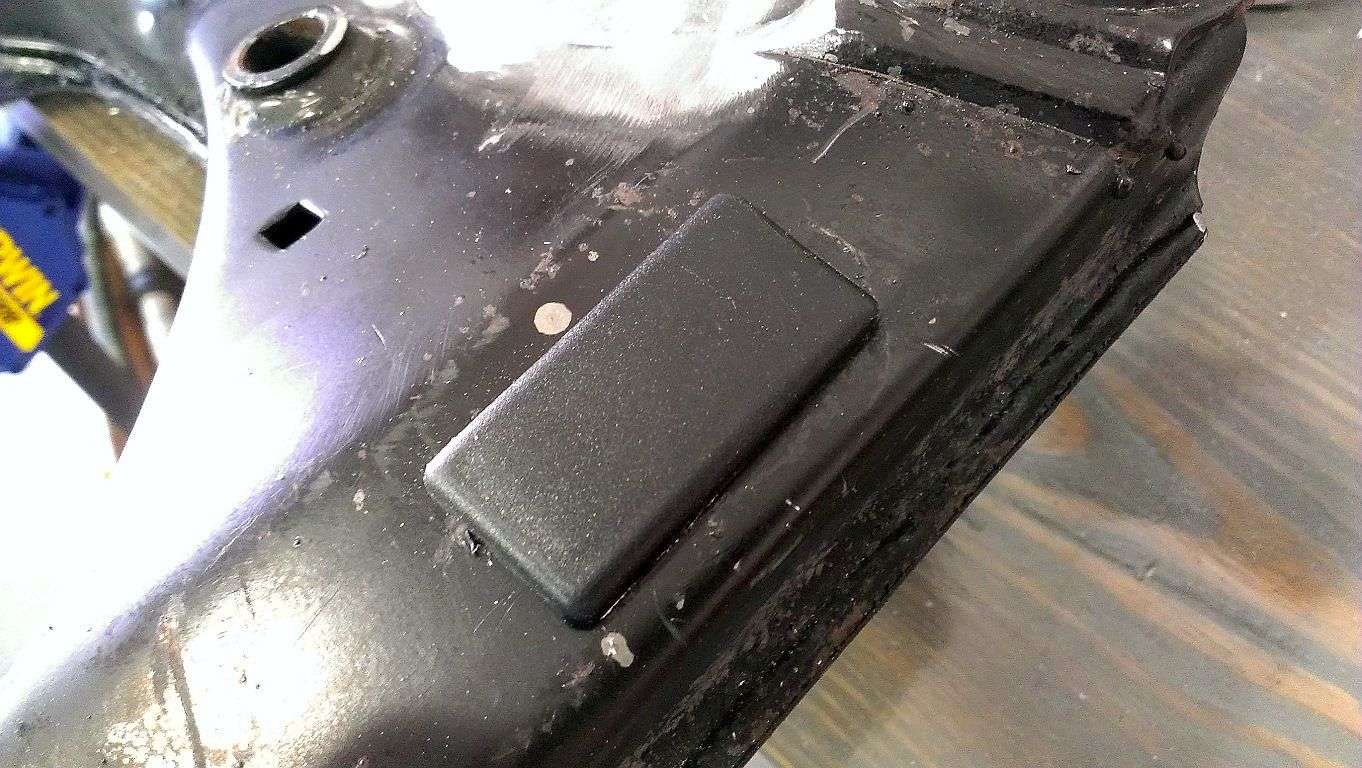
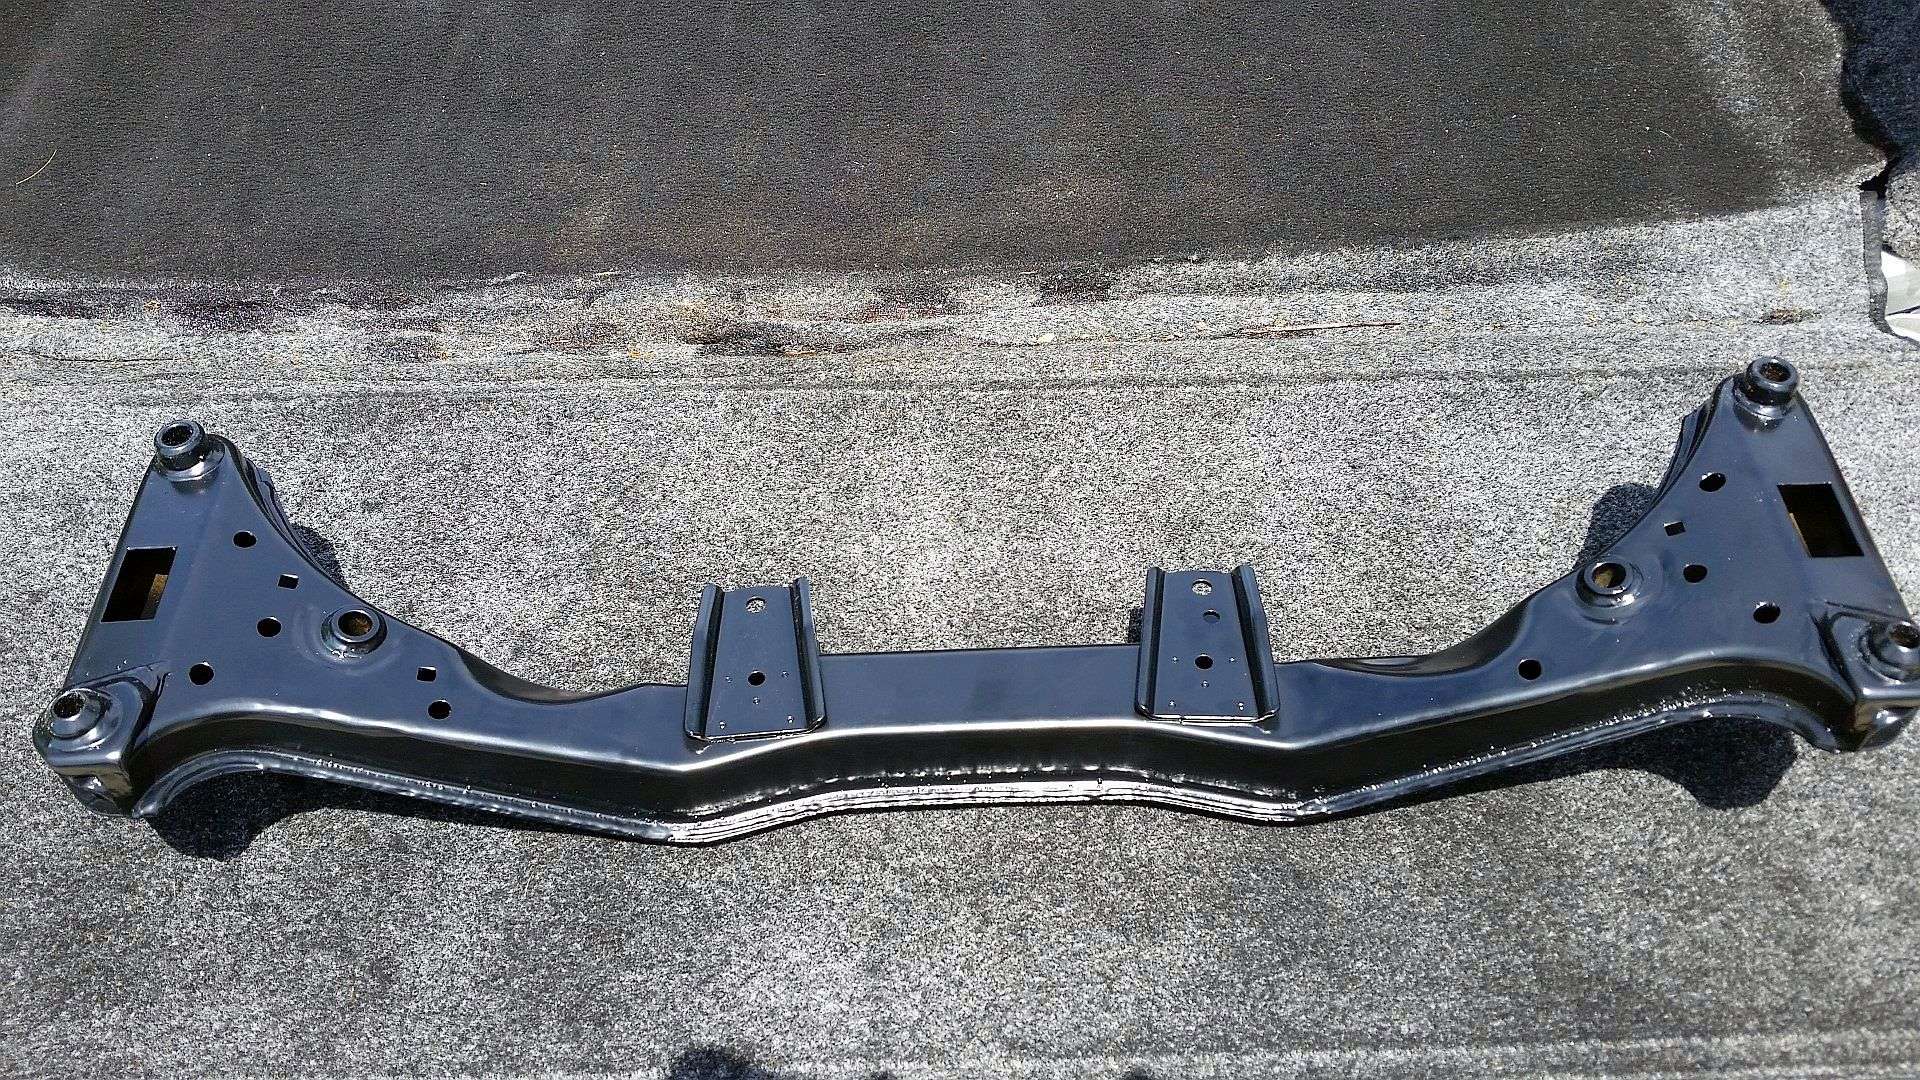
Continuing with the subframe modification. Needed to open two holes in the subframe to allow a wrench to get inside so the motor mount fasteners can be properly secured. JTR calls for making these openings 1" x 2" but I made them slightly smaller. I have some plastic plugs I want to use to cap the opening once everything is installed and the plugs needed an opening just a bit smaller than 1" x 2".
I made a small cardboard template, drilled four holes and made the cuts with a pneumatic body saw. I then trued and deburred with a hand file and a right angle die grinder.

I made a small cardboard template, drilled four holes and made the cuts with a pneumatic body saw. I then trued and deburred with a hand file and a right angle die grinder.
06-04-2014, 07:18 PM
#44
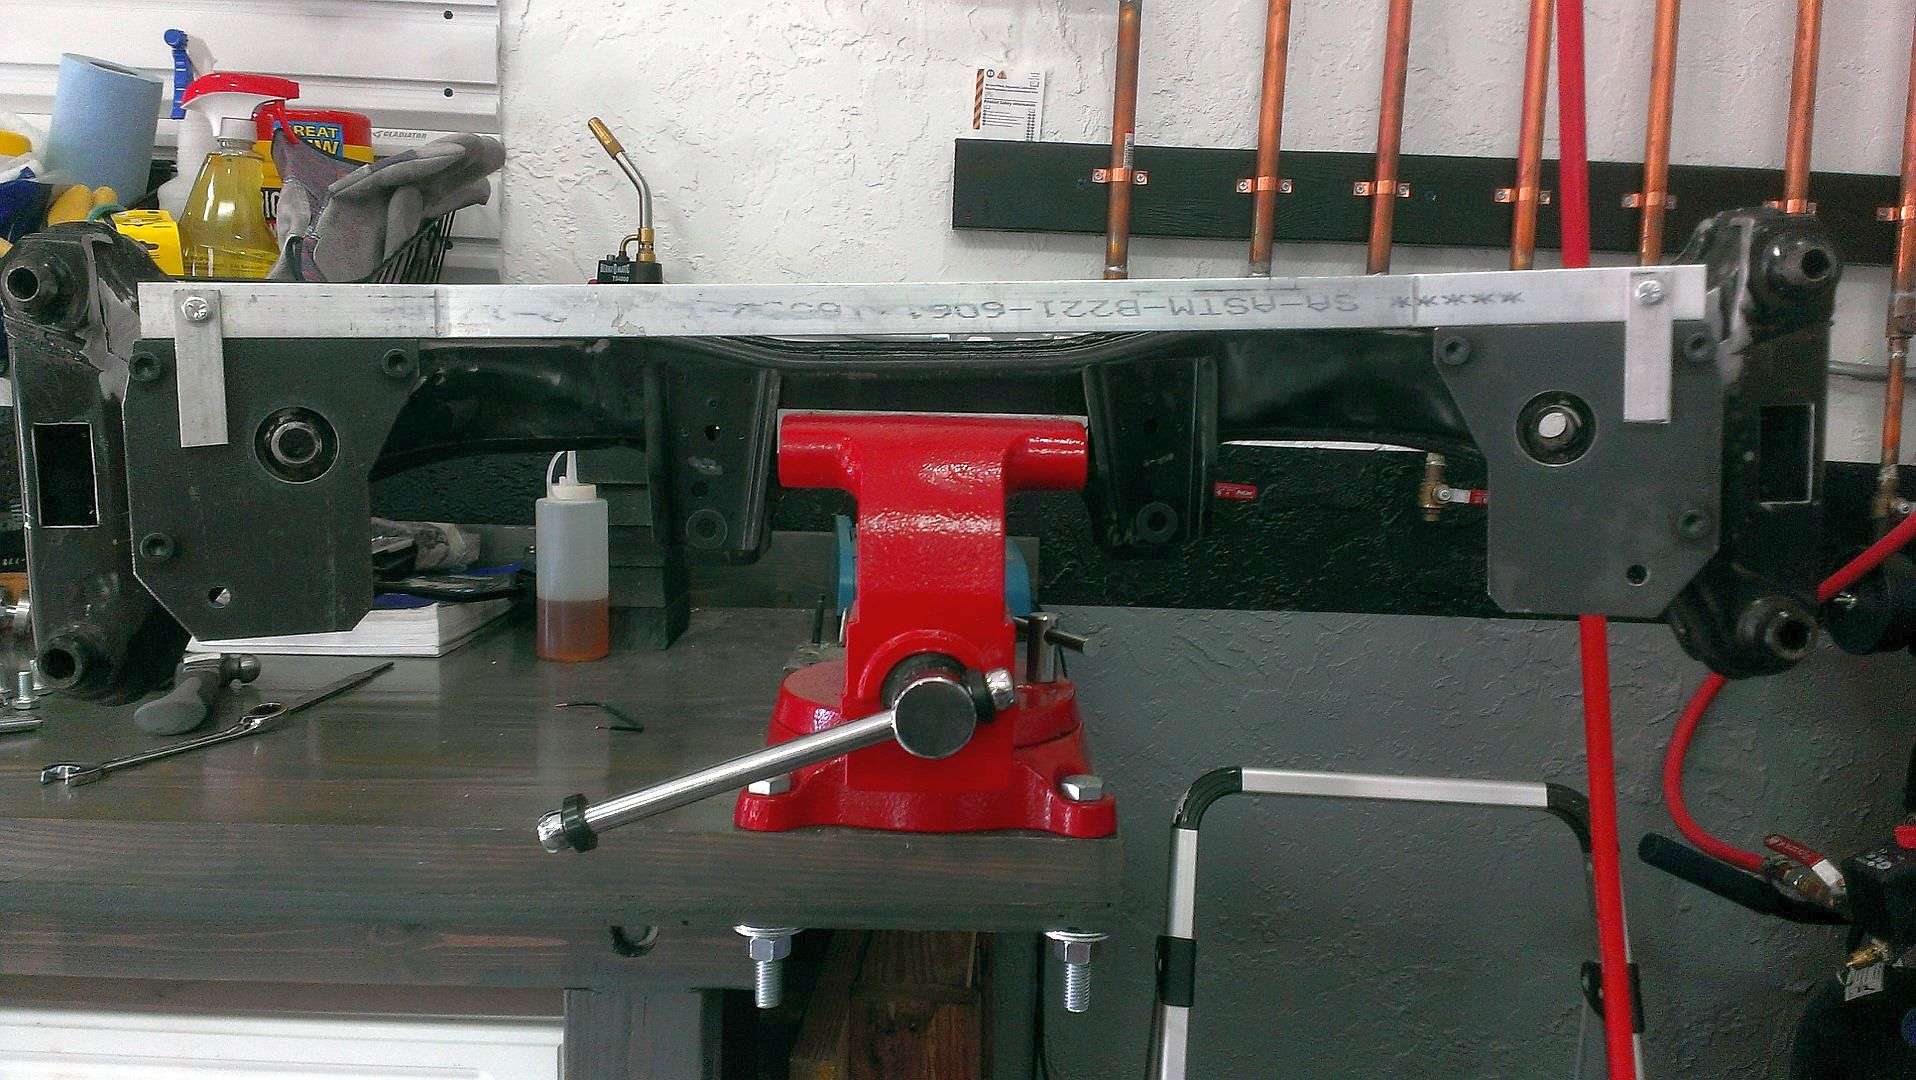
I finished modifying the subframe to accept the JTR motor mounts. Next tool on the wishlist is a drill press. I was really meticulous and took my time but in the end, the holes I drilled still were not-spot on. I had to make them a bit oblong, but it's no big deal and not entirely unexpected. This is the exact verbiage from the JTR installation page: If the 3/8 holes drilled into the subframe are not properly located, use a file or die grinder to elongate the holes to the proper location."
I'll probably have the subframe sandblasted and powder coated.
I'll probably have the subframe sandblasted and powder coated.
06-06-2014, 05:39 PM
#45
Today's update: This Tool Rocks.
It's ridiculous how much discussion there is on how best to remove the balancer. I realize not everyone wants to spend $53 on a tool that will see limited use...but it simply works and works well. The tool that my local Autozone had available for rent was junk.
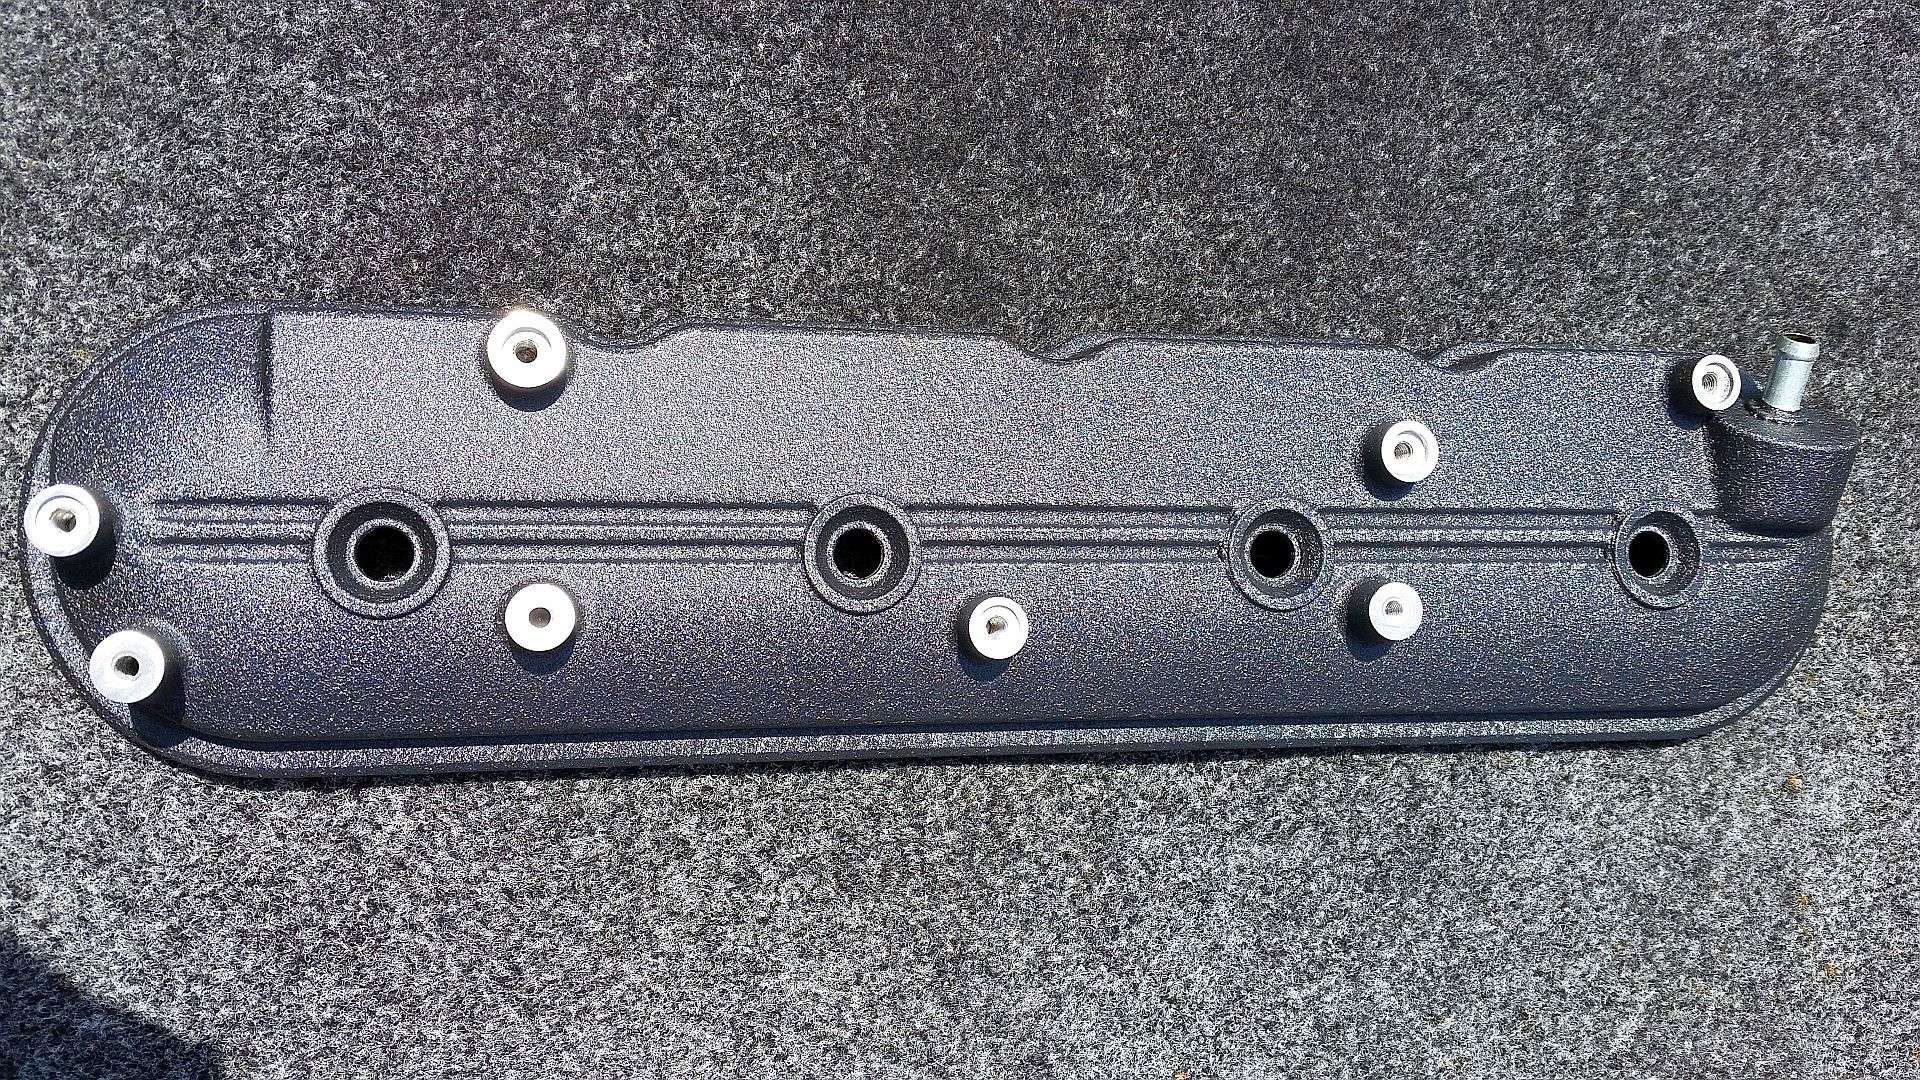
The front of the engine is disassembled, valve covers removed and cam is going in tomorrow. Decided to have the subframe, engine mounts and valve covers powder coated, so I'll drop them off Tuesday. Monday, I'm fishing
Tipsy
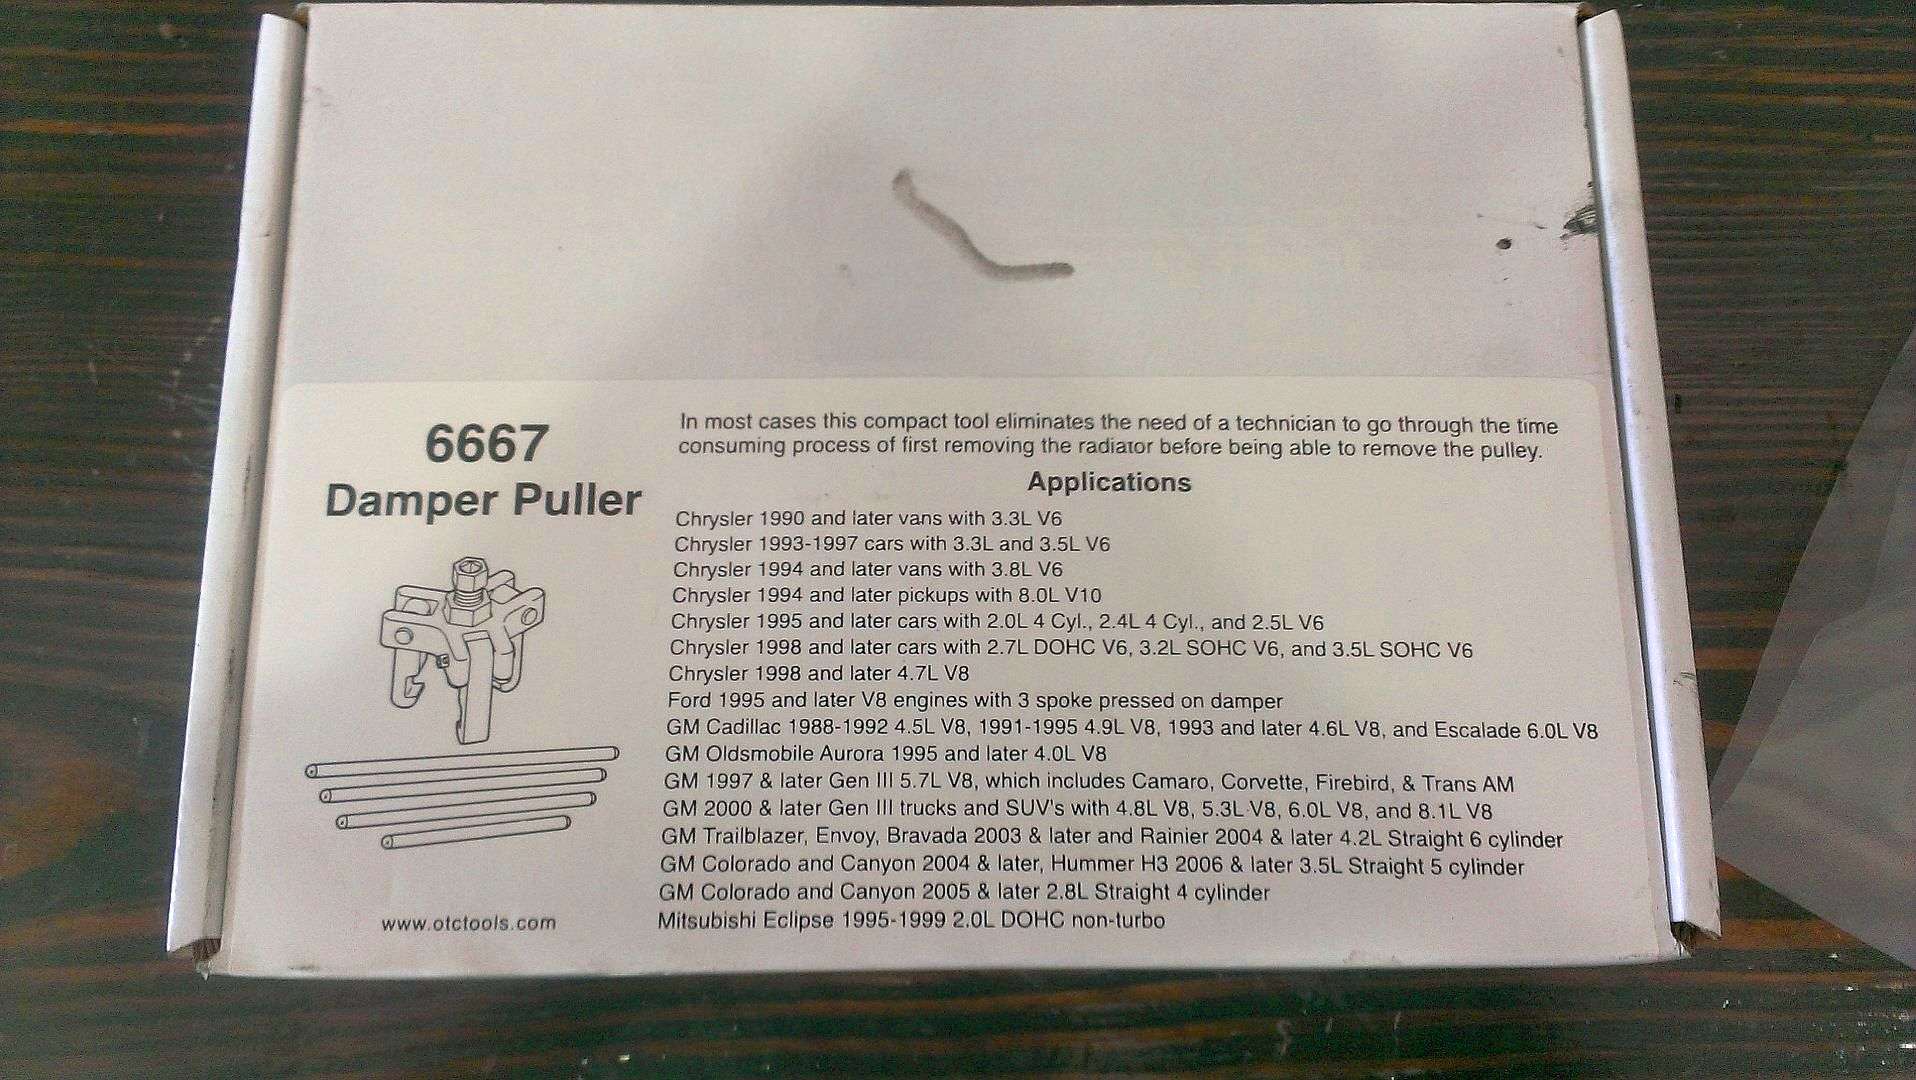
It's ridiculous how much discussion there is on how best to remove the balancer. I realize not everyone wants to spend $53 on a tool that will see limited use...but it simply works and works well. The tool that my local Autozone had available for rent was junk.
The front of the engine is disassembled, valve covers removed and cam is going in tomorrow. Decided to have the subframe, engine mounts and valve covers powder coated, so I'll drop them off Tuesday. Monday, I'm fishing
Tipsy
06-07-2014, 08:39 PM
#46
Spent the entire day in the garage working on the LS2. Made some progress and learned a few things about wrenching on LS engines. I also spent way too much time obsessively searching for a BRP oil pickup tube girdle I bought some months ago. I never did find it. Oh well.
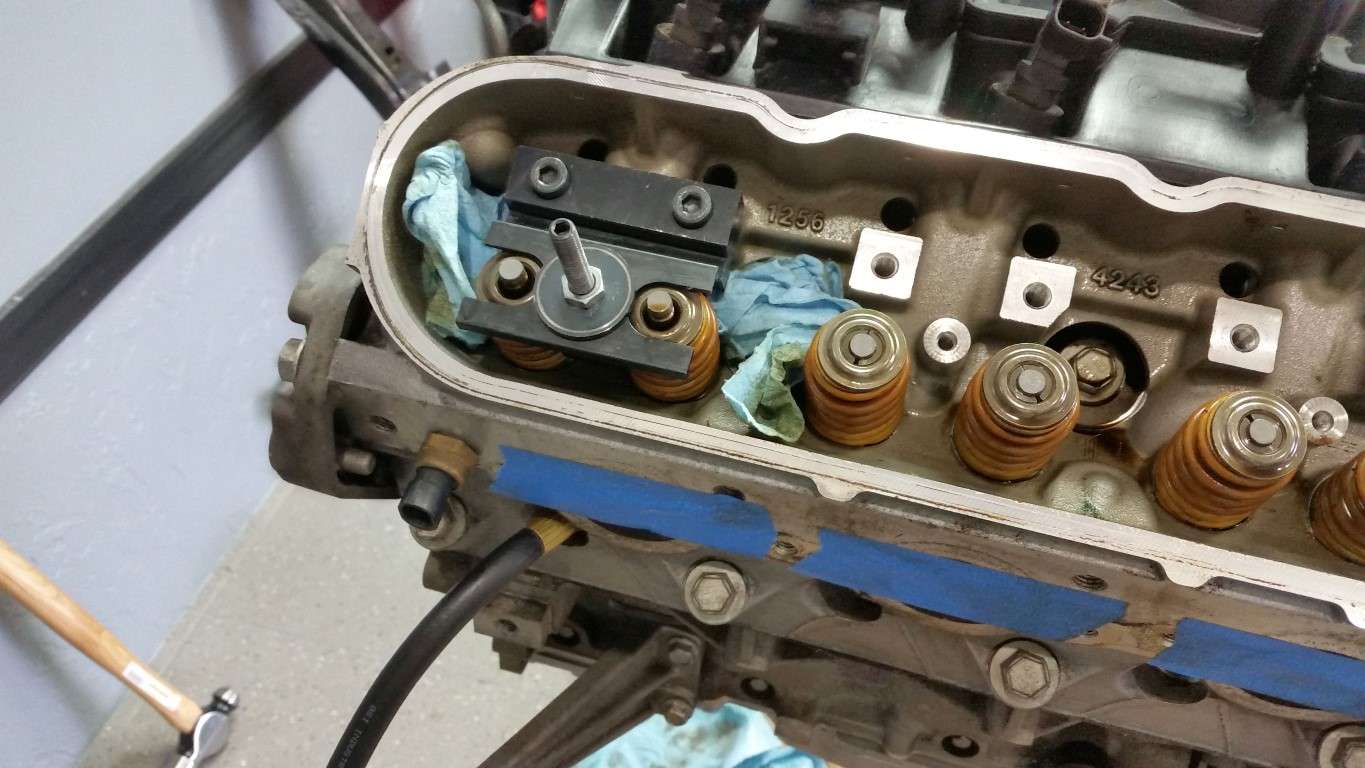
I removed the GTO oil pan and windage tray and installed my Tick cam. Along the way, I discovered not all LS cam retaining bolts are the same. I had bought a set of ARP 134-1002 retainer bolts but as soon as I saw my LS2's cam retainer plate, I knew something was up. My engine has countersunk holes in the plate and uses Torx bolts. It looks like this:

So, I reused my stock bolts. Incidentally, these countersunk Torx get torqued to 11 ft lbs. while the older style bolts are torqued to 18 ft lbs.
I also learned that the cam can be pushed in too far. No big deal really but while I was trying to reinstall the timing chain and timing gear, I couldn't seem to get the gear to seat. I then realized I needed to pull the cam out toward the gear about an 1/8" or so. Hey, it's my first cam swap on an LSx. Now I know. Also installed a new Tick ported oil pump and reinstalled the front cover with a new seal.
Here's where things went not so well. I started a thread seeking info, so I won't reiterate the situation in detail here; but I rotated the engine upside down and right side up a couple of times in the past day. First, to remove the oil pan and again to let gravity help keep the lifters recessed while installing the cam. In doing so, I noticed oil in the number eight cylinder. I hope it's no big deal. Here's my thread. If you're knowledgeable, by all means...please comment.
I installed the Improved Racing baffle into the F Body pan, but because of my oil in the cylinder issue, I've held off on installing the pan. I still have to replace the valve springs. I'll get to that early next week.
Tipsy
I removed the GTO oil pan and windage tray and installed my Tick cam. Along the way, I discovered not all LS cam retaining bolts are the same. I had bought a set of ARP 134-1002 retainer bolts but as soon as I saw my LS2's cam retainer plate, I knew something was up. My engine has countersunk holes in the plate and uses Torx bolts. It looks like this:
So, I reused my stock bolts. Incidentally, these countersunk Torx get torqued to 11 ft lbs. while the older style bolts are torqued to 18 ft lbs.
I also learned that the cam can be pushed in too far. No big deal really but while I was trying to reinstall the timing chain and timing gear, I couldn't seem to get the gear to seat. I then realized I needed to pull the cam out toward the gear about an 1/8" or so. Hey, it's my first cam swap on an LSx. Now I know. Also installed a new Tick ported oil pump and reinstalled the front cover with a new seal.
Here's where things went not so well. I started a thread seeking info, so I won't reiterate the situation in detail here; but I rotated the engine upside down and right side up a couple of times in the past day. First, to remove the oil pan and again to let gravity help keep the lifters recessed while installing the cam. In doing so, I noticed oil in the number eight cylinder. I hope it's no big deal. Here's my thread. If you're knowledgeable, by all means...please comment.
I installed the Improved Racing baffle into the F Body pan, but because of my oil in the cylinder issue, I've held off on installing the pan. I still have to replace the valve springs. I'll get to that early next week.
Tipsy
 06-10-2014, 03:27 PM
#48
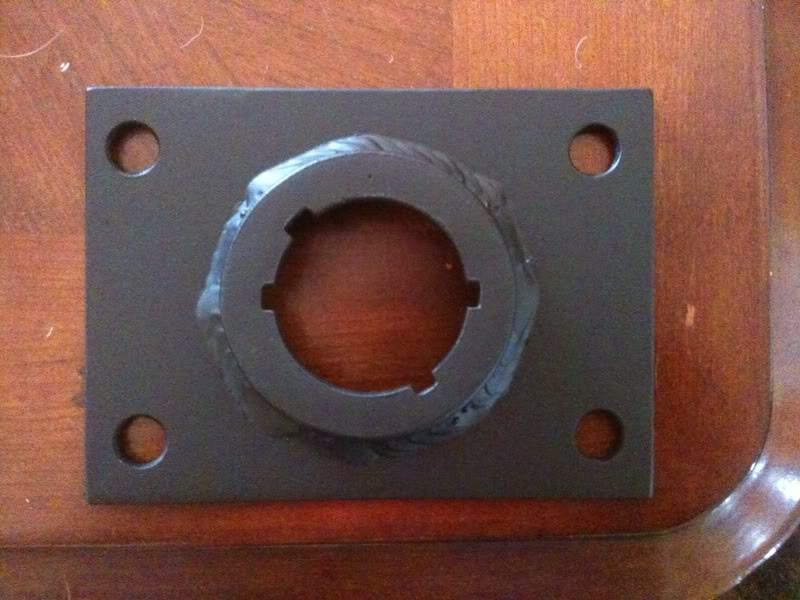
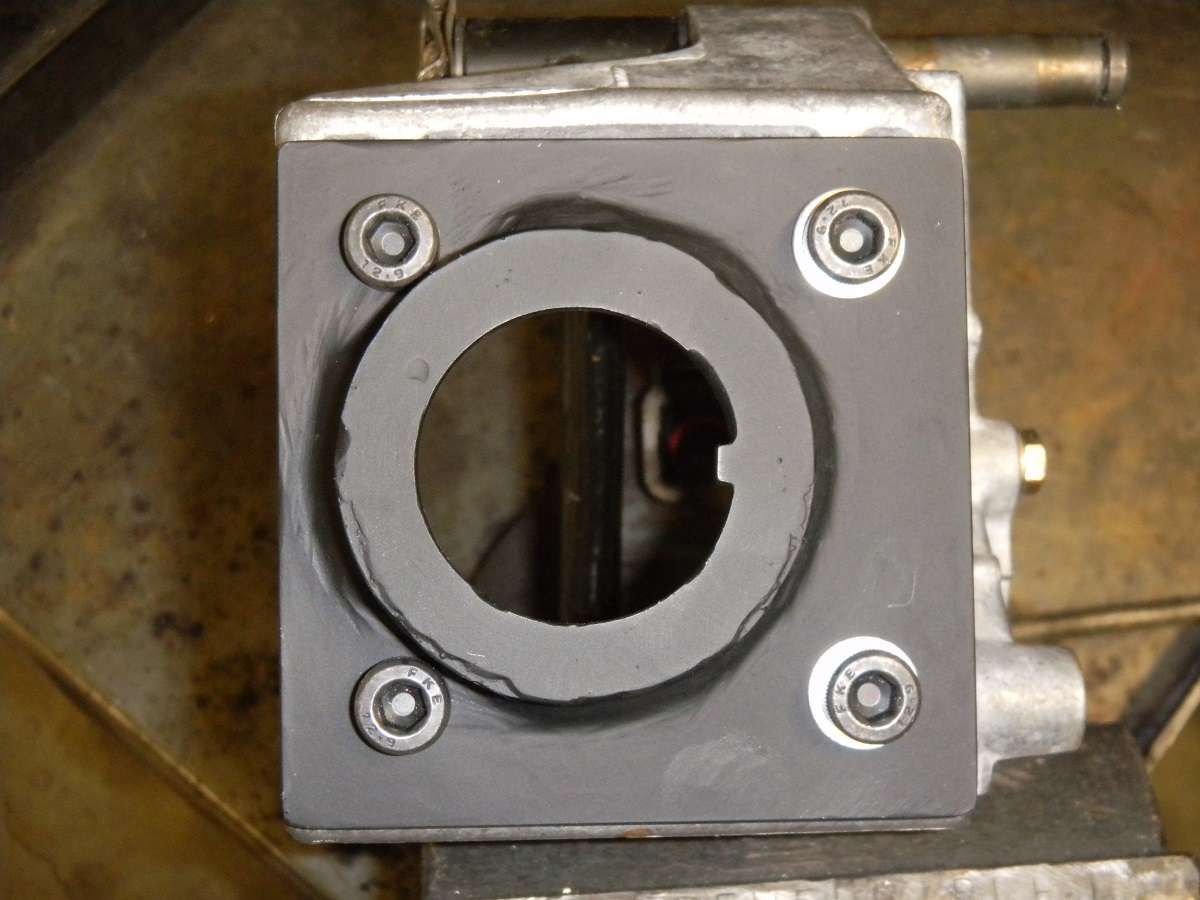
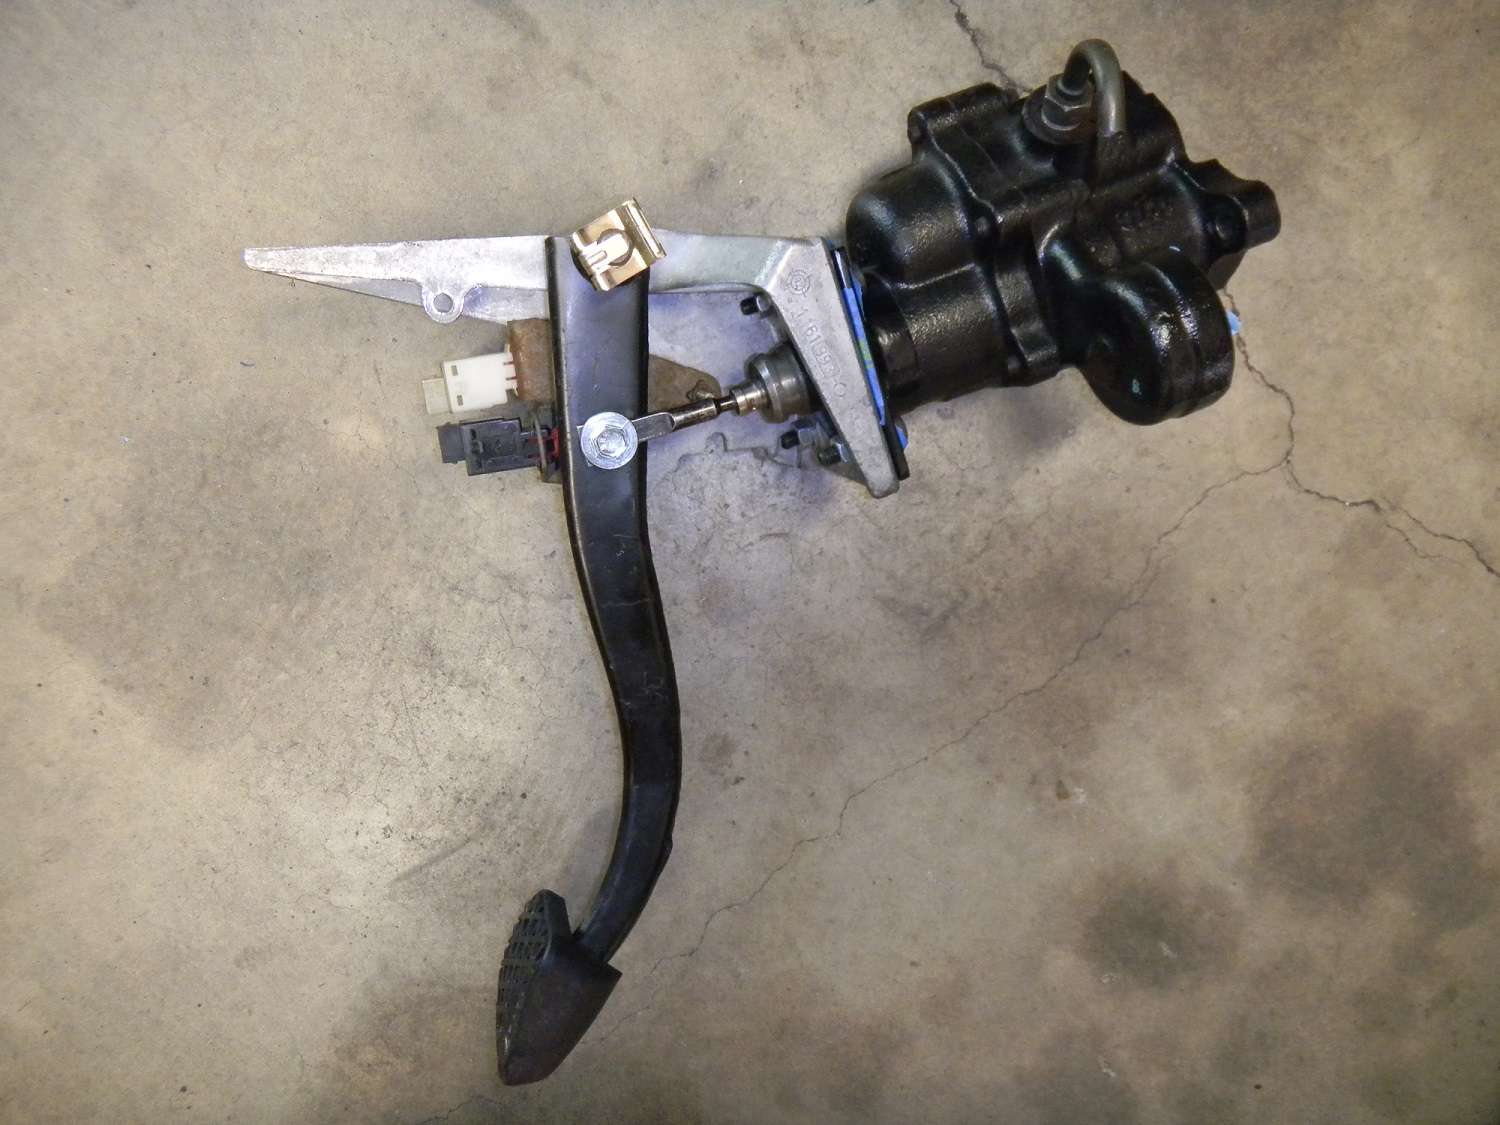
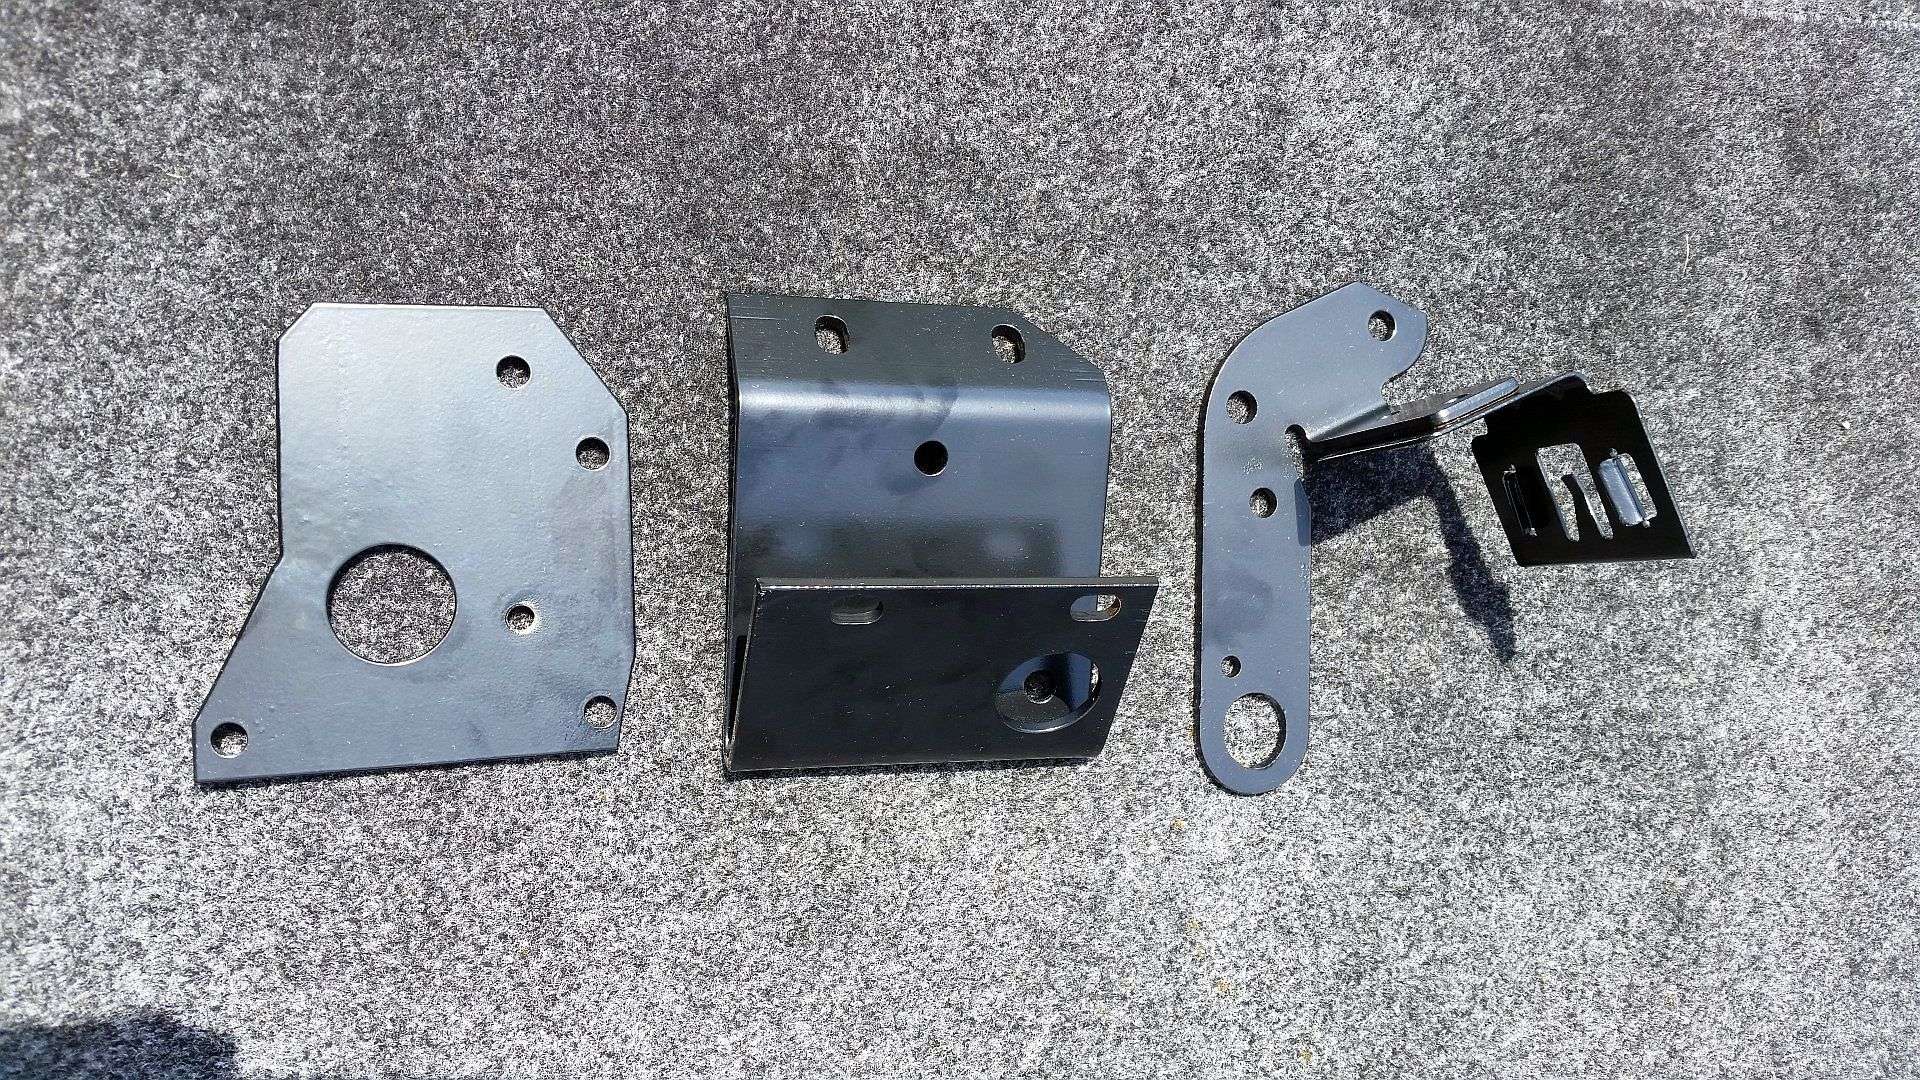
Some progress on the hydroboost mount. I am having something fabbed up from steel. Here's a preview. It'll retain the Mustang brake input rod using a shoulder bolt to attach to the side of the brake pedal. As you can see in the pic, the mount is offset slightly on the plate, which allows the shoulder bolt to align properly with the pedal and will hopefully prevent interference between the master cylinder and the strut tower. More info to come.
Just dropped the modified subframe, JTR motor mounts and valve covers at the powder coaters. I brought the LS2 power steering reservoir bracket too, since it was all cruddy.
Tipsy
Just dropped the modified subframe, JTR motor mounts and valve covers at the powder coaters. I brought the LS2 power steering reservoir bracket too, since it was all cruddy.
Tipsy
Last edited by TipsyMcStagger; 06-10-2014 at 03:36 PM.
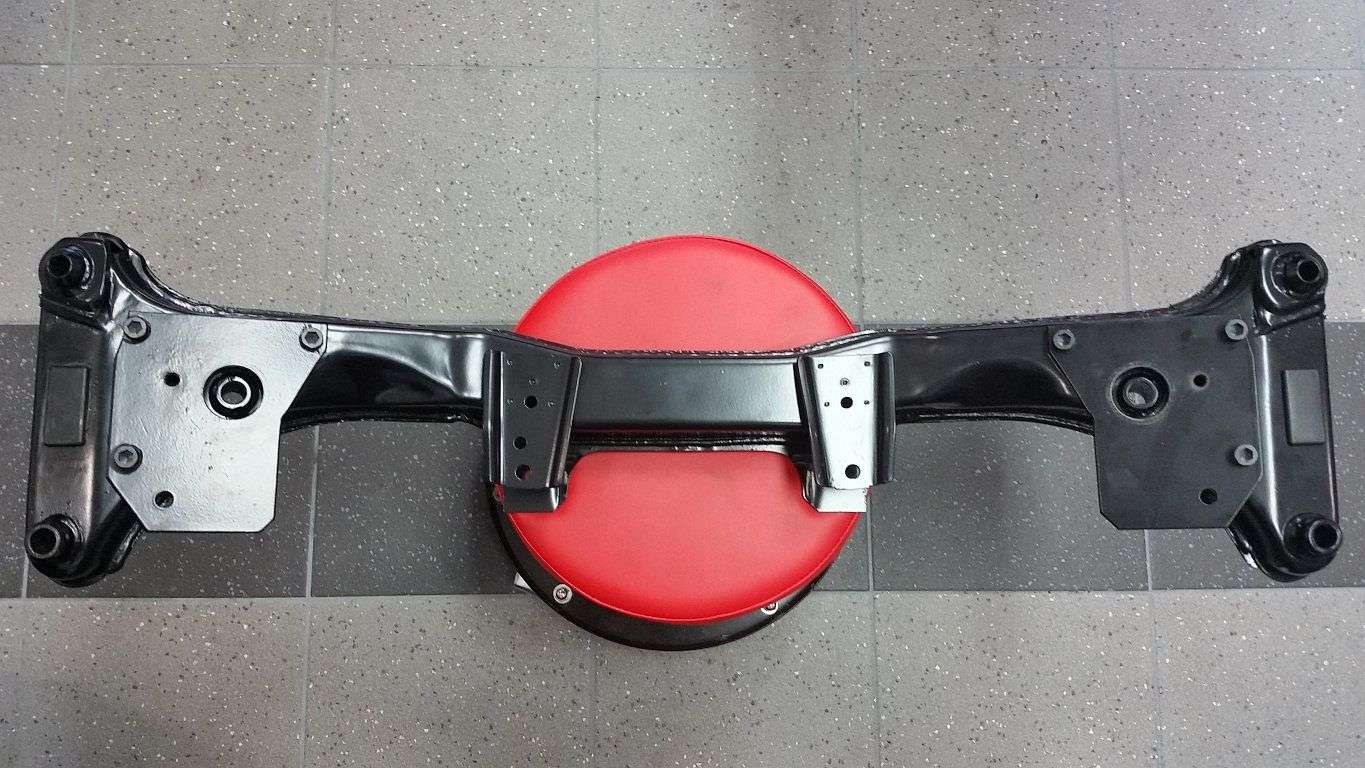
 06-12-2014, 04:20 PM
#50
Brought a few bits in for powder coating Tuesday afternoon and they were ready for pickup Wednesday evening. Very nice attention to detail. All of the threads were protected (even the nutserts in the subframe for the x-brace).
I think I'll start to disassemble the front end now that I have my springs, lower control arms, struts and the everything powder coated.
Tipsy


I think I'll start to disassemble the front end now that I have my springs, lower control arms, struts and the everything powder coated.
Tipsy
06-13-2014, 06:22 PM
#51
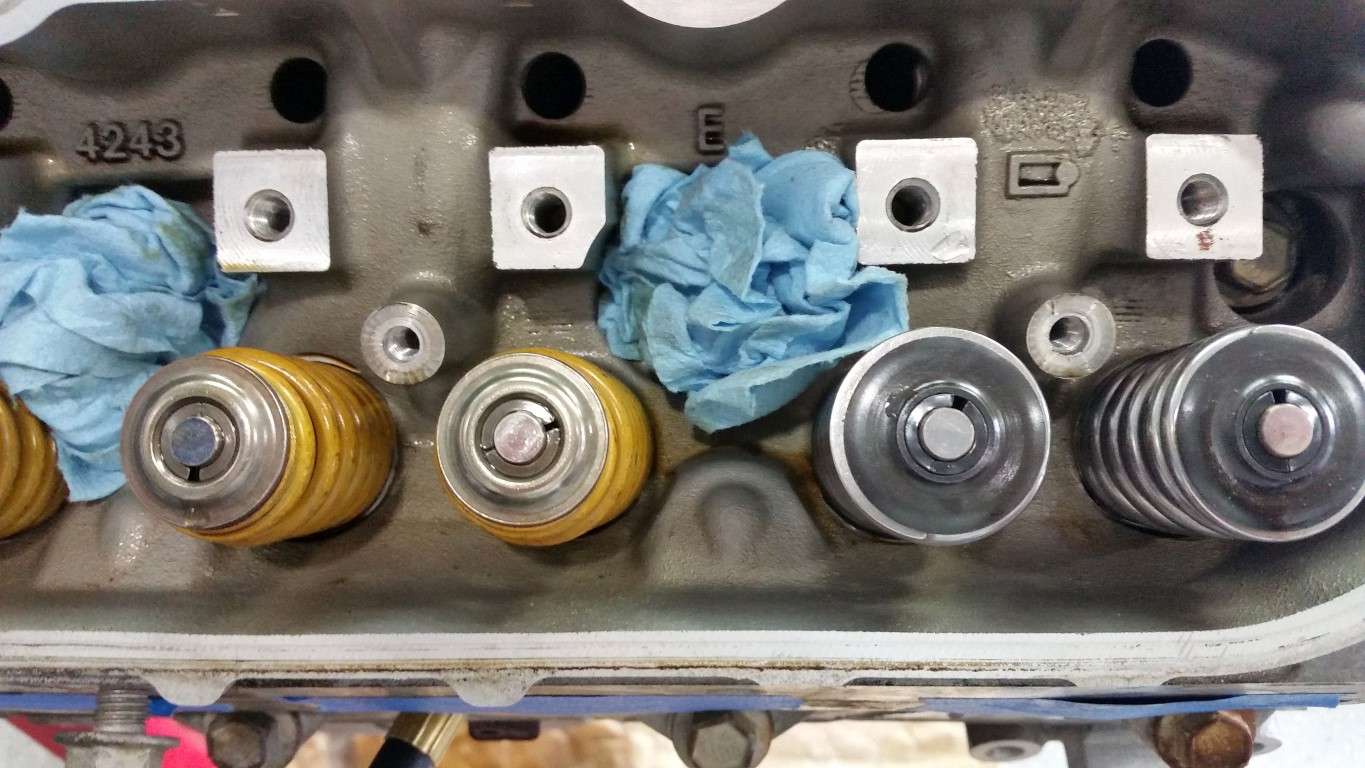
Got the valve springs installed today. First time I've done that. As with everything, there was a bit of a learning curve. To keep the valves from falling into the cylinder, I used compressed air. But on the first cylinder, it leaked down so quickly, my 30 gallon compressor couldn't keep up. It was running constantly because it could never reach the switch-off pressure. After a bit of thought, I figured that after sitting for a year or more, perhaps the rings were too dry to make a good seal. So I gave each cylinder a few squirts of oil, cranked the engine over by hand several times and tried again. It worked! This time, it took about 10 minutes or so for the cylinder to leak down enough for the compressor to kick-on.
There was a bit of a learning curve with the Proform valve spring compressor as well. The first cylinder took nearly half an hour because I was having trouble keeping the valves centered in the retainer, which made it difficult to insert the locks. Ultimately, I learned it was better to to use a ratcheting combination wrench to compress the spring, instead of a socket wrench. It just provided more control to keep the springs positioned properly. By the last cylinder, I was down to five minutes.
Tipsy
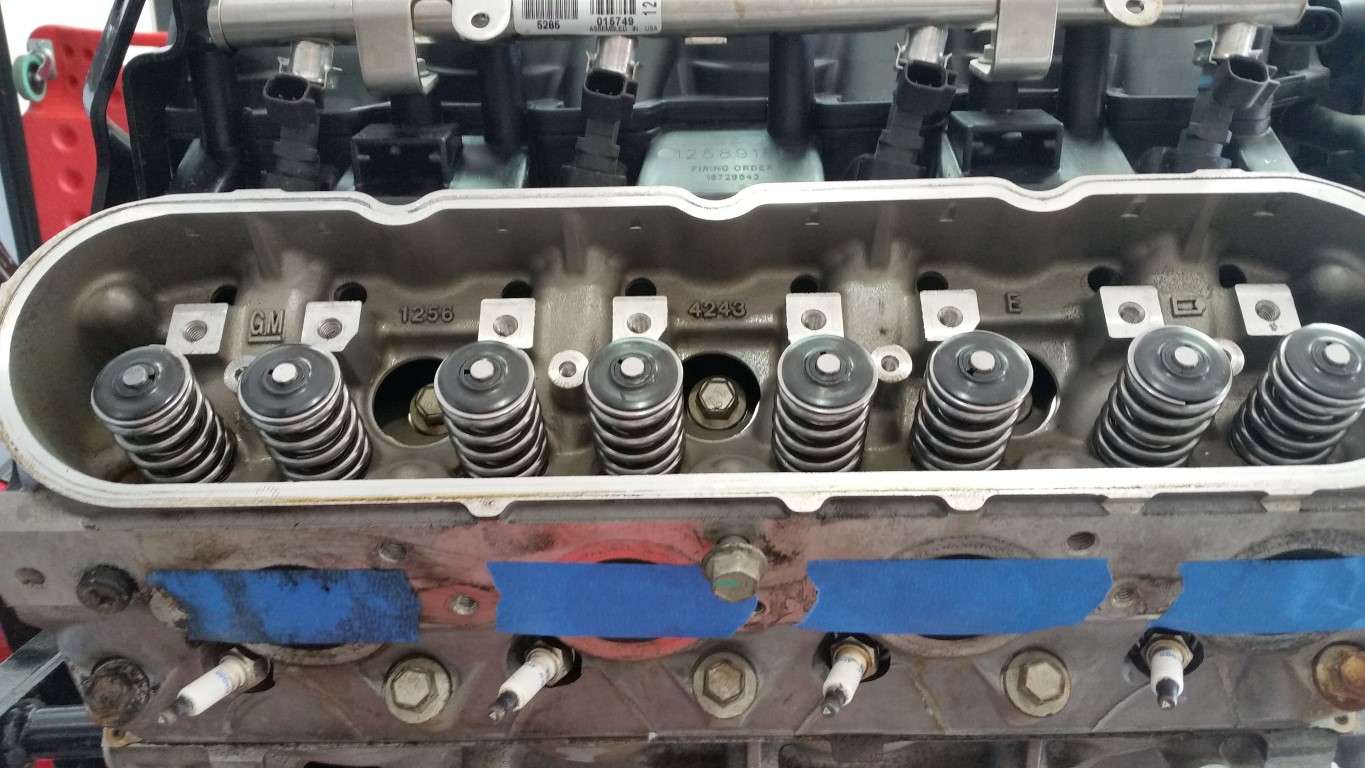
 06-16-2014, 08:13 PM
#53
Today's accomplishment was spending money  I've never been too big into aftermarket wheels, much preferring the OEM look. But my German-car buddy's have told me that DS1's and DS2's are very soft and bend easily. They warned me to keep away. I like LTW's, which are known to be very strong. But finding a decent set is not so easy these days.
So, I picked up this set of BBS RG-R's. They are in very good shape, though the tires are pretty much worthless and they need center caps. I'm not a huge fan of the polished lips but I'll give it a while to grow on me. I might take some very fine steel wool to the lips. We'll see.
It started pouring on my way home, so all I have is the crappy CL picture.
Tipsy
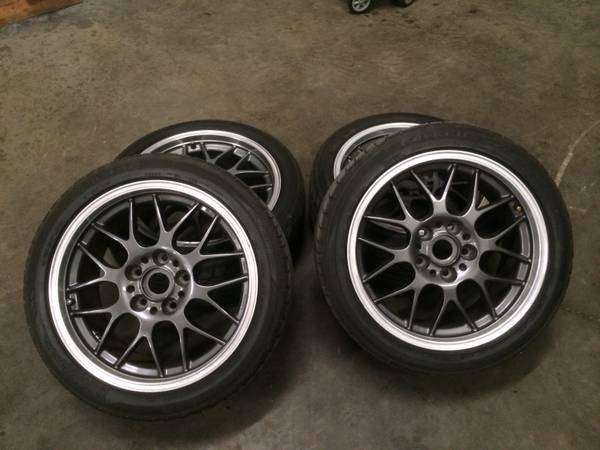
I've never been too big into aftermarket wheels, much preferring the OEM look. But my German-car buddy's have told me that DS1's and DS2's are very soft and bend easily. They warned me to keep away. I like LTW's, which are known to be very strong. But finding a decent set is not so easy these days.So, I picked up this set of BBS RG-R's. They are in very good shape, though the tires are pretty much worthless and they need center caps. I'm not a huge fan of the polished lips but I'll give it a while to grow on me. I might take some very fine steel wool to the lips. We'll see.
It started pouring on my way home, so all I have is the crappy CL picture.
Tipsy

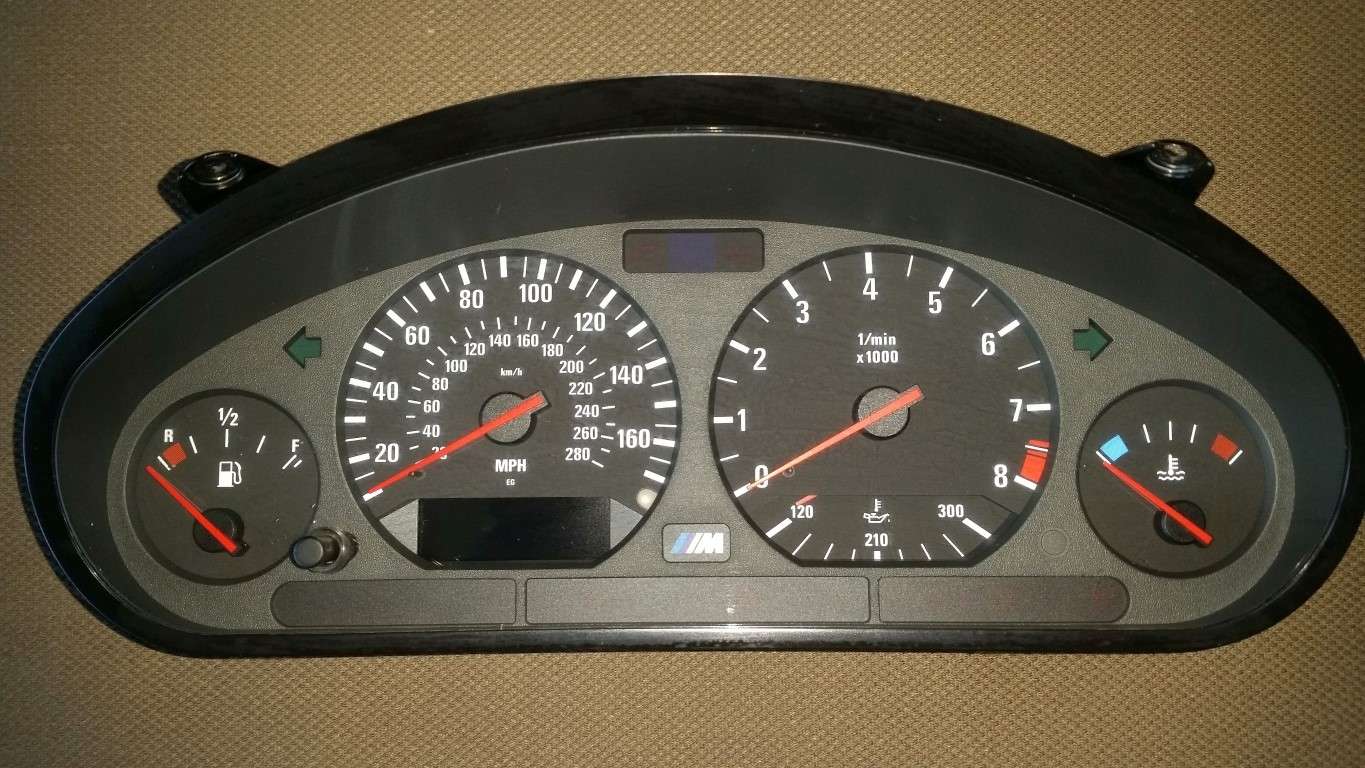
 07-23-2014, 04:55 PM
#57
Just got back from a month on the road, so no real progress. But I picked up this Euro M3 cluster on eBay, shipped from Northern Ireland. MPH and the oil temp scale is in Fahrenheit.
I've got a couple of weeks off and I'm ready to get back at it. Next up is relocating the ABS pump and bending new brake lines. The conundrum is that I don't yet have my headers and I'm a bit leery of relocating the pump and bending new lines without knowing for sure that the new position will adequately clear the headers. Not really sure whether I should put this off until the headers are available.
Tipsy
07-23-2014, 05:23 PM
#58

Just a small update: I'd been away for nearly month and I'm only here for five days before I have to travel again, so I wanted to get something done.
I can't push the car out of the garage without having it roll downhill on my sloped driveway. Without some help to push it back into the garage, my hands are kind of tied. There's no room in front of the car while it's in the garage. I will eventually use a winch to pull the car back into the garage but I still need to install some kind of anchor into the garage floor before I can do so.
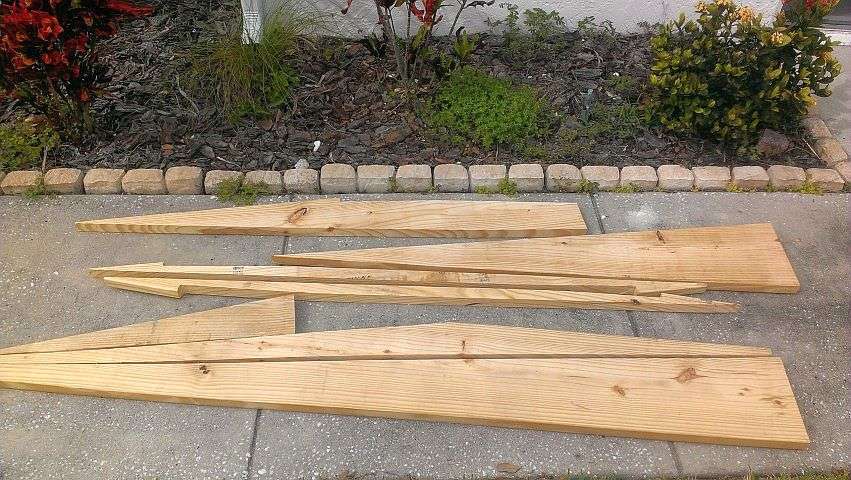
So, I spent half of yesterday and most of today building ramps to extend the plane of the garage floor over the sloped driveway, so I can push the car back and keep it level.
Building the stringers was a bit tricky because the slope of the driveway is not constant. It's steeper at the threshold and then flattens out. It took some trial and error (and some wasted lumber) to get a satisfactory stringer shape.
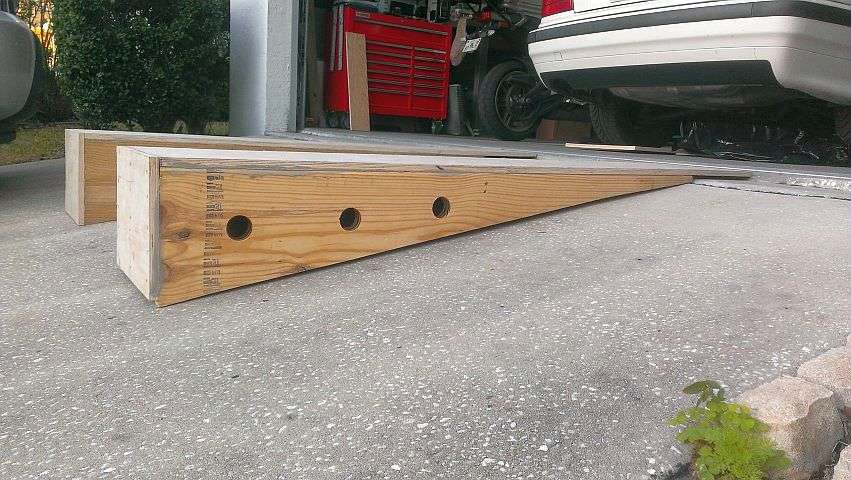
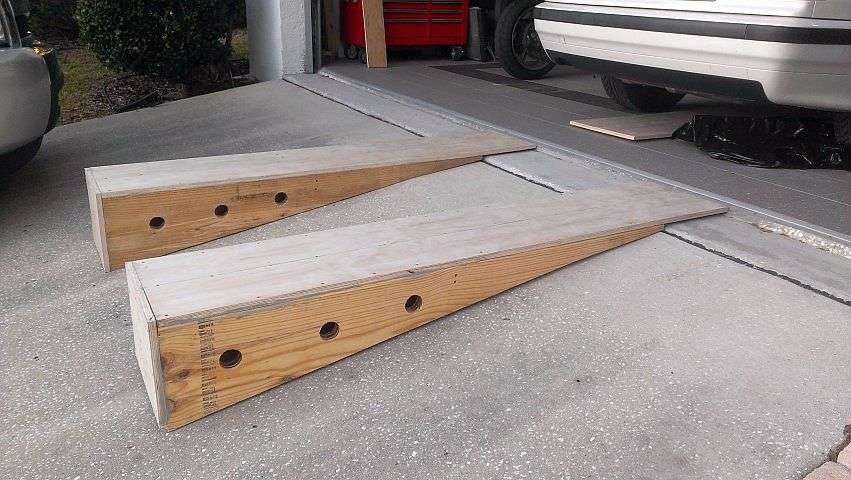
I still need to install some kind of chock on the back of the ramps to keep the car from rolling off, but they're basically finished. They're heavy, but they're strong. They're made from 2x12's and 3/4" plywood with a lot of PL Premium and screws. The holes are my sad attempt to make them lighter. It was a pointless endeavor.
I also got my cam/valve springs/oil pump/timing chain/oil pan, so I'd like to get those installed in the LS2 when I'm back in town.
Figuring out the stringers:

Some waste - trial and error:
Just need chocks:
I can't push the car out of the garage without having it roll downhill on my sloped driveway. Without some help to push it back into the garage, my hands are kind of tied. There's no room in front of the car while it's in the garage. I will eventually use a winch to pull the car back into the garage but I still need to install some kind of anchor into the garage floor before I can do so.
So, I spent half of yesterday and most of today building ramps to extend the plane of the garage floor over the sloped driveway, so I can push the car back and keep it level.
Building the stringers was a bit tricky because the slope of the driveway is not constant. It's steeper at the threshold and then flattens out. It took some trial and error (and some wasted lumber) to get a satisfactory stringer shape.
I still need to install some kind of chock on the back of the ramps to keep the car from rolling off, but they're basically finished. They're heavy, but they're strong. They're made from 2x12's and 3/4" plywood with a lot of PL Premium and screws. The holes are my sad attempt to make them lighter. It was a pointless endeavor.
I also got my cam/valve springs/oil pump/timing chain/oil pan, so I'd like to get those installed in the LS2 when I'm back in town.
Figuring out the stringers:
Some waste - trial and error:
Just need chocks:
Hahah thats great. I remember drawing up some good oL blue prints in microsoft paint for someone wanting to do this.
 07-25-2014, 12:48 PM
#60
The tile is called AutoStone. It's made for the automotive industry and is intended for use in dealership service areas, etc. It's extremely durable. I've dropped tools an even tried to drill a hole to install a floor anchor (using a proper Bosch tile bit) and nothing has done so much as left a mark.
I'm not sure where it's available. I found it on CL from an installer who had just finished an installation at a Mercedes dealership here in Tampa. He had overage and I got it for a steal at $1 sq ft!
Tipsy
I'm not sure where it's available. I found it on CL from an installer who had just finished an installation at a Mercedes dealership here in Tampa. He had overage and I got it for a steal at $1 sq ft!
Tipsy