
My First BMW – My First Swap – LS2/T56 into an E36


 09-02-2014, 06:24 PM
#64
Not too much to report. The headers arrived from JTR/Sanderson last week. These are the latest revision. I opted for uncoated headers. I figured they'll get scratched during the multiple stages of test fitting, so I'll have them coated locally when ready. I've got a bunch of time off but it's been more than 100F in the garage and I can't motivate to deal with the heat right now.
I disassembled my Euro M3 cluster in the air conditioned comfort of my kitchen to install a set of eBay trim rings, but after an hour plus of frustration, I gave up. The rings are supposed to snap-in but they simply don't fit. I'm not a big fan of chrome...in fact I hate it. But in this one instance, I think it adds some nice flair to an otherwise plain-Jane cluster. I was thinking maybe I'd keep an eye open for a cheap Z3 cluster with the trim rings factory installed. I can simply install my Euro cluster into the Z3 housing.
I also think I've decided to relocate the ABS pump to the frame rail, more or less in the same position others have chosen. Since I'm using a Mustang hydroboost, which frees up some space compared to the stock vacuum booster, I'd considered sliding-up the pump a bit above the stock location. But I don't weld and it seems like more trouble than it's worth to devise a mounting solution without the ability to weld. The Vorshlag bracket atop the frame rail seems to make more sense.
I'll need to get some tools to bend the brake lines. I was looking at this set from Eastwood. Anyone have any experience with these? I'm not sure what size the stock E36 lines are but the Eastwood forming plies are for 3/6" and 1/4" tubing.
I also spoke with Jared at Current Performance wring, which is about five minutes from here. I think I'm going to have him convert my factory LS2 harness to stand alone. I'd gone back and forth about doing this myself but I figure I might as well take advantage of their proximity and have it done once and done right. I'll probably ask them to add wires for the BMW water temp sensor (for the factory dash gauge) and the BMW oil temp sensor (for the Euro oil temp gauge). I'm pretty sure I'm going to install an Aeroforce Interceptor, which can display two user selectable parameters at a time. This way, I can have real time information utilizing the GM oil pressure sensor, water temp senor, etc. I'm nearly certain the oil sensor on the rear of the manifold provides actual oil pressure to the E40 PCM, vs. simply activating a dash light, as on the LS1.
I'll also have Jared flash an '05 SSR OS onto my GTO E40, so I can hook-up DBW cruise control. I'll just need to use an SSR/Trailblazer pedal, which I already have.
Tipsy
Last edited by TipsyMcStagger; 09-02-2014 at 07:25 PM.

 09-02-2014, 09:49 PM
#67
Thanks guys. I'm doing my best. I'm sure any of you could do just as well. I haven't done much in the way of fabrication...just a lot of cleaning, grinding and modifying.
One day, I need to learn to weld. When you can weld, you can create.
Tipsy
One day, I need to learn to weld. When you can weld, you can create.
Tipsy
 09-08-2014, 01:01 PM
#69
Not too much to report. The headers arrived from JTR/Sanderson last week. These are the latest revision. I opted for uncoated headers. I figured they'll get scratched during the multiple stages of test fitting, so I'll have them coated locally when ready. I've got a bunch of time off but it's been more than 100F in the garage and I can't motivate to deal with the heat right now.
I disassembled my Euro M3 cluster in the air conditioned comfort of my kitchen to install a set of eBay trim rings, but after an hour plus of frustration, I gave up. The rings are supposed to snap-in but they simply don't fit. I'm not a big fan of chrome...in fact I hate it. But in this one instance, I think it adds some nice flair to an otherwise plain-Jane cluster. I was thinking maybe I'd keep an eye open for a cheap Z3 cluster with the trim rings factory installed. I can simply install my Euro cluster into the Z3 housing.
I also think I've decided to relocate the ABS pump to the frame rail, more or less in the same position others have chosen. Since I'm using a Mustang hydroboost, which frees up some space compared to the stock vacuum booster, I'd considered sliding-up the pump a bit above the stock location. But I don't weld and it seems like more trouble than it's worth to devise a mounting solution without the ability to weld. The Vorshlag bracket atop the frame rail seems to make more sense.
I'll need to get some tools to bend the brake lines. I was looking at this set from Eastwood. Anyone have any experience with these? I'm not sure what size the stock E36 lines are but the Eastwood forming plies are for 3/6" and 1/4" tubing.
I also spoke with Jared at Current Performance wring, which is about five minutes from here. I think I'm going to have him convert my factory LS2 harness to stand alone. I'd gone back and forth about doing this myself but I figure I might as well take advantage of their proximity and have it done once and done right. I'll probably ask them to add wires for the BMW water temp sensor (for the factory dash gauge) and the BMW oil temp sensor (for the Euro oil temp gauge). I'm pretty sure I'm going to install an Aeroforce Interceptor, which can display two user selectable parameters at a time. This way, I can have real time information utilizing the GM oil pressure sensor, water temp senor, etc. I'm nearly certain the oil sensor on the rear of the manifold provides actual oil pressure to the E40 PCM, vs. simply activating a dash light, as on the LS1.
I'll also have Jared flash an '05 SSR OS onto my GTO E40, so I can hook-up DBW cruise control. I'll just need to use an SSR/Trailblazer pedal, which I already have.
Tipsy
I disassembled my Euro M3 cluster in the air conditioned comfort of my kitchen to install a set of eBay trim rings, but after an hour plus of frustration, I gave up. The rings are supposed to snap-in but they simply don't fit. I'm not a big fan of chrome...in fact I hate it. But in this one instance, I think it adds some nice flair to an otherwise plain-Jane cluster. I was thinking maybe I'd keep an eye open for a cheap Z3 cluster with the trim rings factory installed. I can simply install my Euro cluster into the Z3 housing.
I also think I've decided to relocate the ABS pump to the frame rail, more or less in the same position others have chosen. Since I'm using a Mustang hydroboost, which frees up some space compared to the stock vacuum booster, I'd considered sliding-up the pump a bit above the stock location. But I don't weld and it seems like more trouble than it's worth to devise a mounting solution without the ability to weld. The Vorshlag bracket atop the frame rail seems to make more sense.
I'll need to get some tools to bend the brake lines. I was looking at this set from Eastwood. Anyone have any experience with these? I'm not sure what size the stock E36 lines are but the Eastwood forming plies are for 3/6" and 1/4" tubing.
I also spoke with Jared at Current Performance wring, which is about five minutes from here. I think I'm going to have him convert my factory LS2 harness to stand alone. I'd gone back and forth about doing this myself but I figure I might as well take advantage of their proximity and have it done once and done right. I'll probably ask them to add wires for the BMW water temp sensor (for the factory dash gauge) and the BMW oil temp sensor (for the Euro oil temp gauge). I'm pretty sure I'm going to install an Aeroforce Interceptor, which can display two user selectable parameters at a time. This way, I can have real time information utilizing the GM oil pressure sensor, water temp senor, etc. I'm nearly certain the oil sensor on the rear of the manifold provides actual oil pressure to the E40 PCM, vs. simply activating a dash light, as on the LS1.
I'll also have Jared flash an '05 SSR OS onto my GTO E40, so I can hook-up DBW cruise control. I'll just need to use an SSR/Trailblazer pedal, which I already have.
Tipsy
As for sizing, I believe the OE BMW lines are 4.75 mm (.187") - pretty much identical to 3/16".
09-08-2014, 05:17 PM
#70
About the eastwood tubing benders - I have that kit. The bender works fine, but the pliers are garbage. No matter what I tried, I couldn't get them to keep from kinking / denting / marking up the tubing. The tighter the radius is, the more pronounced the problem becomes. For that reason, I wouldn't recommend using them.
As for sizing, I believe the OE BMW lines are 4.75 mm (.187") - pretty much identical to 3/16".
As for sizing, I believe the OE BMW lines are 4.75 mm (.187") - pretty much identical to 3/16".
Tipsy
12-06-2014, 01:37 PM
#71
The ABS pump needs to be relocated for header clearance and I'm just about done with the brake lines. But I stopped short of completing the last line while I contemplate scraping it all and starting from scratch. My main concern is the quality (or lack thereof) of the flares. Flaring tools come in two varieties more or less; $25 Chinese manual flaring tools or $200-$300+ "quality" flaring tools. I've been using the I bought from Amazon.
Being that this was my first time bending and flaring, I did a lot of reading and watched a bunch of Youtube videos. It seems a common criticism of the manual flaring tools is that the tubing clamp doesn't hold the line securely enough and allows the line slip while the die is tightened. The OTC tool doesn't have this problem. In fact, it seems to hold "too" well. The clamp is knurled and it's tearing the **** out of the Poly-Armour brake line. It's also leaves two small "nubs" or tabs just under the flare which prevents the fitting from sitting fully flush against the base of the flare. I've installed each line several times and it seems like the "tabs" get "squished" in the ABS pump or union when the lines are tightened down, but it's just sloppy. The knurling also leaves lots of little "strands" of the Poly-Armour coating...almost like green lint.
Here's a couple of pictures showing the results of the knurling:


My next concern is that each flare is ever so slightly untrue, which I can't really illustrate in a picture with my cell phone camera. It appears that when the die is bottomed out, it's not sitting fully flush against the clamp. It happens every time. The top of the die will have a 1/32" to 1/16" gap while the bottom of the die is in contact with the clamp, preventing any further tightening. And although I've reamed the tubing prior to falring, the resulting orifice is smaller than the factory flares, and somewhat inconsistent.
Factory on the Left. OTC flare on the right:

Here's the die fully tightened. The bottom of the die (which you can't see) is in contact with the clamp. The top is just a hair away from the clamp:

I cut and flared the factory line that goes to the right front brake. Unfortunately, the union ended up just under the clutch hard line. It it really hard to flare a line while it's in the car so that's where the union ended up. I'll protect it with some split fuel line, if I keep it this way.

I tried to cut and flare the line going to the drivers front brake but the line clamp bent the line just enough to keep the fitting from sliding down to the flare, so I had to make a new left front brake line:

So this is pretty much where am at right now:


I really don't know enough about fluid dynamics to know what kind of an effect the inconsistent orifice sizes can have of the operation of the brakes. And I'm very concerned that each flare is less than square. So I'm very concerned I might have leaks. Unfortunately, the only way to know if there are leaks is to get the hydroboost and master cylinder installed and bleed and pressurize the system.
I'm leaning toward buying the Eastwood flaring tool (on sale for $200) and starting over from scratch. Or maybe even going over the top with the ($300). I know I won't have much use for a flaring tool in the future, but the flares I've made so far driving me nuts.
I have to go fly for a couple of days, so I'll give it some thought.
Tipsy
Being that this was my first time bending and flaring, I did a lot of reading and watched a bunch of Youtube videos. It seems a common criticism of the manual flaring tools is that the tubing clamp doesn't hold the line securely enough and allows the line slip while the die is tightened. The OTC tool doesn't have this problem. In fact, it seems to hold "too" well. The clamp is knurled and it's tearing the **** out of the Poly-Armour brake line. It's also leaves two small "nubs" or tabs just under the flare which prevents the fitting from sitting fully flush against the base of the flare. I've installed each line several times and it seems like the "tabs" get "squished" in the ABS pump or union when the lines are tightened down, but it's just sloppy. The knurling also leaves lots of little "strands" of the Poly-Armour coating...almost like green lint.
Here's a couple of pictures showing the results of the knurling:
My next concern is that each flare is ever so slightly untrue, which I can't really illustrate in a picture with my cell phone camera. It appears that when the die is bottomed out, it's not sitting fully flush against the clamp. It happens every time. The top of the die will have a 1/32" to 1/16" gap while the bottom of the die is in contact with the clamp, preventing any further tightening. And although I've reamed the tubing prior to falring, the resulting orifice is smaller than the factory flares, and somewhat inconsistent.
Factory on the Left. OTC flare on the right:
Here's the die fully tightened. The bottom of the die (which you can't see) is in contact with the clamp. The top is just a hair away from the clamp:
I cut and flared the factory line that goes to the right front brake. Unfortunately, the union ended up just under the clutch hard line. It it really hard to flare a line while it's in the car so that's where the union ended up. I'll protect it with some split fuel line, if I keep it this way.
I tried to cut and flare the line going to the drivers front brake but the line clamp bent the line just enough to keep the fitting from sliding down to the flare, so I had to make a new left front brake line:
So this is pretty much where am at right now:
I really don't know enough about fluid dynamics to know what kind of an effect the inconsistent orifice sizes can have of the operation of the brakes. And I'm very concerned that each flare is less than square. So I'm very concerned I might have leaks. Unfortunately, the only way to know if there are leaks is to get the hydroboost and master cylinder installed and bleed and pressurize the system.
I'm leaning toward buying the Eastwood flaring tool (on sale for $200) and starting over from scratch. Or maybe even going over the top with the ($300). I know I won't have much use for a flaring tool in the future, but the flares I've made so far driving me nuts.
I have to go fly for a couple of days, so I'll give it some thought.
Tipsy
12-06-2014, 03:26 PM
#72
Staging Lane
Join Date: Jun 2013
Location: Austin, TX
Posts: 69
Likes: 0
Received 0 Likes
on
0 Posts
I used the Eastwoods flaring tool that I borrowed from a friend. That thing is awesome, I won't use anything else at this point. The instructions said to lubricate the tubing just a bit and this helps. Even then I had to clean up the flares with a bit of fine emery paper after flaring to make them nice and smooth. No leaks so far.
This is one of the reasons I paid for the Vorshlag lines, only required two cuts and flares.
This is one of the reasons I paid for the Vorshlag lines, only required two cuts and flares.
12-06-2014, 05:22 PM
#73
I used the Eastwoods flaring tool that I borrowed from a friend. That thing is awesome, I won't use anything else at this point. The instructions said to lubricate the tubing just a bit and this helps. Even then I had to clean up the flares with a bit of fine emery paper after flaring to make them nice and smooth. No leaks so far.
This is one of the reasons I paid for the Vorshlag lines, only required two cuts and flares.
This is one of the reasons I paid for the Vorshlag lines, only required two cuts and flares.
I'm considering springing for the Mastercool kit because it can be used to flare lines on the car. The Eastwood tool can only be used on a vise.
Tipsy
EDIT: ($63) looks interesting. Anyone here have experience with this type of flaring tool?
Last edited by TipsyMcStagger; 12-06-2014 at 05:47 PM.
12-09-2014, 08:16 PM
#74

A couple of things to try....
1. First cut the tubing with a cutter.
2. Insert the line into the clamp and just have the line barely protruding above the front side of the clamp.
3. Take a flat file and file the tube flush against the clamp.
4. Now use a ream and just ream the inside of the tubing slightly.
5. Now set the tubing up to the required height using the die.
6. Put some oil on the end of the tubing and start the process.
7. After you're finished, use the a wire wheel to help clean up the back side of the tubing where you have some marking and strands of coating.
8. Now go to install the line. Tighten the fitting fully, then back off a turn or so and retighten. You must do this at least 1-2 times in order to fully form the flare of the tubing to the fitting. Most don't know this.
Also of note, some of the cheap Chinese dies don't center the flaring screw dead nuts center on the die. In turn this would skew the flare and make it crooked. Either try a different die or chuck it up onto a lathe and just put a slight counter sink on the die to make sure the flare is hitting it squarely.
Let us know your results.
Doug
12-10-2014, 03:25 AM
#75
^ +1 to everything Doug said
And buy yourself a quality flaring tool. I gave the whole cheap flaring tool thing a shot and all it did was waste money. My first one was a Ridgid 377 and the flare quality was absolute crap. I ditched that and bought an Imperial tool and haven't looked back.
The mastercool would be a good choice on double flares.
Btw - check out this deburring tool. I have one and it's awesome - deburrs the inside of the tube on one side, and the outside of the tube on the other. Not sure if it would work on 3/16" / 4.75 mm line though, which is what I assume you are using for the brake stuff
http://www.grainger.com/product/RIDG...AS01?$smthumb$
Last edited by ckpitt55; 12-10-2014 at 03:30 AM.
12-10-2014, 09:18 AM
#76
A couple of things to try....
1. First cut the tubing with a cutter.
2. Insert the line into the clamp and just have the line barely protruding above the front side of the clamp.
3. Take a flat file and file the tube flush against the clamp.
4. Now use a ream and just ream the inside of the tubing slightly.
5. Now set the tubing up to the required height using the die.
6. Put some oil on the end of the tubing and start the process.
7. After you're finished, use the a wire wheel to help clean up the back side of the tubing where you have some marking and strands of coating.
8. Now go to install the line. Tighten the fitting fully, then back off a turn or so and retighten. You must do this at least 1-2 times in order to fully form the flare of the tubing to the fitting. Most don't know this.
Doug
I ordered the Eastwood Flaring tool to use on the bench. I'd like to cut the lines on the car to create a better transition between old and new. I can't use the Eastwood tool to flare those lines, so I ordered a Cal-Van 156 in-line flaring tool.
I wasn't happy with the cheap ream on the cheap tubing cutter so I ordered an SUR RM69 reamer. Finally, I've been using the Eastwood tri-head tubing bender which works well enough with some practice but it's not well suited for tight radius bends. For this, I ordered a Fragola 900501 bender. It's a bit spendy but it will create a 7/16" bend. Apparently, the Fragola 900501 is just a rebaged Imperial 364-FHA and can be had for a quite a bit less than the Fragola, but I'm being a bit impatient and want to try to get some work done prior to traveling this weekend.
Also, to cut the lines while they're on the car, where there's not a lot of room, I ordered a ratcheting cutter.
So pictorially, here's what's coming:


Last edited by TipsyMcStagger; 12-10-2014 at 09:27 AM.
 12-11-2014, 11:06 AM
#80
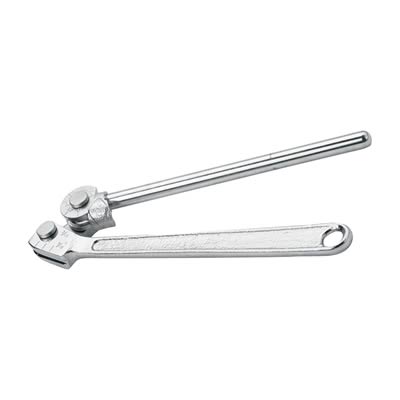
The Fragola 900501 bender arrived. As suspected, it's a repackaged Eastman Imperial 364-FH. So if you're not in a hurry, order the Imperial part number. It can be found for quite a bit less than the Fragola. (Fragola is about $75 from Summit - here's the Imperial 364-FH-03 for $43).
It's a little tough on the Poly-Armour coating but there's no way my tri-head bender could make two 90 degree bends this tight:
Tipsy


It's a little tough on the Poly-Armour coating but there's no way my tri-head bender could make two 90 degree bends this tight:
Tipsy
Last edited by TipsyMcStagger; 12-11-2014 at 11:37 AM.