
1967 Cougar build (over 500 pictures and videos)


 10-06-2014, 04:03 PM
#43
TECH Senior Member
Thread Starter
iTrader: (7)
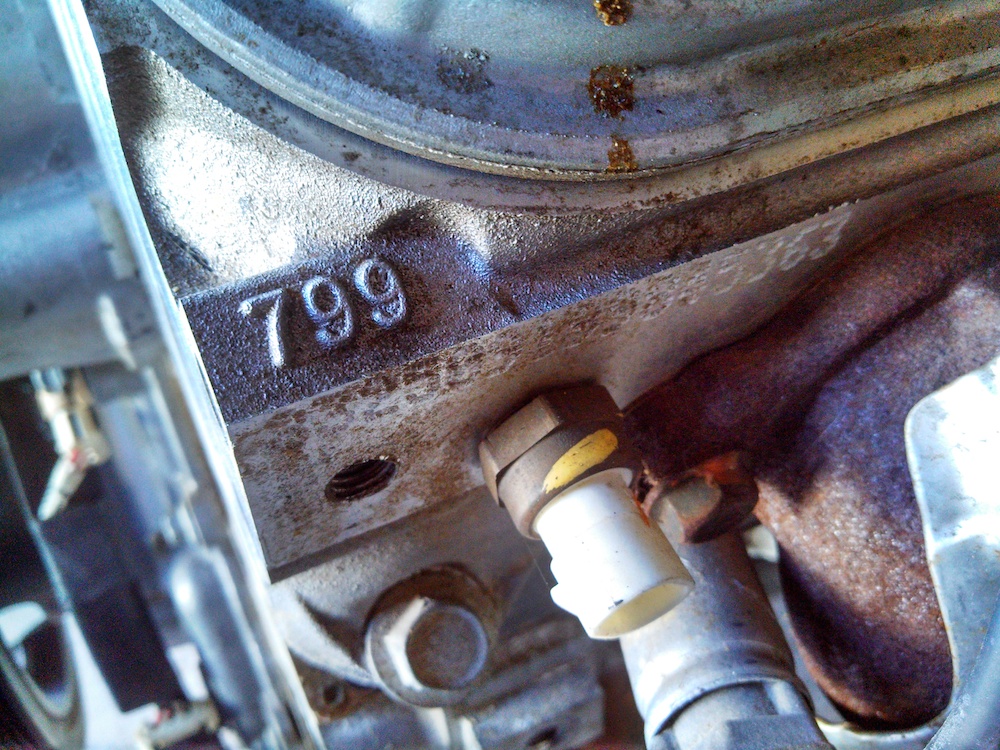
Well...I just got off the phone and pulled the trigger on a 2009 LH8. The LH8 is an aluminum block 5.3L with the good 799 heads and it does not have either the VVT or the AFM, which makes my life much easier. This engine is super clean and only has 368 miles on it. I probably paid a little too much, but you can't argue with a nearly new engine. Stay tuned for some pictures.
Andrew
Andrew
The following users liked this post:
Purcell169 (01-02-2024)
10-10-2014, 03:42 PM
#44
TECH Senior Member
Thread Starter
iTrader: (7)
Well...here it is. I am very pleased with what I got. This engine is exactly as advertised and I totally believe that it only has 386 miles on it. It was shipped on Wednesday and arrived at my door this afternoon. I'll get it mounted on an engine stand over the weekend and start collecting more parts.


If anyone is ever considering getting parts from a salvage yard, I can recommend Fierge Auto Parts in Quincy, IL with confidence. They were very nice to deal with.
Andrew
If anyone is ever considering getting parts from a salvage yard, I can recommend Fierge Auto Parts in Quincy, IL with confidence. They were very nice to deal with.
Andrew
10-11-2014, 09:29 AM
#45
12 Second Club
Join Date: Jan 2014
Location: 217
Posts: 565
Likes: 0
Received 0 Likes
on
0 Posts
Well...here it is. I am very pleased with what I got. This engine is exactly as advertised and I totally believe that it only has 386 miles on it. It was shipped on Wednesday and arrived at my door this afternoon. I'll get it mounted on an engine stand over the weekend and start collecting more parts.
If anyone is ever considering getting parts from a salvage yard, I can recommend Fierge Auto Parts in Quincy, IL with confidence. They were very nice to deal with.
Andrew
If anyone is ever considering getting parts from a salvage yard, I can recommend Fierge Auto Parts in Quincy, IL with confidence. They were very nice to deal with.
Andrew
10-11-2014, 09:46 PM
#46
TECH Senior Member
Thread Starter
iTrader: (7)
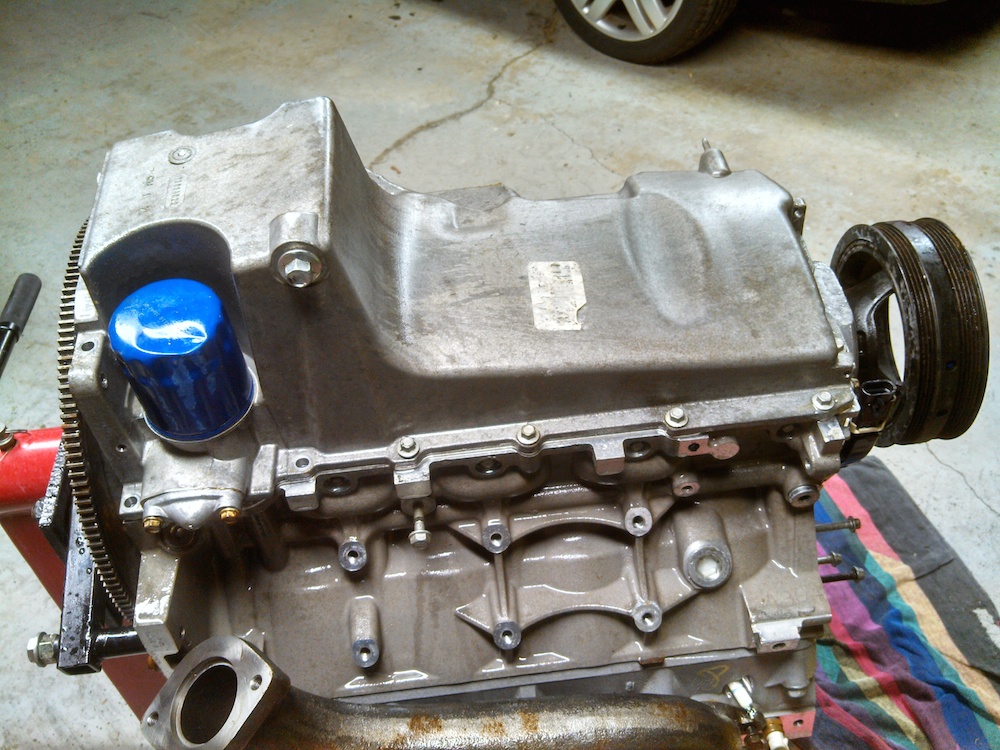
So I had a chance to mess around with the engine today. I got it off the pallet and mounted on an engine stand. This makes working on the engine much easier since I can roll it around and rotate it. I got the water pump off, it will be replaced by a LS2 Corvette style pump. The balancer will also be swapped over to a Corvette style unit. I like using the Corvette style accessories because the alternator will be mounted up high on the driver's side. Since this car doesn't have power steering, I will only need an alternator. Holley makes some really nice accessory brackets for these engines that are affordable and look very nice without having that bling...bling look.
I doused the engine with some Purple Power degreaser and took the intake off. After getting rid of a mouse nest under the intake it cleaned up pretty well:

I then flipped the engine upside down. This is the stock LH8 oil pan that GM actually markets for doing swaps into various older cars. Frankly it doesn't work really well in any application because the sump is fairly deep so it tends to stick down lower than the front crossmember on cars like 64-72 a-bodies and 1st gen Camaros. It obviously won't work on the Cougar because I need a front sump pan:

So off it goes:

These engines have a full length windage tray that does a very good job of keeping the oil down in the pan instead of slinging it up into the crank.
However, when using different oil pans, you have to get the matching windage tray. Since I plan on using the 2004-2006 GTO front sump pan, the windage tray has to go too:

Here is the GTO windage tray:

Here I have the GTO pan mounted along with the Hooker exhaust manifolds. These probably will hurt ultimate performance, but I am not looking to squeeze every last ounce of performance from this engine, so fitment is more important. I am also able to reuse the MLS exhaust manifold gaskets.

Here is a close-up of the valve train.
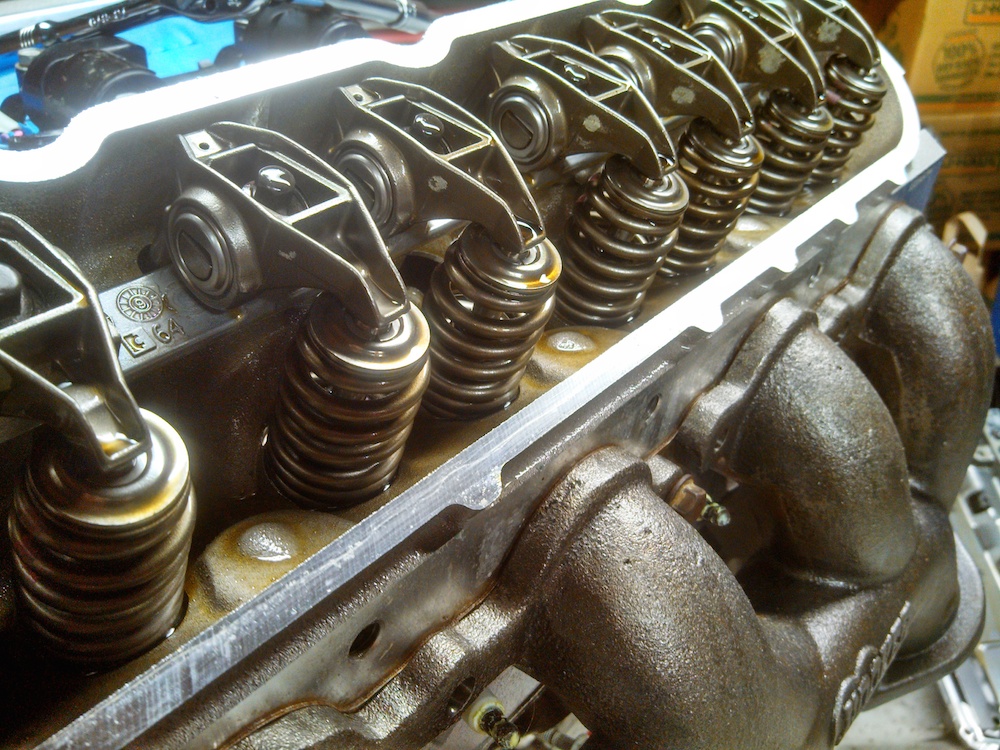
I will swap the springs out for stock LS9 springs and also use titanium retainers which will reduce valve train weight even further. This makes valve control easier and will allow me to raise the red-line. I plan on setting the rev-limiter in the 6750RPM range and shift at 6500rpm.
The current plan is to run the GM ASA cam. I know it is an older design but by all accounts it makes great mid-range and upper RPM power. It is also easy on the valve train since it was designed for endurance oval track racing. These cams also sound fantastic!

Time to start ordering some more parts...after my next paycheck...LOL
Andrew
I doused the engine with some Purple Power degreaser and took the intake off. After getting rid of a mouse nest under the intake it cleaned up pretty well:
I then flipped the engine upside down. This is the stock LH8 oil pan that GM actually markets for doing swaps into various older cars. Frankly it doesn't work really well in any application because the sump is fairly deep so it tends to stick down lower than the front crossmember on cars like 64-72 a-bodies and 1st gen Camaros. It obviously won't work on the Cougar because I need a front sump pan:
So off it goes:
These engines have a full length windage tray that does a very good job of keeping the oil down in the pan instead of slinging it up into the crank.
However, when using different oil pans, you have to get the matching windage tray. Since I plan on using the 2004-2006 GTO front sump pan, the windage tray has to go too:
Here is the GTO windage tray:
Here I have the GTO pan mounted along with the Hooker exhaust manifolds. These probably will hurt ultimate performance, but I am not looking to squeeze every last ounce of performance from this engine, so fitment is more important. I am also able to reuse the MLS exhaust manifold gaskets.
Here is a close-up of the valve train.
I will swap the springs out for stock LS9 springs and also use titanium retainers which will reduce valve train weight even further. This makes valve control easier and will allow me to raise the red-line. I plan on setting the rev-limiter in the 6750RPM range and shift at 6500rpm.
The current plan is to run the GM ASA cam. I know it is an older design but by all accounts it makes great mid-range and upper RPM power. It is also easy on the valve train since it was designed for endurance oval track racing. These cams also sound fantastic!
Time to start ordering some more parts...after my next paycheck...LOL
Andrew
The following users liked this post:
Purcell169 (01-02-2024)
10-17-2014, 02:00 AM
#47
On The Tree

Join Date: Sep 2013
Location: Silverton, Oregon
Posts: 108
Likes: 0
Received 0 Likes
on
0 Posts
Cool buildup. I'm in the process of putting a 4.8 in my '67 cougar. I'm considering using a bravada front chassis for an awd ride. Should make autox a blast.
10-17-2014, 06:57 PM
#48
TECH Senior Member
Thread Starter
iTrader: (7)
So spent a little time in the garage today. I specifically ordered the Hooker manifolds uncoated because I wasn't sure if they were going to work. Now that I know they fit great, I wanted to give them some protection so they wouldn't look like crap by spring.
On a tip from Ken, who has built some very nice cars, including a sweet 1966 Impala convertible:
https://ls1tech.com/forums/conversio...onversion.html
I ordered some spray on graphite lubricant:
http://smile.amazon.com/CRC-Graphite...y+crc+graphite
Ken used this on his Impala manifolds and the results were pretty stellar. The stuff is supposed to hold up to 850 degrees.
Here are the results:


The Hooker manifolds are also designed to use OEM hardware, so I took the studs off the truck manifolds and installed them in the Hooker manifolds:

Andrew
10-17-2014, 07:43 PM
#49

Great start on the engine........what pan are you going to use??
10-18-2014, 03:31 PM
#51
Manifolds still look like the day I put them on..............
10-20-2014, 04:52 PM
#53
TECH Senior Member
Thread Starter
iTrader: (7)
Ordered up a few specialty tool over the weekend and got some today.

There are some tools from SacCity Corvettes. The large one is used to align the rear cover and install the rear main seal, the middle one is used to align the front cover and install the seal, and the small one is used to align the oil pump. I didn't need them all but I figured they would be nice to have. Here is a video showing how the front cover tool works:
Andrew
The following users liked this post:
Purcell169 (01-02-2024)
10-25-2014, 12:12 PM
#54
TECH Senior Member
Thread Starter
iTrader: (7)
Not much actual progress, but I did get a few more goodies.
The Car Shop sells a couple of nice tools that make working on LS engines a little easier. I got their lift plate:

And I also got a little tool to keep the flywheel from turning:

Since I plan on swapping out the truck balancer in favor of a Corvette balancer, I also picked up an ARP balancer bolt:

More parts coming next month.
Andrew
The Car Shop sells a couple of nice tools that make working on LS engines a little easier. I got their lift plate:
And I also got a little tool to keep the flywheel from turning:
Since I plan on swapping out the truck balancer in favor of a Corvette balancer, I also picked up an ARP balancer bolt:
More parts coming next month.
Andrew
11-01-2014, 07:41 PM
#55
TECH Senior Member
Thread Starter
iTrader: (7)
Yesterday I ordered up a few goodies. I don't mind the coils on the valve covers, but the stock bracket that holds the coils is just hideous looking. So to add a little bling to the engine, I ordered a set of Holley valve covers in black:

The Holley valve covers really clean up the look of these engines.
I also pulled the trigger on the intake manifold base:

I also ordered up the stud kit:

Parts should be here next week and I can't wait to get them mocked up. I am thinking about having the manifold hard anodized.
Andrew
The Holley valve covers really clean up the look of these engines.
I also pulled the trigger on the intake manifold base:
I also ordered up the stud kit:
Parts should be here next week and I can't wait to get them mocked up. I am thinking about having the manifold hard anodized.
Andrew
11-02-2014, 09:35 AM
#59
12 Second Club
Join Date: Jan 2014
Location: 217
Posts: 565
Likes: 0
Received 0 Likes
on
0 Posts