
1967 Cougar build (over 500 pictures and videos)


The following users liked this post:
Project GatTagO (08-17-2022)
 08-17-2022, 09:40 AM
#1262
TECH Senior Member
Thread Starter
iTrader: (7)

Tire choice in classic sizes is pretty slim these days. BFGs are stupid expensive...Then there is Cooper....I wanted something that I can buy locally. I had a good experience with a local Discount Tire when I had them mount the drag radials last year.
I was looking on the Discount Tire website and found the Milestar brand. This is their Streetsteel tire, which they make specifically in common muscle car sizes. They seem quiet and the ride is improved, mostly because of the higher aspect ration than what I had with the 16" steel wheels.
Andrew
I was looking on the Discount Tire website and found the Milestar brand. This is their Streetsteel tire, which they make specifically in common muscle car sizes. They seem quiet and the ride is improved, mostly because of the higher aspect ration than what I had with the 16" steel wheels.
Andrew
The following users liked this post:
G Atsma (08-17-2022)
08-28-2022, 06:35 PM
#1263
TECH Senior Member
Thread Starter
iTrader: (7)
It is that time of year again, and I am getting the Cougar ready for Holley LS Fest.
A little persuasion on the inside of the door with a huge pry bar got the big dent out of the door.
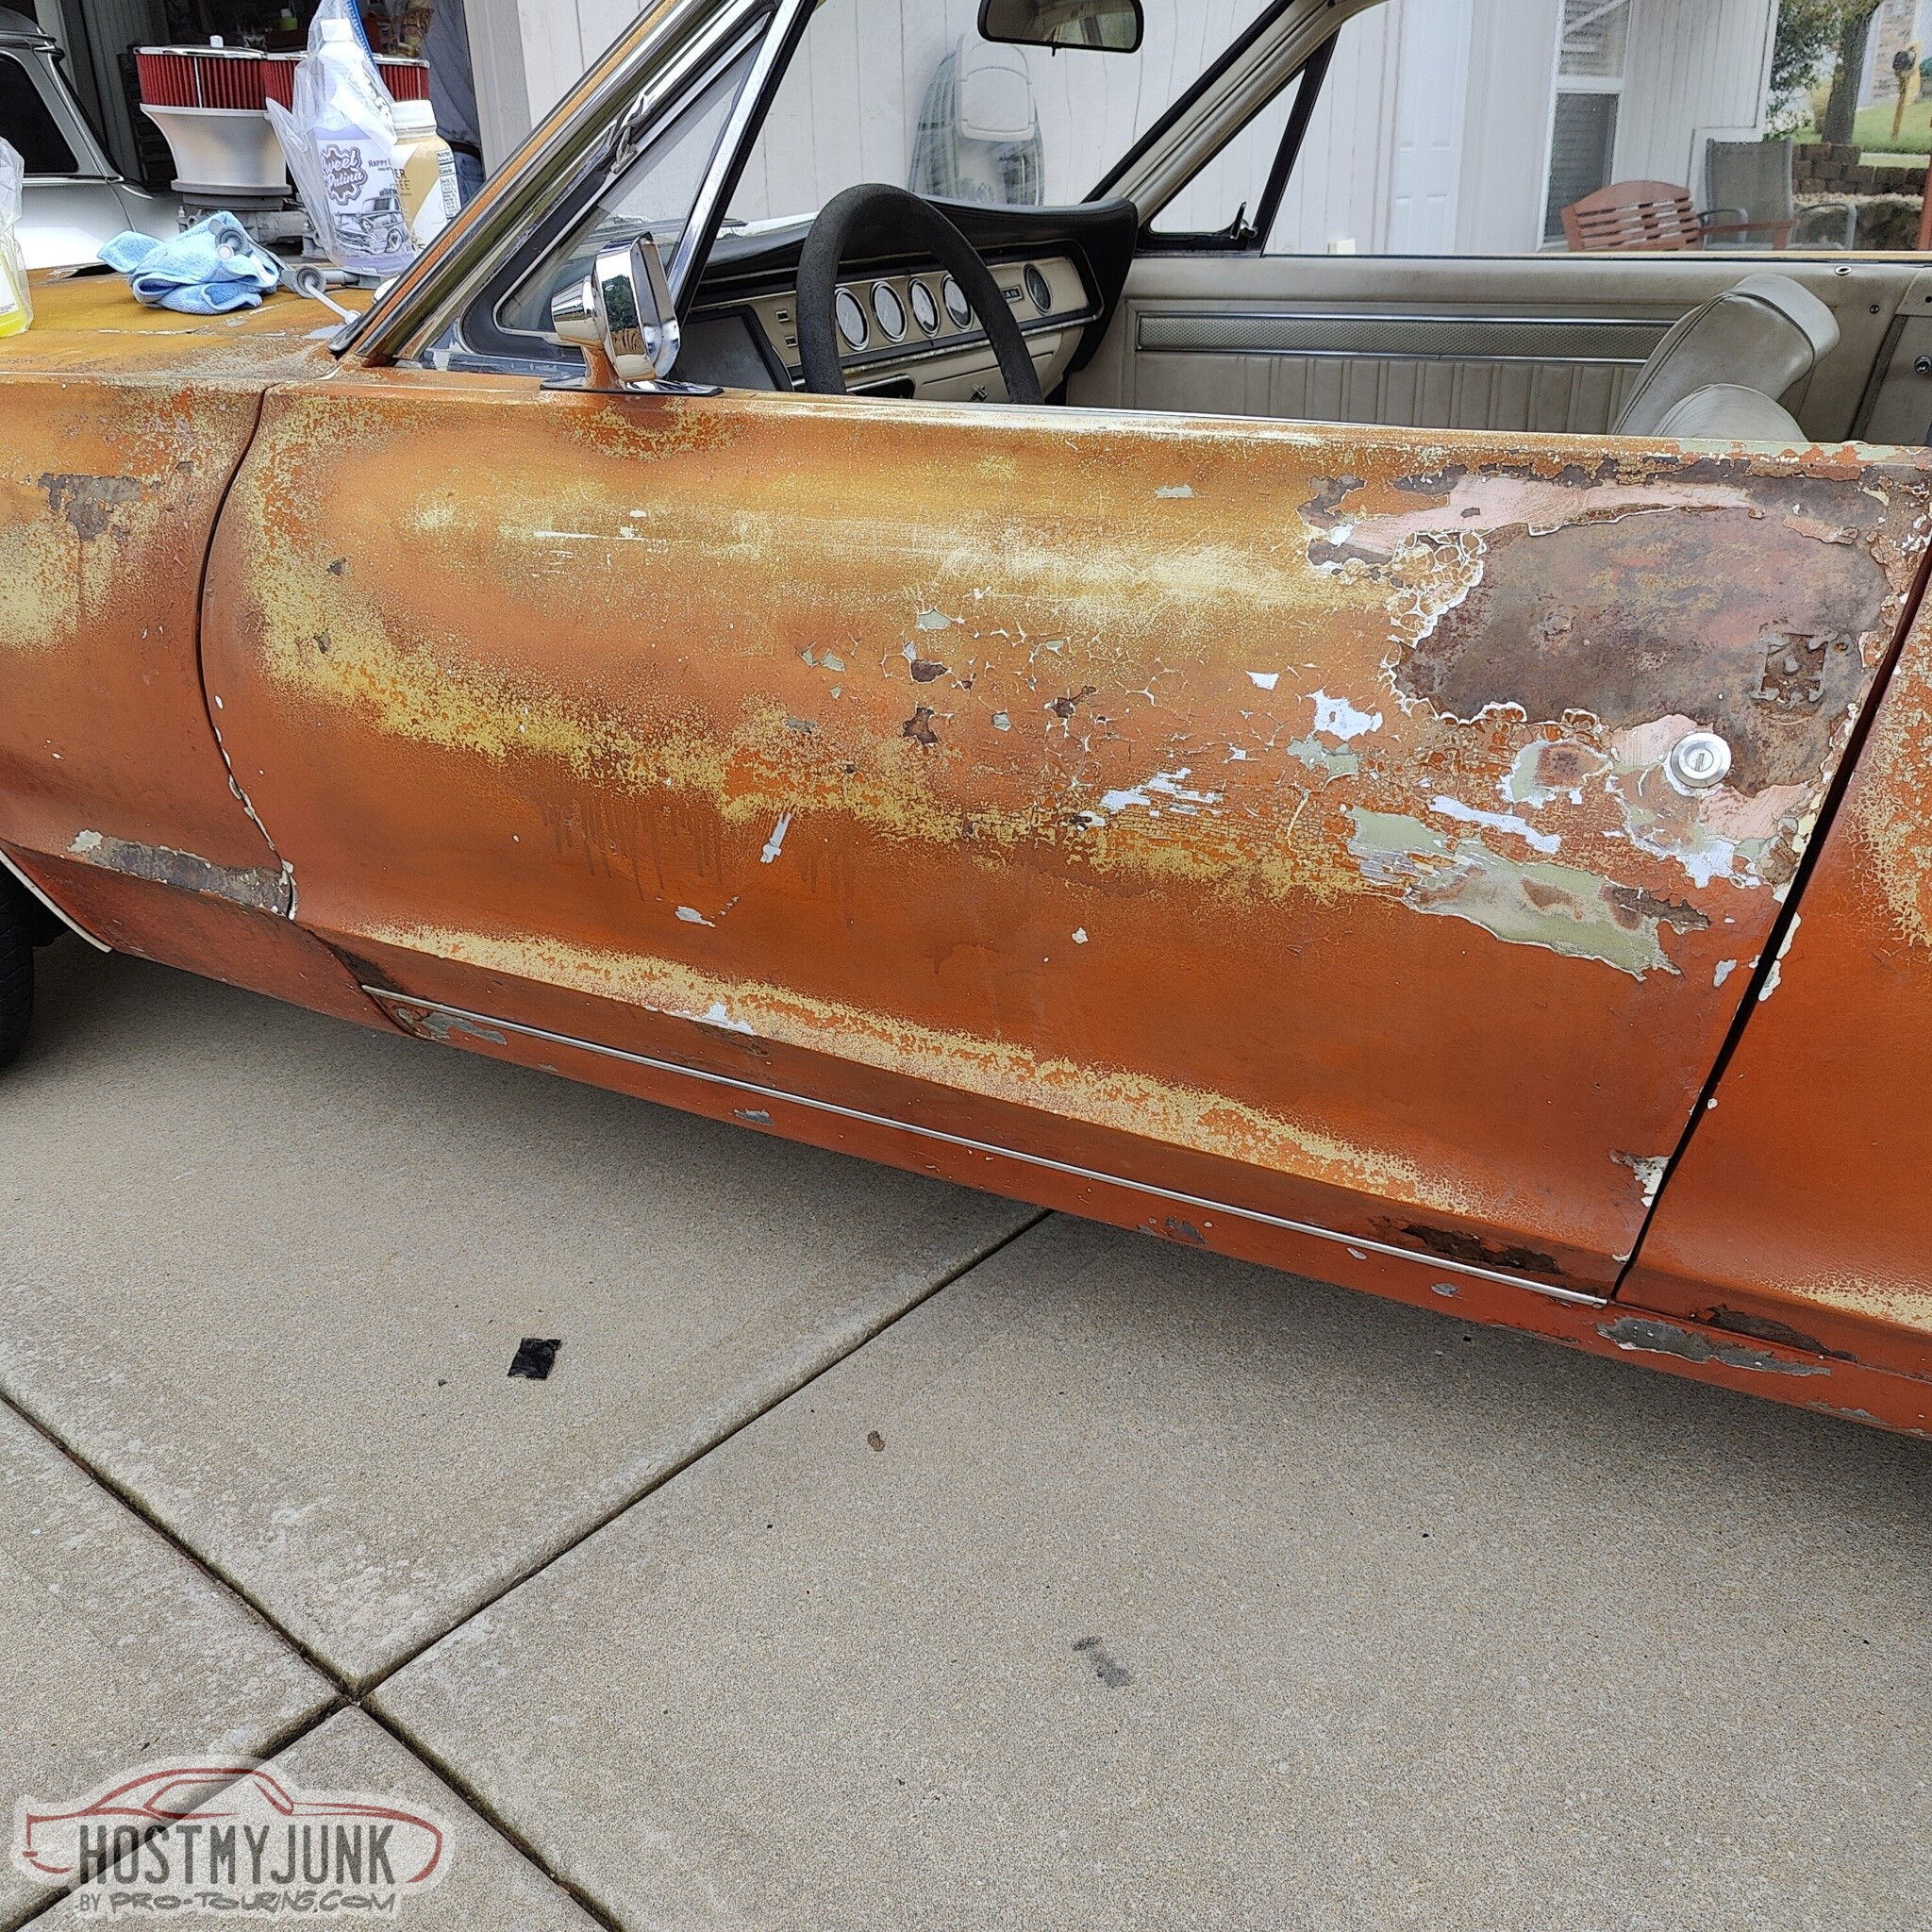
Up next was a little TLC for the pain using some Sweet Patina Juice. I don't know what's in this stuff, but it is probably mostly boiled linseed oil and it smells pretty damn good.
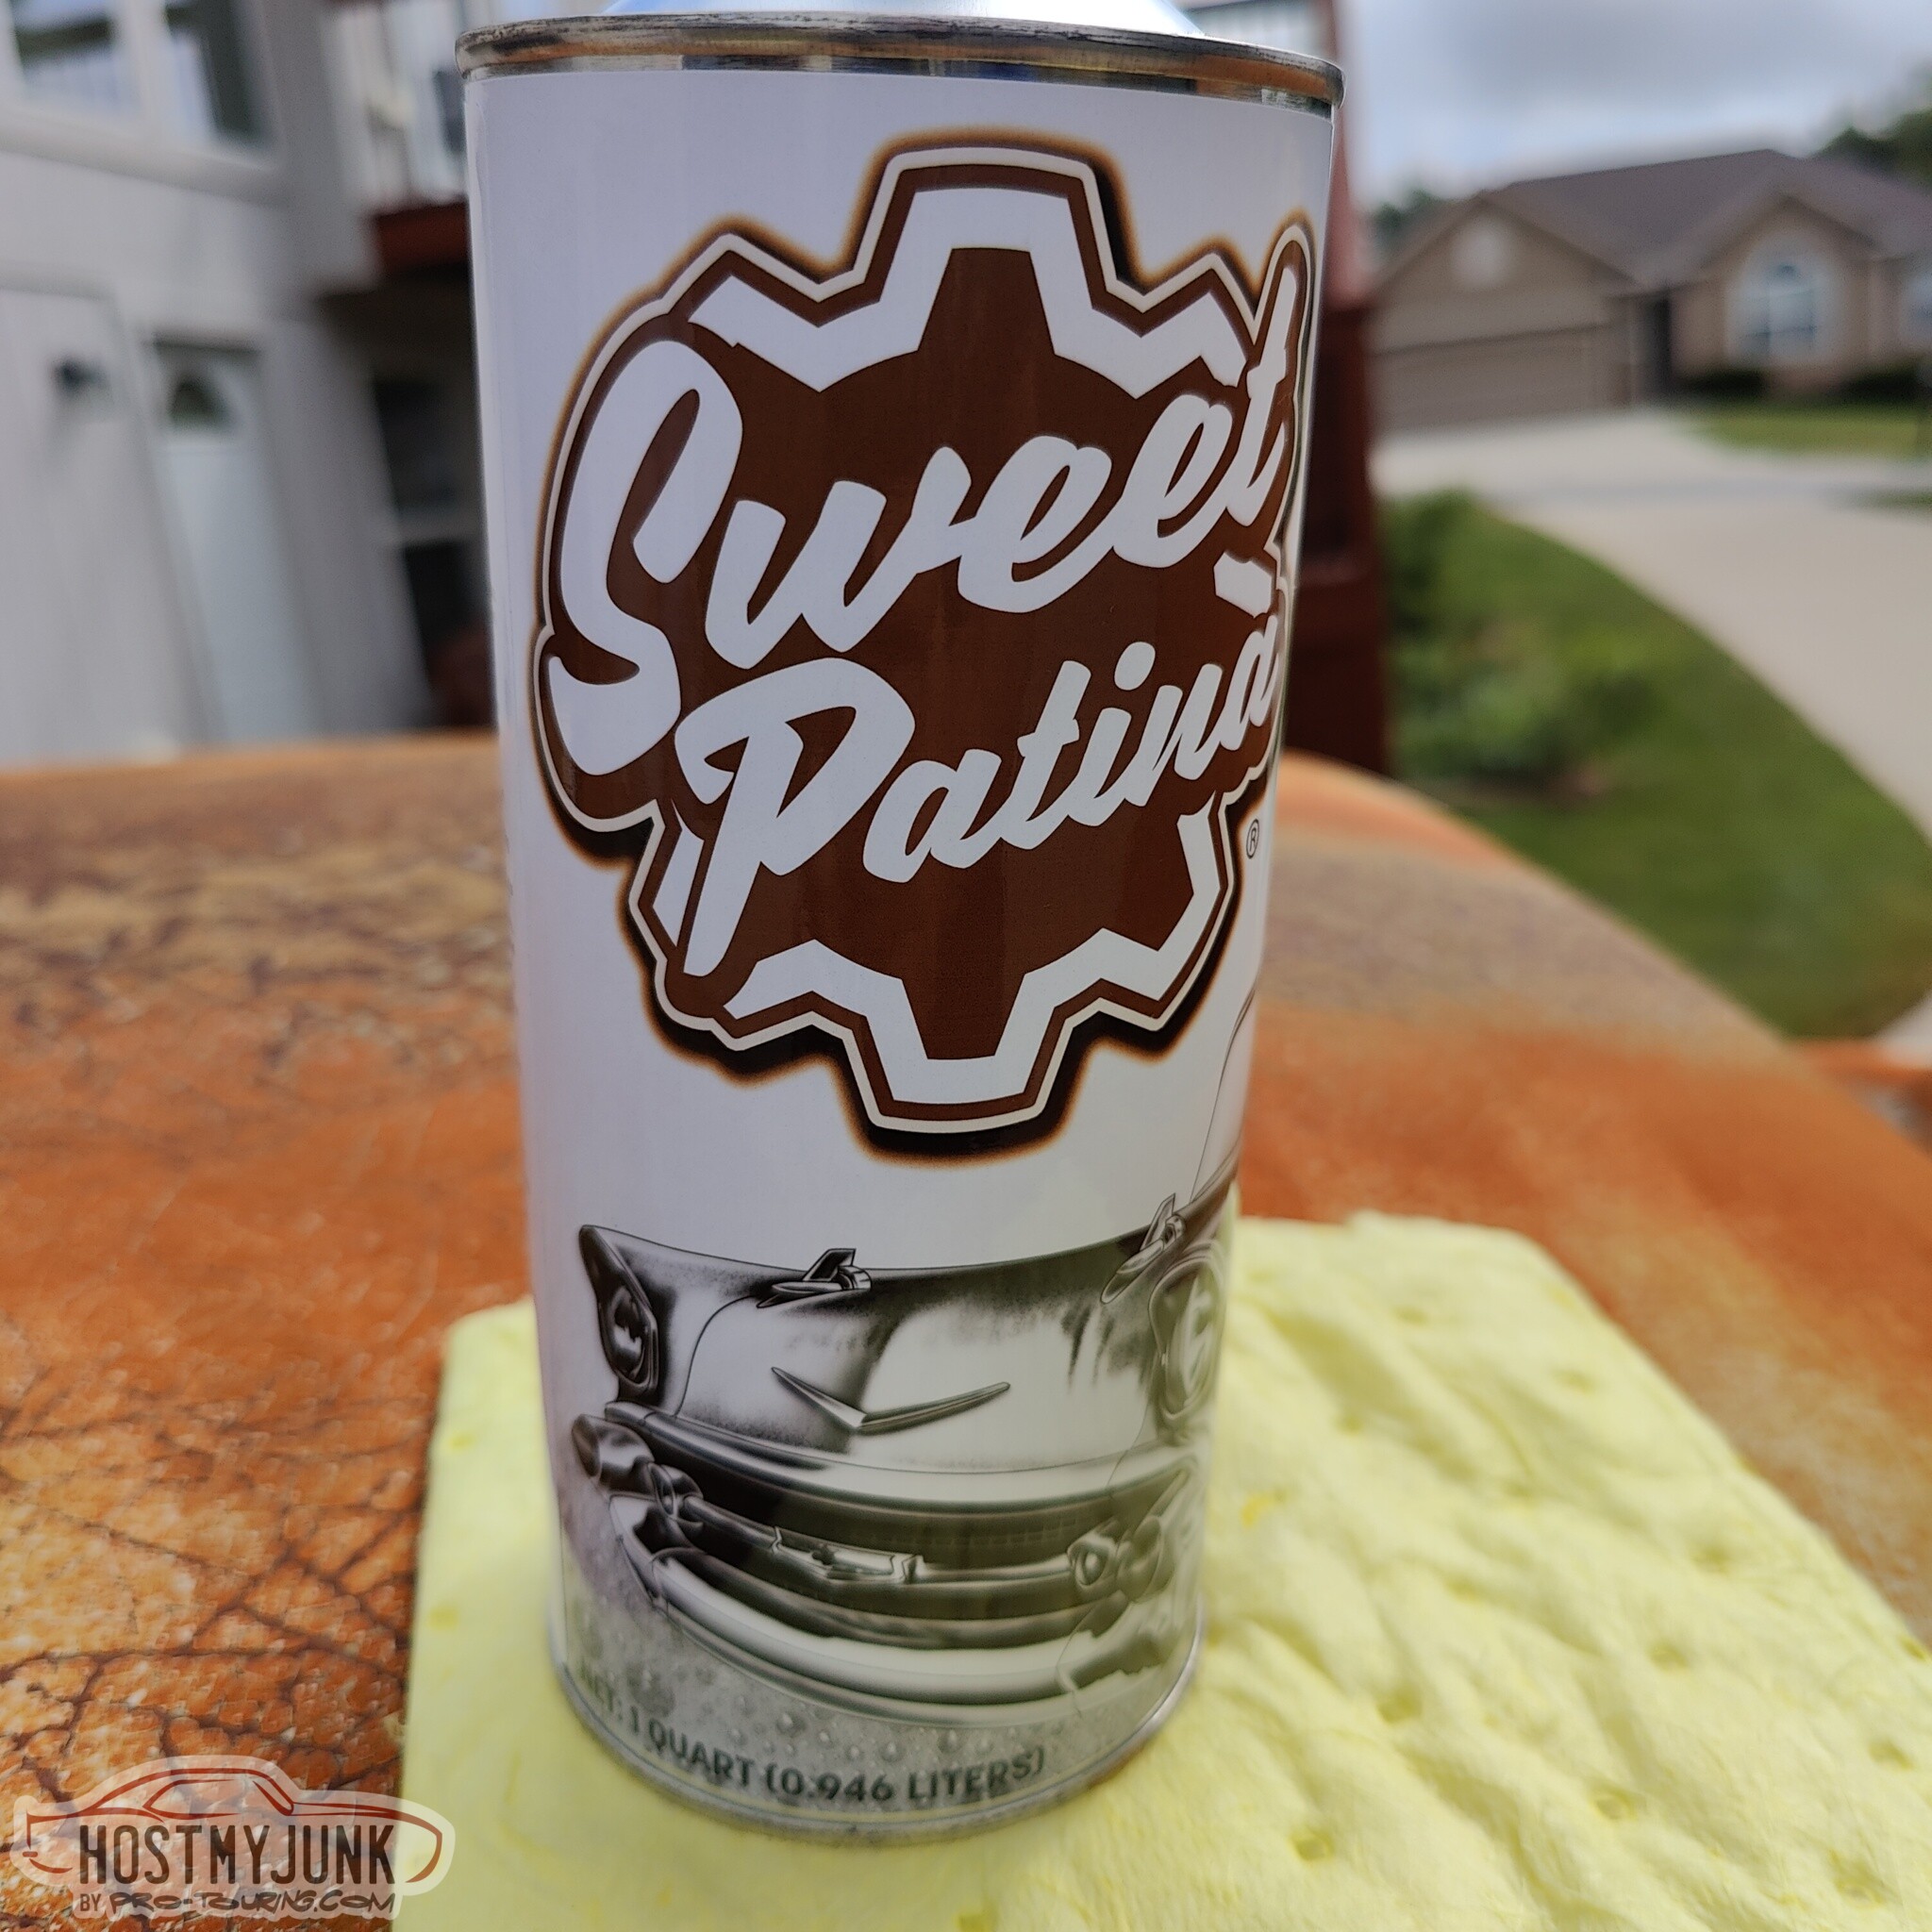
We slathered the whole car with the stuff, and let it sit for about 30 minutes.
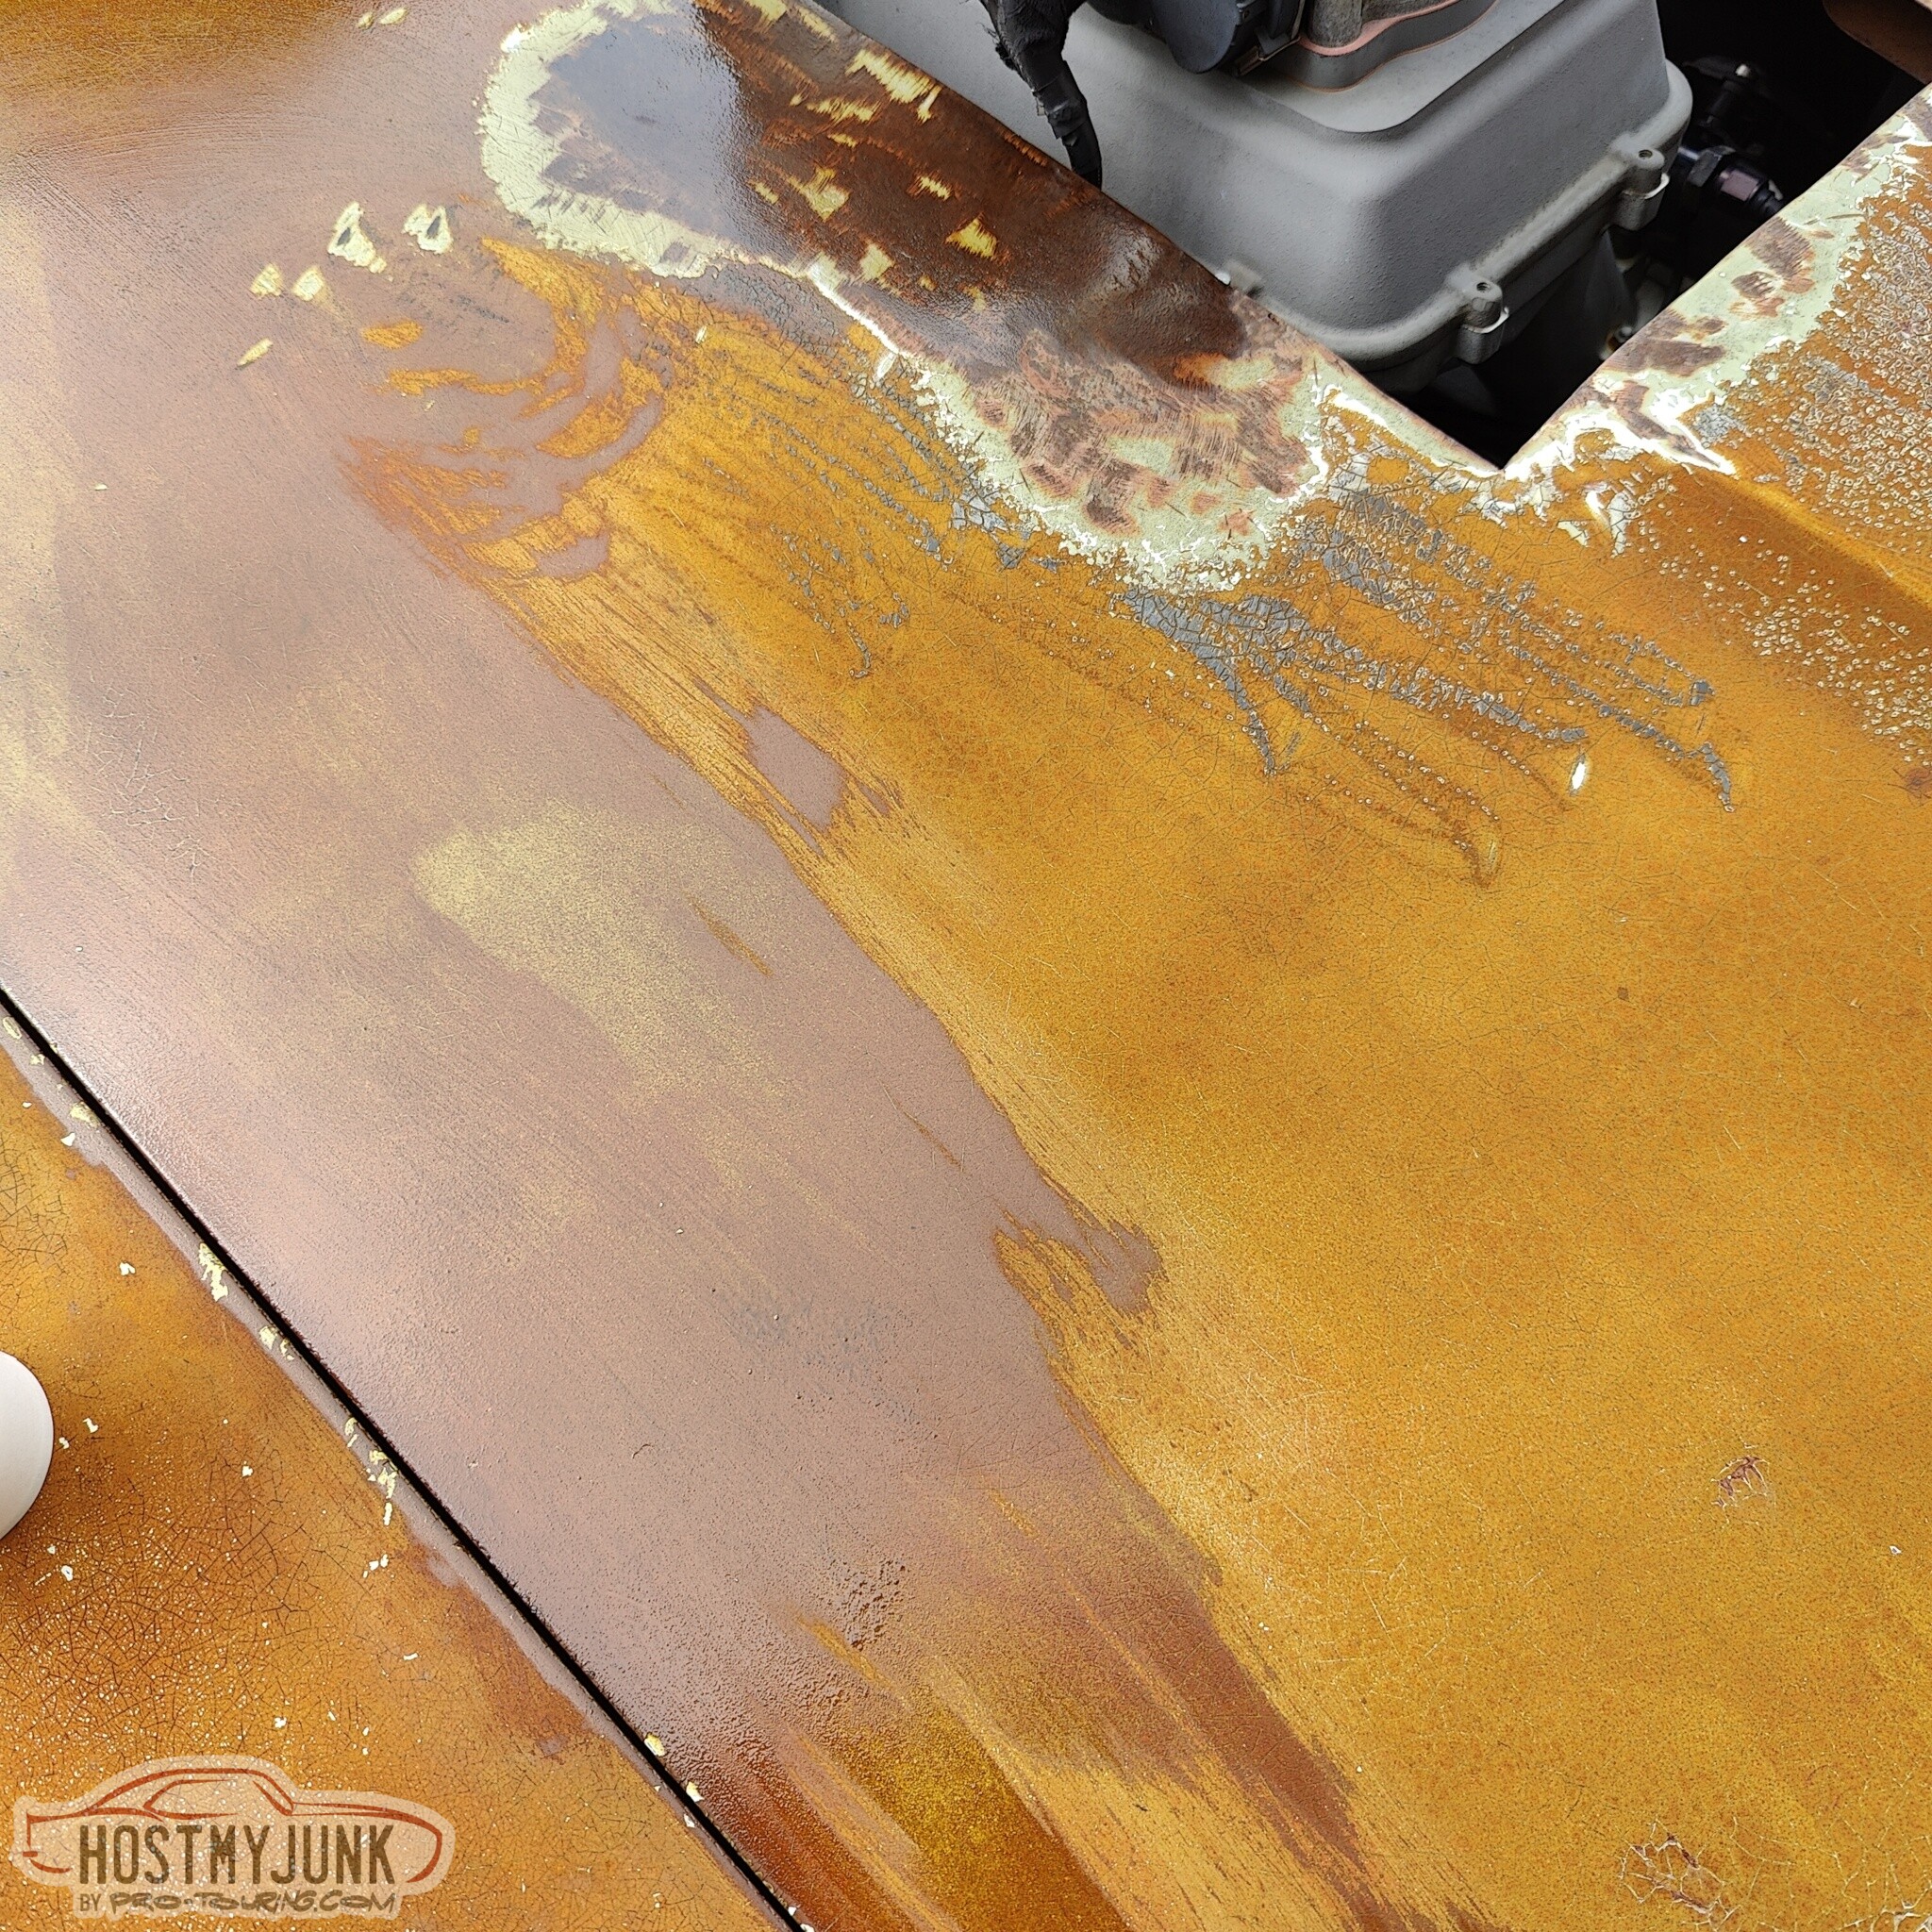
Then, using some rags, wiped the excess off. Looks pretty damn OK if you ask me.
Andrew
A little persuasion on the inside of the door with a huge pry bar got the big dent out of the door.
Up next was a little TLC for the pain using some Sweet Patina Juice. I don't know what's in this stuff, but it is probably mostly boiled linseed oil and it smells pretty damn good.
We slathered the whole car with the stuff, and let it sit for about 30 minutes.
Then, using some rags, wiped the excess off. Looks pretty damn OK if you ask me.
Andrew
The following 4 users liked this post by Project GatTagO:
09-13-2022, 09:30 AM
#1264
TECH Senior Member
Thread Starter
iTrader: (7)
Last Thursday I made the 530 mile trip from Kansas City to Bowling Green, KY for the Holley LS Fest. Drive there without any issues, averaging about 22 mpg. Hung out with my friends, did a little drag racing, and drove home on Sunday because of rain.
Here are a couple of videos that were taken and I posted on my Instagram page.
My best pass was a 11.86 @ 118mph...Not too bad considering the 3.25 gears and a soft 1.80 60 foot time.
Andrew
Here are a couple of videos that were taken and I posted on my Instagram page.
My best pass was a 11.86 @ 118mph...Not too bad considering the 3.25 gears and a soft 1.80 60 foot time.
Andrew
The following users liked this post:
Project GatTagO (09-13-2022)
12-06-2022, 04:07 PM
#1266
TECH Senior Member
Thread Starter
iTrader: (7)
One day, last summer, my neighbor, who lives down the street a bit stops by my house in a 69 El Camino and introduces himself. Turns out that he own Empire Automotive in Kansas City, Kansas. We decided that one day this fall we were going to get the Cougar to his shop and he was going to improve on my rather unfortunate dented fender.
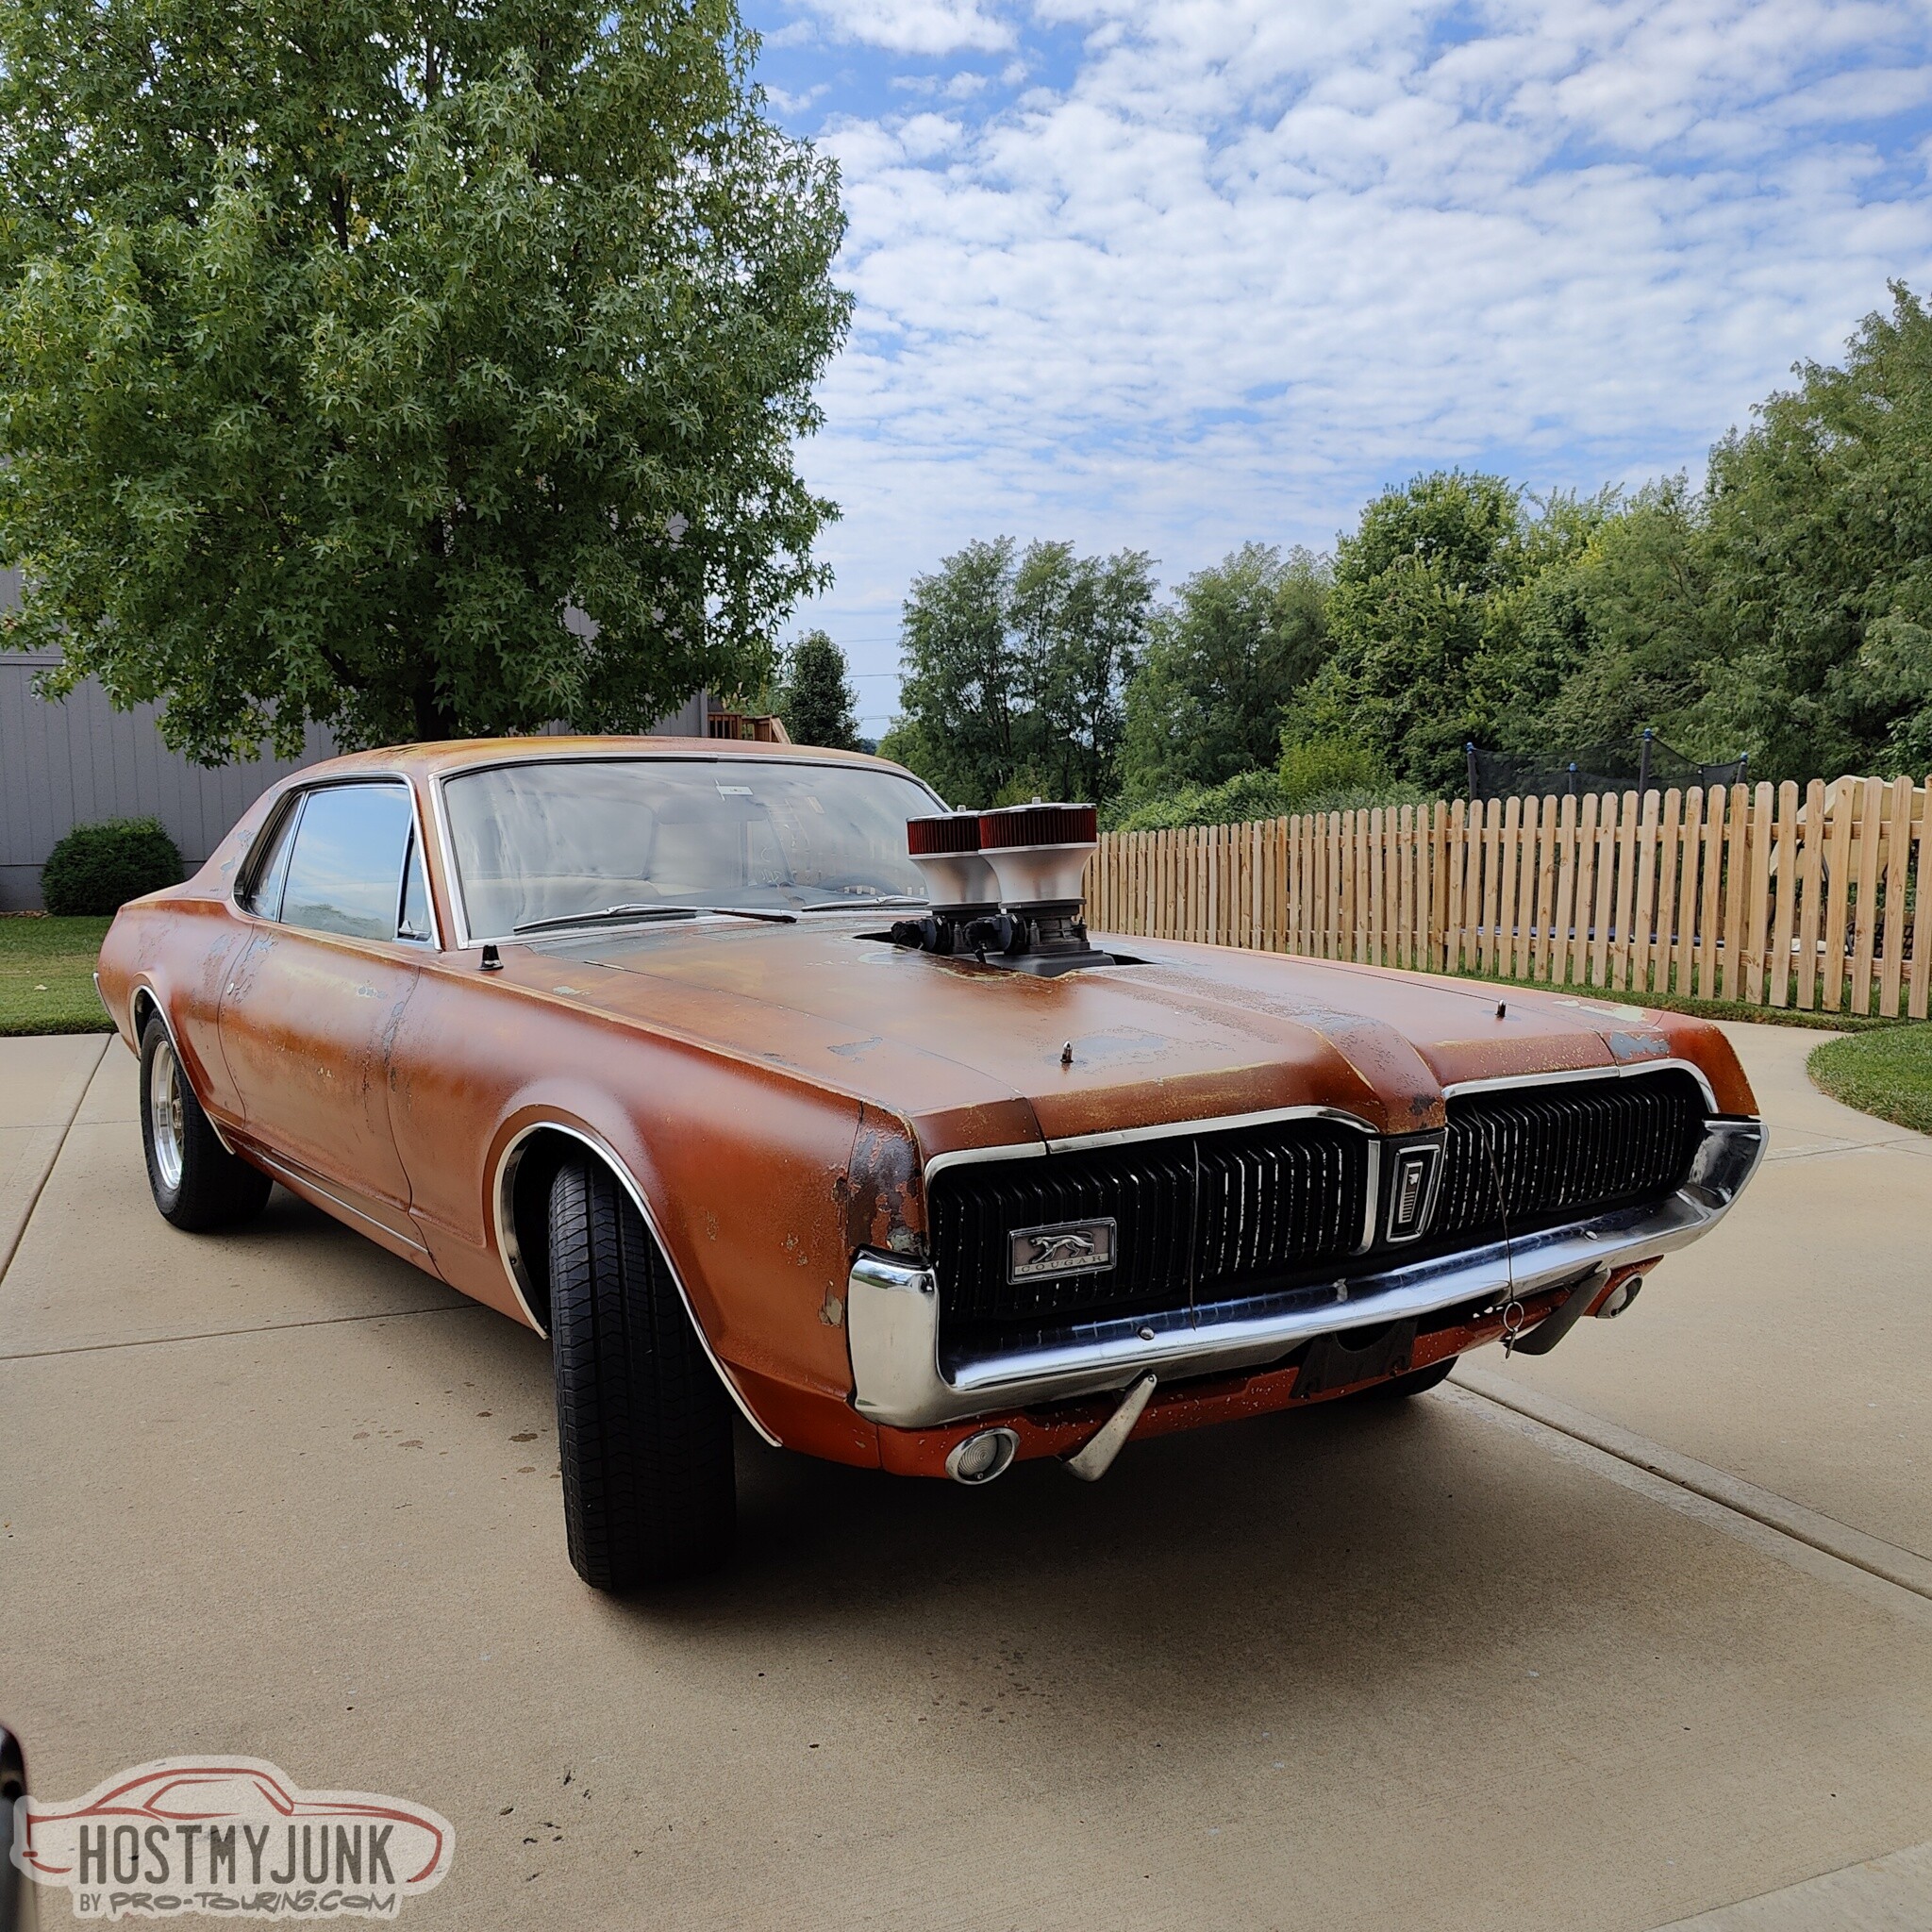
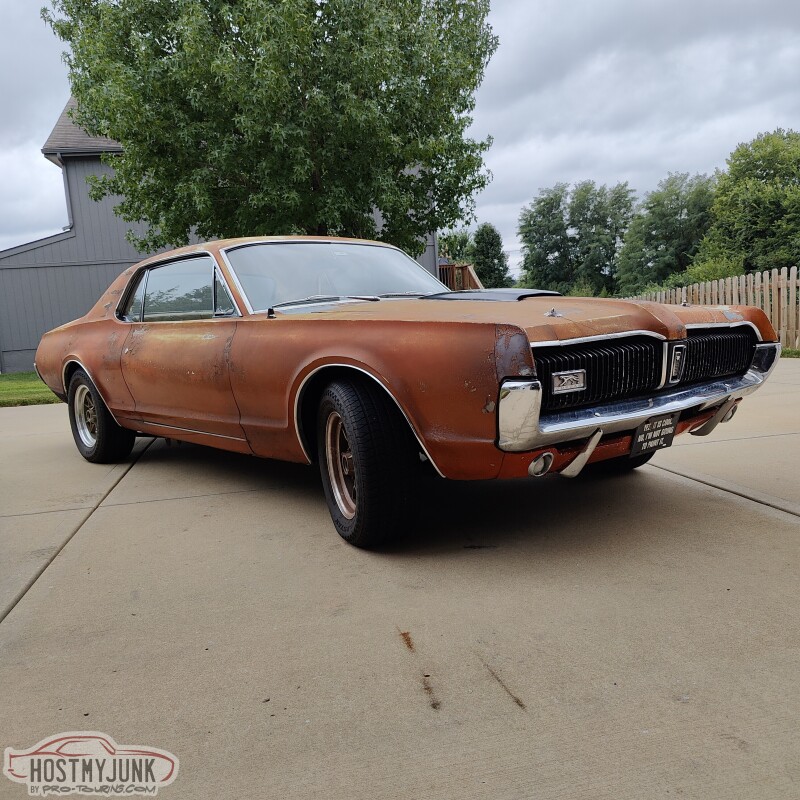
Here are the results of his efforts. The big crease between the door and the rear wheel well is completely gone. The general shape of the fender is excellent.
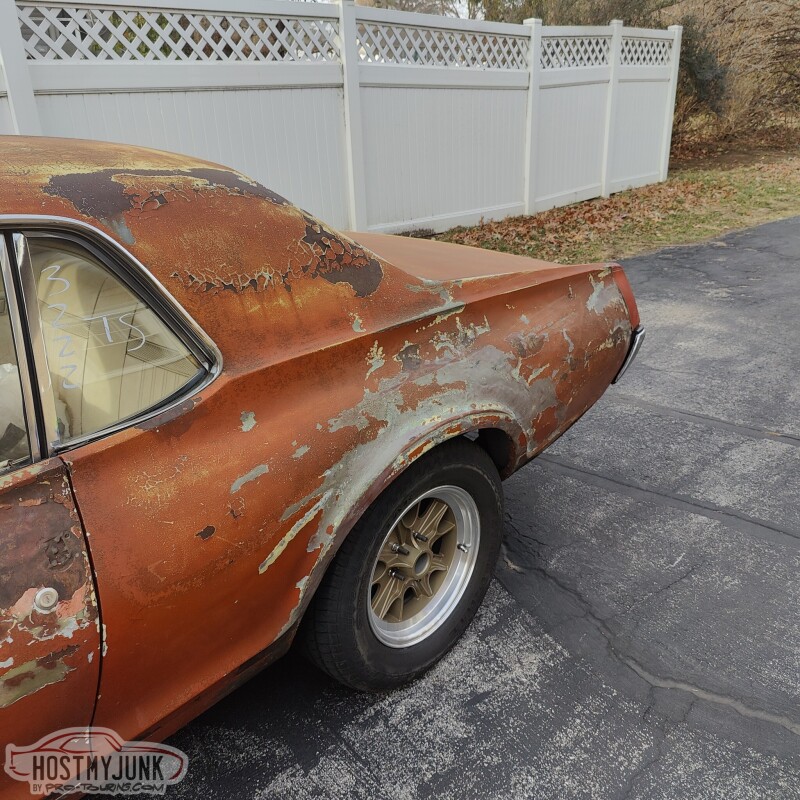
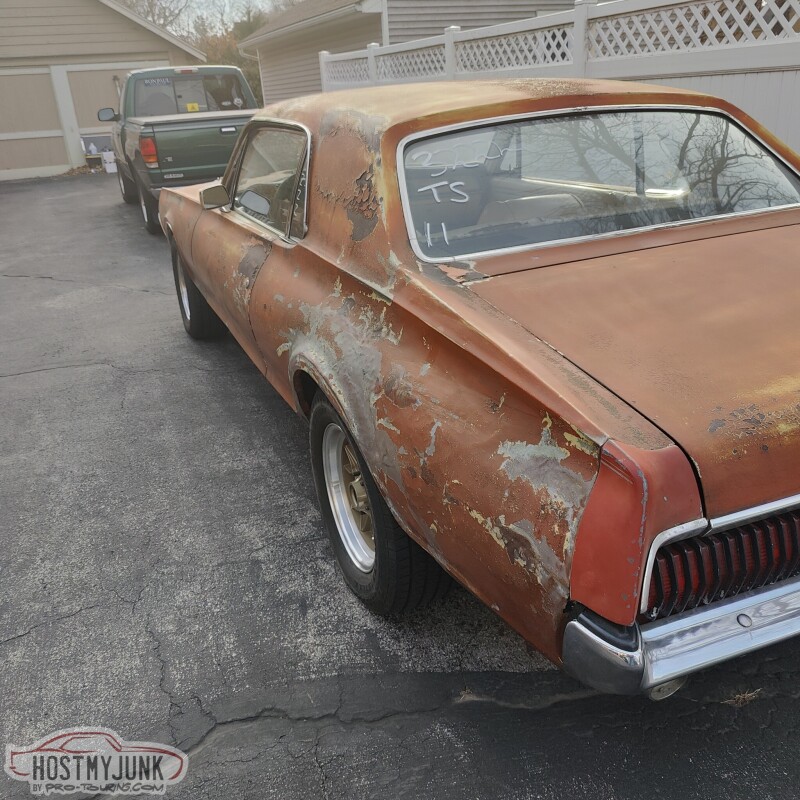
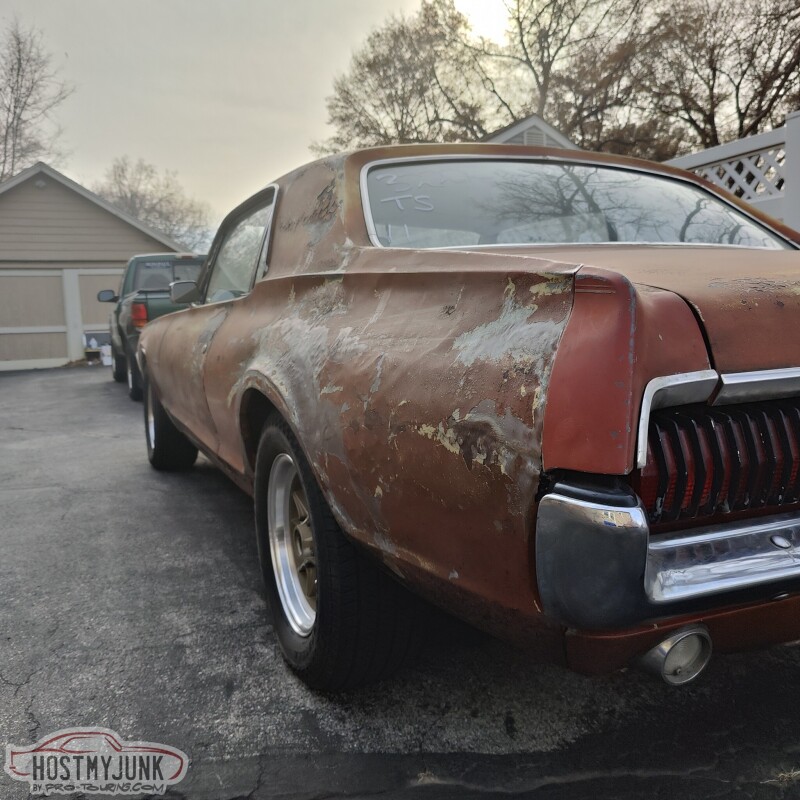
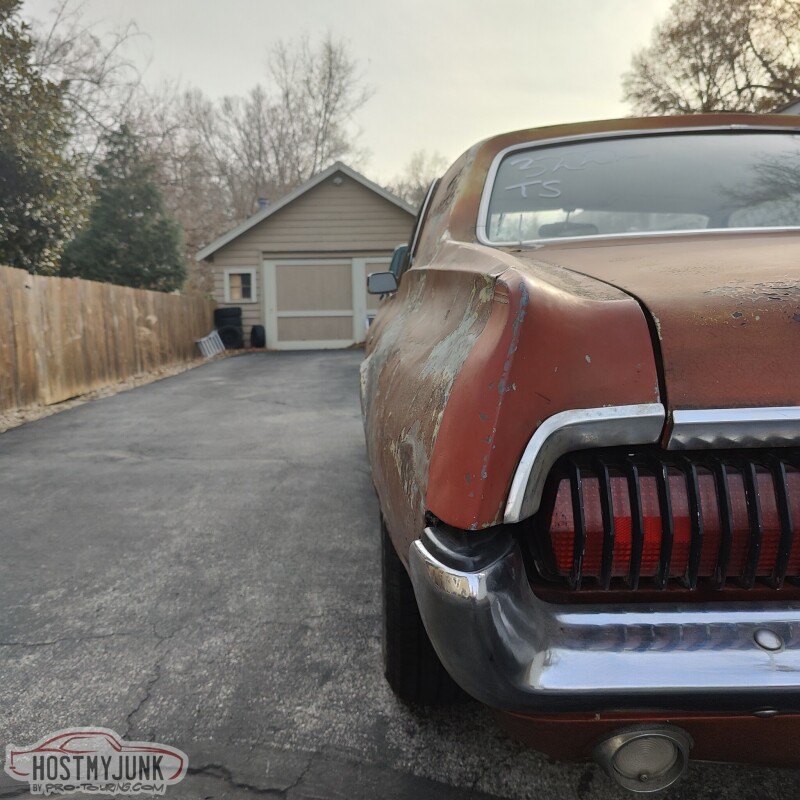
Is it perfect, of course not, but that wasn't the point. The mission was to improve the overall appearance and preserve the patina. To that end, mission accomplished. The used rear quarter extension even sort of matches in color.
Andrew
Here are the results of his efforts. The big crease between the door and the rear wheel well is completely gone. The general shape of the fender is excellent.
Is it perfect, of course not, but that wasn't the point. The mission was to improve the overall appearance and preserve the patina. To that end, mission accomplished. The used rear quarter extension even sort of matches in color.
Andrew
The following users liked this post:
Jipper67 (12-06-2022)

The following users liked this post:
Project GatTagO (12-06-2022)
The following users liked this post:
Project GatTagO (12-06-2022)
12-06-2022, 08:24 PM
#1269

One day, last summer, my neighbor, who lives down the street a bit stops by my house in a 69 El Camino and introduces himself. Turns out that he own Empire Automotive in Kansas City, Kansas. We decided that one day this fall we were going to get the Cougar to his shop and he was going to improve on my rather unfortunate dented fender.
Here are the results of his efforts. The big crease between the door and the rear wheel well is completely gone. The general shape of the fender is excellent.
Is it perfect, of course not, but that wasn't the point. The mission was to improve the overall appearance and preserve the patina. To that end, mission accomplished. The used rear quarter extension even sort of matches in color.
Andrew
You should be very happy with the results..
The following users liked this post:
Project GatTagO (12-06-2022)
12-06-2022, 09:21 PM
#1270
TECH Senior Member
Thread Starter
iTrader: (7)
Thanks John. I agree, it looks way better. I just need to add the stainless wheel well molding and it'll look even better.
Andrew
The following users liked this post:
G Atsma (12-07-2022)
The following 3 users liked this post by Project GatTagO:
08-28-2023, 09:13 AM
#1272
The following 2 users liked this post by Project GatTagO:
G Atsma (08-28-2023), ryeguy2006a (08-28-2023)
08-28-2023, 04:48 PM
#1273
TECH Senior Member
Thread Starter
iTrader: (7)
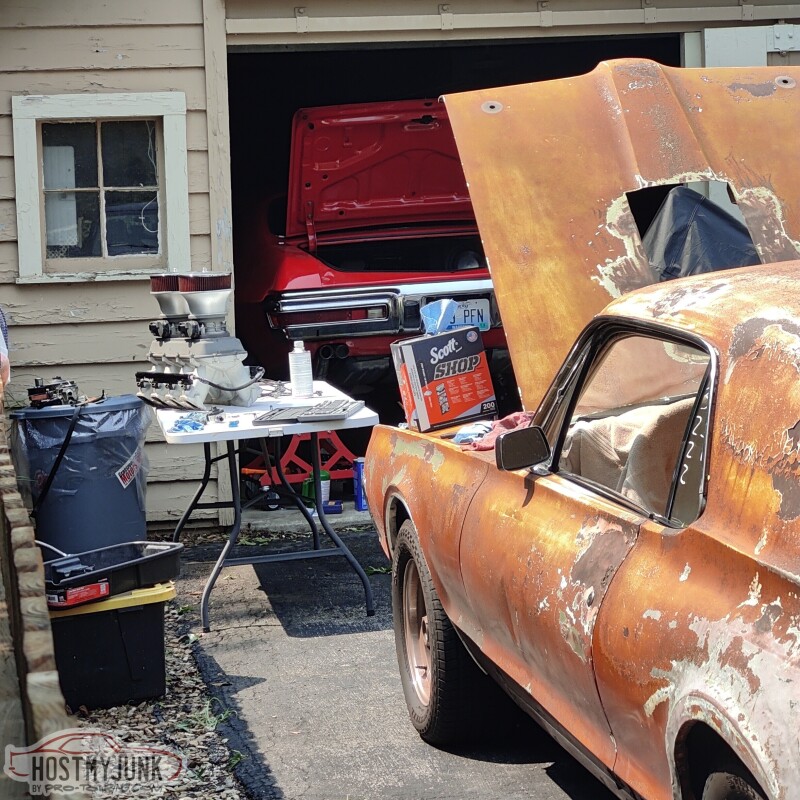
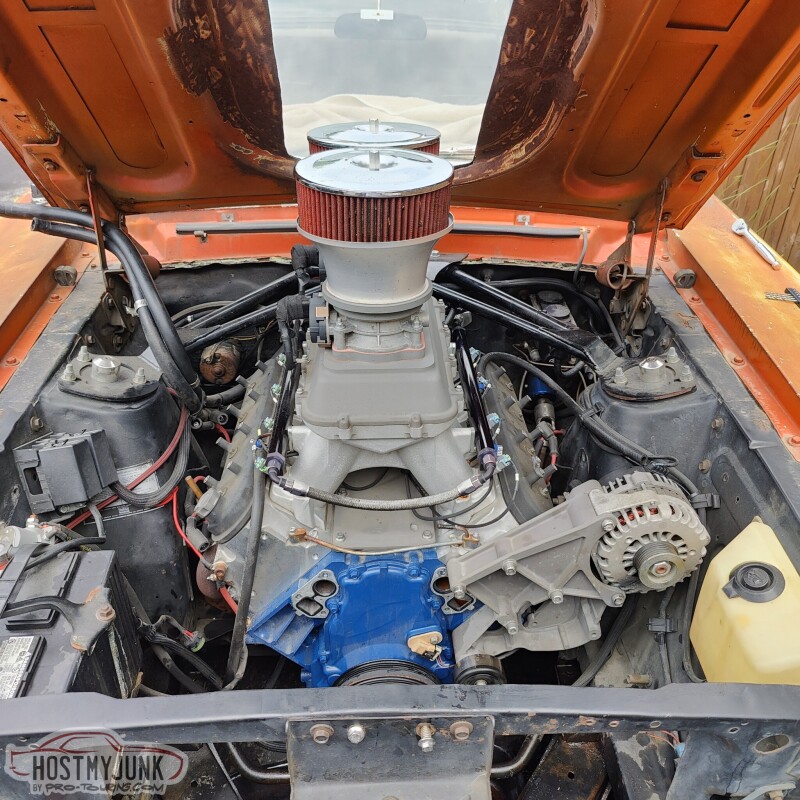
I picked a week with good weather and got started. As you can see, the swap is a little dusty and weathered.
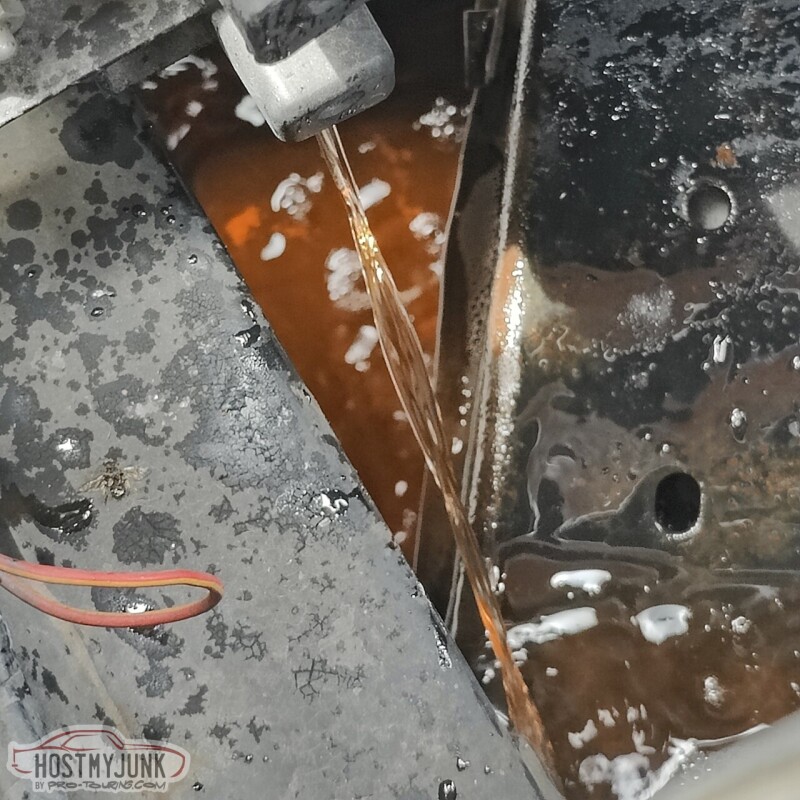
The radiator that I was using did not have a drain on it, so I picked a good location on the driver's side tank and drilled a hole.
With the water drained, off comes the belt...

and the radiator/fan combo can come out.
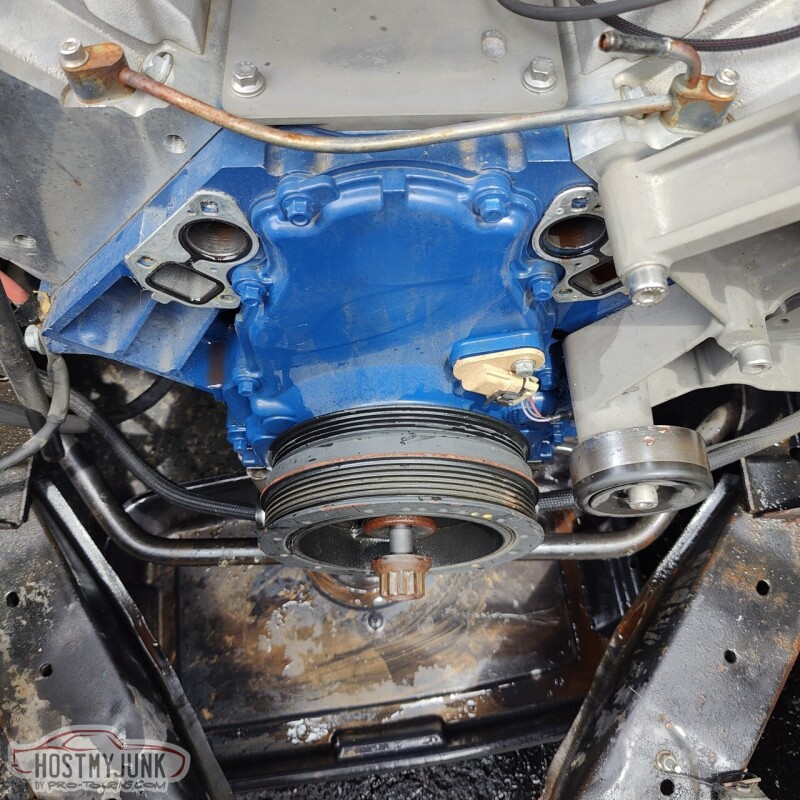
With the radiator and fan out of the way, the water pump can come off.
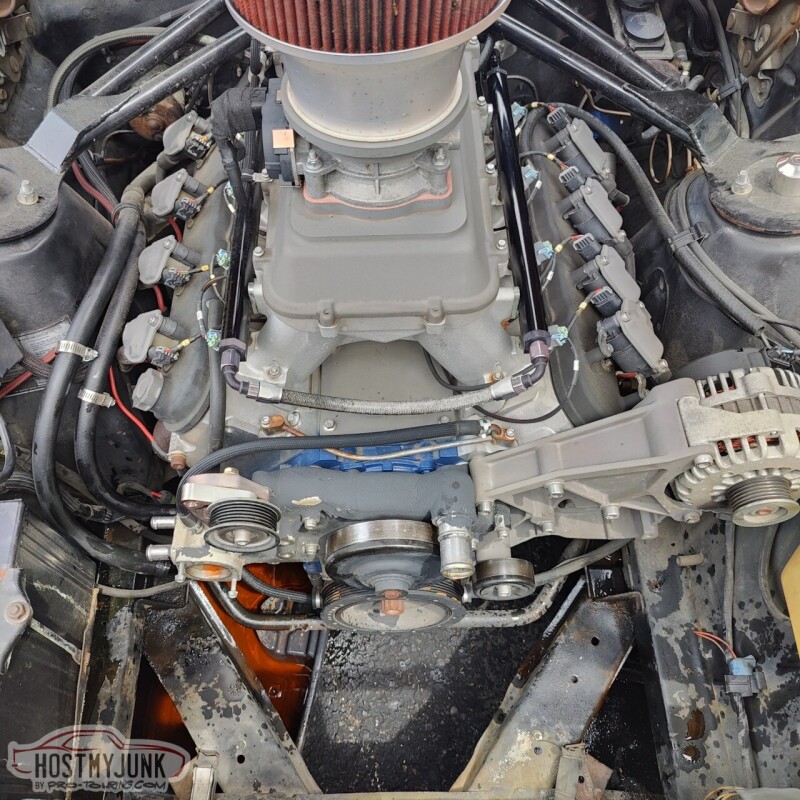
There is nothing wrong with the water pump, but it will be getting a new one, mostly because #vanity.
Next was the balancer bolt...
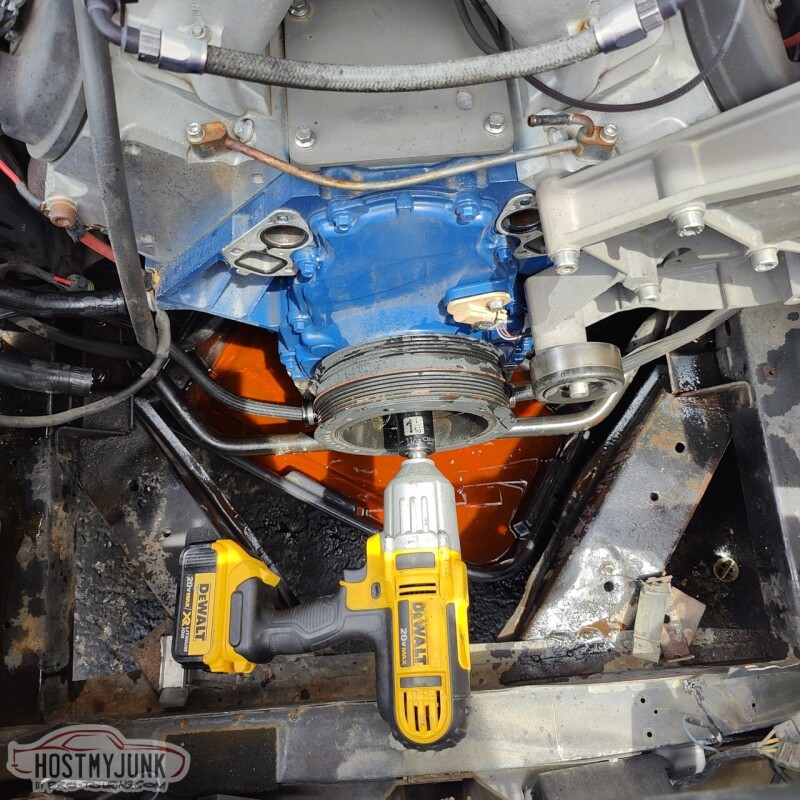
All of this is for a cam swap, in case anyone was wondering...LOL
Andrew
The radiator that I was using did not have a drain on it, so I picked a good location on the driver's side tank and drilled a hole.
With the water drained, off comes the belt...
and the radiator/fan combo can come out.
With the radiator and fan out of the way, the water pump can come off.
There is nothing wrong with the water pump, but it will be getting a new one, mostly because #vanity.
Next was the balancer bolt...
All of this is for a cam swap, in case anyone was wondering...LOL
Andrew
The following 2 users liked this post by Project GatTagO:
jrs396 (09-04-2023), ryeguy2006a (08-29-2023)
09-05-2023, 06:39 AM
#1274
TECH Senior Member
Thread Starter
iTrader: (7)
Back to the cam swap...
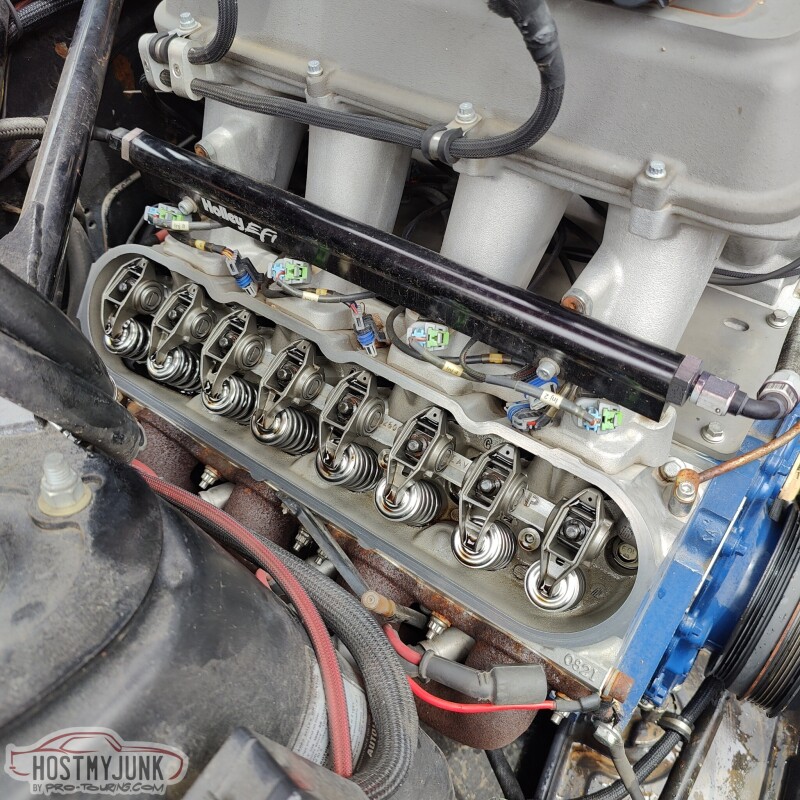
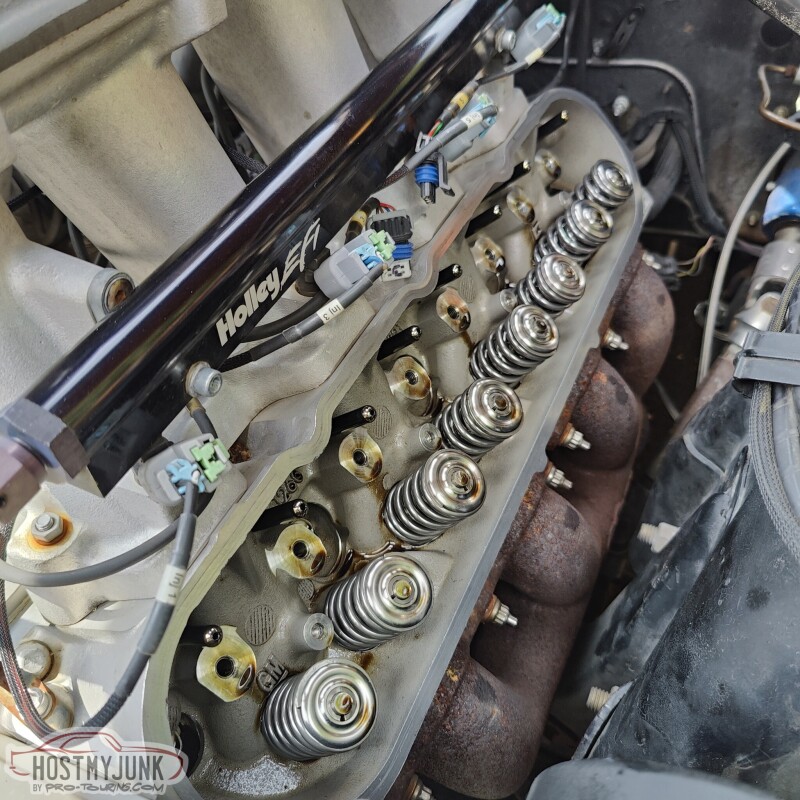
After getting the balancer bolt out, I stripped off the coils so that the valve covers can be removed.
Everything looked great here. You can see that the valve springs have ben upgraded in the past and they are well matched to the new cam.
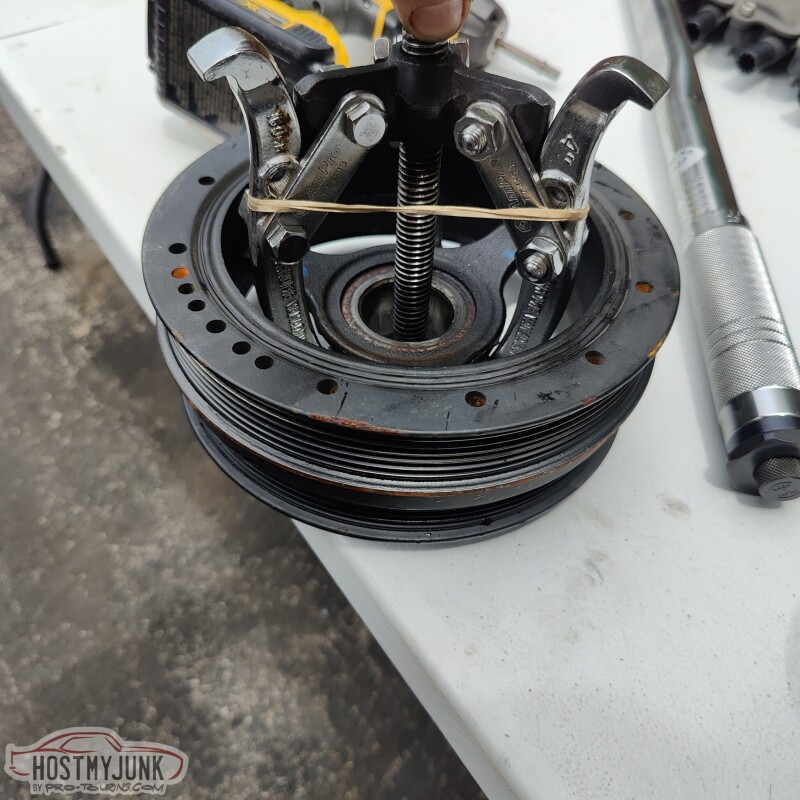
The balancer came off without a fight.
Tip: use a rubber band to keep the fingers of the pulley puller in contact with the back of the balancer.
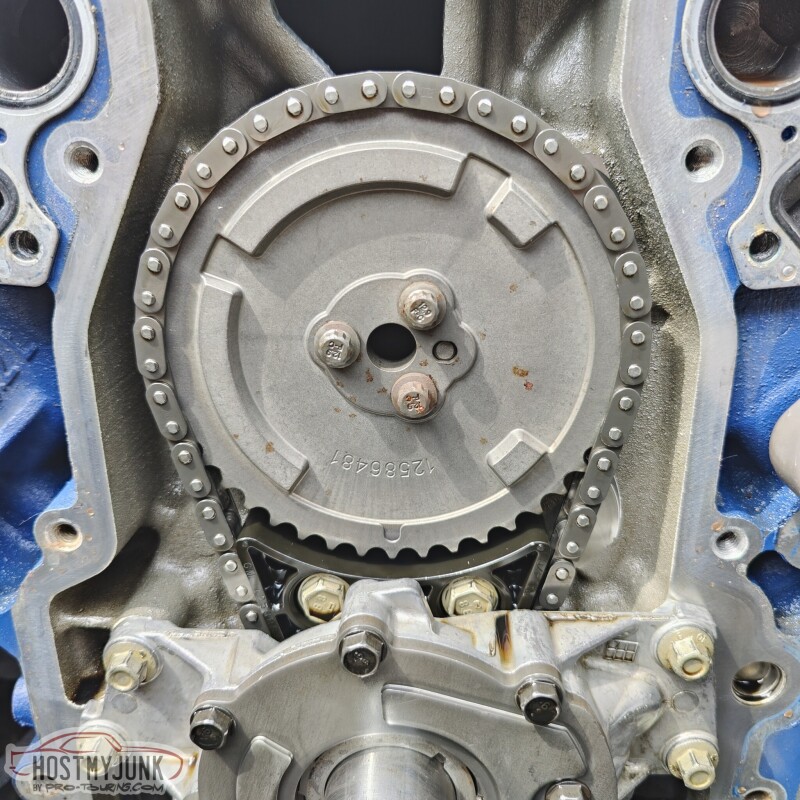
Next I aligned the cam. Most people think that when the cam gears are "dot to dot" on a LS that this is the #1 cylinder at TDC on the compression stroke. It isn't...This alignment actually puts #6 at TDC on the compression stroke. This really doesn't matter if you install the new cam the same way, but it does matter when tightening down the rockers, if you want to do it correctly and line up each cylinder with the lifters on the cam base circle. Here you would start with #6 and then rotate the engine 90 degrees for each subsequent cylinder in the firing order.
Rockers off and everything looking pretty good.
Here is where I ran into a problem. If you look closely, the left Torx bolt is stripped out. I promise I used the correct Torx bit, but it stripped easily using even a small ratchet. I actually ended up stripping two of the bolts out and two came out without any drama.
I ended up using these...
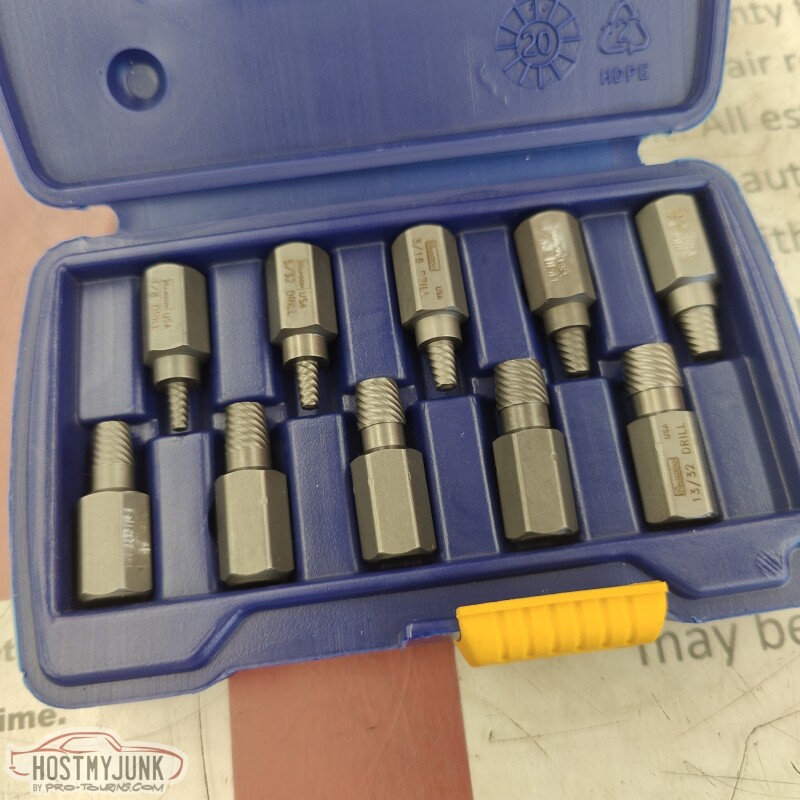
and my first attempt failed because I used an extractor that was too small in diameter. I then drilled a larger hole for a bigger extractor and that did the trick.
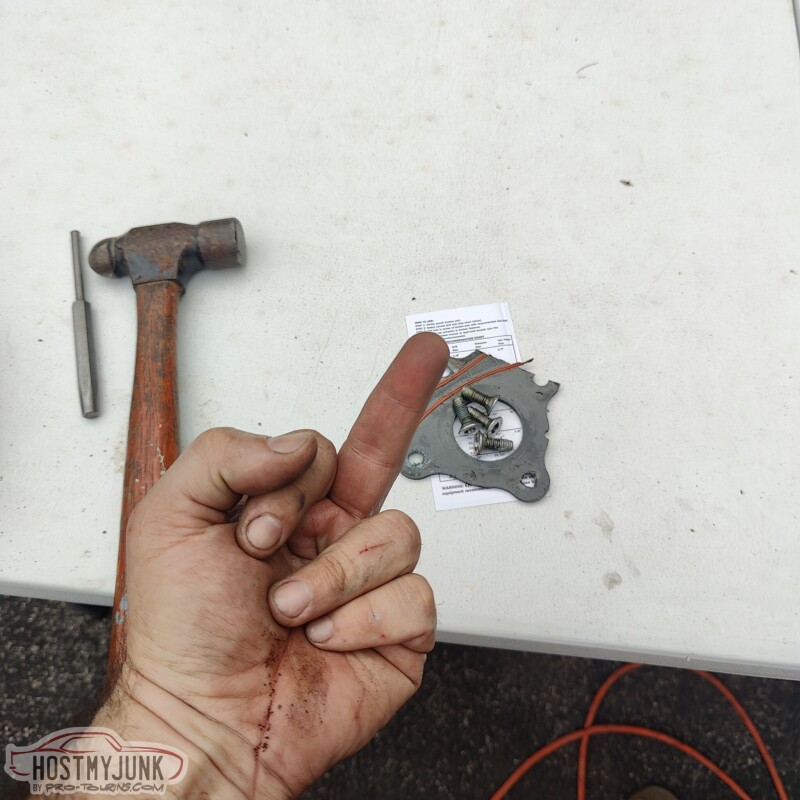
This about wraps up how I felt after the whole ordeal...
Who is going to be at LS Fest?
Andrew
After getting the balancer bolt out, I stripped off the coils so that the valve covers can be removed.
Everything looked great here. You can see that the valve springs have ben upgraded in the past and they are well matched to the new cam.
The balancer came off without a fight.
Tip: use a rubber band to keep the fingers of the pulley puller in contact with the back of the balancer.
Next I aligned the cam. Most people think that when the cam gears are "dot to dot" on a LS that this is the #1 cylinder at TDC on the compression stroke. It isn't...This alignment actually puts #6 at TDC on the compression stroke. This really doesn't matter if you install the new cam the same way, but it does matter when tightening down the rockers, if you want to do it correctly and line up each cylinder with the lifters on the cam base circle. Here you would start with #6 and then rotate the engine 90 degrees for each subsequent cylinder in the firing order.
Rockers off and everything looking pretty good.
Here is where I ran into a problem. If you look closely, the left Torx bolt is stripped out. I promise I used the correct Torx bit, but it stripped easily using even a small ratchet. I actually ended up stripping two of the bolts out and two came out without any drama.
I ended up using these...
and my first attempt failed because I used an extractor that was too small in diameter. I then drilled a larger hole for a bigger extractor and that did the trick.
This about wraps up how I felt after the whole ordeal...
Who is going to be at LS Fest?
Andrew
The following 2 users liked this post by Project GatTagO:
NCDEERE (09-14-2023), ryeguy2006a (09-07-2023)
09-05-2023, 10:21 PM
#1275
TECH Senior Member
Thread Starter
iTrader: (7)
I guess nobody is going to LS Fest? LOL....
I wasn't completely unhappy with the cam that was in the Cougar before. It was a cam that my buddy chose for this engine, and it is the BTR Stg2 LS3 cam. The cam makes excellent power but I wanted something with a little less overlap, so I called Cam Motion and we discussed my needs and I got a very similar cam, but with a wider LSA.
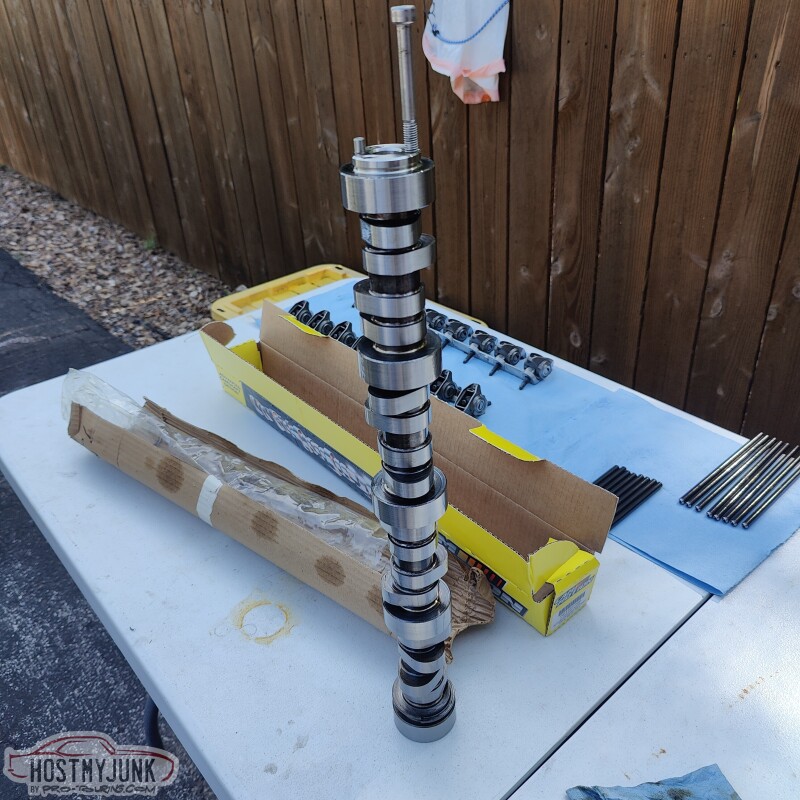
The last time that I did a cam swap in the Cougar I used the wooden dowel method and it worked great, so I did it again.
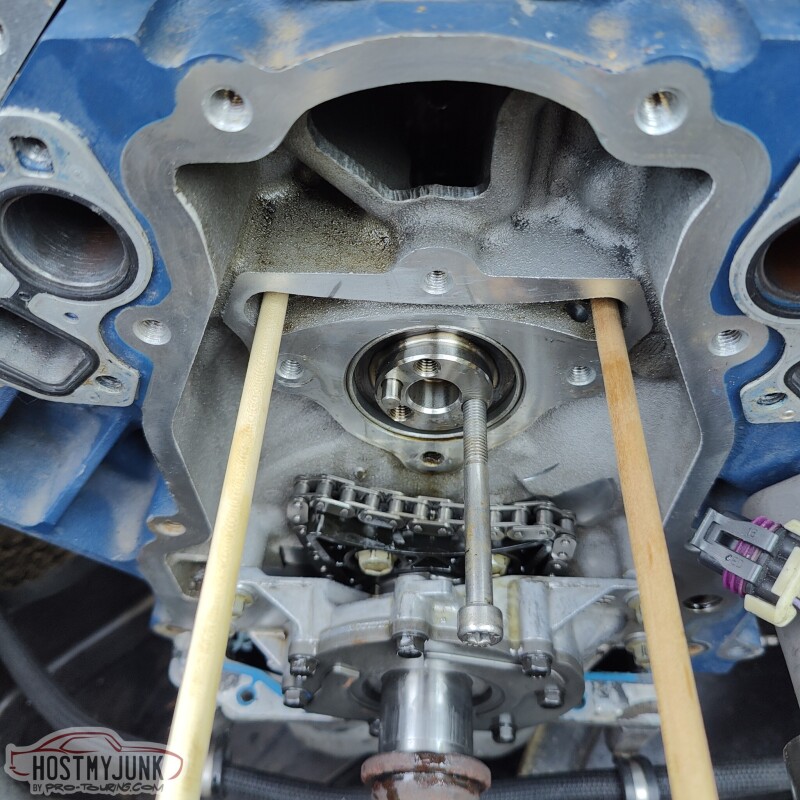
There is just enough room in front of the engine to the core support. The cam has to be maneuvered between the hood support uprights, but it does slide in.

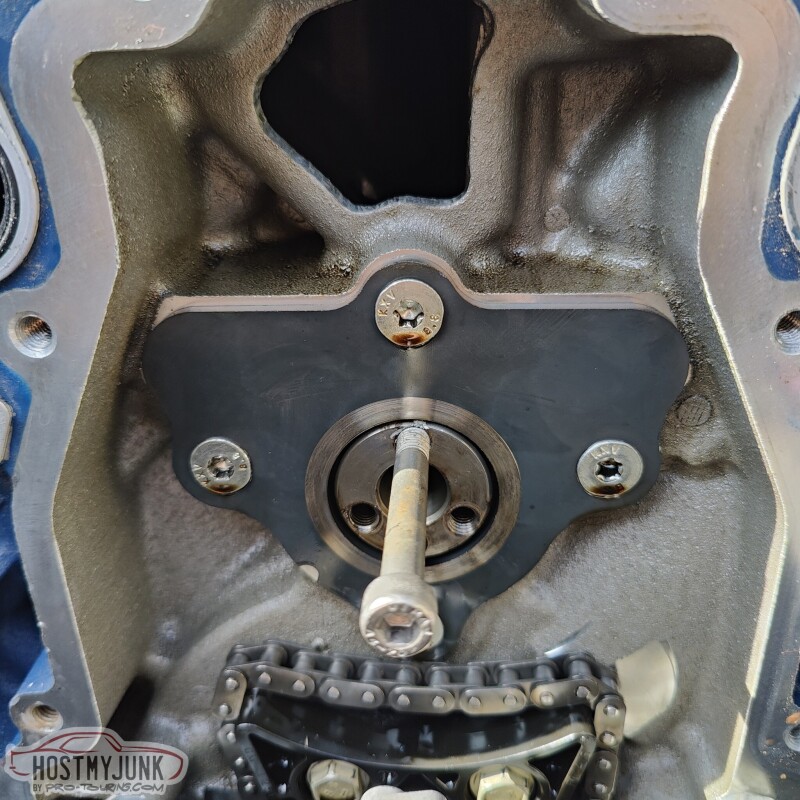
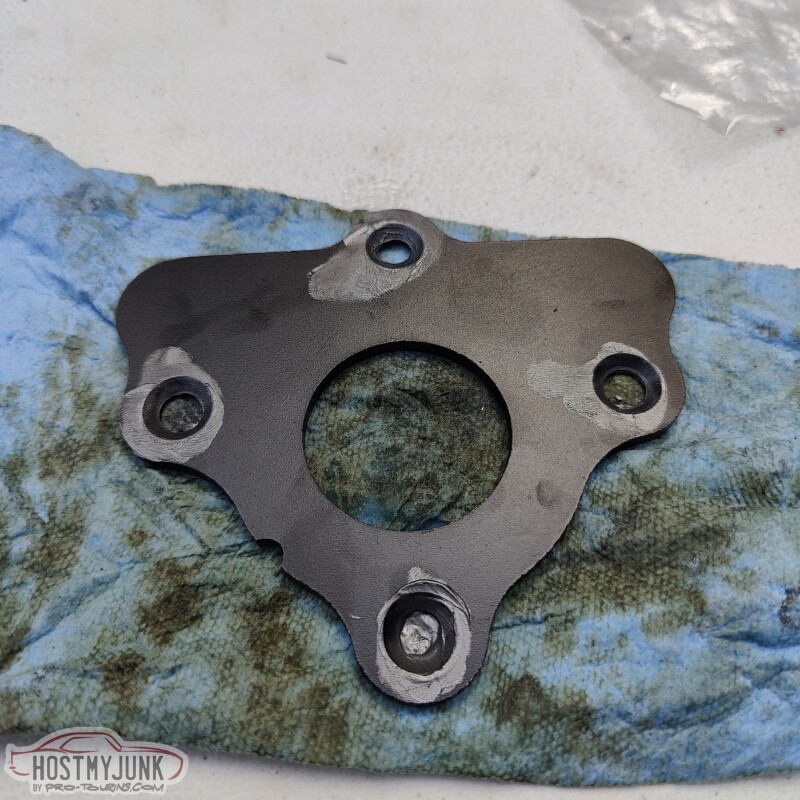
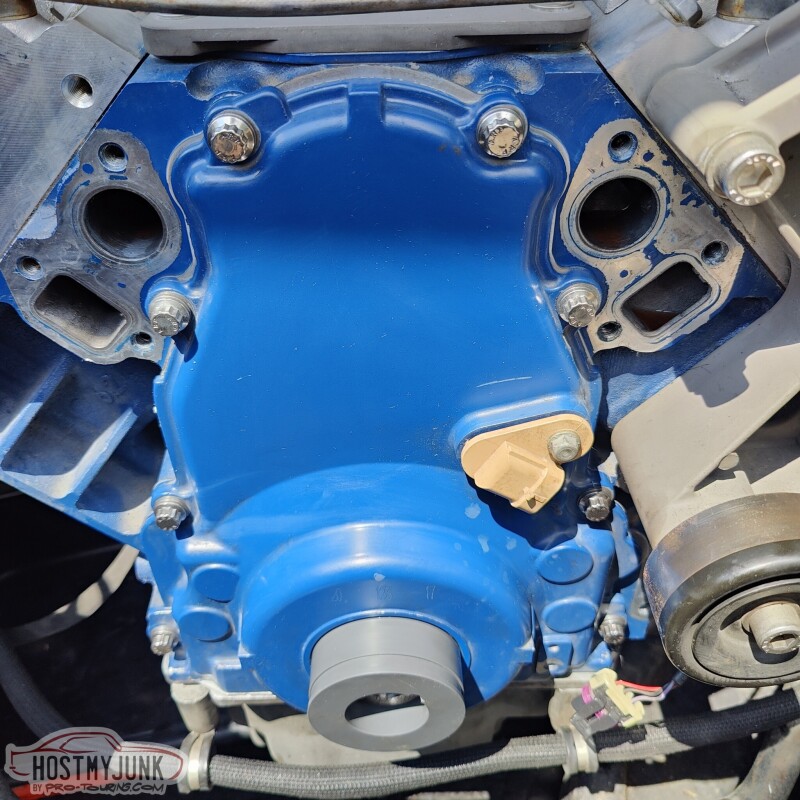
I got a new cam retainer plate...
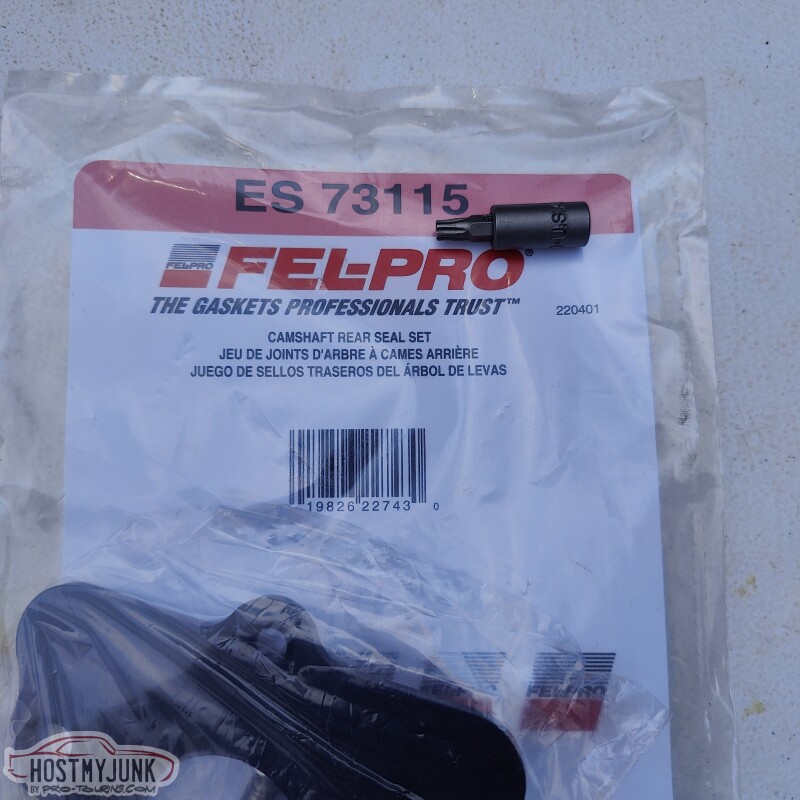
and applied some anti-seize to the retainer bolts, just in case.
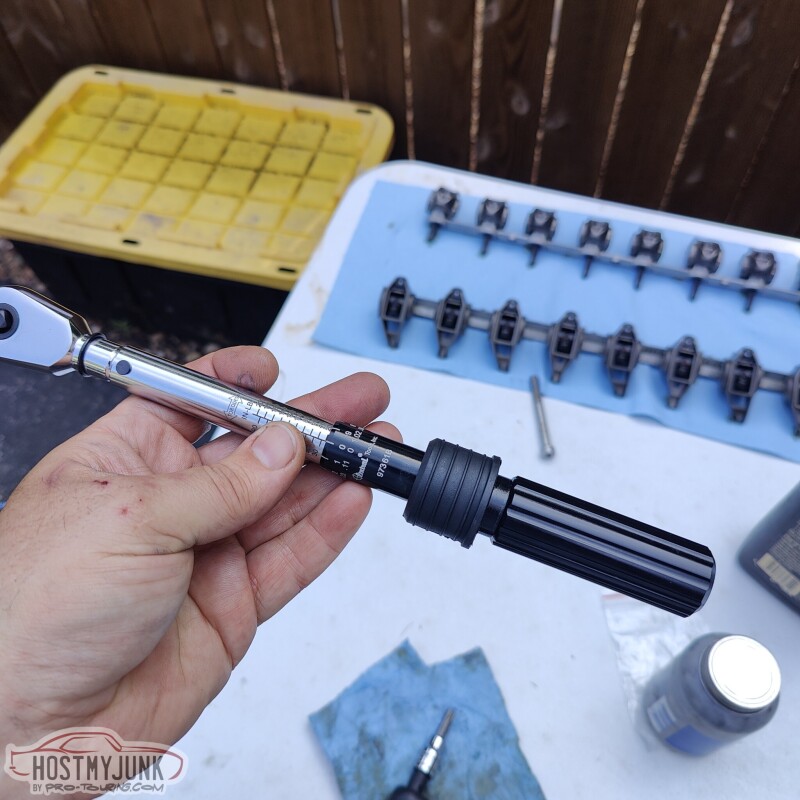
I even bought a fancy new baby torque wrench to make sure everything was to spec.
Cam is in...

The timing chain is aligned and the cam gear is bolted in place.
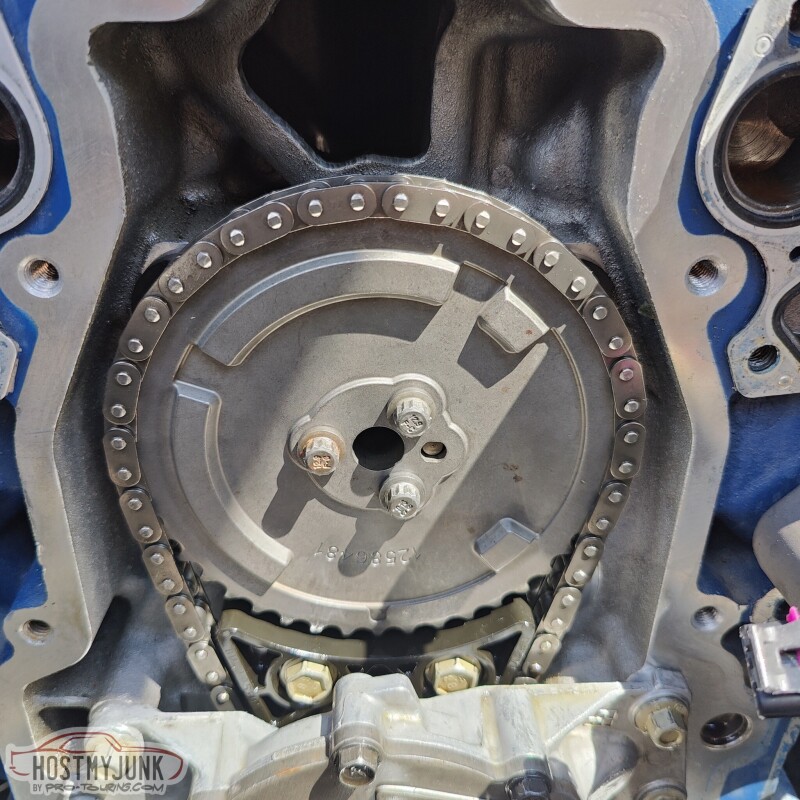
I had some spare hardware banging around, so I added a little bling to the front cover. I also forgot to plug the cam sensor back in, which bit me in the a$$ later.
More progress to come!
Andrew
I wasn't completely unhappy with the cam that was in the Cougar before. It was a cam that my buddy chose for this engine, and it is the BTR Stg2 LS3 cam. The cam makes excellent power but I wanted something with a little less overlap, so I called Cam Motion and we discussed my needs and I got a very similar cam, but with a wider LSA.
The last time that I did a cam swap in the Cougar I used the wooden dowel method and it worked great, so I did it again.
There is just enough room in front of the engine to the core support. The cam has to be maneuvered between the hood support uprights, but it does slide in.
I got a new cam retainer plate...
and applied some anti-seize to the retainer bolts, just in case.
I even bought a fancy new baby torque wrench to make sure everything was to spec.
Cam is in...
The timing chain is aligned and the cam gear is bolted in place.
I had some spare hardware banging around, so I added a little bling to the front cover. I also forgot to plug the cam sensor back in, which bit me in the a$$ later.
More progress to come!
Andrew
The following 2 users liked this post by Project GatTagO:
Rick Dorion (09-06-2023), ryeguy2006a (09-07-2023)
09-14-2023, 01:22 PM
#1276
TECH Senior Member
Thread Starter
iTrader: (7)
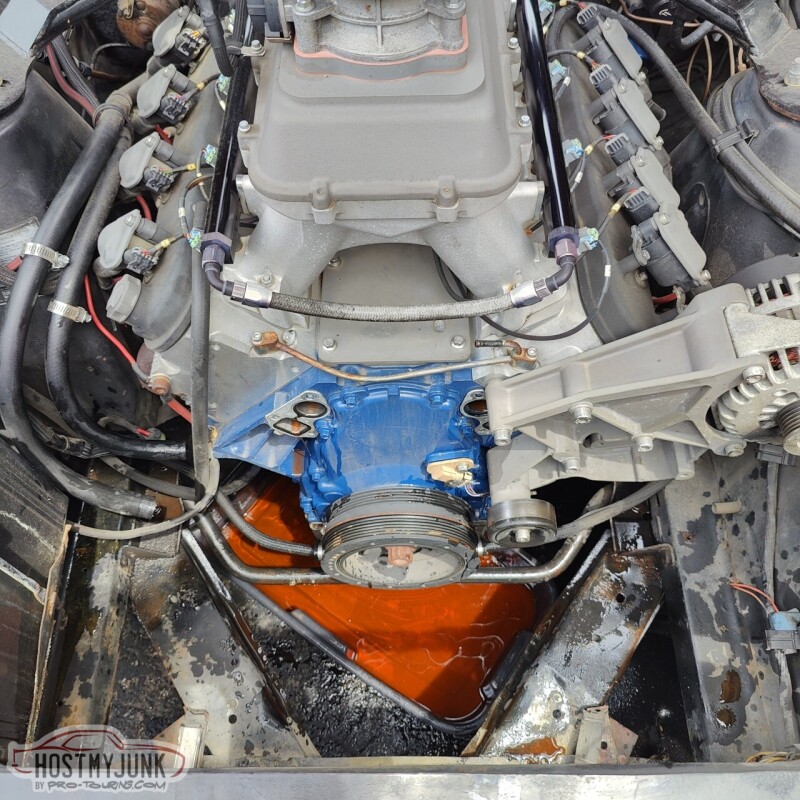
Now that LS Fest has come and gone, and cat is out of the bag...In case y'all aren't catching on, this thing is getting a LSA supercharger.
Now that the cam has been installed, a stock LSA balancer needs to be installed. Since this is a LS 3 it does not have a crank keyway, but I did have a crank pinning kit handy.

Big thanks to @kwhizz for sending me the balancer and the pinning kit, back in 2017...
The kit has a fixture with a drill and a precision reamer to make an accurate hole for the dowel pin.
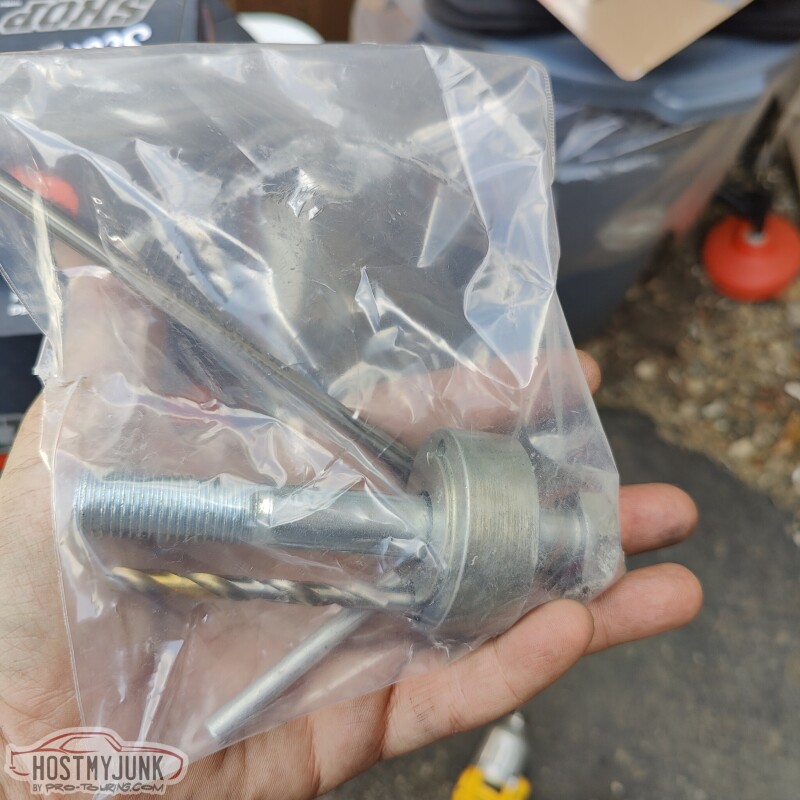
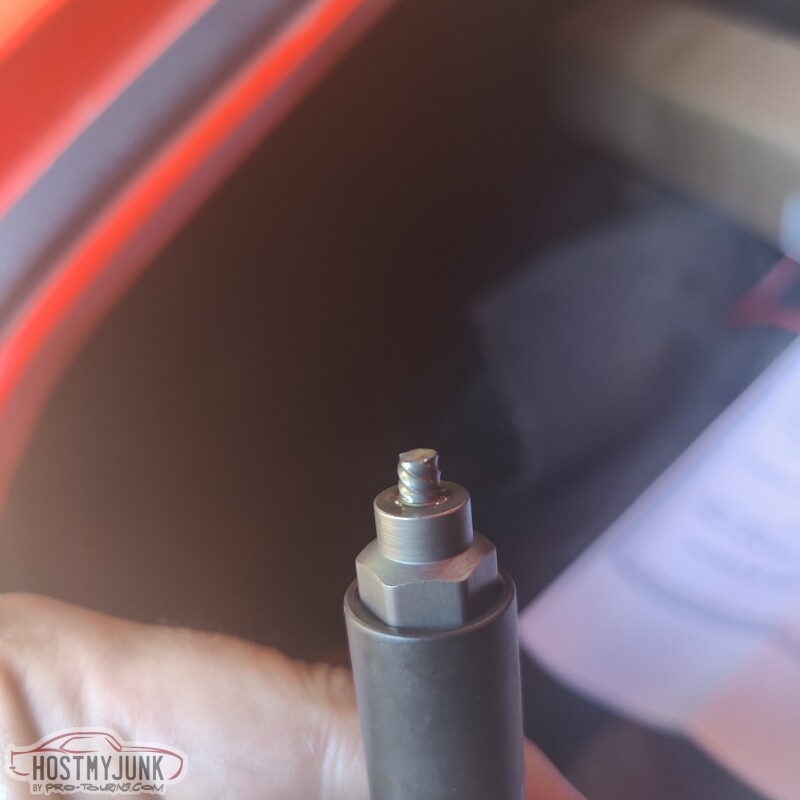
The drilling and reaming were straightforward, and here you see the dowel being tapped in. It is not a press fit, but a very close slip fit.
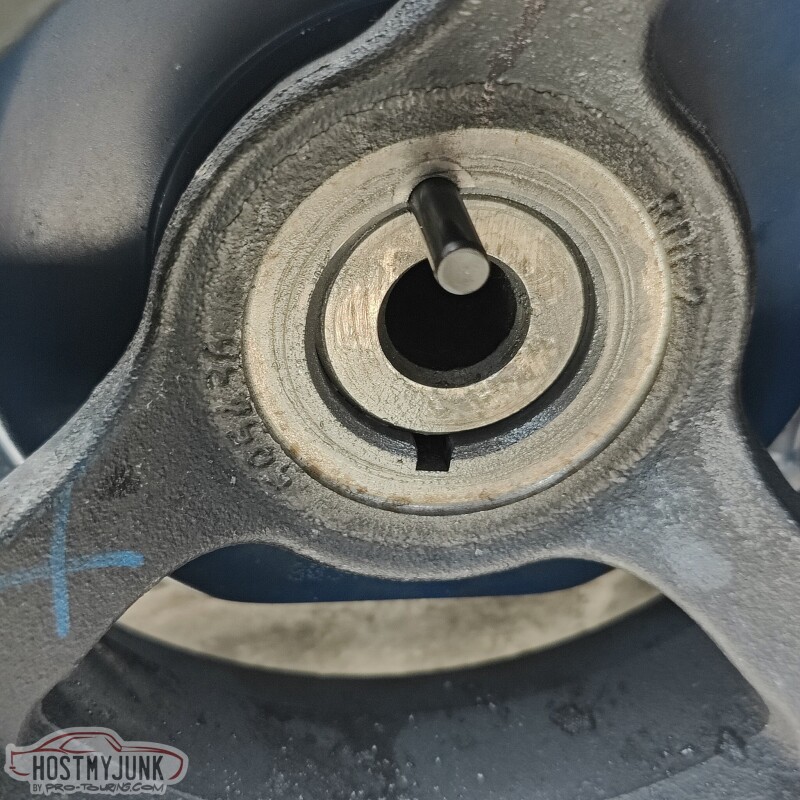
The dowel pin is fully seated...

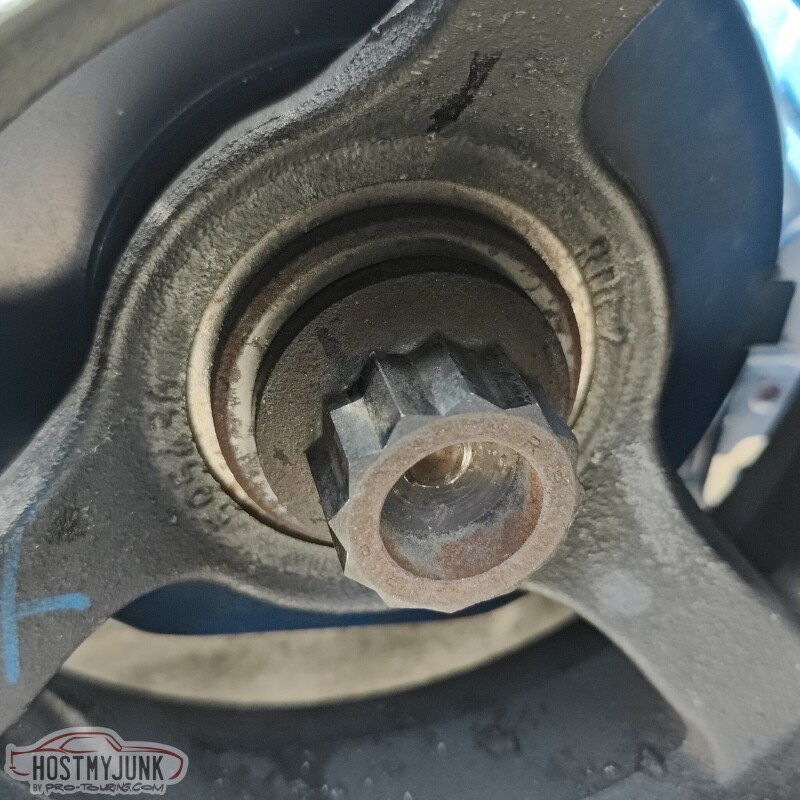
And finally the balancer can be installed. To tighten the balancer, I took off the starter and used a flywheel locking tool and a 250lb/ft torque wrench to tighten the ARP balancer bolt to 235lb/ft.
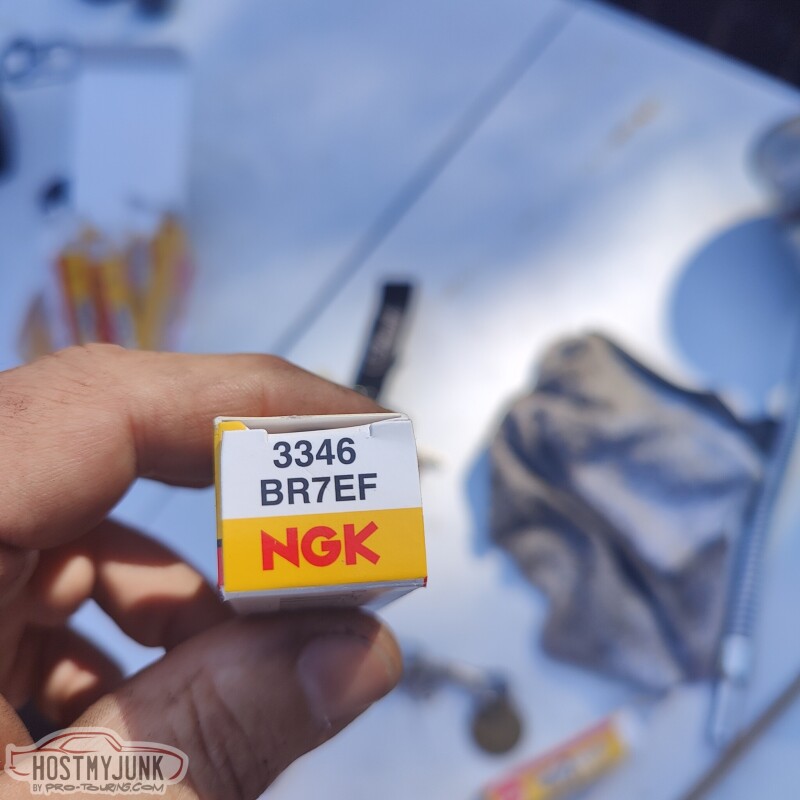
I got new NGK TR7 plugs...
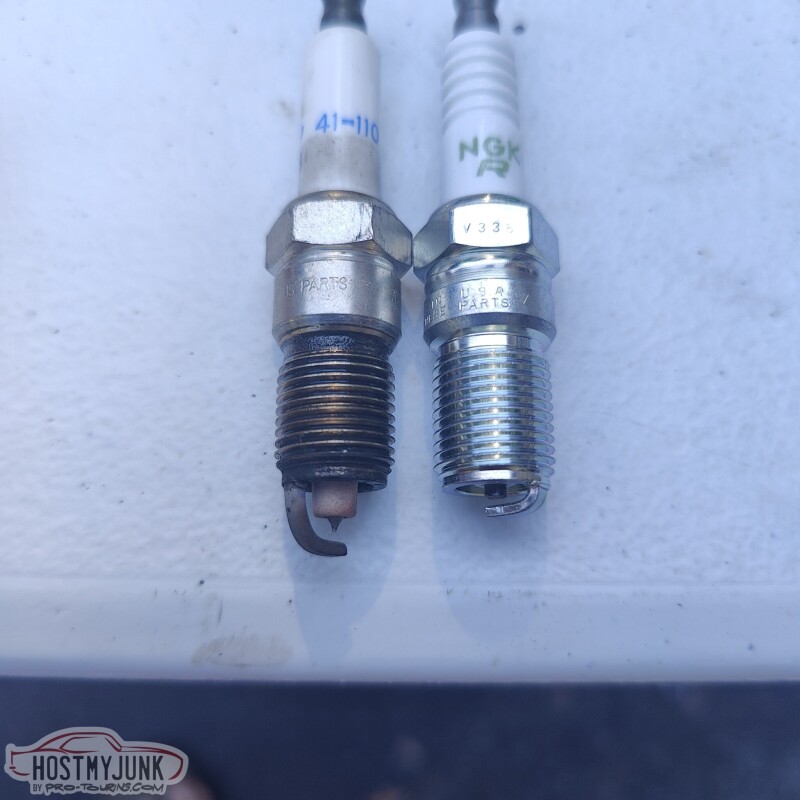
Here is a comparison with the LS3 plugs that were in it.
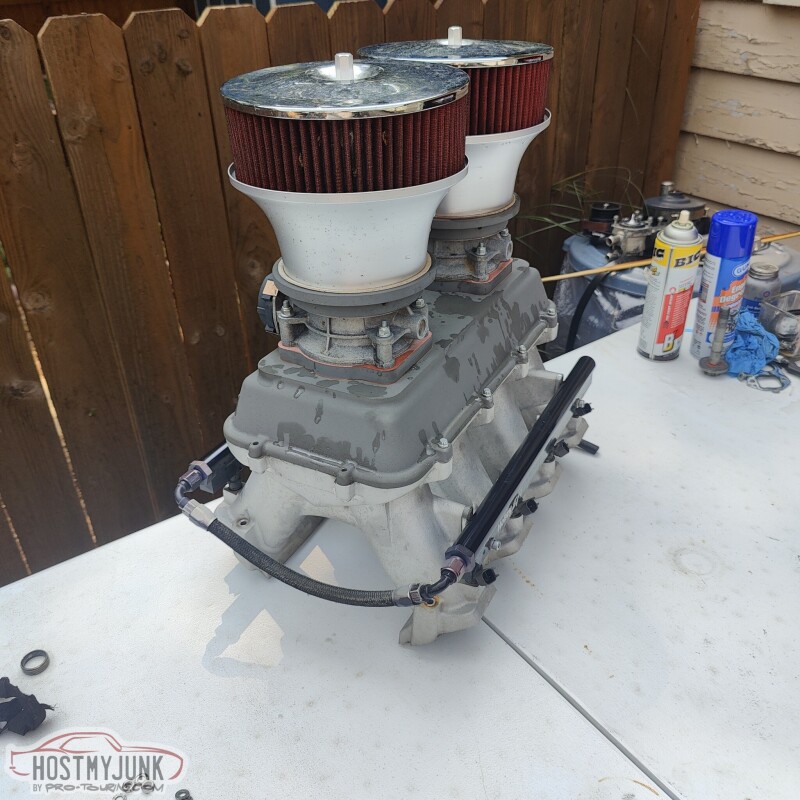
And finally the Hi-Ram comes off to make room for the LSA blower...
More to come very soon.
Andrew
Now that the cam has been installed, a stock LSA balancer needs to be installed. Since this is a LS 3 it does not have a crank keyway, but I did have a crank pinning kit handy.
Big thanks to @kwhizz for sending me the balancer and the pinning kit, back in 2017...
The kit has a fixture with a drill and a precision reamer to make an accurate hole for the dowel pin.
The drilling and reaming were straightforward, and here you see the dowel being tapped in. It is not a press fit, but a very close slip fit.
The dowel pin is fully seated...
And finally the balancer can be installed. To tighten the balancer, I took off the starter and used a flywheel locking tool and a 250lb/ft torque wrench to tighten the ARP balancer bolt to 235lb/ft.
I got new NGK TR7 plugs...
Here is a comparison with the LS3 plugs that were in it.
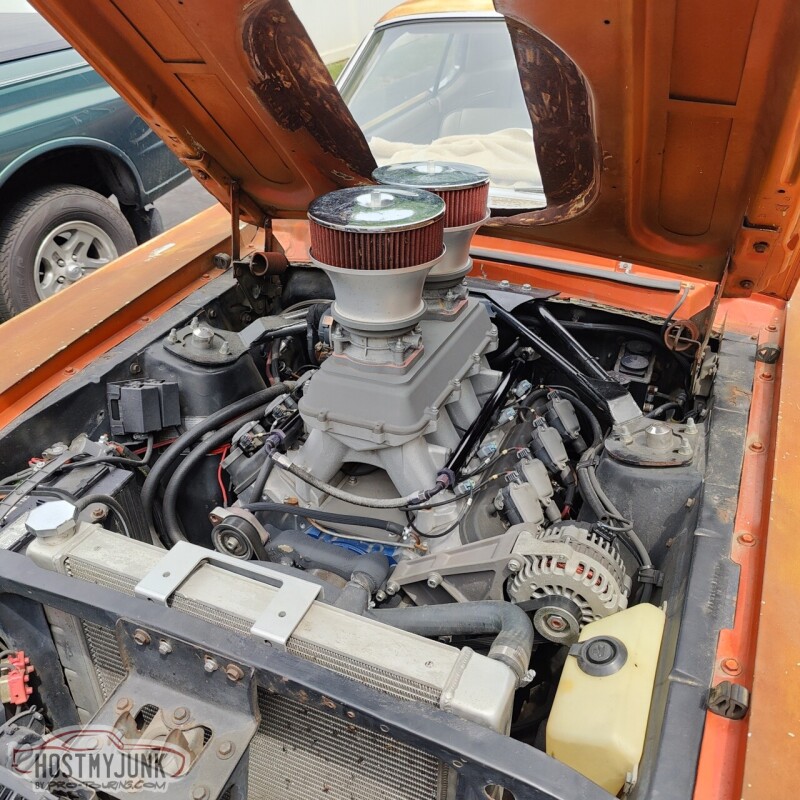
And finally the Hi-Ram comes off to make room for the LSA blower...
More to come very soon.
Andrew
The following users liked this post:
kwhizz (09-14-2023)
The following 2 users liked this post by NCDEERE:
Project GatTagO (09-14-2023), Zanie (09-15-2023)
09-14-2023, 10:51 PM
#1278
TECH Senior Member
Thread Starter
iTrader: (7)
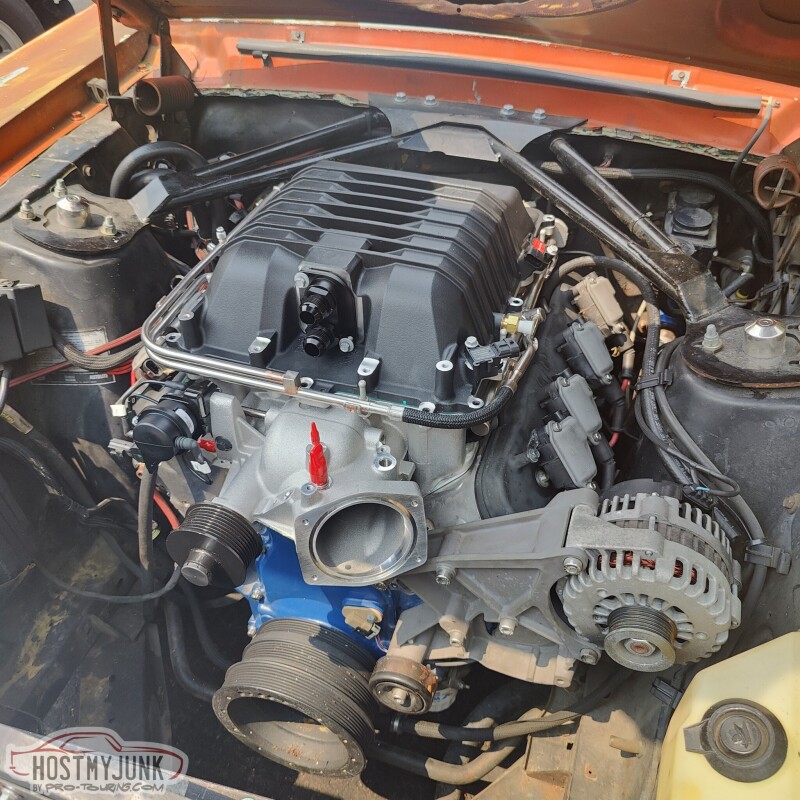
Here is the LSA supercharger mocked up for the first time.
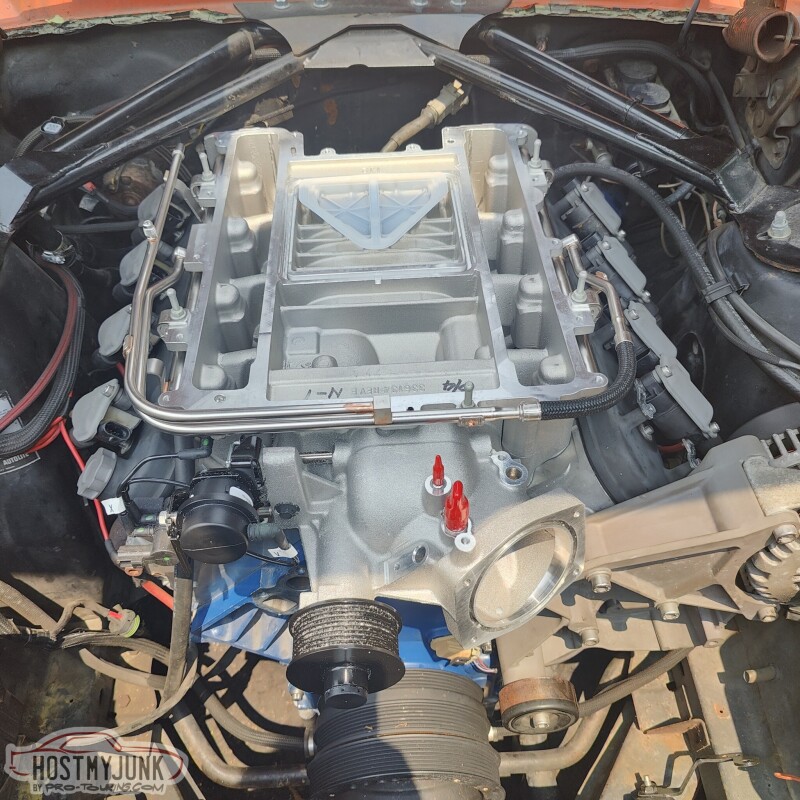
Clearance on the driver's side looks pretty good.
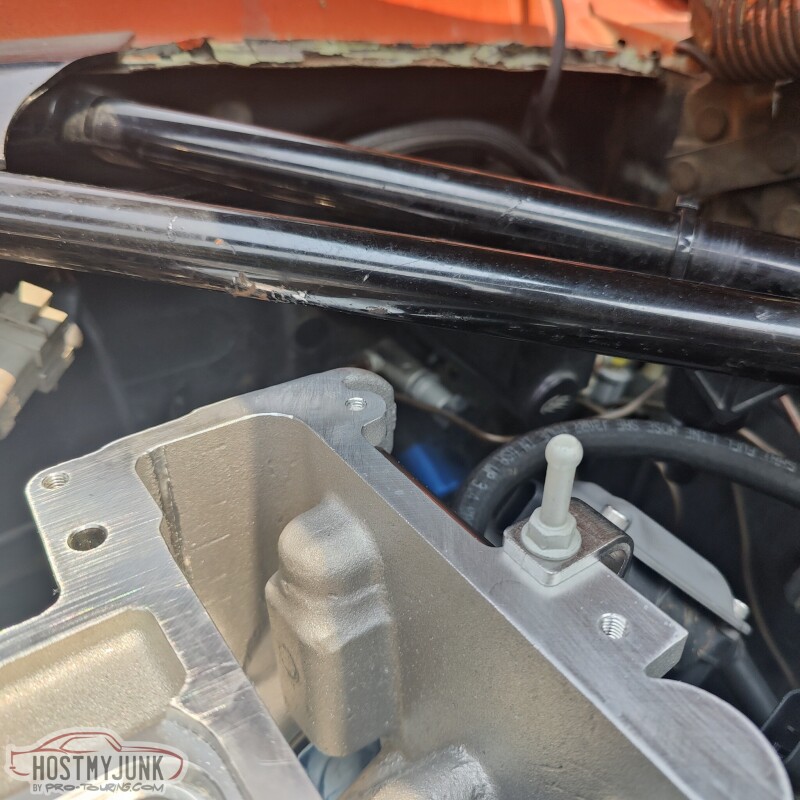
However, it looks pretty tight on the passenger side.
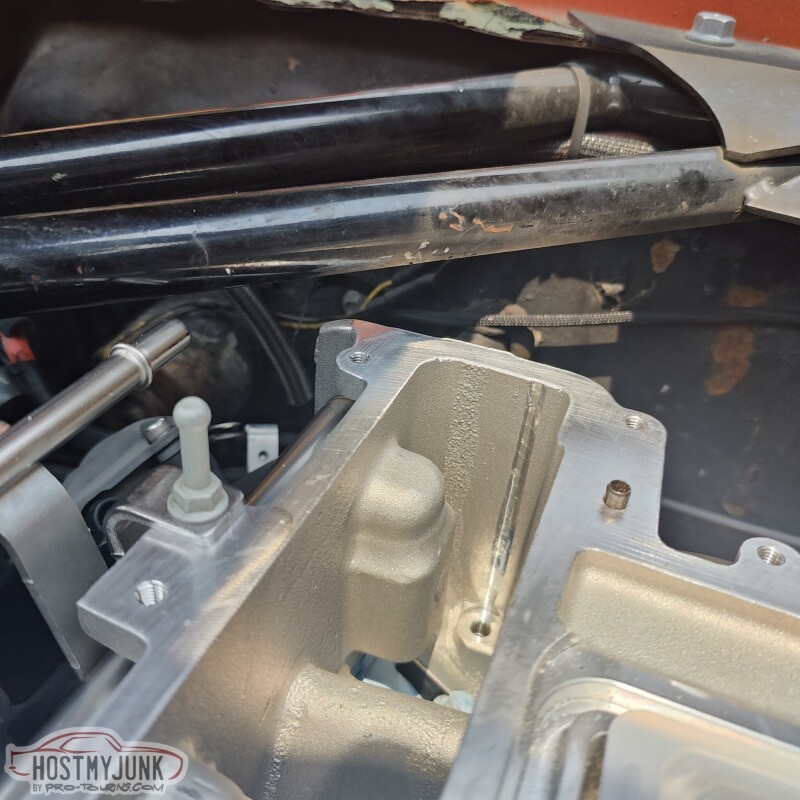
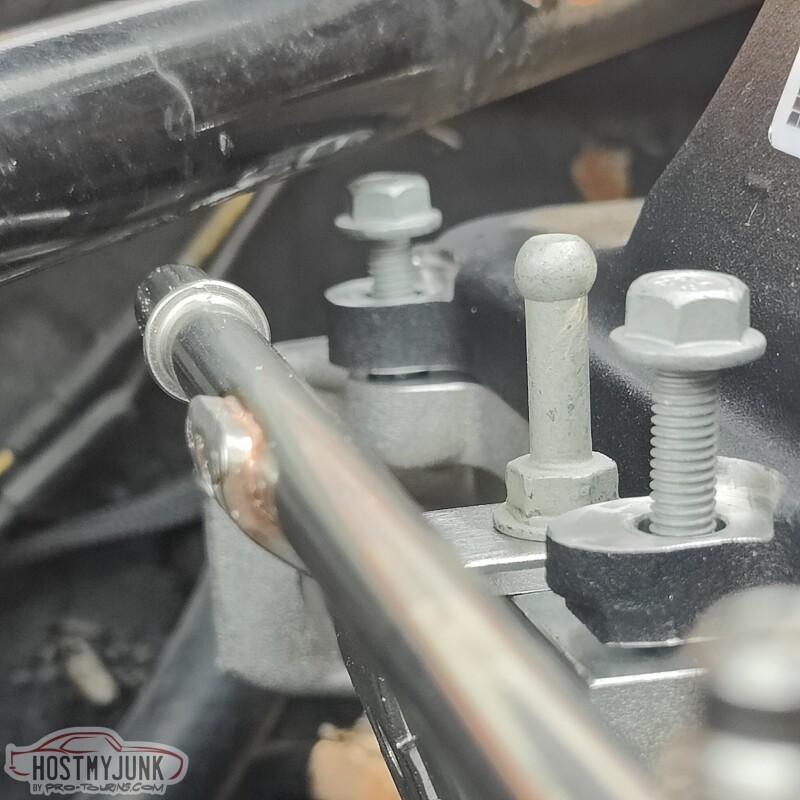
With the lid installed, I can just barely drop the bolt under the strut tower brace. But something is definitely going to have to be done about the fuel rail inlet. There is no way of getting a fitting on that inlet without crashing into the strut tower brace.
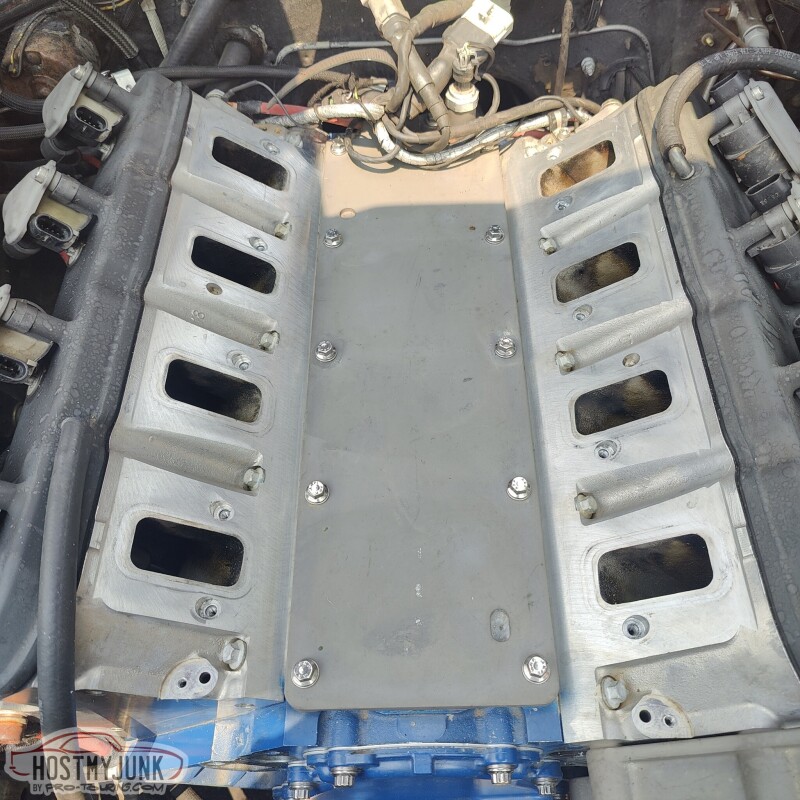
I didn't remove the valley cover, but I did my best to really clean everything before installing the supercharger for the final time.
Here it is installed for good. You can also see that I installed a different intercooler inlet/outlet adapter from LSx Concepts. This adapter uses ORB style fittings which allow for a wide variety of plumbing options. I plan to use AN-12 size fittings with pushlock style fittings, but using standard 3/4" heater hope for the lines. Standard heater hose is more than up to the task, being that these systems are generally low pressure. Heater hose is also very pliable, readily available, and inexpensive.
In case anyone is wondering, that is a Holley high-mount alternator bracket, which is basically a C5/C6 Corvette bracket, but has spacing for a less expensive truck style alternator, instead of the Corvette specific alternator.
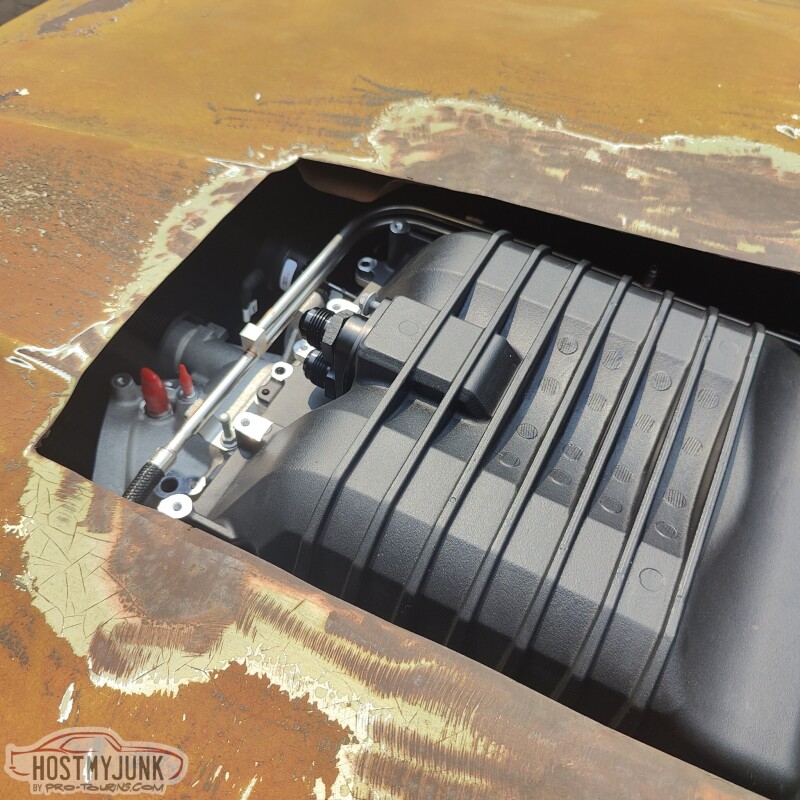
Something is definitely going to have to be done about the hole in the hood.
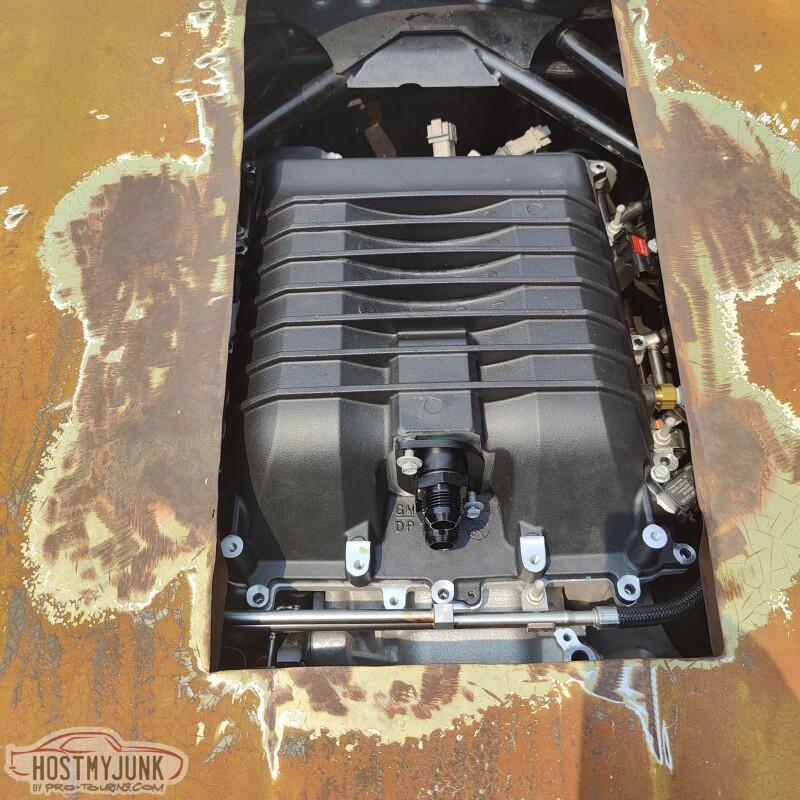
Although if the hole wasn't there, one would have to be added in order to clear the very front of the supercharger lid.
More to come...
Andrew
Clearance on the driver's side looks pretty good.
However, it looks pretty tight on the passenger side.
With the lid installed, I can just barely drop the bolt under the strut tower brace. But something is definitely going to have to be done about the fuel rail inlet. There is no way of getting a fitting on that inlet without crashing into the strut tower brace.
I didn't remove the valley cover, but I did my best to really clean everything before installing the supercharger for the final time.
Here it is installed for good. You can also see that I installed a different intercooler inlet/outlet adapter from LSx Concepts. This adapter uses ORB style fittings which allow for a wide variety of plumbing options. I plan to use AN-12 size fittings with pushlock style fittings, but using standard 3/4" heater hope for the lines. Standard heater hose is more than up to the task, being that these systems are generally low pressure. Heater hose is also very pliable, readily available, and inexpensive.
In case anyone is wondering, that is a Holley high-mount alternator bracket, which is basically a C5/C6 Corvette bracket, but has spacing for a less expensive truck style alternator, instead of the Corvette specific alternator.
Something is definitely going to have to be done about the hole in the hood.
Although if the hole wasn't there, one would have to be added in order to clear the very front of the supercharger lid.
More to come...
Andrew
The following users liked this post:
G Atsma (09-15-2023)
09-15-2023, 04:37 PM
#1279
LS1Tech Co-Founder
iTrader: (34)
Great hanging out with you at LS Fest, I didn't imbibe that many beverages since I was having good progress on the banana.
Can you adapt a '69 Cougar hood scoop?
I feel like I should buy another car and borrow that tunnel ram. Half kidding.
Can you adapt a '69 Cougar hood scoop?
I feel like I should buy another car and borrow that tunnel ram. Half kidding.
The following 2 users liked this post by Pro Stock John:
G Atsma (09-15-2023), Project GatTagO (09-16-2023)
09-16-2023, 09:50 PM
#1280
TECH Senior Member
Thread Starter
iTrader: (7)
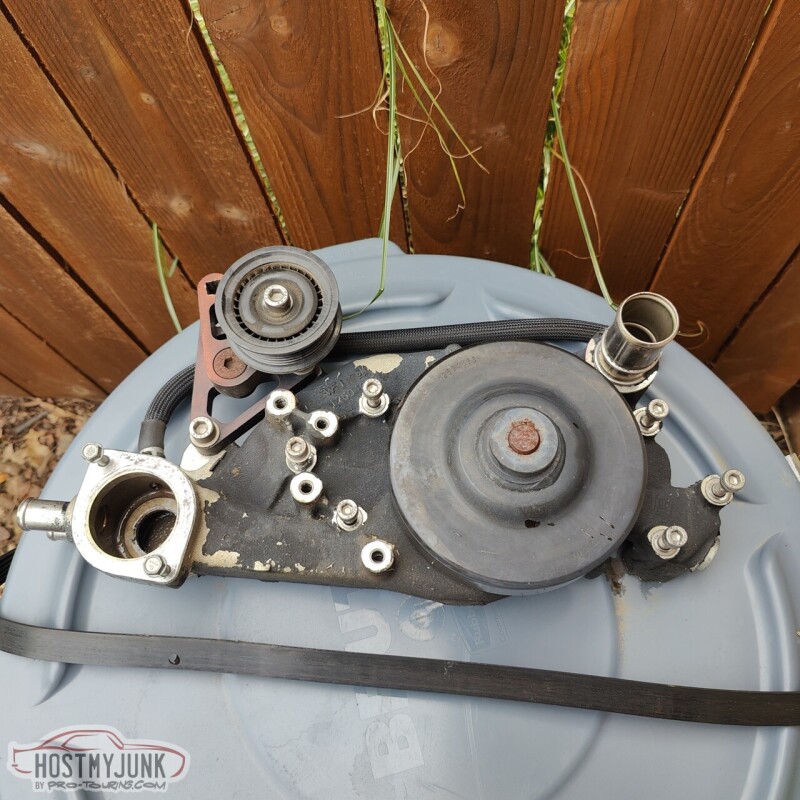
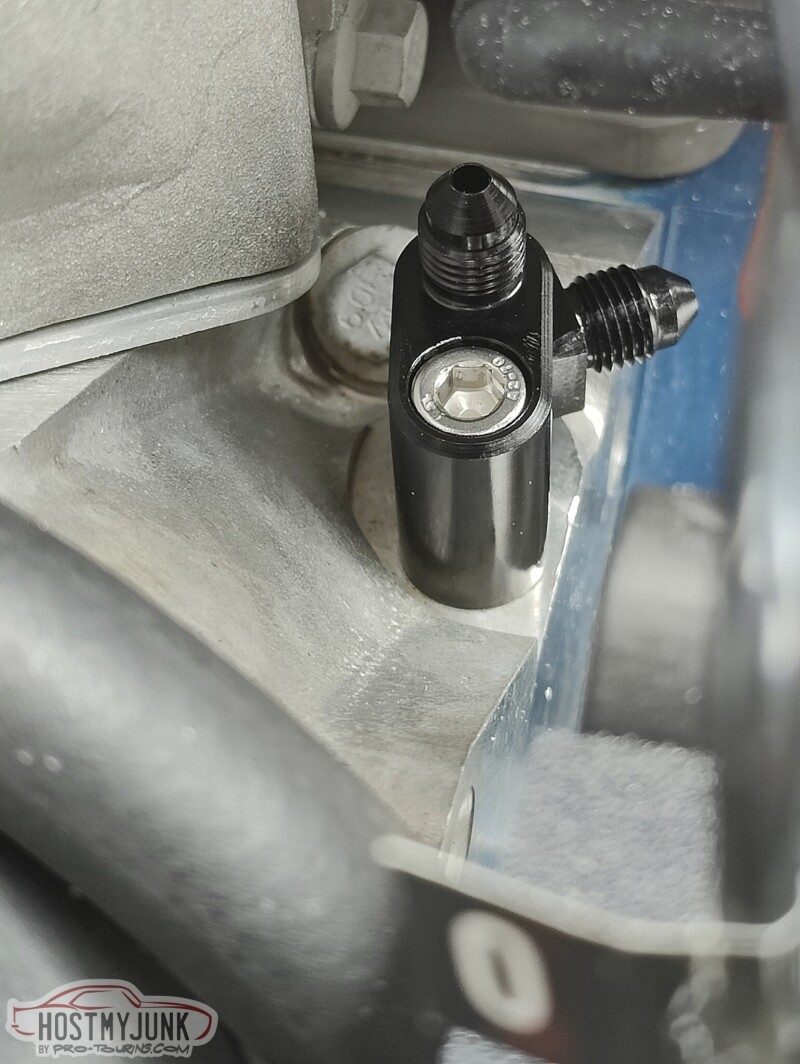
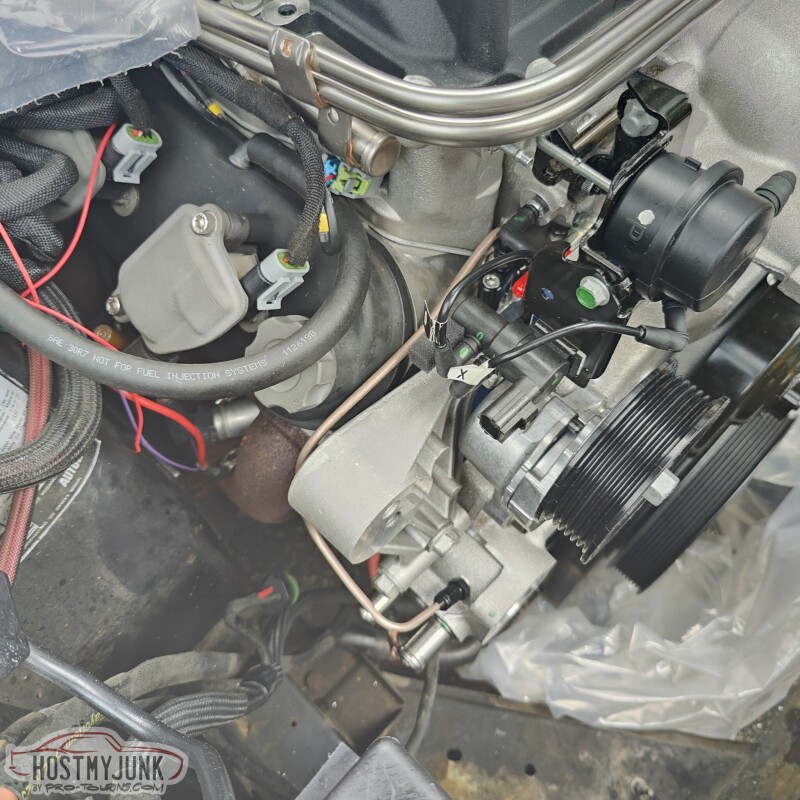
The stock LSA engines use some sort of two-piece front crossover for the head steam vents. I have never seen what the stock ones look like. Besides, this is a hot rod and we make hot rod parts.
I really like using these little adapters from Earl's. There are other ones on the market, but I find these to be the most compact and cleverly designed. This one is on the passenger side. It has a side exit that till go to the driver's side and a top exit that I will plumb to the water pump.
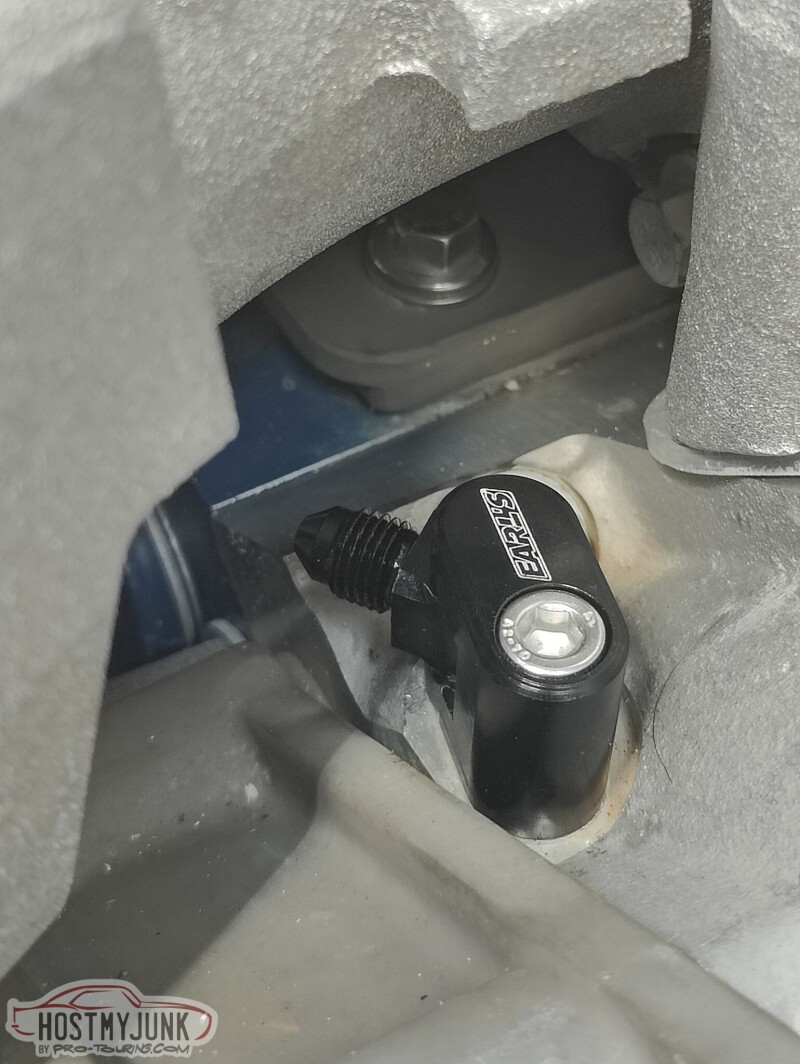
This is the driver's side fitting.
I made a 3/16" NiCopp tube that connects the two heads together. I love working with NiCopp because it is easy to bend, flare, and adds a neat look to the engine.
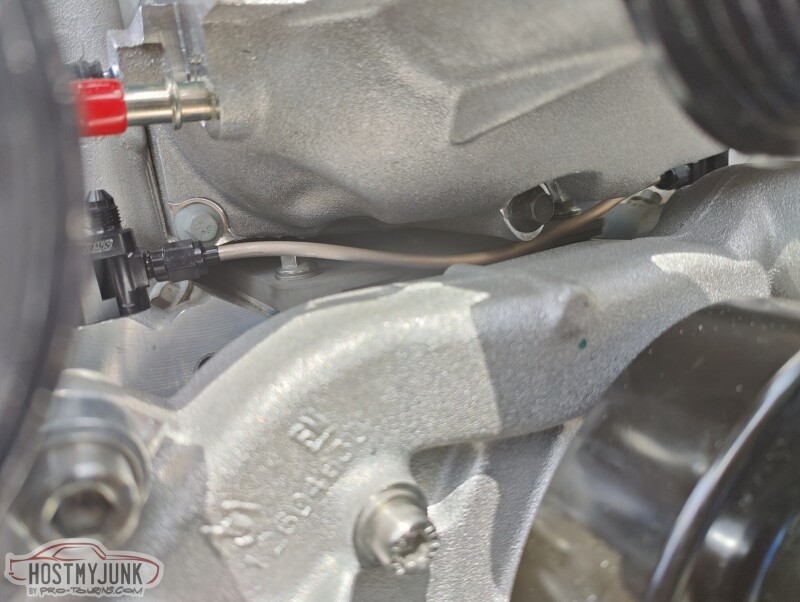
I then drilled and tapped a hole in the water pump, in the thermostat area, just above where the large heater hose is connected
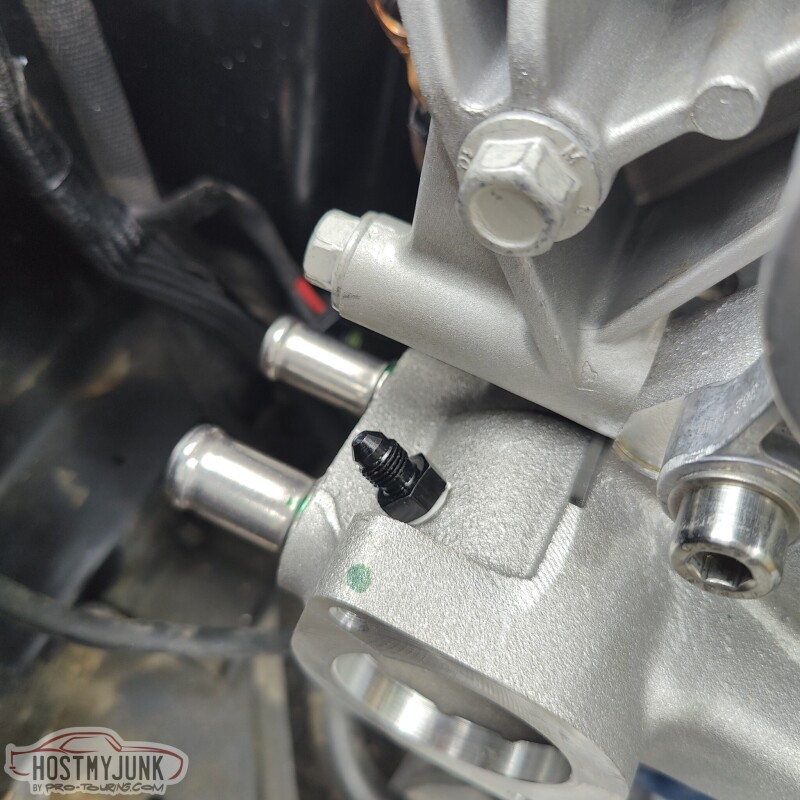
I then bent up another NiCopp tube that connects the passenger side top fitting to the water pump.
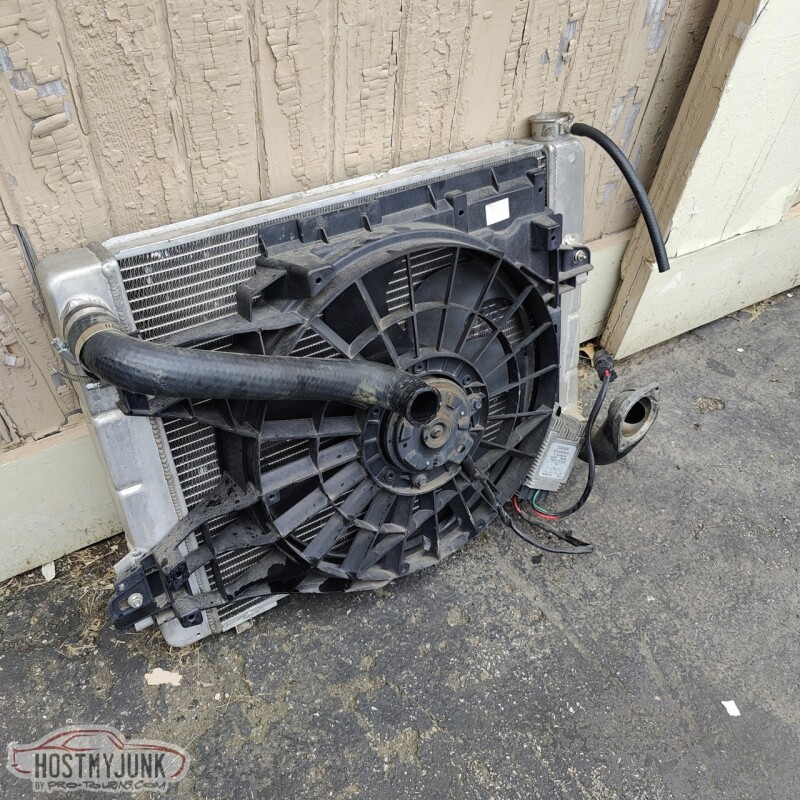
Another key piece of the puzzle arrived. There are actually two new parts here.
First is the new, dual pass radiator. The supercharger snout points to the driver's side of the engine, which would interfere with the old radiator top hose. I need a dual pass radiator so that the top hose and the bottom hose go to the passenger side.
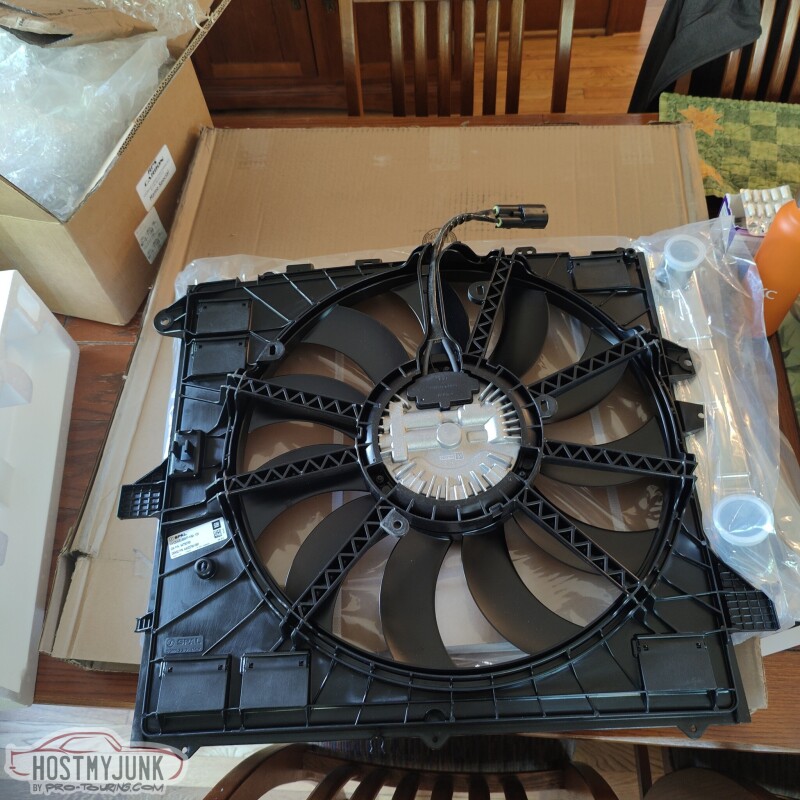
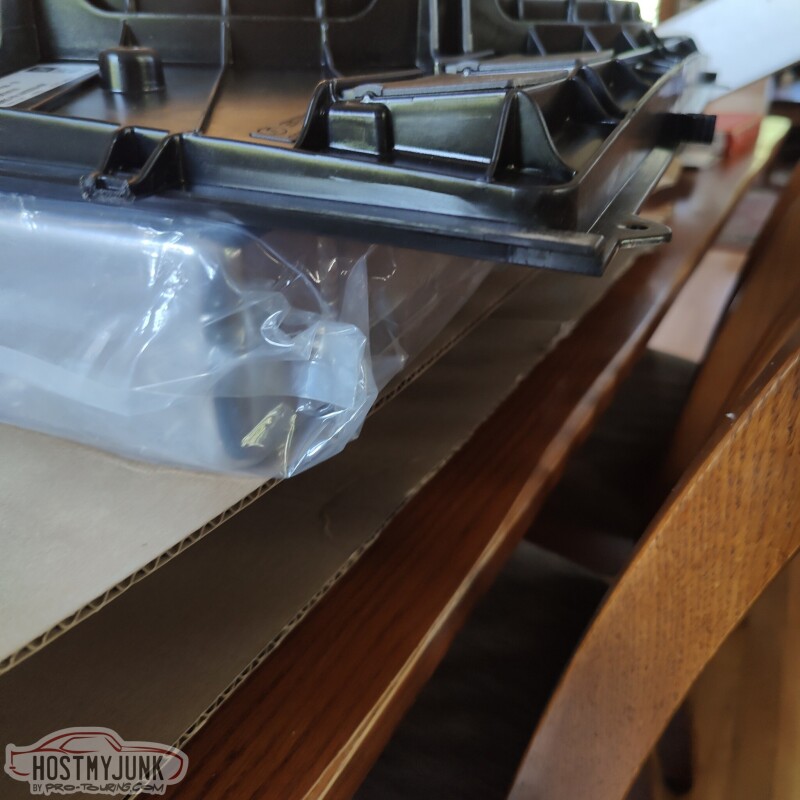
The second part is the new fan. This is a 6th Gen Camaro 850 watt brushless fan. As you can see, it is a little tall for this radiator, but we have a plan for making it work.
Andrew
I really like using these little adapters from Earl's. There are other ones on the market, but I find these to be the most compact and cleverly designed. This one is on the passenger side. It has a side exit that till go to the driver's side and a top exit that I will plumb to the water pump.
This is the driver's side fitting.
I made a 3/16" NiCopp tube that connects the two heads together. I love working with NiCopp because it is easy to bend, flare, and adds a neat look to the engine.
I then drilled and tapped a hole in the water pump, in the thermostat area, just above where the large heater hose is connected
I then bent up another NiCopp tube that connects the passenger side top fitting to the water pump.
Another key piece of the puzzle arrived. There are actually two new parts here.
First is the new, dual pass radiator. The supercharger snout points to the driver's side of the engine, which would interfere with the old radiator top hose. I need a dual pass radiator so that the top hose and the bottom hose go to the passenger side.
The second part is the new fan. This is a 6th Gen Camaro 850 watt brushless fan. As you can see, it is a little tall for this radiator, but we have a plan for making it work.
Andrew