When you click on links to various merchants on this site and make a purchase, this can result in this site earning a commission. Affiliate programs and affiliations include, but are not limited to, the eBay Partner Network.
Here is the re-do of the harness plug using the Deutch connector.
The terminals crimp on using the same tool that I used for the Delphi connectors and push in from the back of the plug which has an integral silicone seal that keeps the connector water tight.
Once the pins are in place, the green wedge snaps in place and retains the pins.
I also got these nifty brackets that will hold the connector securely in place. Also note that I used a large piece of heat shrink to seal the back of the connector.
The other large connector is for the injector harness. I still need to add the other injector harness for the odd bank. The other wires that run forward are for the cam sensor, coolant temp sensor, and the fuel pressure sensor. I am not sure exactly how I will mount the fuel pressure sending unit yet, so for now it will keep the wires long.
I also decided to use heat shrink to cover the wires for the coil harness. From the center, cylinders 2 and 4 will run forward and cylinders 6 and 8 will come around the back side. I did this strictly for the appearance of symmetry. Of course I forgot my label...:-damnit
I will finish the coil harnesses today and will post updates later.
VEry nice progress. I love the look of shrink tubing as a harness wrap.
I do too. I used 1/4" tubing and with the thin wire it shrank down just enough to be tidy, but not so tight that it shows the wires inside. The tubing is also very flexible. Playing with all this stuff was a learning experience as some heat shrink gets very stiff after it has been recovered (shrunk). This is what I used:
Thanks for the link Andrew. Hopefully some day I will get to use them. Do you ever think you might change out your shortblock for more CI someday? Even though you may have different criteria for the Cougar's use, I don't see how it would be driven that much after reading how well you GTO pulls.
Thanks for the link Andrew. Hopefully some day I will get to use them. Do you ever think you might change out your shortblock for more CI someday? Even though you may have different criteria for the Cougar's use, I don't see how it would be driven that much after reading how well you GTO pulls.
The long term plan is to put the 6.2L in the Cougar and send off the 5.3L block to get sleeved and stroked ;-)
Although, I think this Cougar will run hard because it weights a lot less than the GTO. I believe it'll run 11's.
The level of detail in your build is awesome! Make as my build look like a total redneck job. Lol.
Thanks! Don't be so hard on yourself. Your fab skills are way above mine!
Not much progress as I am waiting on a few supplies to finish the odd side coil harness. I did have a chance to visit the car and take some pictures and measurements to plan out a few things. There are various sources that list the radiator core size, but that rarely equates to the exact external dimensions of the radiator, which is what I was looking for.
Here is the stock radiator:
I am quite certain that it is original from 1967 as there is pretty good build-up inside of it. Most sources will show this radiator as being 24" wide x 15" tall. This is the core size, with the actual dimensions being 25" x 21".
Off on the driver's side of the radiator is what appears to be the voltage regulator (won't be needed) and an octopus with vacuum line tentacles. Presumably this is for the headlight door activation.
The width of the frame rails is about 27" and this width will be the limiting factor in sourcing a new radiator.
Over on the passenger side, the limiting factor is actually the battery tray that sticks out past the frame rails. You can also see the gnarly scale build-up inside the radiator.
Over on the driver's side is also the old MSD 6200 box. Anyone need one?
After doing a bunch of reading and looking around at various radiators, I decide to go with an OEM aluminum radiator for a C4 Corvette.
I used this radiator in my LS powered RX7 and it worked great, even with the limited airflow in that chassis. With the open grill of the Cougar, I am confident that it will work just fine. The upside to this radiator is that it is readily available, cheap, and super light weight. It also has a built in trans cooler, but I won't need that. The other nice thing about this radiator is that the hose sizes are an exact match with the LS engine. This will make sourcing hoses a lot easier.
This radiator is also the right size for the fan that I am going to use. I am a big fan of OEM fans since they are designed to be quiet and flow a lot of air. The one I am going to use is from a C6 Corvette:
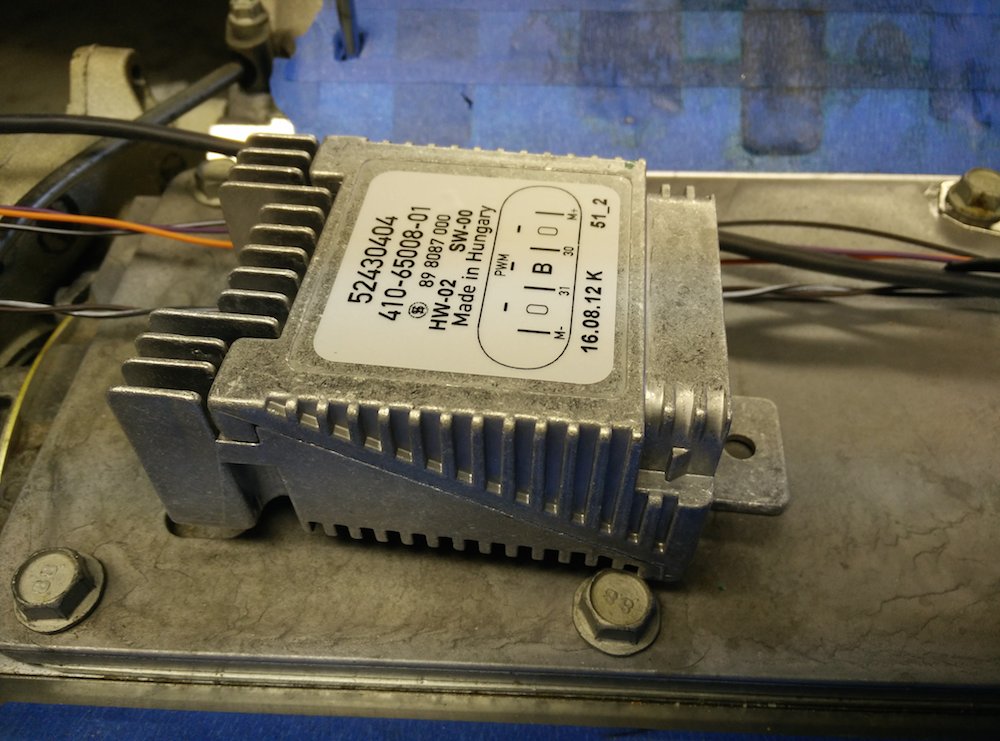
This controller is essentially a solid state relay that will run the fan at variable speed. It takes a PWM signal from the ECU and will ramp up the fan speed based on temperature, vehicle speed, A/C activation, basically whatever you want to program. The Holley Dominator can be configured to provide this signal and the programming behind it. So no more loud fans!
Not much to report, but I took a few pictures of the dash. The original gauges were replaced a long time ago with custom Stewart Warner gauges. The tach is mechanical, as is the speedo (of course), and we must have the all important vacuum gauge!
Over to the right are a bank of smaller gauges: oil pressure, water temp, fuel level, amps, and forget what the far right gauge is.
My original plan was to use all of the gauges and make them functional, but after seeing all of the sensors that the Holley Dominator has, it makes a lot of sense to just use one of the new Holley digital dash displays. I'll make a mount that clamps to the steering column and positions the dash right in front.
As any custom in the 70s, the stock radio was replaced by a groovy AM/FM 8 track HiFi!
I am going to keep the head unit there, but will see about installing an iPod dock inside where the tapes used to go, and have that going to a small amp and with a couple of speakers. Nothing crazy.
Got a few more goodies today. I've been thinking about how I want to mount the fuel pressure sender, and I bought a couple of different adapters that will give me some flexibility. One option is to use a -6 female to -6 male adapter with a 1/8" NPT port. With this adapter I can just mount it to the fuel rail and be done with it:
Another option, and the one that I am leaning towards is to use this fitting:
I like the little bracket and I was thinking that I can mount this out of the way, under the car, inline with the fuel line. Earl's only makes it in blue, otherwise I would mount it on the fire wall. I will see how it all looks once the engine is installed.
Here is the C6 Corvette fan controller. It's rather large, but surprisingly light. As best as I can figure, this is a solid state relay that is made by Bosch. It should work with the Holley Dominator and allow me to program the fan to run via PWM.
I also picked up a little bling from Katech. I like to use the non-springloaded belt tensioner because I've had belt jumping issues in the past. This tensioner cured the problem so I just use them now.
I also picked up the Holley alternator bracket. It is a very nicely cast piece and looks very much like the Corvette bracket, except it takes the much less expensive truck style alternator, instead of the Corvette alternator. Smart of Holley to make this bracket.
I'll probably grind smooth the casting flash and give it a quick rattle can paint job. I did that on my GTO and it works great.
I also picked up a 130 amp alternator. I might paint the aluminum part of the case to match the bracket (and probably paint the water pump as well).
One problem area is behind the alternator where it interferes with the #1 coil. Holley includes a little off-set bracket, just for this, to move the coil over a little, but sadly it doesn't work with the round coils. No big deal, I will mod the bracket as needed to make it all work.
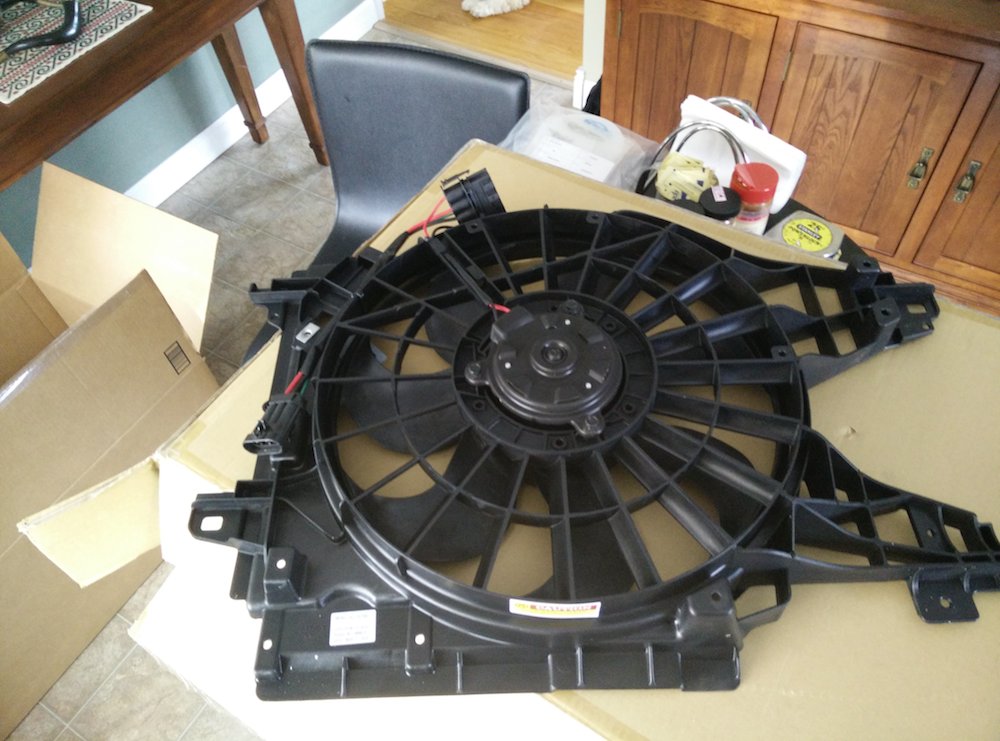
I've been looking at various fans and I decided to go with the C6 Corvette fan, mainly because it seems to be the right size, has a big 400w motor, and already comes prewired for the fan controller. There are various options available, but I saw the Dorman listed on Amazon for $80 so I couldn't pass it up. I was not surprised that it was made in Taiwan, given the low price, but who cares, last time I checked iPhones are made in Taiwan too, so country of original is no sign of quality (or the lack thereof).
It did indeed come with the right connector to mate with the fan controller, which is a big deal, since no one is able to locate a source for these connectors. Obviously, somebody at Dorman knows.
The other connector looks like a standard Metripack 800 3 cavity connector. This is where you connect power, ground, and PWM signal.
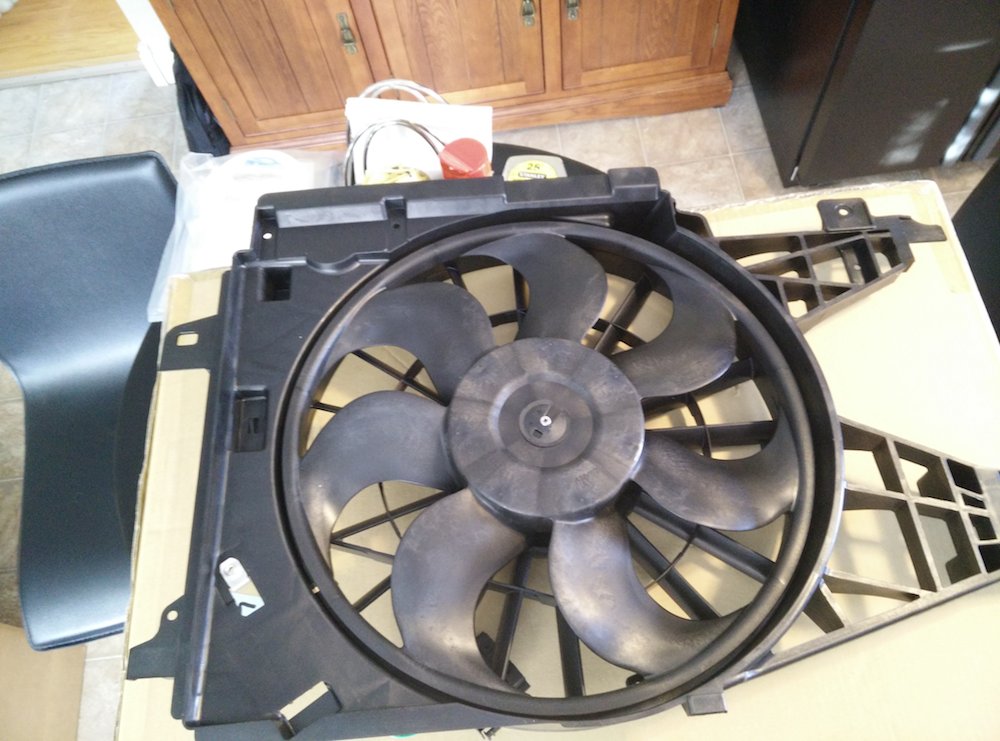
Here is the back side. The fan assembly is a beast and the fan blade is 16.5"
Here is the side that faces the radiator. I spun the thing by hand and you could already feel the air flow. But I guess most fans are like that...LOL
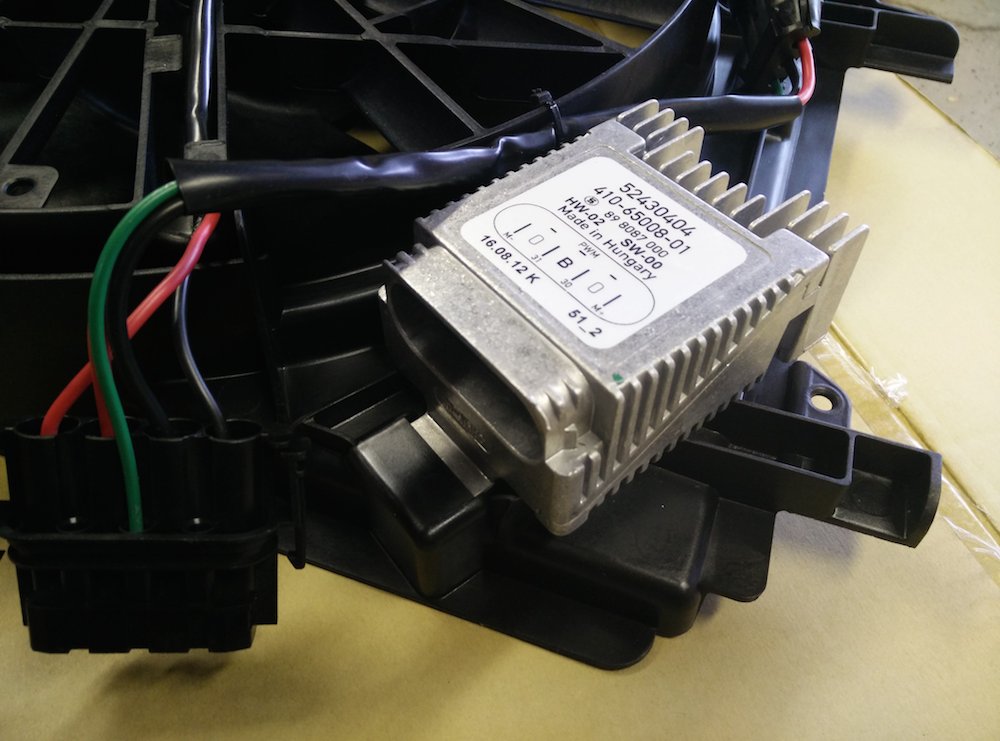
The nice part is that molded into the shroud is a place to mount the fan controller:
Just slip it under the tab and bolt it down. It even included a captured nut clip.
The plug fits the fan controller perfectly, but of course, the wires coming from the motor are too short, so that needs to be addressed. I know it was too good to be true, but for $80 my expectations were met.
Good info. how does it mount on the Corvette? You could easily mount it to a shroud like this. It is 1/8" AL. I scored it with a table saw to make sharp bends and then TIG welded the corners back together. I have in mind a similar but less boxy design for my GEN II version. I will use angled sides vs. the squared off ones


 12-24-2014, 12:03 PM