When you click on links to various merchants on this site and make a purchase, this can result in this site earning a commission. Affiliate programs and affiliations include, but are not limited to, the eBay Partner Network.
Yeah I'm making more progress than I thought I would to be completely honest! Haha. And yeah I'm going home this weekend and can get the measurement when I get home! It might be different for you tho if you are keeping your heater box... I have read that people have had problems with their coil packs hitting the heater box, along with the windshield wiper motor hitting the coil pack on the driver side on the earlier third generations.. The motor was redesigned (i think) for the updated third gens... Don't quote me but if memory serves correct, that is what I read.
Thanks for the input, TEDS! Only place I had some trouble was with my engine leveler scraping the windshield wiper cowl pinch weld... But some paint and it looked fine lol
Been awhile since the last update but I was preparing for finals week and had a bunch of stuff like that to do but finally got some more good updates! Cody and I pulled a 12-hour "shift" working on the car and we made some wooden car stands, tapped & plugged the water pump heater core nipples, along with pulling the rear end & gas tank on Saturday! Here's some pics!
Then here's just kinda a funny one to show the mess from under the car
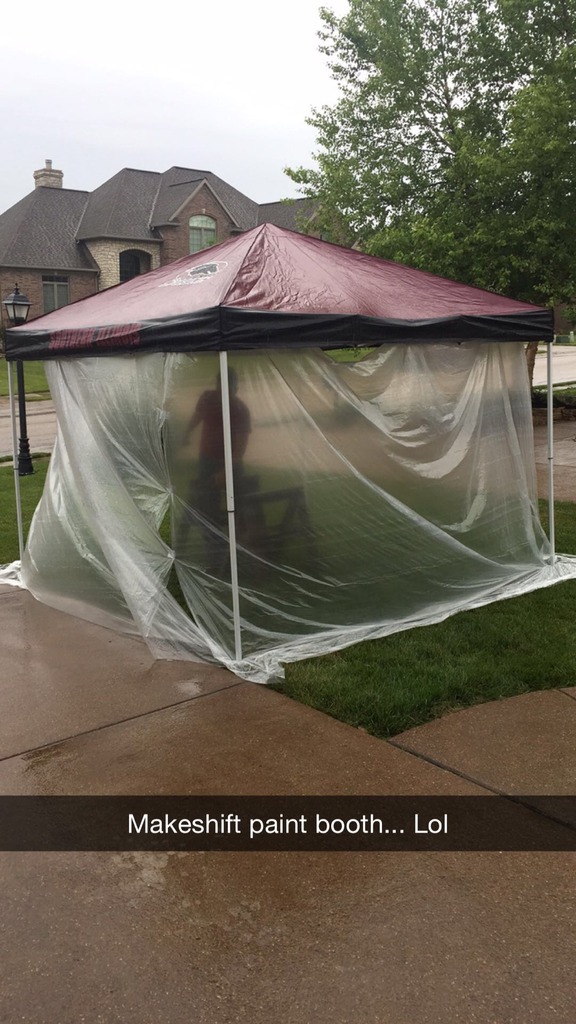
Then yesterday (even tho it was raining all day) we managed to setup a makeshift paint booth to paint some more under-hood parts and finally got the front clip & everything else behind it installed yesterday!
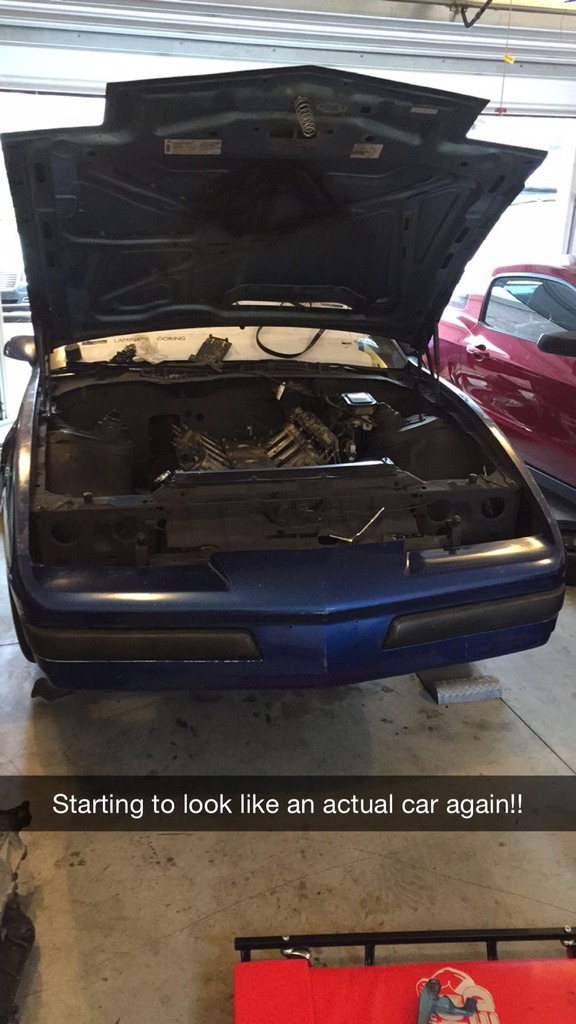
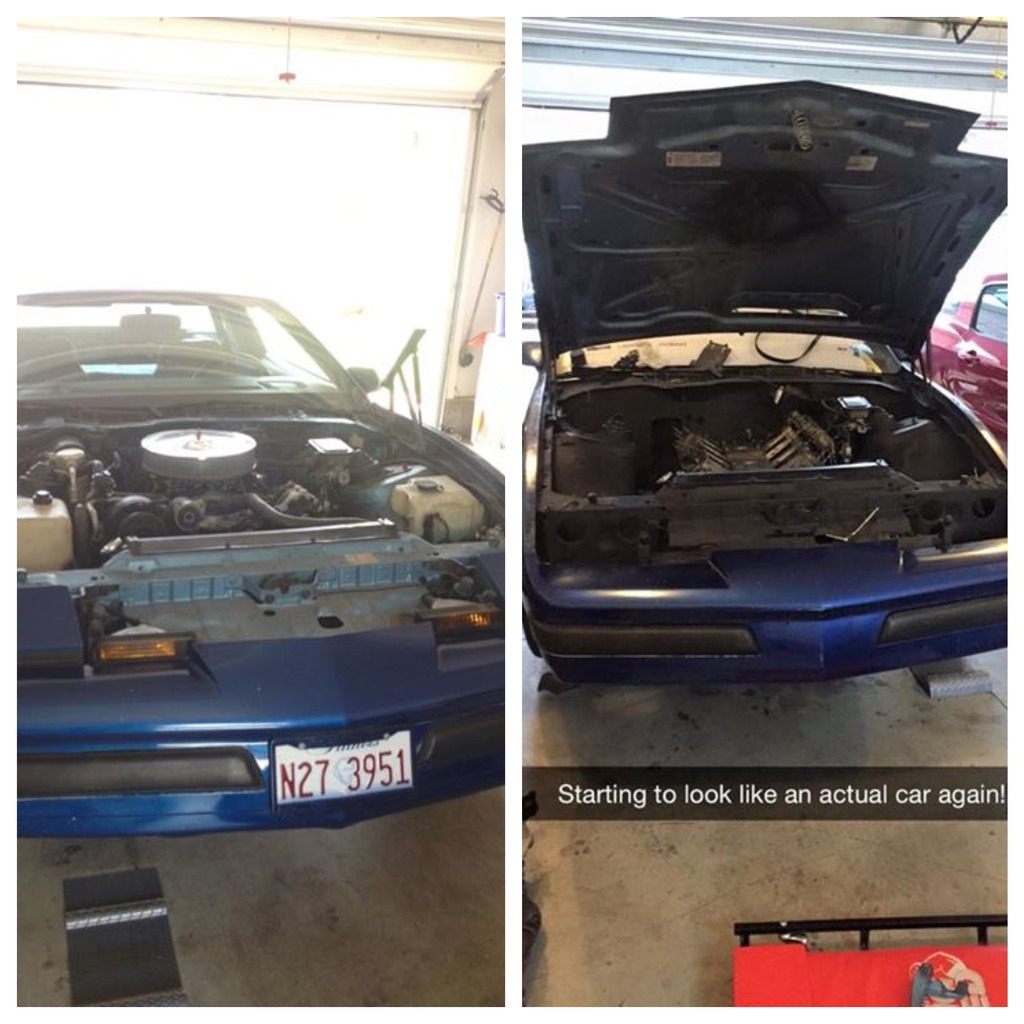
And here's a comparison of the old motor and the new one stabbed in place, along with the painted engine bay. I think it looks so much better!
And here's a couple pics from last week that I took of my camaro & firebird, along with Cody's 01 LS catfish that he recently bought (28k original miles, bone stock, rust free, auto, black on black)
Sorry I haven't had any updates in awhile... I traded my Camaro for a Powerstroke and then I'm also saving up all of the rest of the money to propose to the girlfriend which has been a long time coming. lol Once I do anything, I'll post pictures haha
Been awhile since an update... It's time to sell the truck already. I've just been having too many problems with it so hopefully I'll have some time to work on the firebird soon and I'll post up updates when there are any
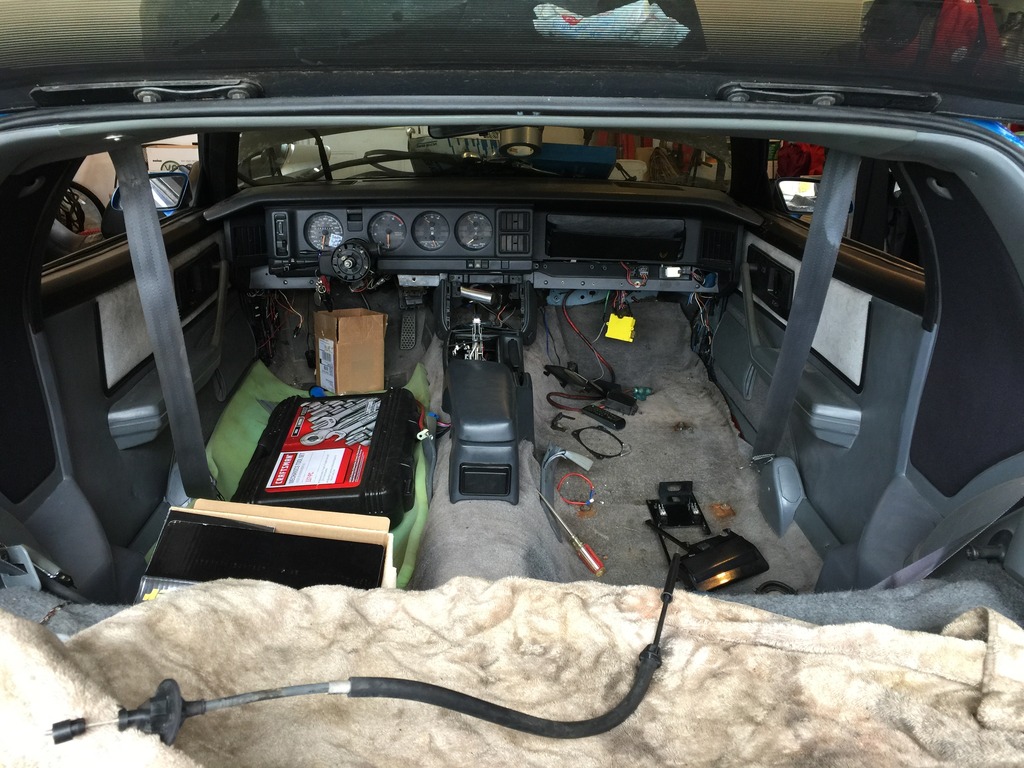
Hey guys, went home over thanksgiving break and got some work done finally! First of all I put almost all of the interior back in and cleaned it up! Here's a picture of that.
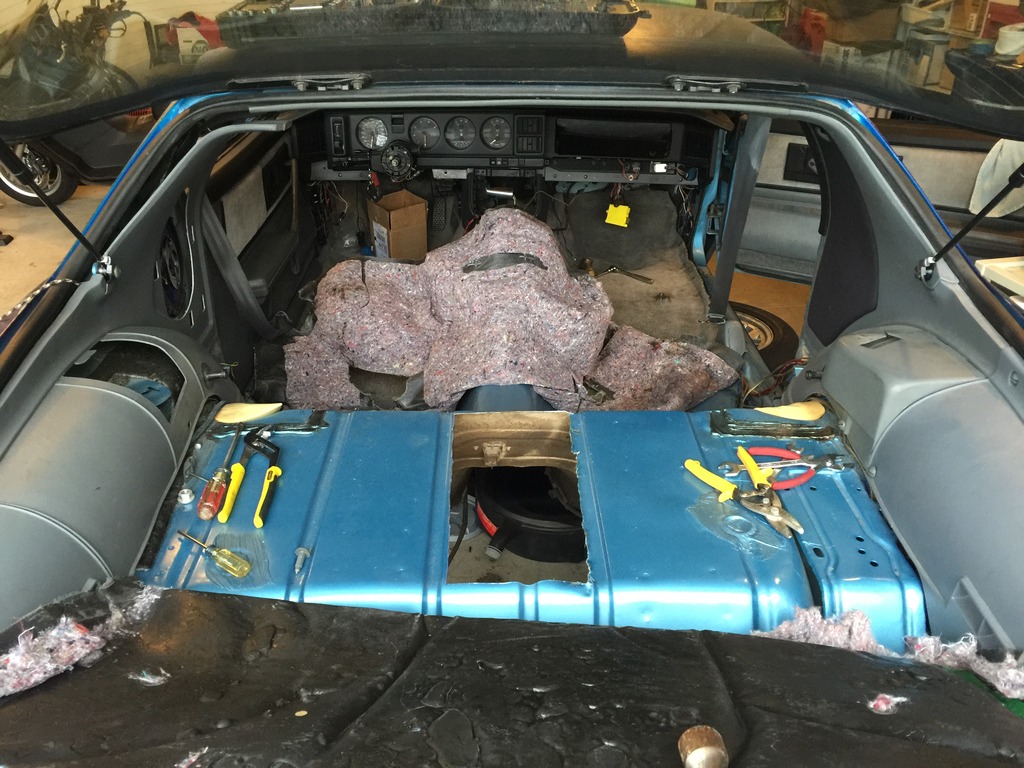
And then I started to cut a biiig access hole for the fourth gen tank (made it much bigger than needed just in case to help with routing fuel lines)
Then I mounted the fourth gen tank for mock-up and made the hole a little bigger and here's after the tank was mounted and the hole was fixed (forgive the roughness of the hole, it will be filed and fixed when we make the cover for the access hole)
Nice to see a fellow southern IL build! Neat project so far; those 3rd gens are going to be the car to build for the next couple years. Detroit Speed just started making some pretty high-end suspension components for that chassis. It will be exciting to see what the modern aftermarket has in store!
I'm building an 89 mustang coupe with a 6.0 right down the road in Marion.
Oh really? We'll have to meet up sometime and exchange notes. Haha. Yeah, I'm doing a h/c/I 6.0 (obviously) and want the car under 3,000 pounds and the drivetrain built for a 1000+ hp turbo build someday after I graduate and get stable enough haha. I'm sure you've heard of them but I actually worked for Hale's Automotive on Court St for about a year and a half back in 2013.
Sorry I haven't had any updates in awhile... I traded my Camaro for a Powerstroke and then I'm also saving up all of the rest of the money to propose to the girlfriend which has been a long time coming. lol Once I do anything, I'll post pictures haha
couple questions as i'm doing a '84 Trans Am.
is the LS1 gas tank a direct fit? did you use the 3rd gen tank straps or the 4th gen? i have a plastic LS1 tank for my build, but haven't got that far yet.
could you take some measurements to locate where the fuel sender is on the floor? i want to make an access panel as well, but would like it to be smaller than the one you're doing.
thanks.
exactly hahaha trust me, I know that :p and it's having even more trouble because the previous owner made it a 500 hp truck so it comes with all of the problems associated with upgrading a diesel haha
couple questions as i'm doing a '84 Trans Am.
is the LS1 gas tank a direct fit? did you use the 3rd gen tank straps or the 4th gen? i have a plastic LS1 tank for my build, but haven't got that far yet.
could you take some measurements to locate where the fuel sender is on the floor? i want to make an access panel as well, but would like it to be smaller than the one you're doing.
thanks.
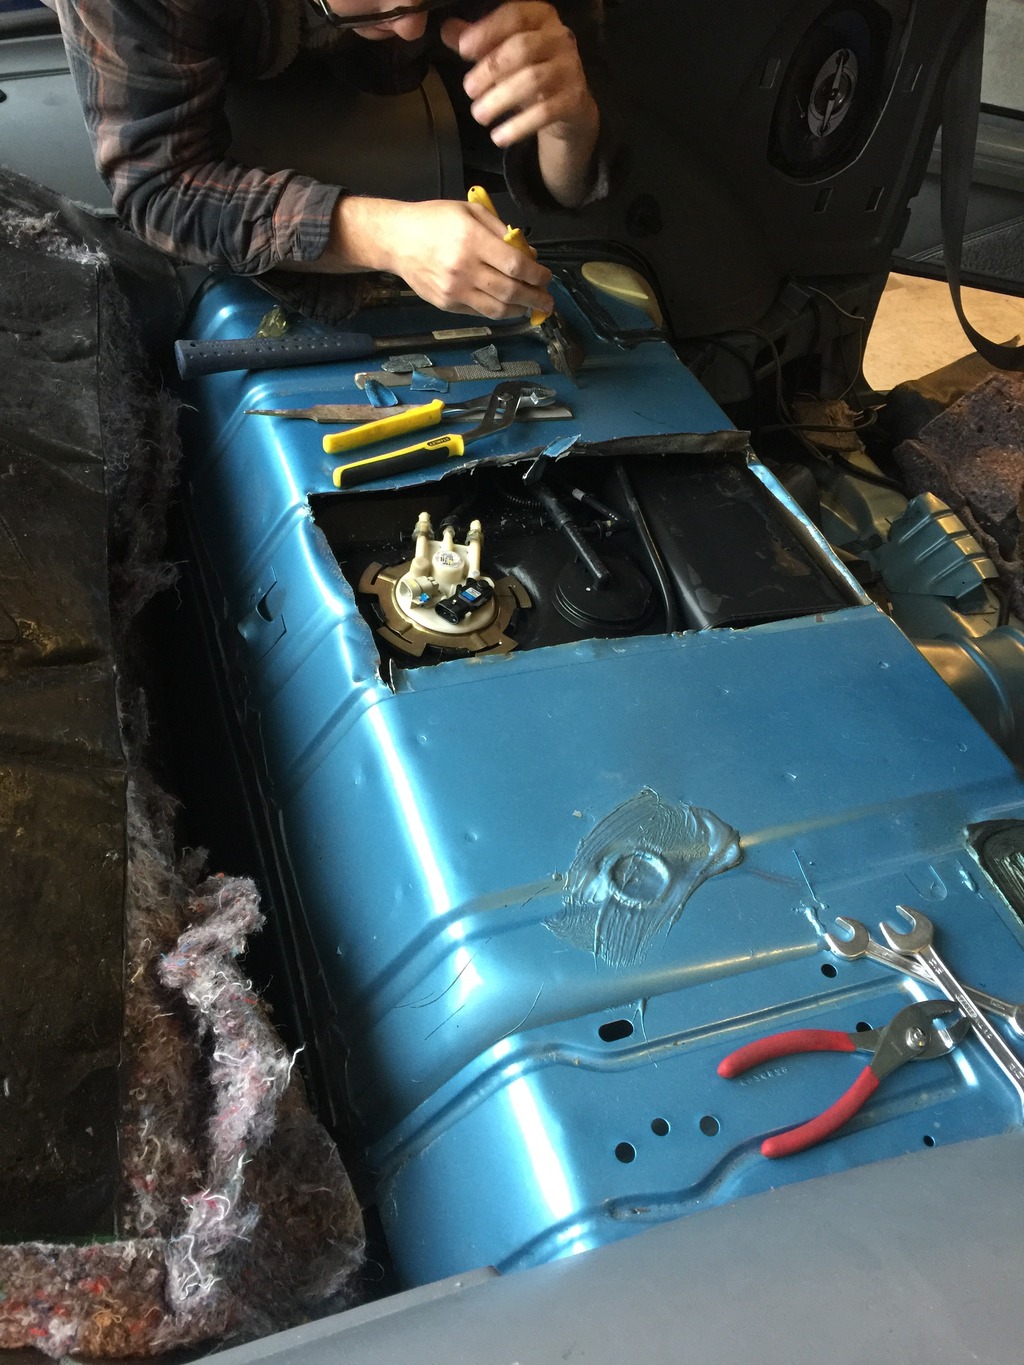
The plastic tank was an amazing fit, like it was made for the car and I reused the third gen straps and they fit the bends and everything of the plastic tank. And I'm not at home with the car, I'm off at college now but will be home on the 14th if you want me to take measurements then. or if you're ready to install it now, you can look up GhettoCruiser's youtube page (JEG'S garage) and he shows a video of cutting out his access hole and it shows the relative measurements of the placement of his access hole.
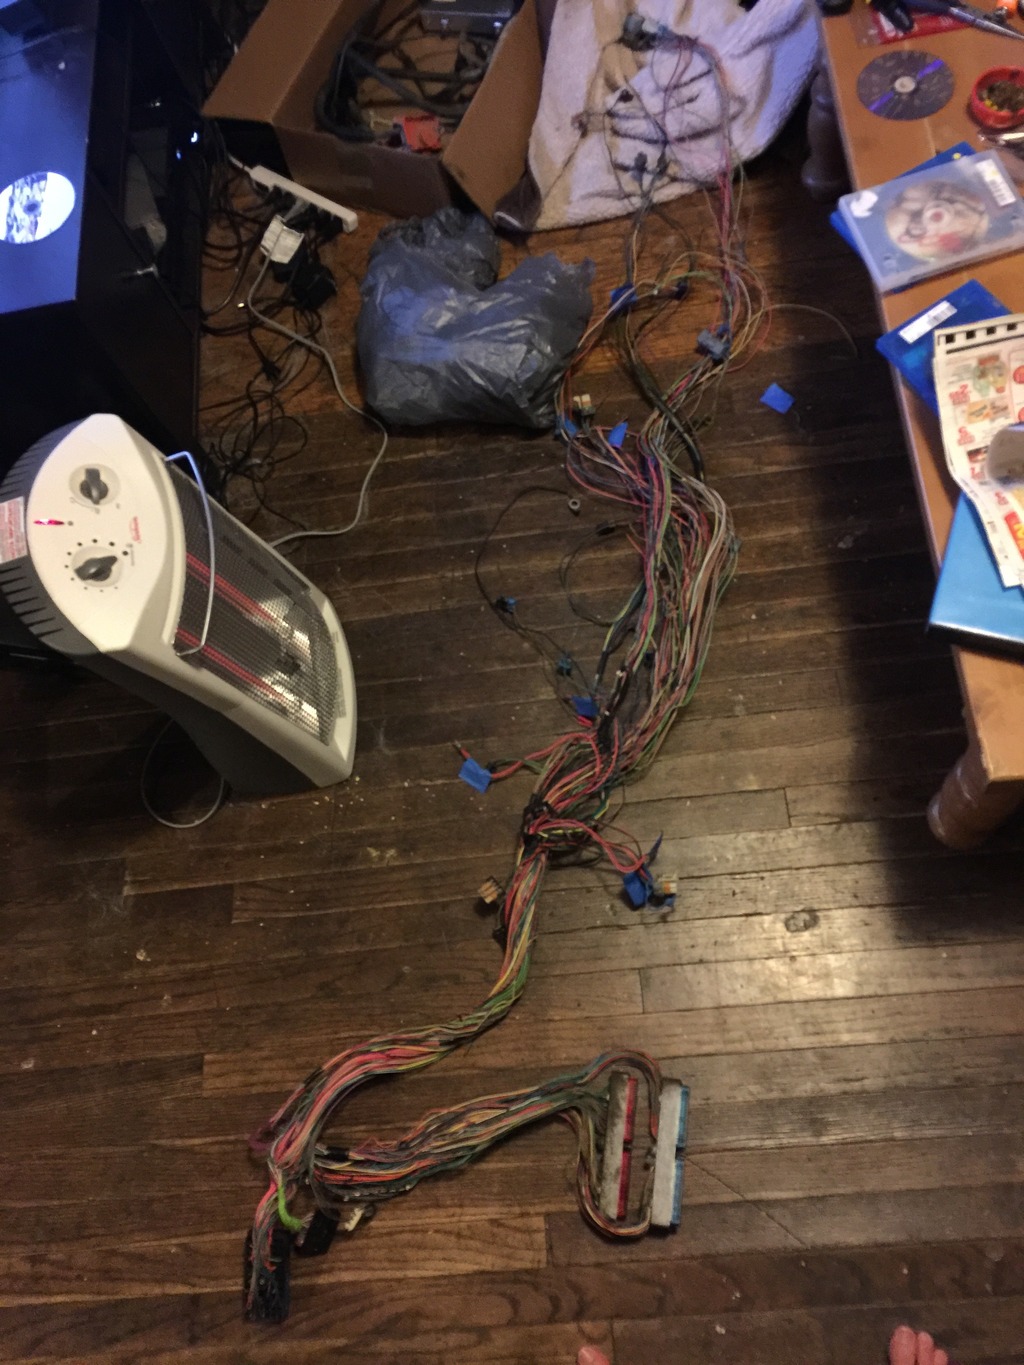
While I'm off at school I'm working on converting the LQ wiring harness to a stand-alone much like some people buy or send theirs out for this to be done; I am following the lt1swap.com guide to converting my harness, lots and lots of good information on their website. It's actually a lot easier than I thought it would be so far and I'm actually enjoying it quite a bit. Waiting on parts right now for the fuse block and relay blocks right now but here is a picture of how the harness was after I spent about 7 hours stripping all of the wire loom and tape off of the harness.
While I'm off at school I'm working on converting the LQ wiring harness to a stand-alone much like some people buy or send theirs out for this to be done; I am following the lt1swap.com guide to converting my harness, lots and lots of good information on their website. It's actually a lot easier than I thought it would be so far and I'm actually enjoying it quite a bit. Waiting on parts right now for the fuse block and relay blocks right now but here is a picture of how the harness was after I spent about 7 hours stripping all of the wire loom and tape off of the harness.


 04-16-2015 | 11:36 PM


 I've just been having too many problems with it so hopefully I'll have some time to work on the firebird soon and I'll post up updates when there are any