

1937 Ford Sedan


Very cool rendering!!! They did a nice job on that, should give you some motivation when the tedious and boring parts of the build make it seem like there's no end in sight. It's looking real good so far, keep up the progress!

Teching In
Joined: Dec 2015
Posts: 14
Likes: 0
Great sedan and awesome fab work! I sure wish when my Uncle and his friends hacked up his 40 Ford, they would have done the suspension upgrades like you. Instead, they used beer and a broken yard stick.  My Uncle past away in 95 and my aunt sold his car in 99. I baught it from the guy who baught it from her in 2009. I drove it and did some improvements to it and almost 3 years ago I yanked the body and started doing what you are now. I was putting a 354 Hemi in it, but now I have changed my plans to a turbo 5.3. Hopefully I can find the room for a turbo. Hopefully after Christmas I can get my car to my garage and get back to work on it. I want to drive it this summer! Anyway, great work and keep at it! Your rendered pic looks awesome!
TECH Resident
Joined: Oct 2004
Posts: 800
Likes: 1
From: Simi VAlley,CA
As I look at your images of the fab work it really takes me back to those days when I spent many hours in the shop building my sedan. I really haven't done much on it during the past 10 years but I guess that must mean I got it right the first time around. I miss those long sessions designing, planning and fabricating parts.
Very nice build.
Very nice build.


TECH Fanatic


Joined: Jul 2008
Posts: 1,569
Likes: 173
Quote:
Originally Posted by Oscar Will View Post
As I look at your images of the fab work it really takes me back to those days when I spent many hours in the shop building my sedan. I really haven't done much on it during the past 10 years but I guess that must mean I got it right the first time around. I miss those long sessions designing, planning and fabricating parts.
Very nice build.
Sounds like you just need a new project!
__________________X 2

Thread Starter
TECH Regular


Joined: Mar 2015
Posts: 485
Likes: 123
From: Tyler, TX
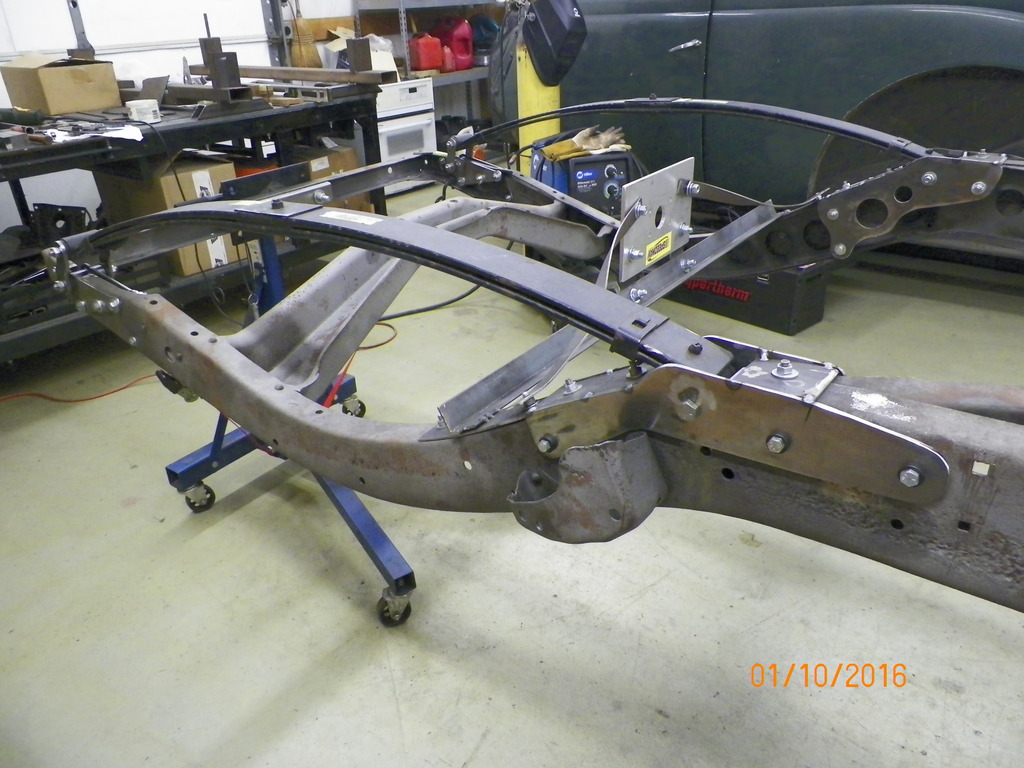
Ran into a snag on the drivers side leaf spring. It was hanging out past the frame. Knowing there will be minimal room for a good size tire I decided to tackle several items to gain a tiny amount of tire room and make the leaf springs exactly the same side to side. Problem 1 - frame had a slight twist. Here is how we took the twist out....


Thread Starter
TECH Regular
Joined: Mar 2015
Posts: 485
Likes: 123
From: Tyler, TX
Problem 2...Also found that one of the store bought brackets wasn't assembled correctly.  No we didn't bend it on the frame pull Anyway, the fab director made 2 layouts of the same bracket to illustrate how far from 90 degrees the pipe was installed between the 2 plates. I took it completely apart, found new 1" ID pipe, and made it right.

No we didn't bend it on the frame pull Anyway, the fab director made 2 layouts of the same bracket to illustrate how far from 90 degrees the pipe was installed between the 2 plates. I took it completely apart, found new 1" ID pipe, and made it right.
Last edited by Kharp; Jan 10, 2016 at 08:54 PM.
Thread Starter
TECH Regular
Joined: Mar 2015
Posts: 485
Likes: 123
From: Tyler, TX
Still needed 1/4" more to put the spring in line with the frame. I could not find any offset shackles with 2.5" centers that I could purchase so I recruited some help to bend some.


Last edited by Kharp; Jan 10, 2016 at 09:29 PM.
Thread Starter
TECH Regular
Joined: Mar 2015
Posts: 485
Likes: 123
From: Tyler, TX
Here is the bracket after the surgery and the offset shackles. Also shows the 3/16" plate inside the frame. Spring is now right on the money.


Last edited by Kharp; Jan 10, 2016 at 09:35 PM.
Thread Starter
TECH Regular
Joined: Mar 2015
Posts: 485
Likes: 123
From: Tyler, TX
Springs are now square to the centerline, flat across, and in line with the frame on both sides. Here are the key gains from notching the frame and "sinking" the springs.
(1) Raised the rear end in the car 1 5/8", which will make the lowering blocks much shorter
(2) Looks a little cleaner and is definitely stronger
(3) An added bonus is I "think" there will be more room for tailpipes between the shackles and the fuel tank.
BEFORE

AFTER
(1) Raised the rear end in the car 1 5/8", which will make the lowering blocks much shorter
(2) Looks a little cleaner and is definitely stronger
(3) An added bonus is I "think" there will be more room for tailpipes between the shackles and the fuel tank.
BEFORE

AFTER

Last edited by Kharp; Jan 10, 2016 at 09:44 PM.
Thread Starter
TECH Regular
Joined: Mar 2015
Posts: 485
Likes: 123
From: Tyler, TX
As I cleaned up the shop tonight I noticed how many "special tools" were laying around that had been created for this little project. Poster board and cardboard templates were used early on (Daddy Bills CAD system ). The 3 round sticks of wood were made from an old broom handle, and they worked great for mock ups before the steel spacers were machined. Used a piece of angle iron to cut some circles with the plasma cutter. Made some frame straightening tools from scrap steel, and even made some wooden offset shackles to see if they would work. Fun stuff!
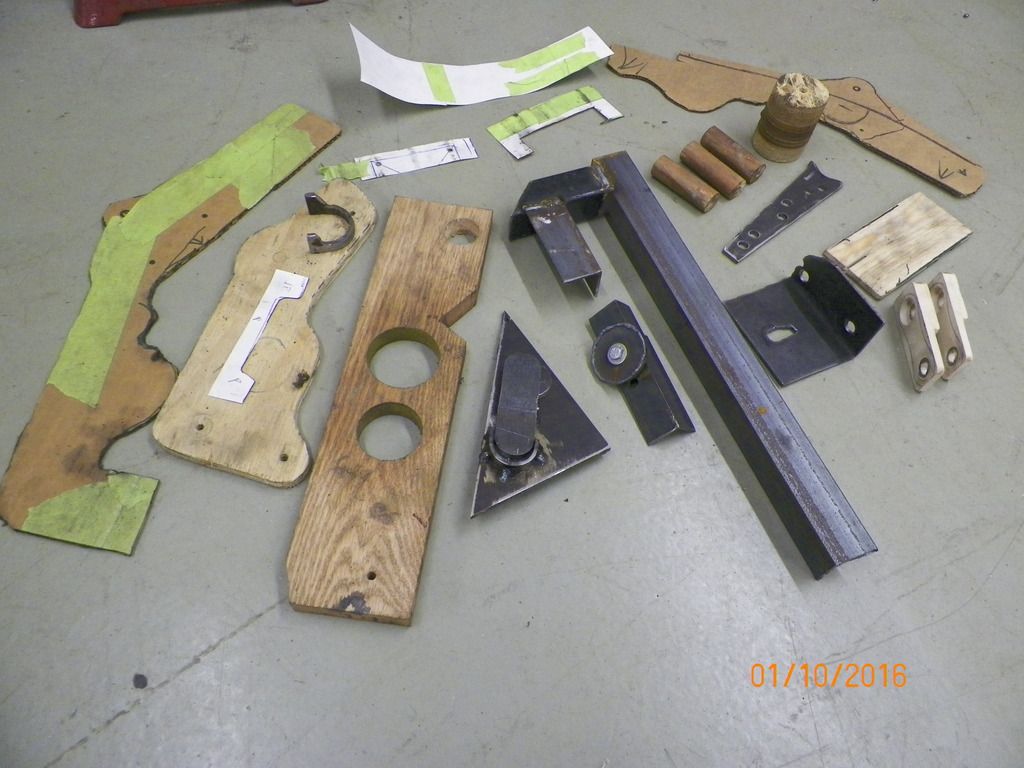
). The 3 round sticks of wood were made from an old broom handle, and they worked great for mock ups before the steel spacers were machined. Used a piece of angle iron to cut some circles with the plasma cutter. Made some frame straightening tools from scrap steel, and even made some wooden offset shackles to see if they would work. Fun stuff! 
Last edited by Kharp; Jan 11, 2016 at 06:21 AM.
Hey Keith, dont know if you've thought about it, but you might consider removing the rear transverse spring mount/crossmember and replacing it with a straight across piece. Your floor should be flat in that area, and with that crossmember dipping down the way it does, it really eats up room for running tail pipes. I really wish I had donethat, but figured it was a good place to mount the shocks so I left it, and now having to deal with the exhaust dumping right ahead of the axle since there's no way to get anything over it with the original crossmember in the way. Just a thought. Your progress is looking real good!
TECH Fanatic
Joined: Jul 2008
Posts: 1,569
Likes: 173
Hey Keith, dont know if you've thought about it, but you might consider removing the rear transverse spring mount/crossmember and replacing it with a straight across piece. Your floor should be flat in that area, and with that crossmember dipping down the way it does, it really eats up room for running tail pipes. I really wish I had donethat, but figured it was a good place to mount the shocks so I left it, and now having to deal with the exhaust dumping right ahead of the axle since there's no way to get anything over it with the original crossmember in the way. Just a thought. Your progress is looking real good!
X 2......................................Great Job!!!!!
Thread Starter
TECH Regular
Joined: Mar 2015
Posts: 485
Likes: 123
From: Tyler, TX
Hey Keith, dont know if you've thought about it, but you might consider removing the rear transverse spring mount/crossmember and replacing it with a straight across piece. Your floor should be flat in that area, and with that crossmember dipping down the way it does, it really eats up room for running tail pipes. I really wish I had donethat, but figured it was a good place to mount the shocks so I left it, and now having to deal with the exhaust dumping right ahead of the axle since there's no way to get anything over it with the original crossmember in the way. Just a thought. Your progress is looking real good!

Teching In
Joined: Dec 2014
Posts: 20
Likes: 0
From: Mustang, OK
I have been reading over all of the threads on the forum for the last few months. I have a 36 Ford pickup that I have owed since high school.
I have been laboring over the fact of relearning everything I know about the SBC. I am a little apprehensive about making the leap to the LS based platform, even though I know it makes the most sense.
I am going to use this thread and the 37 Ford coupe build by KWhizz for my reference.
I am not new to building hot rods, but I am going to have to commit and take the plunge. Everyone tells me that I won't regret it. I hope they are right.
Thanks for taking the time to document.
Root
TECH Fanatic
Joined: Jul 2008
Posts: 1,569
Likes: 173
I have been reading over all of the threads on the forum for the last few months. I have a 36 Ford pickup that I have owed since high school.
I have been laboring over the fact of relearning everything I know about the SBC. I am a little apprehensive about making the leap to the LS based platform, even though I know it makes the most sense.
I am going to use this thread and the 37 Ford coupe build by KWhizz for my reference.
I am not new to building hot rods, but I am going to have to commit and take the plunge. Everyone tells me that I won't regret it. I hope they are right.
Thanks for taking the time to document.
Root
I have been laboring over the fact of relearning everything I know about the SBC. I am a little apprehensive about making the leap to the LS based platform, even though I know it makes the most sense.
I am going to use this thread and the 37 Ford coupe build by KWhizz for my reference.
I am not new to building hot rods, but I am going to have to commit and take the plunge. Everyone tells me that I won't regret it. I hope they are right.
Thanks for taking the time to document.
Root
Once you do the LS swap......You will never look back and completely lose interest in the old Carburated Technology..........
Ken
Thread Starter
TECH Regular
Joined: Mar 2015
Posts: 485
Likes: 123
From: Tyler, TX
I have been reading over all of the threads on the forum for the last few months. I have a 36 Ford pickup that I have owed since high school.
I have been laboring over the fact of relearning everything I know about the SBC. I am a little apprehensive about making the leap to the LS based platform, even though I know it makes the most sense.
I am going to use this thread and the 37 Ford coupe build by KWhizz for my reference.
I am not new to building hot rods, but I am going to have to commit and take the plunge. Everyone tells me that I won't regret it. I hope they are right.
Thanks for taking the time to document.
Root
I have been laboring over the fact of relearning everything I know about the SBC. I am a little apprehensive about making the leap to the LS based platform, even though I know it makes the most sense.
I am going to use this thread and the 37 Ford coupe build by KWhizz for my reference.
I am not new to building hot rods, but I am going to have to commit and take the plunge. Everyone tells me that I won't regret it. I hope they are right.
Thanks for taking the time to document.
Root
Thread Starter
TECH Regular
Joined: Mar 2015
Posts: 485
Likes: 123
From: Tyler, TX
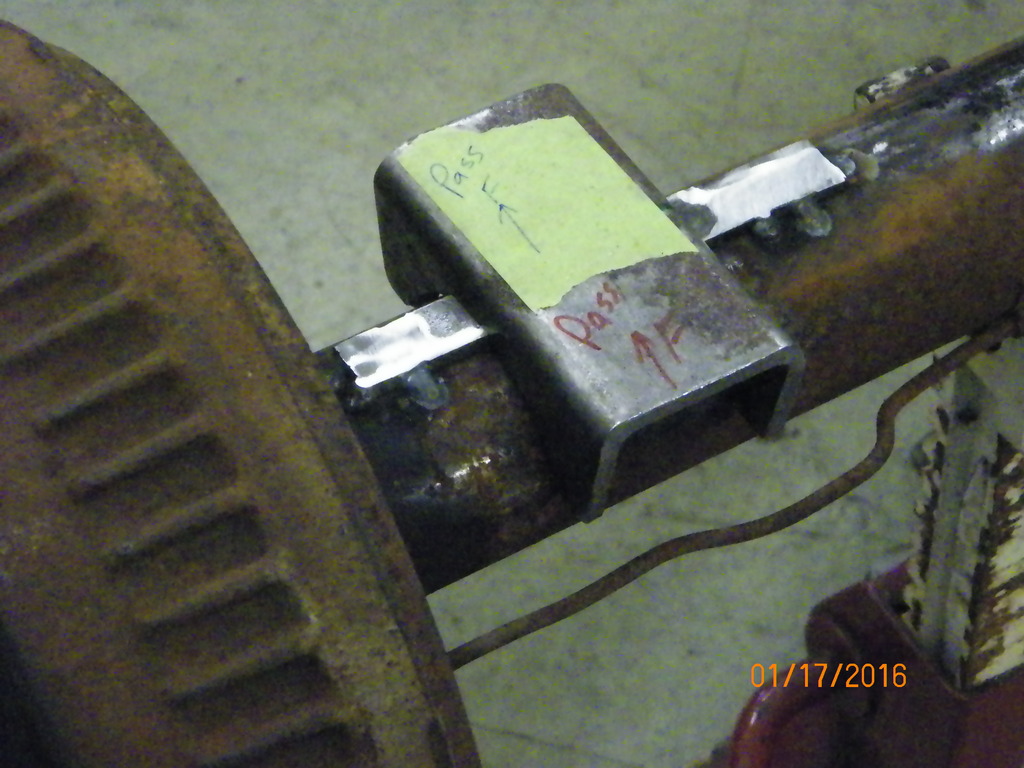
Out of town most of the weekend, but I did manage to get the rear end centered in the car. I welded some tabs to locate it side to side. Pinion angle to be set later...much later

TECH Resident
Joined: Oct 2004
Posts: 800
Likes: 1
From: Simi VAlley,CA
Don't be afraid to go "LS"...it is worth it.
If you still want to "look" old school, you can do what I did. Top that off with the replica Olds-Caddy air cleaner and at least it sorta looks "old".
By the way, the performance I feel is maybe a bit better from the "seat of your pants" dyno.
If you still want to "look" old school, you can do what I did. Top that off with the replica Olds-Caddy air cleaner and at least it sorta looks "old".
By the way, the performance I feel is maybe a bit better from the "seat of your pants" dyno.