
My S13 240 Build : Ls swap, Corvette transaxle, ITB's, Widebody, Do everything car
 03-14-2016, 10:42 AM
#21
Staging Lane
Thread Starter

Join Date: Oct 2015
Posts: 91
Likes: 0
Received 0 Likes
on
0 Posts
So last night i did a bit on pondering on the front end air management. Since i had made the decison to run the itbs verticaly through the hood, i was wondering what i would do with the top opening in the rocket bunny front bumper which ill be running. The oroginal plan was for the itbs to do the traditional criss cross and the trumpets over the valve covers, being fed air from that top opening on the bumper i just mentioned by making a divider to plit the air side to side. Downside to that was more air in the engine bay and more importantly the intake sucking in super heated air that resides in the engine bay.
I want to keep that center upper opening as if i were to blank it off i think it would be too plain. So i came up with the idea to channel the air through the center hood vent and make it swirl with the air coming from the radiator to help cool it off a bit before getting sucked into the itbs. Its still warmer than ambient air, but its the lesser evil compared to the super heated air of the engine bay.
Excuse the crude paint drawings
 1990-nissan-180sx-rocket-bunny-bensopra-aero-15 by lawrx, on Flickr
 5a83a250f4fdeaf05db326eb4bbbdc3d by lawrx, on Flickr
I want to keep that center upper opening as if i were to blank it off i think it would be too plain. So i came up with the idea to channel the air through the center hood vent and make it swirl with the air coming from the radiator to help cool it off a bit before getting sucked into the itbs. Its still warmer than ambient air, but its the lesser evil compared to the super heated air of the engine bay.
Excuse the crude paint drawings
1990-nissan-180sx-rocket-bunny-bensopra-aero-15 by lawrx, on Flickr5a83a250f4fdeaf05db326eb4bbbdc3d by lawrx, on Flickr  03-14-2016, 10:42 AM
#22
Staging Lane
Thread Starter
Join Date: Oct 2015
Posts: 91
Likes: 0
Received 0 Likes
on
0 Posts
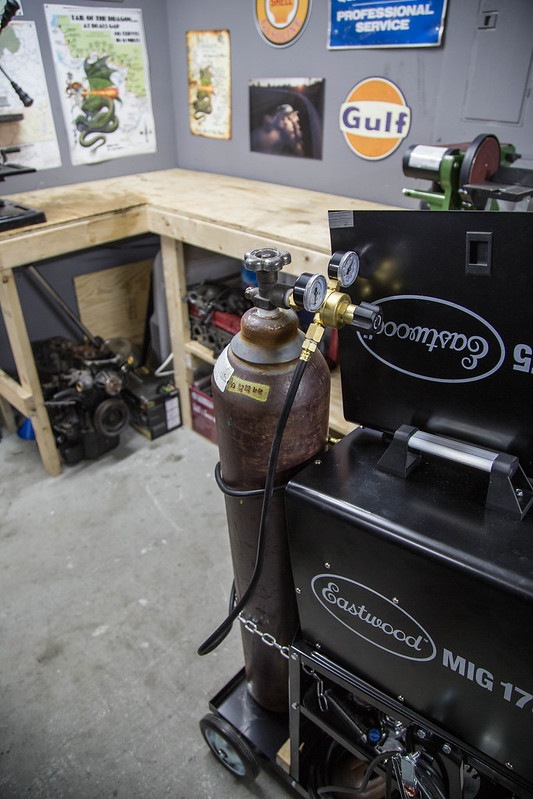
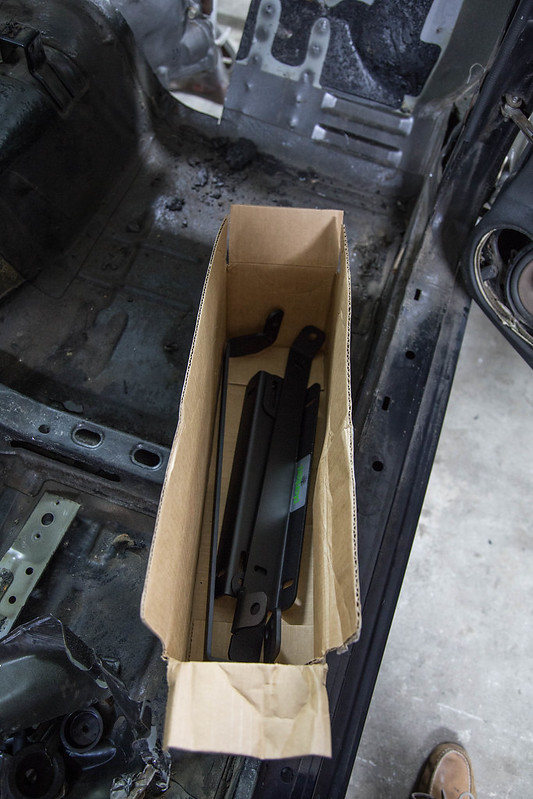
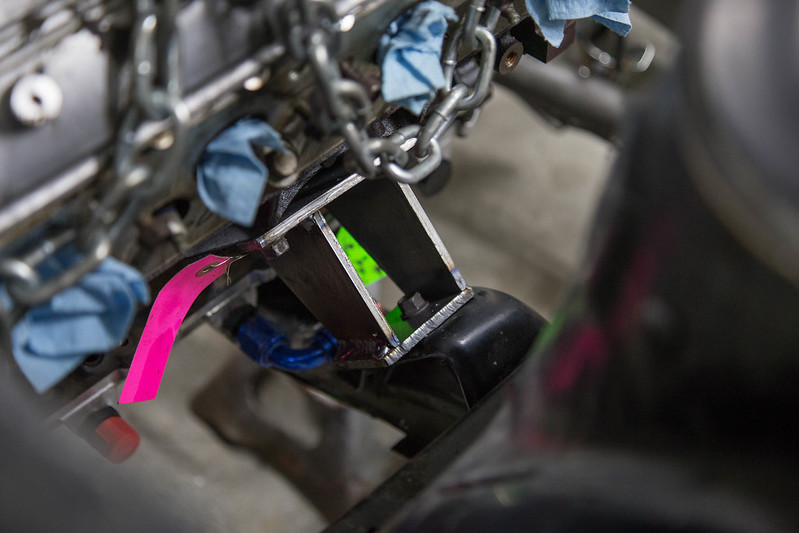
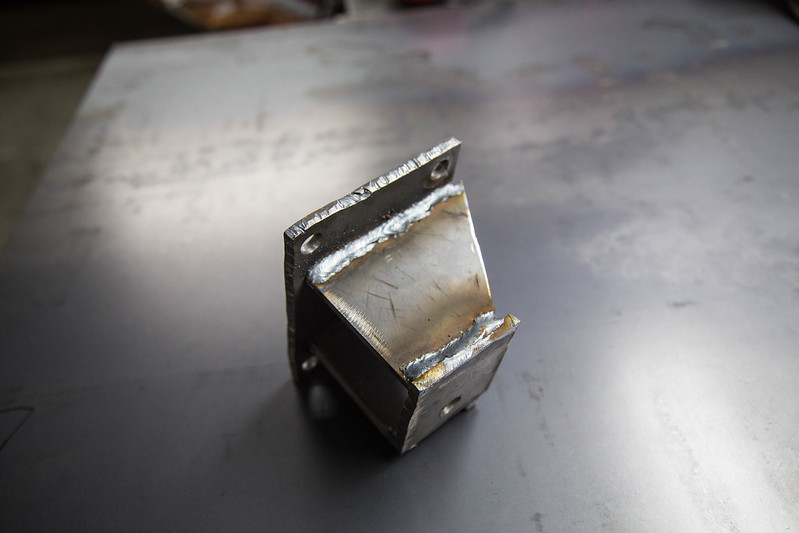
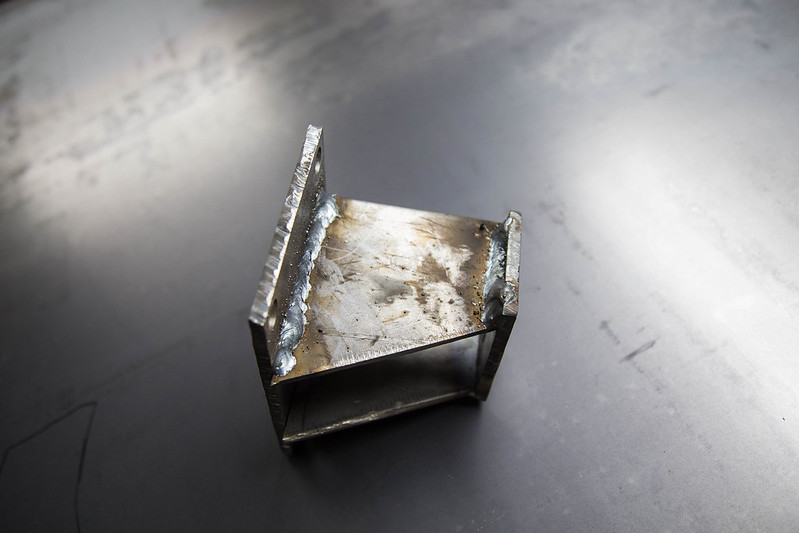
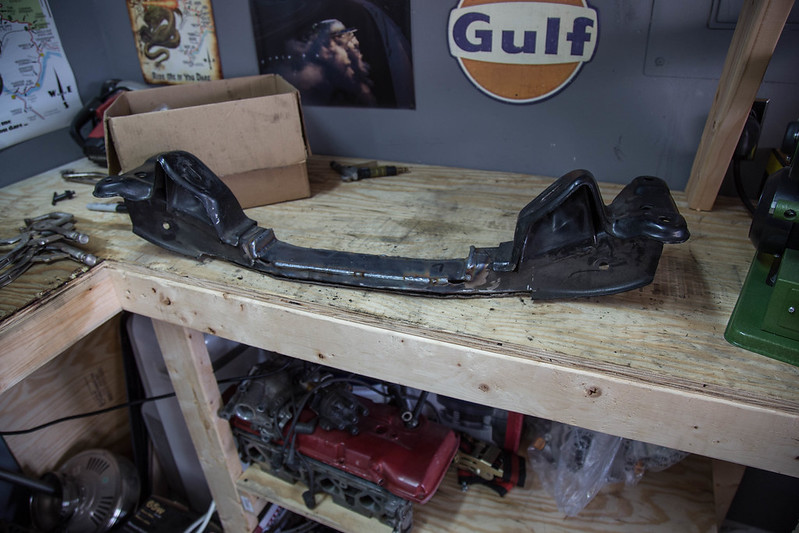
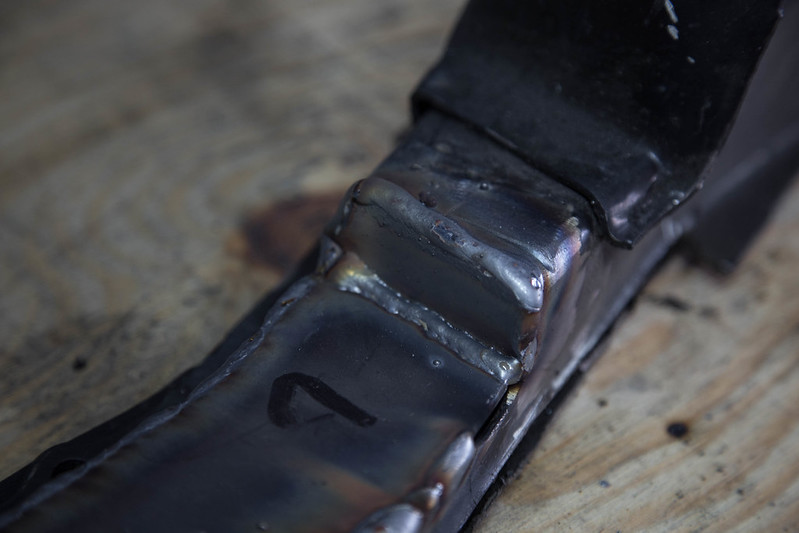
Finally got some progress made, not the amount of progress i wanted to make, but progress none the less. Finally got a bottle of gas and got the welder setup to go %100. Started out by throwing on one of the gktech subframe gussets and then making a set of gussets/ load plates for where the trans mount would be welded.
 untitled (3 of 17)-3 by lawrx, on Flickr
 untitled (4 of 17)-3 by lawrx, on Flickr
 untitled (6 of 17)-3 by lawrx, on Flickr
 untitled (7 of 17)-3 by lawrx, on Flickr
 untitled (8 of 17)-3 by lawrx, on Flickr
 untitled (9 of 17)-3 by lawrx, on Flickr
 untitled (10 of 17)-3 by lawrx, on Flickr
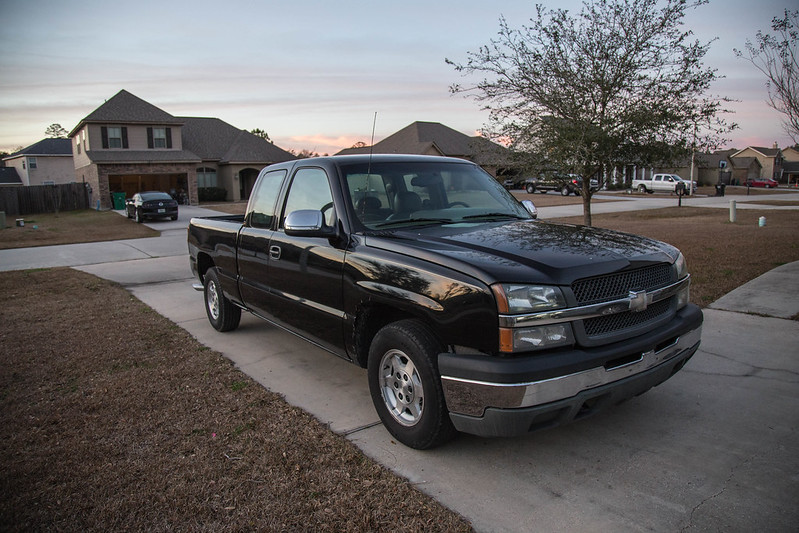
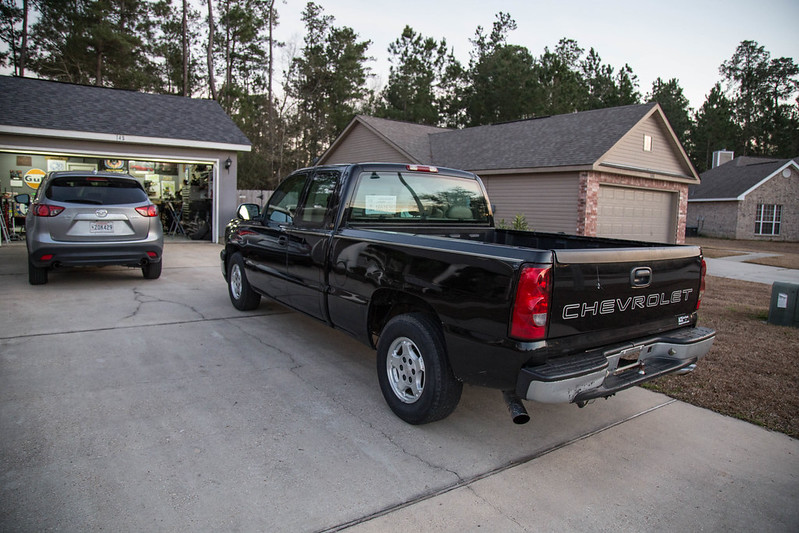
Ok so i finally also bought a daily. Decided against taking out a small loan on one the cars i wanted and picked up a truck. With a baby 4 months out id rather not have the second car note to deal with while trying to adjust funds with the newfound money sucker upper that is an infant. Plan is to drive it for a year and get something nicer next summer. Maybe ill get me my 911 I've been wanting for, well, ever lol Well here she is in all her glory. 04 silverado, needs a little love but she was cheap and a decent buy. Should come in handy towing racer stuff in the future.
 untitled (11 of 17)-3 by lawrx, on Flickr
 untitled (12 of 17)-3 by lawrx, on Flickr
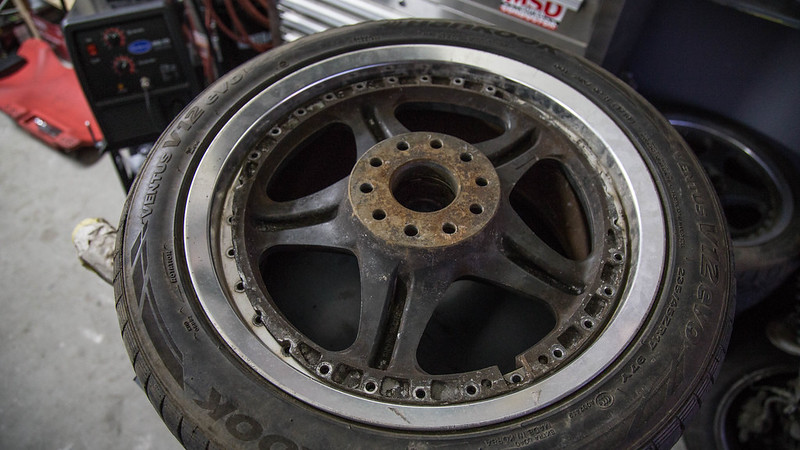
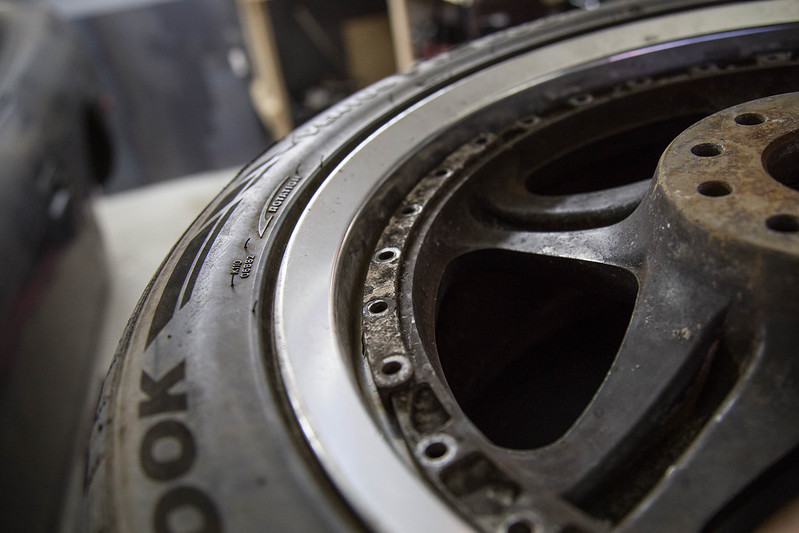
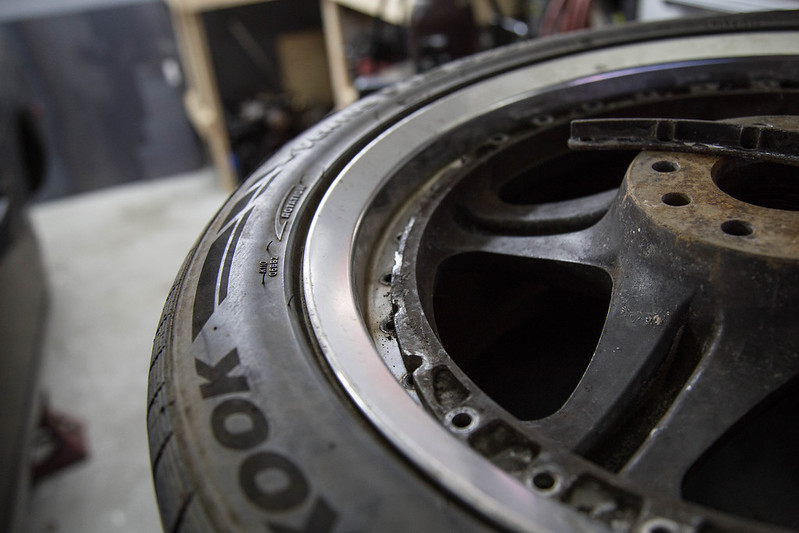
Alright, so the wheel escapade, here are some shots showing how the machined smaller edge site in relation to the barrel and the reinforcement bracket on the Lmt2's. The bracket has a 90* shape to it so as to acts as part of the wheel to press against the lip when bolted down, i dont see any reason it shouldn't work like Ray's or Nismo intended. Here are some detailed shots on how it mounts. Dont mind the face being upside down in the barrel, i was lazy....
 untitled (13 of 17)-3 by lawrx, on Flickr
 untitled (14 of 17)-3 by lawrx, on Flickr
 untitled (15 of 17)-3 by lawrx, on Flickr
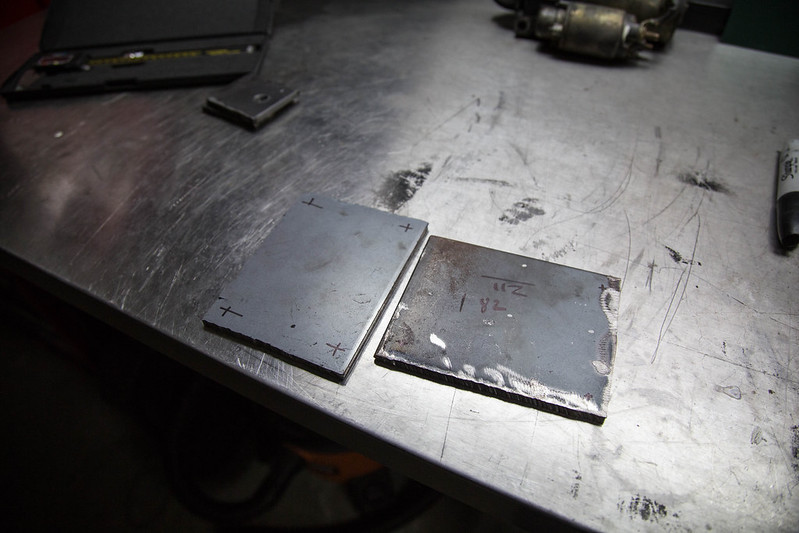
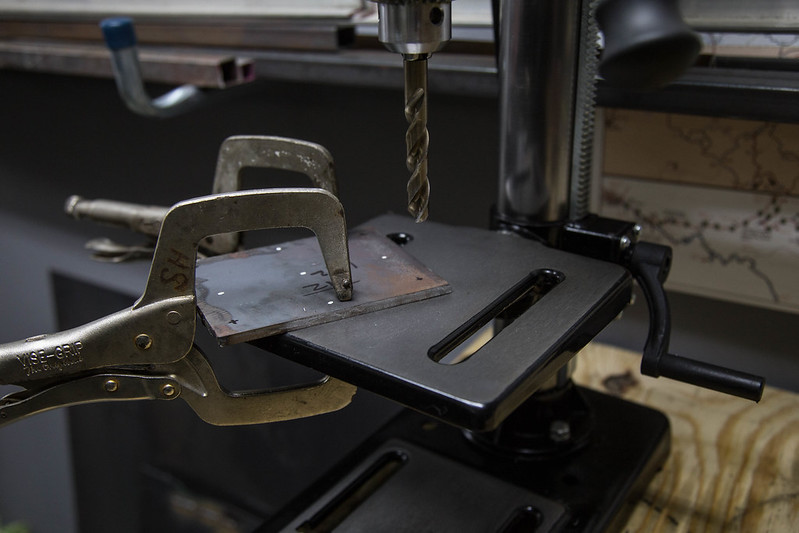
Also got a bit more work done on my motor mounts, got all the slag off from the plasma cutter and started to drill some mount holes and marked off some weight reduction holes. Drilling through 1/4" plate takes few minutes even with a drill press, and i wasn't really feeling that great tonight i just called it a night and will pick back up tomorrow. Was really wanting the drivetrain under its own weight by now but just ran out of time.
 untitled (16 of 17)-3 by lawrx, on Flickr
 untitled (17 of 17)-3 by lawrx, on Flickr
Lastly, i did a bit of measureming and came to a bit of a predicament. The front tires i will be running vs the ride height i want to run is causing a bit of an issue clearance wise. Between tire, height, suspension travel room, and ground clearance, there just isn't quite enough room between the ground and the upper rail where the strut mount. So with that being said i will be chopping off the strut towers and relocating them in up and back a little bit along with removing the upper rail entirely and creating my own new upper rail that ties into the dash bar and roll cage. I won't say yet what size tire i will be running, but it will require a bit of wide body massaging for a bit of t300 esque fender looks for wheel and tire fitment, but not full race car, but not full stanced either. regardless its gunna be worth the wait.
 untitled (1 of 17)-3 by lawrx, on Flickr
 untitled (2 of 17)-3 by lawrx, on Flickr
untitled (3 of 17)-3 by lawrx, on Flickruntitled (4 of 17)-3 by lawrx, on Flickruntitled (6 of 17)-3 by lawrx, on Flickruntitled (7 of 17)-3 by lawrx, on Flickruntitled (8 of 17)-3 by lawrx, on Flickruntitled (9 of 17)-3 by lawrx, on Flickruntitled (10 of 17)-3 by lawrx, on FlickrOk so i finally also bought a daily. Decided against taking out a small loan on one the cars i wanted and picked up a truck. With a baby 4 months out id rather not have the second car note to deal with while trying to adjust funds with the newfound money sucker upper that is an infant. Plan is to drive it for a year and get something nicer next summer. Maybe ill get me my 911 I've been wanting for, well, ever lol Well here she is in all her glory. 04 silverado, needs a little love but she was cheap and a decent buy. Should come in handy towing racer stuff in the future.
untitled (11 of 17)-3 by lawrx, on Flickruntitled (12 of 17)-3 by lawrx, on FlickrAlright, so the wheel escapade, here are some shots showing how the machined smaller edge site in relation to the barrel and the reinforcement bracket on the Lmt2's. The bracket has a 90* shape to it so as to acts as part of the wheel to press against the lip when bolted down, i dont see any reason it shouldn't work like Ray's or Nismo intended. Here are some detailed shots on how it mounts. Dont mind the face being upside down in the barrel, i was lazy....
untitled (13 of 17)-3 by lawrx, on Flickruntitled (14 of 17)-3 by lawrx, on Flickruntitled (15 of 17)-3 by lawrx, on FlickrAlso got a bit more work done on my motor mounts, got all the slag off from the plasma cutter and started to drill some mount holes and marked off some weight reduction holes. Drilling through 1/4" plate takes few minutes even with a drill press, and i wasn't really feeling that great tonight i just called it a night and will pick back up tomorrow. Was really wanting the drivetrain under its own weight by now but just ran out of time.
untitled (16 of 17)-3 by lawrx, on Flickruntitled (17 of 17)-3 by lawrx, on FlickrLastly, i did a bit of measureming and came to a bit of a predicament. The front tires i will be running vs the ride height i want to run is causing a bit of an issue clearance wise. Between tire, height, suspension travel room, and ground clearance, there just isn't quite enough room between the ground and the upper rail where the strut mount. So with that being said i will be chopping off the strut towers and relocating them in up and back a little bit along with removing the upper rail entirely and creating my own new upper rail that ties into the dash bar and roll cage. I won't say yet what size tire i will be running, but it will require a bit of wide body massaging for a bit of t300 esque fender looks for wheel and tire fitment, but not full race car, but not full stanced either. regardless its gunna be worth the wait.
untitled (1 of 17)-3 by lawrx, on Flickruntitled (2 of 17)-3 by lawrx, on Flickr
03-14-2016, 10:43 AM
#23
Staging Lane
Thread Starter
Join Date: Oct 2015
Posts: 91
Likes: 0
Received 0 Likes
on
0 Posts
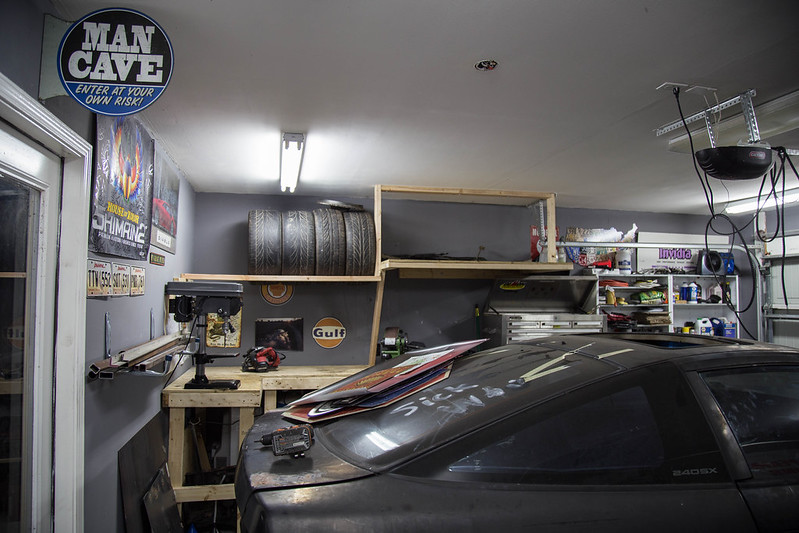
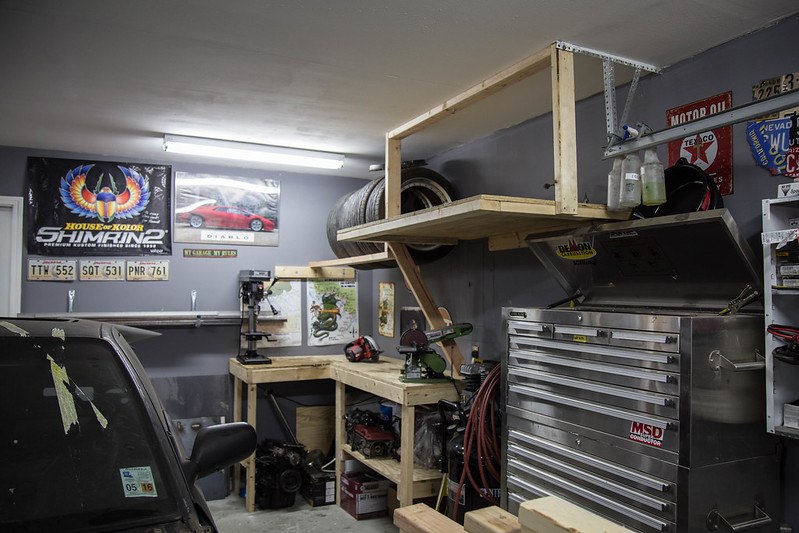
Well, this past week has been a bust. Last weekend i was hoping to get the motor mounts finished and drivetrain all mounted up but ran out of time. This week has also sucked, I've been sick all week and had zero energy to touch the car. Today had a friend come by and help me build a storage shelf and wheel shelf. super excited how it came out, easily fit 2 9'' wheels and 2 10'' wheels with room for probably 2 more. Also got some planted seat mounts in, but can't do much of anything with them until my contact gets back with me on pricing for a seat. Need the seat to set main roll cage hoop location so i can set front down bar location which is needed to connect to the dash bar and front strut tower tubes. Its all a connect to dot game, and I'm patiently waiting my turn.
 untitled (1 of 3) by lawrx, on Flickr
 untitled (2 of 3) by lawrx, on Flickr
 untitled (3 of 3) by lawrx, on Flickr
untitled (1 of 3) by lawrx, on Flickruntitled (2 of 3) by lawrx, on Flickruntitled (3 of 3) by lawrx, on Flickr
03-14-2016, 10:43 AM
#24
Staging Lane
Thread Starter
Join Date: Oct 2015
Posts: 91
Likes: 0
Received 0 Likes
on
0 Posts
Finally able to get some sorta work done after the last two weeks sucking. Finished drilling the mount holes for one side of motor mounts, cut out the connecting pieces and welded them in. So one motor mount is complete, hopefully knock the next one out this weekend,
 untitled (1 of 9)-2 by lawrx, on Flickr
 untitled (2 of 9)-2 by lawrx, on Flickr
 untitled (3 of 9)-2 by lawrx, on Flickr
 untitled (4 of 9)-2 by lawrx, on Flickr
 untitled (5 of 9)-2 by lawrx, on Flickr
 untitled (6 of 9)-2 by lawrx, on Flickr
 untitled (7 of 9)-2 by lawrx, on Flickr
 untitled (8 of 9)-2 by lawrx, on Flickr
 untitled (9 of 9)-2 by lawrx, on Flickr
untitled (1 of 9)-2 by lawrx, on Flickruntitled (2 of 9)-2 by lawrx, on Flickruntitled (3 of 9)-2 by lawrx, on Flickruntitled (4 of 9)-2 by lawrx, on Flickruntitled (5 of 9)-2 by lawrx, on Flickruntitled (6 of 9)-2 by lawrx, on Flickruntitled (7 of 9)-2 by lawrx, on Flickruntitled (8 of 9)-2 by lawrx, on Flickruntitled (9 of 9)-2 by lawrx, on Flickr
03-14-2016, 10:43 AM
#25
Staging Lane
Thread Starter
Join Date: Oct 2015
Posts: 91
Likes: 0
Received 0 Likes
on
0 Posts
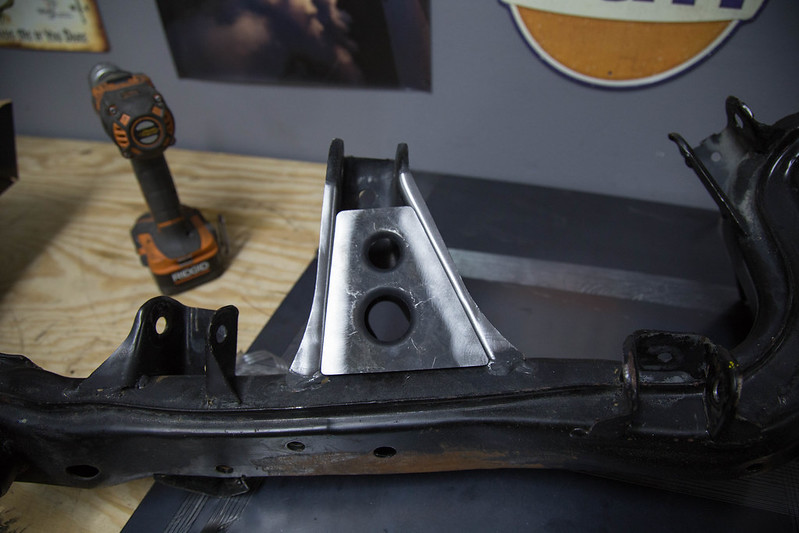
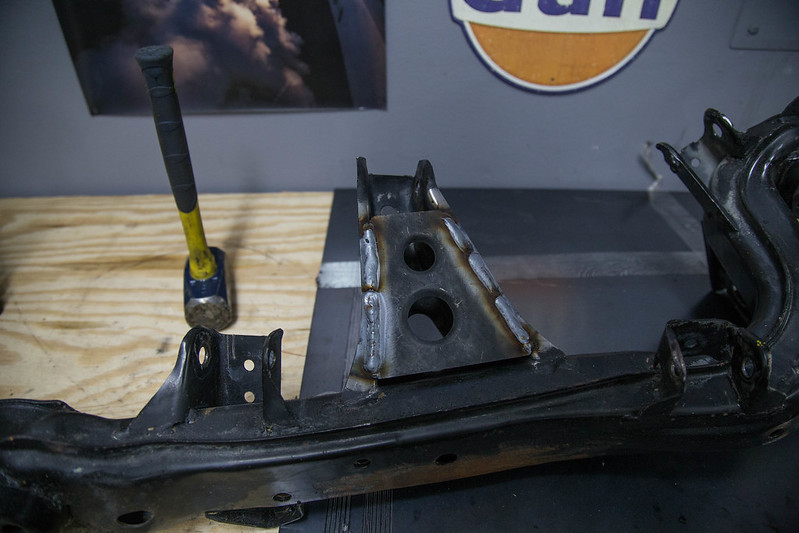
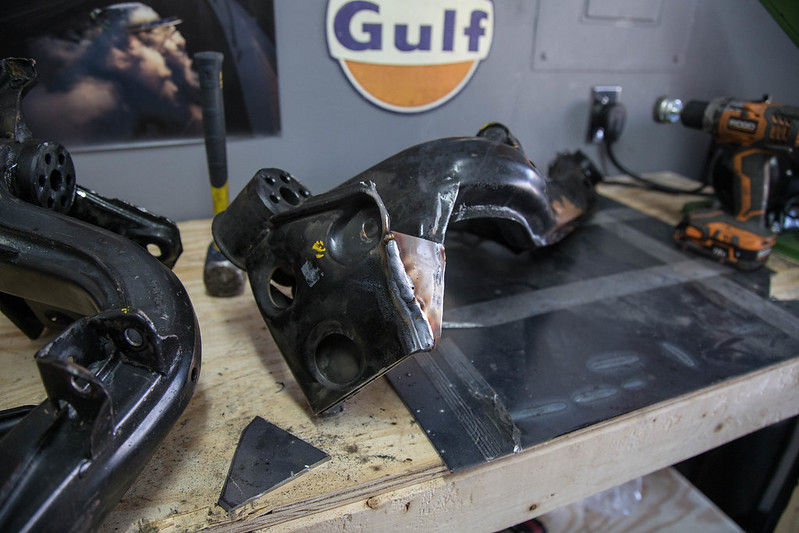
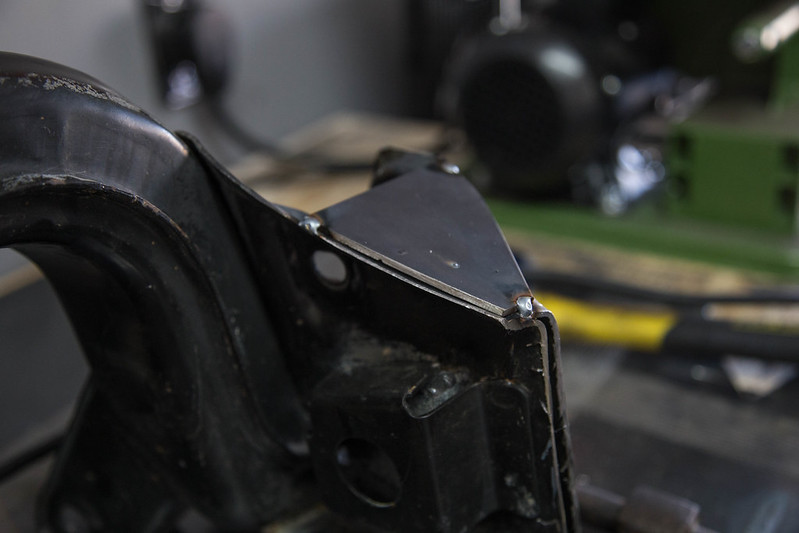
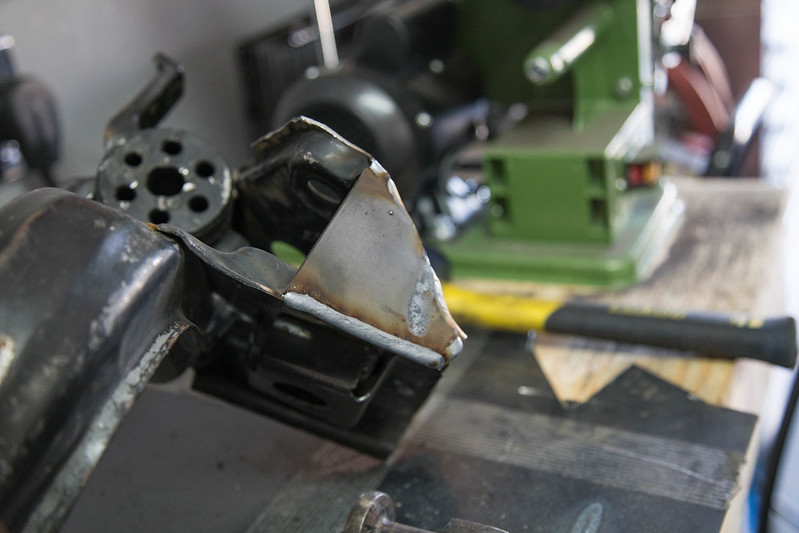
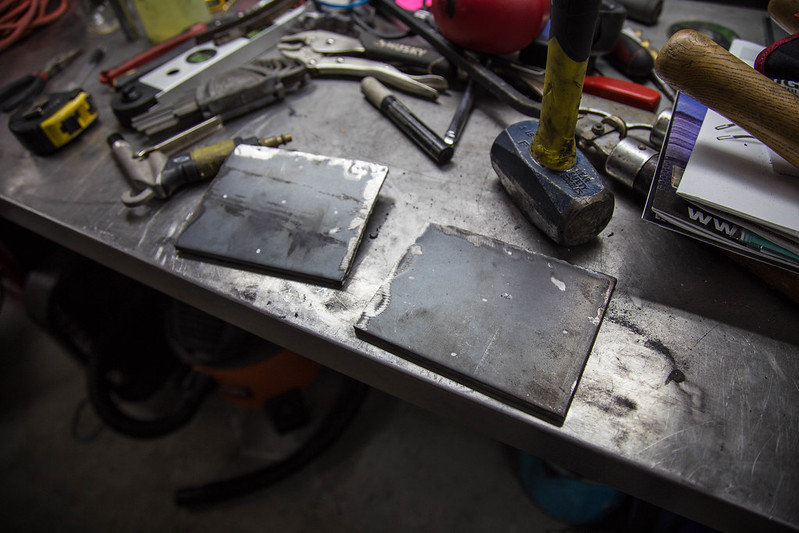
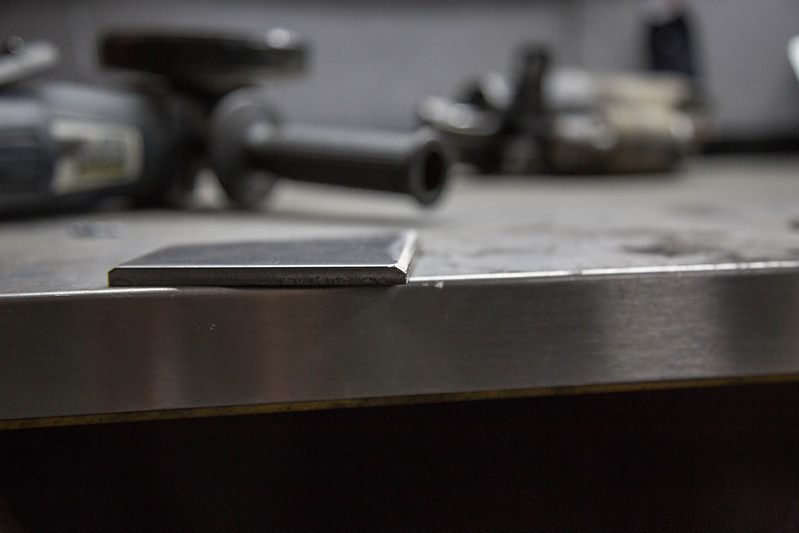
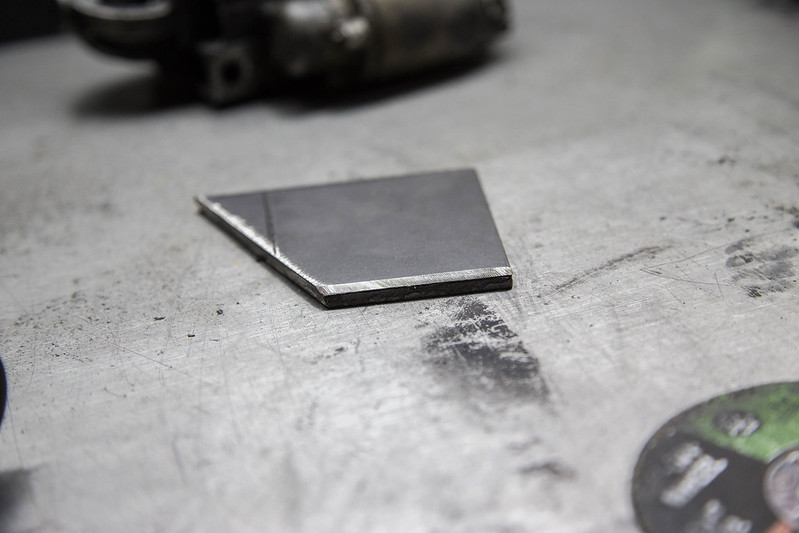
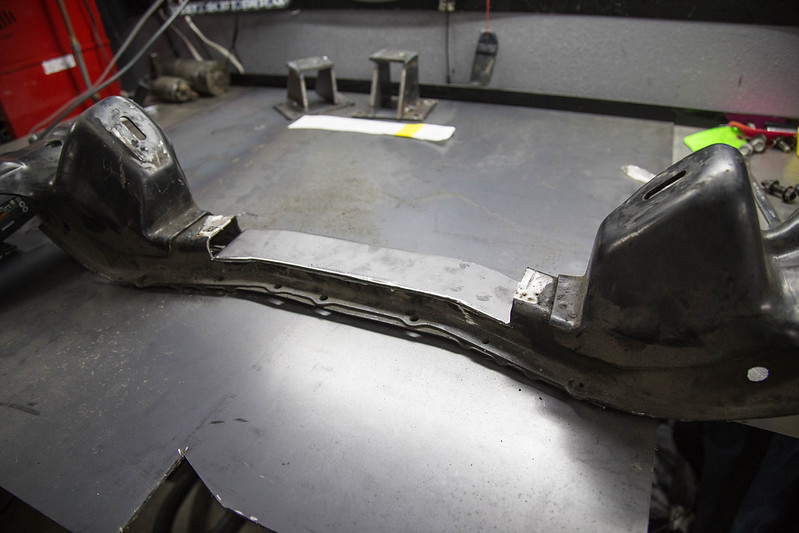
Was able to knock ou the other side motor mount today. They still need some cleaning up of the edges from the plasma cutter and a bit of splatter from welding but they came out decent. Also started on making the metal to shut in the drop out section of the front subframe. Good ole loose leaf paper makes for great template making. Once subframe is welded shut i can start on making the jig to locate the front lca front mount position and the front strut tower placement as well in prep of the front tubular setup.
 IMG_1386 by lawrx, on Flickr
 IMG_1387 by lawrx, on Flickr
 IMG_1389 by lawrx, on Flickr
 IMG_1390 by lawrx, on Flickr
Also went out this morning to support my dad and a friend of ours who we did the bodywork and paint on at World of Wheels car show in the Superdome down in New Orleans. Both ended up winning 1st in class, so pretty awesome to have had a hand in each build and them place so well, there were some decent cars there as well. Dont mind the wife, she's not fat she is just prego haha
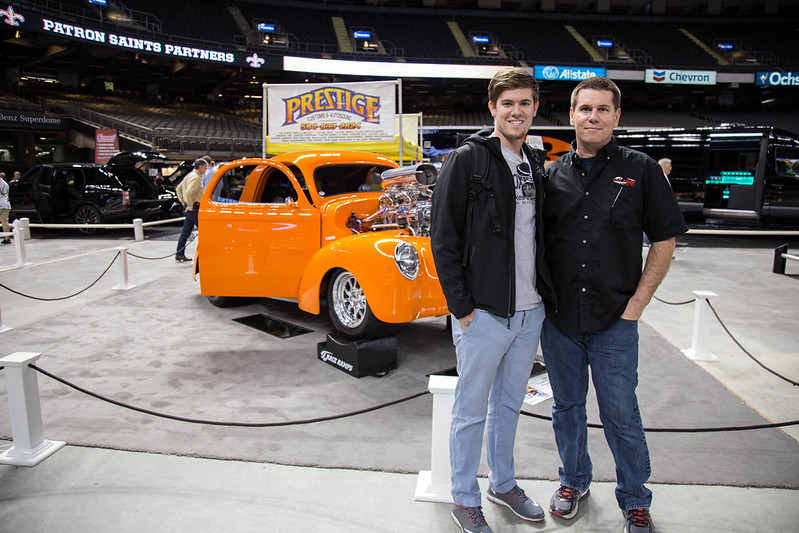 IMG_1367 by lawrx, on Flickr
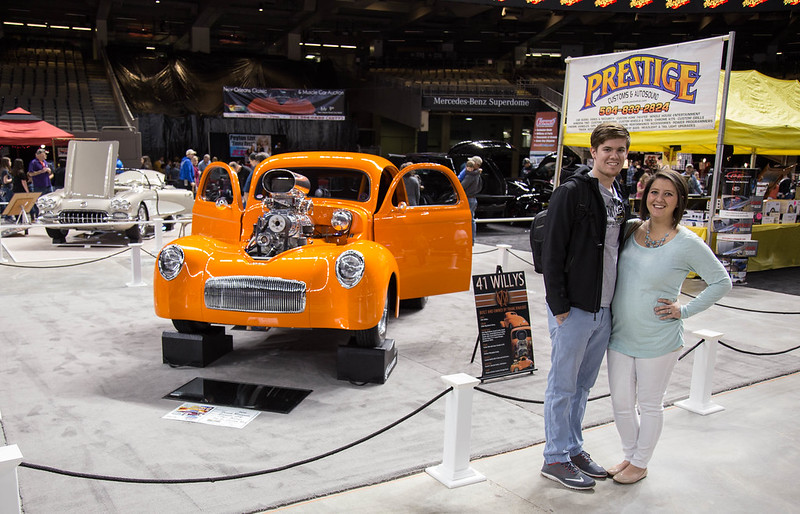 IMG_1374 by lawrx, on Flickr
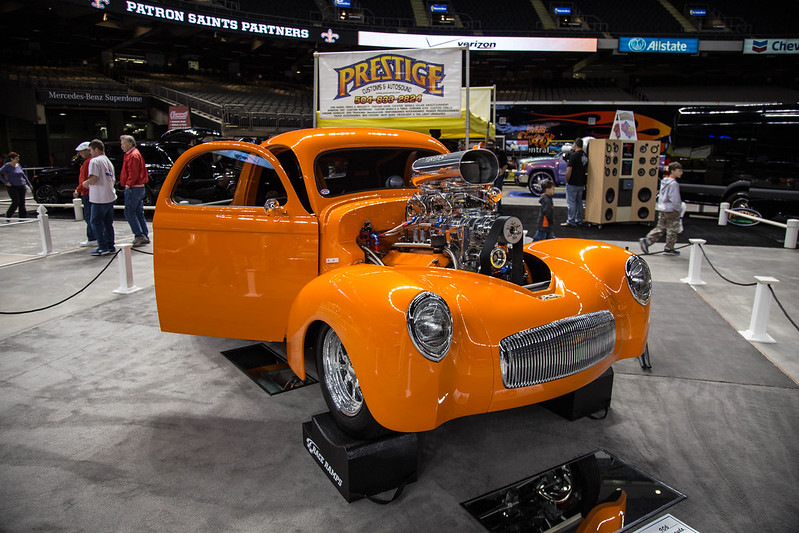 IMG_1352 by lawrx, on Flickr
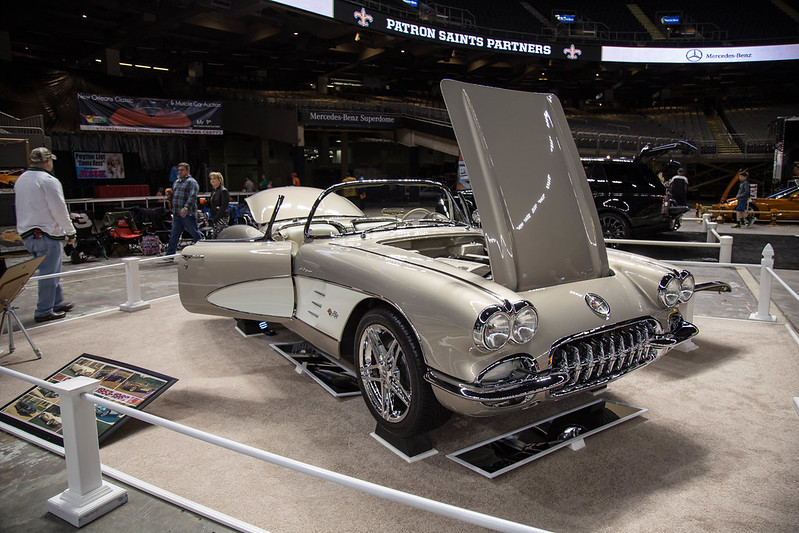 IMG_1351 by lawrx, on Flickr
Also have parts and tools on the way, should have few more parts on way once my contact gets back with me. Ready to start on the roll cage to get the front end moving!
IMG_1386 by lawrx, on FlickrIMG_1387 by lawrx, on FlickrIMG_1389 by lawrx, on FlickrIMG_1390 by lawrx, on FlickrAlso went out this morning to support my dad and a friend of ours who we did the bodywork and paint on at World of Wheels car show in the Superdome down in New Orleans. Both ended up winning 1st in class, so pretty awesome to have had a hand in each build and them place so well, there were some decent cars there as well. Dont mind the wife, she's not fat she is just prego haha
IMG_1367 by lawrx, on FlickrIMG_1374 by lawrx, on FlickrIMG_1352 by lawrx, on FlickrIMG_1351 by lawrx, on FlickrAlso have parts and tools on the way, should have few more parts on way once my contact gets back with me. Ready to start on the roll cage to get the front end moving!
03-14-2016, 10:44 AM
#26
Staging Lane
Thread Starter
Join Date: Oct 2015
Posts: 91
Likes: 0
Received 0 Likes
on
0 Posts
Well ended up having some time today to get some work done, had a few alignment cancellations so i was able to head home early and get some **** done.
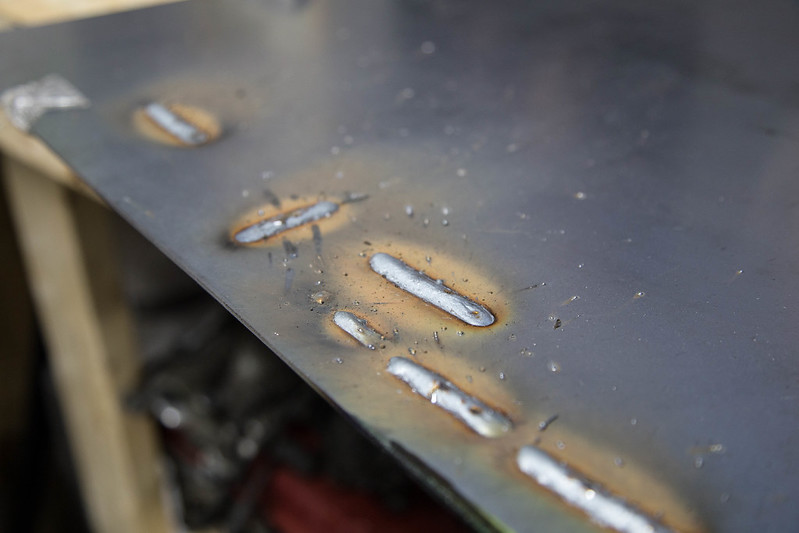
Welded up the indention i cut into front subframe, still need to work on my welding once there is heat in the metal. I, not compensating in my speed for it so I'm ether too fast or too slow. So I'm either almost burning through or not quite getting enough penetration.
 IMG_1399 by lawrx, on Flickr
 IMG_1400 by lawrx, on Flickr
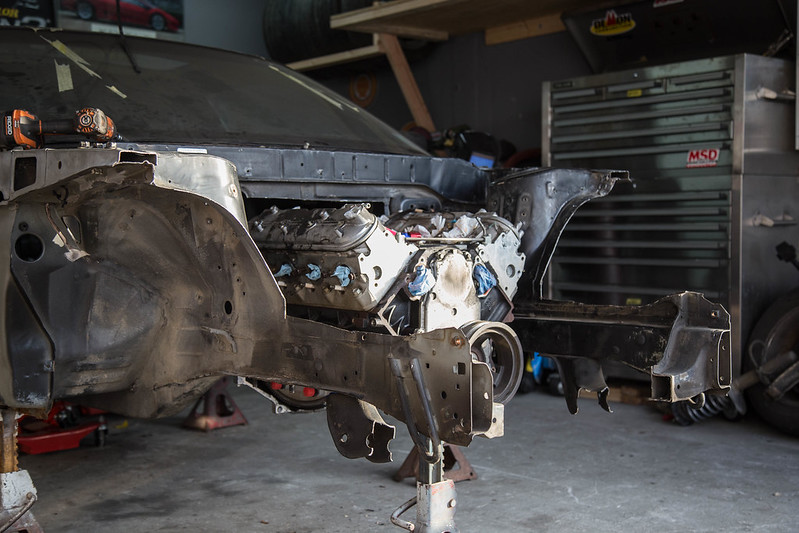
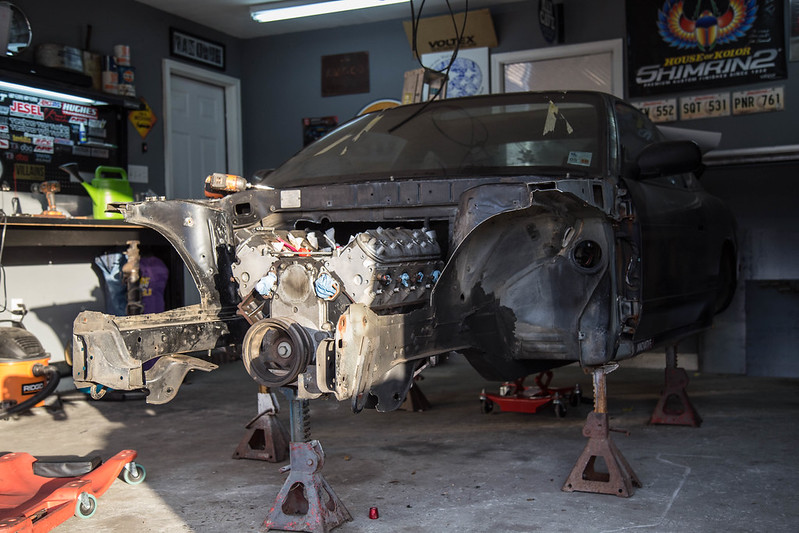
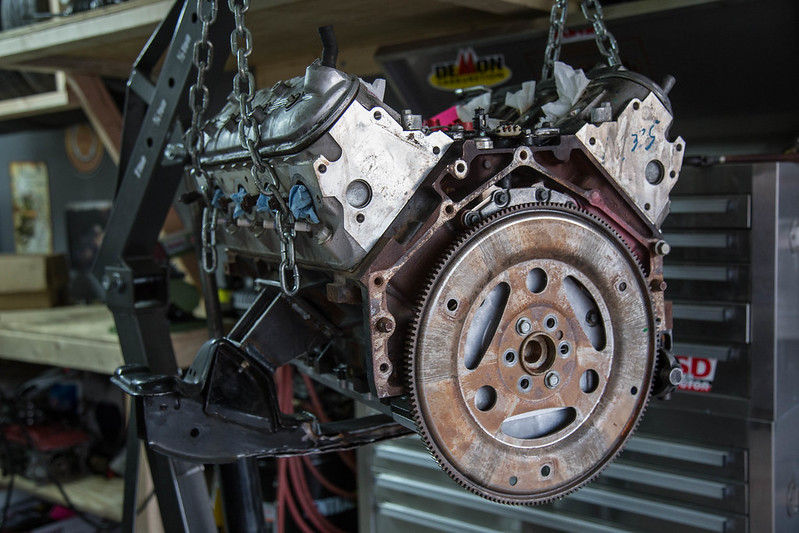
I had gotten home with some daylight left so i took some shots with actual sunlight on the car with where the motors final resting place is in respect to the engine bay.
 IMG_1401 by lawrx, on Flickr
 IMG_1403 by lawrx, on Flickr
 IMG_1416 by lawrx, on Flickr
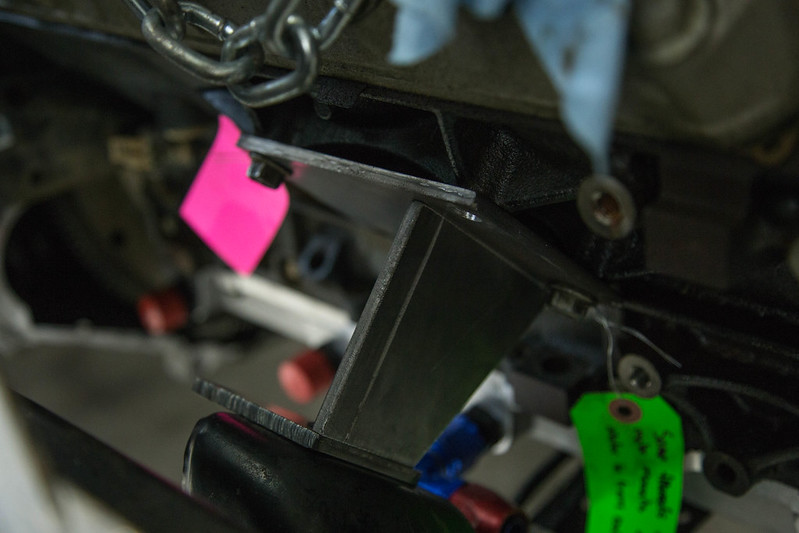
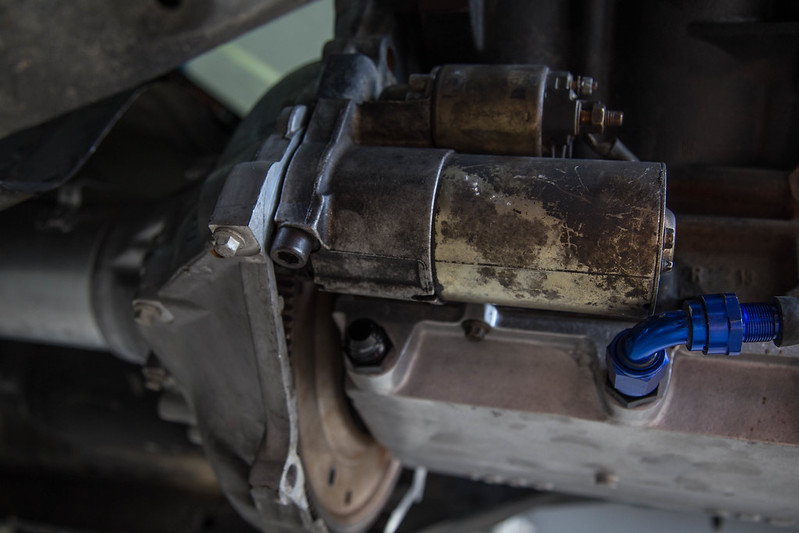
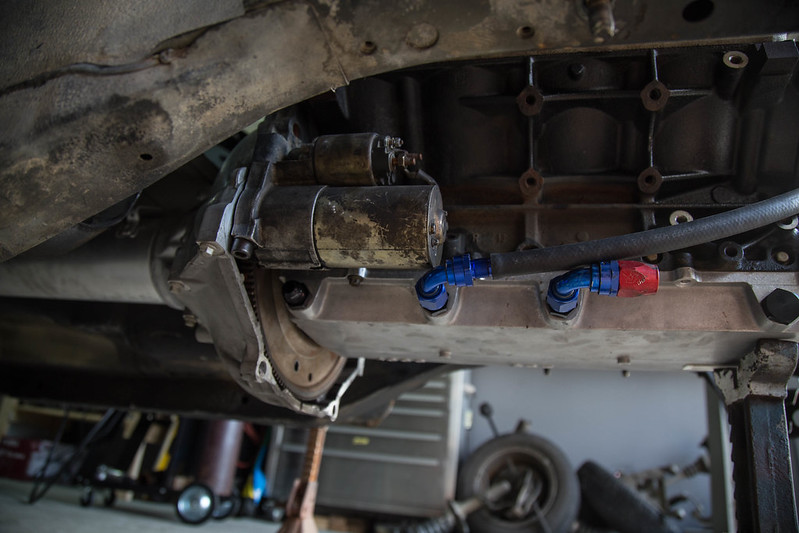
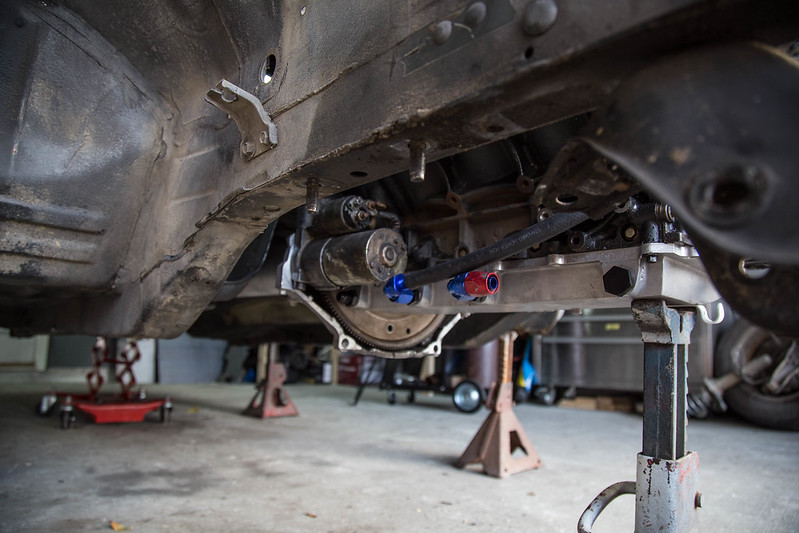
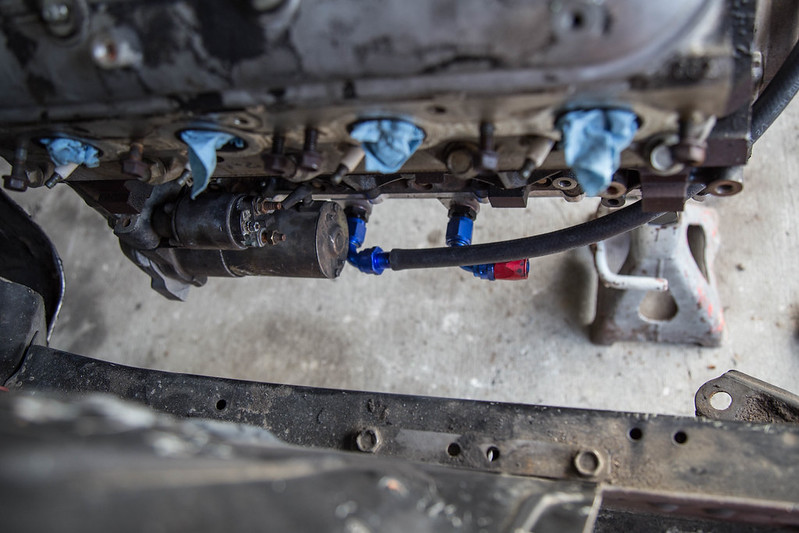
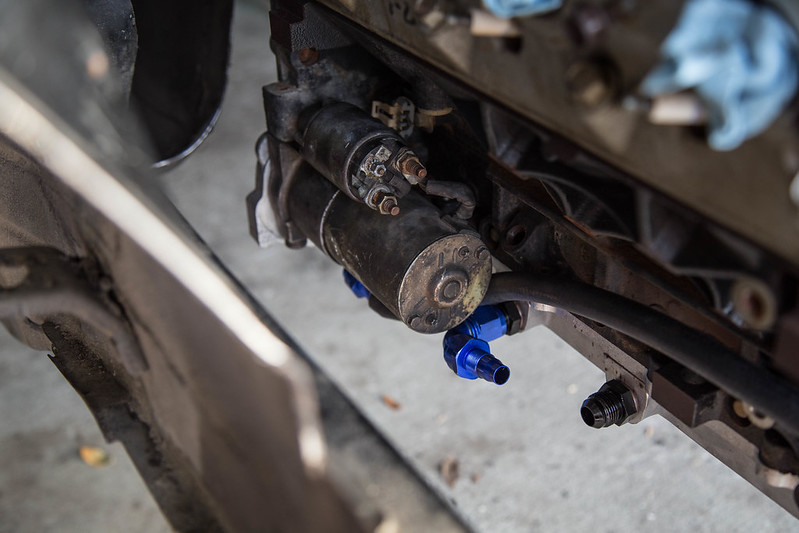
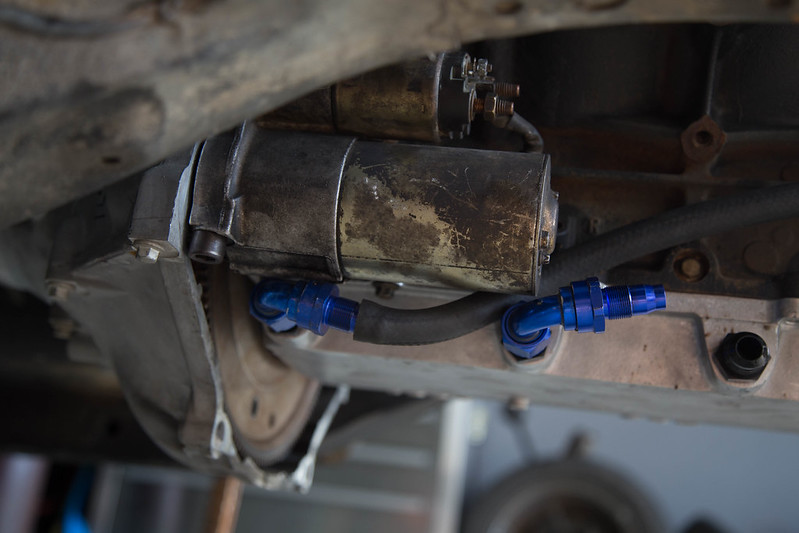
Picked up a used truck starter to use for mock up to check oil line clearances and header room as well. Header wise i should have plenty of room to make what i want. Regarding dry sump oil lines, I'm not able to run the center port as it will hit the motor mount/ subframe. When i first put the starter on i wasn't thinking i could run the rear most port. But once i put the 90* fitting on i think i can just manage to get it to run and be out of the way by massaging the motor and starter a bit. By massaging i mean grinding on the motor and a hammer on the starter for a slight indentation haha Also dont worry about the rubber line, i will be using braided stainless line on the actual install.
 IMG_1405 by lawrx, on Flickr
 IMG_1406 by lawrx, on Flickr
 IMG_1407 by lawrx, on Flickr
 IMG_1408 by lawrx, on Flickr
 IMG_1409 by lawrx, on Flickr
 IMG_1410 by lawrx, on Flickr
 IMG_1413 by lawrx, on Flickr
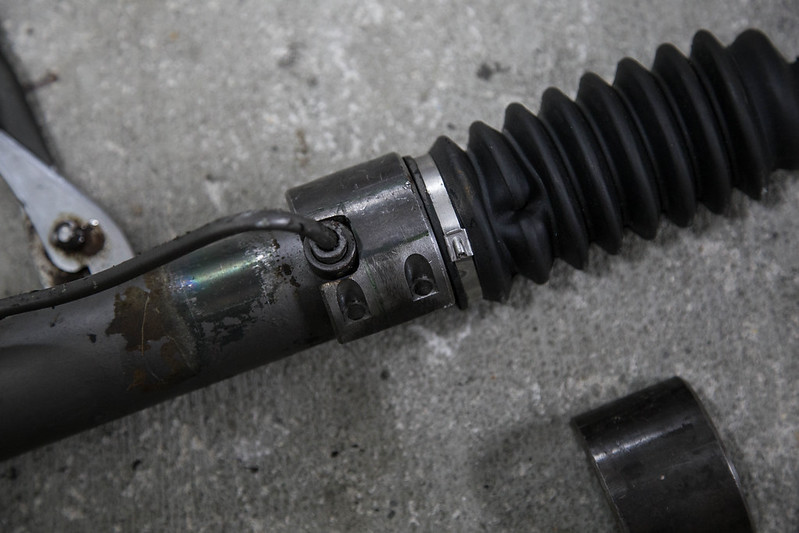
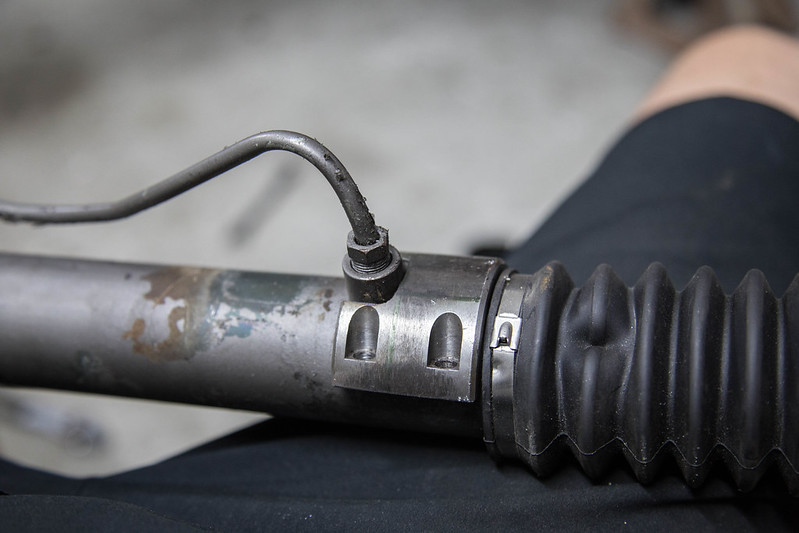
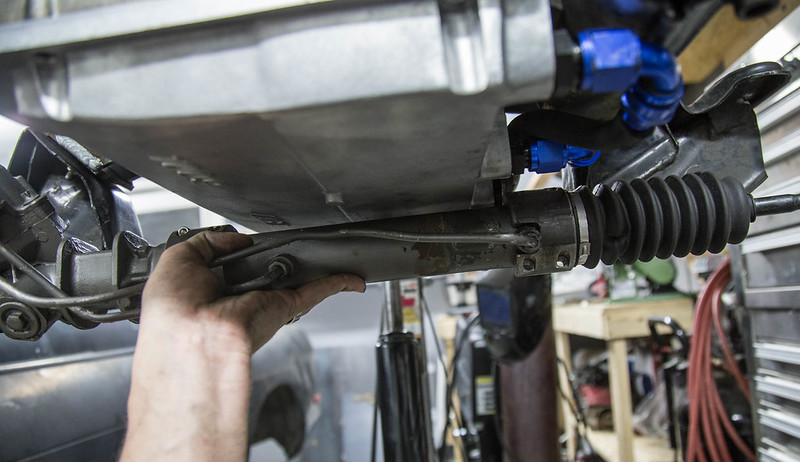
Once the subframe was welded up, i pulled the motor out and bolted the subframe up to start measuring and mock up for the new mounts for the steering rack. I ended up having to notch the passenger side mount to go around the nipple for where there hardline connects to the rack
 IMG_1420 by lawrx, on Flickr
 IMG_1423 by lawrx, on Flickr
 IMG_1424 by lawrx, on Flickr
 IMG_1426 by lawrx, on Flickr
Welded up the indention i cut into front subframe, still need to work on my welding once there is heat in the metal. I, not compensating in my speed for it so I'm ether too fast or too slow. So I'm either almost burning through or not quite getting enough penetration.
IMG_1399 by lawrx, on FlickrIMG_1400 by lawrx, on FlickrI had gotten home with some daylight left so i took some shots with actual sunlight on the car with where the motors final resting place is in respect to the engine bay.
IMG_1401 by lawrx, on FlickrIMG_1403 by lawrx, on FlickrIMG_1416 by lawrx, on FlickrPicked up a used truck starter to use for mock up to check oil line clearances and header room as well. Header wise i should have plenty of room to make what i want. Regarding dry sump oil lines, I'm not able to run the center port as it will hit the motor mount/ subframe. When i first put the starter on i wasn't thinking i could run the rear most port. But once i put the 90* fitting on i think i can just manage to get it to run and be out of the way by massaging the motor and starter a bit. By massaging i mean grinding on the motor and a hammer on the starter for a slight indentation haha Also dont worry about the rubber line, i will be using braided stainless line on the actual install.
IMG_1405 by lawrx, on FlickrIMG_1406 by lawrx, on FlickrIMG_1407 by lawrx, on FlickrIMG_1408 by lawrx, on FlickrIMG_1409 by lawrx, on FlickrIMG_1410 by lawrx, on FlickrIMG_1413 by lawrx, on FlickrOnce the subframe was welded up, i pulled the motor out and bolted the subframe up to start measuring and mock up for the new mounts for the steering rack. I ended up having to notch the passenger side mount to go around the nipple for where there hardline connects to the rack
IMG_1420 by lawrx, on FlickrIMG_1423 by lawrx, on FlickrIMG_1424 by lawrx, on FlickrIMG_1426 by lawrx, on Flickr
03-14-2016, 10:44 AM
#27
Staging Lane
Thread Starter
Join Date: Oct 2015
Posts: 91
Likes: 0
Received 0 Likes
on
0 Posts
Been doing a little thinking lately where i could put a pair of auxillary coolers. Used my awesome paint skills to depict my idea thus far. Ive always been a big fan of the ferrari f40, and ive been wanting to incorpate a few design features from it into the 240. A while back i decided i wanted to do the triple exhuast tip look from it. I also thought of today doing a naca duct on the quarter panel to feed air to a pair of coolers mounted vertical within the rear body below the tailights.
A plus side to this is bringing more air behind the car to lessen the low pressure area that causes drag on cars. So not only will i be drawing air from a fairly high pressure area, i will be disposing of it in the most effective area against the fight for less drag for more efficiency.
The red squares are the coolers, the three black circles exhaust tips, the blue square rear diffuser, and the yellow and orange depicts various tempertures of the air exting the various parts
 qtr naca duct flow by lawrx, on Flickr
 rear coolers flow by lawrx, on Flickr
A plus side to this is bringing more air behind the car to lessen the low pressure area that causes drag on cars. So not only will i be drawing air from a fairly high pressure area, i will be disposing of it in the most effective area against the fight for less drag for more efficiency.
The red squares are the coolers, the three black circles exhaust tips, the blue square rear diffuser, and the yellow and orange depicts various tempertures of the air exting the various parts
qtr naca duct flow by lawrx, on Flickrrear coolers flow by lawrx, on Flickr
03-14-2016, 10:44 AM
#28
Staging Lane
Thread Starter
Join Date: Oct 2015
Posts: 91
Likes: 0
Received 0 Likes
on
0 Posts
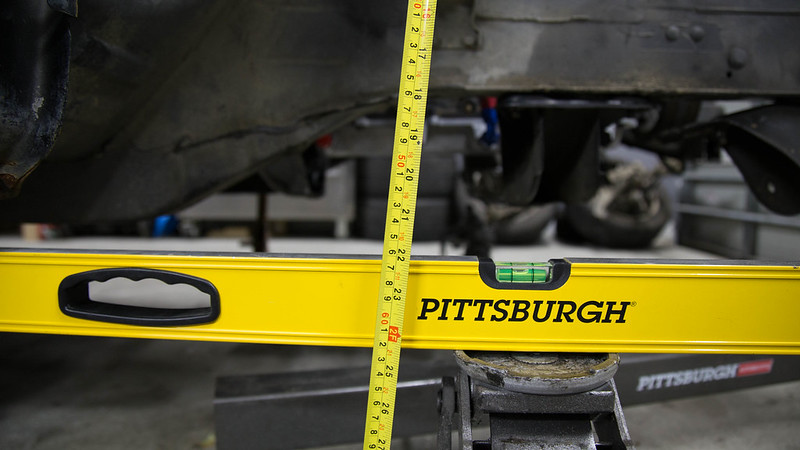
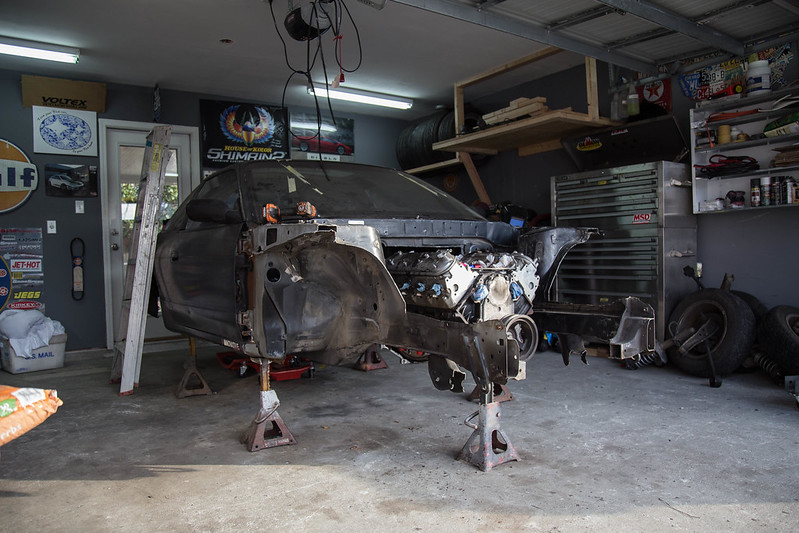
Over the last few days i was able to get the everything bolted up, throw the stock suspension back on, and lower it down under it owns weight. The conclusion i have come to is this motor sits ******* LOW. The center of the heads sit even with my knee caps (I'm 6'1 for reference) needless to say its way down there.
 IMG_1430 by lawrx, on Flickr
 IMG_1431 by lawrx, on Flickr
 IMG_1432 by lawrx, on Flickr
 IMG_1433 by lawrx, on Flickr
 IMG_1435 by lawrx, on Flickr
Also swung by my dads to pick up and borrow some tools vs just buying my own right now. saving money is good, who cares if your using tools that aren't your own. Biggest thing i picked up tho was his tubing bender. Saved me a few hundred bucks from buying one, and i dont have to wait for one to get shipped in either. Week or so ago i ordered a tubing roller. How this differs from a bender is the roller will give the tubing a nice radius bend, where as the bender gives short specific angle bends. Roller will come in hand for various pieces i.e. strut tower bar, some smaller wall roll cage tie in points maybe etc. Also picked up from dad a few angle finders and a tool to hold in place the tubing while you tack in place. Pretty usefull little tool
 IMG_1436 by lawrx, on Flickr
 IMG_1437 by lawrx, on Flickr
 IMG_1438 by lawrx, on Flickr
 IMG_1439 by lawrx, on Flickr
 IMG_1442 by lawrx, on Flickr
I also have multiple parts on order currently, I'm quite excited. Heres a run down of what all is on order.
- Front and rear fenders
-Front and rear flares
-Roll cage tubing
-Bucket seat
-Hole saw bits to cut roll cage
Actual work itself on the car is going to slow over the next month or so as i have two large side jobs ill be under taking. So ill be tide up with those for a bit. They also are paying quite well so i should also in the mean time be able to get a few more parts ordered as well, namely rear inner and outer barrels to start mock up of the wheels.
Cant really measure for the fronts yet as i need the new knuckles, lca's and coilovers as well. So front mock is still a ways out. Hopefully my friend buys my Varis parts in the next 2 weeks as promised and ill be able to get the knuckles and such just mentioned on the way.
Busy times ahead. My bank account is really feeling it :/
IMG_1430 by lawrx, on FlickrIMG_1431 by lawrx, on FlickrIMG_1432 by lawrx, on FlickrIMG_1433 by lawrx, on FlickrIMG_1435 by lawrx, on FlickrAlso swung by my dads to pick up and borrow some tools vs just buying my own right now. saving money is good, who cares if your using tools that aren't your own. Biggest thing i picked up tho was his tubing bender. Saved me a few hundred bucks from buying one, and i dont have to wait for one to get shipped in either. Week or so ago i ordered a tubing roller. How this differs from a bender is the roller will give the tubing a nice radius bend, where as the bender gives short specific angle bends. Roller will come in hand for various pieces i.e. strut tower bar, some smaller wall roll cage tie in points maybe etc. Also picked up from dad a few angle finders and a tool to hold in place the tubing while you tack in place. Pretty usefull little tool
IMG_1436 by lawrx, on FlickrIMG_1437 by lawrx, on FlickrIMG_1438 by lawrx, on FlickrIMG_1439 by lawrx, on FlickrIMG_1442 by lawrx, on FlickrI also have multiple parts on order currently, I'm quite excited. Heres a run down of what all is on order.
- Front and rear fenders
-Front and rear flares
-Roll cage tubing
-Bucket seat
-Hole saw bits to cut roll cage
Actual work itself on the car is going to slow over the next month or so as i have two large side jobs ill be under taking. So ill be tide up with those for a bit. They also are paying quite well so i should also in the mean time be able to get a few more parts ordered as well, namely rear inner and outer barrels to start mock up of the wheels.
Cant really measure for the fronts yet as i need the new knuckles, lca's and coilovers as well. So front mock is still a ways out. Hopefully my friend buys my Varis parts in the next 2 weeks as promised and ill be able to get the knuckles and such just mentioned on the way.
Busy times ahead. My bank account is really feeling it :/
03-14-2016, 10:45 AM
#29
Staging Lane
Thread Starter
Join Date: Oct 2015
Posts: 91
Likes: 0
Received 0 Likes
on
0 Posts
Had some unexpected free time today, so i cleaned up the garage a bit and threw out some things to make room for my buddys Cts-v that he is dropping off early this week for somebody work. Wait till y'all see this ******* thing.
 untitled (1 of 9)-3 by lawrx, on Flickr
 untitled (2 of 9)-3 by lawrx, on Flickr
 untitled (3 of 9)-3 by lawrx, on Flickr
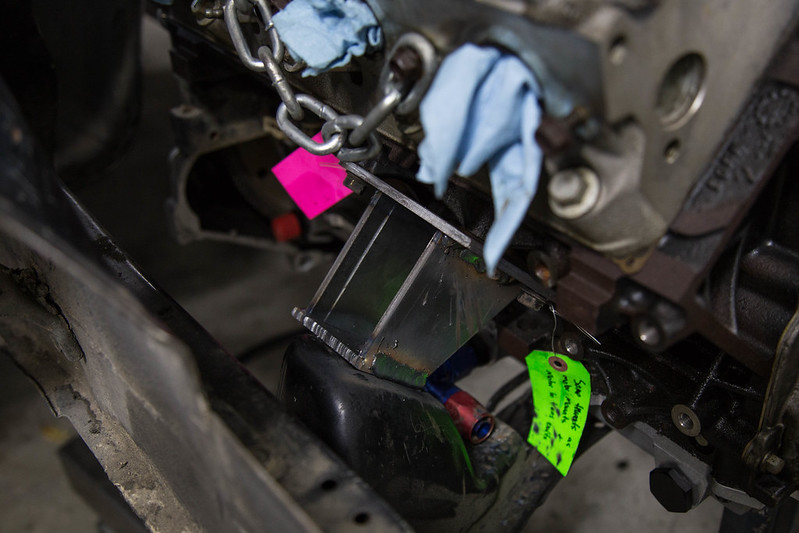
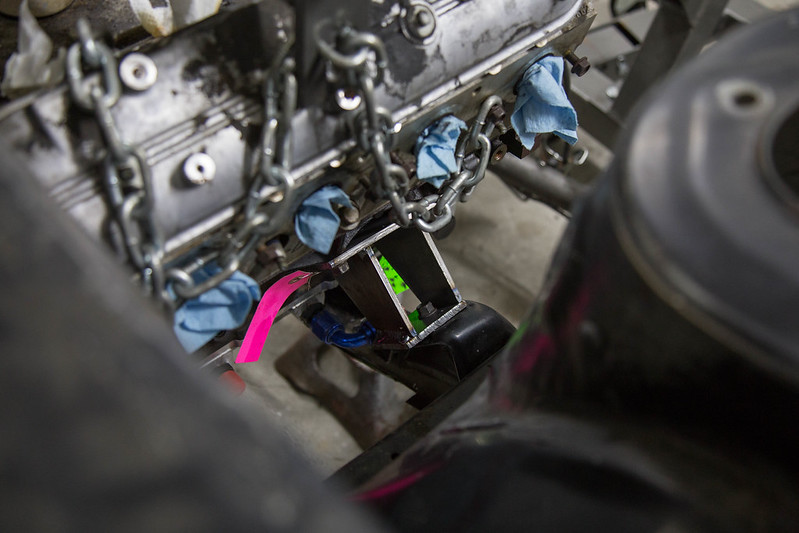
Also took the time to use some spare materials i had laying around to sorta mock up how i want to do the front tube work. The outside bar will be joining the downbar/dashbar through the firewall and the two angled bars will be going through the cowl and connecting to the dash bar as well. I fell this will be a very sturdy, structurally sound design. Of course there will be some bars connecting these upper bars to the lower rail. Ill figure that out once i come to it, but i already have a few ideas.
 untitled (4 of 9)-3 by lawrx, on Flickr
 untitled (5 of 9)-3 by lawrx, on Flickr
 untitled (6 of 9)-3 by lawrx, on Flickr
 untitled (7 of 9)-3 by lawrx, on Flickr
Also picked up some 1/2" conduit the other day to mock up and try out some ideas for the age before i bend the actual dom tubing for the first time. dad recommended it and said ti was a good way to try new angles and such.
 untitled (8 of 9)-3 by lawrx, on Flickr
 untitled (9 of 9)-3 by lawrx, on Flickr
untitled (1 of 9)-3 by lawrx, on Flickruntitled (2 of 9)-3 by lawrx, on Flickruntitled (3 of 9)-3 by lawrx, on FlickrAlso took the time to use some spare materials i had laying around to sorta mock up how i want to do the front tube work. The outside bar will be joining the downbar/dashbar through the firewall and the two angled bars will be going through the cowl and connecting to the dash bar as well. I fell this will be a very sturdy, structurally sound design. Of course there will be some bars connecting these upper bars to the lower rail. Ill figure that out once i come to it, but i already have a few ideas.
untitled (4 of 9)-3 by lawrx, on Flickruntitled (5 of 9)-3 by lawrx, on Flickruntitled (6 of 9)-3 by lawrx, on Flickruntitled (7 of 9)-3 by lawrx, on FlickrAlso picked up some 1/2" conduit the other day to mock up and try out some ideas for the age before i bend the actual dom tubing for the first time. dad recommended it and said ti was a good way to try new angles and such.
untitled (8 of 9)-3 by lawrx, on Flickruntitled (9 of 9)-3 by lawrx, on Flickr
03-14-2016, 10:45 AM
#30
Staging Lane
Thread Starter
Join Date: Oct 2015
Posts: 91
Likes: 0
Received 0 Likes
on
0 Posts
Borrowed some glass tools from work today to pull the windshield. Was going to do the qtr windows as well but didn't feel like fighting with them as i **** using the saw, decided to pull the hatch and some door gaskets as well. Also found a bit of rust under the windshield urethane, but not a big deal as it isn't bad at all.
Does anyone know where to buy some New Old Stock gaskets and trim pieces for an s13? I have a feeling its going to be a bitch locate some factory gaskets and such
Also got the car moved over as tomorrow the cats-v is getting dropped off, and she needs her space inside while i work on her.
 untitled (1 of 11) by lawrx, on Flickr
 untitled (2 of 11) by lawrx, on Flickr
 untitled (3 of 11) by lawrx, on Flickr
 untitled (4 of 11) by lawrx, on Flickr
 untitled (5 of 11) by lawrx, on Flickr
 untitled (6 of 11) by lawrx, on Flickr
 untitled (7 of 11) by lawrx, on Flickr
 untitled (8 of 11) by lawrx, on Flickr
 untitled (9 of 11) by lawrx, on Flickr
 untitled (11 of 11) by lawrx, on Flickr
Also went to a cars and coffee this past sunday. Some lovely machinery, and also my attainable dream car, 997 911 turbo. Mint condition, stock, manual, and not a crazy color interior. Ugh much want.
 untitled (4 of 8) by lawrx, on Flickr
 untitled (3 of 8) by lawrx, on Flickr
 untitled (6 of 6) by lawrx, on Flickr
 untitled (5 of 6) by lawrx, on Flickr
 untitled (4 of 6) by lawrx, on Flickr
 untitled (3 of 6) by lawrx, on Flickr
 untitled (2 of 8) by lawrx, on Flickr
 untitled (2 of 6) by lawrx, on Flickr
 untitled (1 of 6) by lawrx, on Flickr
Does anyone know where to buy some New Old Stock gaskets and trim pieces for an s13? I have a feeling its going to be a bitch locate some factory gaskets and such
Also got the car moved over as tomorrow the cats-v is getting dropped off, and she needs her space inside while i work on her.
untitled (1 of 11) by lawrx, on Flickruntitled (2 of 11) by lawrx, on Flickruntitled (3 of 11) by lawrx, on Flickruntitled (4 of 11) by lawrx, on Flickruntitled (5 of 11) by lawrx, on Flickruntitled (6 of 11) by lawrx, on Flickruntitled (7 of 11) by lawrx, on Flickruntitled (8 of 11) by lawrx, on Flickruntitled (9 of 11) by lawrx, on Flickruntitled (11 of 11) by lawrx, on FlickrAlso went to a cars and coffee this past sunday. Some lovely machinery, and also my attainable dream car, 997 911 turbo. Mint condition, stock, manual, and not a crazy color interior. Ugh much want.
untitled (4 of 8) by lawrx, on Flickruntitled (3 of 8) by lawrx, on Flickruntitled (6 of 6) by lawrx, on Flickruntitled (5 of 6) by lawrx, on Flickruntitled (4 of 6) by lawrx, on Flickruntitled (3 of 6) by lawrx, on Flickruntitled (2 of 8) by lawrx, on Flickruntitled (2 of 6) by lawrx, on Flickruntitled (1 of 6) by lawrx, on Flickr
03-14-2016, 10:46 AM
#31
Staging Lane
Thread Starter
Join Date: Oct 2015
Posts: 91
Likes: 0
Received 0 Likes
on
0 Posts
Well, the cause of no progress on the 240 is here. Currently working on a locals car, got to fund this build somehow...
http://www.stanceworks.com/forums/sh...ad.php?t=83789
 untitled (2 of 10) by lawrx, on Flickr
 untitled (7 of 10) by lawrx, on Flickr
http://www.stanceworks.com/forums/sh...ad.php?t=83789
untitled (2 of 10) by lawrx, on Flickruntitled (7 of 10) by lawrx, on Flickr
03-14-2016, 10:46 AM
#32
Staging Lane
Thread Starter
Join Date: Oct 2015
Posts: 91
Likes: 0
Received 0 Likes
on
0 Posts
So the other day i was doing a bit of thinking on my tire sizes. The current plan is
Front 315/30/18 18x12.5
Rear 335/30/18 18x14
I fully intend to put this car through its paces on the road course and other various events. But at the same time is purpose down to its core is just a fun, badass looking car i can hoon in on the streets, to meets, and various events.
With that being said a big inspiration to this build is the gt300 racing class put of japan. I love the way the cars look with their raised fender hips and large slicks and aero. One thing i have noticed is they are all running the same size front and rear tire (to my knowledge). So it got me thinking, logically it makes sense, tire rotations, swapping front to back etc to keep rear tire overwear to a minimum from over spinning etc.
So im considering just going batshit insane 18x14 335/30s all around. Will give it that big tired wide hipped look i love from the gt300 racing class, better tire life from being able to rotate tires, and and its something i believe know one has ran width wise up front as well. \
I know someone brought up getting enough heat intot the tires to actually make use of them. But i have some big plans aero wise to generate some actually useable/measureable downforce that will def get me the heat and use out of the size of the tires il be running.
 130_0311_02_zoom+2003_subaru_impreza_sti_cusco_gt3 00+front_left_view by lawrx, on Flickr
 Shift-GT300-IS-054 by lawrx, on Flickr
 subaru_brz_gt300_front_by_dangeruss-d6bq6sl by lawrx, on Flickr
Front 315/30/18 18x12.5
Rear 335/30/18 18x14
I fully intend to put this car through its paces on the road course and other various events. But at the same time is purpose down to its core is just a fun, badass looking car i can hoon in on the streets, to meets, and various events.
With that being said a big inspiration to this build is the gt300 racing class put of japan. I love the way the cars look with their raised fender hips and large slicks and aero. One thing i have noticed is they are all running the same size front and rear tire (to my knowledge). So it got me thinking, logically it makes sense, tire rotations, swapping front to back etc to keep rear tire overwear to a minimum from over spinning etc.
So im considering just going batshit insane 18x14 335/30s all around. Will give it that big tired wide hipped look i love from the gt300 racing class, better tire life from being able to rotate tires, and and its something i believe know one has ran width wise up front as well. \
I know someone brought up getting enough heat intot the tires to actually make use of them. But i have some big plans aero wise to generate some actually useable/measureable downforce that will def get me the heat and use out of the size of the tires il be running.
130_0311_02_zoom+2003_subaru_impreza_sti_cusco_gt3 00+front_left_view by lawrx, on FlickrShift-GT300-IS-054 by lawrx, on Flickrsubaru_brz_gt300_front_by_dangeruss-d6bq6sl by lawrx, on Flickr
03-14-2016, 10:47 AM
#33
Staging Lane
Thread Starter
Join Date: Oct 2015
Posts: 91
Likes: 0
Received 0 Likes
on
0 Posts
**** poor update, but it is one. While i had my friends caddy's wheel off I measured to see the overall height of the tire, and much to my surprise it's the same overall diameter as the tires i intend to run. So I'm sure you know what happened next. I rolled the wheel over to the back of the 240 and good god. These son bitches are going to be huge. Its exactly the look I'm going for. Cant wait to see what it looks like with all the planned aero and wide body.:eyebrows:eyebrows
Currently still waiting on wide body panels to come in as well as roll cage tubing. Also have a seat on order, which is a ways out still as its coming from the land of the rising sun. I hate waiting on parts.....
 untitled (1 of 1) by lawrx, on Flickr
Currently still waiting on wide body panels to come in as well as roll cage tubing. Also have a seat on order, which is a ways out still as its coming from the land of the rising sun. I hate waiting on parts.....
untitled (1 of 1) by lawrx, on Flickr
03-14-2016, 11:14 AM
#34
On The Tree
When you get to the tube rolling, for those nice radius tubes, you might want to consider adding the Swag Offroad electric drive kit. Makes life a lot easier.
http://www.swagoffroad.com/SWAG-Elec...ler-_p_74.html
http://www.swagoffroad.com/SWAG-Elec...ler-_p_74.html
03-14-2016, 11:40 AM
#35
Staging Lane
Thread Starter
Join Date: Oct 2015
Posts: 91
Likes: 0
Received 0 Likes
on
0 Posts
When you get to the tube rolling, for those nice radius tubes, you might want to consider adding the Swag Offroad electric drive kit. Makes life a lot easier.
http://www.swagoffroad.com/SWAG-Elec...ler-_p_74.html
http://www.swagoffroad.com/SWAG-Elec...ler-_p_74.html
 03-14-2016, 11:50 AM
#36
On The Tree
You bet. Swag has tons of great stuff. No affiliation with them, just like their stuff. I've got a mount of theirs for my portable bandsaw too. Super handy. They also have other tubing bender upgrades for benders like yours. Like to retrofit hydraulics.
 03-14-2016, 01:01 PM
#38
Staging Lane
Thread Starter
Join Date: Oct 2015
Posts: 91
Likes: 0
Received 0 Likes
on
0 Posts
03-14-2016, 10:19 PM
#39
TECH Addict
Holy nuts, this is a cool build. I like your style, sir. The use of the transaxle, dry sump, individual throttle bodies... all of it. This is going to be absolutely fantastic. Keep up the great work.
03-14-2016, 10:30 PM
#40
Staging Lane
Thread Starter
Join Date: Oct 2015
Posts: 91
Likes: 0
Received 0 Likes
on
0 Posts