

My S13 240 Build : Ls swap, Corvette transaxle, ITB's, Widebody, Do everything car
 01-18-2016, 06:12 PM
#1
Staging Lane
Thread Starter

Join Date: Oct 2015
Posts: 91
Likes: 0
Received 0 Likes
on
0 Posts
Sup guys. Figured i had gotten done enough to make a build thread for my s13. Little background on previous cars. Used to have a 2012 Subaru wrx. Bought it when i was 18. Was working full time and decided to splurge on myself. I daily drove it for 3 years while modifying it. Had the typical ringland issue, built motor dropped in. Ended up getting a full varis front end for it, and making another set of varis fenders conforma nd line up with the varis front bumper. That front end is still my favourite to date on any car, such clean aggressive and purposeful lines. I ended up parting it out and selling it to buy the wife a daily. Picked upan 05 wrx as a daily and have had nothing but problems with it, just finished droppin a motor into it, prolly gunna drive it for a bit then sell it off and get a new daily, maybe a truck idk yet.
 DSC_0531 by lawrx, on Flickr
 DSC_0534 by lawrx, on Flickr
Anyways enough about the Subarus, (******* pains in my ***). So, the plan with the s13 is an all around performer, not built for anything specific and capable of nearly any kinda event i want to attend. Drag, drift, road course, autox, hill climb whatever.
From the get go i knew i wanted to do something different. I dont really like following the crowd and love doing custom one off stuff. I knew the 240s already had pretty good weight distribution, so i wanted to capitalize on that and make it even better. did a bunch of figuring, measuring, brainstorming and a slight bit of obsession, but i finally settled on a corvette transaxle with an ls motor. I considered other motors to run with the corvette transaxle but none of them met my goals better than the ls did.
So, picked upa local shell, and got it home. Thing was in rough shape. I knew i didnt want to buy a mint car as it will be getting cut up and everything and i wouldnt be using majority of the stock ext. panels.
This is the shape i got it home in and basically my starting base (if you want to call it that)
 untitled (1 of 29) by lawrx, on Flickr
 untitled (2 of 29) by lawrx, on Flickr
 untitled (3 of 29) by lawrx, on Flickr
 untitled (4 of 29) by lawrx, on Flickr
 untitled (5 of 29) by lawrx, on Flickr
I didnt waste any time starting to gut it of virtually every part on it as evberything will be either changed or modified.
 untitled (7 of 29) by lawrx, on Flickr
 untitled (8 of 29) by lawrx, on Flickr
 untitled (9 of 29) by lawrx, on Flickr
 untitled (10 of 29) by lawrx, on Flickr
 untitled (11 of 29) by lawrx, on Flickr
Once mostly gutted. I pulled the rear subframe in lieu of the transaxle currently being in route. Once out i test the the rear diff which i already had in my possession.
 untitled (12 of 29) by lawrx, on Flickr
 untitled (13 of 29) by lawrx, on Flickr
DSC_0531 by lawrx, on FlickrDSC_0534 by lawrx, on FlickrAnyways enough about the Subarus, (******* pains in my ***). So, the plan with the s13 is an all around performer, not built for anything specific and capable of nearly any kinda event i want to attend. Drag, drift, road course, autox, hill climb whatever.
From the get go i knew i wanted to do something different. I dont really like following the crowd and love doing custom one off stuff. I knew the 240s already had pretty good weight distribution, so i wanted to capitalize on that and make it even better. did a bunch of figuring, measuring, brainstorming and a slight bit of obsession, but i finally settled on a corvette transaxle with an ls motor. I considered other motors to run with the corvette transaxle but none of them met my goals better than the ls did.
So, picked upa local shell, and got it home. Thing was in rough shape. I knew i didnt want to buy a mint car as it will be getting cut up and everything and i wouldnt be using majority of the stock ext. panels.
This is the shape i got it home in and basically my starting base (if you want to call it that)
untitled (1 of 29) by lawrx, on Flickruntitled (2 of 29) by lawrx, on Flickruntitled (3 of 29) by lawrx, on Flickruntitled (4 of 29) by lawrx, on Flickruntitled (5 of 29) by lawrx, on FlickrI didnt waste any time starting to gut it of virtually every part on it as evberything will be either changed or modified.
untitled (7 of 29) by lawrx, on Flickruntitled (8 of 29) by lawrx, on Flickruntitled (9 of 29) by lawrx, on Flickruntitled (10 of 29) by lawrx, on Flickruntitled (11 of 29) by lawrx, on FlickrOnce mostly gutted. I pulled the rear subframe in lieu of the transaxle currently being in route. Once out i test the the rear diff which i already had in my possession.
untitled (12 of 29) by lawrx, on Flickruntitled (13 of 29) by lawrx, on Flickr  01-18-2016, 10:32 PM
#2
Staging Lane
Thread Starter
Join Date: Oct 2015
Posts: 91
Likes: 0
Received 0 Likes
on
0 Posts
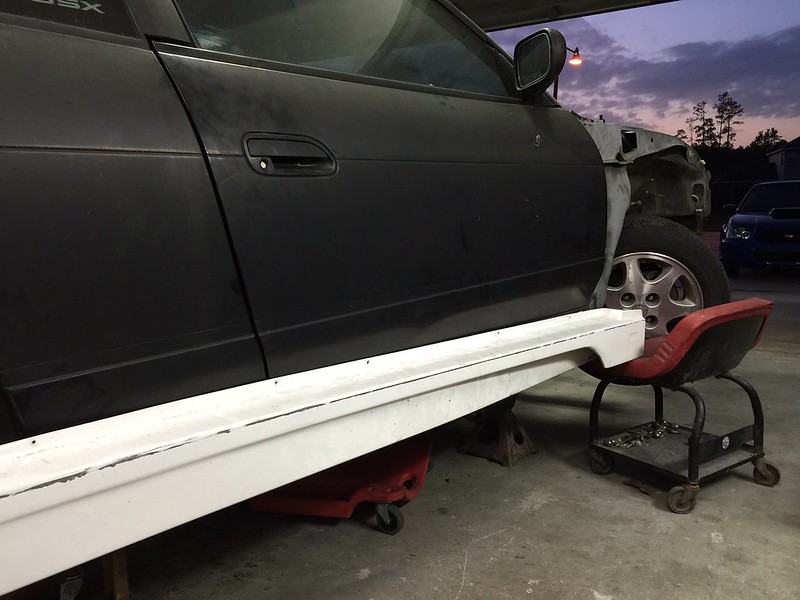
After cutting up the rear floor i had a beautiful day here so i decided to pull her out the garage and clean up the underside and engine bay. This thing was FULL of grease and grime as if it had leaked from day one and never fixed. Got it much cleaner but still has a long way to go. I also mockup up one of my Varis side skirts from my gr wry, may just have to incorporate that into the build....
 IMG_2567 by lawrx, on Flickr
 IMG_2546 by lawrx, on Flickr
 untitled (17 of 29) by lawrx, on Flickr
 untitled (15 of 29) by lawrx, on Flickr
At this point progress slowed a bit as i had to do a trans,hug,brake and suspension swap on a friends 03 wrx wagon. Talk about a sleeper. Hell of a fun car and room for the family. At this point the 240 had been sitting in the driveway as pictured above for 2.5 weeks.Got a letter from the HOA, luckily i was planning on moving it back inside the next day or so anyway. Damn HOA, can't wait to move somewhere with 1-2acres and no HOA lol
 untitled (18 of 29) by lawrx, on Flickr
 untitled (16 of 29) by lawrx, on Flickr
After finishing the trans swap on my buddies car and getting the 240 back in the garage, i made a el cheapo crude strut tower brace to make sure everything is square once i start to cut up the front. traced out some lines of rough cuts for the front and i will finalize them later once i have a better idea of how much i actually want to take off.
 untitled (19 of 29) by lawrx, on Flickr
 untitled (21 of 29) by lawrx, on Flickr
 untitled (22 of 29) by lawrx, on Flickr
 untitled (23 of 29) by lawrx, on Flickr
 untitled (24 of 29) by lawrx, on Flickr
IMG_2567 by lawrx, on FlickrIMG_2546 by lawrx, on Flickruntitled (17 of 29) by lawrx, on Flickruntitled (15 of 29) by lawrx, on FlickrAt this point progress slowed a bit as i had to do a trans,hug,brake and suspension swap on a friends 03 wrx wagon. Talk about a sleeper. Hell of a fun car and room for the family. At this point the 240 had been sitting in the driveway as pictured above for 2.5 weeks.Got a letter from the HOA, luckily i was planning on moving it back inside the next day or so anyway. Damn HOA, can't wait to move somewhere with 1-2acres and no HOA lol
untitled (18 of 29) by lawrx, on Flickruntitled (16 of 29) by lawrx, on FlickrAfter finishing the trans swap on my buddies car and getting the 240 back in the garage, i made a el cheapo crude strut tower brace to make sure everything is square once i start to cut up the front. traced out some lines of rough cuts for the front and i will finalize them later once i have a better idea of how much i actually want to take off.
untitled (19 of 29) by lawrx, on Flickruntitled (21 of 29) by lawrx, on Flickruntitled (22 of 29) by lawrx, on Flickruntitled (23 of 29) by lawrx, on Flickruntitled (24 of 29) by lawrx, on Flickr
01-18-2016, 10:33 PM
#3
Staging Lane
Thread Starter
Join Date: Oct 2015
Posts: 91
Likes: 0
Received 0 Likes
on
0 Posts
Finally got my motor. For now its a LR4 4.8 from a silverado. iron block. Plan is build the it setup for it, get the dry sump up and fitted to it and all the quirks figured out, add a decent cam, some better flowing heads and i will also be building a 180 degree header for it as well to give it a unique sound. Should def be a unique ls swap for a 240.
 untitled (25 of 29) by lawrx, on Flickr
 untitled (12 of 18) by lawrx, on Flickr
 untitled (26 of 29) by lawrx, on Flickr
 untitled (27 of 29) by lawrx, on Flickr
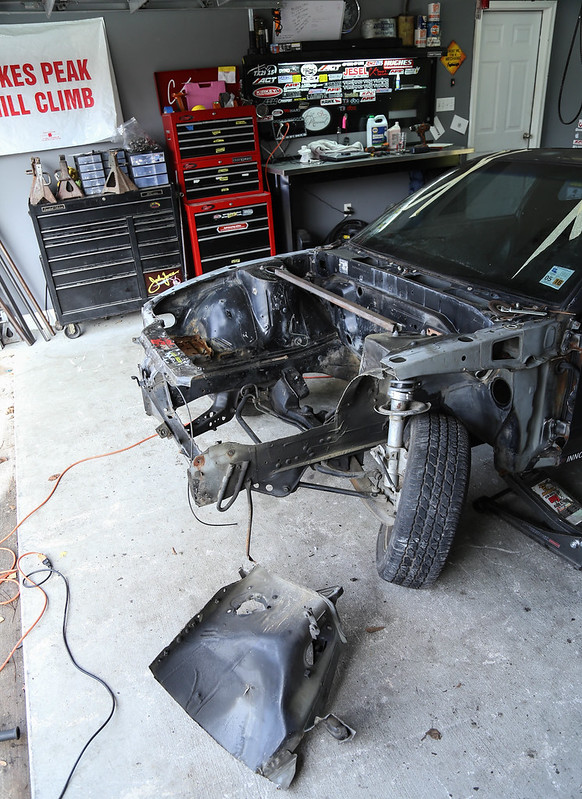
After initial mockup of the motor i knew i wanted it to sit further back in it was, so i did what insane person would, i cut a giant hole in my firewall. I also removed some of the double layer metal as well, ill clean the hard glue **** up later on. Now the motor is sitting a good 2'' further back, with the center of the motor in line/slightly aft of the front strut tower center line, great for weight distribution.
 untitled (16 of 18) by lawrx, on Flickr
 untitled (6 of 18) by lawrx, on Flickr
 untitled (14 of 18) by lawrx, on Flickr
 untitled (9 of 18) by lawrx, on Flickr
 untitled (10 of 18) by lawrx, on Flickr
 untitled (8 of 18) by lawrx, on Flickr
 untitled (4 of 18) by lawrx, on Flickr
Pup decided he wanted to help today. He's not too keen on the loud noises tho lol. When i pulled the intake manifold i was created with a lovely sight. Some fabulous grimy build up in the intake ports on the heads. Good thing these will be replaced with some higher flowing units before she fires up. These will work great as mock up test fit set up tho. After the initial mockup i decided i need to trim a bit more, just to make future access a bit easier, and so i could make a slightly shallower incline once i fabb up the firewall back. Id ask accumulated a decent amount of parts I'm not going to use. Need to figure out somehting cool to make out of it all in the future.
 untitled (2 of 18) by lawrx, on Flickr
 untitled (1 of 18) by lawrx, on Flickr
 untitled (13 of 18) by lawrx, on Flickr
 untitled (5 of 18) by lawrx, on Flickr
untitled (8 of 18) by lawrx, on Flickr
untitled (25 of 29) by lawrx, on Flickruntitled (12 of 18) by lawrx, on Flickruntitled (26 of 29) by lawrx, on Flickruntitled (27 of 29) by lawrx, on FlickrAfter initial mockup of the motor i knew i wanted it to sit further back in it was, so i did what insane person would, i cut a giant hole in my firewall. I also removed some of the double layer metal as well, ill clean the hard glue **** up later on. Now the motor is sitting a good 2'' further back, with the center of the motor in line/slightly aft of the front strut tower center line, great for weight distribution.
untitled (16 of 18) by lawrx, on Flickruntitled (6 of 18) by lawrx, on Flickruntitled (14 of 18) by lawrx, on Flickruntitled (9 of 18) by lawrx, on Flickruntitled (10 of 18) by lawrx, on Flickruntitled (8 of 18) by lawrx, on Flickruntitled (4 of 18) by lawrx, on FlickrPup decided he wanted to help today. He's not too keen on the loud noises tho lol. When i pulled the intake manifold i was created with a lovely sight. Some fabulous grimy build up in the intake ports on the heads. Good thing these will be replaced with some higher flowing units before she fires up. These will work great as mock up test fit set up tho. After the initial mockup i decided i need to trim a bit more, just to make future access a bit easier, and so i could make a slightly shallower incline once i fabb up the firewall back. Id ask accumulated a decent amount of parts I'm not going to use. Need to figure out somehting cool to make out of it all in the future.
untitled (2 of 18) by lawrx, on Flickruntitled (1 of 18) by lawrx, on Flickruntitled (13 of 18) by lawrx, on Flickruntitled (5 of 18) by lawrx, on Flickruntitled (8 of 18) by lawrx, on Flickr  01-19-2016, 09:07 PM
#6
Staging Lane
Thread Starter
Join Date: Oct 2015
Posts: 91
Likes: 0
Received 0 Likes
on
0 Posts
01-19-2016, 09:08 PM
#7
Staging Lane
Thread Starter
Join Date: Oct 2015
Posts: 91
Likes: 0
Received 0 Likes
on
0 Posts
Itbs will be purchased in a month or so. Not really needed currently in the build. But will be building my own setup. Common on 4 cylinders, not so much with v8s, but I'm up for the challenge, have access to a few friends with some good machinery to help get it done.
Trending Topics
01-19-2016, 09:13 PM
#8
On The Tree
Jenvey makes some nice, but pricey manifolds, could use that as a starting point. I've seen some other DIY ITBs on here. How you do it kind of depends on if you want them sticking up, or laying over. Could also start with a cheap OBX set for the LSx engines. Especially if you have access to machinery to make them a little better.
01-19-2016, 09:24 PM
#9
Staging Lane
Thread Starter
Join Date: Oct 2015
Posts: 91
Likes: 0
Received 0 Likes
on
0 Posts
Jenvey makes some nice, but pricey manifolds, could use that as a starting point. I've seen some other DIY ITBs on here. How you do it kind of depends on if you want them sticking up, or laying over. Could also start with a cheap OBX set for the LSx engines. Especially if you have access to machinery to make them a little better.
01-19-2016, 09:25 PM
#10
Staging Lane
Thread Starter
Join Date: Oct 2015
Posts: 91
Likes: 0
Received 0 Likes
on
0 Posts
After getting the rough idea of where the motor was going to sit, pulled the front subframe to get it cleaned up and to cut off the steering rack mounts, as I'm going to modify it to get it to sit as low as i can get it so that i can get the motor as low as possible.
 untitled (11 of 18) by lawrx, on Flickr
 untitled (17 of 18) by lawrx, on Flickr
 untitled (7 of 8) by lawrx, on Flickr
 untitled (8 of 8) by lawrx, on Flickr
 untitled (18 of 18) by lawrx, on Flickr
Also had some shiny parts come in today. As i mentioned before my shell i purchased didn't come with a steering rack or any of the brackets or bushings. So i had to source some separately. Today i received the factory mount brackets, which btw weigh a TON for what they are. Gong to drill some holes in them and lighten them up bit. Also got in some energy suspension steering rack bushings. These are just for mock up and test fit duties. Ill be getting a set of aluminum solid bushings for the final install. Also received the ARE dry sump oil pan. Currently only ordered the pan as thats all i need right now to mock up the motor and get it mounted. Ill ordered the rest of the kit later down the road when i need the additional parts and when i can afford it lol
 untitled (2 of 8) by lawrx, on Flickr
 untitled (3 of 8) by lawrx, on Flickr
 untitled (4 of 8) by lawrx, on Flickr
 untitled (5 of 8) by lawrx, on Flickr
 untitled (6 of 8) by lawrx, on Flickr
untitled (11 of 18) by lawrx, on Flickruntitled (17 of 18) by lawrx, on Flickruntitled (7 of 8) by lawrx, on Flickruntitled (8 of 8) by lawrx, on Flickruntitled (18 of 18) by lawrx, on FlickrAlso had some shiny parts come in today. As i mentioned before my shell i purchased didn't come with a steering rack or any of the brackets or bushings. So i had to source some separately. Today i received the factory mount brackets, which btw weigh a TON for what they are. Gong to drill some holes in them and lighten them up bit. Also got in some energy suspension steering rack bushings. These are just for mock up and test fit duties. Ill be getting a set of aluminum solid bushings for the final install. Also received the ARE dry sump oil pan. Currently only ordered the pan as thats all i need right now to mock up the motor and get it mounted. Ill ordered the rest of the kit later down the road when i need the additional parts and when i can afford it lol
untitled (2 of 8) by lawrx, on Flickruntitled (3 of 8) by lawrx, on Flickruntitled (4 of 8) by lawrx, on Flickruntitled (5 of 8) by lawrx, on Flickruntitled (6 of 8) by lawrx, on Flickr
01-19-2016, 11:07 PM
#11
Staging Lane
Thread Starter
Join Date: Oct 2015
Posts: 91
Likes: 0
Received 0 Likes
on
0 Posts
So with this post brings us up to date of where I'm at on the build. Today has been a whirlwind to say the least. I hit an animal (still never figured out wtf it was i actually hit) in my daily driver 05 wry, my wife nearly ran over a body on the interstate (something had just happened and no one was on the scene yet, cops were right behind her). And then a little bit of good happened. The last few weeks i have been searching for a set of Nismo Lmgt2's to buy. Ill be rebuilding them and converting them to 3 piece wheels so i wasn't looking for a mint set. My biggest stipulation was i wanted all 4 correct center caps in decent condition with the wheels. Turns out as rare as these wheels are i happned upon a set 10 minutes away from my house. I couldn't believe after searching for weeks with multiple dead ends i was able to find a quality set with all 4 center caps right down the road from my house.
 untitled (1 of 8) by lawrx, on Flickr
 untitled (1 of 4) by lawrx, on Flickr
 untitled (2 of 4) by lawrx, on Flickr
 untitled (3 of 4) by lawrx, on Flickr
 untitled (4 of 4) by lawrx, on Flickr
untitled (1 of 8) by lawrx, on Flickruntitled (1 of 4) by lawrx, on Flickruntitled (2 of 4) by lawrx, on Flickruntitled (3 of 4) by lawrx, on Flickruntitled (4 of 4) by lawrx, on Flickr
01-20-2016, 08:25 PM
#12
Staging Lane
Thread Starter
Join Date: Oct 2015
Posts: 91
Likes: 0
Received 0 Likes
on
0 Posts
Got my steering rack in today. This allowed me to mock it up along with the dry sump pan to see how low i could get the motor.
 untitled (1 of 22) by lawrx, on Flickr
After setting the steering rack in place of where it goes stock, I was able to see how far i could move it over to gain more clearance for the driver side header. The downside of this is now one inner tie rod is too long and one is too short. In the future i will measure exactly how far over i moved the rack, cut that much out of the longer tie rod and add it to the other side. Ill probably have to add a bit of small tuning reinforcement, kinda like a sleeve, over the modified areas that get back welded together
 untitled (2 of 22) by lawrx, on Flickr
 untitled (3 of 22) by lawrx, on Flickr
 untitled (5 of 22) by lawrx, on Flickr
 untitled (4 of 22) by lawrx, on Flickr
 untitled (6 of 22) by lawrx, on Flickr
 untitled (7 of 22) by lawrx, on Flickr
 untitled (9 of 22) by lawrx, on Flickr
With the modified distance for the steering rack confirmed, i mounted up the dry sump oil pan and lowered the motor in to see how low i could get it and what would be in the way of getting it lower.
 untitled (8 of 22) by lawrx, on Flickr
 untitled (10 of 22) by lawrx, on Flickr
 untitled (11 of 22) by lawrx, on Flickr
 untitled (12 of 22) by lawrx, on Flickr
 untitled (13 of 22) by lawrx, on Flickr
With the motor dropped into the engine bay i was amazed how much more room i had with the steering rack over. Def a helpful modification in the space department. Also got a bit of a visual of where the Altenator, Ac compressor, and Dry sump pump will be. Plan is to mount the oil gear pump on one side of the motor and low near level with the motor mount under the head, and the alternator and ac compressor on the other side in the same position, all below the head. Ill be running a electric power steering pump from a vauxhall astra so there won't be a mechanical pump mounted on the motor. With the few accessories i have being mounted so low and out of the way and running an electric water pump, the front of the motor will be extremely clean and simplistic.
 untitled (14 of 22) by lawrx, on Flickr
 untitled (15 of 22) by lawrx, on Flickr
 untitled (16 of 22) by lawrx, on Flickr
 untitled (17 of 22) by lawrx, on Flickr
I realized after setting the motor in roughly where it is going to sit that there is going to be a monumental amount of space for the radiator and condenser, which both will be mounted on a roughly 45* forward angle, with the air coming through the from bumper, passing through the radiator/condensor and then up and out a duct through a center vent in the hood, more than likely a koguchi power item.
 untitled (18 of 22) by lawrx, on Flickr
 untitled (19 of 22) by lawrx, on Flickr
I also took a minute to mock up one of the rear wheels. I know its not anywhere near what its gong to look like, between missing about 6" of lip and a massively wonder qtr, but you get the idea. And who can't give in to the temptation to mock up a new set of wheels on the project car?!
 untitled (20 of 22) by lawrx, on Flickr
 untitled (21 of 22) by lawrx, on Flickr
 untitled (22 of 22) by lawrx, on Flickr
untitled (1 of 22) by lawrx, on FlickrAfter setting the steering rack in place of where it goes stock, I was able to see how far i could move it over to gain more clearance for the driver side header. The downside of this is now one inner tie rod is too long and one is too short. In the future i will measure exactly how far over i moved the rack, cut that much out of the longer tie rod and add it to the other side. Ill probably have to add a bit of small tuning reinforcement, kinda like a sleeve, over the modified areas that get back welded together
untitled (2 of 22) by lawrx, on Flickruntitled (3 of 22) by lawrx, on Flickruntitled (5 of 22) by lawrx, on Flickruntitled (4 of 22) by lawrx, on Flickruntitled (6 of 22) by lawrx, on Flickruntitled (7 of 22) by lawrx, on Flickruntitled (9 of 22) by lawrx, on FlickrWith the modified distance for the steering rack confirmed, i mounted up the dry sump oil pan and lowered the motor in to see how low i could get it and what would be in the way of getting it lower.
untitled (8 of 22) by lawrx, on Flickruntitled (10 of 22) by lawrx, on Flickruntitled (11 of 22) by lawrx, on Flickruntitled (12 of 22) by lawrx, on Flickruntitled (13 of 22) by lawrx, on FlickrWith the motor dropped into the engine bay i was amazed how much more room i had with the steering rack over. Def a helpful modification in the space department. Also got a bit of a visual of where the Altenator, Ac compressor, and Dry sump pump will be. Plan is to mount the oil gear pump on one side of the motor and low near level with the motor mount under the head, and the alternator and ac compressor on the other side in the same position, all below the head. Ill be running a electric power steering pump from a vauxhall astra so there won't be a mechanical pump mounted on the motor. With the few accessories i have being mounted so low and out of the way and running an electric water pump, the front of the motor will be extremely clean and simplistic.
untitled (14 of 22) by lawrx, on Flickruntitled (15 of 22) by lawrx, on Flickruntitled (16 of 22) by lawrx, on Flickruntitled (17 of 22) by lawrx, on FlickrI realized after setting the motor in roughly where it is going to sit that there is going to be a monumental amount of space for the radiator and condenser, which both will be mounted on a roughly 45* forward angle, with the air coming through the from bumper, passing through the radiator/condensor and then up and out a duct through a center vent in the hood, more than likely a koguchi power item.
untitled (18 of 22) by lawrx, on Flickruntitled (19 of 22) by lawrx, on FlickrI also took a minute to mock up one of the rear wheels. I know its not anywhere near what its gong to look like, between missing about 6" of lip and a massively wonder qtr, but you get the idea. And who can't give in to the temptation to mock up a new set of wheels on the project car?!
untitled (20 of 22) by lawrx, on Flickruntitled (21 of 22) by lawrx, on Flickruntitled (22 of 22) by lawrx, on Flickr 
 03-14-2016, 09:35 AM
#15
Teching In

Join Date: Mar 2016
Posts: 6
Likes: 0
Received 0 Likes
on
0 Posts
Just so you know, I made an account specifically to follow this thread lol
I've been considering a similar project on my S13 coupe, albeit with a Porsche 951 (944 Turbo) transaxle, adapted to a 944 torque tube, then using the 944 -> LS1 conversion adapter mainly due to cost, and the hundreds of old 944's laying around for cheap. But, if you can figure out an easier way than using adapters upon adapters, I might look into the 'vette transaxle a bit more. I am very curious how you end up mounting the it. By far one of the best projects I've seen started on a 240sx, looking forward to updates!
I've been considering a similar project on my S13 coupe, albeit with a Porsche 951 (944 Turbo) transaxle, adapted to a 944 torque tube, then using the 944 -> LS1 conversion adapter mainly due to cost, and the hundreds of old 944's laying around for cheap. But, if you can figure out an easier way than using adapters upon adapters, I might look into the 'vette transaxle a bit more. I am very curious how you end up mounting the it. By far one of the best projects I've seen started on a 240sx, looking forward to updates!
03-14-2016, 10:39 AM
#17
Staging Lane
Thread Starter
Join Date: Oct 2015
Posts: 91
Likes: 0
Received 0 Likes
on
0 Posts
Got a bit more work done the other night. Borrowed my dads plasma cutter (thing is AWESOME) to start cutting some sheet for the motor mounts. At this point for the mounts thats about all i can do for now until i pick up a welder and a drill press, which should be soon.
 untitled (2 of 9) by lawrx, on Flickr
 untitled (1 of 9) by lawrx, on Flickr
 untitled (4 of 9) by lawrx, on Flickr
 untitled (3 of 9) by lawrx, on Flickr
 untitled (5 of 9) by lawrx, on Flickr
Also was able to mount the trans, torque tube and motor all up as one. This allowed me to see about where the diff will sit in relation to how far back the motor will sit. I ran into a bit of a clearance issue, probably have about another inch back the diff could go before the motor sits where i want it. Just have to do some minor trimming on the rear subframe for some more clearance. I also have to grind off the stock corvette shift box mounts to allow the trans axle/ rear diff to be mounted higher as at this current point they are contacting the trans tunnel in the middle. So the rear diff will probably sit .5-.75" higher and 1-1.25" farther back than this. Should have plenty of ground clearance, cooling air space, and hopefully SOMEWHERE to run the exhaust...
 untitled (6 of 9) by lawrx, on Flickr
 untitled (7 of 9) by lawrx, on Flickr
 untitled (8 of 9) by lawrx, on Flickr
 untitled (9 of 9) by lawrx, on Flickr
untitled (2 of 9) by lawrx, on Flickruntitled (1 of 9) by lawrx, on Flickruntitled (4 of 9) by lawrx, on Flickruntitled (3 of 9) by lawrx, on Flickruntitled (5 of 9) by lawrx, on FlickrAlso was able to mount the trans, torque tube and motor all up as one. This allowed me to see about where the diff will sit in relation to how far back the motor will sit. I ran into a bit of a clearance issue, probably have about another inch back the diff could go before the motor sits where i want it. Just have to do some minor trimming on the rear subframe for some more clearance. I also have to grind off the stock corvette shift box mounts to allow the trans axle/ rear diff to be mounted higher as at this current point they are contacting the trans tunnel in the middle. So the rear diff will probably sit .5-.75" higher and 1-1.25" farther back than this. Should have plenty of ground clearance, cooling air space, and hopefully SOMEWHERE to run the exhaust...
untitled (6 of 9) by lawrx, on Flickruntitled (7 of 9) by lawrx, on Flickruntitled (8 of 9) by lawrx, on Flickruntitled (9 of 9) by lawrx, on Flickr
03-14-2016, 10:40 AM
#18
Staging Lane
Thread Starter
Join Date: Oct 2015
Posts: 91
Likes: 0
Received 0 Likes
on
0 Posts
Got home from a weekend getaway down in New Orleans, think i almost went broke on food, and id been perfectly happy if i had.
Ok, so enough about the food. Started cutting up the front subframe to allow the motor to sit a bit lower. Before i could measure for notching the subframe, i had to remove the factory corvette shifter mounts. They were hitting the trans tunnel and not allowing me to get the trans setup to sit where i wanted it to. I also removed the front suspension as it was getting in the way with measuring and what not.
 untitled (1 of 17) by lawrx, on Flickr
 untitled (3 of 17) by lawrx, on Flickr
 untitled (5 of 17) by lawrx, on Flickr
With everything out of the way i cut off the flange that jutted out from the subframe that the steering rack mounted it. I decided to not use the standard mounting brackets and ordered a set of Villains drift solid mounts, which are weld on replacements. This allows me to have free reign of where I'm going to mount the rack. The rack will be moved forward, forward, and to the lt side compared to factory location.
 untitled (2 of 17) by lawrx, on Flickr
 untitled (6 of 17) by lawrx, on Flickr
 untitled (7 of 17) by lawrx, on Flickr
With the subframe notched i was able to see how low i could get the motor and how the rear diff would sit, after some more minor trimming of the rear subframe. If i had to guess id say the motor is proly sitting close to 2'' lower than a typical ls swapped s13.
 untitled (8 of 17) by lawrx, on Flickr
 untitled (9 of 17) by lawrx, on Flickr
 untitled (10 of 17) by lawrx, on Flickr
 untitled (16 of 17) by lawrx, on Flickr
Bad news with motor sitting so low i ran in a bit of a problem. The bell housing is sitting an 1" below the framerails. To remedy this i need to get a flywheel and see how low it sits in comparison to the bell housing so i can see how much i can chop off of it. Also thew in my make shift strut brace to see how much room i had gained. Should have plenty of clearance to build the its now.
 untitled (14 of 17) by lawrx, on Flickr
 untitled (11 of 17) by lawrx, on Flickr
 untitled (12 of 17) by lawrx, on Flickr
 untitled (13 of 17) by lawrx, on Flickr
Also threw up a piece of piping to check exhaust clearance, driver side, GREAT, passenger side, not so much, some clearancing will be required for sure.
untitled (16 of 17) by lawrx, on Flickr
 untitled (15 of 17) by lawrx, on Flickr
With the motor sitting about where i wanted it to, i realized this thing is going to look like it will be sitting on the ground once its at ride height.
 untitled (17 of 17) by lawrx, on Flickr
untitled (5 of 17) by lawrx, on Flickr
Ok, so enough about the food. Started cutting up the front subframe to allow the motor to sit a bit lower. Before i could measure for notching the subframe, i had to remove the factory corvette shifter mounts. They were hitting the trans tunnel and not allowing me to get the trans setup to sit where i wanted it to. I also removed the front suspension as it was getting in the way with measuring and what not.
untitled (1 of 17) by lawrx, on Flickruntitled (3 of 17) by lawrx, on Flickruntitled (5 of 17) by lawrx, on FlickrWith everything out of the way i cut off the flange that jutted out from the subframe that the steering rack mounted it. I decided to not use the standard mounting brackets and ordered a set of Villains drift solid mounts, which are weld on replacements. This allows me to have free reign of where I'm going to mount the rack. The rack will be moved forward, forward, and to the lt side compared to factory location.
untitled (2 of 17) by lawrx, on Flickruntitled (6 of 17) by lawrx, on Flickruntitled (7 of 17) by lawrx, on FlickrWith the subframe notched i was able to see how low i could get the motor and how the rear diff would sit, after some more minor trimming of the rear subframe. If i had to guess id say the motor is proly sitting close to 2'' lower than a typical ls swapped s13.
untitled (8 of 17) by lawrx, on Flickruntitled (9 of 17) by lawrx, on Flickruntitled (10 of 17) by lawrx, on Flickruntitled (16 of 17) by lawrx, on FlickrBad news with motor sitting so low i ran in a bit of a problem. The bell housing is sitting an 1" below the framerails. To remedy this i need to get a flywheel and see how low it sits in comparison to the bell housing so i can see how much i can chop off of it. Also thew in my make shift strut brace to see how much room i had gained. Should have plenty of clearance to build the its now.
untitled (14 of 17) by lawrx, on Flickruntitled (11 of 17) by lawrx, on Flickruntitled (12 of 17) by lawrx, on Flickruntitled (13 of 17) by lawrx, on FlickrAlso threw up a piece of piping to check exhaust clearance, driver side, GREAT, passenger side, not so much, some clearancing will be required for sure.
untitled (16 of 17) by lawrx, on Flickruntitled (15 of 17) by lawrx, on FlickrWith the motor sitting about where i wanted it to, i realized this thing is going to look like it will be sitting on the ground once its at ride height.
untitled (17 of 17) by lawrx, on Flickruntitled (5 of 17) by lawrx, on Flickr
03-14-2016, 10:40 AM
#19
Staging Lane
Thread Starter
Join Date: Oct 2015
Posts: 91
Likes: 0
Received 0 Likes
on
0 Posts
Small update. I FINALLY BOUGHT A WELDER. Now thats out of my system. Finally bought a welder after wanting one for so long. Been using the one at the shop for small projects here and there. But not having one here at home as really hampered me and what i could do.
Also picked up a few other things. Saw someone else using this speed blaster, and figured i could def use that on my car, anxious to try it out and see how it does! Also picked up a drill press and a belt sander. Anyone knows, if you have tried drilling through anything thicker than a thin body panel with a drill, its a major, slow, pain in the ******* ***.
Also got some ITB's in. They are Ducati 999R items. If your not familiar with ducatis, they are 2 cylider motors. Basically what that means for these its is that they are larger than the 4 cylinder bike its such as gsxr and hayabusa's which are in the 46-48mm range where these from the ducati are 52mm. Still need to order 3 more pairs for a full set, but i just ordered this first set for mock up and test fitting.
 untitled (1 of 12) by lawrx, on Flickr
 untitled (4 of 12) by lawrx, on Flickr
 untitled (6 of 12) by lawrx, on Flickr
 untitled (7 of 12) by lawrx, on Flickr
 untitled (8 of 12) by lawrx, on Flickr
 untitled (9 of 12) by lawrx, on Flickr
 untitled (10 of 12) by lawrx, on Flickr
 untitled (11 of 12) by lawrx, on Flickr
 untitled (12 of 12) by lawrx, on Flickr
Also got some ITB's in. They are Ducati 999R items. If your not familiar with ducatis, they are 2 cylider motors. Basically what that means for these its is that they are larger than the 4 cylinder bike its such as gsxr and hayabusa's which are in the 46-48mm range where these from the ducati are 52mm. Still need to order 3 more pairs for a full set, but i just ordered this first set for mock up and test fitting.
 untitled (2 of 12) by lawrx, on Flickr
 untitled (3 of 12) by lawrx, on Flickr
Also picked up a few other things. Saw someone else using this speed blaster, and figured i could def use that on my car, anxious to try it out and see how it does! Also picked up a drill press and a belt sander. Anyone knows, if you have tried drilling through anything thicker than a thin body panel with a drill, its a major, slow, pain in the ******* ***.
Also got some ITB's in. They are Ducati 999R items. If your not familiar with ducatis, they are 2 cylider motors. Basically what that means for these its is that they are larger than the 4 cylinder bike its such as gsxr and hayabusa's which are in the 46-48mm range where these from the ducati are 52mm. Still need to order 3 more pairs for a full set, but i just ordered this first set for mock up and test fitting.
untitled (1 of 12) by lawrx, on Flickruntitled (4 of 12) by lawrx, on Flickruntitled (6 of 12) by lawrx, on Flickruntitled (7 of 12) by lawrx, on Flickruntitled (8 of 12) by lawrx, on Flickruntitled (9 of 12) by lawrx, on Flickruntitled (10 of 12) by lawrx, on Flickruntitled (11 of 12) by lawrx, on Flickruntitled (12 of 12) by lawrx, on FlickrAlso got some ITB's in. They are Ducati 999R items. If your not familiar with ducatis, they are 2 cylider motors. Basically what that means for these its is that they are larger than the 4 cylinder bike its such as gsxr and hayabusa's which are in the 46-48mm range where these from the ducati are 52mm. Still need to order 3 more pairs for a full set, but i just ordered this first set for mock up and test fitting.
untitled (2 of 12) by lawrx, on Flickruntitled (3 of 12) by lawrx, on Flickr
03-14-2016, 10:41 AM
#20
Staging Lane
Thread Starter
Join Date: Oct 2015
Posts: 91
Likes: 0
Received 0 Likes
on
0 Posts
So, seeing as i had the day off today, i piddled in the garage a bit. Had a buddy come over and help wire in a few new plugs. Needed a 220v of course for the welder, and also added a standard 110v plug on this wall. For whatever reason when the house was built there wasn't a plug put on the far side wall of the garage. Anyway, got that wired up and working good, just need a bottle of gas now and I'm ready to start the fab work. I also mounted some hooks so that i could store metal tubing and other materials on the wall, as well as taking down my subaru flag and hanging a few things I've had lying around for a while.
 untitled (2 of 17)-2 by lawrx, on Flickr
 untitled (1 of 17)-2 by lawrx, on Flickr
 untitled (3 of 17)-2 by lawrx, on Flickr
 untitled (5 of 17)-2 by lawrx, on Flickr
 untitled (6 of 17)-2 by lawrx, on Flickr
 untitled (7 of 17)-2 by lawrx, on Flickr
 untitled (15 of 17)-2 by lawrx, on Flickr
Currently the front end is surround by stuff while I've been busy the last week or so :/ need to change that asap. Still have yet to pick up a daily. Hopefully once that happens ill get back into my routine and get some parts ordered, start some fab work, and get the ball rolling. In the meantime, i decided to clean up the wheels a bit so that i could remove the faces in an effort to be able to sell the barrels and make some more space in the garage. Anyone want some lmgt2 barrels?? It was a pretty day today so the wife and pup joined me outside. He loves the hose....
 untitled (9 of 17)-2 by lawrx, on Flickr
 untitled (8 of 17)-2 by lawrx, on Flickr
 untitled (12 of 17)-2 by lawrx, on Flickr
 untitled (13 of 17)-2 by lawrx, on Flickr
 untitled (14 of 17)-2 by lawrx, on Flickr
 untitled (10 of 17)-2 by lawrx, on Flickr
 untitled (11 of 17)-2 by lawrx, on Flickr
It got a bit chilly and windy after the sun went down so i resorted to closing the door and doing what i could inside. Decided to start planning out the front tube work and how i wanted to do it. Not sure how feasible my ideas are but that is what I'm leaning towards. Still need to order the front body work to mock up before the first cuts made, which should be very soon. Also received my new steering rack mounts from Villains. Need to mock those up and see what needs to be trimmed and cut to make them fit my modified steering rack
 untitled (16 of 17)-2 by lawrx, on Flickr
 untitled (17 of 17)-2 by lawrx, on Flickr
untitled (2 of 17)-2 by lawrx, on Flickruntitled (1 of 17)-2 by lawrx, on Flickruntitled (3 of 17)-2 by lawrx, on Flickruntitled (5 of 17)-2 by lawrx, on Flickruntitled (6 of 17)-2 by lawrx, on Flickruntitled (7 of 17)-2 by lawrx, on Flickruntitled (15 of 17)-2 by lawrx, on FlickrCurrently the front end is surround by stuff while I've been busy the last week or so :/ need to change that asap. Still have yet to pick up a daily. Hopefully once that happens ill get back into my routine and get some parts ordered, start some fab work, and get the ball rolling. In the meantime, i decided to clean up the wheels a bit so that i could remove the faces in an effort to be able to sell the barrels and make some more space in the garage. Anyone want some lmgt2 barrels?? It was a pretty day today so the wife and pup joined me outside. He loves the hose....
untitled (9 of 17)-2 by lawrx, on Flickruntitled (8 of 17)-2 by lawrx, on Flickruntitled (12 of 17)-2 by lawrx, on Flickruntitled (13 of 17)-2 by lawrx, on Flickruntitled (14 of 17)-2 by lawrx, on Flickruntitled (10 of 17)-2 by lawrx, on Flickruntitled (11 of 17)-2 by lawrx, on FlickrIt got a bit chilly and windy after the sun went down so i resorted to closing the door and doing what i could inside. Decided to start planning out the front tube work and how i wanted to do it. Not sure how feasible my ideas are but that is what I'm leaning towards. Still need to order the front body work to mock up before the first cuts made, which should be very soon. Also received my new steering rack mounts from Villains. Need to mock those up and see what needs to be trimmed and cut to make them fit my modified steering rack
untitled (16 of 17)-2 by lawrx, on Flickruntitled (17 of 17)-2 by lawrx, on Flickr