


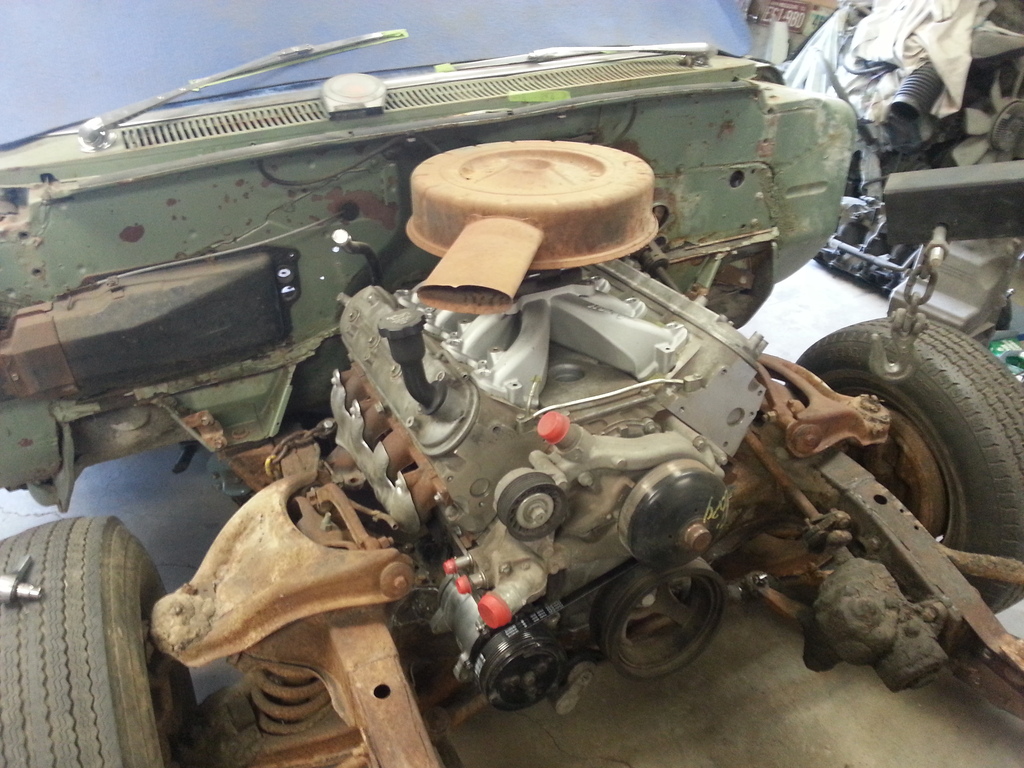
1959 Biscayne 2 door wagon
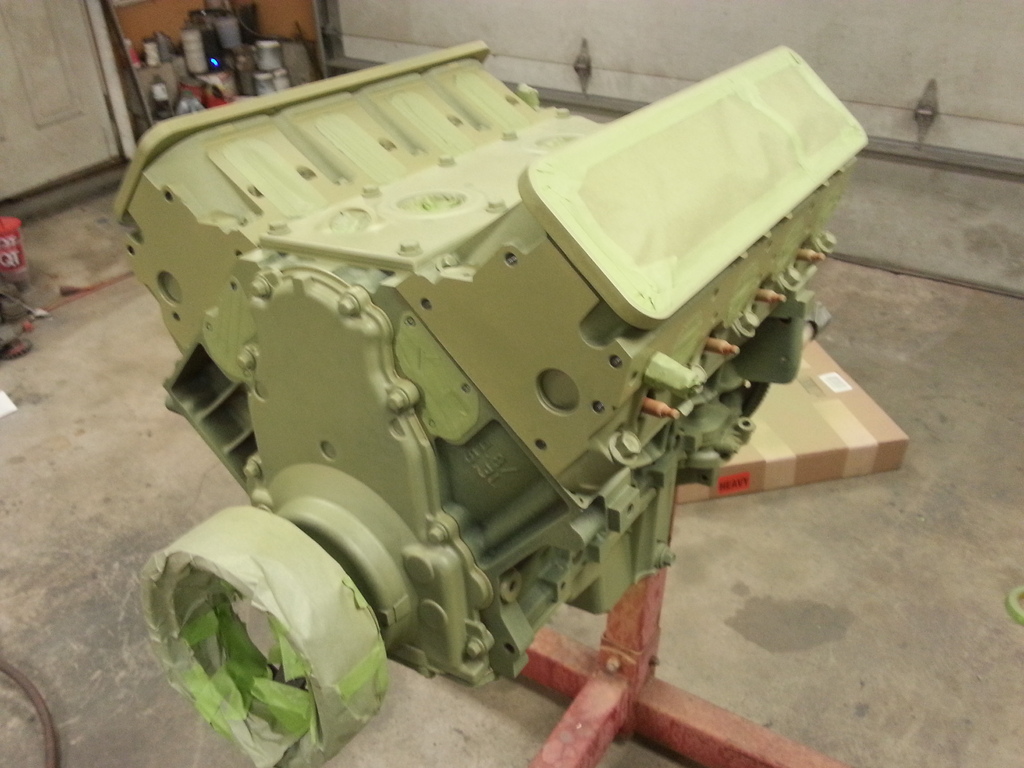
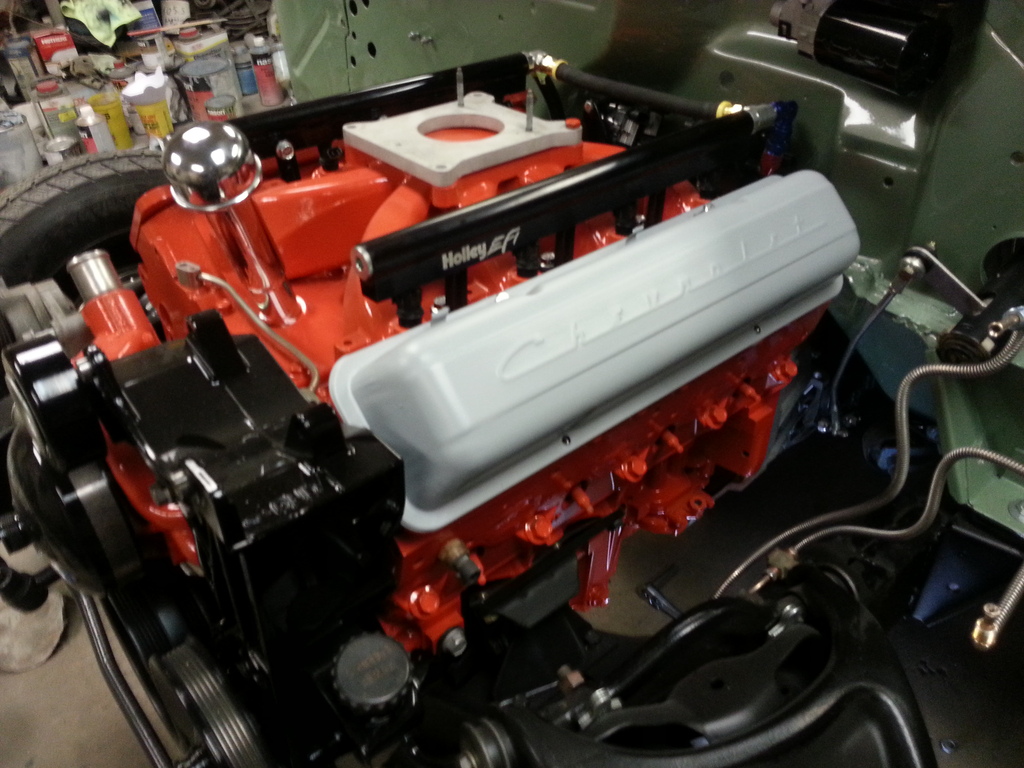
So this is the look I'm going for. After doing a lot of LS swaps, you need to do something to keep them from being the same old same old, so this one is going to look like a 283 that the car could have came with originally. You'll have to picture it with the Chevrolet script valve covers in this pic since I only have the one at the moment, and its a staggered bolt pattern so it wont bolt to the adapters. I have some regular bolt pattern valve covers coming.
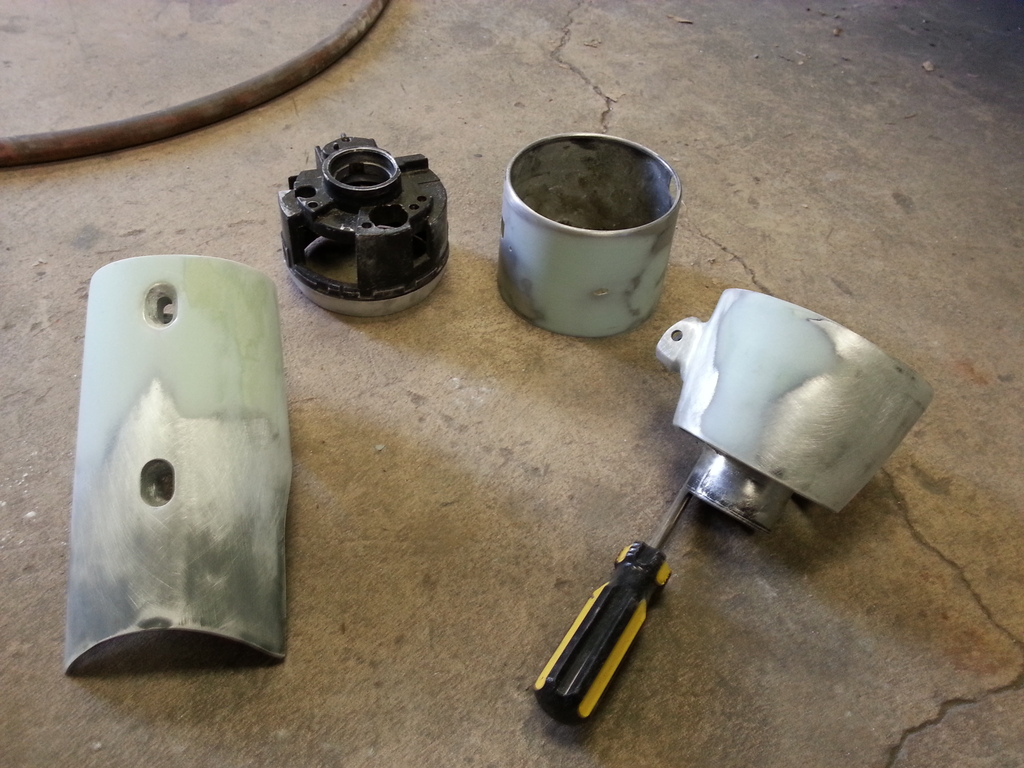
So with using the old valve covers, there's no where to put oil in the engine, and I didn't like the idea of having to remove a valve cover each time I change the oil, so I decided I needed a 283 oil fill tube. To do that, I took that 2" piece of aluminum and drilled a hole in the valley cover, got it at the right angle to look right and clear everything and had it welded in.

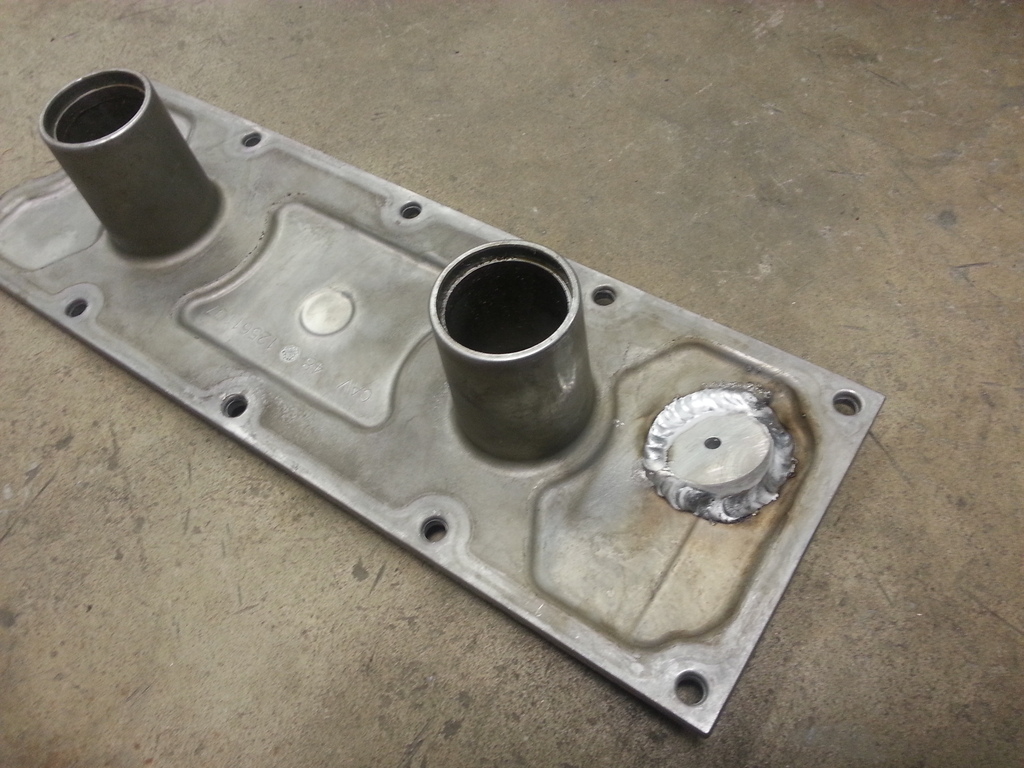
After it was welded in, I drilled a hole for the tube and filed it to the correct size. Then grinded the weld smooth to look like it was made that way.
The filler tube will be blasted and painted black, it's just that all you can buy are chrome ones. . I don't know if running this type of filler tube will cause any problems yet since I don't have the PCV system totally figured out, but I don't think it will cause a problem.

So with using the old valve covers, there's no where to put oil in the engine, and I didn't like the idea of having to remove a valve cover each time I change the oil, so I decided I needed a 283 oil fill tube. To do that, I took that 2" piece of aluminum and drilled a hole in the valley cover, got it at the right angle to look right and clear everything and had it welded in.


After it was welded in, I drilled a hole for the tube and filed it to the correct size. Then grinded the weld smooth to look like it was made that way.


The filler tube will be blasted and painted black, it's just that all you can buy are chrome ones.
. I don't know if running this type of filler tube will cause any problems yet since I don't have the PCV system totally figured out, but I don't think it will cause a problem. 
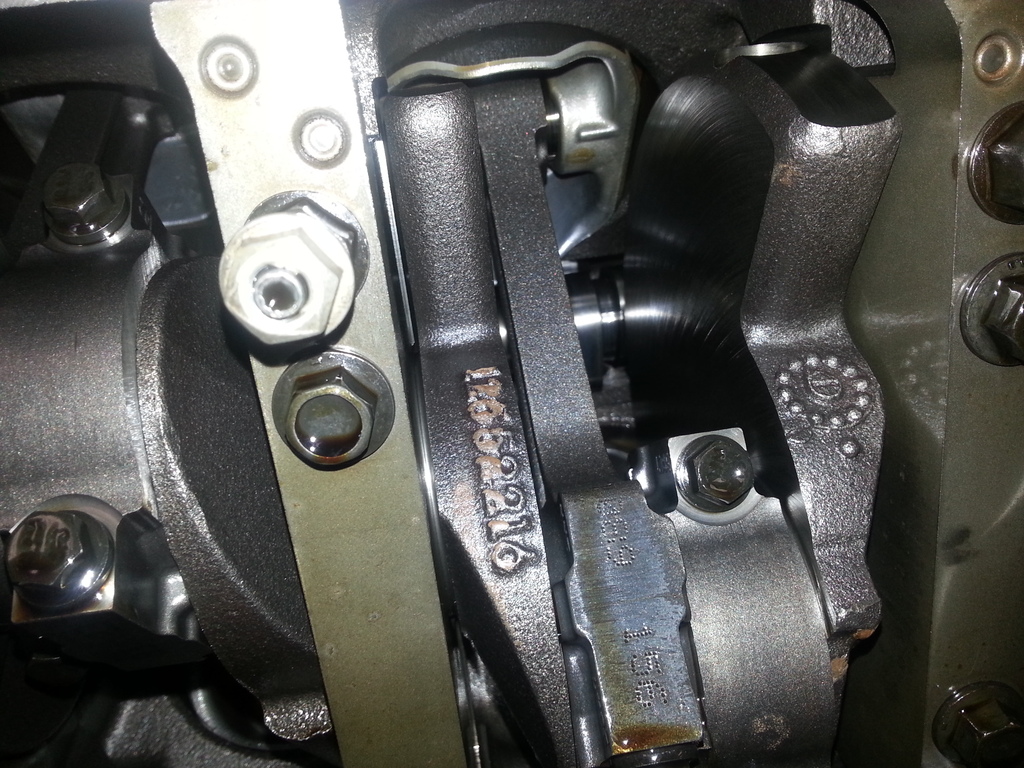
Getting the engine put together for the final time so it can get painted. New oil pump O ring....

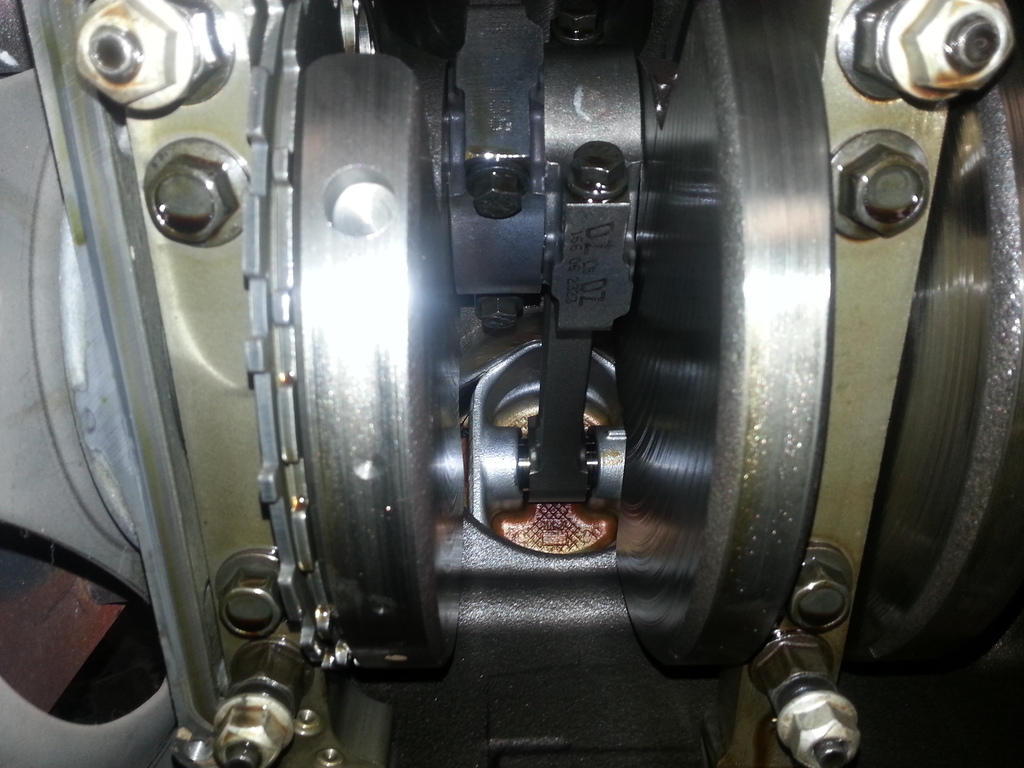
Couple of pics of the inside. This thing is pretty clean.
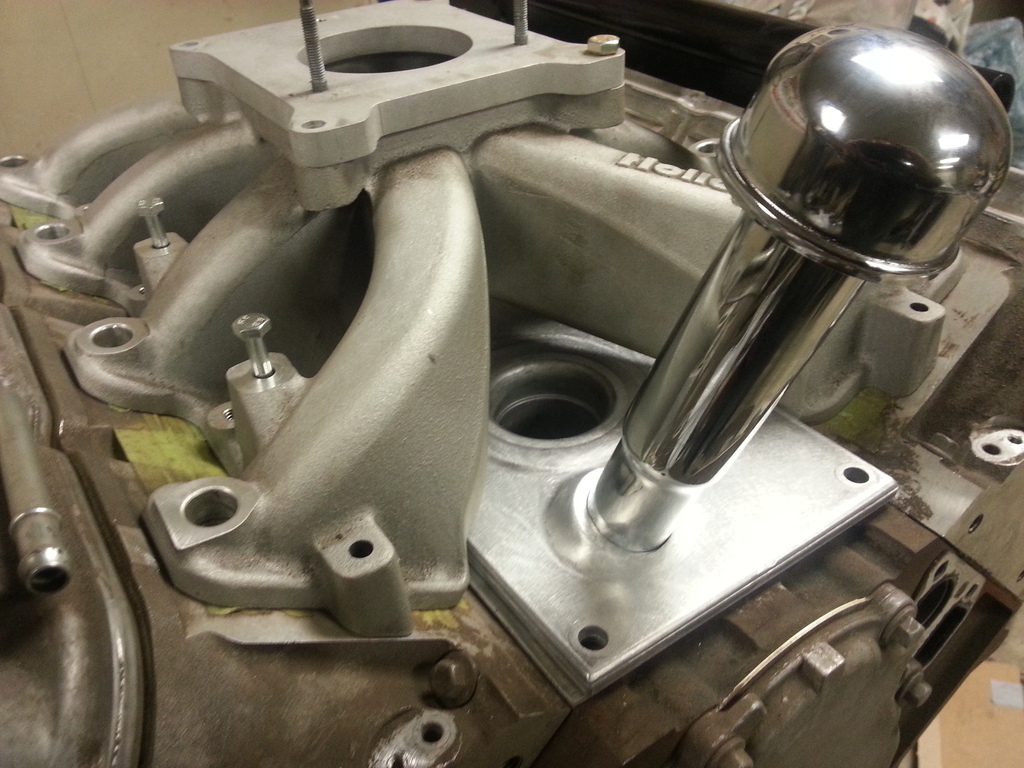
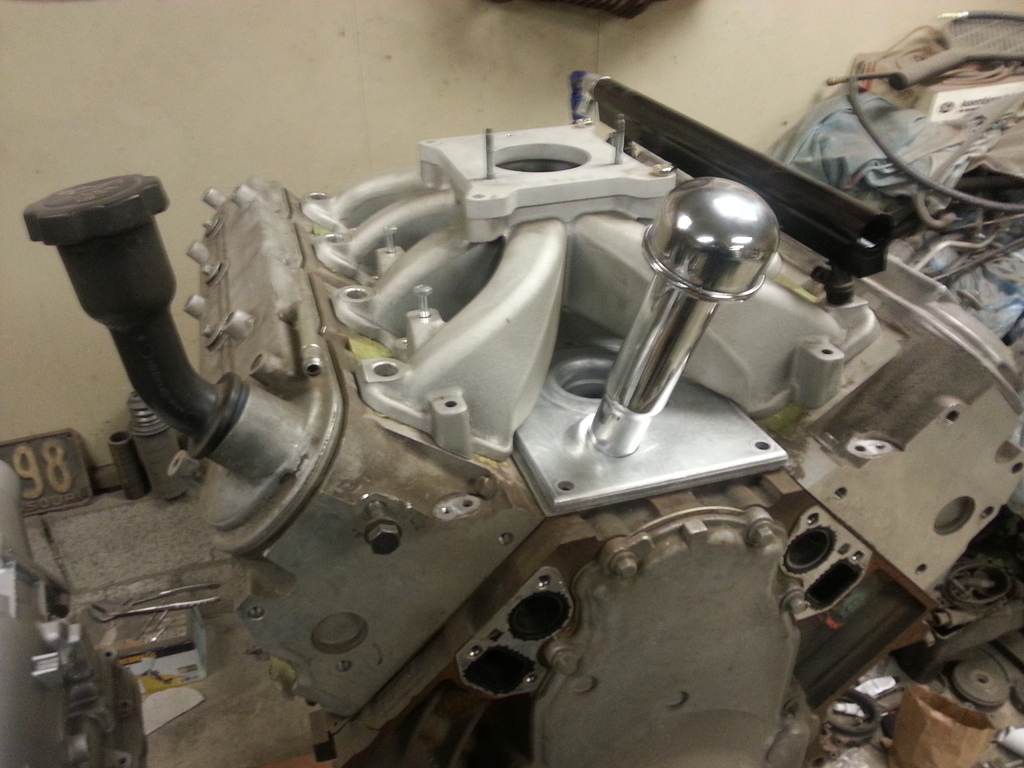
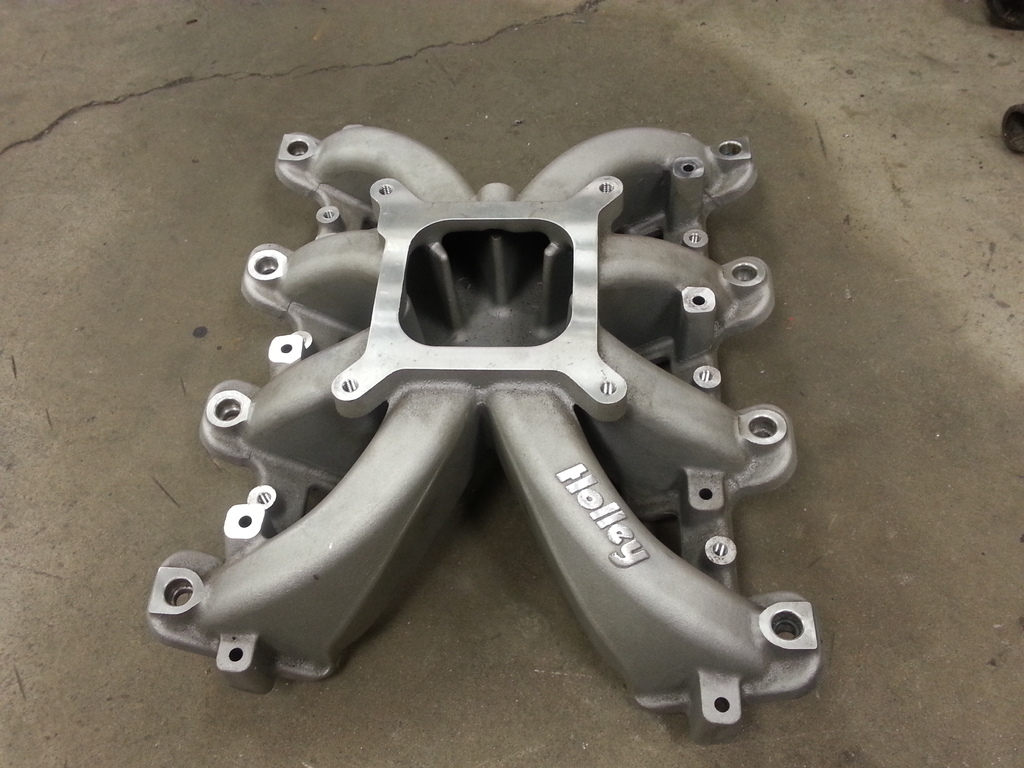
Grinding the Holley logo off the intake to make it look more stock....
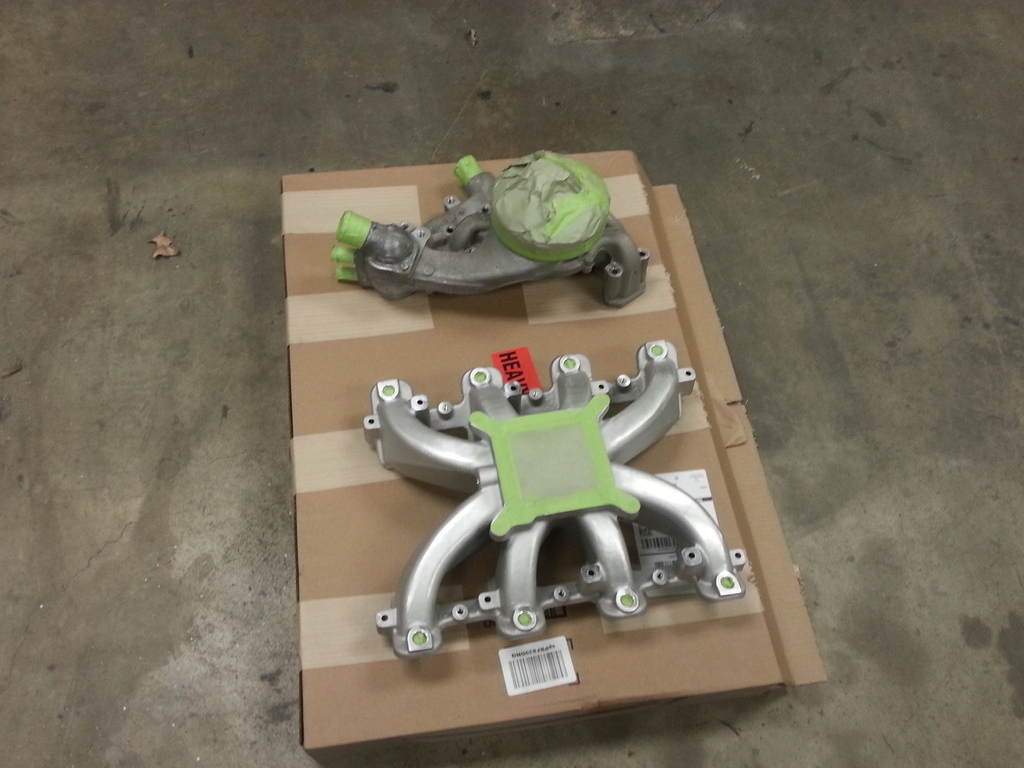
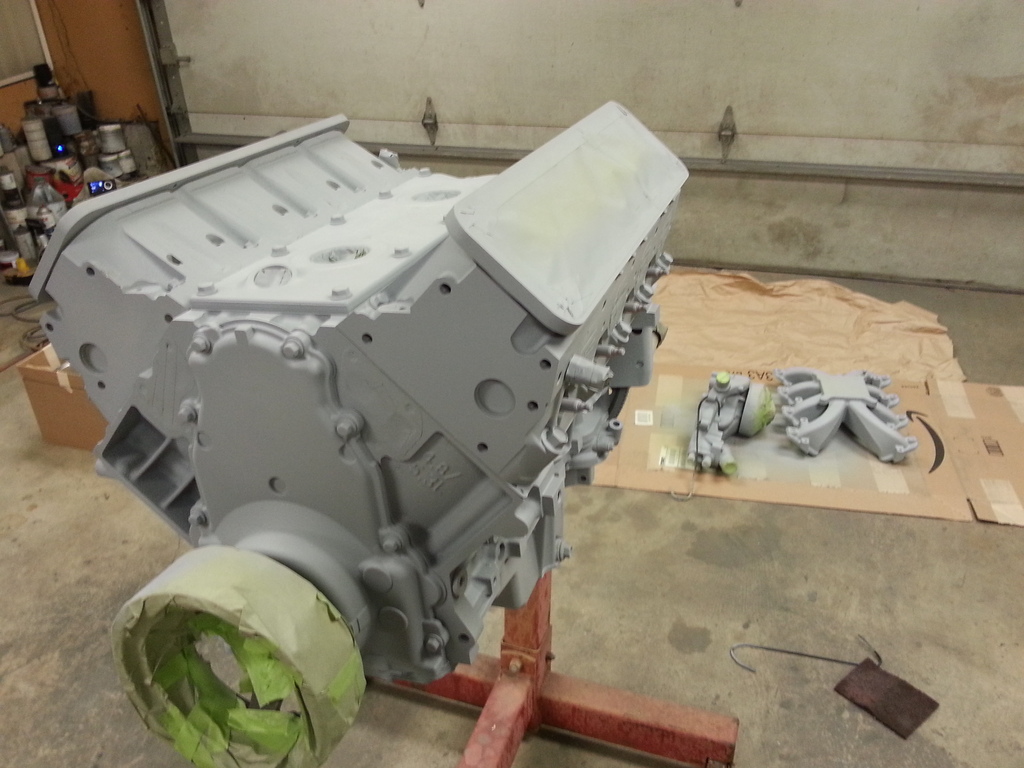
Getting everything masked off in preparation of paint.

First coat of etch primer....
A little urethane primer....
And finally some orange paint!
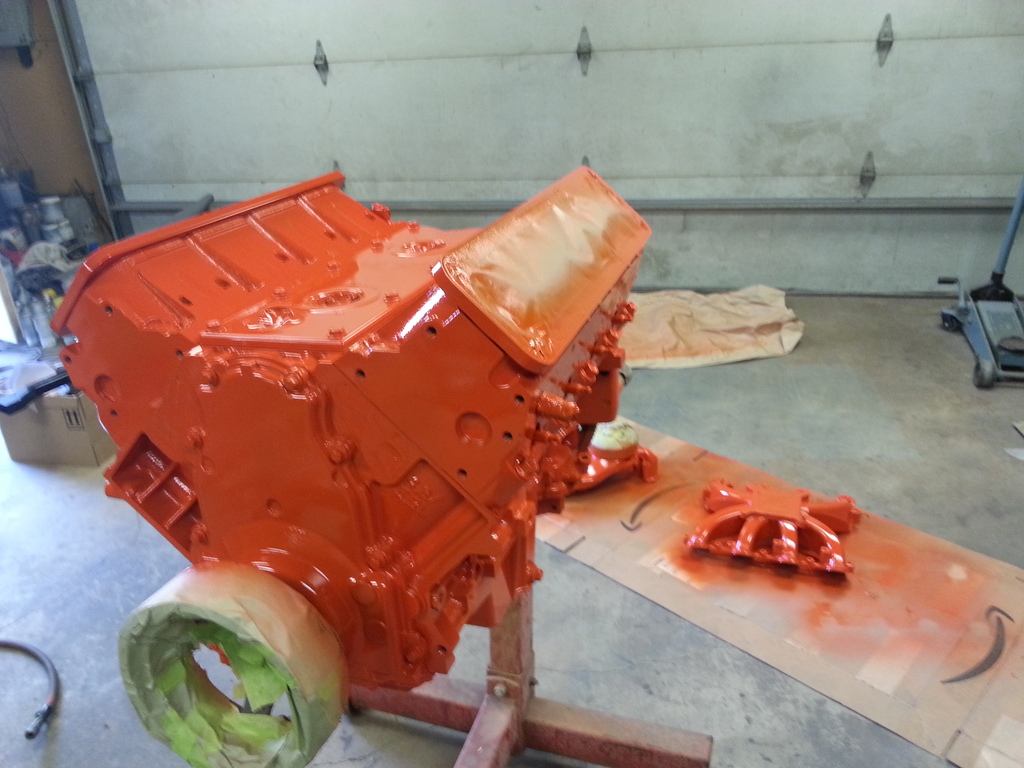
Now to get this thing installed for the final time!

Couple of pics of the inside. This thing is pretty clean.


Grinding the Holley logo off the intake to make it look more stock....

Getting everything masked off in preparation of paint.


First coat of etch primer....

A little urethane primer....

And finally some orange paint!

Now to get this thing installed for the final time!
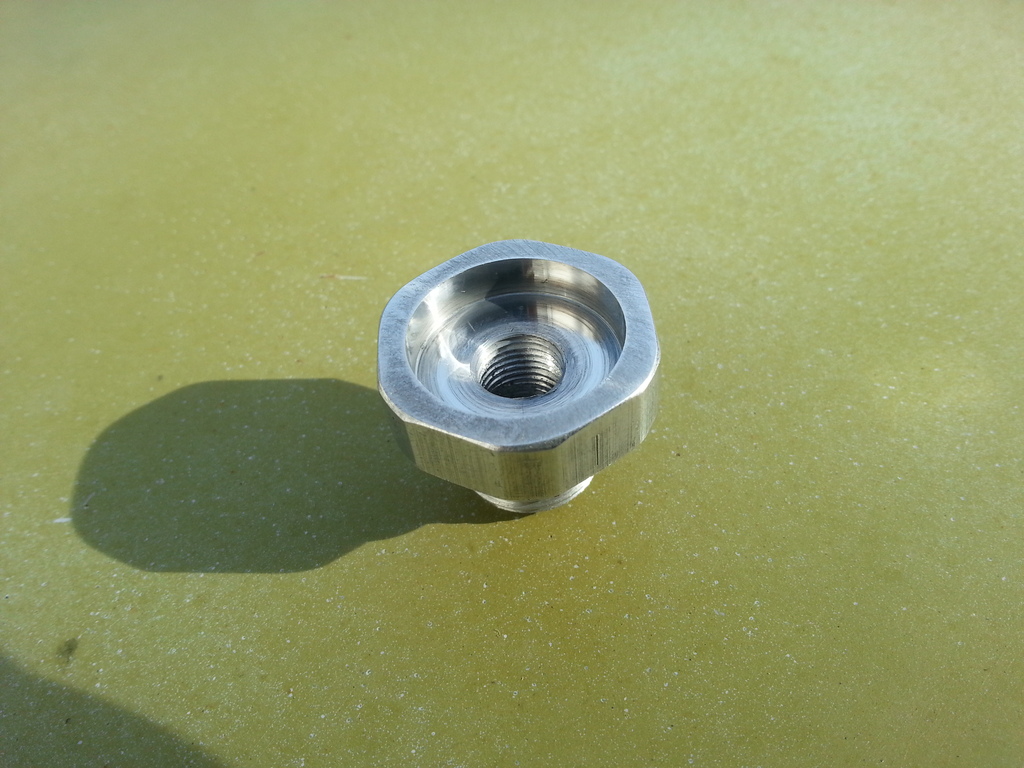
Grinded the top off of the oil sender to make an adapter for the oil sender switch I'll be using. There's a little computer in there! 
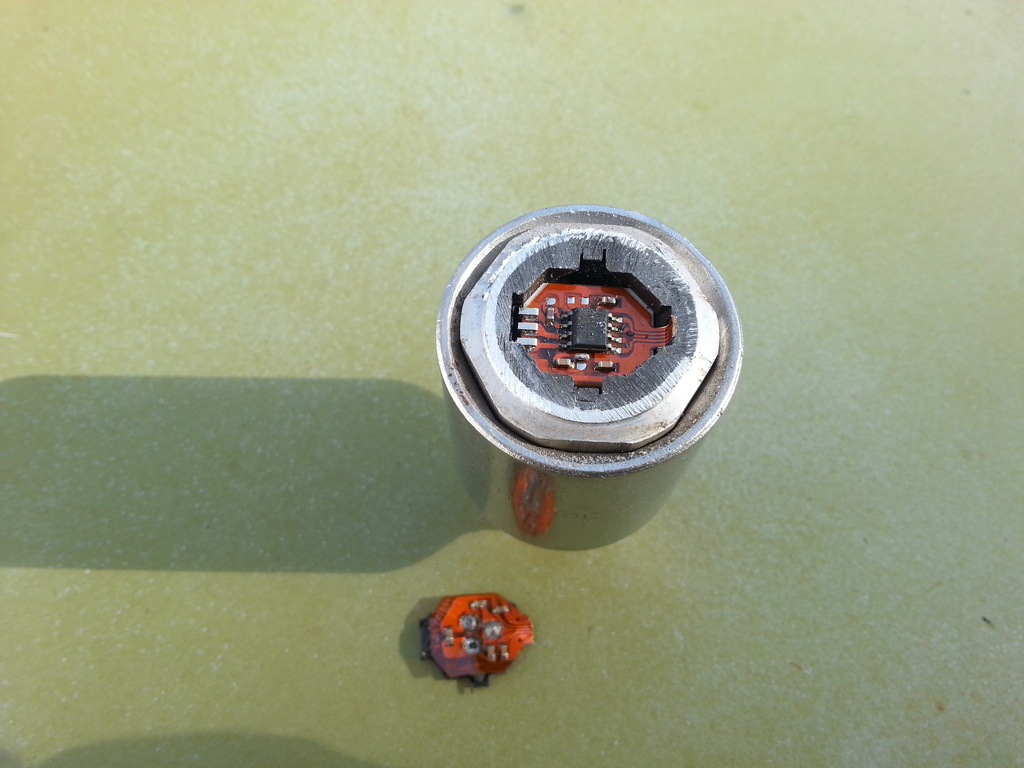
Gutted and drilled and tapped.
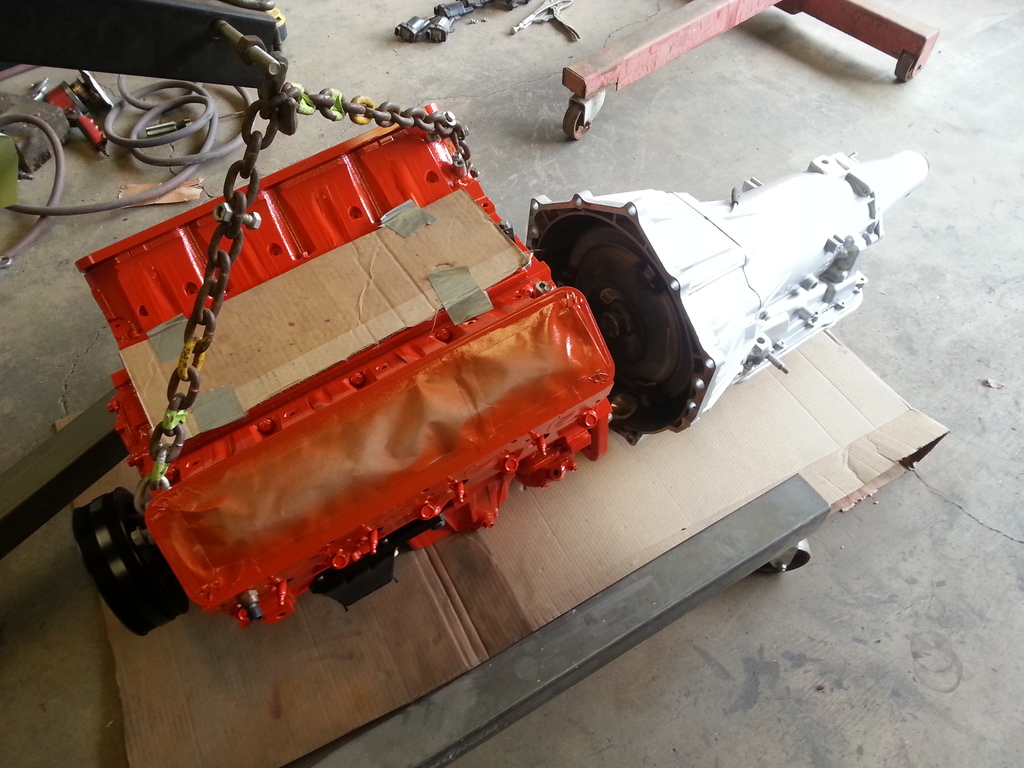
Mating the engine to the transmission.
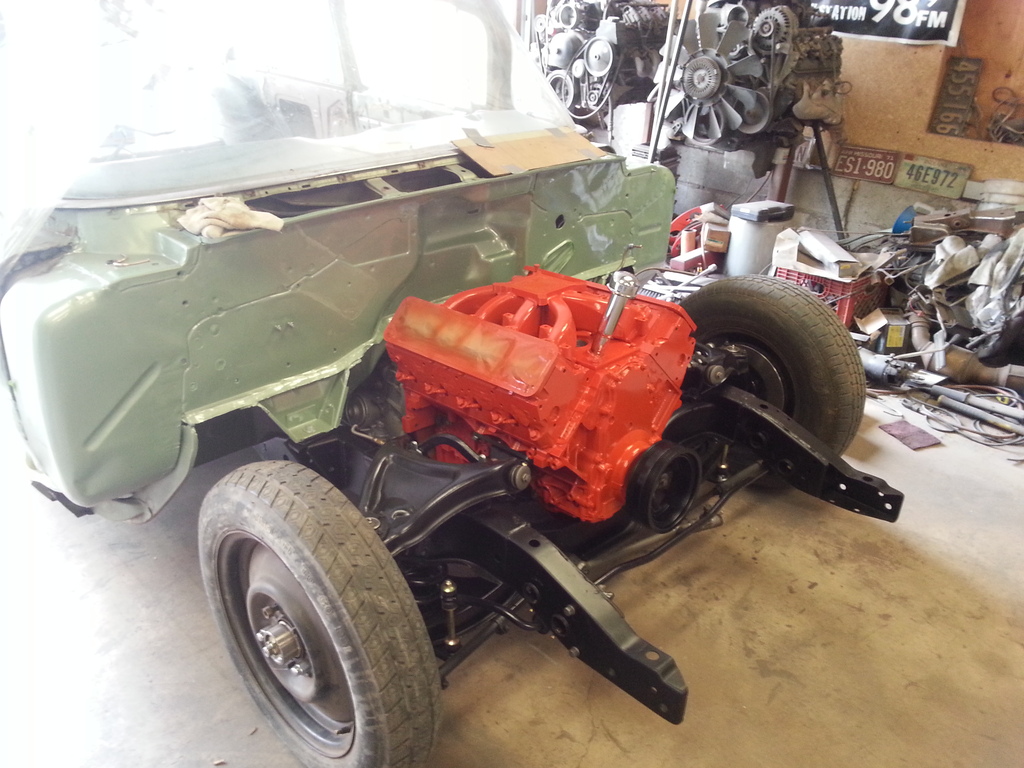
And in she goes! Had a buddy come over to give me a hand so I didn't scratch anything.
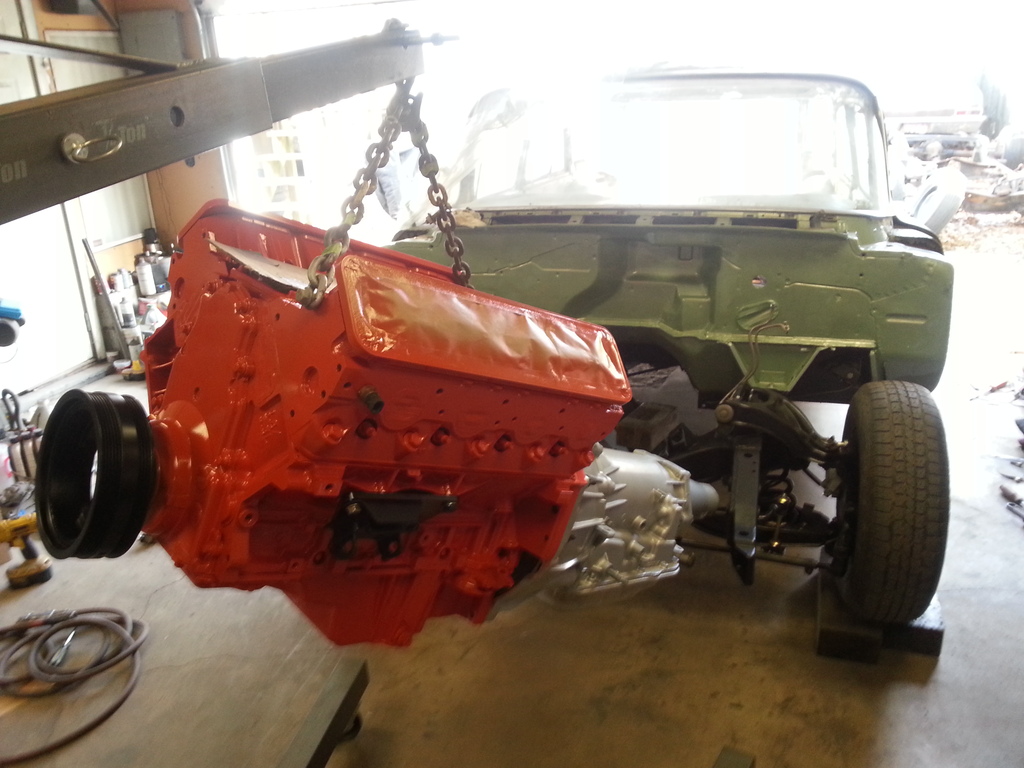
In!!!
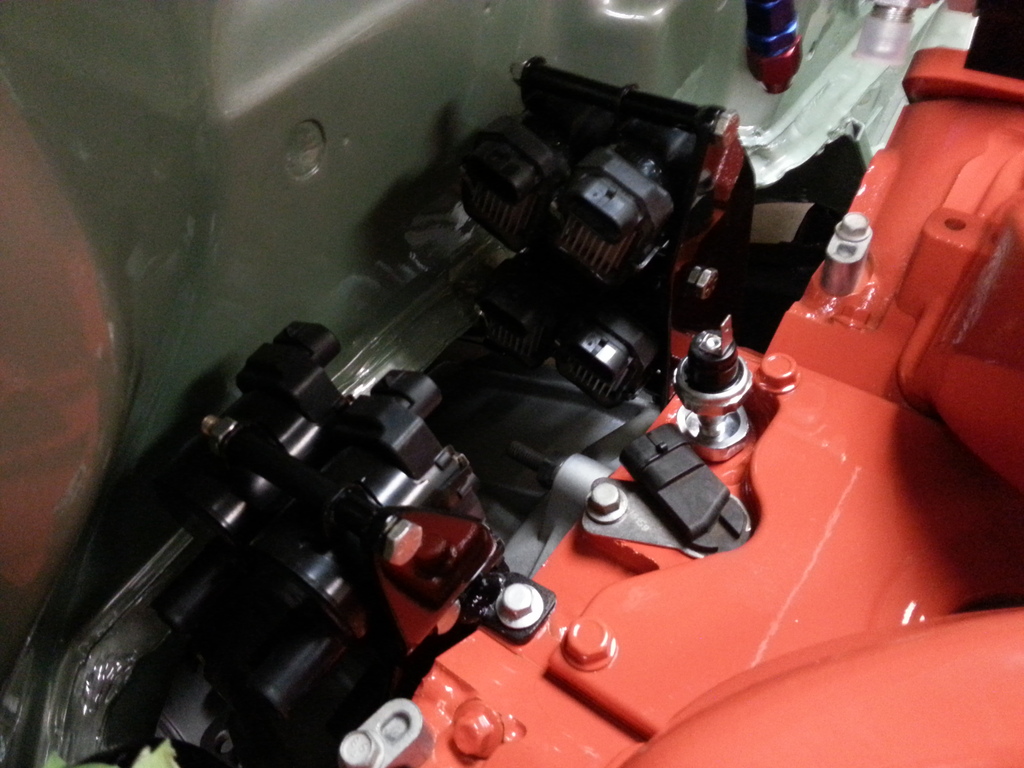
Bolted the coils back on the painted brackets I made earlier.

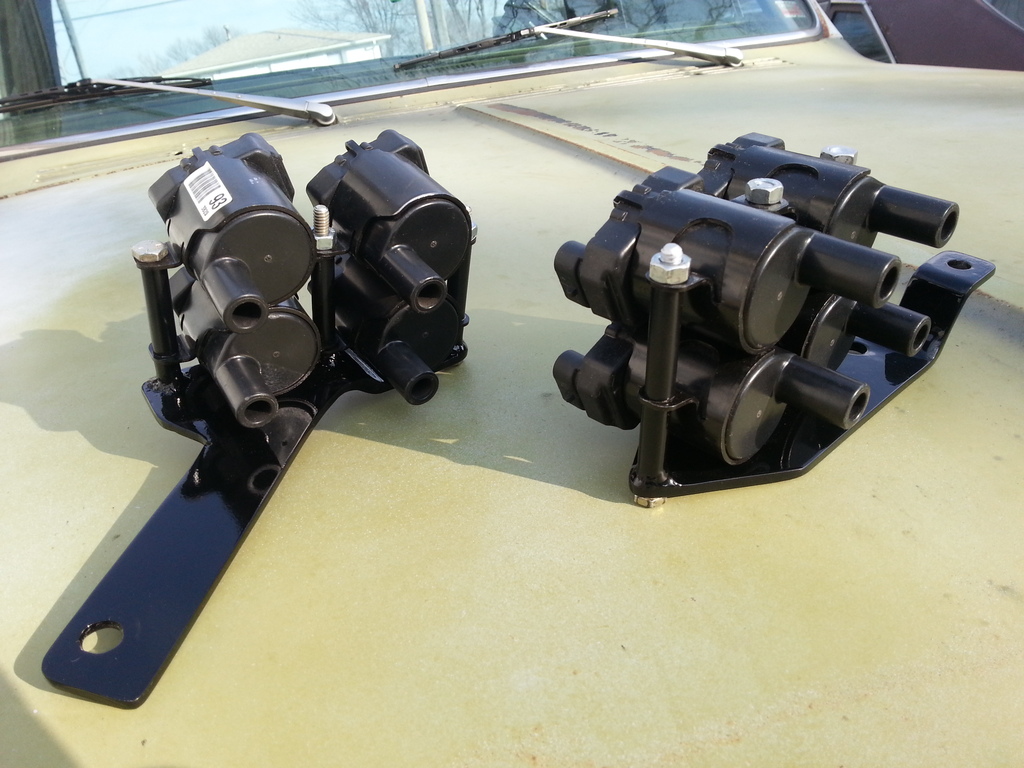
Coils and brackets put in place. You can also see the oil sender adapter in this pic.
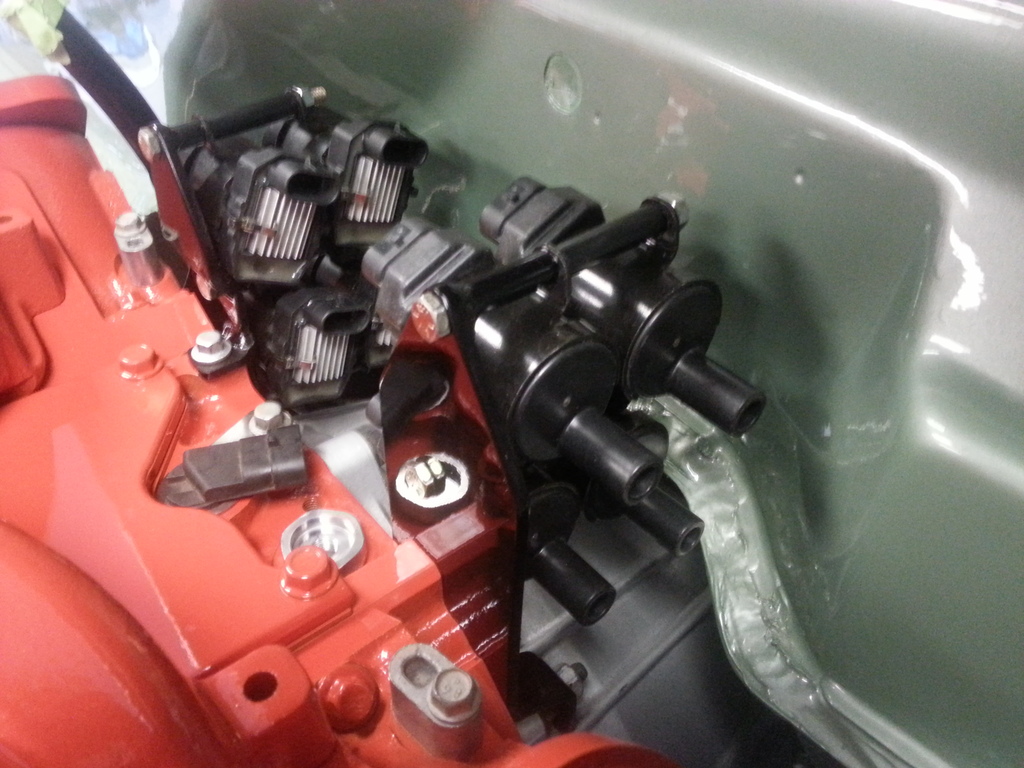
Another angle. Got the oil switch in too.

LS1 Tech Stories
The Best V8 Stories One Small Block at Time

Gas Monkey Built a 6-Wheel Ferrari Testarossa With a Corvette LT4 Engine
Verdad Gallardo
7 Most Reliable High-Performance Engines GM Has Ever Built
Verdad Gallardo
Amazing '71 Camaro Restomod Is Modern Muscle Car Under the Skin
Verdad Gallardo
6 Common C5 Corvette Failures and What's Involved In Repairing Them
Pouria Savadkouei
Retro Modern Bandit Pontiac Trans AM Comes With Burt Reynolds' Autograph
Verdad Gallardo
Top 10 Greatest Cadillac V Series Performance Models Ever, Ranked
Pouria Savadkouei
Top 10 Most Powerful Chevy Trucks Ever Made!

Hennessey's New Supercharged Silverado ZR2 Has 700 HP
Verdad Gallardo
Coachbuilt N2A Anteros Is an LS2-Powered C6 Corvette In Italian Clothes
Verdad Gallardo
Hey LS1NOVA71 take a look here...
http://www.zip-corvette.com/63-67-c2...ube-black.html they're cheap and they also have the cap and new gasket, if you get the one with the screw in fitting for the PCV you could just put a plug in it. That will solve your oil misting dilemma. You do nice work....
http://www.zip-corvette.com/63-67-c2...ube-black.html they're cheap and they also have the cap and new gasket, if you get the one with the screw in fitting for the PCV you could just put a plug in it. That will solve your oil misting dilemma. You do nice work....

Thanks!
It's a semi-gloss black urethane, they call it hot rod primer, but it isn't really primers
The etch prime is Variprime, which is a two part primer, then another two part urethane primer followed by a catalyzed enamel paint. It holds up way better than spray can paint, but definitely isn't as easy. LOL
Thanks.
I'll have to look into that. Thanks for the link.
Thanks, I think it will look good with the Chevrolet script valve covers. Can't claim credit for the idea though. I got the idea from a friend on another forum.
It's a semi-gloss black urethane, they call it hot rod primer, but it isn't really primers
The etch prime is Variprime, which is a two part primer, then another two part urethane primer followed by a catalyzed enamel paint. It holds up way better than spray can paint, but definitely isn't as easy. LOL
Hey LS1NOVA71 take a look here...
http://www.zip-corvette.com/63-67-c2...ube-black.html they're cheap and they also have the cap and new gasket, if you get the one with the screw in fitting for the PCV you could just put a plug in it. That will solve your oil misting dilemma. You do nice work....
http://www.zip-corvette.com/63-67-c2...ube-black.html they're cheap and they also have the cap and new gasket, if you get the one with the screw in fitting for the PCV you could just put a plug in it. That will solve your oil misting dilemma. You do nice work....
Thanks, I think it will look good with the Chevrolet script valve covers. Can't claim credit for the idea though. I got the idea from a friend on another forum.


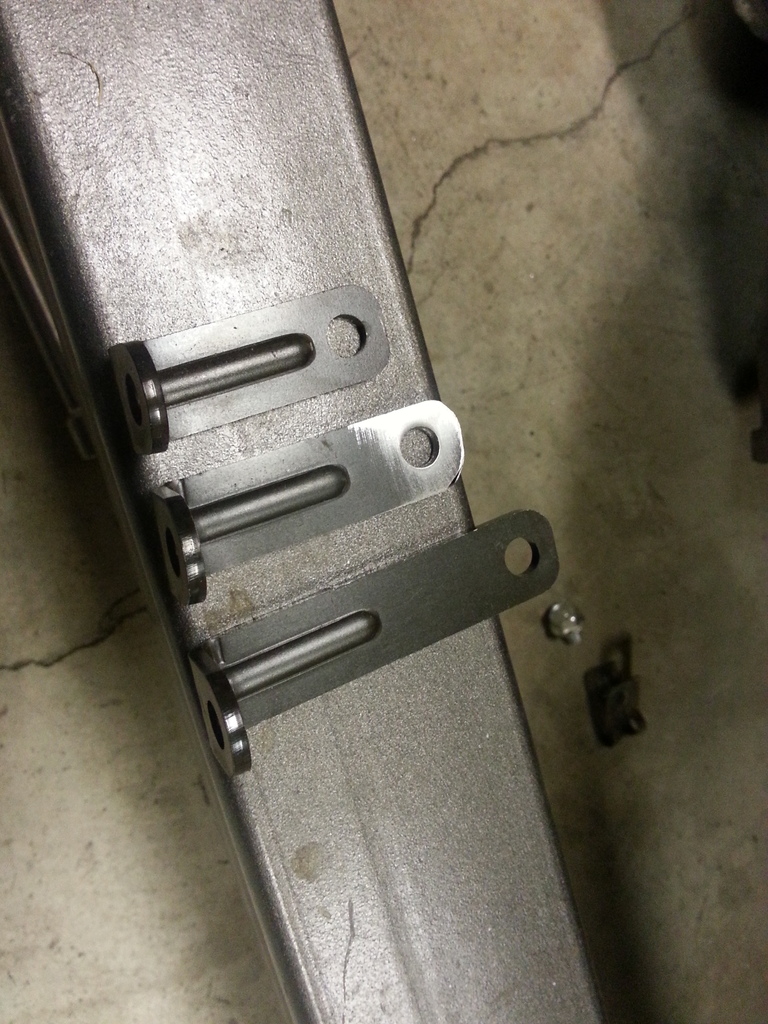
Todays update is a little out of order, but I never posted this. In order to use the Holley intake and fuel rails with truck injectors, you have to modify the brackets. Apparently they are set up for car injectors and the truck ones are in the middle of the long and short brackets that the rails come with. So, you have to mark them and drill new holes in the long ones and then cut the top of the bracket off so you have an in between size one. I have two different size injectors, the '07 flex ones and an '02 non flex set. I decided to use the smaller non flex ones.
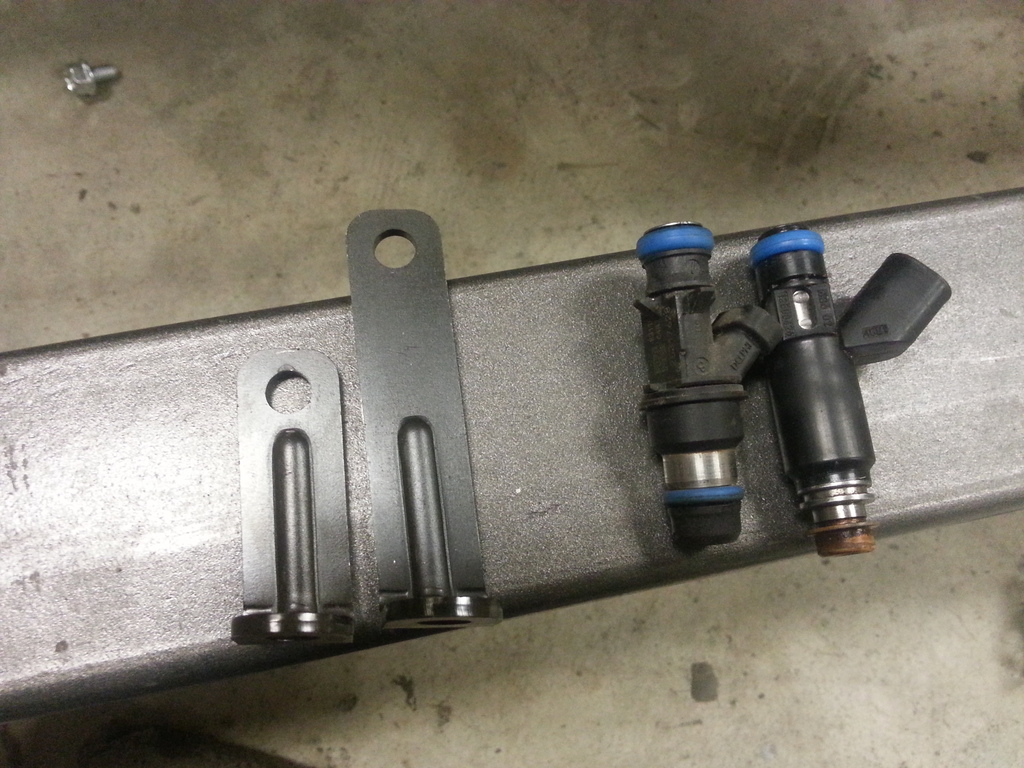
Modded bracket in the middle....
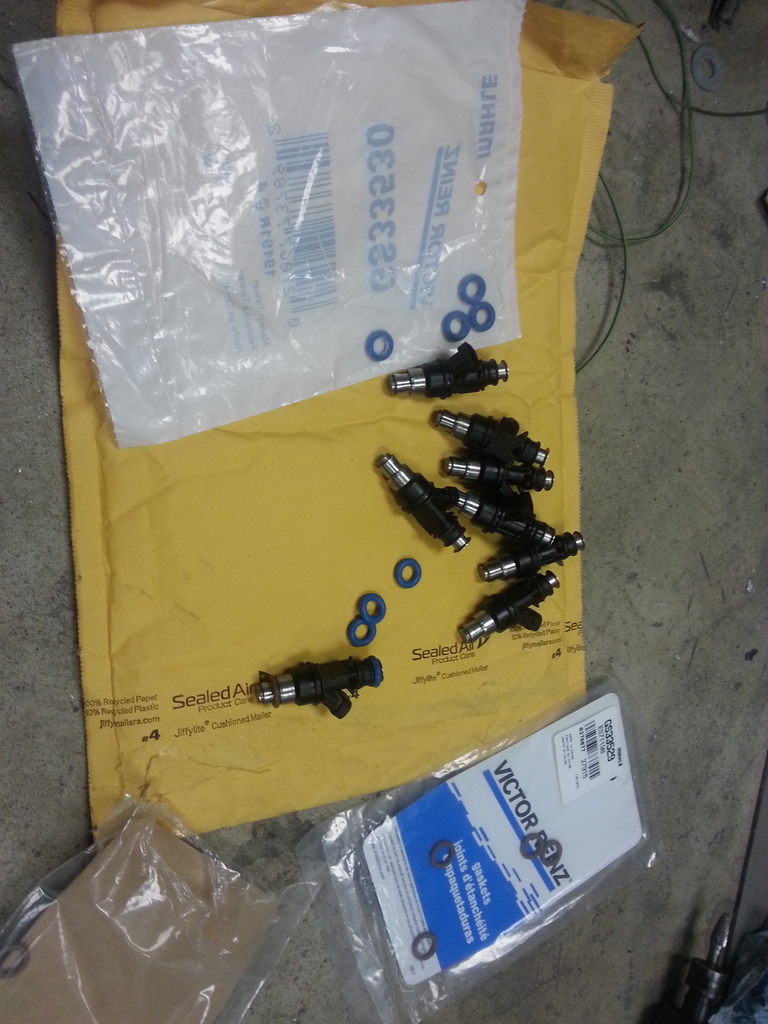
Then soaked the injectors in Seafoam over night, and put some new O rings on them. Then put them in the rails, which I think may be seen in an earlier posted pic.
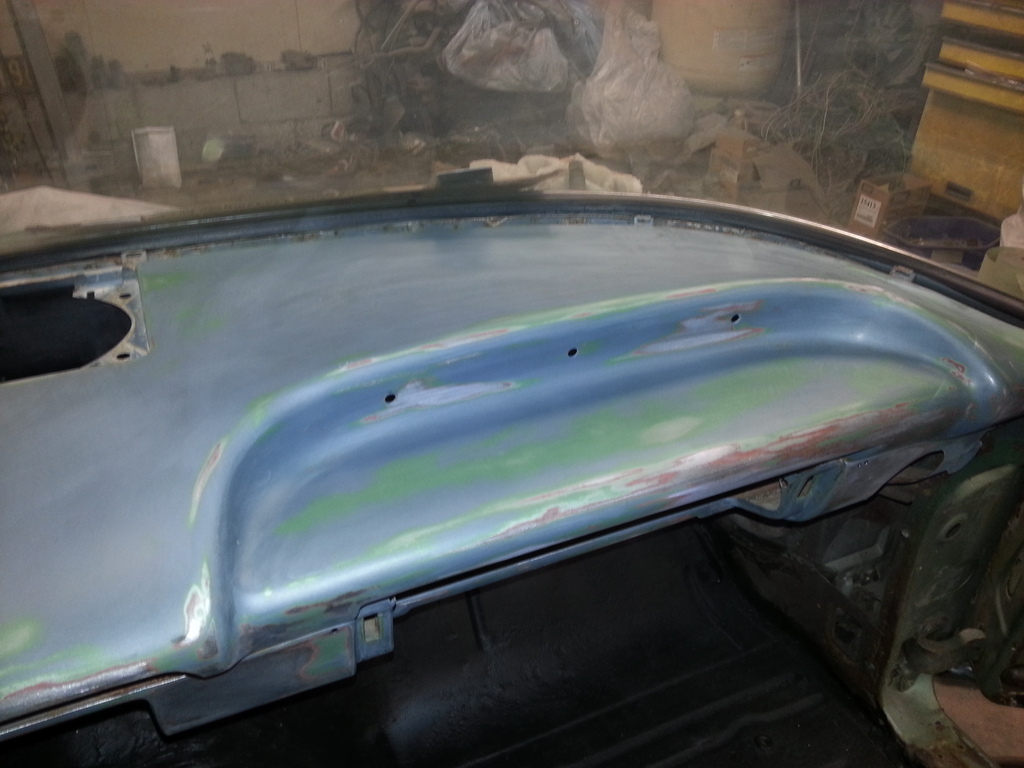
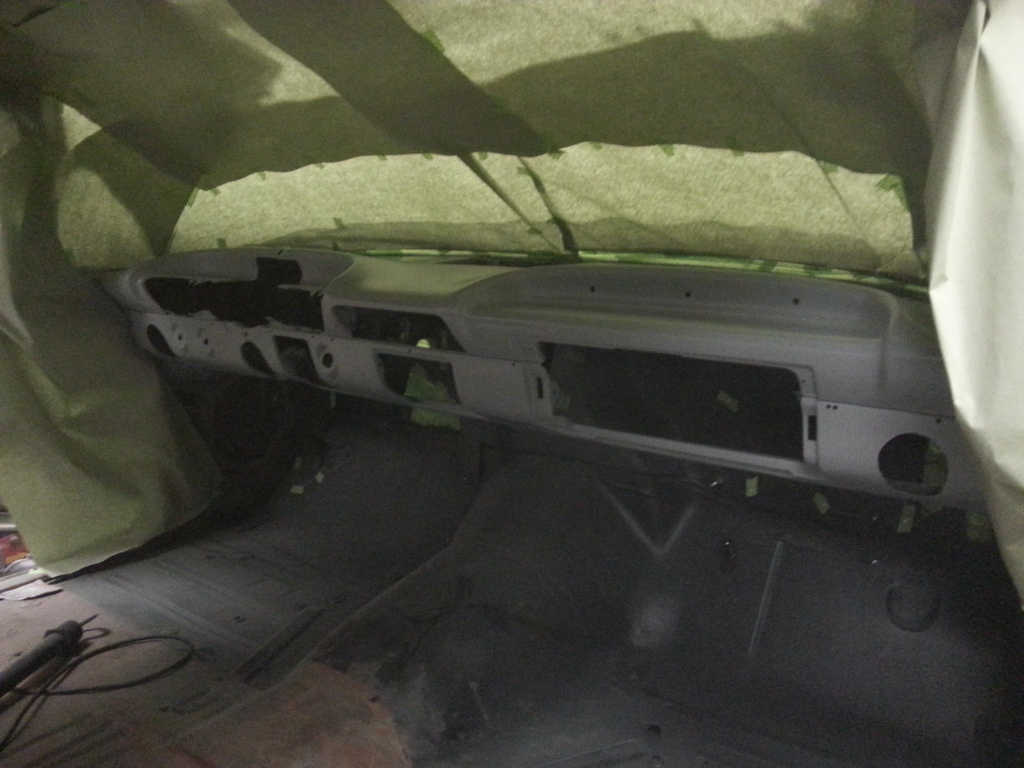
With the engine in, the next big thing on the list to get done was painting the dash, so that I can start installing the insulation, wiring, A/C etc. Now I don't know if this car was built on a Monday morning, or late on a Friday, but it must have been one of the two since someone screwed up on the line and painted the dash green. Not the body color green, but the other green interior color they had in '59. I noticed when sanding it, it was green underneath the gray color that the interior was. Then I noticed there was gray paint on the windshield weatherstrip, so apparently the color mishap wasn't discovered until after the windshield was installed.......
Paint on the right side weatherstrip.....
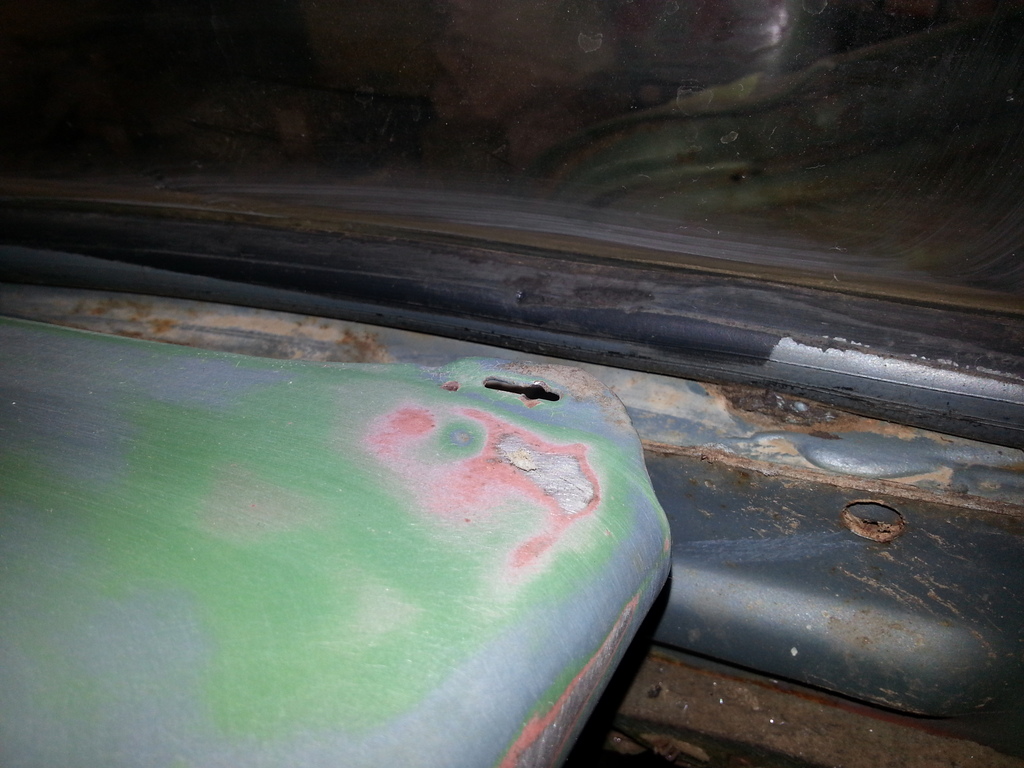
And the left. I'm sure whoever had to fix this wasn't happy because painting the dash with the windshield in is a pain in the ***.

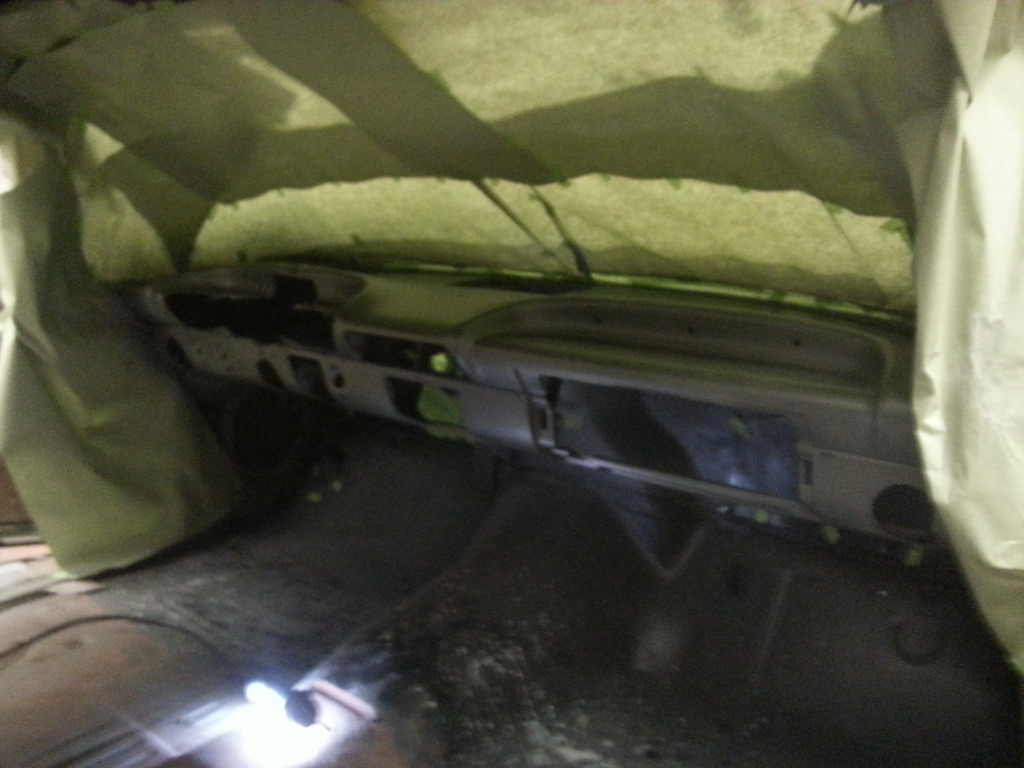
This is how I know it's a pain in the ***...... Got it primered......
Then got the base on it and it was looking good until it started lifting the urethane primer. Guess I put it on a little too heavy in spots. Time to stop and start over the next day.

Modded bracket in the middle....

Then soaked the injectors in Seafoam over night, and put some new O rings on them. Then put them in the rails, which I think may be seen in an earlier posted pic.

With the engine in, the next big thing on the list to get done was painting the dash, so that I can start installing the insulation, wiring, A/C etc. Now I don't know if this car was built on a Monday morning, or late on a Friday, but it must have been one of the two since someone screwed up on the line and painted the dash green. Not the body color green, but the other green interior color they had in '59. I noticed when sanding it, it was green underneath the gray color that the interior was. Then I noticed there was gray paint on the windshield weatherstrip, so apparently the color mishap wasn't discovered until after the windshield was installed.......

Paint on the right side weatherstrip.....

And the left. I'm sure whoever had to fix this wasn't happy because painting the dash with the windshield in is a pain in the ***.

This is how I know it's a pain in the ***...... Got it primered......

Then got the base on it and it was looking good until it started lifting the urethane primer. Guess I put it on a little too heavy in spots. Time to stop and start over the next day.

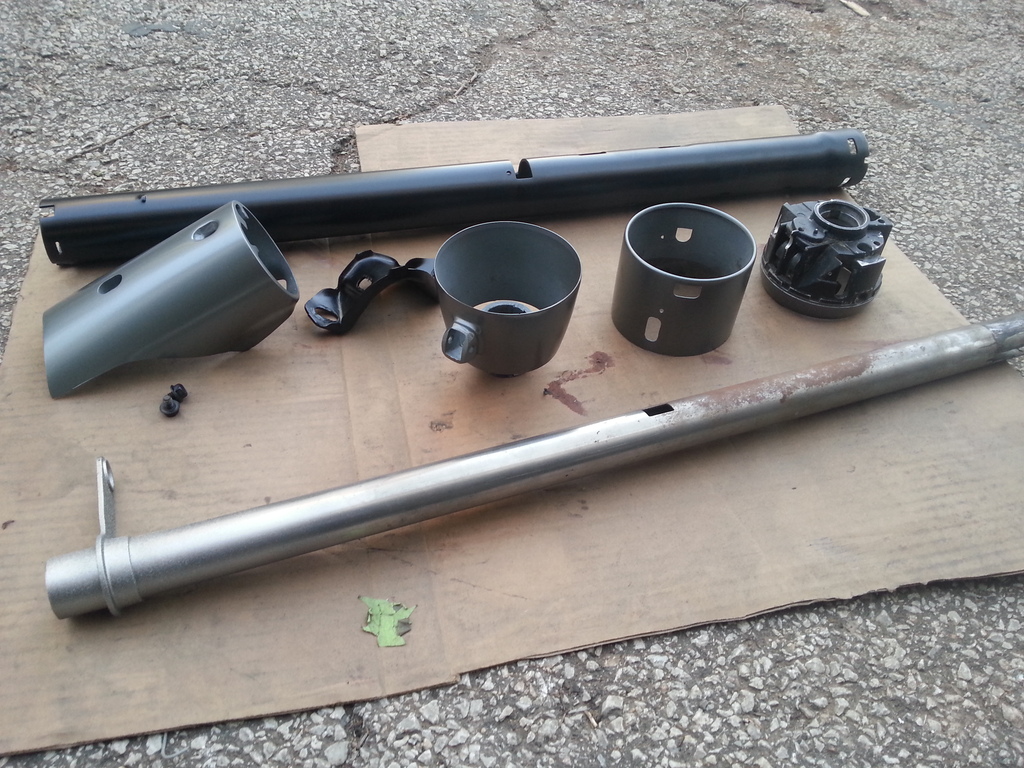
With the paint on the dash screwed up and needing to be reprimed, I decided I would get the steering column parts ready to be painted at the same time. Welded up the indicator light hole in the upper turn signal cover.

Going to run the indictor off the '59 column. Might try and change the numbers at a later date to include all four gears.
A little body work and these are ready for some primer.
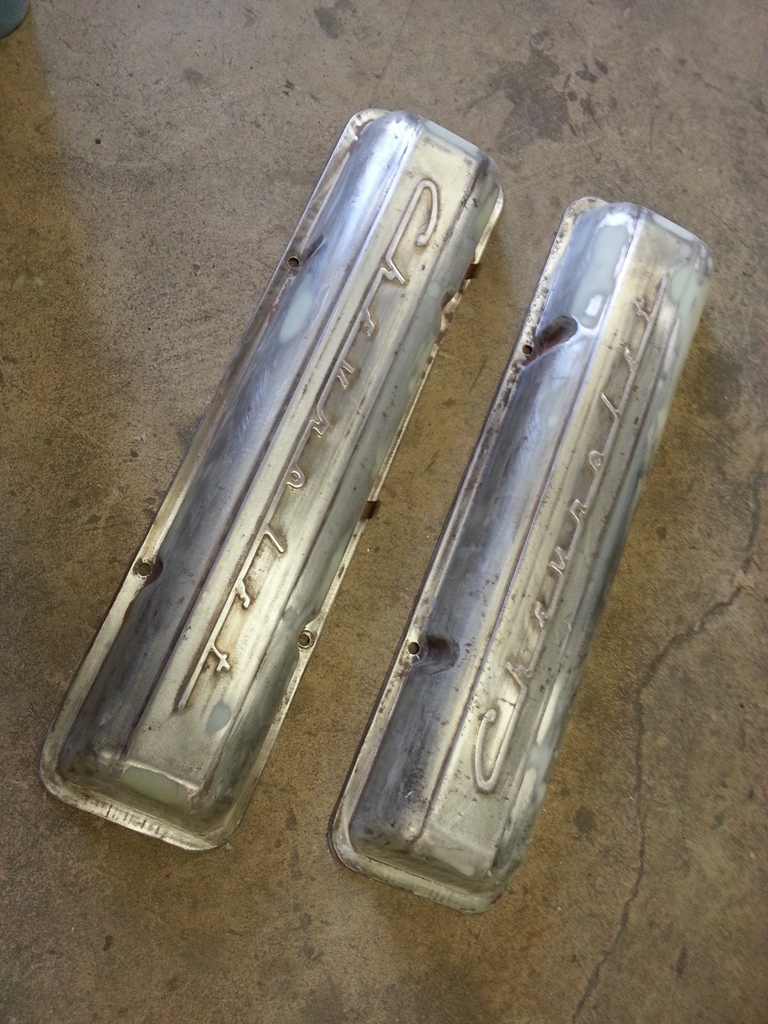
My script valve covers showed up, so decided to get them ready for primer also. These are in pretty nice shape. It's amazing how hard these things have become to find in nice shape lately.
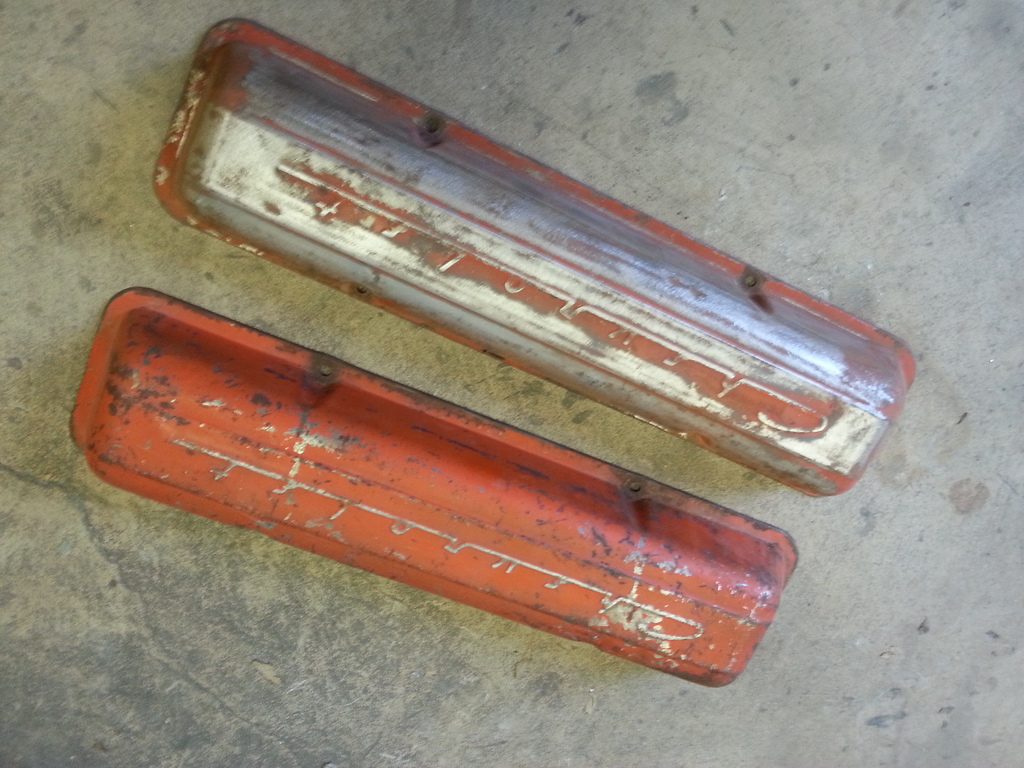
Stripped and a few dings fixed.
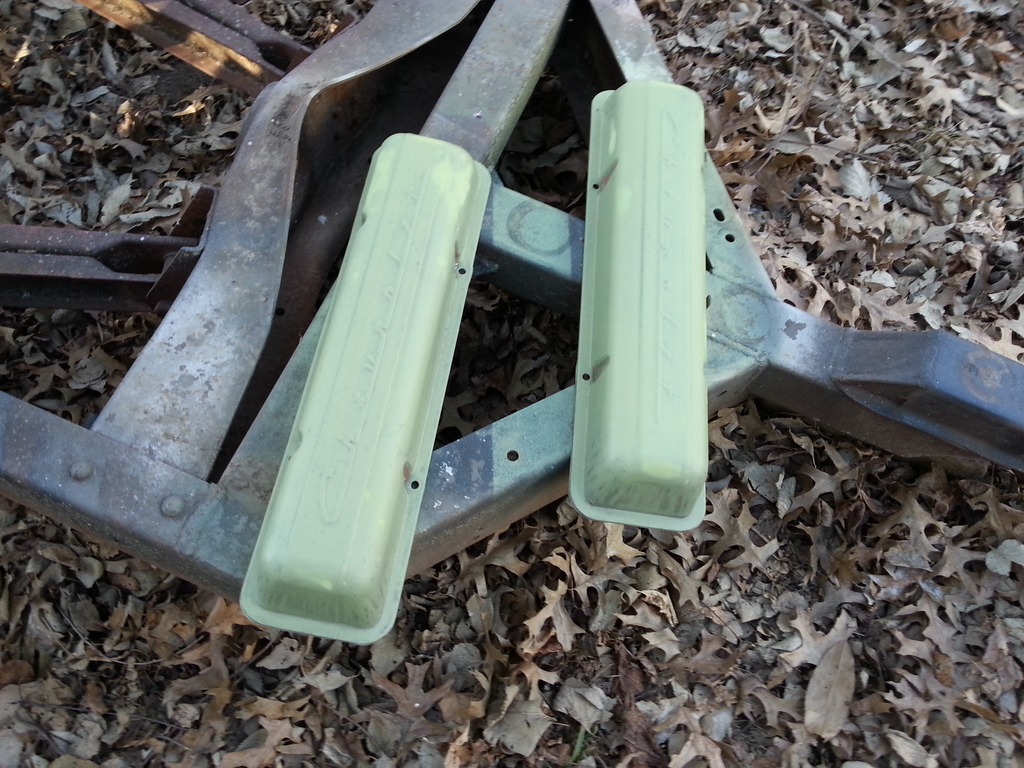
Quick coat of etch prime.
Guess I didn't get a pic of the dash painted, but this is all the column pieces painted and ready for reassembly.
Threw one of the valve covers on to see what it would look like.
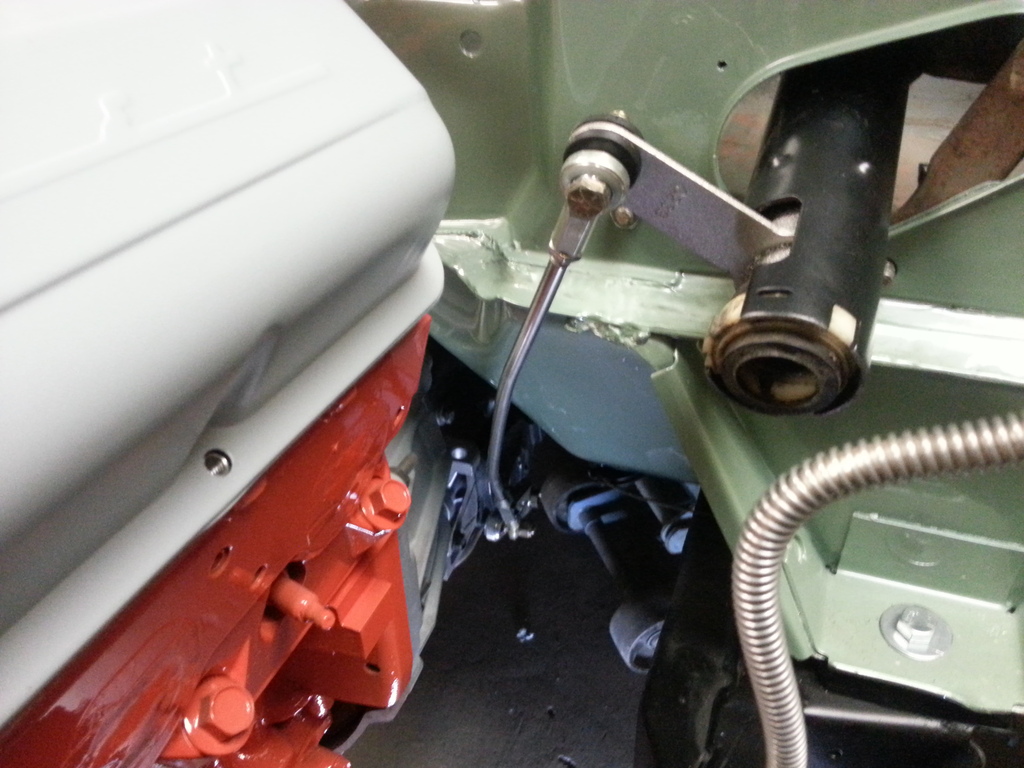
Then hooked up the shifter with a Lokar kit I had bought for my Blazer build, that it wouldn't work on...... I only have half of the column together because I need to change the detents in the column to better match the shift points of the 4l60e versus the 3 speed auto that the column was originally.


Going to run the indictor off the '59 column. Might try and change the numbers at a later date to include all four gears.

A little body work and these are ready for some primer.

My script valve covers showed up, so decided to get them ready for primer also. These are in pretty nice shape. It's amazing how hard these things have become to find in nice shape lately.

Stripped and a few dings fixed.

Quick coat of etch prime.

Guess I didn't get a pic of the dash painted, but this is all the column pieces painted and ready for reassembly.

Threw one of the valve covers on to see what it would look like.

Then hooked up the shifter with a Lokar kit I had bought for my Blazer build, that it wouldn't work on...... I only have half of the column together because I need to change the detents in the column to better match the shift points of the 4l60e versus the 3 speed auto that the column was originally.

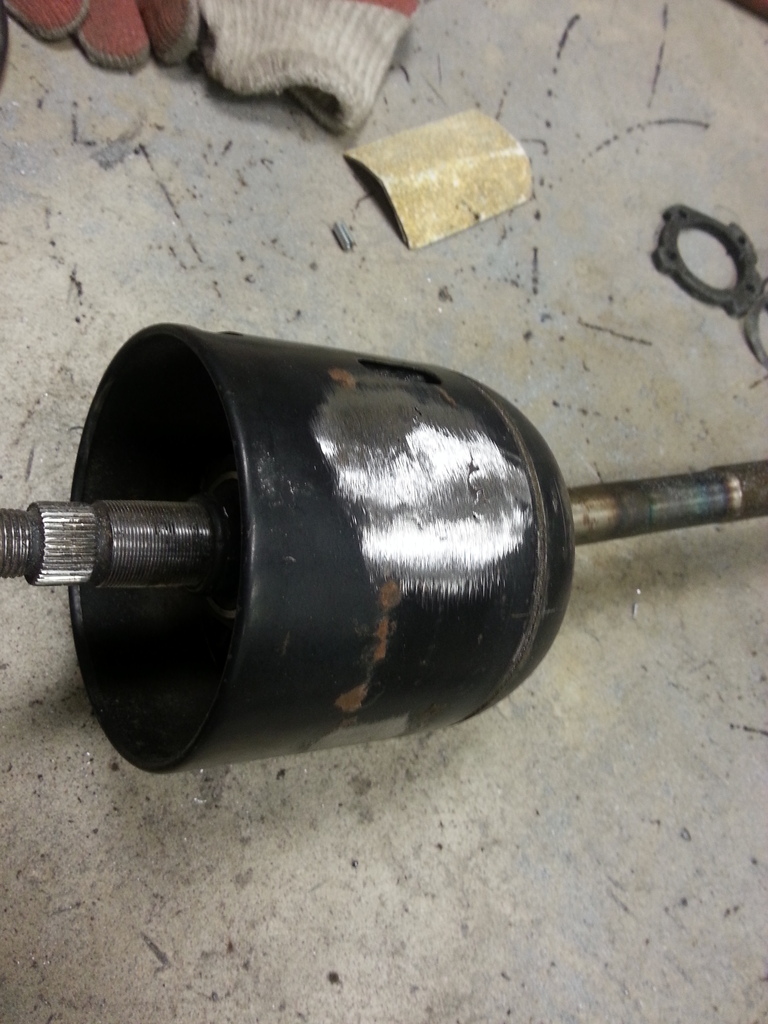
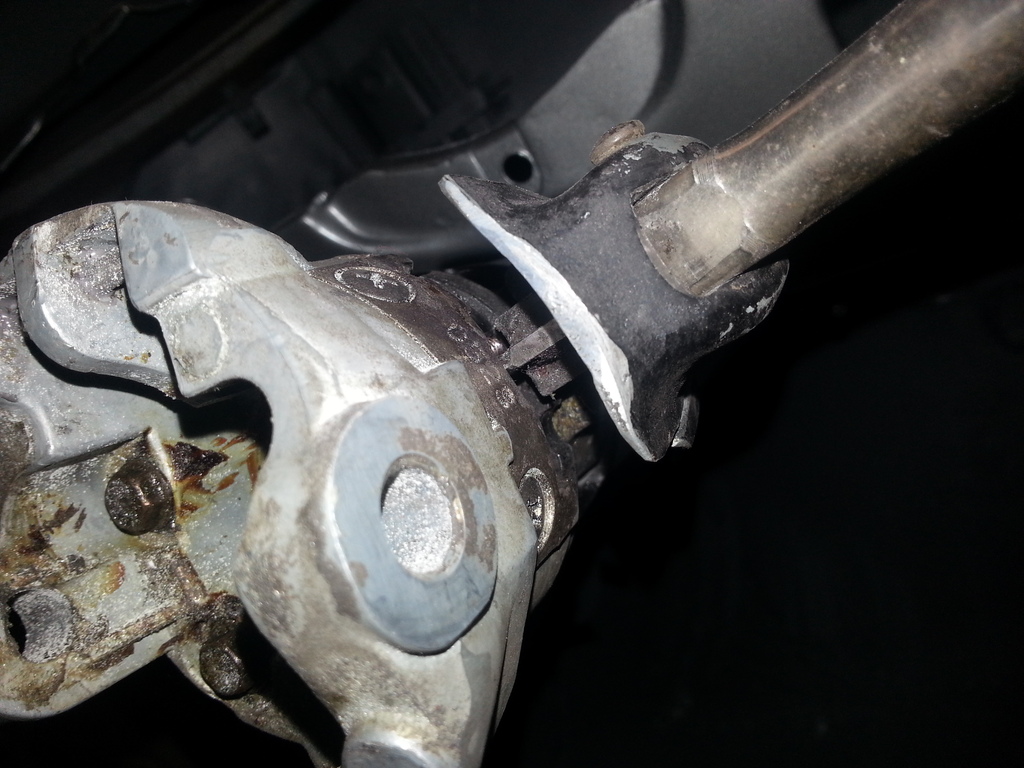
This next part is probably not for the faint of heart, but I'm real picky about having the shift linkage work right. Using the Lokar shift linkage you are able to physically get the shifter to reach all four gears, but the detents in the column are usually off by a certain amount. Since I have rebuilt way too many of this particular type of column, I have a vast supply of parts for them. So what I did was take a messed up shift bowl and cut the bowl part off leaving just the shifter part. This allows you to see the detent, but more importantly, it allows you to remove it and make adjustments to it.

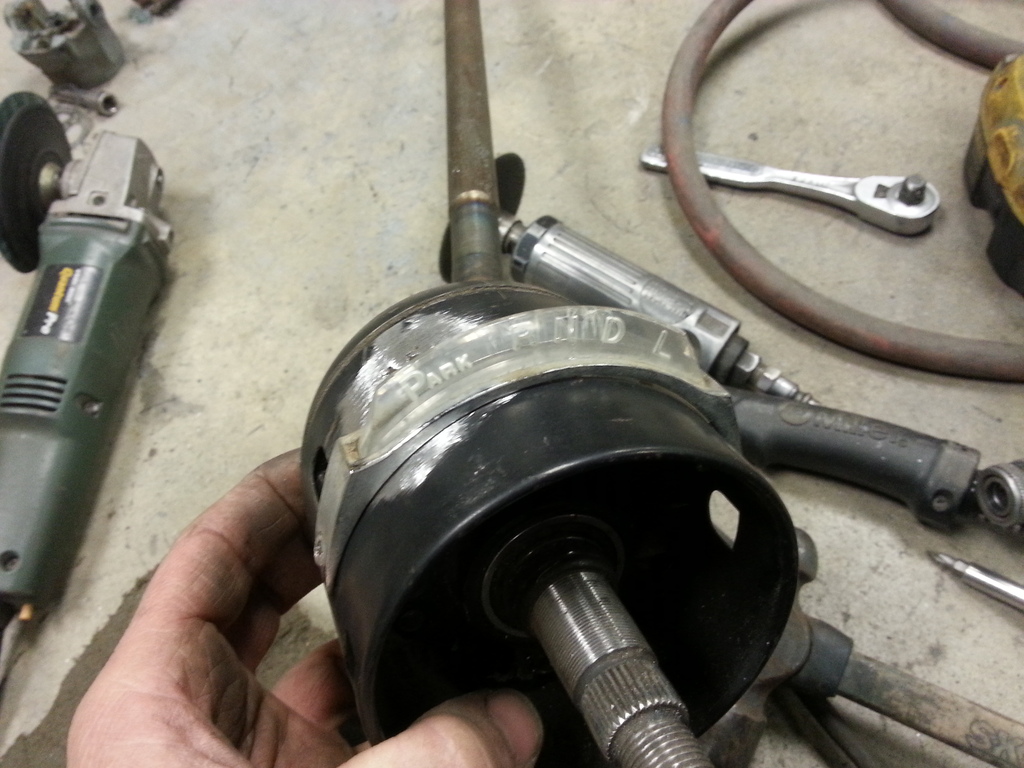
This is the shifter in reverse, it may be a little hard to see, but the shifter isn't in the detent all the way.
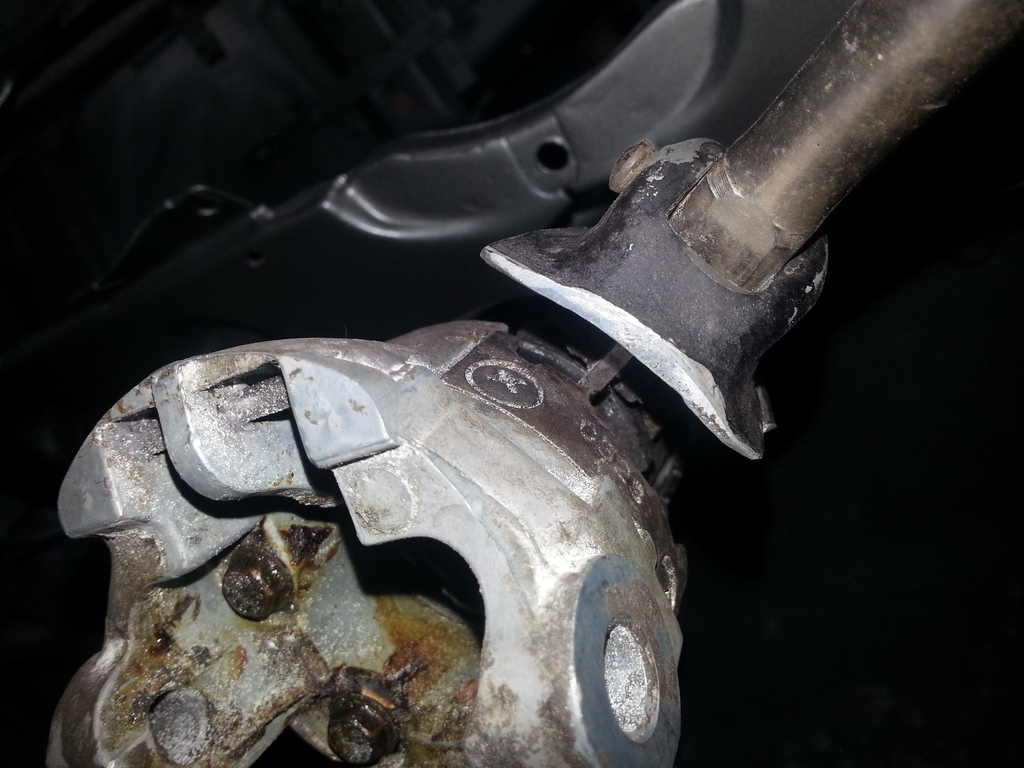
And this is the shifter in OD. Notice the area below the shifter in the detent, it allows the shifter to fall almost into 3rd, not what you want. I like the shifter to almost naturally go to OD when quickly pulled into gear, so the detents need to be changed.
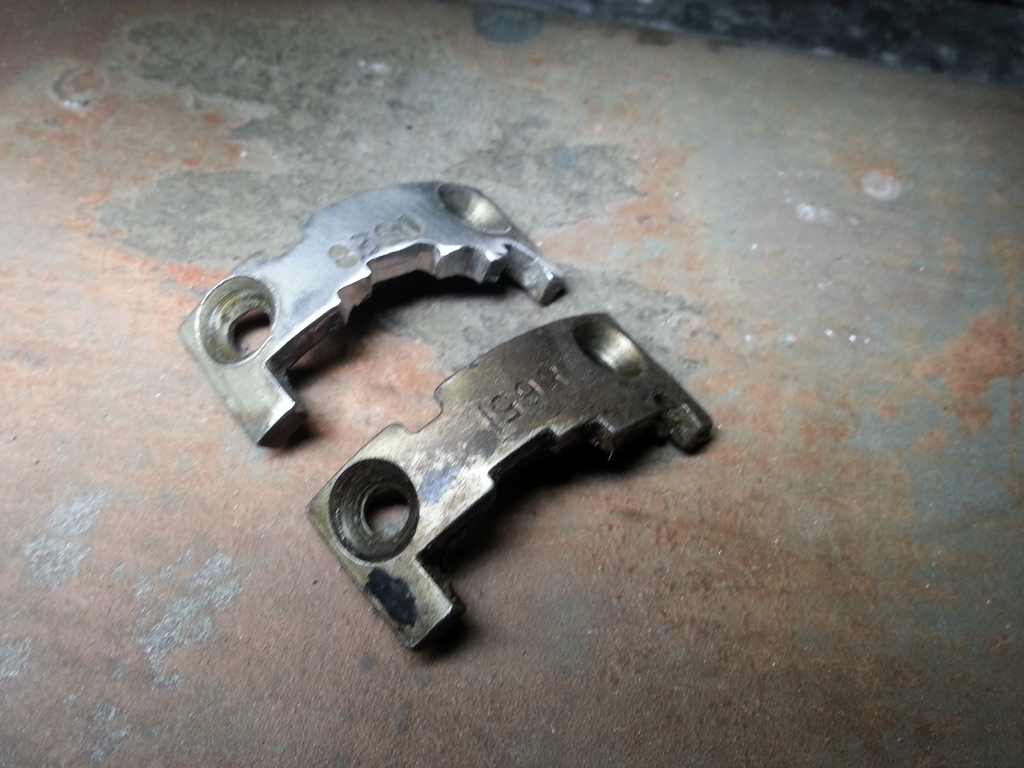
By removing the detent, I one at a time marked the locations with a marker then removed the detent and took the cut off tool and ground a new detent. The shifter now goes right to OD, and you can bump it into neutral without having to pull the shifter back, then from neutral to OD the same way. All other gears require pulling the shifter back, with the exception of first and second. You can see the difference between the 3 speed one on the bottom and the modified 4 speed one on the top in this pic.
