


1959 Biscayne 2 door wagon
So I decided to move the engine forward about half an inch to make some things fit better. Redrilled some holes in the crossmember.....

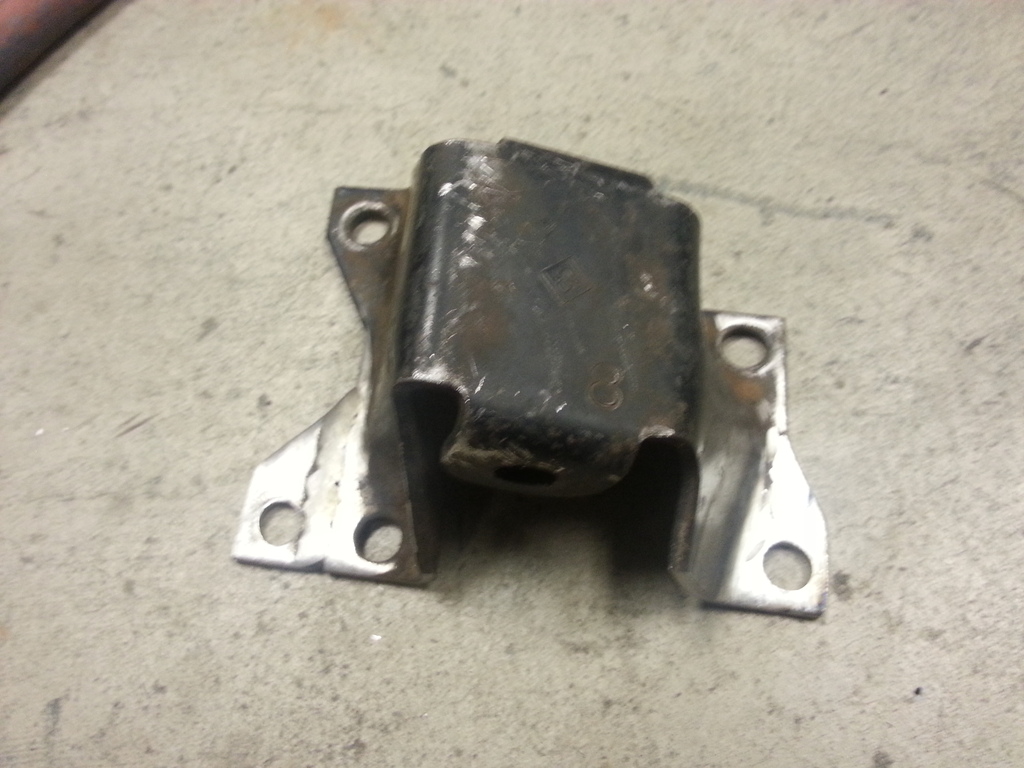
And modified the stands a little bit.....

Because I wanted to keep the A/C compressor mounted down low. Not an easy task on these cars. I figured I would make my own compressor bracket since I wanted to tuck it as close to the block as possible, and I didn't think the Alan Grove one would do that. So I spent a couple days making one, only to find out that the tensioner wouldn't fit without hitting the compressor pulley. So back to square one. Then when all was said and done, I had a virtually identical bracket to the Alan Grove one, albeit not as nice looking. Live and learn I guess. Should have bought that one at first and saved me some time! But, it's on there, and then it was time to start notching the crossmember to fit it. From here on out, you will realize I'm not afraid to cut and weld metal.


And modified the stands a little bit.....


Because I wanted to keep the A/C compressor mounted down low. Not an easy task on these cars. I figured I would make my own compressor bracket since I wanted to tuck it as close to the block as possible, and I didn't think the Alan Grove one would do that. So I spent a couple days making one, only to find out that the tensioner wouldn't fit without hitting the compressor pulley.
So back to square one. Then when all was said and done, I had a virtually identical bracket to the Alan Grove one, albeit not as nice looking. Live and learn I guess. Should have bought that one at first and saved me some time! But, it's on there, and then it was time to start notching the crossmember to fit it. From here on out, you will realize I'm not afraid to cut and weld metal. 

Starting the mock up...

Surely a priority mail box and some green masking tape will hold it, right?

Started to make some clearance on the other side too.


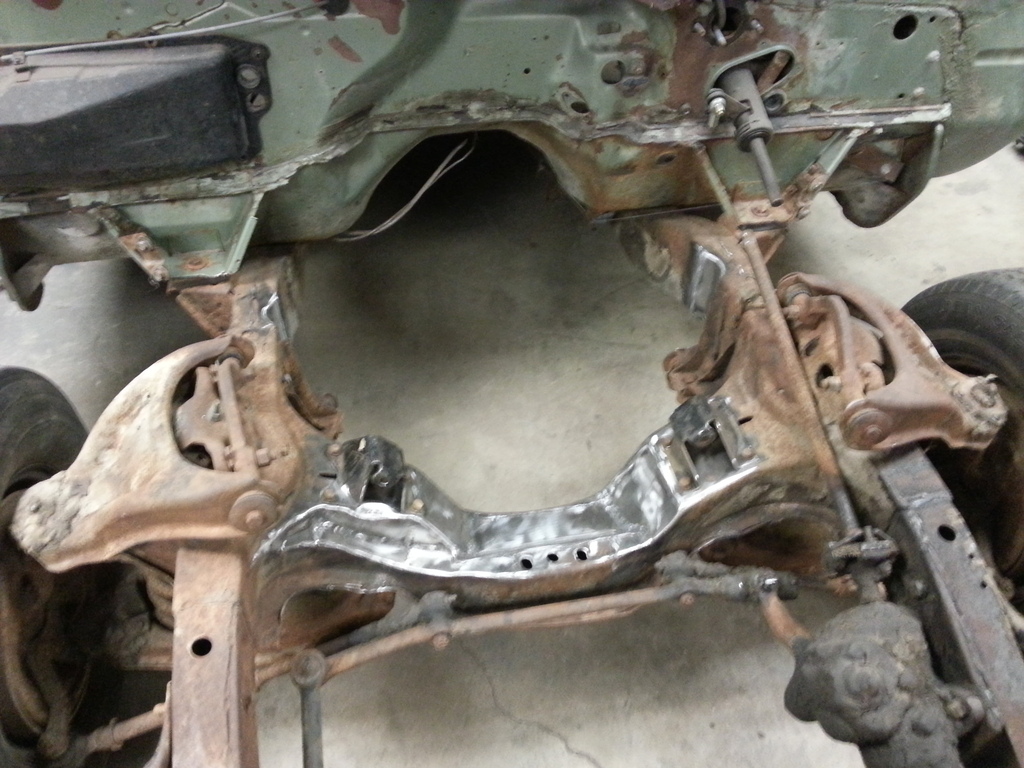
So, when you move the engine forward a half an inch, since the taper on the oil pan is such that it gets bigger the further back it goes, and it does it in a hurry, I had to clearance the frame more than I thought I was going to have to, but I absolutely don't want it hitting anywhere. I kept measuring between the upper control arm bolts, and it's the same now as when I started, although I do think it may need to be pushed out a bit to be able to get my camber where I want it. Going to have to put the drop spindles and discs on and see where it is first.


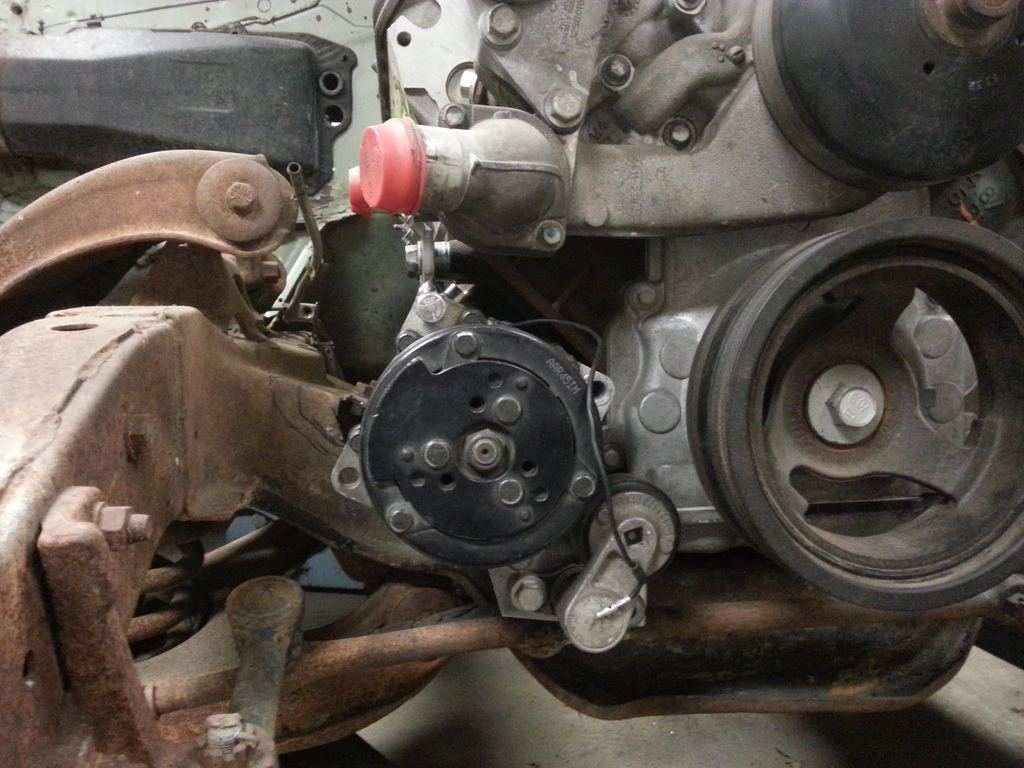
All's well that ends well. This is just a mock up compressor, but looks like I'm going to have enough room for it.

LS1 Tech Stories
The Best V8 Stories One Small Block at Time

Gas Monkey Built a 6-Wheel Ferrari Testarossa With a Corvette LT4 Engine
Verdad Gallardo
7 Most Reliable High-Performance Engines GM Has Ever Built
Verdad Gallardo
Amazing '71 Camaro Restomod Is Modern Muscle Car Under the Skin
Verdad Gallardo
6 Common C5 Corvette Failures and What's Involved In Repairing Them
Pouria Savadkouei
Retro Modern Bandit Pontiac Trans AM Comes With Burt Reynolds' Autograph
Verdad Gallardo
Top 10 Greatest Cadillac V Series Performance Models Ever, Ranked
Pouria Savadkouei
Top 10 Most Powerful Chevy Trucks Ever Made!

Hennessey's New Supercharged Silverado ZR2 Has 700 HP
Verdad Gallardo
Coachbuilt N2A Anteros Is an LS2-Powered C6 Corvette In Italian Clothes
Verdad GallardoI installed the front disc conversion this wekend and measured the camber, and although there is no front clip on it at the moment, I got a pretty good idea of where its going to be. I have 1/2 degree of negative camber on the passenger side and about 1/2 degree positive on the driver's side. I think I can adjust it from there. I'm just really picky on front end alignments after getting several bad ones from shops, so now I just do them myself. ...
I understand how you feel but I think you've been going to the wrong alignment shops. I have a couple I go to, but I'm also picky.
I had to extend the upper control arms on the rear of the Thunderbird so it would align properly. When I brought the car back the following day, the alignment guy couldn't tell I modified them. Hahaha.


I came to a stopping point on the engine install and decided to pull the gas tank to see what kind of shape it was in and whether or not I was going to have to get a new one. My last build was an Arizona truck that had been sitting inside for the last 20 years and the inside of that tank looked like artifacts pulled from the Titanic, so I wasn't expecting much from this one. Luckily they started remaking station wagon tanks in the last year or so.

a little dirty on the outside, but not a lot of rust, and the bolts just came right off with a little PB blaster.

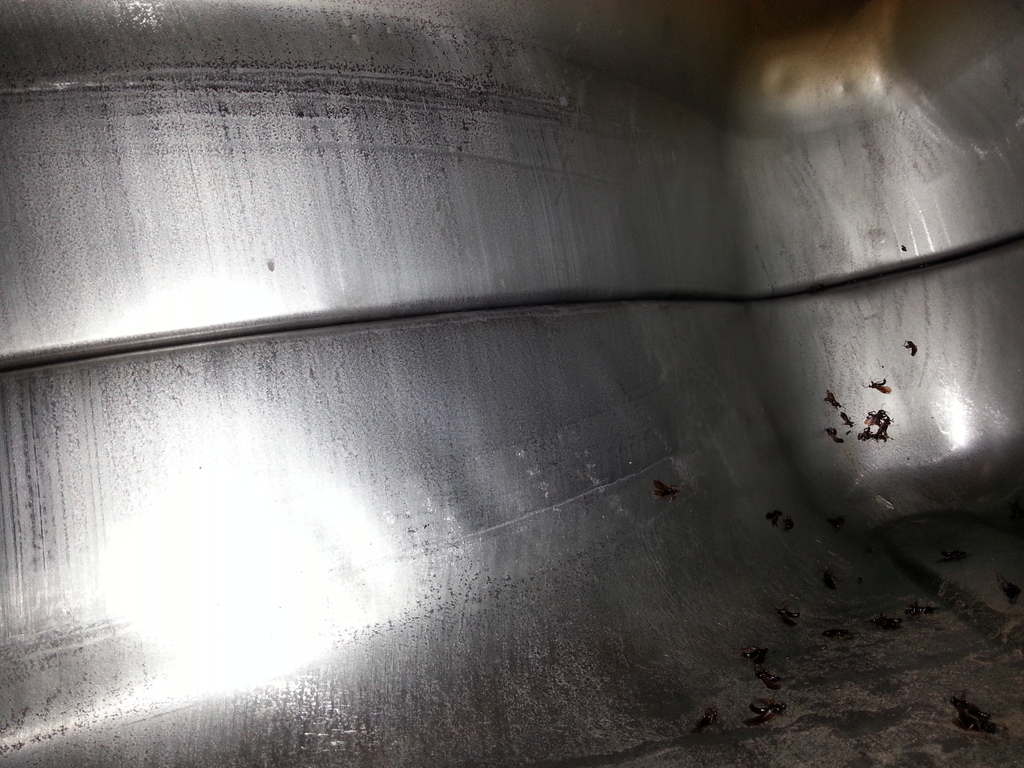
Then I pulled the sender and was shocked! There was a lot of little flying ant looking bugs in there, and it smelled like turpentine, but absolutely no rust what so ever!!!!
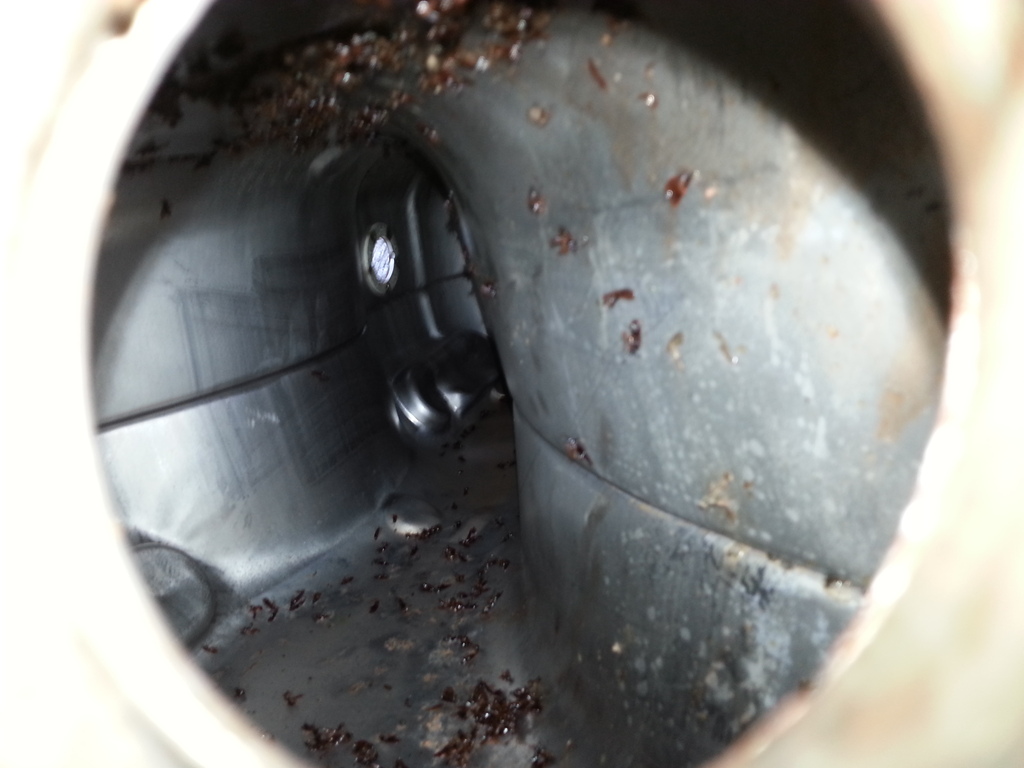
I ended up washing out the bugs with a garden hose, and it looks brand new inside! Almost going to be a shame to cut this up to add a fuel pump. Almost......

a little dirty on the outside, but not a lot of rust, and the bolts just came right off with a little PB blaster.

Then I pulled the sender and was shocked! There was a lot of little flying ant looking bugs in there, and it smelled like turpentine, but absolutely no rust what so ever!!!!

I ended up washing out the bugs with a garden hose, and it looks brand new inside! Almost going to be a shame to cut this up to add a fuel pump. Almost......

With the engine back in, I put the manifolds back on because I knew I was going the have to make a little room for them. They actually fit between the frame rails, but only by the thickness of a piece of paper, that's all you could get between them and the frame on both sides..... Will probably grind down the flange on the manifolds just because too.
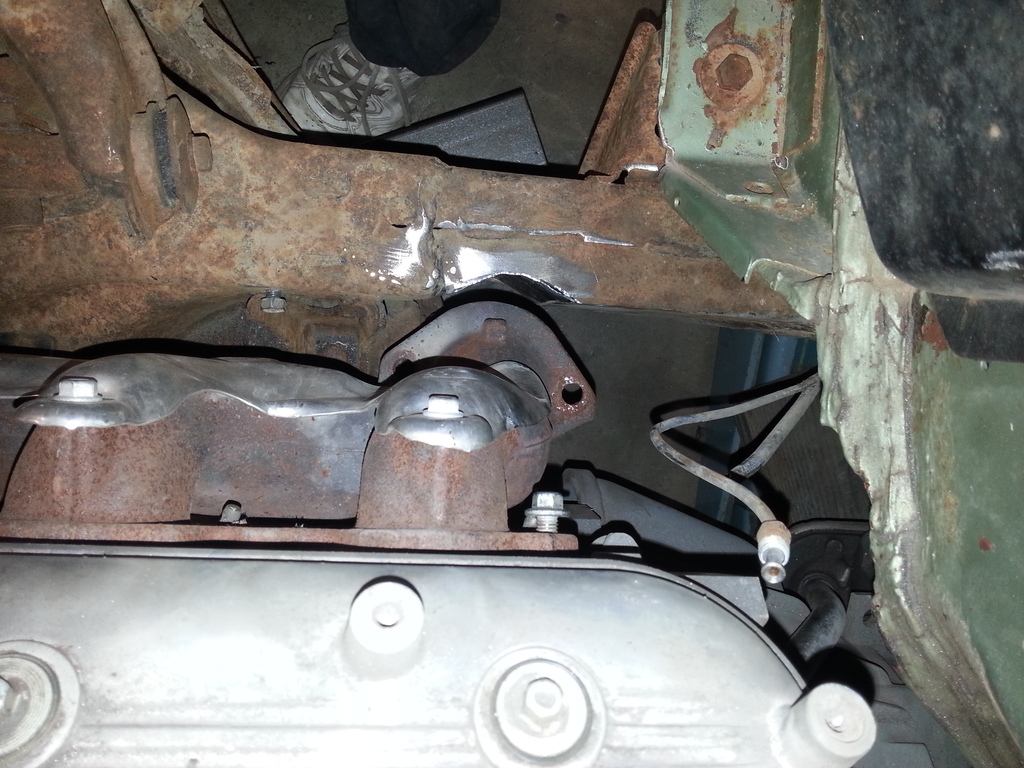
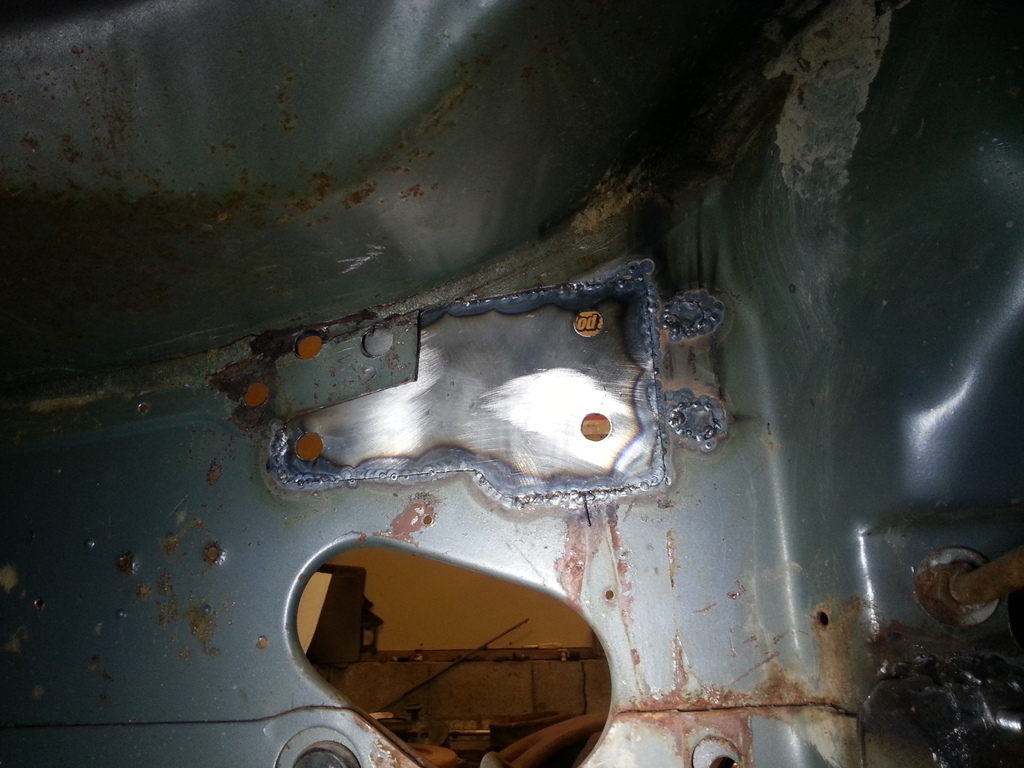
So I notched the frame top and bottom, split it and folded the sides in.
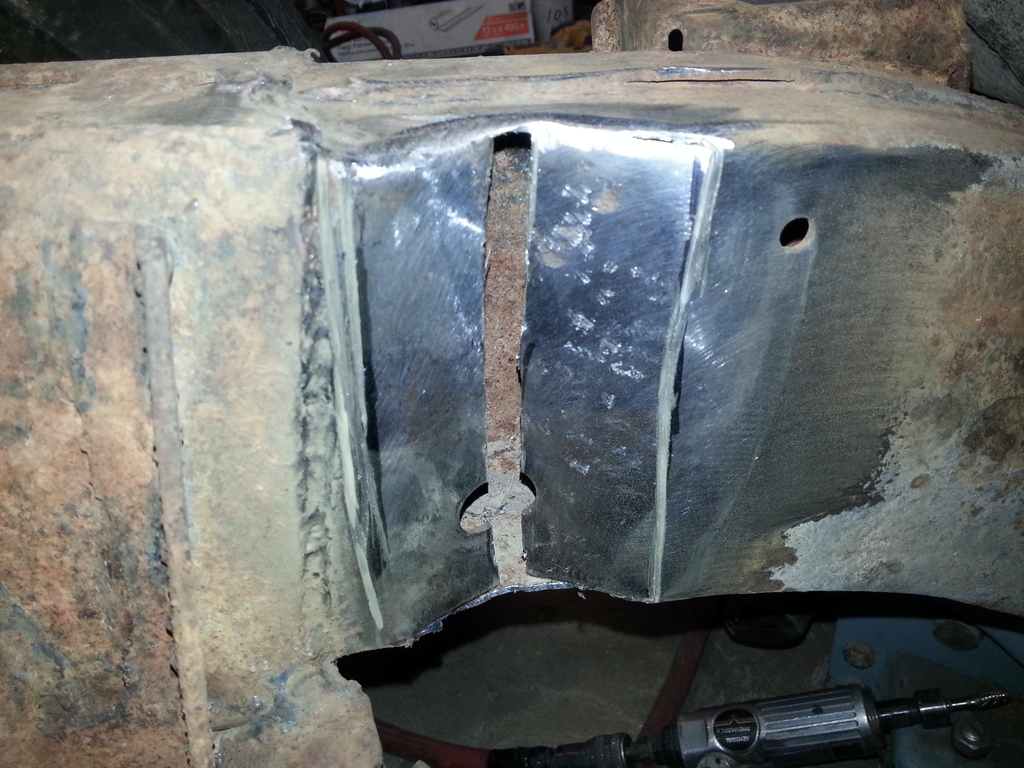
Then put a filler piece in.

Welded it in and ground it down. This is the other side, but you get the idea...

Then cleaned up the engine stands a bit.
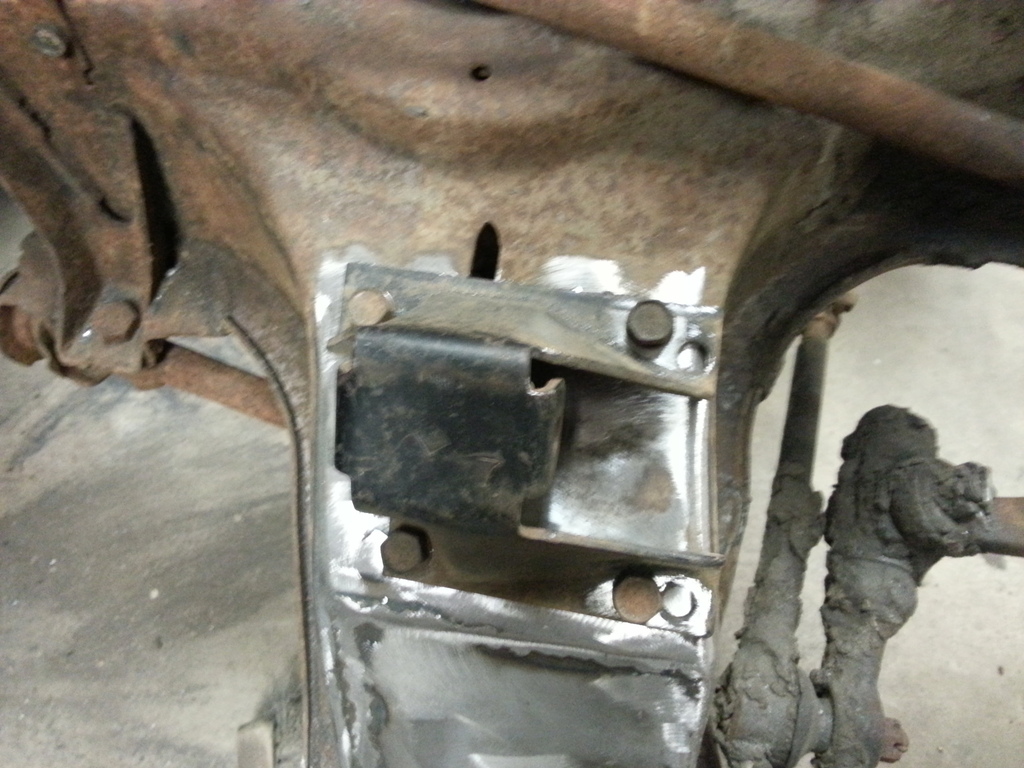
That's better!
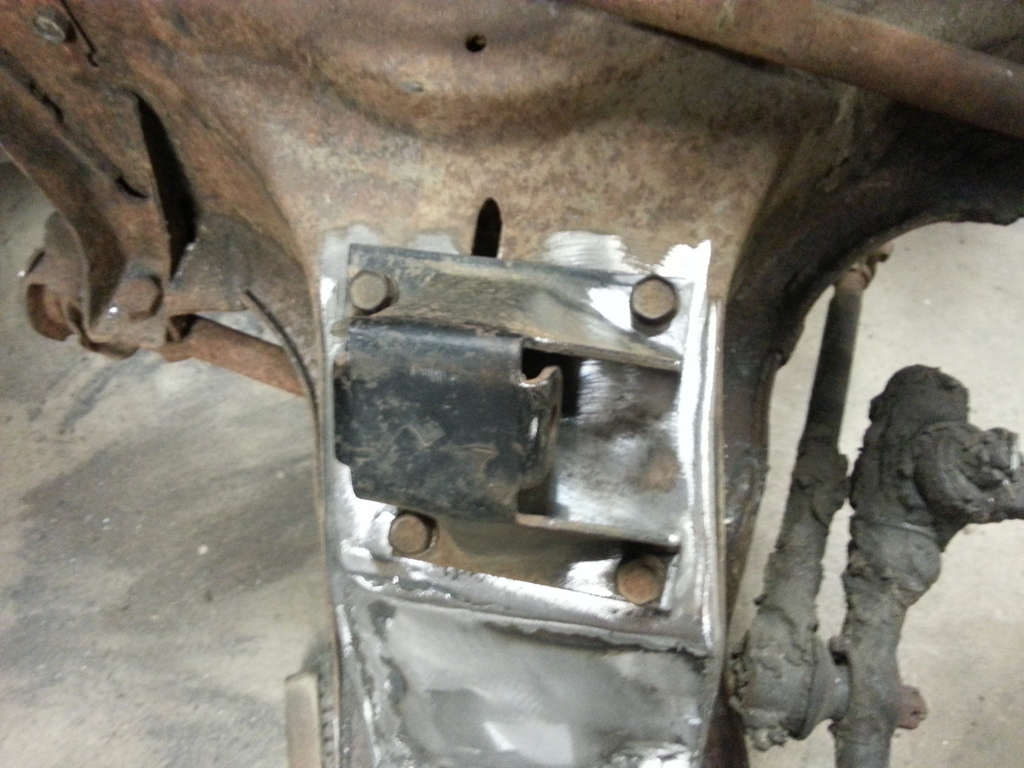
Frame pretty much good to go as far as modifications.
Will probably grind down the flange on the manifolds just because too.
So I notched the frame top and bottom, split it and folded the sides in.

Then put a filler piece in.

Welded it in and ground it down. This is the other side, but you get the idea...

Then cleaned up the engine stands a bit.

That's better!

Frame pretty much good to go as far as modifications.

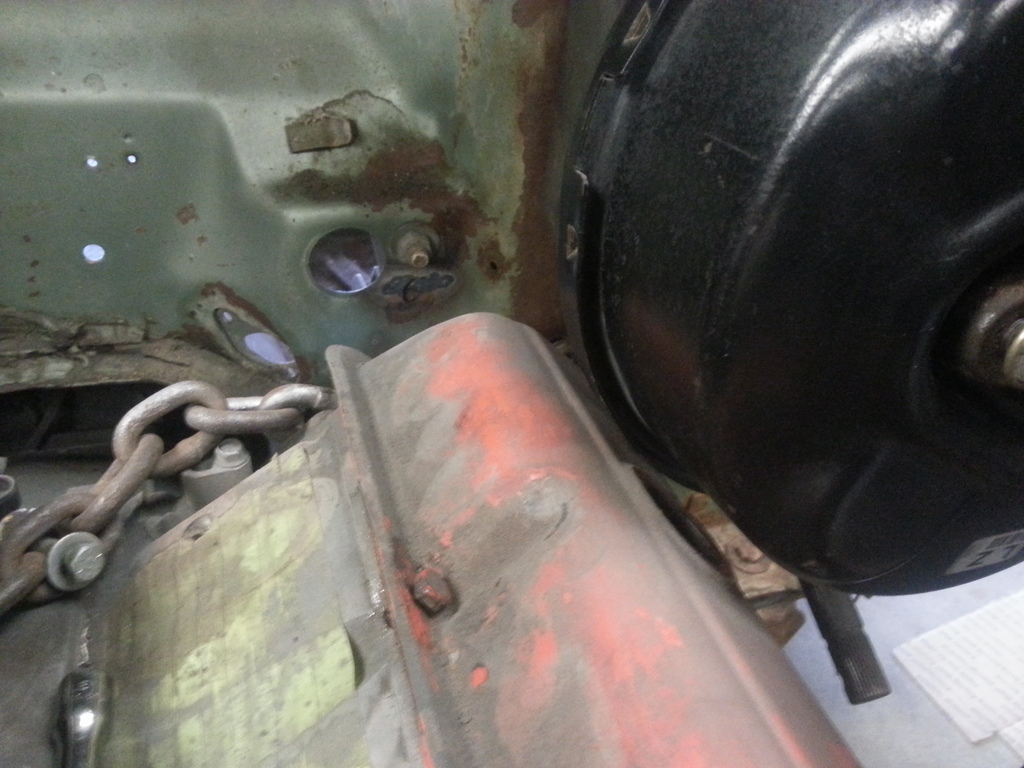
The next "issue" was the brake booster was way too close to the engine. The booster I'm using is off of a 1999 Corvette. I won't use aftermarket boosters again because I have had bad luck with them, like they don't make enough assist to safely stop the car. I am not the only one whose had this problem either, I've heard from several others who's symptoms with the so called "street rod boosters" are the same. So I was determined to get this to work.
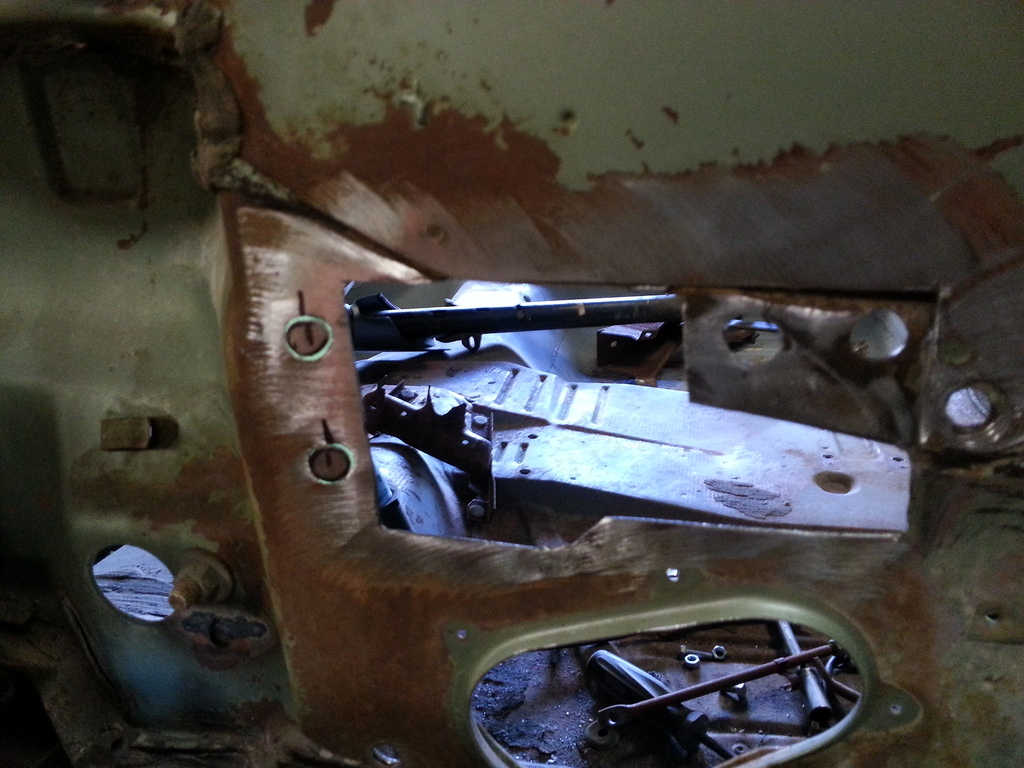
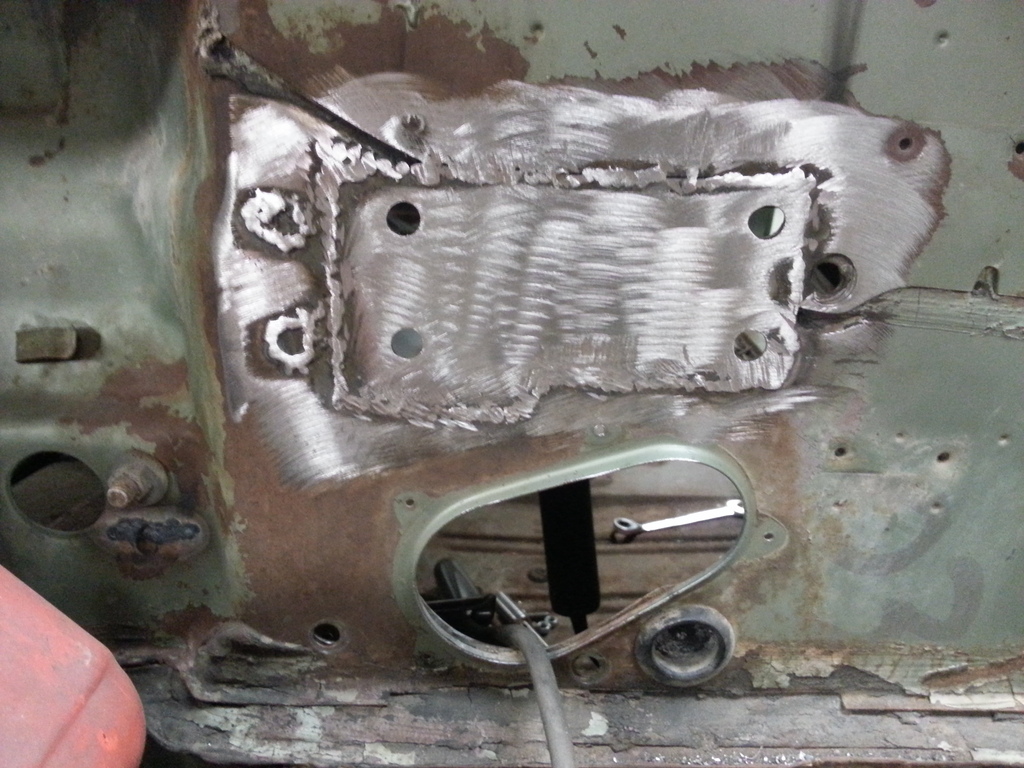
After a couple of failed attempts at making brackets to move the booster, it became clear that just moving the whole thing over a bit was going to be the solution, although not the easiest thing to do. So I cut out the area where I had been drilling holes for the other brackets....
Made a new filler piece.
And welded it in.
Then had to "slightly" modify the brake pedal bracket.
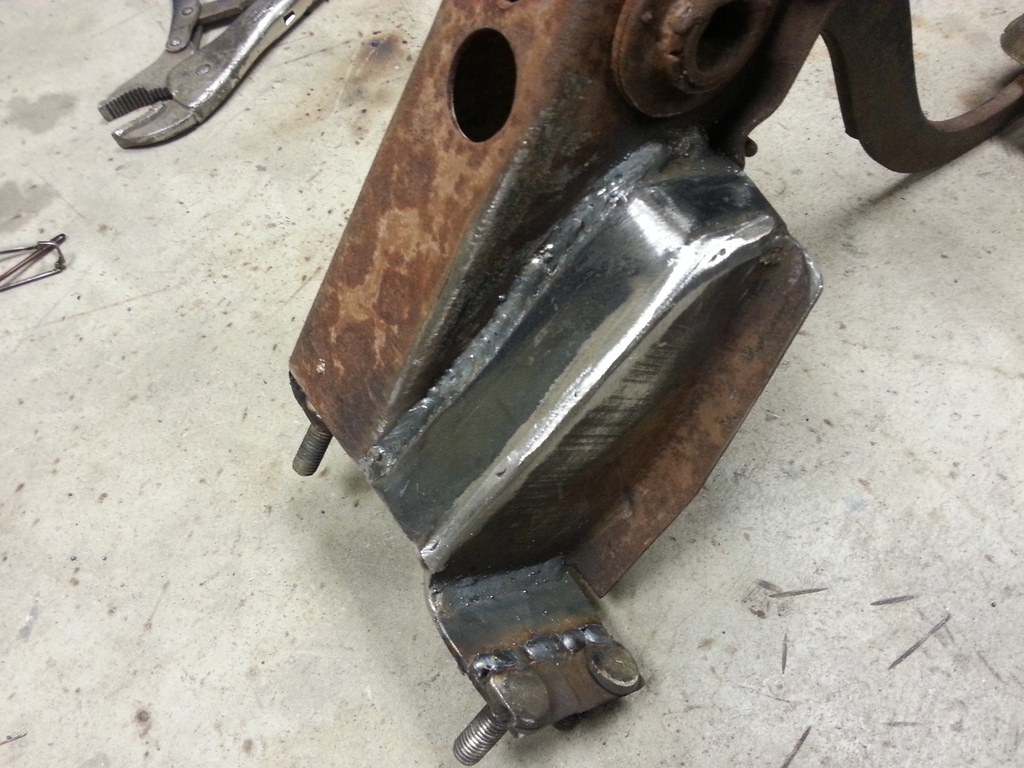
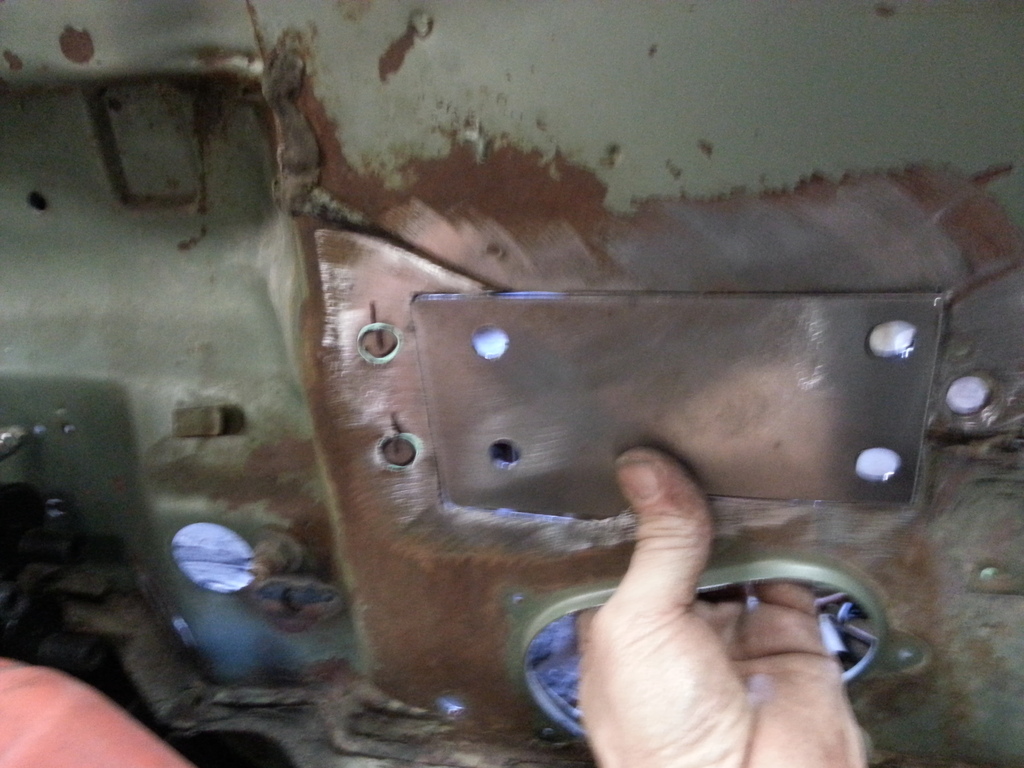
Started making a new brake booster bracket.

This piece is so that the rubber seal on the back of the booster will seal against something.

This piece is welded to the bracket, and the bracket will be sealed to the fire wall so no air or water can leak into the car.
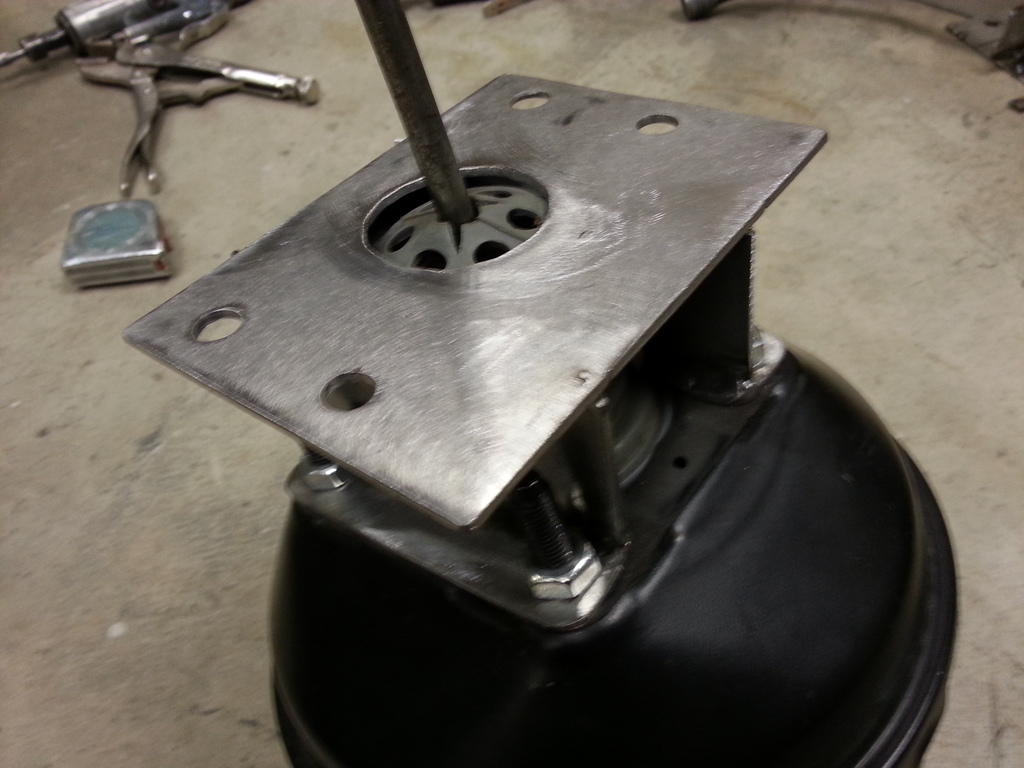
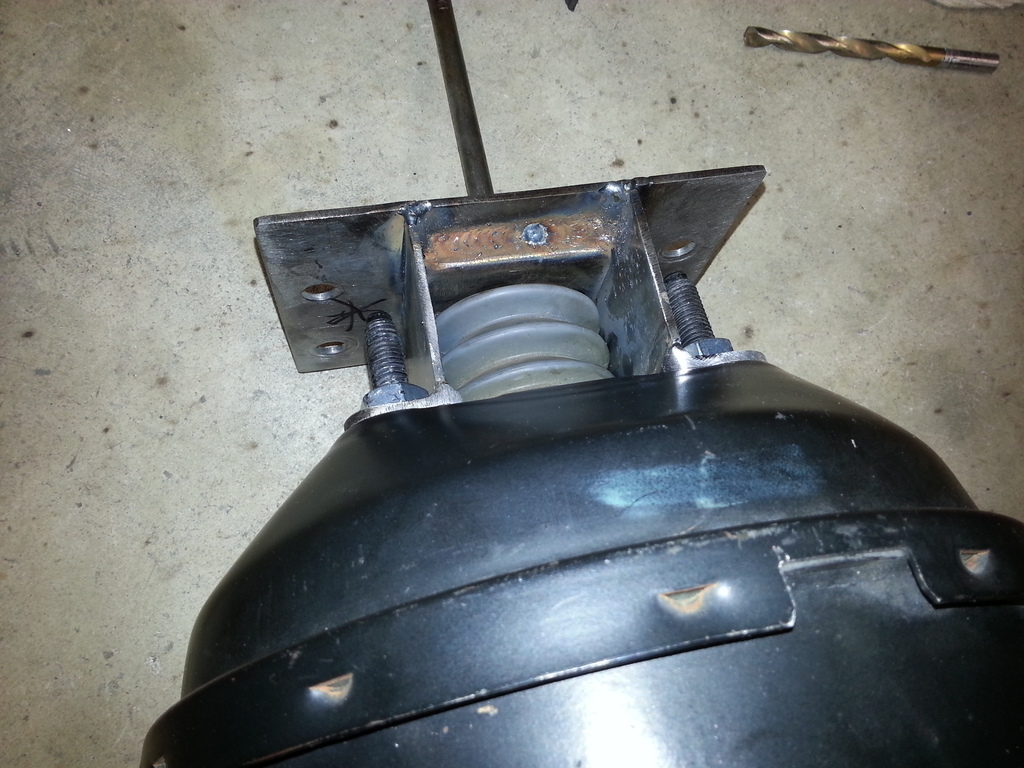
Fitting better now.

Then cut the end off the booster rod and threaded it.
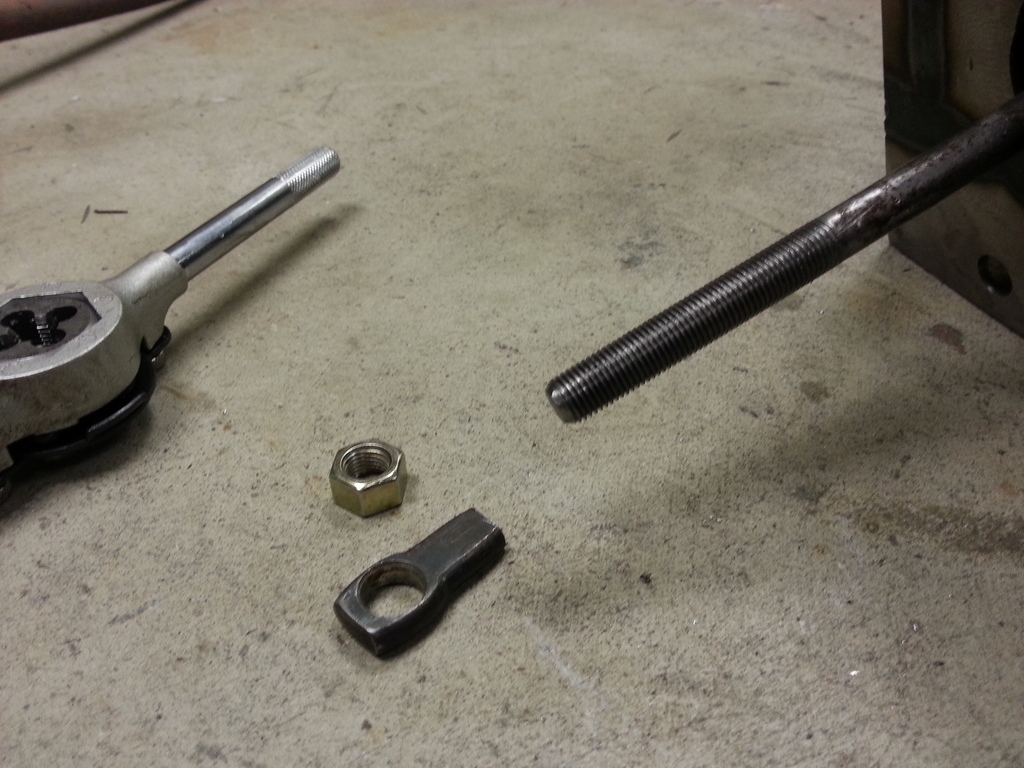
Made a coupler out of a piece of DOM tubing I had lying around.

This is all the pieces to hook it all up.

And put together. The spacer between the brake pedal and the coupler that used to hook to it is threaded, so when it's all put together, the bolt tightens down before it gets tight so it moves freely, then that is bolted to the pedal. If that makes sense?


After a couple of failed attempts at making brackets to move the booster, it became clear that just moving the whole thing over a bit was going to be the solution, although not the easiest thing to do. So I cut out the area where I had been drilling holes for the other brackets....

Made a new filler piece.

And welded it in.


Then had to "slightly" modify the brake pedal bracket.

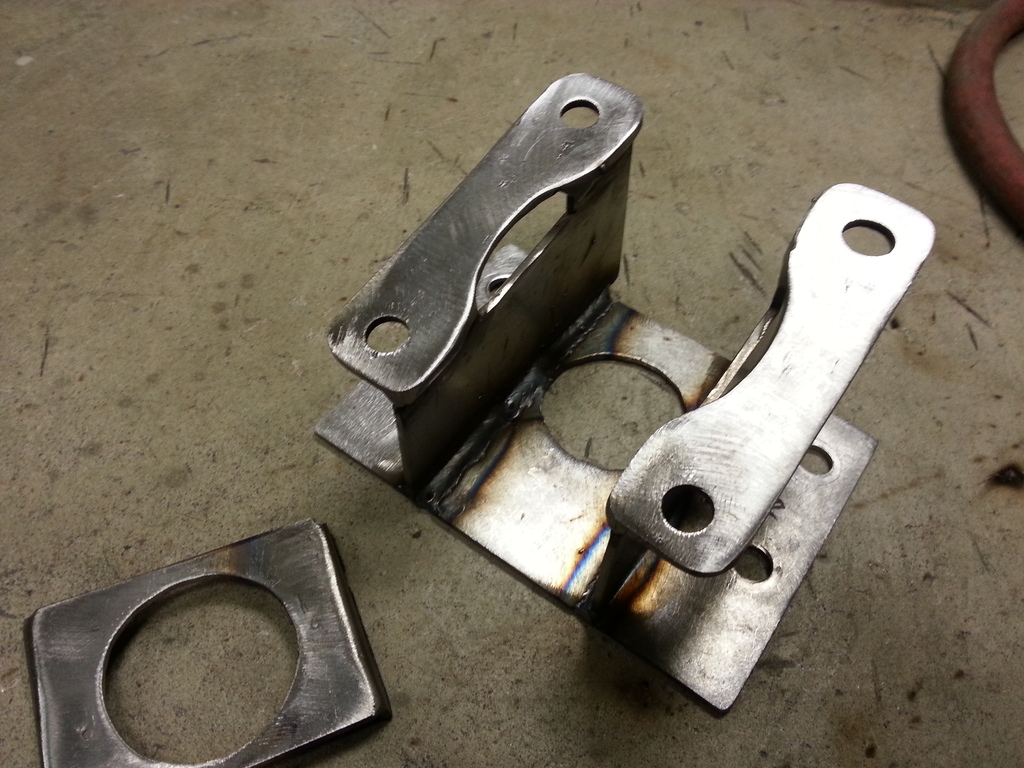
Started making a new brake booster bracket.

This piece is so that the rubber seal on the back of the booster will seal against something.

This piece is welded to the bracket, and the bracket will be sealed to the fire wall so no air or water can leak into the car.


Fitting better now.

Then cut the end off the booster rod and threaded it.

Made a coupler out of a piece of DOM tubing I had lying around.

This is all the pieces to hook it all up.

And put together. The spacer between the brake pedal and the coupler that used to hook to it is threaded, so when it's all put together, the bolt tightens down before it gets tight so it moves freely, then that is bolted to the pedal. If that makes sense?


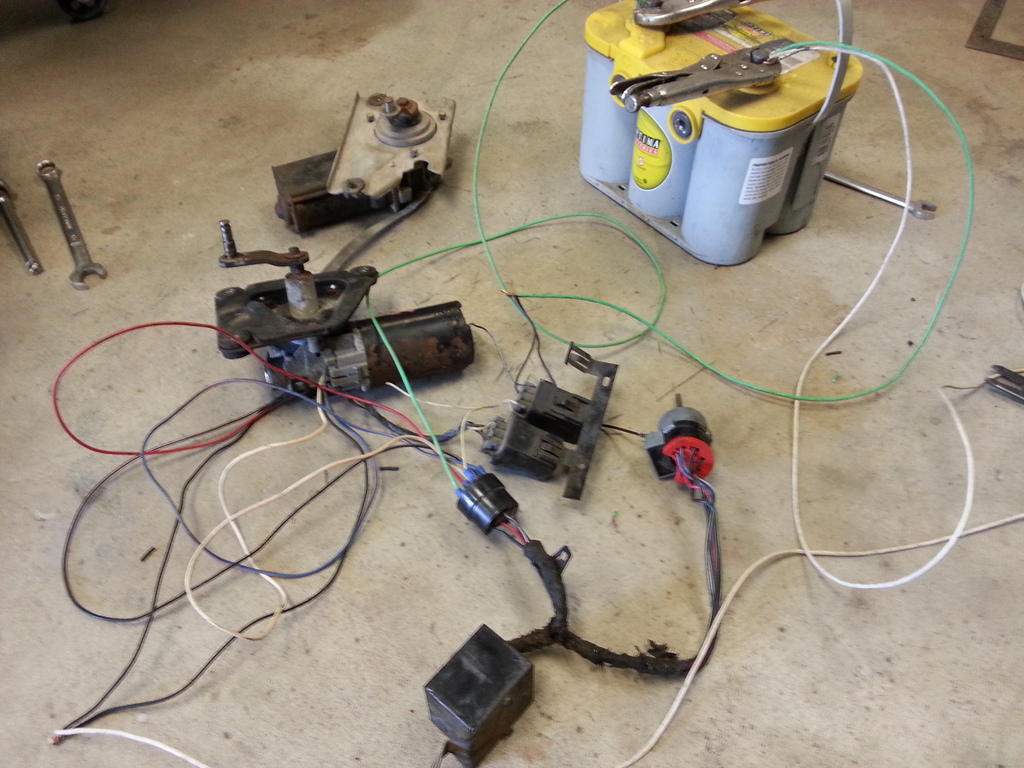
It might seem like I jump around a lot, but that's because I do.....  When I get to a point where things are not going my way, I just move on to something that I think I can finish, so I still feel like I've accomplished something, and then when I go back to whatever was handing my *** to me, I can start with a fresh outlook. That being said, I turned my attention to the windshield wipers. The original wipers were one speed, which if I had to guess, was going to be slow speed! Add to that just about every time I go to a car show out of town it rains at least once, those just were not going to cut it. Adapting a newer wiper motor seemed pretty straight forward, and most of them come with delay which is always nice, but the problem is almost all of them have the switches mounted on the column. What I needed was a rotary switch with delay. I tried taking a switch out of a column and making it work, but it wasn't going to happen and be easy or even really durable. That led me to the Pick n Pull to search out another option. What I found was that Ford trucks from around '84-92 I think, have that switch! So during a sale where all wiper motors were half off, I grabbed one out of a '91 along with the switch, the governor and as much of the wiring as I could get. It cost $25 total, and I figured if I couldn't make it work, I'd just take it back.
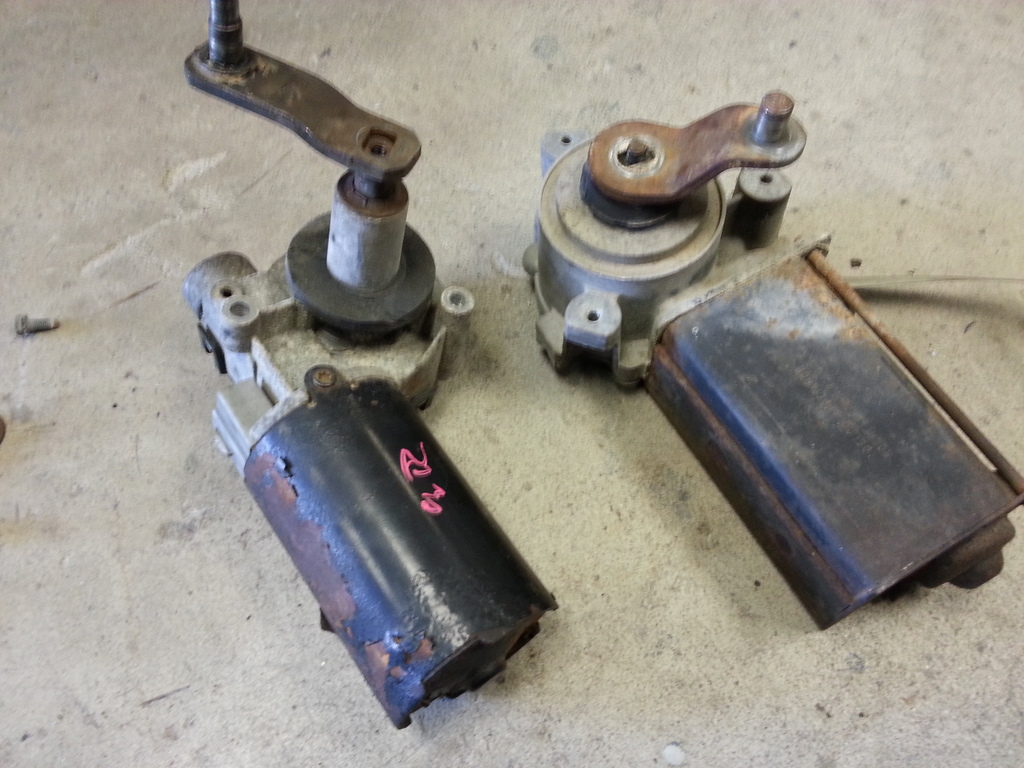
  In this first pic you can see the '59 motor at the top and the '91 motor and switch hooked up to a battery to make sure it worked.
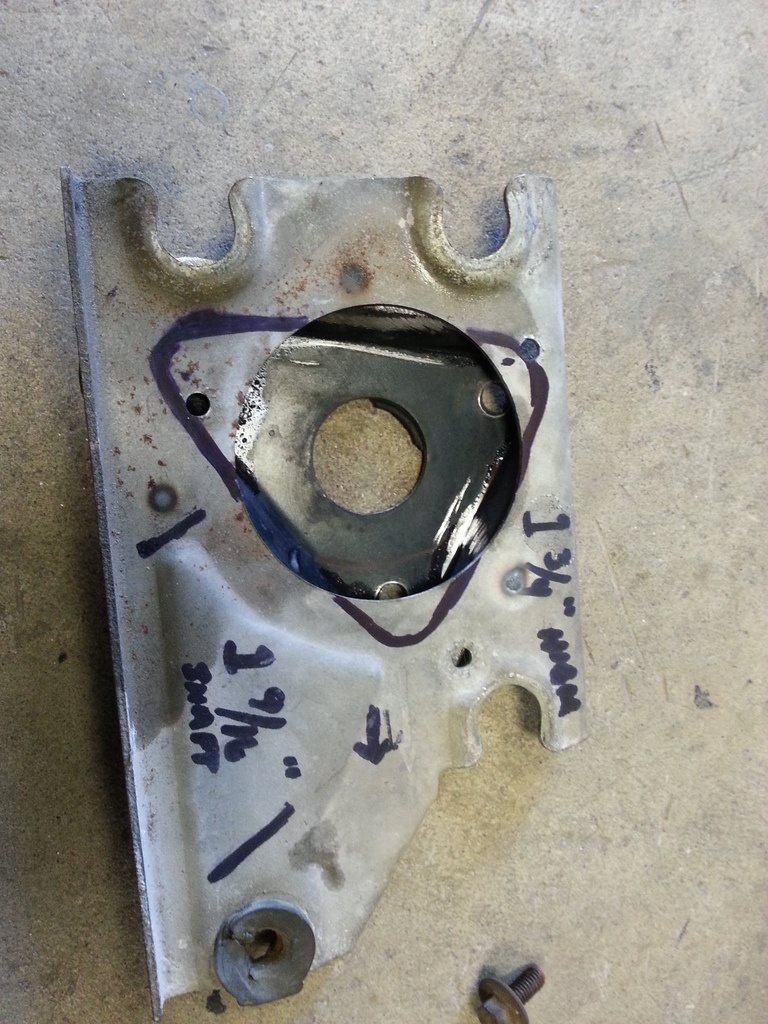
After making sure the motor and switch worked, I took the Ford motor off it's bracket and trimmed it up....
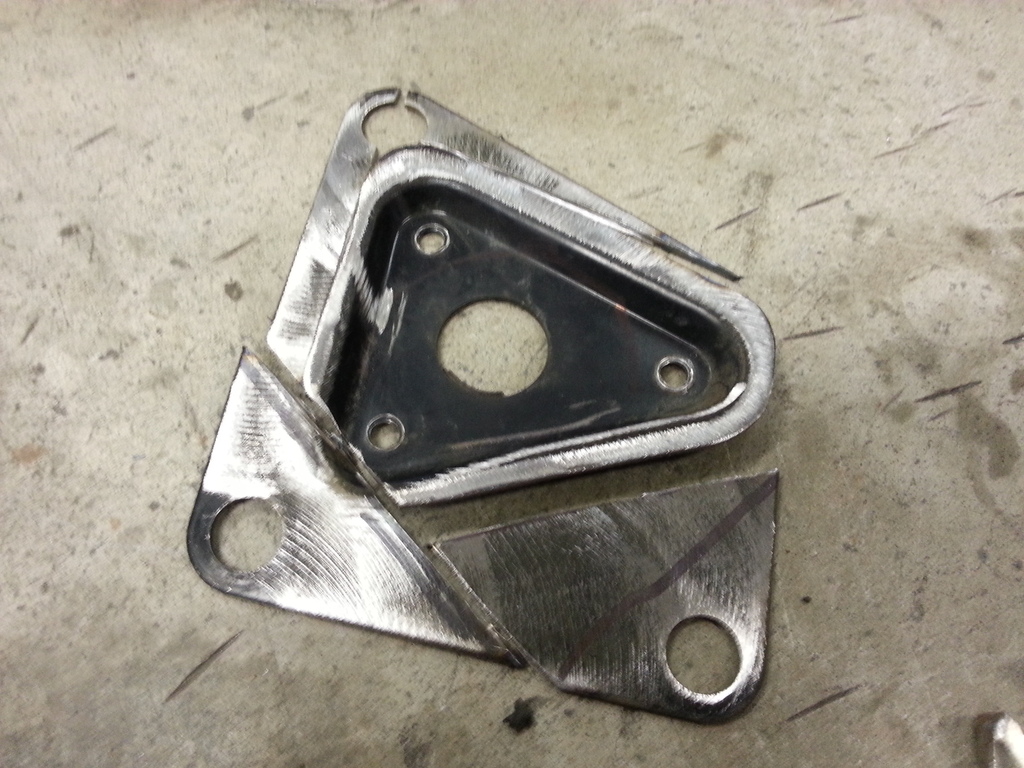
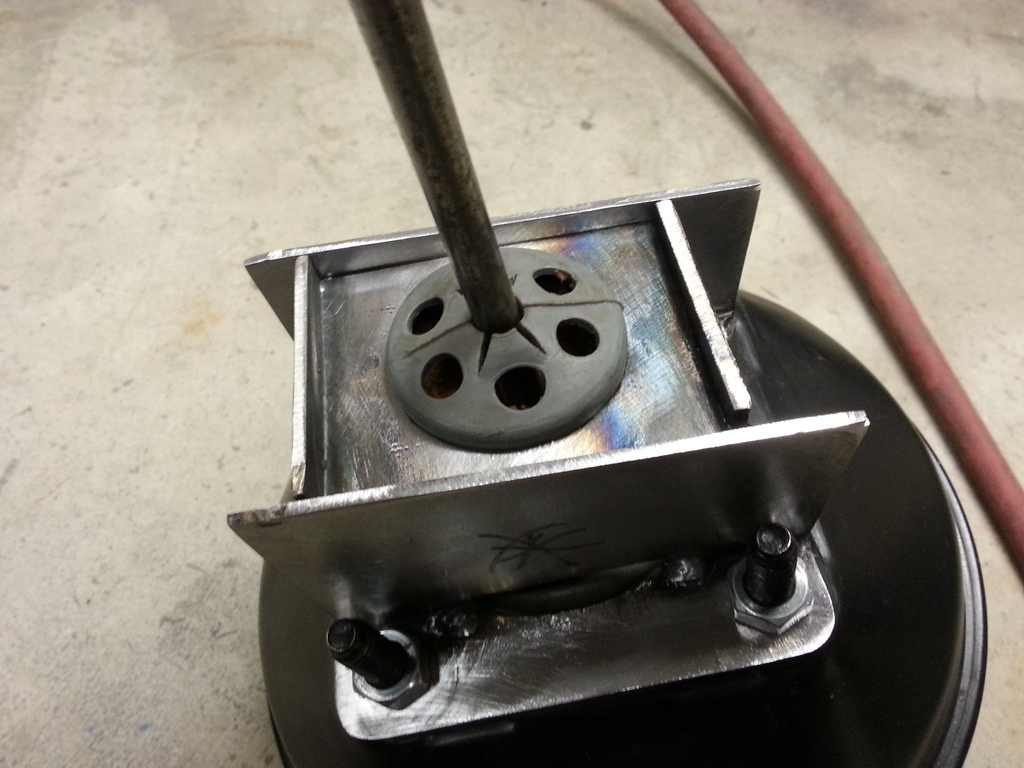
With the mount trimmed up, I centered it on the '59 bracket and clocked it so it wasn't sticking out of the fire wall too much.
Then tack welded them together and test fitted the motor. I guess I didn't take a picture of it final welded together, but it's basically like this, only welded solid. I then had to cut the arms off of both motors, bolted the ford part to the ford motor, then tack welded the '59 arm to it. You just have to make sure that when you're done it's pointing where the '59 one was originally and that it's the same length. Then I took it back off and welded it solid. They work like a charm! I put some tape on the blades to keep from scraping the windshield, and made the quick video. They were making a little noise in the video due to only having 3 of the 4 rubber mounts on the plate, but they are quiet now.

Here's the short video.
When I get to a point where things are not going my way, I just move on to something that I think I can finish, so I still feel like I've accomplished something, and then when I go back to whatever was handing my *** to me, I can start with a fresh outlook. That being said, I turned my attention to the windshield wipers. The original wipers were one speed, which if I had to guess, was going to be slow speed! Add to that just about every time I go to a car show out of town it rains at least once, those just were not going to cut it. Adapting a newer wiper motor seemed pretty straight forward, and most of them come with delay which is always nice, but the problem is almost all of them have the switches mounted on the column. What I needed was a rotary switch with delay. I tried taking a switch out of a column and making it work, but it wasn't going to happen and be easy or even really durable. That led me to the Pick n Pull to search out another option. What I found was that Ford trucks from around '84-92 I think, have that switch! So during a sale where all wiper motors were half off, I grabbed one out of a '91 along with the switch, the governor and as much of the wiring as I could get. It cost $25 total, and I figured if I couldn't make it work, I'd just take it back. In this first pic you can see the '59 motor at the top and the '91 motor and switch hooked up to a battery to make sure it worked.
After making sure the motor and switch worked, I took the Ford motor off it's bracket and trimmed it up....

With the mount trimmed up, I centered it on the '59 bracket and clocked it so it wasn't sticking out of the fire wall too much.

Then tack welded them together and test fitted the motor. I guess I didn't take a picture of it final welded together, but it's basically like this, only welded solid. I then had to cut the arms off of both motors, bolted the ford part to the ford motor, then tack welded the '59 arm to it. You just have to make sure that when you're done it's pointing where the '59 one was originally and that it's the same length. Then I took it back off and welded it solid. They work like a charm! I put some tape on the blades to keep from scraping the windshield, and made the quick video. They were making a little noise in the video due to only having 3 of the 4 rubber mounts on the plate, but they are quiet now.


Here's the short video.