


1959 Biscayne 2 door wagon
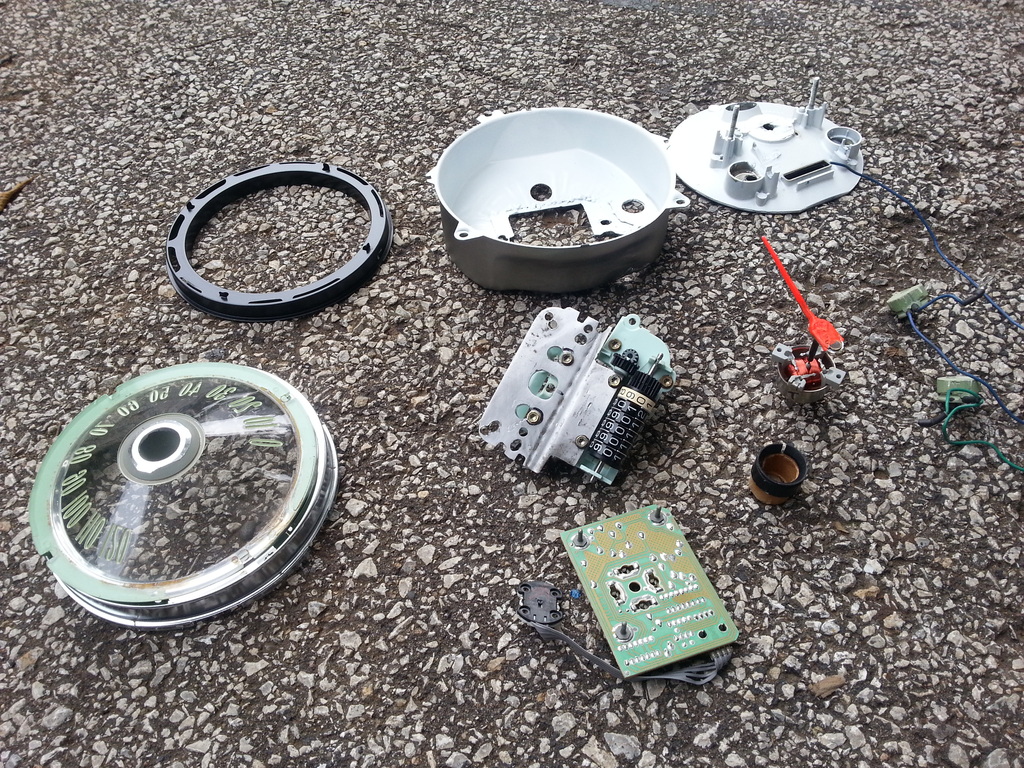
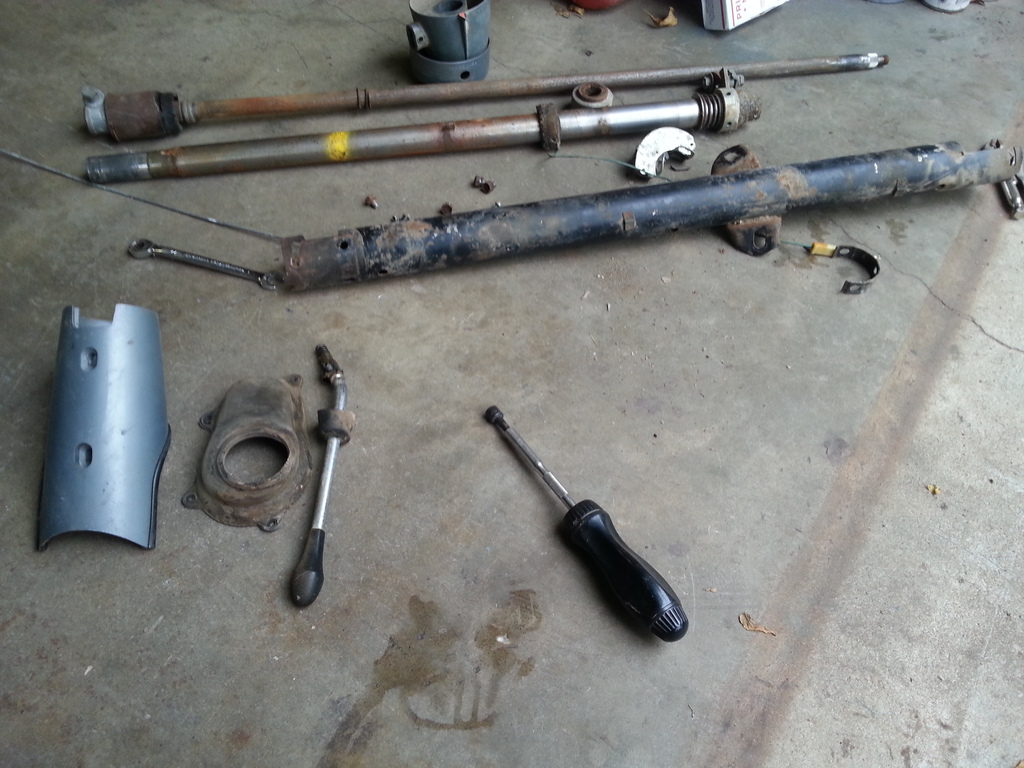
All the parts. I don't have a lot of pics while doing the conversion, because some of the pics I took are no longer relevant, meaning I had to start over a few times! 
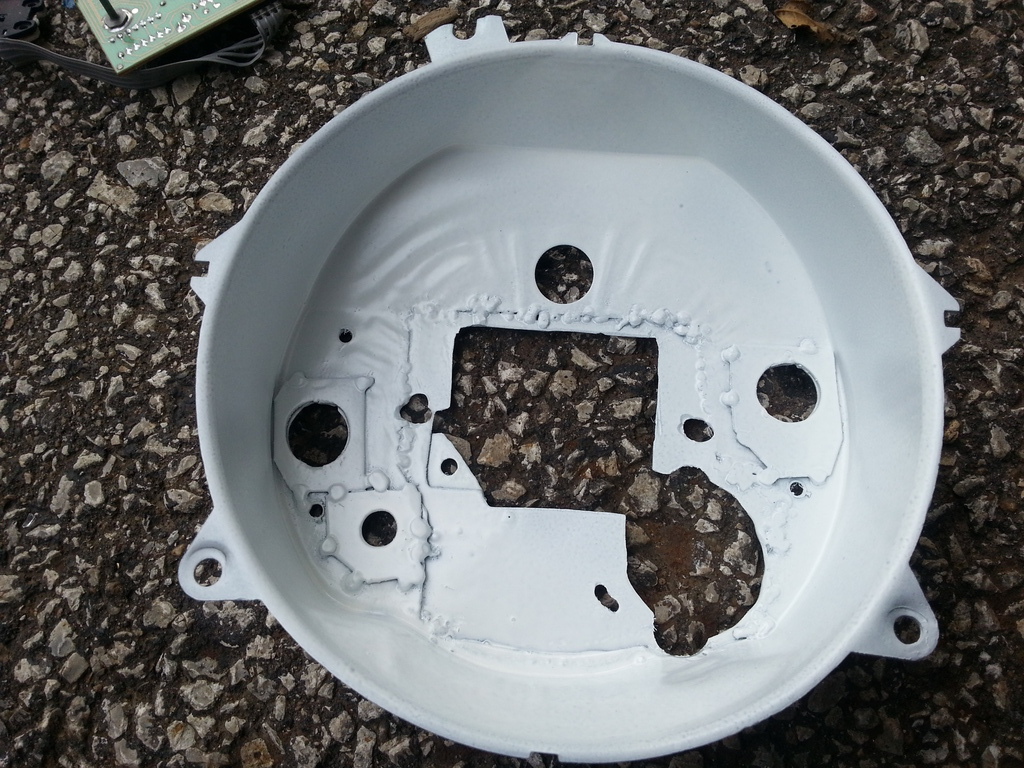
This is the slightly modified housing.
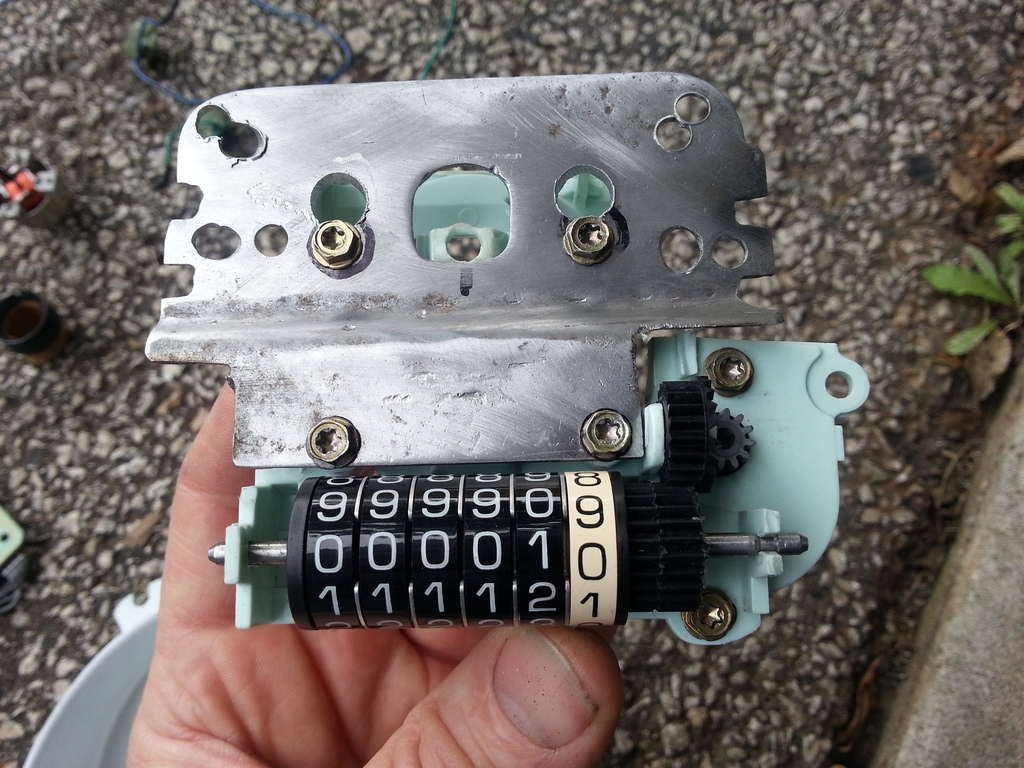
And then there's this hot mess of a bracket. Made several of these, so not sure if this was a final one or not. The problem was the odometer on the '59 is a lot lower than the Corsica one, so I had to cut that part out and move it down a 1/2 inch or so. I ended up using another speedo for parts, so that's why it looks like there's double parts in it. I also removed the first digit in the odometer to make it fit the opening in the speedo face, so now instead of rolling over at a million miles like late model cars, I'm back to rolling over at 100k. I can't take credit for figuring out that part however, a guy I know from another forum was kind enough to turn me onto it. It also requires moving the numbers over a bit and adding another gear to keep in contact with the drive motor.
In this pic you can see where I added LEDs for the turn signals.
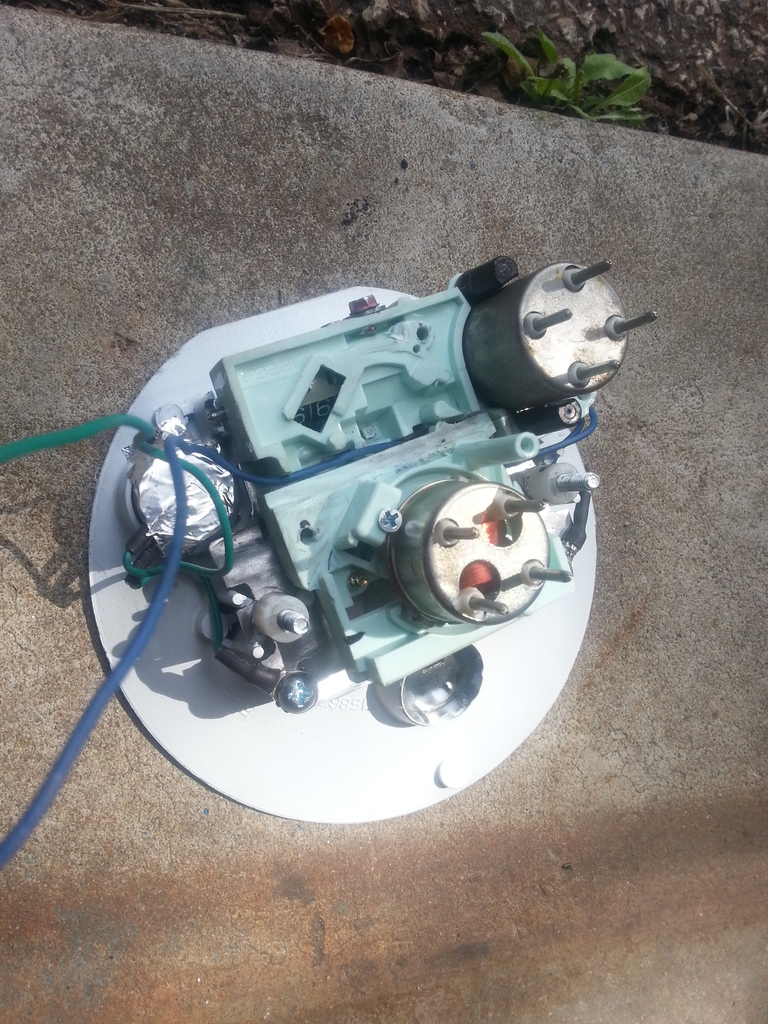
With the circuit board on the back. I made a cover box to cover this up, but don't have a pic at the moment.

With the face back on while going back together. The little hole at the 0 mph mark is for the little plastic stop so that the needle doesn't go out of sight with the key off.

And the finished product! Note that it has 10 miles on it now. I hooked it up to my '03 Sunfire and drove with it a couple of days and actually put over 100 miles on it to make sure it was going to be good to go. Then rolled the odometer back, reassembled it for the final time, then hooked it up in the old Sunfire one more time just to be sure!


This is the slightly modified housing.

And then there's this hot mess of a bracket. Made several of these, so not sure if this was a final one or not. The problem was the odometer on the '59 is a lot lower than the Corsica one, so I had to cut that part out and move it down a 1/2 inch or so. I ended up using another speedo for parts, so that's why it looks like there's double parts in it. I also removed the first digit in the odometer to make it fit the opening in the speedo face, so now instead of rolling over at a million miles like late model cars, I'm back to rolling over at 100k. I can't take credit for figuring out that part however, a guy I know from another forum was kind enough to turn me onto it. It also requires moving the numbers over a bit and adding another gear to keep in contact with the drive motor.

In this pic you can see where I added LEDs for the turn signals.

With the circuit board on the back. I made a cover box to cover this up, but don't have a pic at the moment.

With the face back on while going back together. The little hole at the 0 mph mark is for the little plastic stop so that the needle doesn't go out of sight with the key off.

And the finished product! Note that it has 10 miles on it now. I hooked it up to my '03 Sunfire and drove with it a couple of days and actually put over 100 miles on it to make sure it was going to be good to go. Then rolled the odometer back, reassembled it for the final time, then hooked it up in the old Sunfire one more time just to be sure!

Very cool.
It's little stuff like this you can really burn a lot of time on trying to get everything perfect. I swear I'm going to install a punch clock in my shop to see how many hours I actually dump into my projects. I must be scared though as I've said this for years and never come up with a punch clock. Hahaha.
It's little stuff like this you can really burn a lot of time on trying to get everything perfect. I swear I'm going to install a punch clock in my shop to see how many hours I actually dump into my projects. I must be scared though as I've said this for years and never come up with a punch clock. Hahaha.
I keep trying to update this thread, but every time I try it, I have problems loading pictures..... 
Anyway, when we finally brought the car home, we loaded it on the trailer which went pretty smoothly.
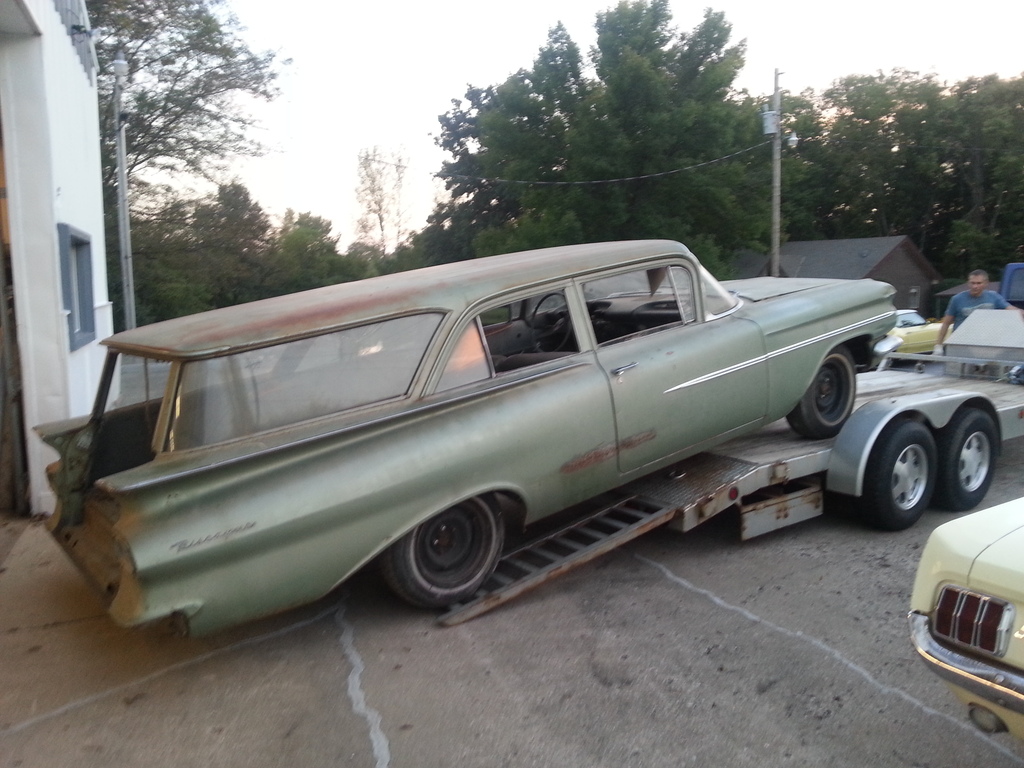
And of course, by the time we got home with it, it was dark.

Then came the task of getting it off the trailer, which usually wouldn't have been any problem, but the car had no brakes what so ever, and I didn't dare push the park brake for fear of them not releasing and making the car immobile. Now we could have used the same winch we loaded it with, but it's painfully slow, and it was late, so we just decided if it rolls off the trailer, it will stop eventually, right? It was a little unnerving since the seat wasn't bolted down either, but it stayed right side up, and the car only rolled 30 feet or so from the trailer.

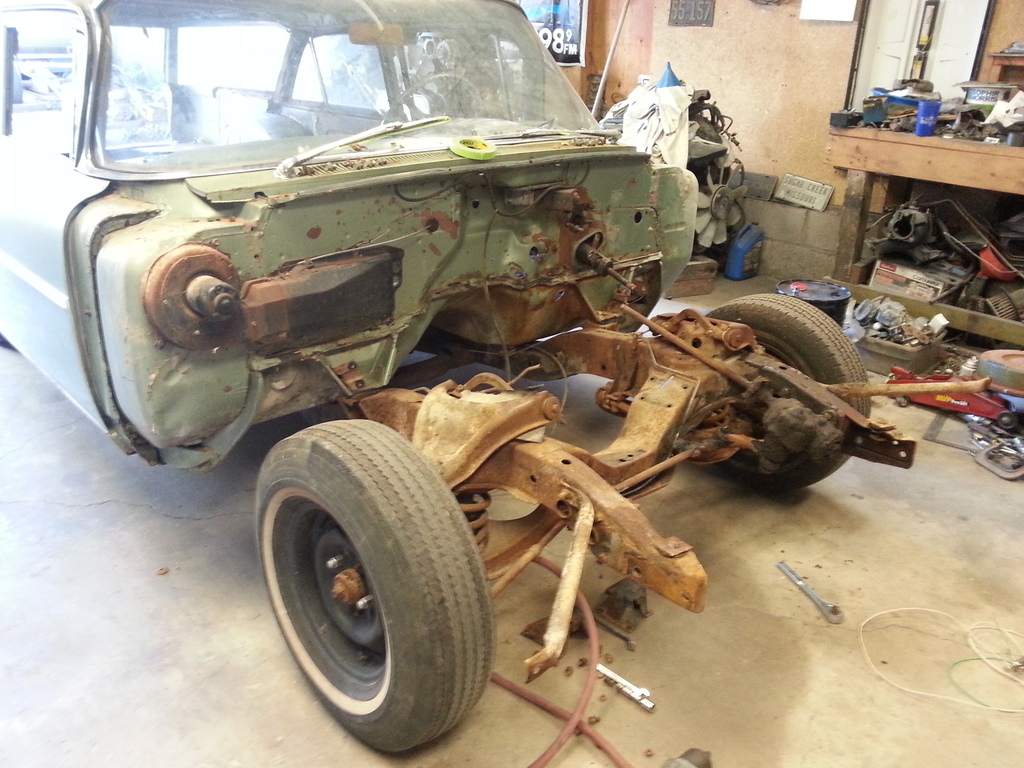
This is the only picture I took of the outside before tearing into it. I was off for the week and wanted to make the most of my time.
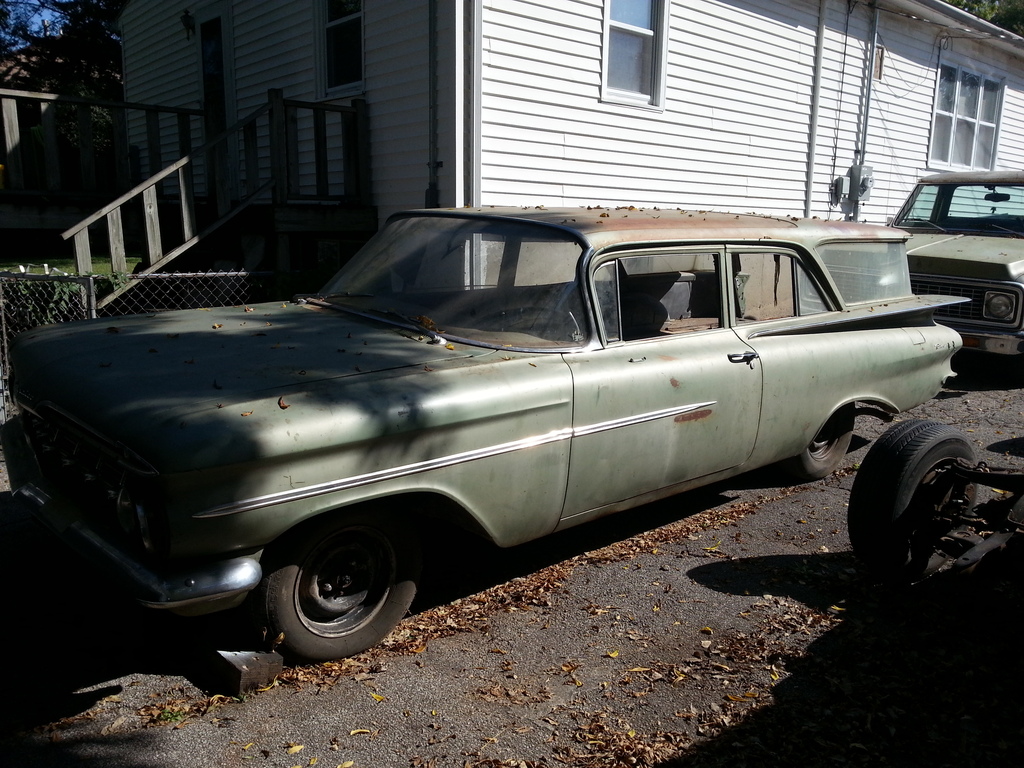
Inside is looking a little rough, but the floors are super solid, nothing hiding here. The left side rear floor pan has been changed for some unknown reason, because the other three are perfect, but for what it's worth, they did a nice job on it, all butt welded in and nothing overlapped. It has a few spots that need finish welded, but that's easy enough.


And this is where the old 6 cylinder/powerglide used to live. If you know anything about these cars, you will notice that it has factory windshield washers and a one speed wiper motor, seems like an odd combo?

Anyway, when we finally brought the car home, we loaded it on the trailer which went pretty smoothly.

And of course, by the time we got home with it, it was dark.

Then came the task of getting it off the trailer, which usually wouldn't have been any problem, but the car had no brakes what so ever, and I didn't dare push the park brake for fear of them not releasing and making the car immobile. Now we could have used the same winch we loaded it with, but it's painfully slow, and it was late, so we just decided if it rolls off the trailer, it will stop eventually, right?
It was a little unnerving since the seat wasn't bolted down either, but it stayed right side up, and the car only rolled 30 feet or so from the trailer.
This is the only picture I took of the outside before tearing into it. I was off for the week and wanted to make the most of my time.

Inside is looking a little rough, but the floors are super solid, nothing hiding here. The left side rear floor pan has been changed for some unknown reason, because the other three are perfect, but for what it's worth, they did a nice job on it, all butt welded in and nothing overlapped. It has a few spots that need finish welded, but that's easy enough.


And this is where the old 6 cylinder/powerglide used to live. If you know anything about these cars, you will notice that it has factory windshield washers and a one speed wiper motor, seems like an odd combo?

I never have problems posting pictures, but I hate photobucket's intermittent quirkiness and host them on my own domain.
That does seem like an odd combo. I can't say I've ever seen washer with a single speed wiper. Something I love about old Chevrolet cars is the ability to choose which options you wanted and leave the ones you didn't. Everything today is about packages.
The car looks super solid by the way. That's awesome.
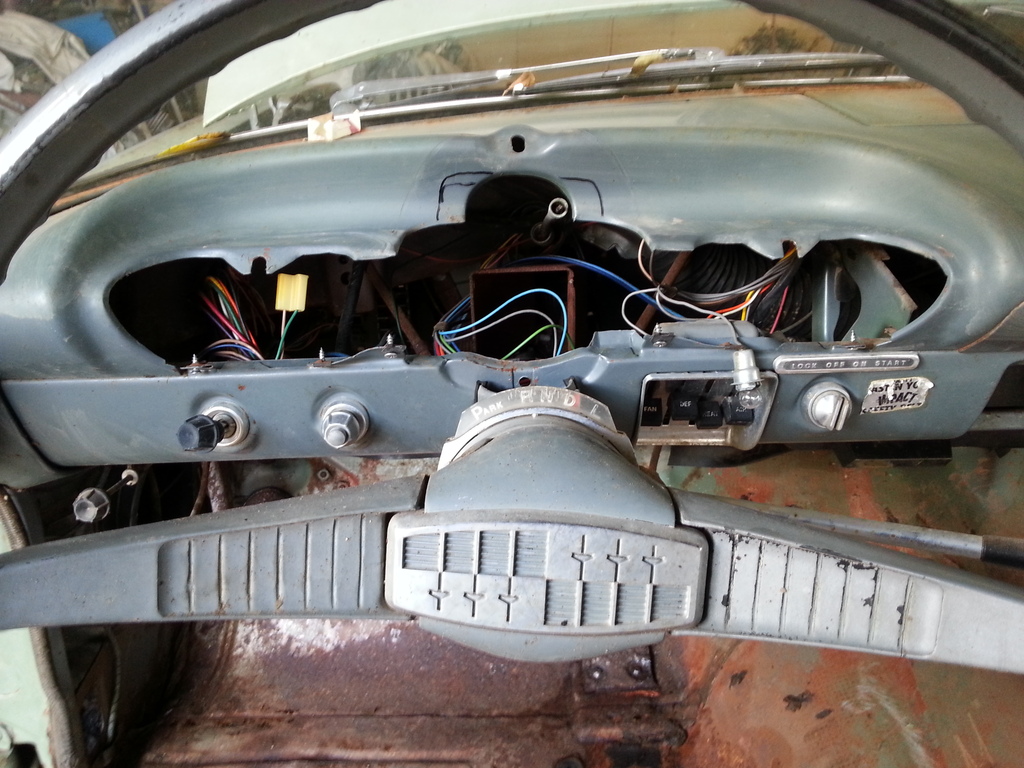
The tear down continues. In this pic you can see the car was an automatic and has the deluxe heater, the 4 lever control one. Also notice the "Fasten your impact safety device" sticker on the dash. I tried to get them off, but they wouldn't come off in one piece.... 
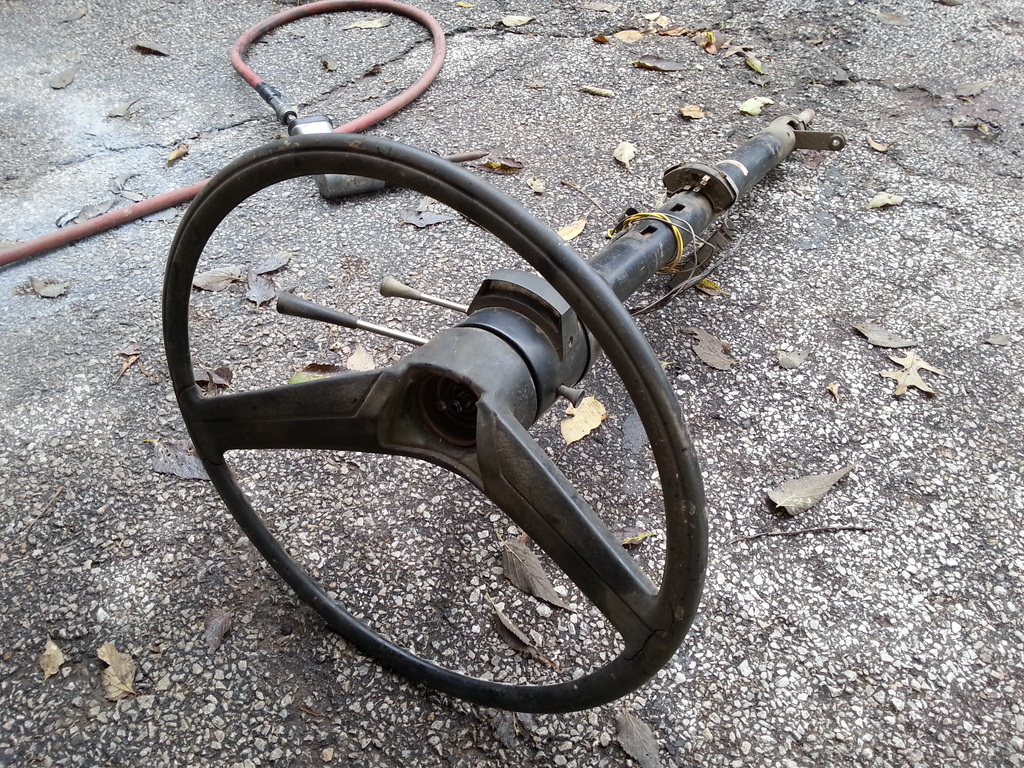
Tearing the old column apart to get some parts off of it that I will put on the new column.

Here's the reason it didn't have any brakes. That brake line doesn't go to anything.....

Well, I think I found the source of the smell in the car, or at least part of it anyway!

Tilt column out of a mid 70's Chevy van.
Taking both columns apart. Already have the '59 column mounting bracket bolted to the van column in this pic.
When you get to this point, you have to stop, there isn't any more to take apart.
Need to trim this cover back a bit to keep the column from being too close to the driver.

Bad pic of what it looks like installed. I stopped working on the column at this point. Since I know it will fit now, it's just a matter of rebuilding and painting it, so that's the easy part.

Moved on to mounting the gas pedal. Just fabbed up a bracket to bolt it to and welded it to the firewall. Quick and easy.
Cut a gas pedal off of a '72 truck and welded it to the DBW pedal.

Might run the wires through the hole left behind from taking the speedometer cable out....


Tearing the old column apart to get some parts off of it that I will put on the new column.

Here's the reason it didn't have any brakes. That brake line doesn't go to anything.....

Well, I think I found the source of the smell in the car, or at least part of it anyway!

Tilt column out of a mid 70's Chevy van.

Taking both columns apart. Already have the '59 column mounting bracket bolted to the van column in this pic.

When you get to this point, you have to stop, there isn't any more to take apart.

Need to trim this cover back a bit to keep the column from being too close to the driver.

Bad pic of what it looks like installed. I stopped working on the column at this point. Since I know it will fit now, it's just a matter of rebuilding and painting it, so that's the easy part.

Moved on to mounting the gas pedal. Just fabbed up a bracket to bolt it to and welded it to the firewall. Quick and easy.

Cut a gas pedal off of a '72 truck and welded it to the DBW pedal.

Might run the wires through the hole left behind from taking the speedometer cable out....

LS1 Tech Stories
The Best V8 Stories One Small Block at Time

6 Common C5 Corvette Failures and What's Involved In Repairing Them
Pouria Savadkouei
Retro Modern Bandit Pontiac Trans AM Comes With Burt Reynolds' Autograph
Verdad Gallardo
Top 10 Greatest Cadillac V Series Performance Models Ever, Ranked
Pouria Savadkouei
Top 10 Most Powerful Chevy Trucks Ever Made!

Hennessey's New Supercharged Silverado ZR2 Has 700 HP
Verdad Gallardo
Coachbuilt N2A Anteros Is an LS2-Powered C6 Corvette In Italian Clothes
Verdad Gallardo
Awesome K5 Blazer Restomod Comes With C7 Corvette Power
Verdad Gallardo
10 Camaros You Should Never Buy

10 LS Engine Myths That Refuse to Die
Verdad Gallardo


Launching!
Joined: Jul 2016
Posts: 286
Likes: 6
Yeah, this is one of the coolest vehicles that I've seen on this site for a while now!!


Well, I tried to find another picture hosting site before I started this thread, but apparently I didn't look hard enough.....  But it will have to work for now.
Got the front clip pulled to make trial fitting the engine a lot easier. I knew it would be in and out about a hundred times before all was said and done, and when you're working by yourself, this is way easier than going in over a core support.
A buddy came over as I was unbolting everything and he helped me get the front clip in the back yard.

And here's the engine. The infamous Midway engine I bought like 6 years ago. Some of you may remember the debacle it was when I bought it and another engine, but at todays prices, I did get it for a steal. It's a 2007 5.3 out of a Silverado Classic with 17k on it. I paid $1650 for the complete lift out, not bad with that kind of mileage I don't think. That isn't the intake that came on it, it's in my basement. I had taken the engine apart to mock it up in another truck at one point but got another engine for it, so this one has been sitting in the garage ever since. It has gotten kind of dusty, but it's been sealed up so should be alright.
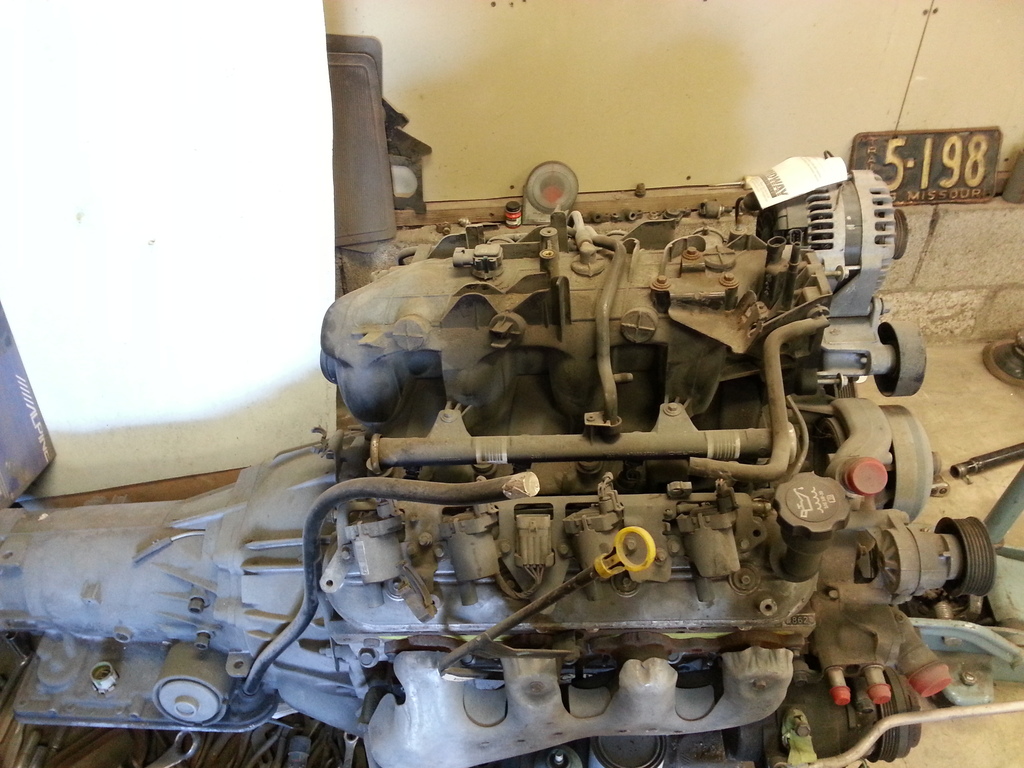
Looks like a legit low mile engine to me, what do you think?

Clean!!!
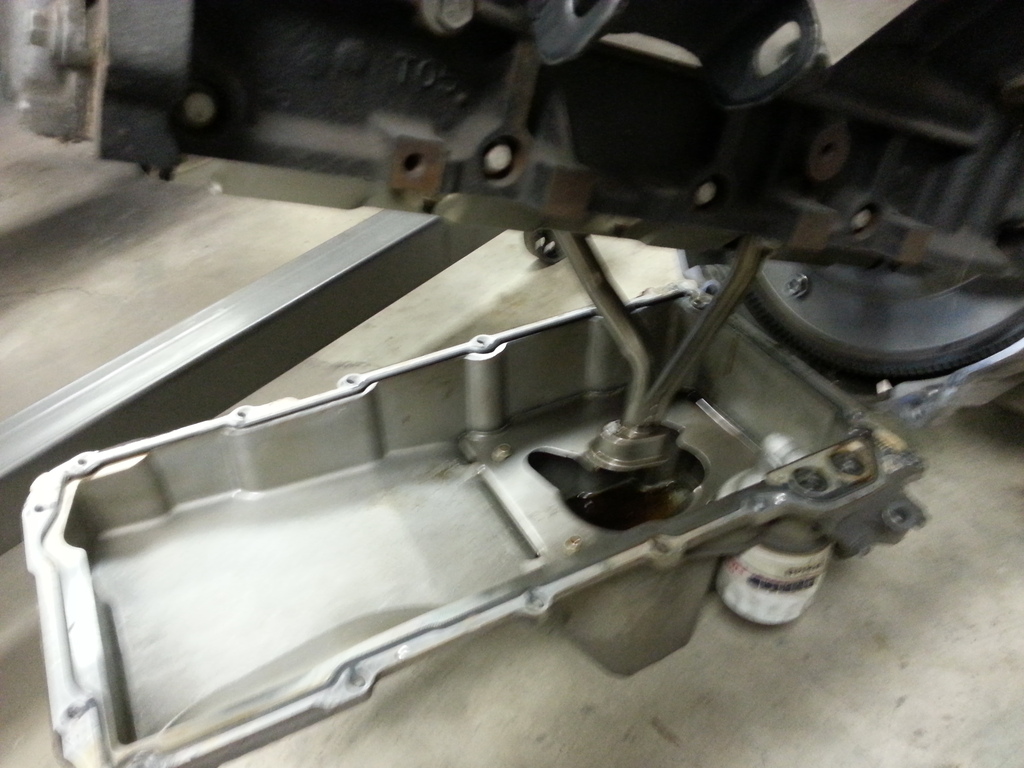
The '98-02 F body oil pan and pick up tube, cleaned up and ready to go.

Bought my first ever set of conversion mounts off of eBay. I usually make my own mounts, but at $24 shipped, it's not worth the hassle to try and make these. As a side note, they had a 'buy it now' of $25 or best offer. I made 3 offers starting at $20 and it didn't take any of them, then locked me out of that auction, so I had to go to another one of the companies other auctions and try again, got them for $24. Really??? The best offer they will take is a dollar off? Geeze!!!

Off road use only? Riiiiiiiiiiiiiiight! I'll be sure to keep it off the road....

First trial fit of the engine. I have helped a couple guys do LS's in 59's before, so knew about what to expect, but I'm going to be changing it up a bit, so it won't be the same old boring deal.


But it will have to work for now.Got the front clip pulled to make trial fitting the engine a lot easier. I knew it would be in and out about a hundred times before all was said and done, and when you're working by yourself, this is way easier than going in over a core support.

A buddy came over as I was unbolting everything and he helped me get the front clip in the back yard.

And here's the engine. The infamous Midway engine I bought like 6 years ago. Some of you may remember the debacle it was when I bought it and another engine, but at todays prices, I did get it for a steal. It's a 2007 5.3 out of a Silverado Classic with 17k on it. I paid $1650 for the complete lift out, not bad with that kind of mileage I don't think. That isn't the intake that came on it, it's in my basement. I had taken the engine apart to mock it up in another truck at one point but got another engine for it, so this one has been sitting in the garage ever since. It has gotten kind of dusty, but it's been sealed up so should be alright.

Looks like a legit low mile engine to me, what do you think?

Clean!!!

The '98-02 F body oil pan and pick up tube, cleaned up and ready to go.

Bought my first ever set of conversion mounts off of eBay. I usually make my own mounts, but at $24 shipped, it's not worth the hassle to try and make these. As a side note, they had a 'buy it now' of $25 or best offer. I made 3 offers starting at $20 and it didn't take any of them, then locked me out of that auction, so I had to go to another one of the companies other auctions and try again, got them for $24. Really??? The best offer they will take is a dollar off? Geeze!!!

Off road use only? Riiiiiiiiiiiiiiight! I'll be sure to keep it off the road....

First trial fit of the engine. I have helped a couple guys do LS's in 59's before, so knew about what to expect, but I'm going to be changing it up a bit, so it won't be the same old boring deal.


Sadly I remember that deal well.
I made my last deal with them for two engines around that time - one was supposed to be Gen III drive by wire. It was actually still in the Tahoe when I found it and took pictures of it and the VIN. Somehow magically I got home with two drive by cable engines, harnsses and PCM's...
Another friend bought an engine I tuned that had some odd wiring harness damage (abrasion and pinched wires). The truck was supposed to be blue and rear ended, but a VIN search showed a white truck with very heavy front end damage near the PCM (explaining the damaged wires in the same area). He also saw the truck the engine supposedly came from before it was pulled. WTF.
Needless to say I don't shop or recommend them any longer.


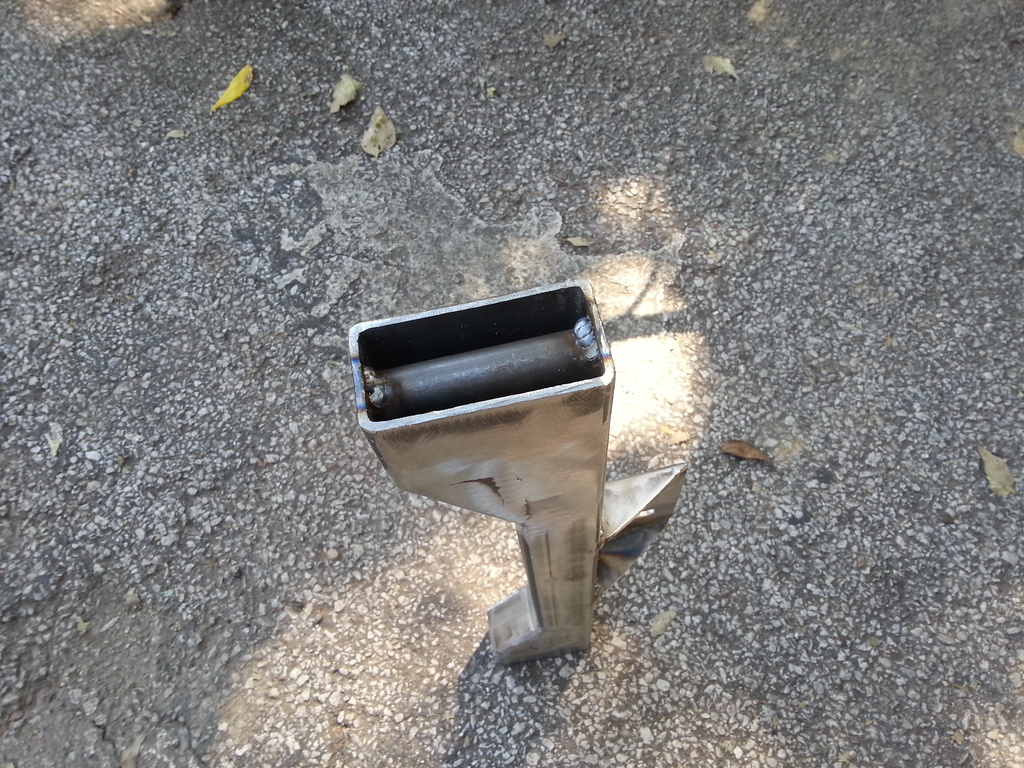
The beginning of fabbing up the transmission crossmember.
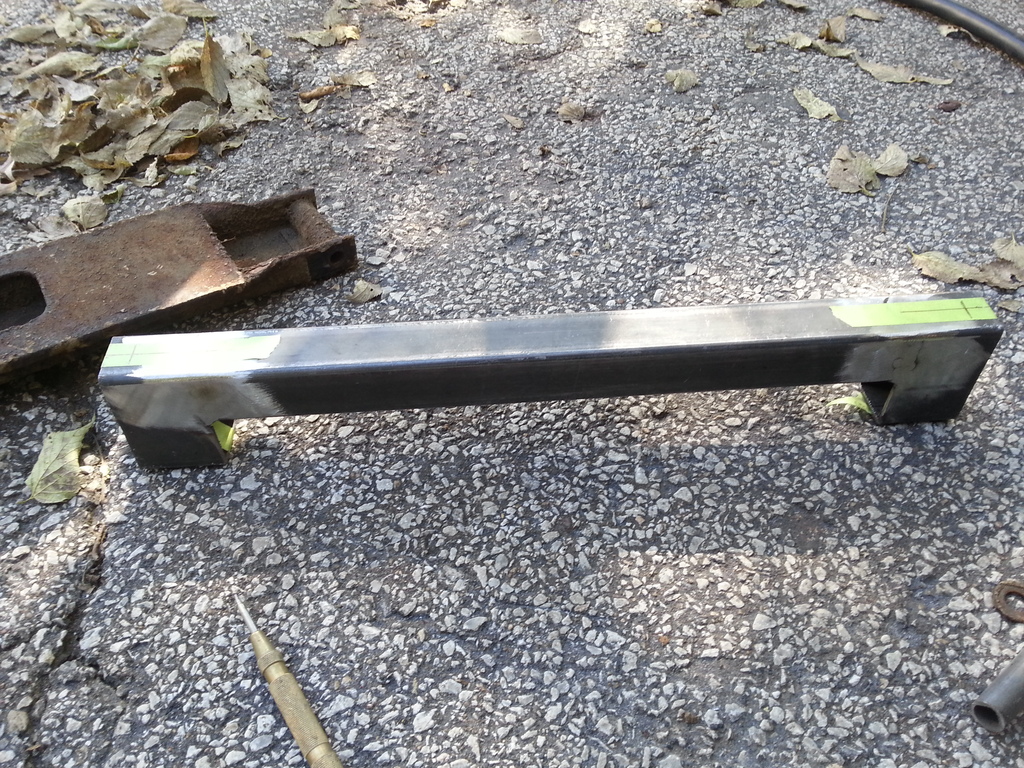
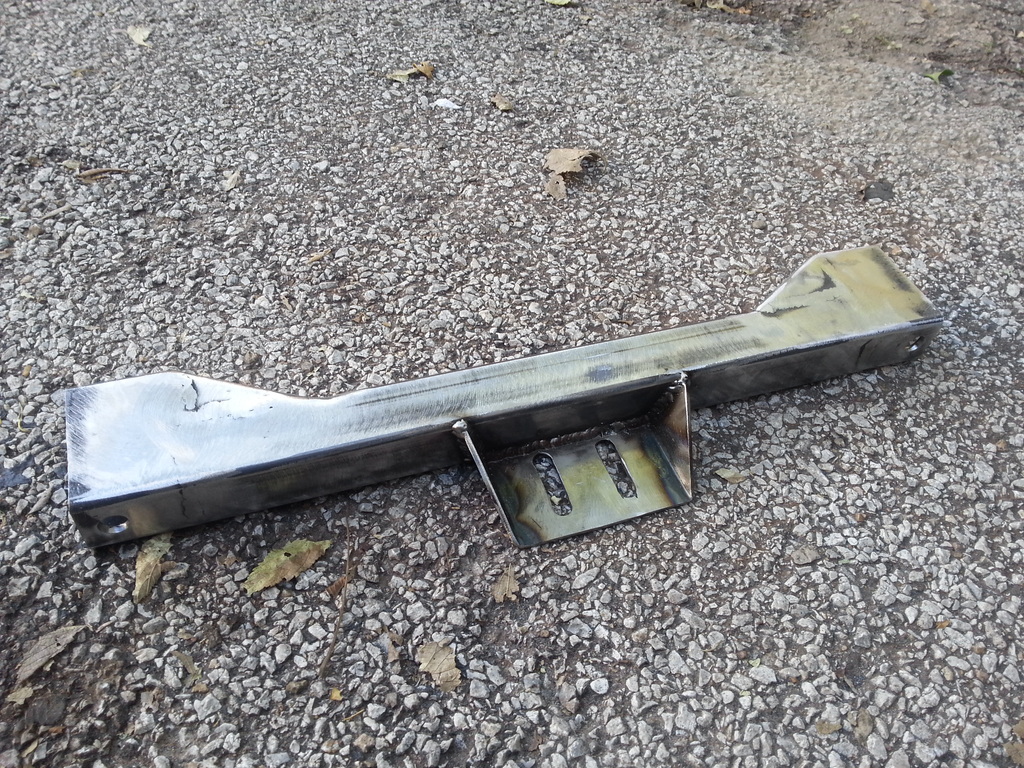
Crossmember done

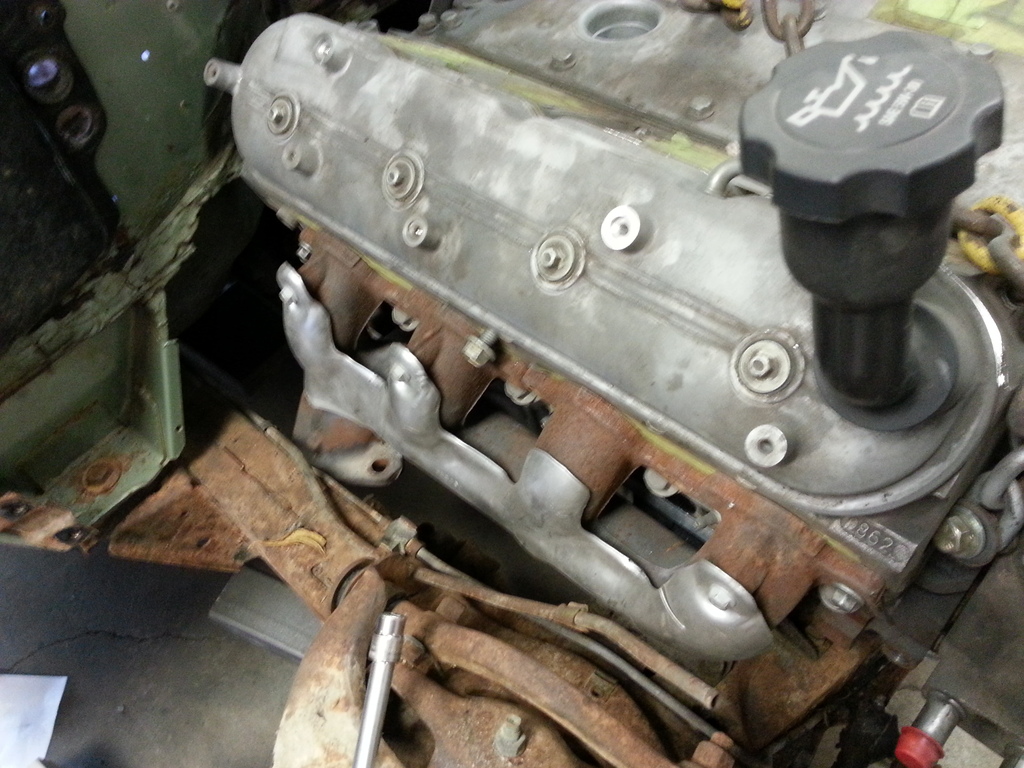
Then put the engine back in and started to see if my 5th gen F body exhaust manifolds were going to work. They fit, and didn't touch the frame, but only by about the thickness of a piece of paper..... Going to have to do some clearancing to make them work, but I really don't want headers on this car, you'll see why in a bit.


Crossmember done


Then put the engine back in and started to see if my 5th gen F body exhaust manifolds were going to work. They fit, and didn't touch the frame, but only by about the thickness of a piece of paper.....
Going to have to do some clearancing to make them work, but I really don't want headers on this car, you'll see why in a bit. 


