

1978 Aerocoupe Caprice: 5.3 / 4L60E
 10-22-2018, 09:39 PM
#81

I believe the part number was 72475. I know that the 71- number has been replaced with the 72- number. The main difference is that some of the part numbers include extra dies or a line cutter.
https://www.mastercool.com/product/7...ring-tool-set/
https://www.mastercool.com/product/7...ring-tool-set/
 10-22-2018, 09:56 PM
#82
TECH Senior Member
iTrader: (7)

I believe the part number was 72475. I know that the 71- number has been replaced with the 72- number. The main difference is that some of the part numbers include extra dies or a line cutter.
https://www.mastercool.com/product/7...ring-tool-set/
https://www.mastercool.com/product/7...ring-tool-set/
Andrew
10-23-2018, 08:31 PM
#83
You may want to shop around if you're interested in the kit. I found a wide range of prices for the exact same kit. Also, some appeared to be remanufactured. I wasn't very clear earlier. What I meant to say was that the new kit part #'s begin with 72, however the numbers after 72 indicate what different adapters or tools come with the kit.
10-27-2018, 10:56 PM
#84
I called the exhaust shop down the street last week and they said they would take the car even if it didn't run so Dad brought the truck and trailer over and helped me load it up. Fortunately he had gotten the winch working a while back. =center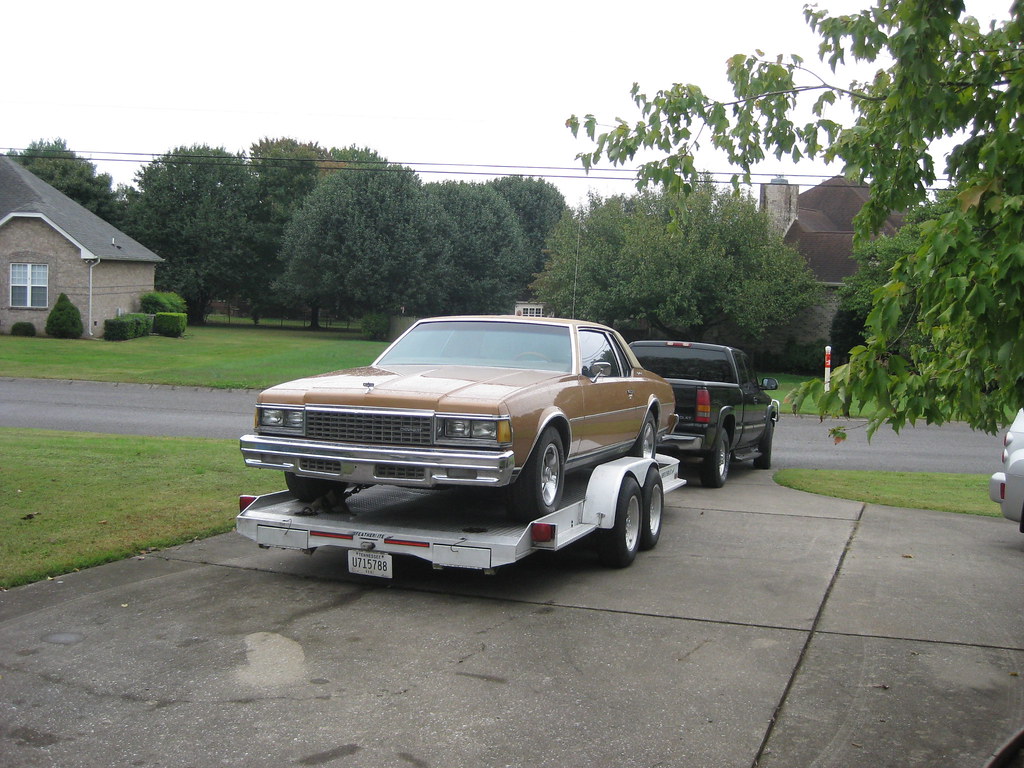
The shop is at the top of a small hill, until you consider pushing a car up the hill, then it becomes a very long mountain. Fortunately I was able to back the trailer up to the lift and pull the ramps out right onto the lift. Pushing the car wasn't difficult at all, not that I was actually pushing; I was steering at that point.=center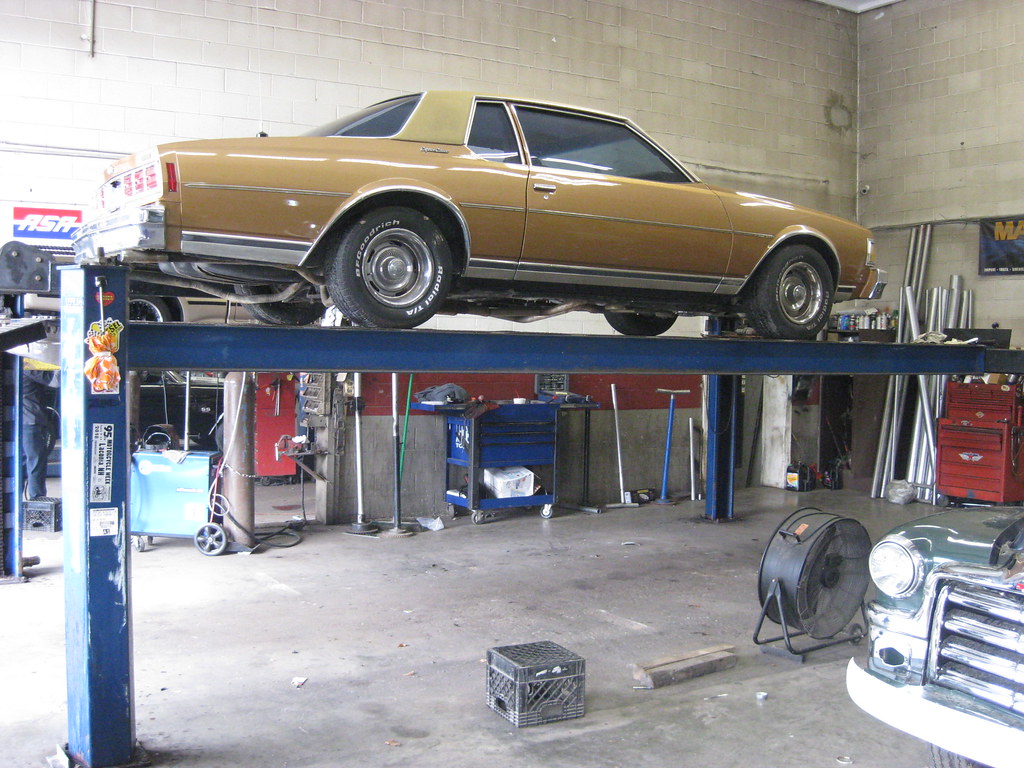
Here's a shot of the new gas tank and the old glass pack exhaust. This same shop put these on about 20 years ago. It was a very big deal for me to be able to get dual exhaust on The Caprice back then. I had access to what most would consider some pretty cool cars of the day, but I wasn't interested in them and loved this Caprice. It used to be a loaner car for Dad's dealership and when I found it, it was on the back lot with weeds grown all around it and was soon to be on its way to the junkyard. I really loved the look of the car, but at the time almost no one at all appreciated these cars, and this certainly wasn't even a nice example of one. I used to get made fun of quite a lot for driving it. My parents thought my love of this car was some kind of teenage rebellion of sorts because I chose it over something nice, but I never actually went through any teenage rebellion phases and just really loved this particular car. As a result, Dad never let me modify or spend money on the car because he didn't like it and thought it was a waste of money, so when I finally convinced him to let me put dual exhaust with glass packs on it it was a big deal. Also at some point someone had traded in a Chevrolet S10 with 7 inch rallies on it and I convinced him to let me swap them onto my car and take the hubcaps and whitewalls off. Eventually I used that as a segue to getting some 8 inch Corvette rallies and white letter tires. Years later someone with a body shop owed Dad a favor so I actually was able to get the car painted. I'll miss the sound of the old glass packs. Sometimes I would come home on summer weekend nights and sit behind the car and listen to the true dual idle out the pipes for a little while. It wasn't fast at all but it had a nice sound to it.
I don't have any photos of the finished exhaust because I wasn't there when they finish it. Because of my work schedule I'm not in town when the shop is open. Dad went by on Monday and picked the car up and we unloaded that night at the house.=center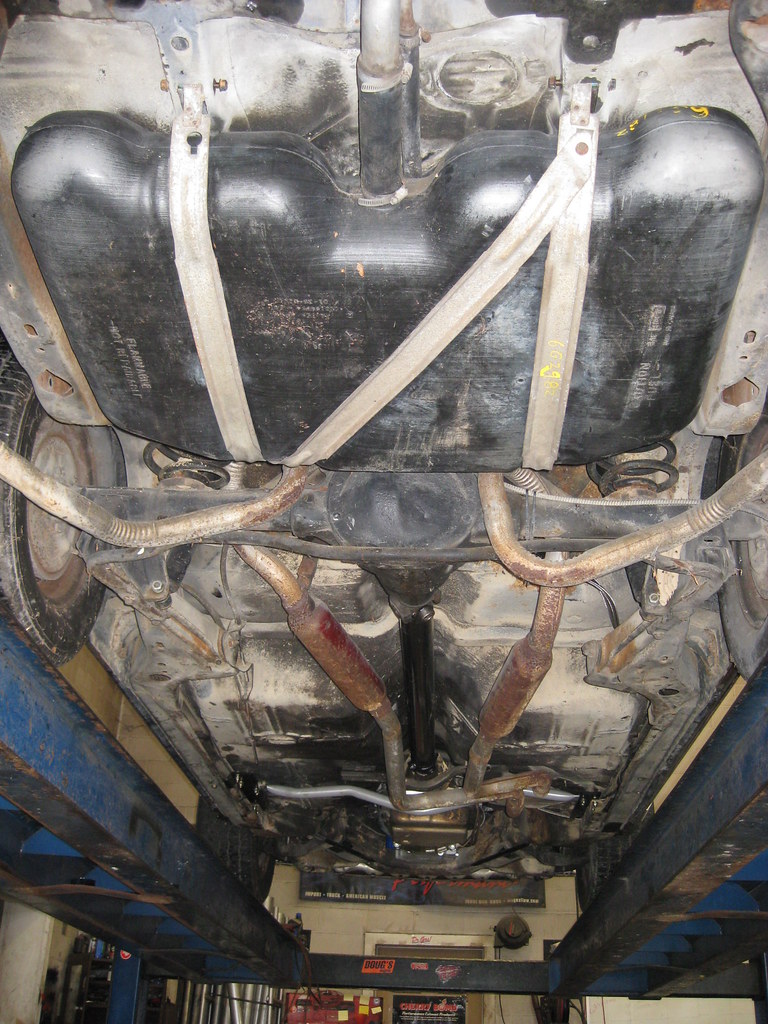
The aftermarket transmission dipstick wasn't made exactly correct (no surprise) and the mounts wouldn't fit, so I had to make my own. I started by bolting a piece of cardboard to the block to use as a template.=center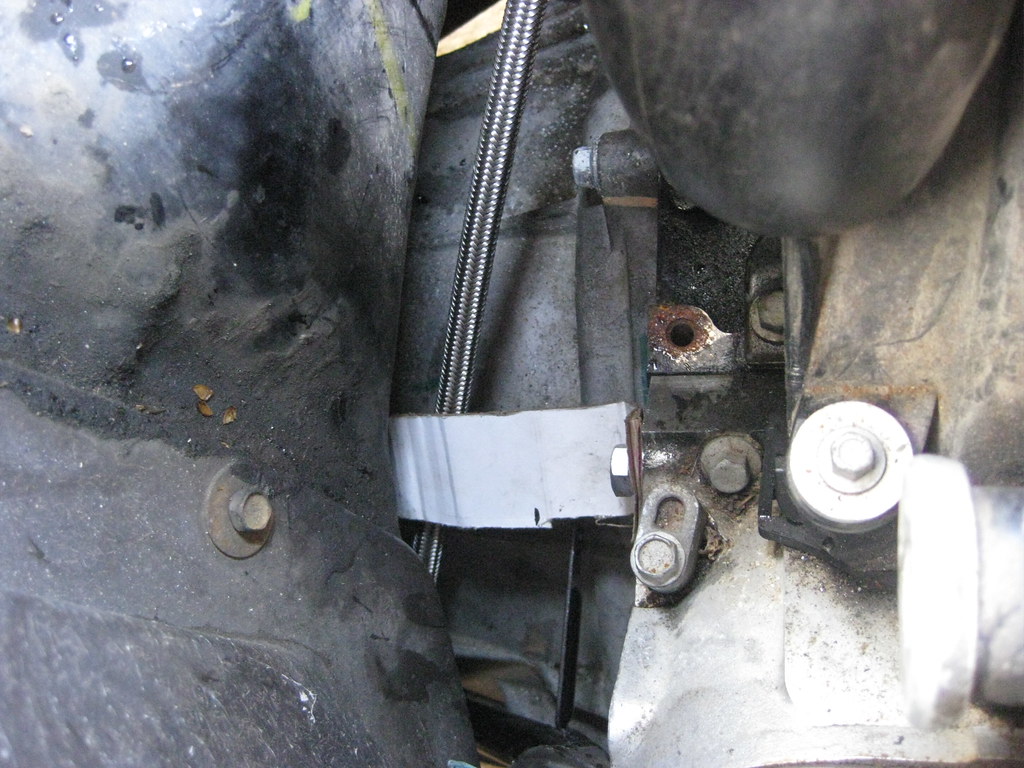
Anything over a single bend is difficult to impossible with my small vice. I used some of the leftover 1/8" steel from the upper radiator mount, which I intentionally ordered large because I figured a need would arise for the excess. This setup doesn't make good looking bends, but they're passable for this project.=center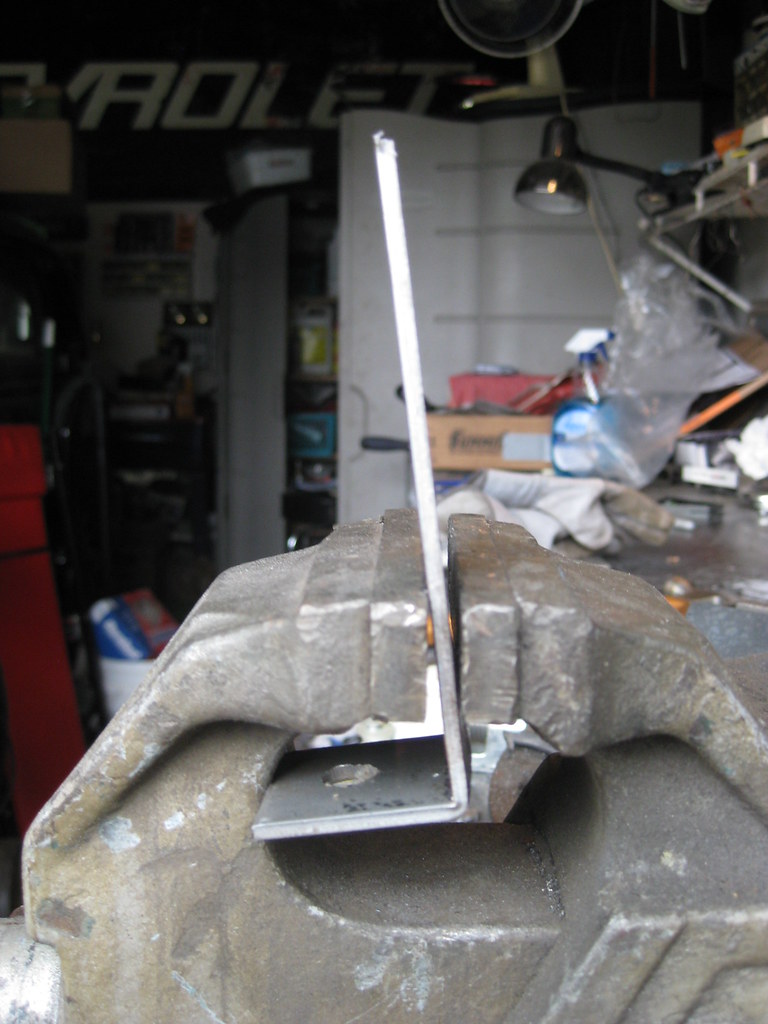
I had to mark where to drill the second hold for the dipstick tube, which was very difficult because there was a lot of play in the tube so I had to mark its entire travel and also getting the marker between the firewall and tube was a task in and of itself. I located where the hole needed to be with a punch.=center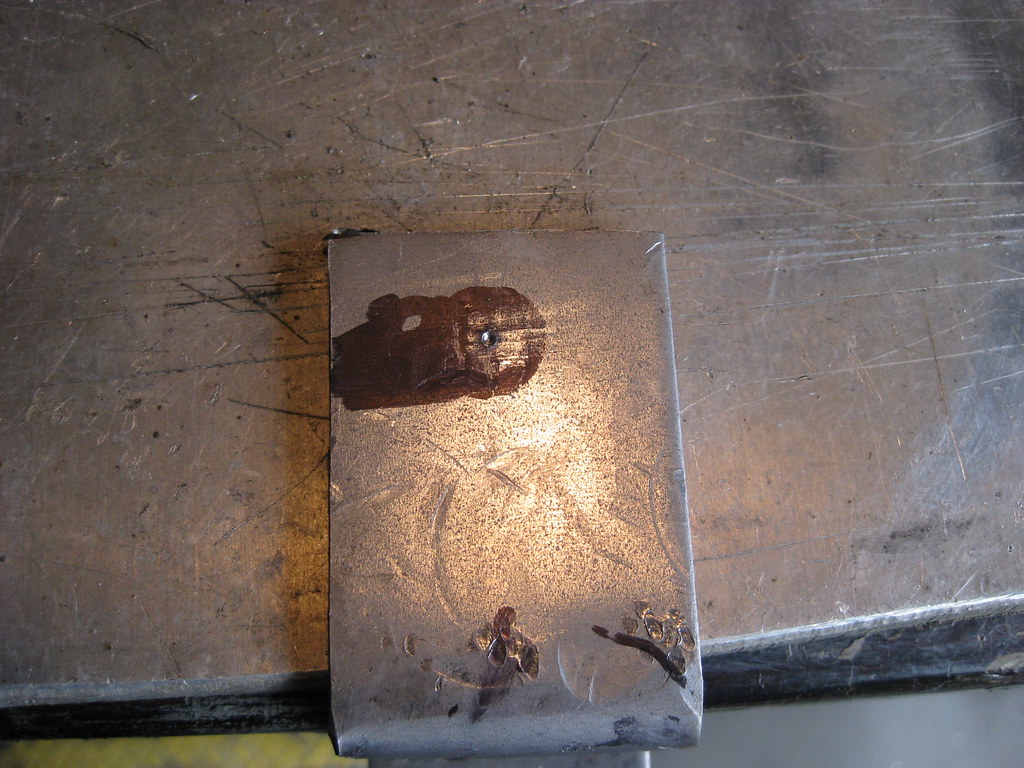
And then I had to transfer that mark to the other side of the mount so I could put the piece in the drill press.
=center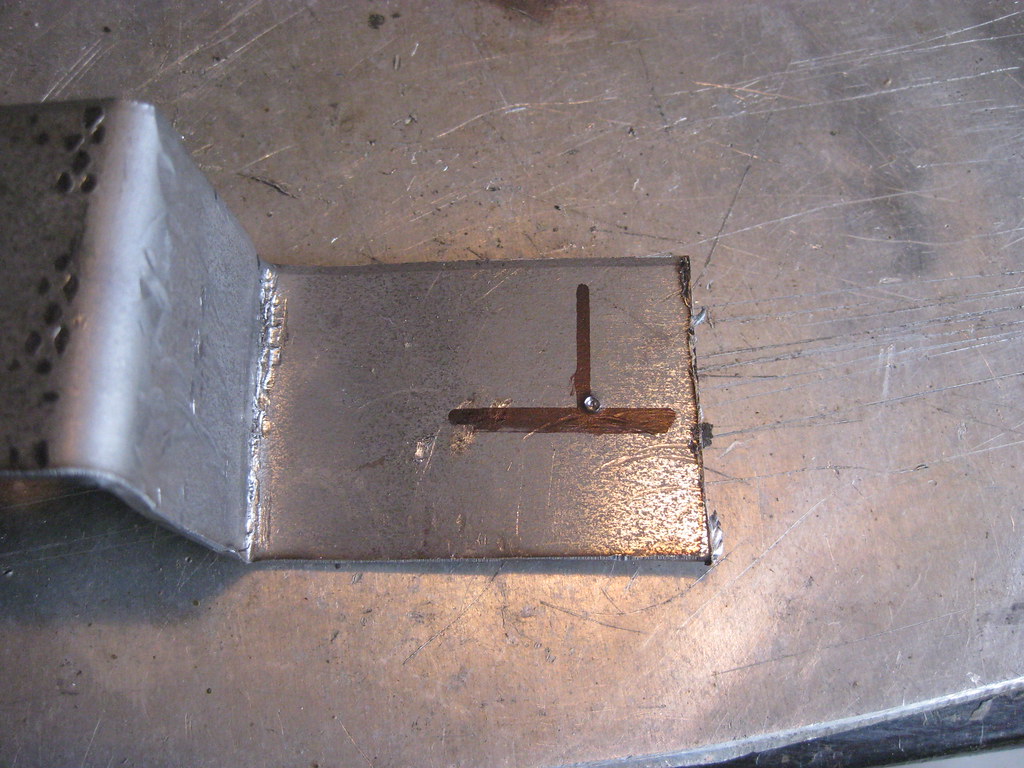
I eventually got all of the bends and holes where they needed to be.
=center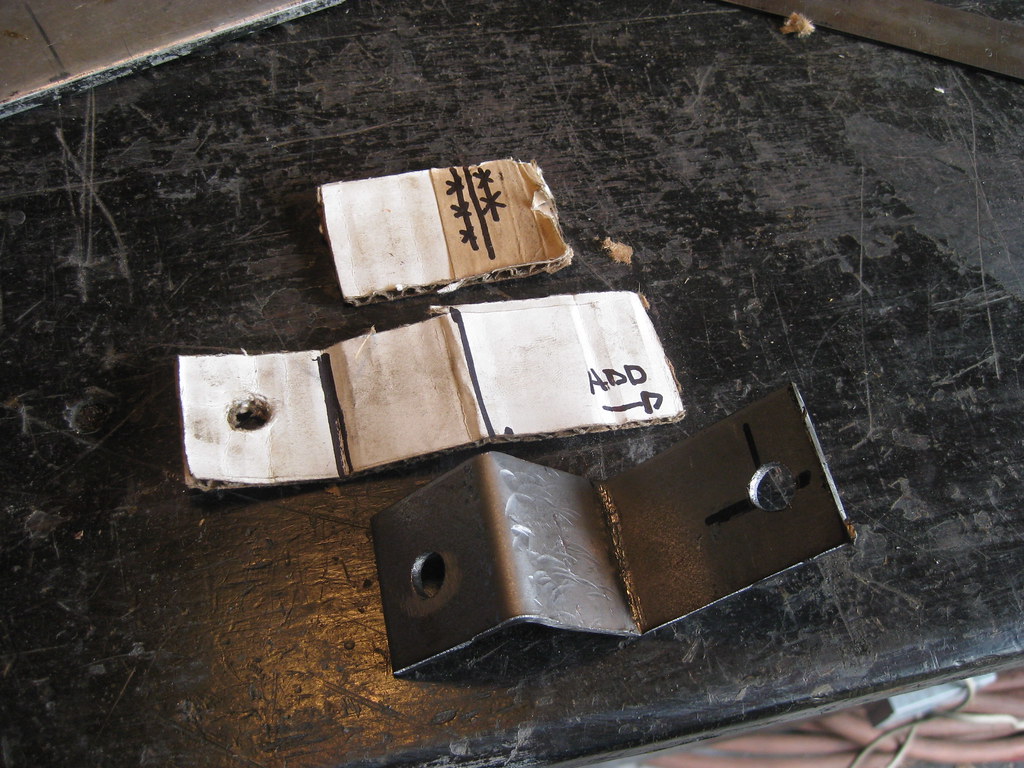
Primered, painted, and ready to install. It still surprises me how long it takes to make things like this. I think I ended up having about 4 hours just in this mount, mostly because of the difficulty of measuring the bends and holes in such a compact and difficult to reach space.=center
I had to cut down a couple bolts to make everything work, but the hard part was getting everything tightened down. I think I had to crawl under and pick up the bolt or my wrench no less than 8 times.=center
I also had to make a mount for the transmission lines. I ordered some line clamps. That body clip I had welded and painted for the fender and then found out I didn't need ended up being the perfect solution to for this mount.=center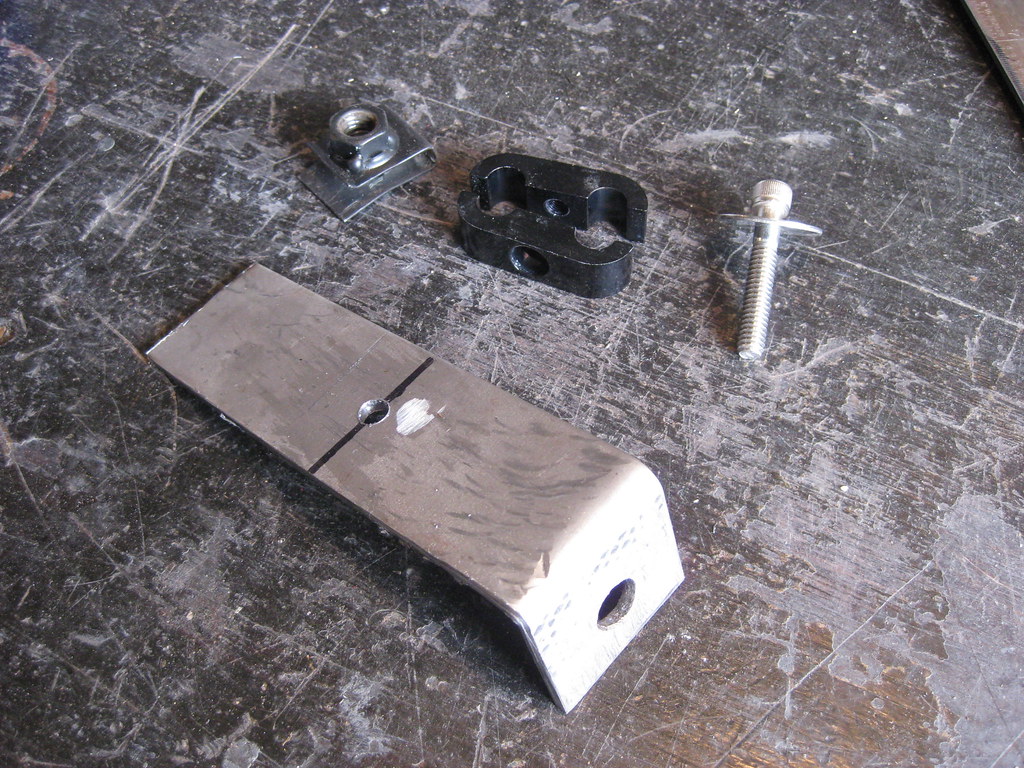
I mocked everything into place several times and drilled the holes for the line clamps and shortened the bolt. I had bought a couple of these flanged bolts for something else but ended up not needing them.=center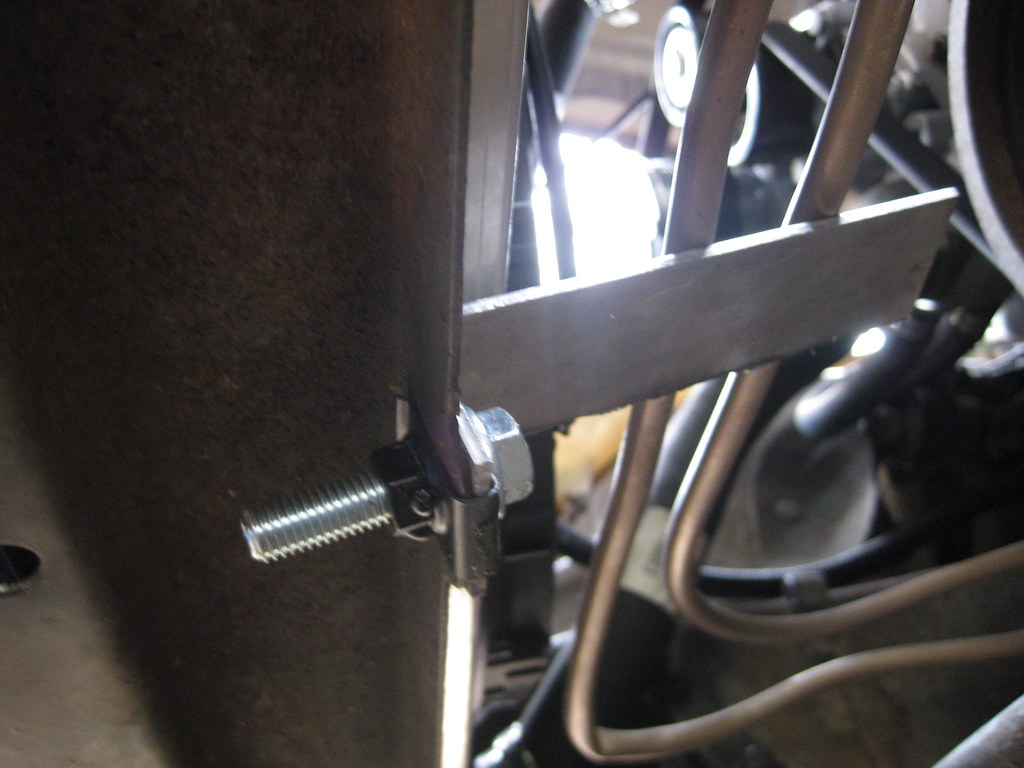
I was in a hurry last Saturday morning when I made this transmission line because I had to get the car to the exhaust shop before 12 and I needed the line to be in place so the shop would know where to run the exhaust pipes. =center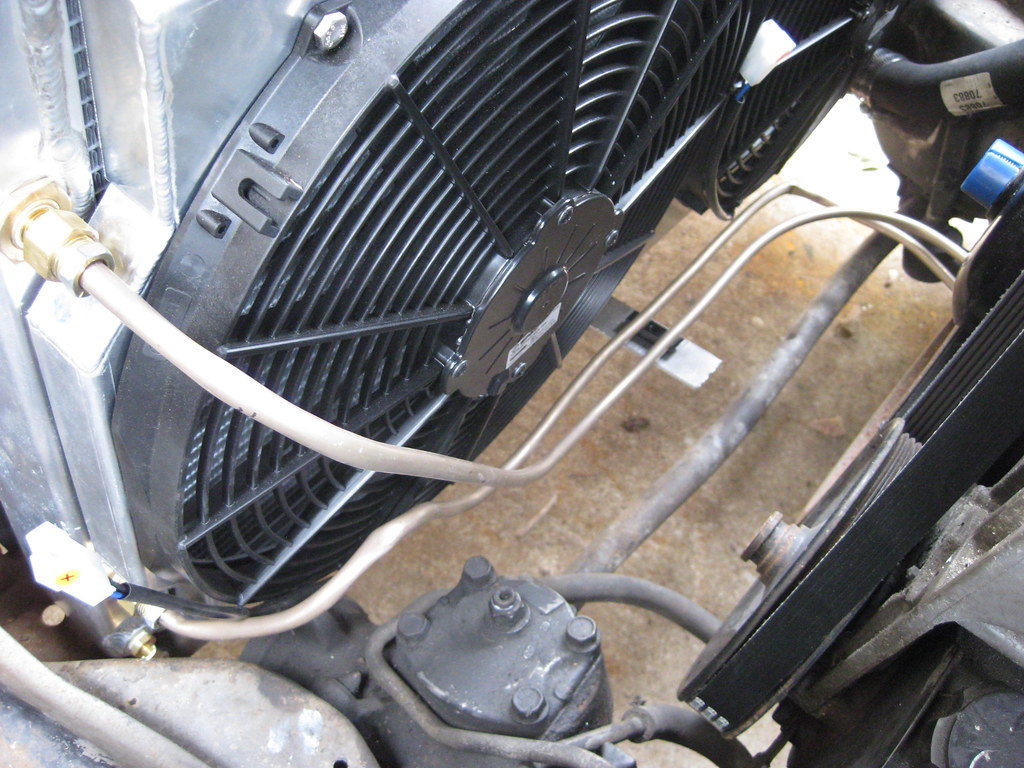
I ended up kinking the line so I knew I would have to replace it.
=center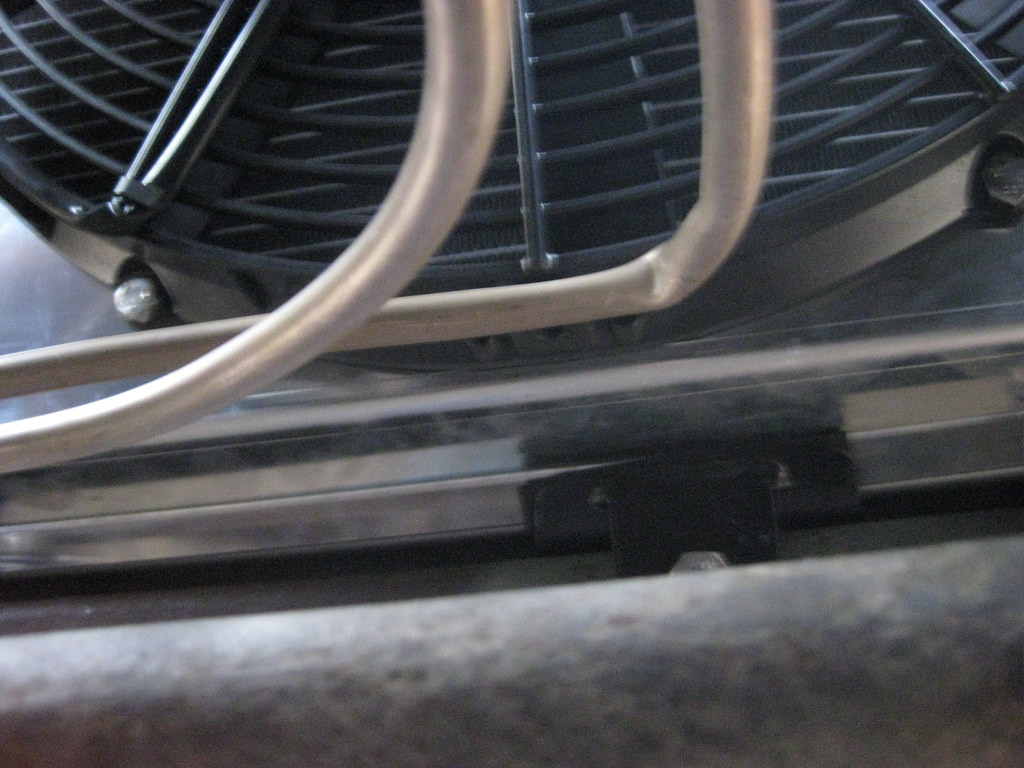
I knew immediately when it happened I had ruined the line. I was pulling gently and all at once it gave away and bent. I'm also not very good at this, so that doesn't help either. This copper aluminum line is very nice to work with, but kinks very easily.=center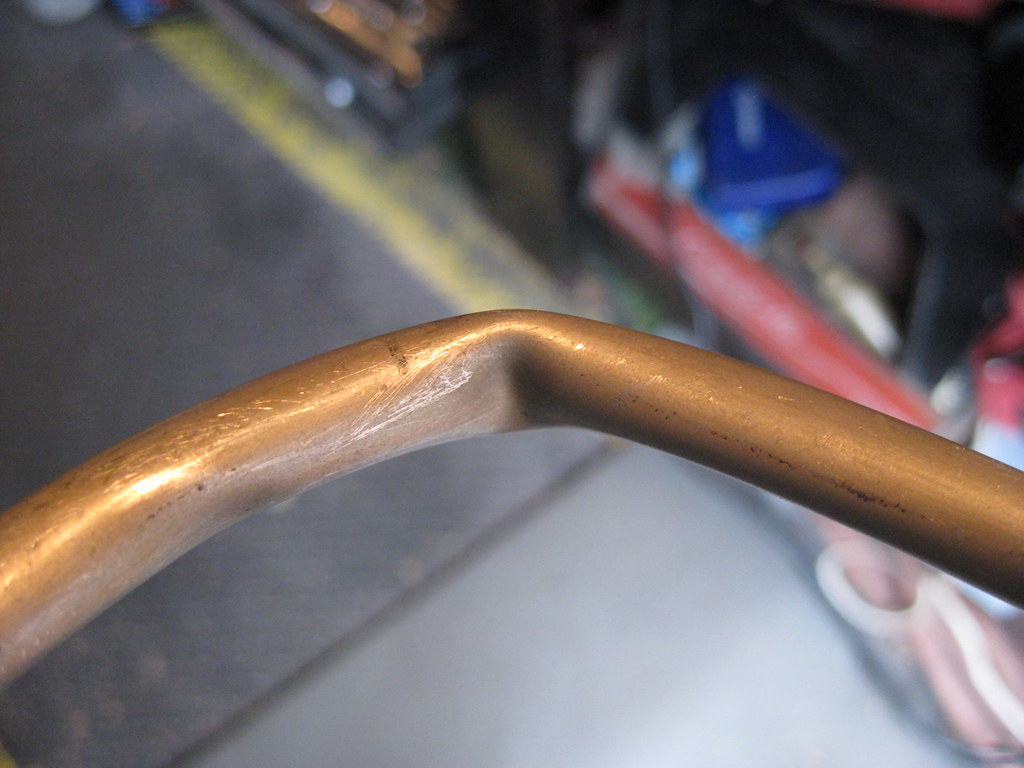
There was also a smaller kink on the same line closer to the radiator so I replaced the entire line from here forward.
=center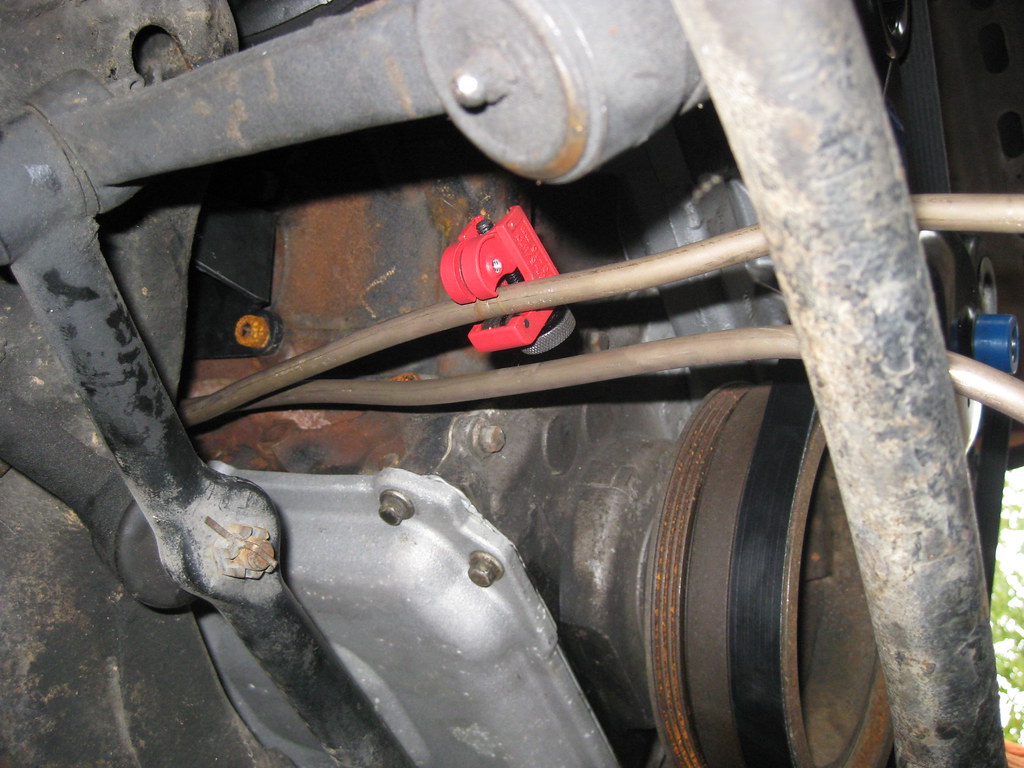
10-27-2018, 10:56 PM
#85
I made sure to put fittings on the lines immediately so I wouldn't forget.
=center
The rear section of the line would not come out without taking a lot of the bends out and reshaping it to reinstall. Fitting the flaring tool was very tight, but it was possible. It would not have worked with the traditional flaring tools I had been using. I can't say enough about how great this tool has been. I don't even worry about how the flare is going to turn out because it has yet to make anything other than a perfectly round flare.=center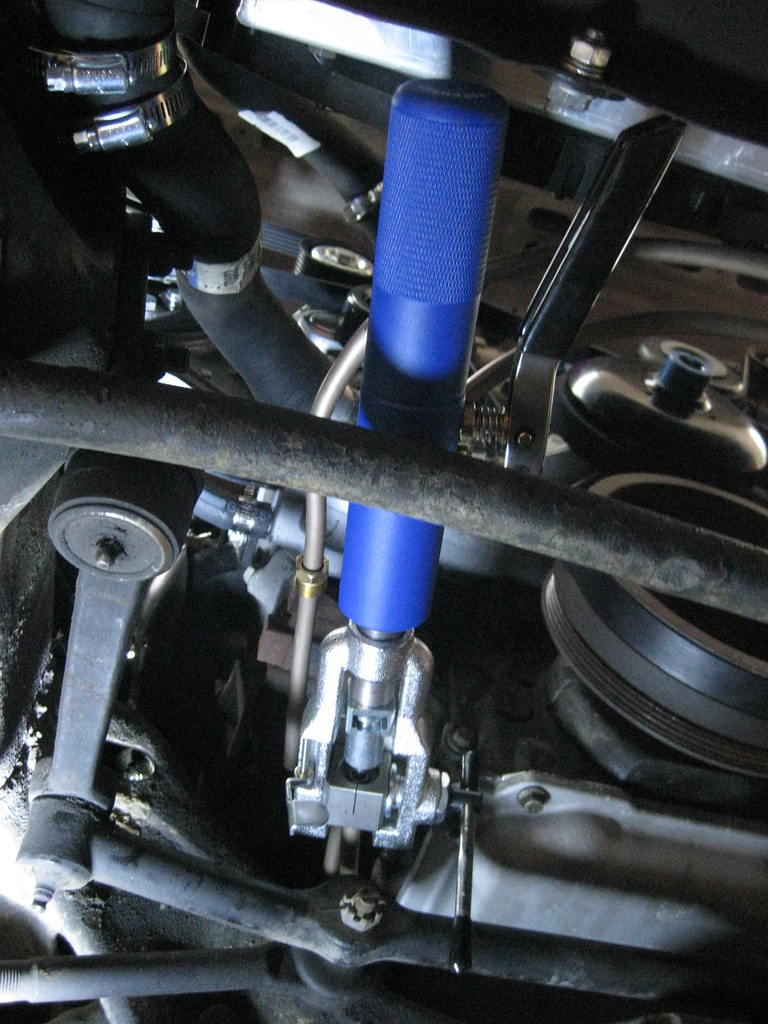
I used the old line as a template and April helped me hold the excess roll of line while I bent it into shape. Because of the tight fit of the lower line near the radiator there is practically zero room for error in the shape.=center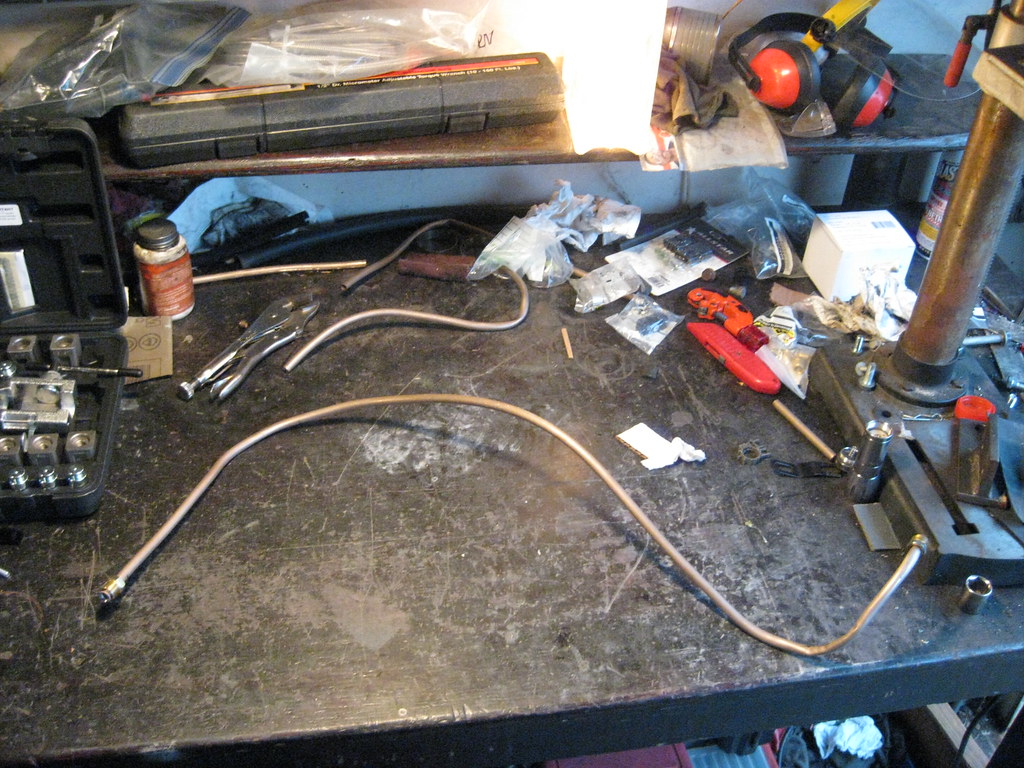
I had anticipated this earlier in the week and ordered some female flared fittings.
=center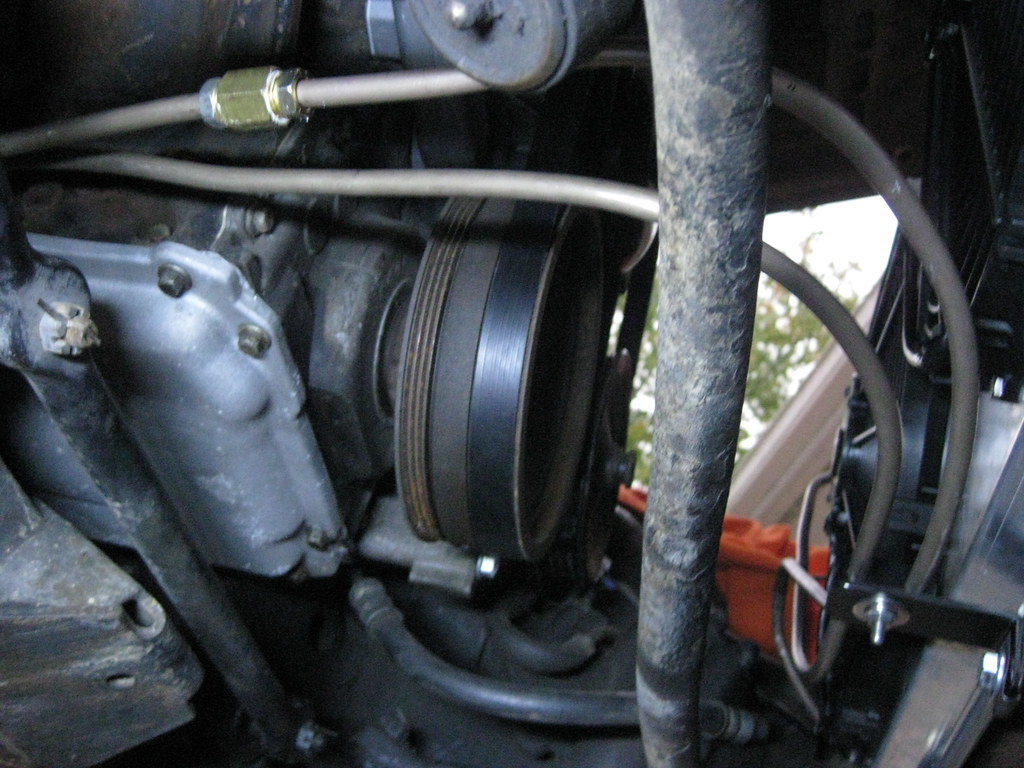
The finished mount ended up like this. The 1/8" steel provided a very study mount.
=center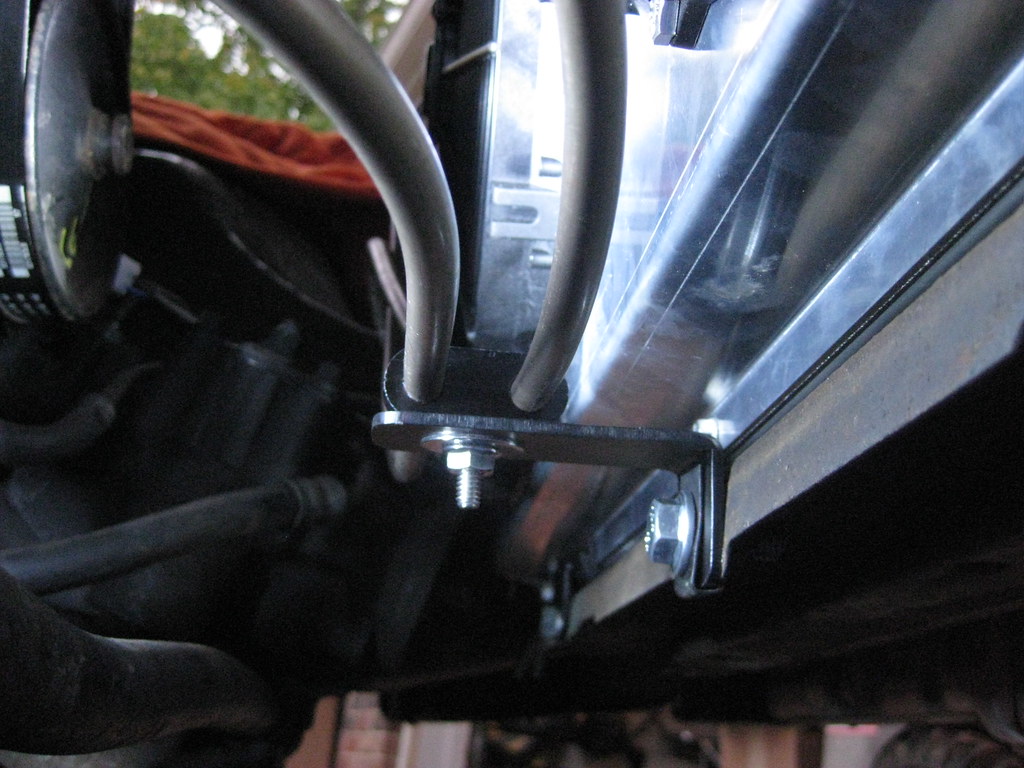
And here are the lines after the final installation. I would really like to have tucked them in closer and put some tighter bends in them but this is the best I could do with the tools and skill that I have. I was running out of line and didn't have enough to experiment with. I'm curious if the air intake tube will have enough room to fit behind these.=center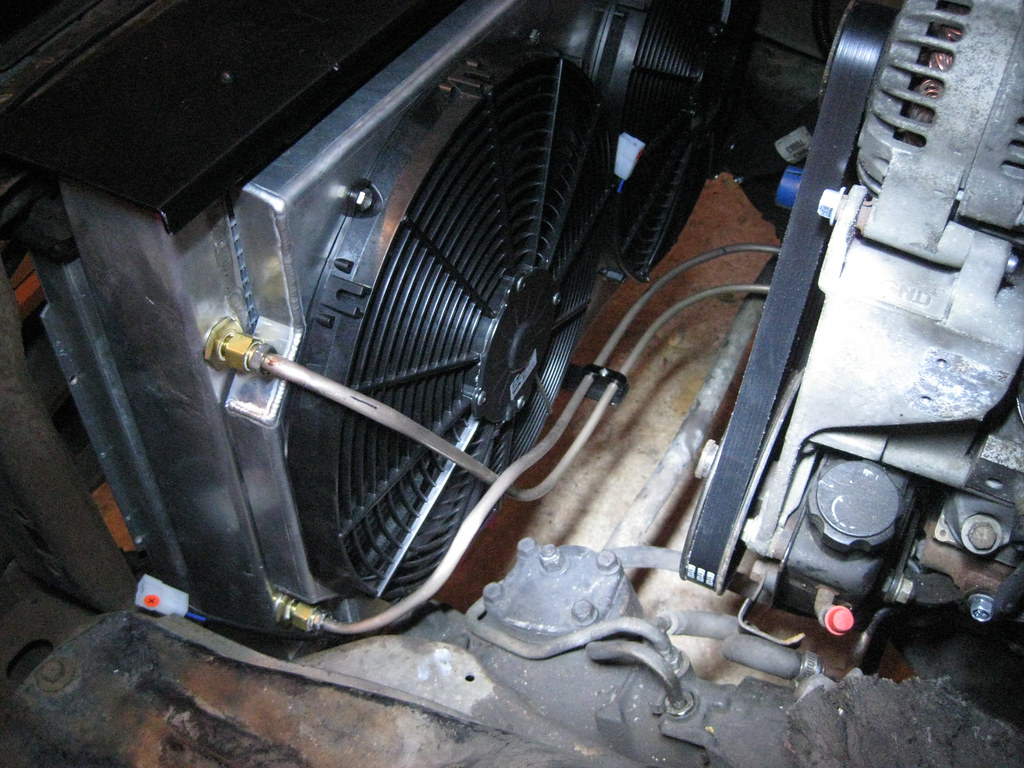
Finally, a kink-free turn. I would like to have been able to get the lines to look more symmetrical but I think it would take more than what I have available to make them look factory perfect.=center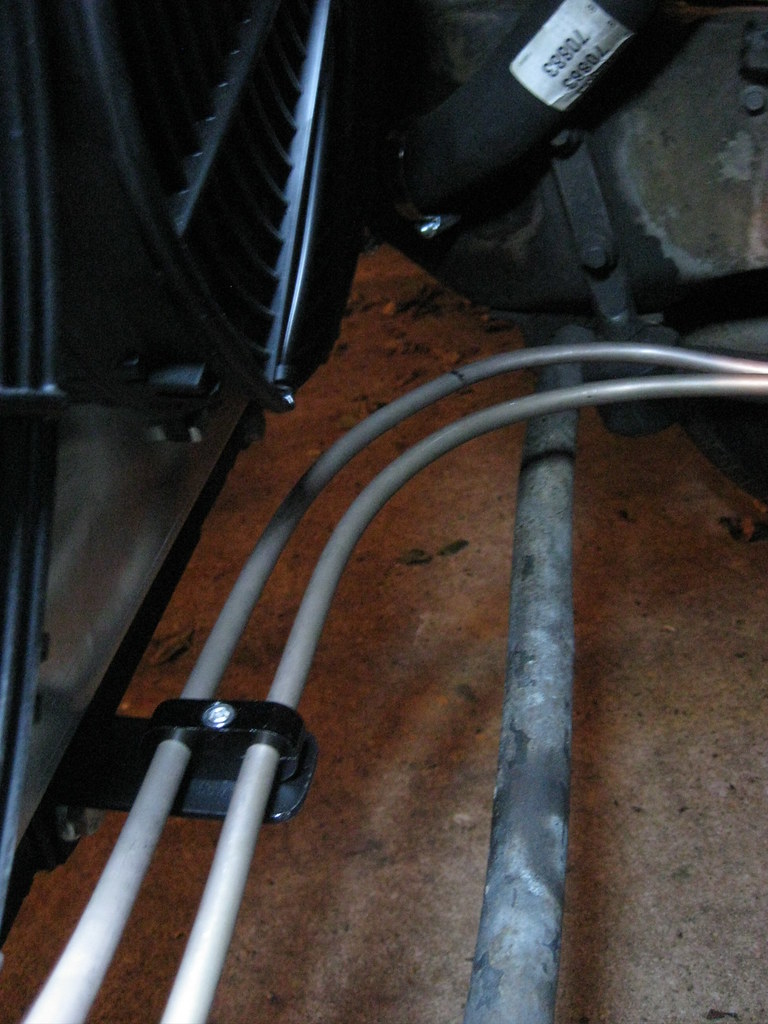
I ordered the line clamps in a two pack. I installed the other here which now has given the lines more stability and they do not make contact with anything around them even under vibration.=center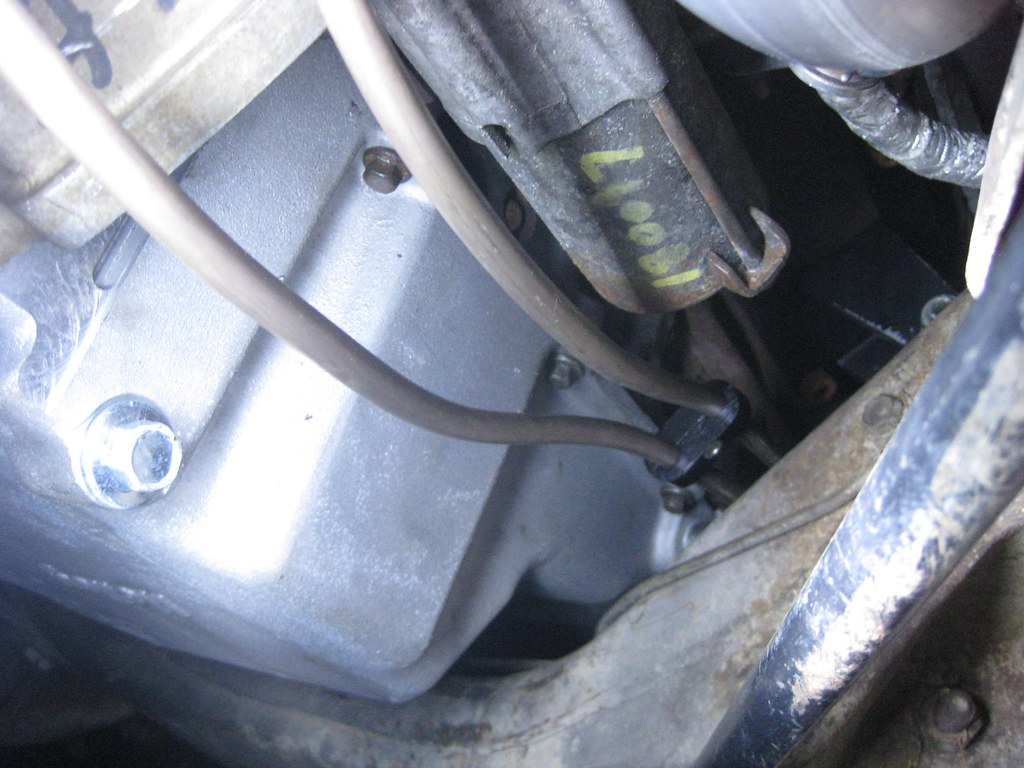
=center
The rear section of the line would not come out without taking a lot of the bends out and reshaping it to reinstall. Fitting the flaring tool was very tight, but it was possible. It would not have worked with the traditional flaring tools I had been using. I can't say enough about how great this tool has been. I don't even worry about how the flare is going to turn out because it has yet to make anything other than a perfectly round flare.=center
I used the old line as a template and April helped me hold the excess roll of line while I bent it into shape. Because of the tight fit of the lower line near the radiator there is practically zero room for error in the shape.=center
I had anticipated this earlier in the week and ordered some female flared fittings.
=center
The finished mount ended up like this. The 1/8" steel provided a very study mount.
=center
And here are the lines after the final installation. I would really like to have tucked them in closer and put some tighter bends in them but this is the best I could do with the tools and skill that I have. I was running out of line and didn't have enough to experiment with. I'm curious if the air intake tube will have enough room to fit behind these.=center
Finally, a kink-free turn. I would like to have been able to get the lines to look more symmetrical but I think it would take more than what I have available to make them look factory perfect.=center
I ordered the line clamps in a two pack. I installed the other here which now has given the lines more stability and they do not make contact with anything around them even under vibration.=center
 11-02-2018, 08:18 PM
#92
Got mine from a place In Louisville called Besslers, it was a terrible experience, nothing they told me or agreed to panned out. I was dealing with another salvage yard prior to them and they were lying about mileage as I was car faxing the vin#'s Glad, Ebbings was good, they just did not have the low mileage :33 engine I was after for my turbo project.
11-03-2018, 12:01 PM
#93
I have a list of smaller things that will finish up the car. I was hoping that I might even get to start the car for the first time this weekend as a test, but I was up late at night with one girl throwing up, and then my wife's sickness got worse this week, so the kids stayed at my parents' house, then I got sick and feel terrible and my parents just called and said they have a stomach bug and I've had to go pick the kids up. It's frustrating to wait all week to get progress done and then be sitting in the house all weekend sick getting nothing done.
11-03-2018, 02:27 PM
#94
TECH Senior Member

Wow! Hoping all of you recover soon from this nasty bug!
11-18-2018, 07:46 PM
#96
A bad stomach bug was going around and sickness hit our household hard. April ended up with multiple ailments and both kids were sick at one point and then I was sick myself. As as a result I had to go three weeks without working on the car. It was hard to be patient knowing I was so close to the end but still had so much work to do.
I put a new filter in the transmission. I thought I was going to be smart and pre-fill the filter with fluid like an oil filter. After it all ran out on my workbench and floor I realized that the filter has holes in the bottom. I probably won't make that mistake again.=center
I cleaned the pan up and realized I had the wrong gasket. Fortunately a gasket came with the filter so I was able to use that.
=center
This is a picture of the very last stages of the PCM and fuse panel.
=center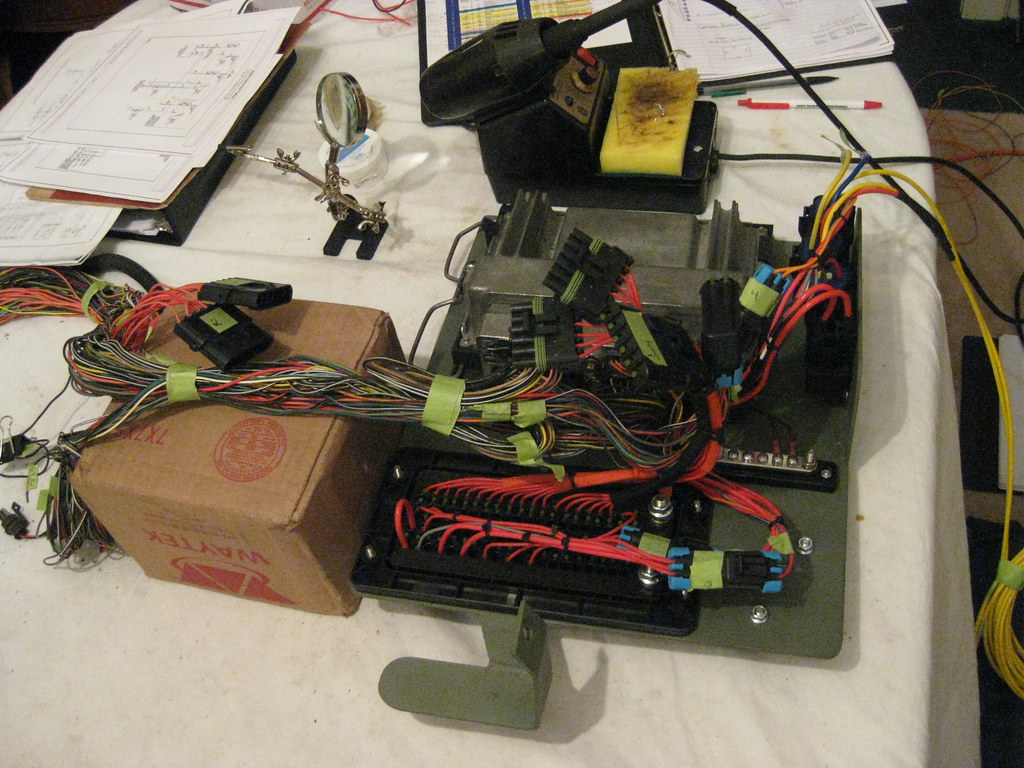
At long last I applied some paint to the fuse panel.
=center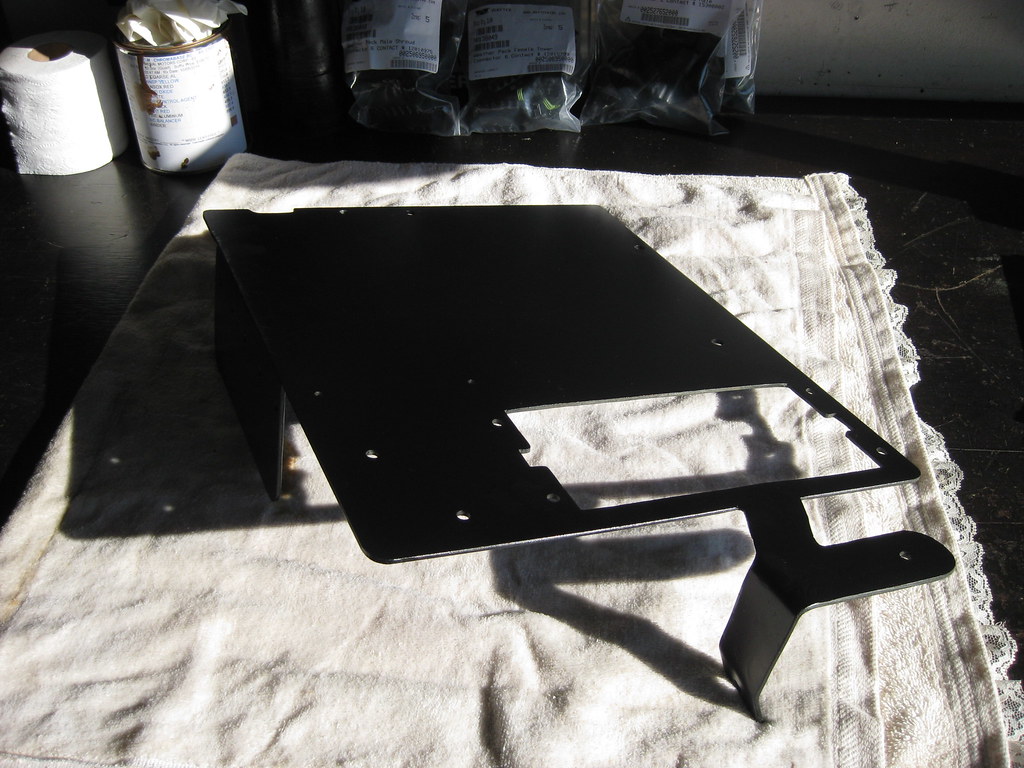
I did a final inspection of the wires and applied heat shrink to any naked wires.
=center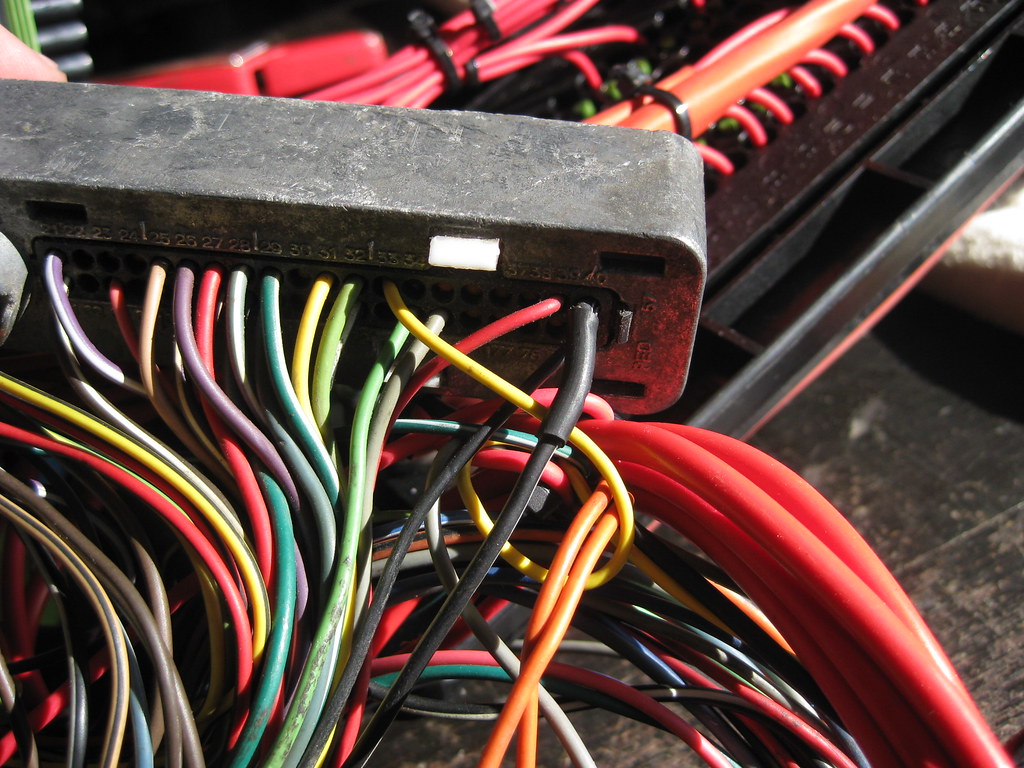
I installed the PCM connectors and realized I'd forgotten these plastic pieces. I've been working on these for so long I had forgotten they existed. I also installed the PCM gaskets that came with the new-to-me PCM. My old PCM was missing the gaskets.=center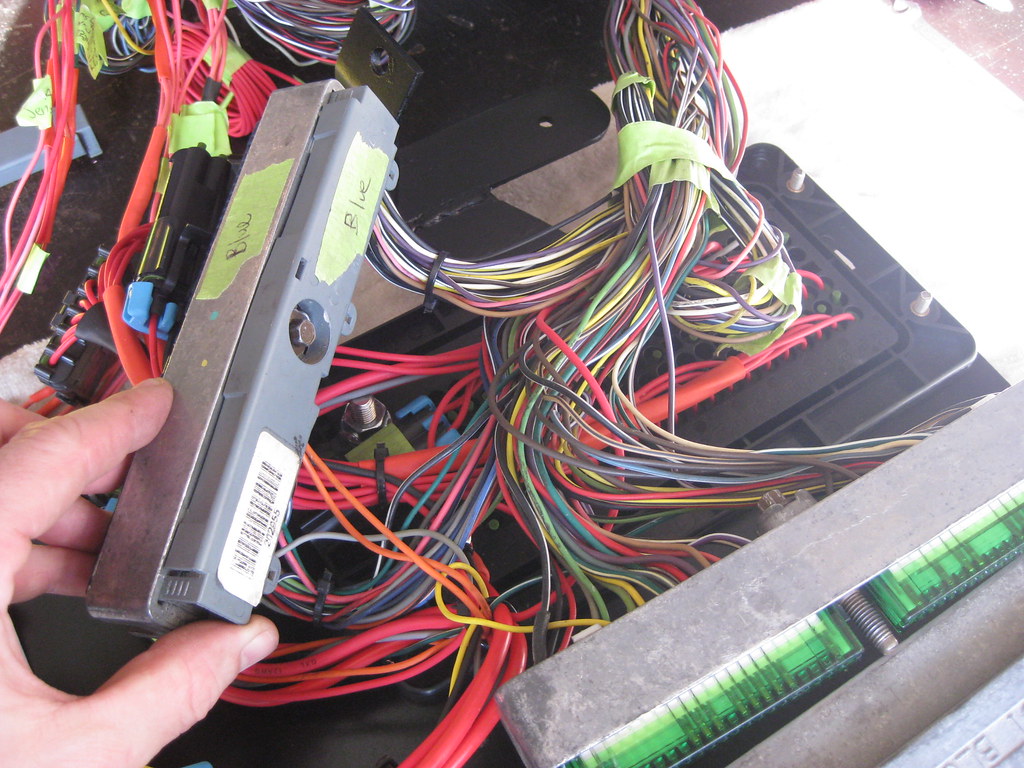
I finally did what I should have done from the beginning and put all of the harness supplies in pull-out drawers. This is way better than continually digging through tiny plastic bags.=center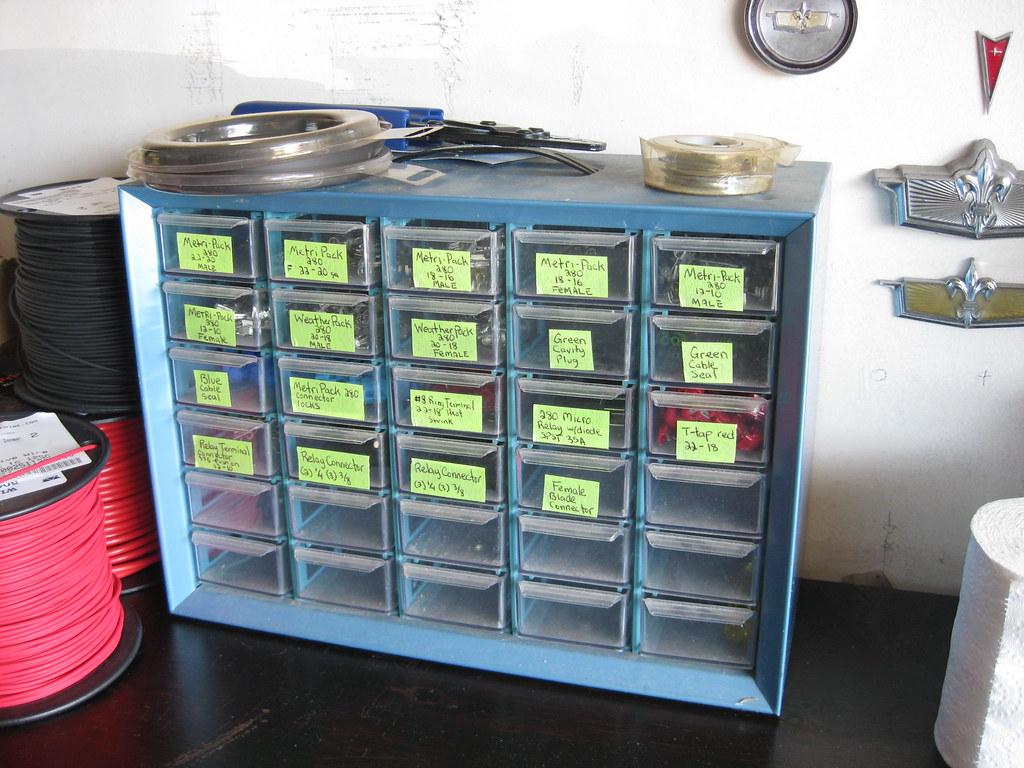
I noticed that there was an empty slot on the back of the fuse box. The wire that powers the AC relay was missing. I was confused because these connectors are not easy to remove even if you are trying and they cannot just fall out. As it turns out I had just cut the wire and stuck it in there and forgot to put connectors on the end. I found the wire on the floor and installed it properly. I also installed the cavity plugs.=center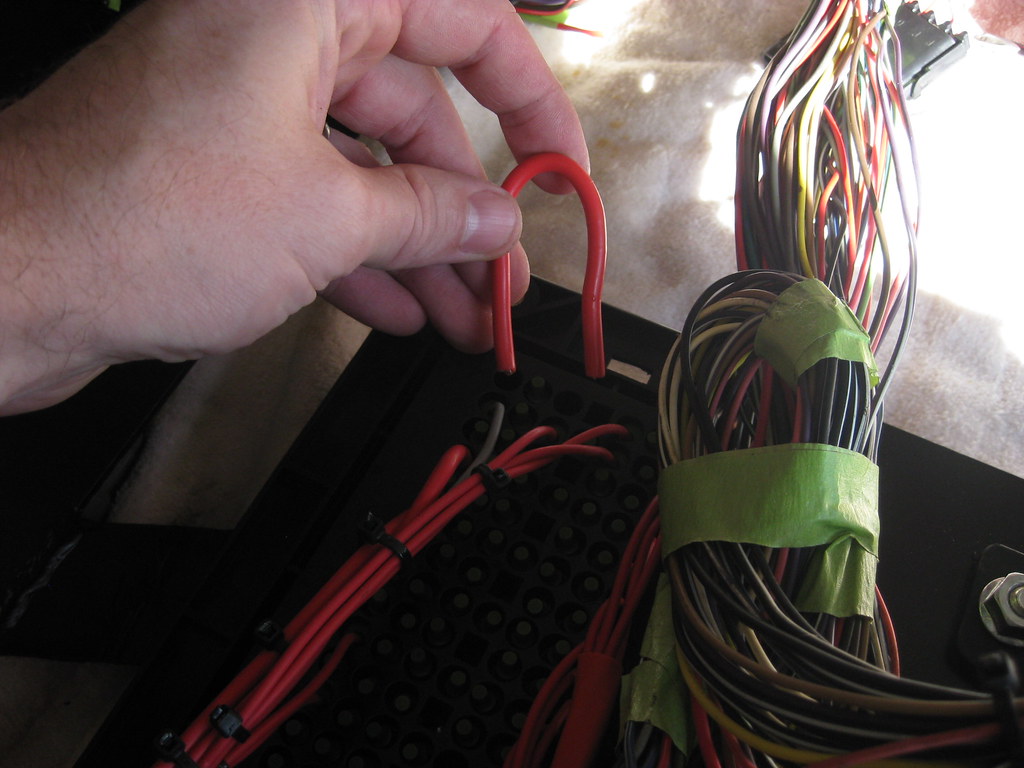
The assembly was finally ready for the first fitment in the car. This moment has been a long time coming.
=center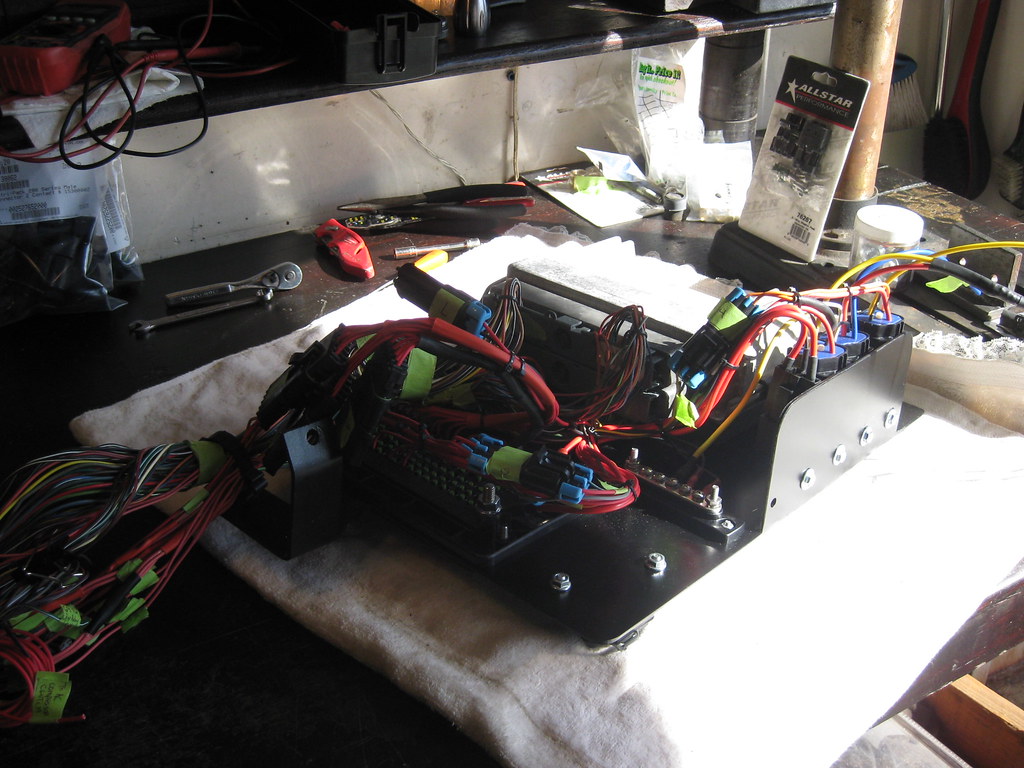
I suppose the best way to describe this process is the same as describing walking many miles. Just one step at a time. I bolted the fuse panel in and slowly began working my way down the harness.=center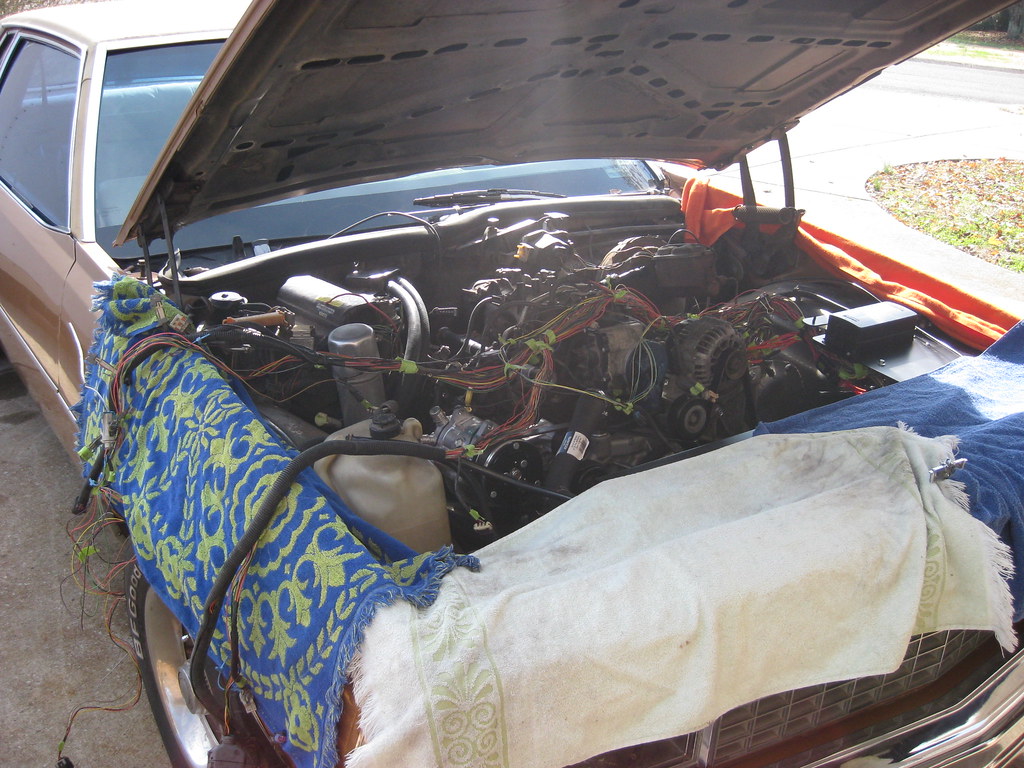
The electronic gas pedal requires a harness connector and a controller box. The controller box originally mounted under the hood but I don't have a good spot for it so I'm going to mount it under the dash. Regardless of that fact the connector would not fit through the hole in the firewall and I'd have to cut a monster hole to get it to fit. Rather than do that I opted to de-pin the connector and I will re-pin it once they're all through the firewall. I will also end up shortening these wires as there is just too much slack to contain and too little room under the dash. =center
I cut the original firewall grommet off of the original throttle cable assembly, however the rubber was far too hard and brittle to work. Also, the interior diameter was too small for what I needed so I picked up a new grommet at the hardware store, which at this point should probably offer me a position on their trustee board.=center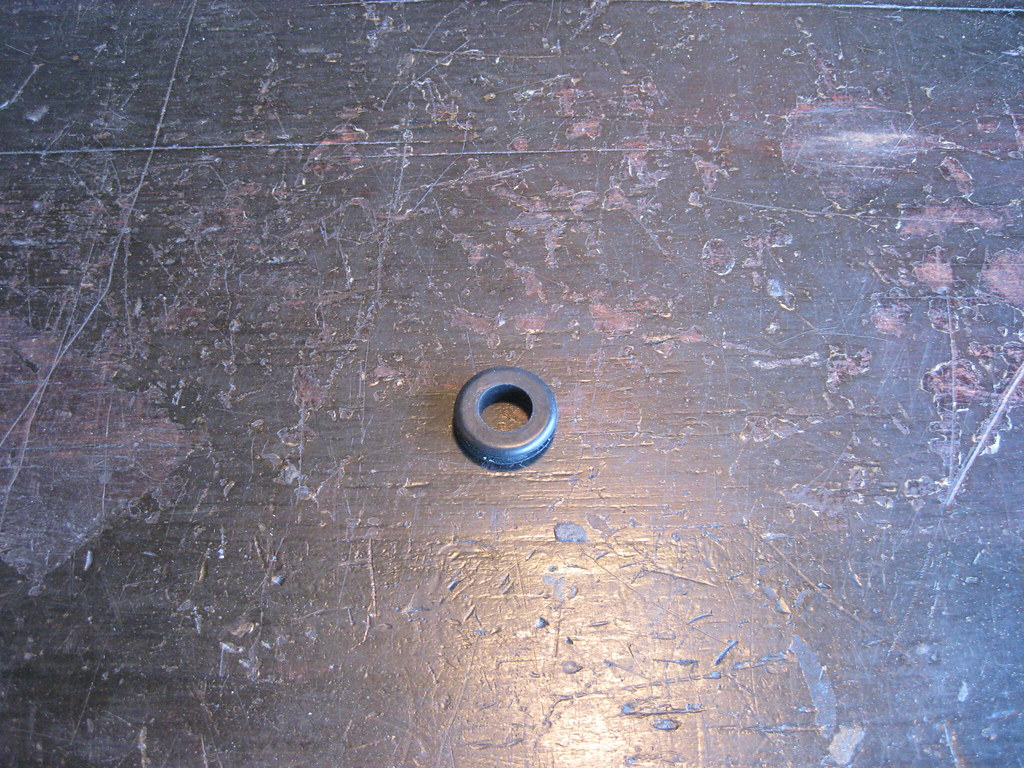
In order to get the Dakota Digital dash operational I'm going to need to mount a couple of pieces. There are a lot of items here and not a lot of real estate. The top left is the electronic pedal controller. The right is the controller for the digital dash and the bottom left if the BIM connector which will allow the Dakota Digital dash to plug into and get engine diagnostic and monitor information from the OBD II port. This will allow the dash to gather most of it's information for the engine displays from a single cable running to the OBD II port rather than running all the wires to the different sending units. If I understand this correctly it's going to save a lot of work and tidy up the wiring to a large extent.=center
In all the years I've worked under the dash of this car I've never removed this panel and the vent behind it to make more room. I'm not sure why because it was only four screws and pulling the vent hose off. It took about 3 minutes and made it way, way, way easier. =center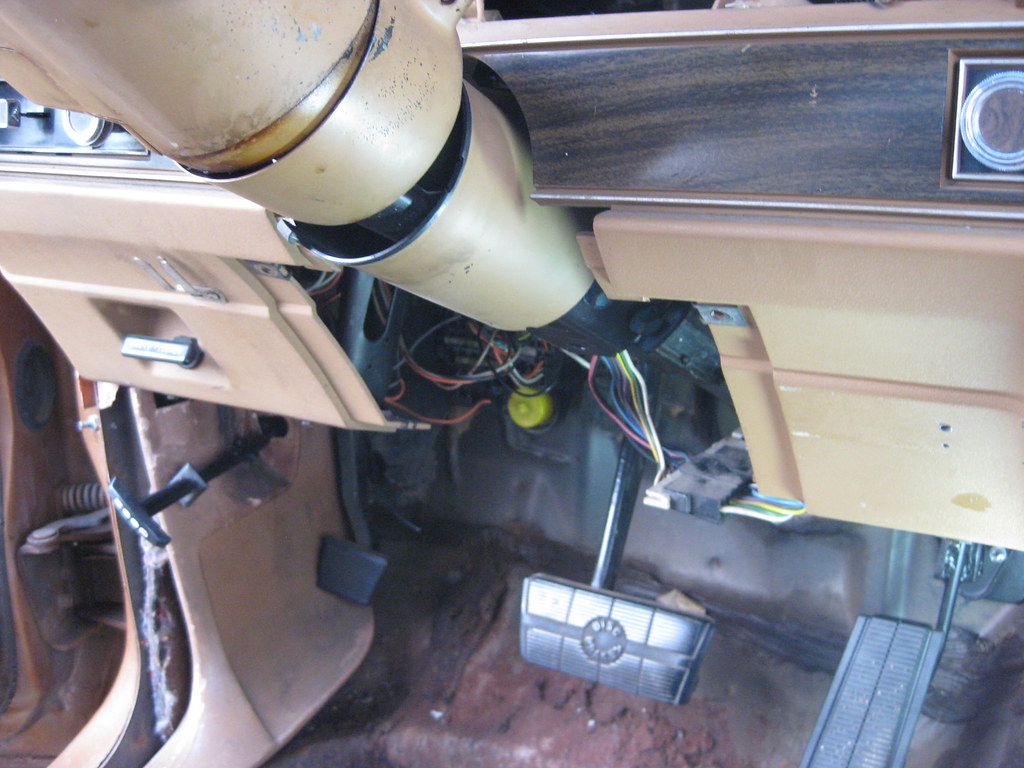
After looking at a lot of options with my head in the floorboard and my feet in the air I found this location that I believe will work great. I'll make a mount for the Dakota controller to mount up high. This will allow it to be near the entrance of the wires coming through the fire wall and will also allow it to be near the wires I'll have to pull from the original dash harness and install into the controller. I may not even have to extend some of the wires to fit. The pedal controller will mount lower, to an existing brace under the dash so all I will need to do to it is drill a couple holes.=center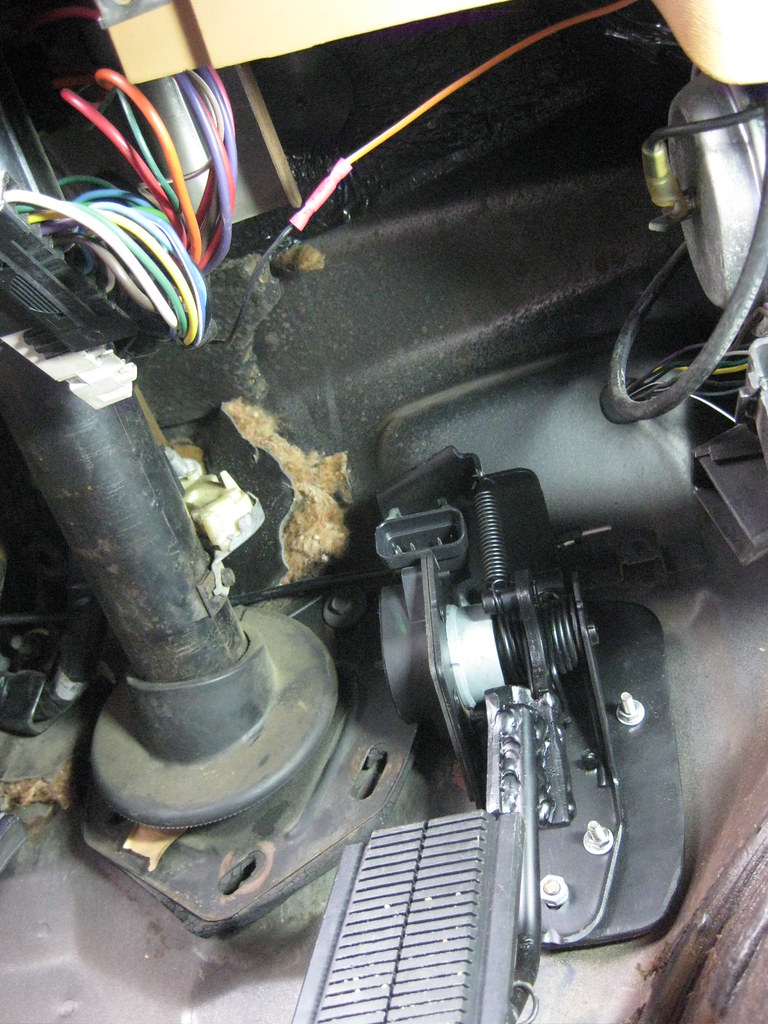
In the picture below the empty hole to the left is for the brake pedal arm. I will make and attach an L-shaped bracket and bolt it here for the dash controller. I was very surprised at how well these mounting locations worked out and I'm still somewhat afraid something is going to spoil the plan.=center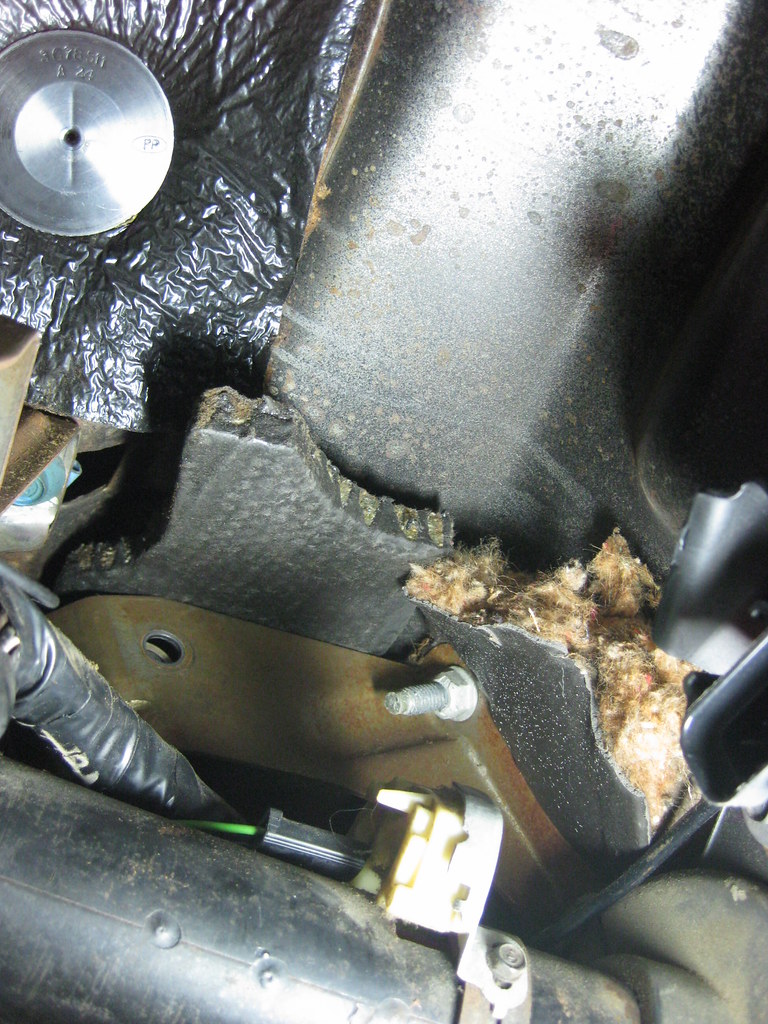
The 1/8" steel from the upper radiator mount continues to pay dividends. I'll use it to make a simple but sturdy mount for the dash controller.=center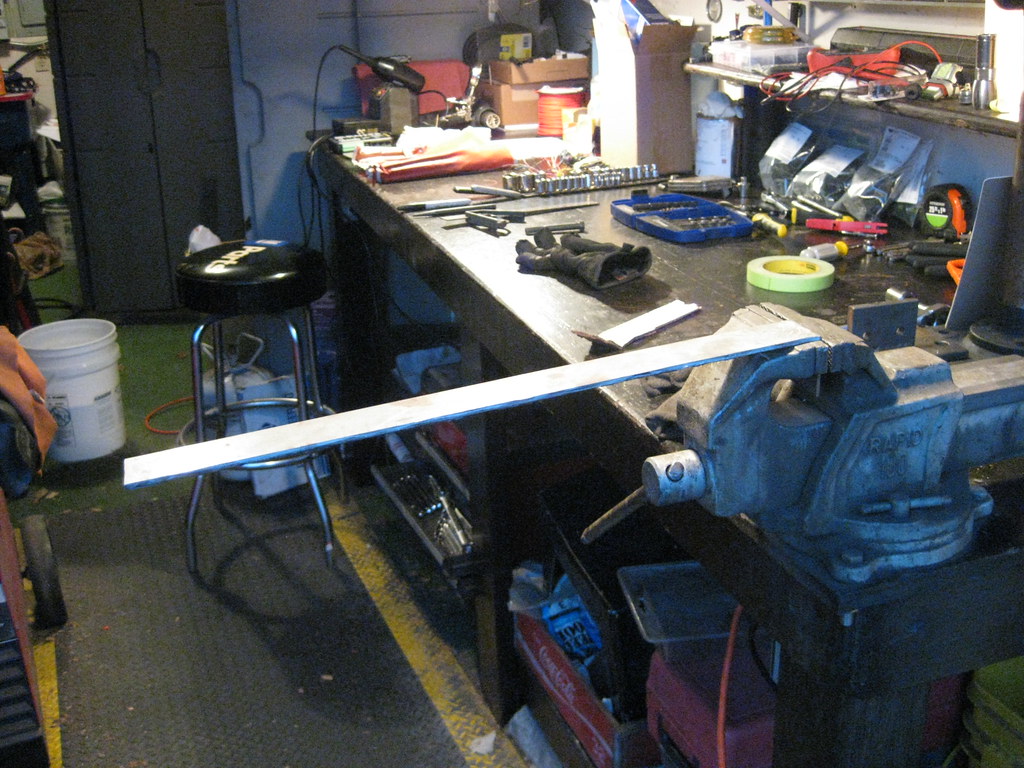
I was really using my noodle this night for some reason. I remembered to drill the hole for the mounting bolt before I bent the metal and then I remembered to pull the controller back away from the bolt so I will have room to tighten the screw when installing it.=center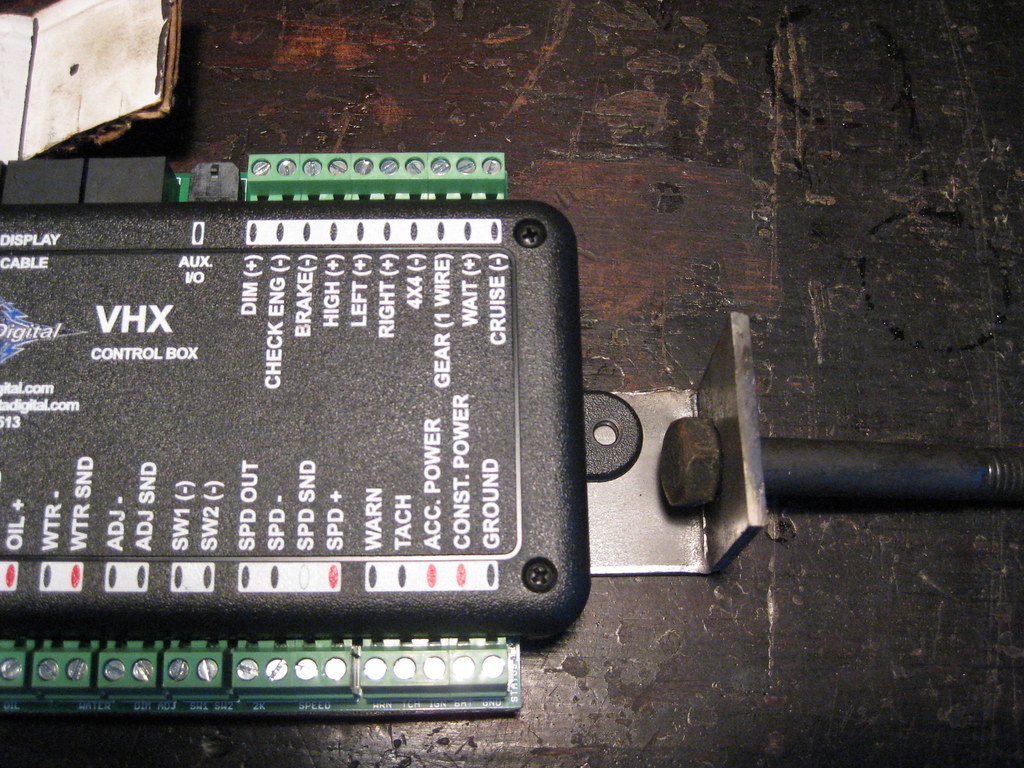
11-19-2018, 09:25 PM
#98
Hahaha, yeah, without a doubt. I have set up past midnight several nights trying to figure out all of the pieces and parts to their setups. Now I find myself saying things like, "I'm going to have to use a Metri-Pack 280 with the tanged male and femaile connectors because this is a 30 amp load and the weather-packs can only handle 20. Don't forget the cable seals this time or you'll have to cut the end off and start over," and then I think, "What on earth am I talking about??"
It's amazing how quickly all that stuff can add up ($$$$)
It's amazing how quickly all that stuff can add up ($$$$)
11-19-2018, 11:02 PM
#99
TECH Senior Member
iTrader: (7)
Hahaha, yeah, without a doubt. I have set up past midnight several nights trying to figure out all of the pieces and parts to their setups. Now I find myself saying things like, "I'm going to have to use a Metri-Pack 280 with the tanged male and femaile connectors because this is a 30 amp load and the weather-packs can only handle 20. Don't forget the cable seals this time or you'll have to cut the end off and start over," and then I think, "What on earth am I talking about??"
It's amazing how quickly all that stuff can add up ($$$$)
It's amazing how quickly all that stuff can add up ($$$$)
Andrew
11-20-2018, 02:56 AM
#100
TECH Enthusiast
I can't wait to see this thing go......I have a feeling your gonna fall in love with this car one more time once you get that n�w breath of life in her......awesome build