

1978 Chevy K20 longbed with nearly 500,000 miles! LS Swap begins!
 01-11-2021 | 09:54 PM
#61
Thread Starter
TECH Regular

Joined: Oct 2011
Posts: 413
Likes: 159
From: Alaska
For sure! The throttle body is a very nice piece, but the NW bracket was a huge disappointment and nearly made me consider going back to 78mm, but this new one couldn’t have been any more perfect. Thanks again for turning me onto it! That’s absolutely what I was looking for to begin with, but couldn’t find anything. Plenty of adjustment left for cable wear in the future, too.
The following users liked this post:
RedXray (01-12-2021)
01-16-2021 | 04:36 PM
#62
Thread Starter
TECH Regular
Joined: Oct 2011
Posts: 413
Likes: 159
From: Alaska
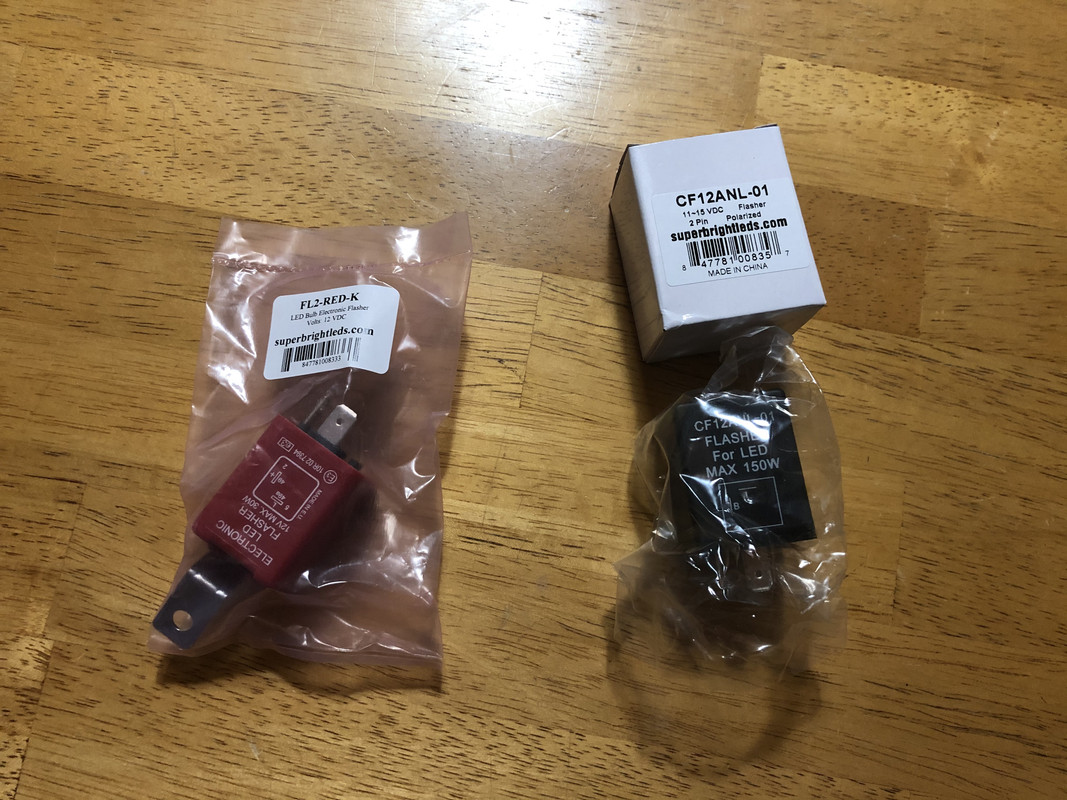
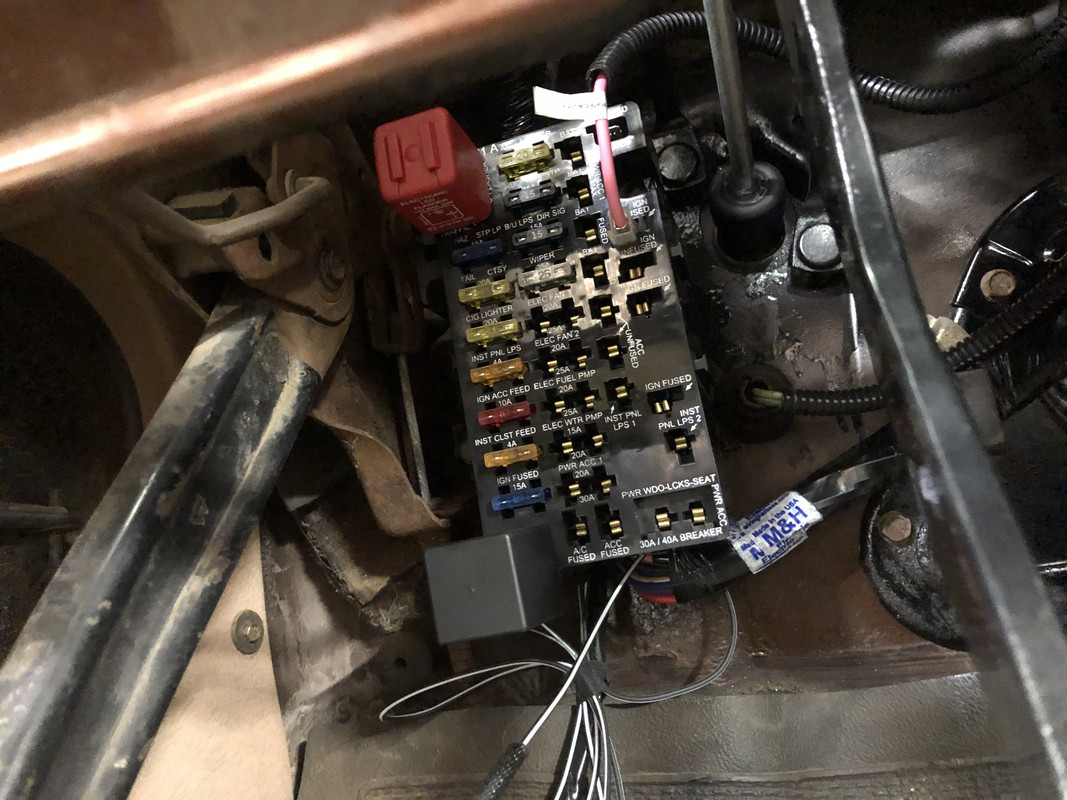
Since I changed all the lights over to LED, new flashers were needed. These came in from SuperBrightLEDs, and should hopefully make them all function like stock. HD ones were ordered for the additional load that trailer lights add to the system. Black is for regular turn signals, red is for hazards. Just FYI for anyone else doing LEDs, the flashers are wired at different polarities at the flasher terminals on these Chevy trucks, and will cause issues if the flashers don’t match. Hence the need for two different flasher units.
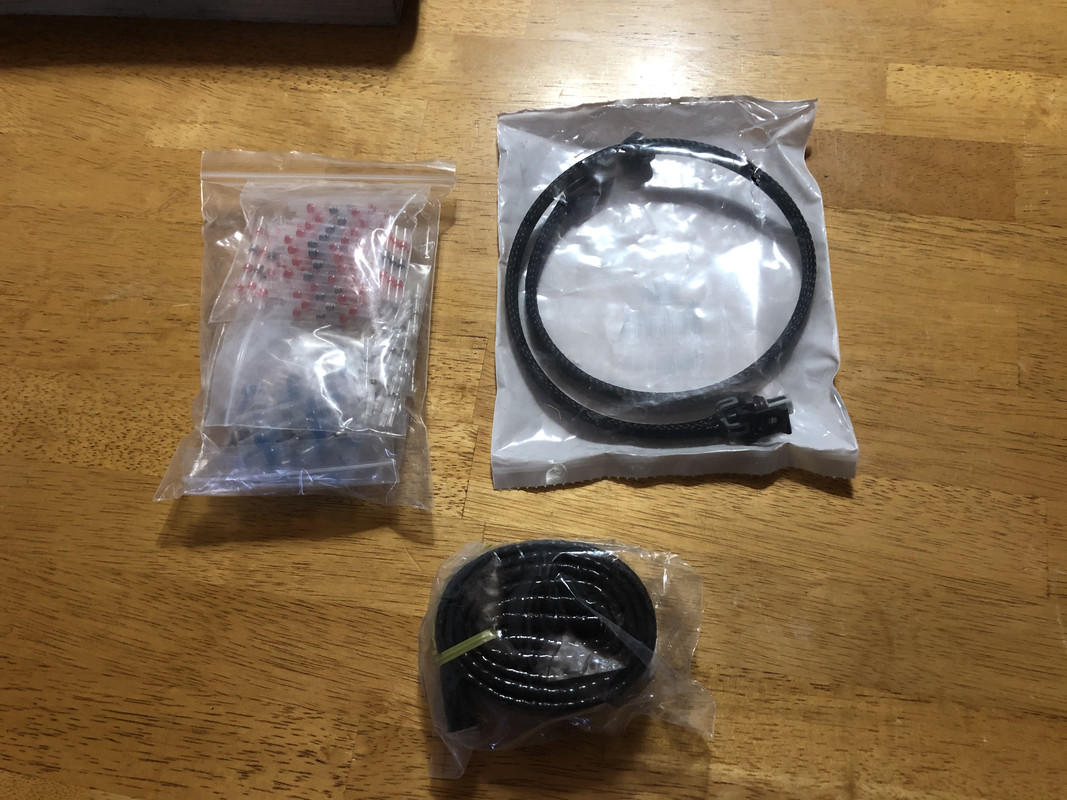
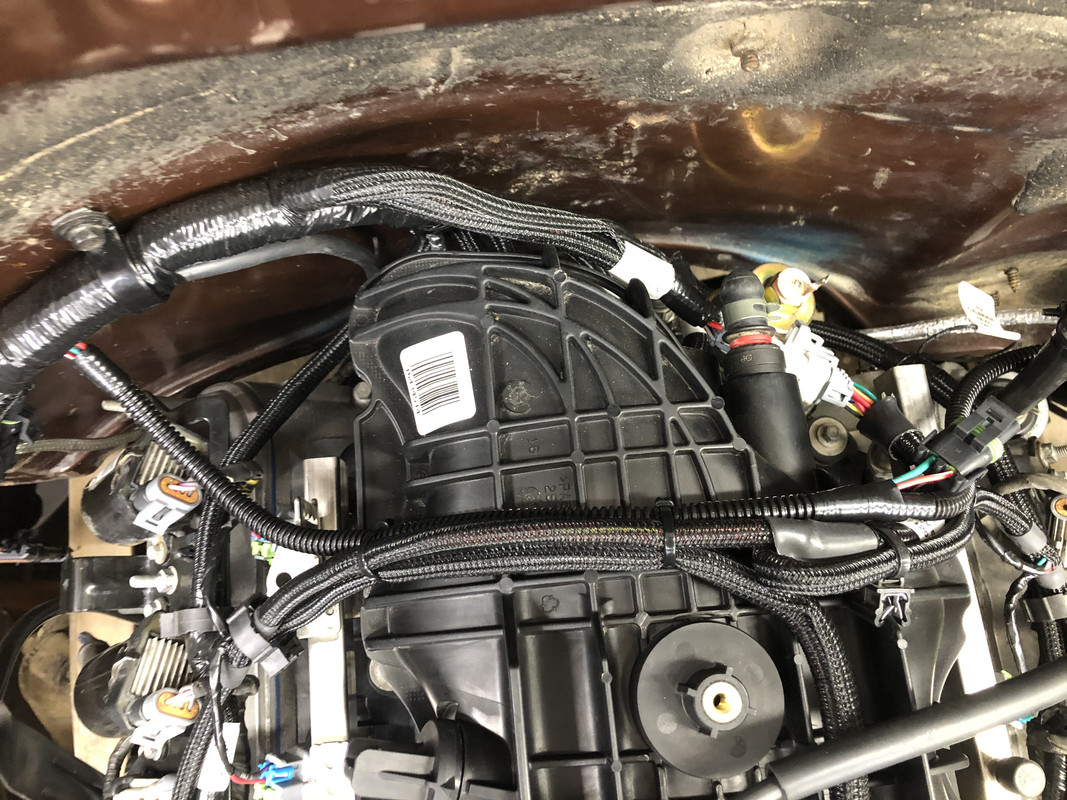
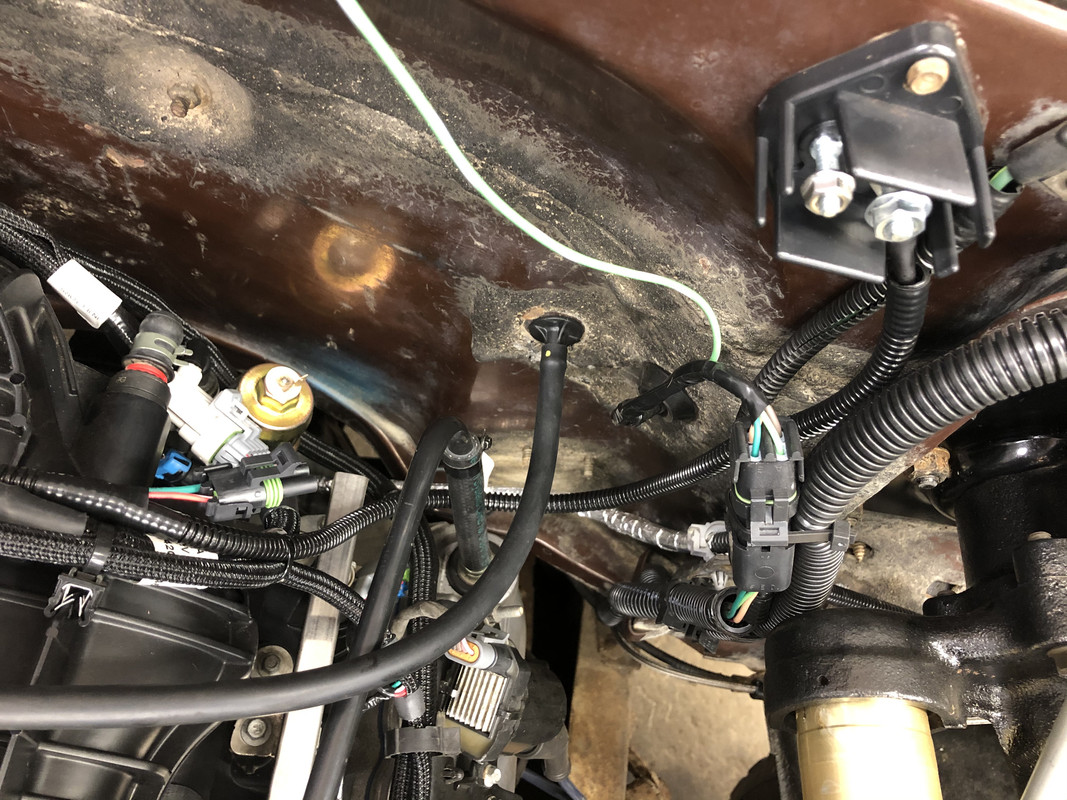
Summit also delivered more fire sleeve for fuel lines, solder connectors for a few more bits of wiring remaining, and the fuel pressure sensor wiring extension so I can safely mount it to the fender instead of the engine.
I also picked up a headlight switch which I had forgotten to order earlier.
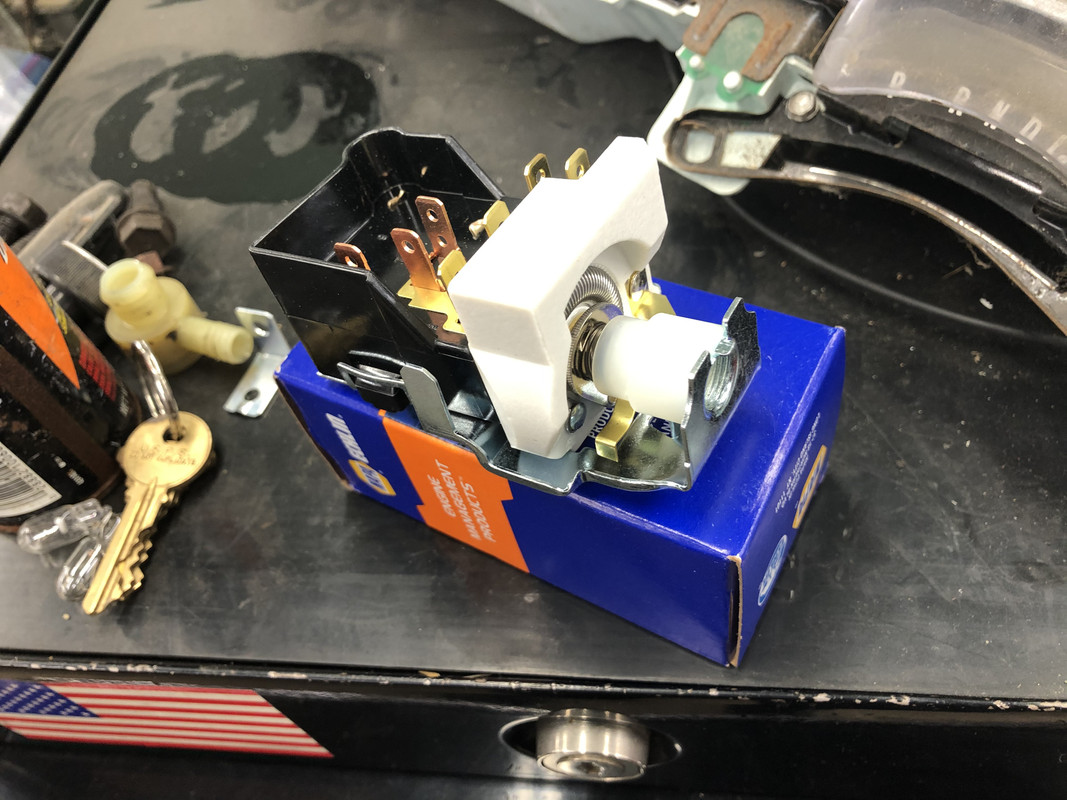
Headlight switch installed!
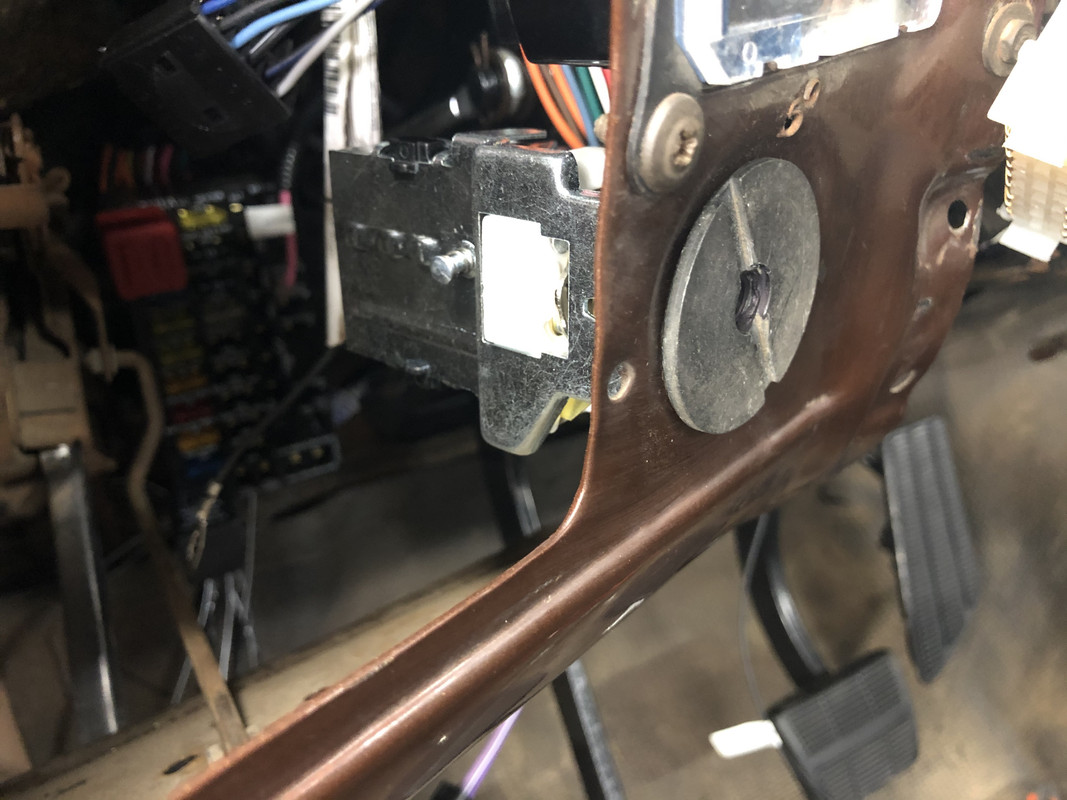
Flashers installed in the fuse block!
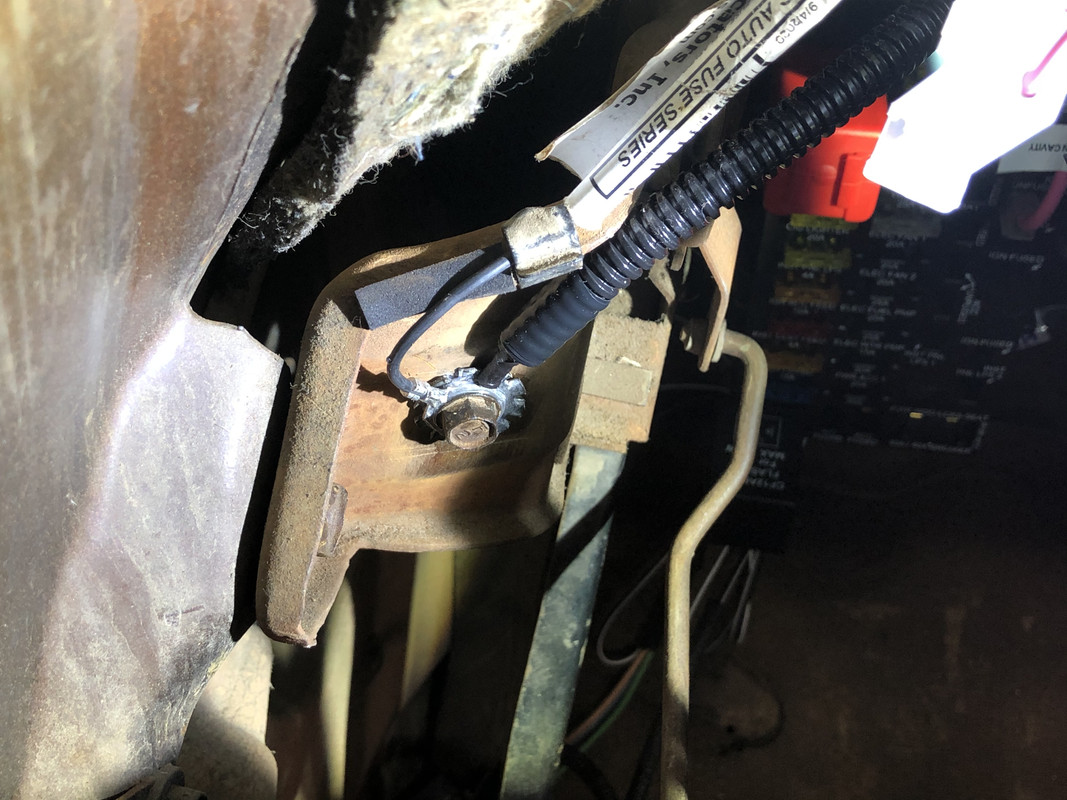
Extended the ground wire for the fuel pump relays, and changed to a ring terminal.

Under dash grounds finished!
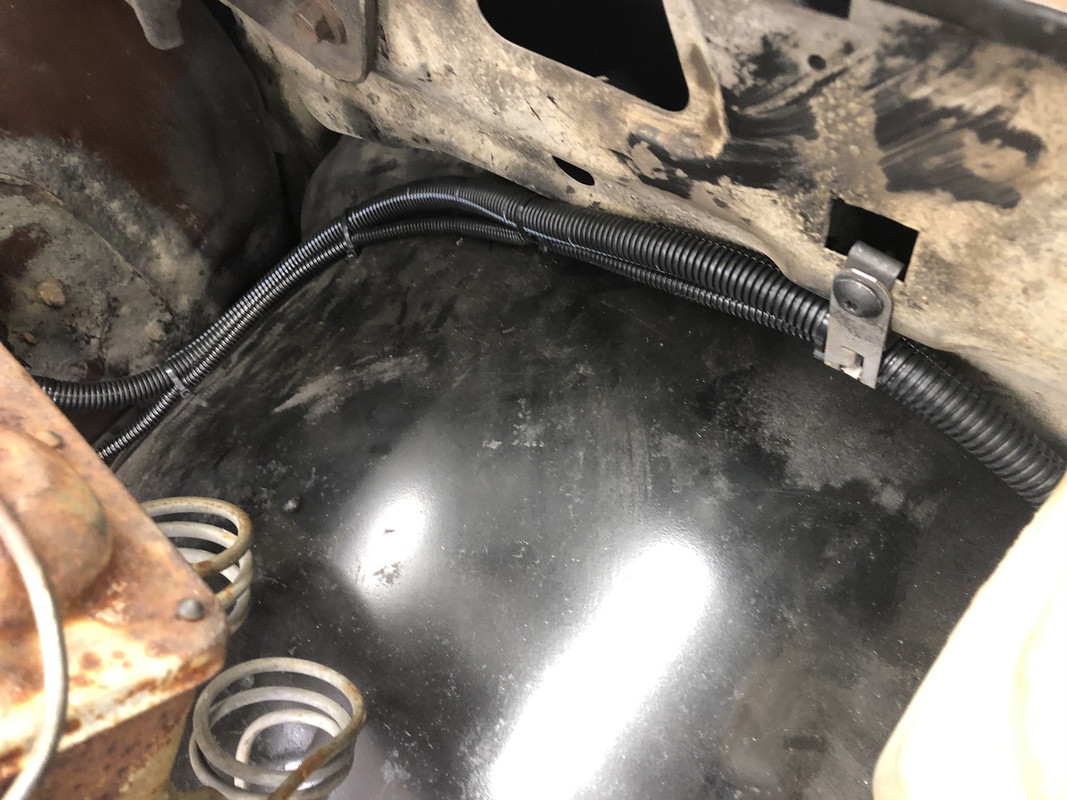
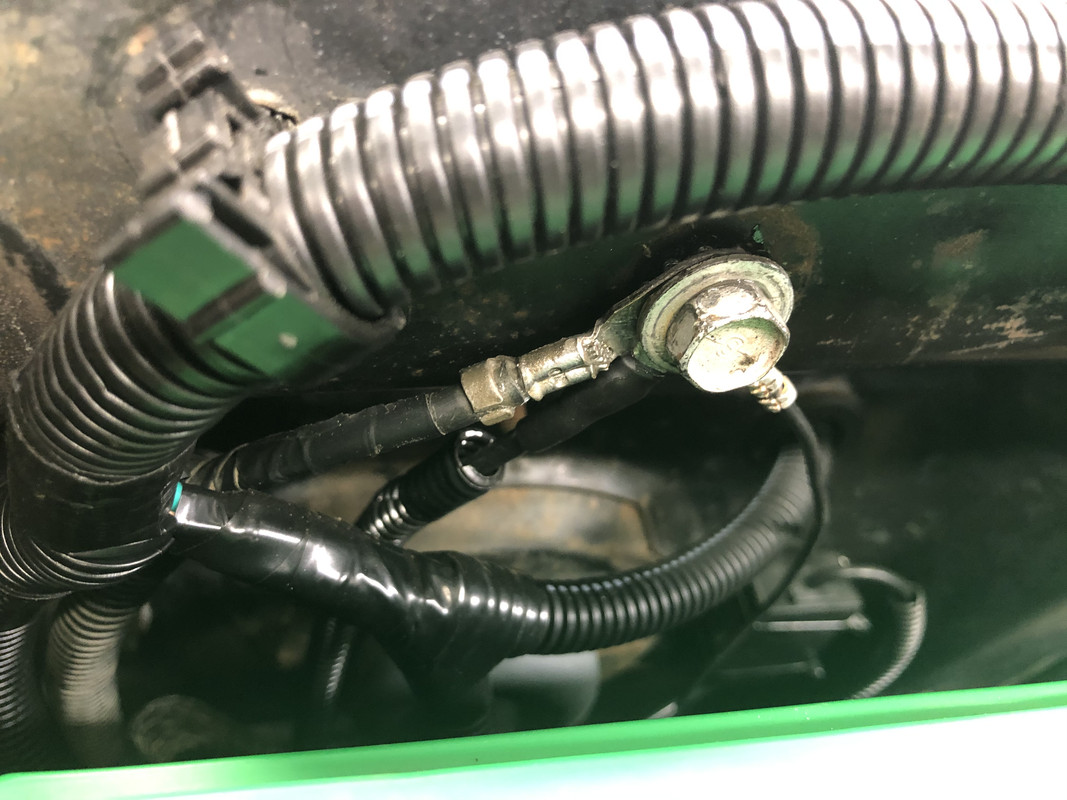
I also ran the secondary ground wire for the fuel pumps themselves. This interties with the ground wire near the switching valve, to eliminate any chance of grounding issues with the pumps!
Summit also delivered more fire sleeve for fuel lines, solder connectors for a few more bits of wiring remaining, and the fuel pressure sensor wiring extension so I can safely mount it to the fender instead of the engine.
I also picked up a headlight switch which I had forgotten to order earlier.
Headlight switch installed!
Flashers installed in the fuse block!
Extended the ground wire for the fuel pump relays, and changed to a ring terminal.
Under dash grounds finished!
I also ran the secondary ground wire for the fuel pumps themselves. This interties with the ground wire near the switching valve, to eliminate any chance of grounding issues with the pumps!
The following users liked this post:
y5mgisi (11-09-2022)
01-18-2021 | 07:46 PM
#63
Thread Starter
TECH Regular
Joined: Oct 2011
Posts: 413
Likes: 159
From: Alaska
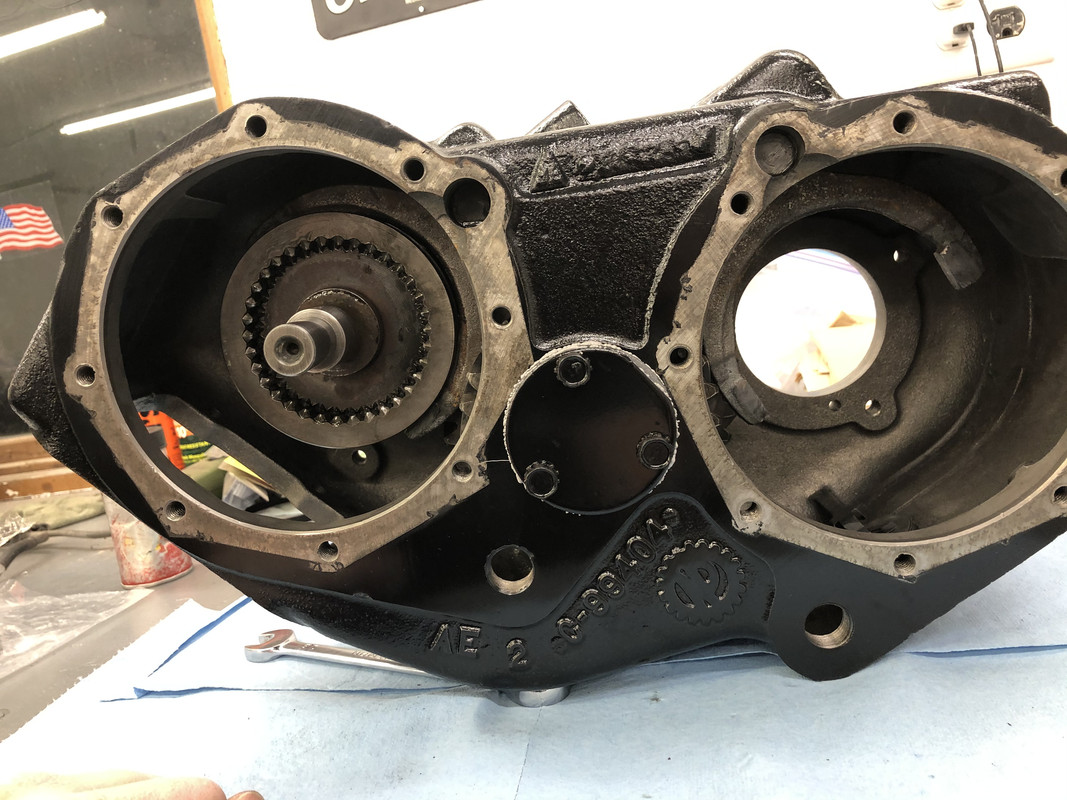
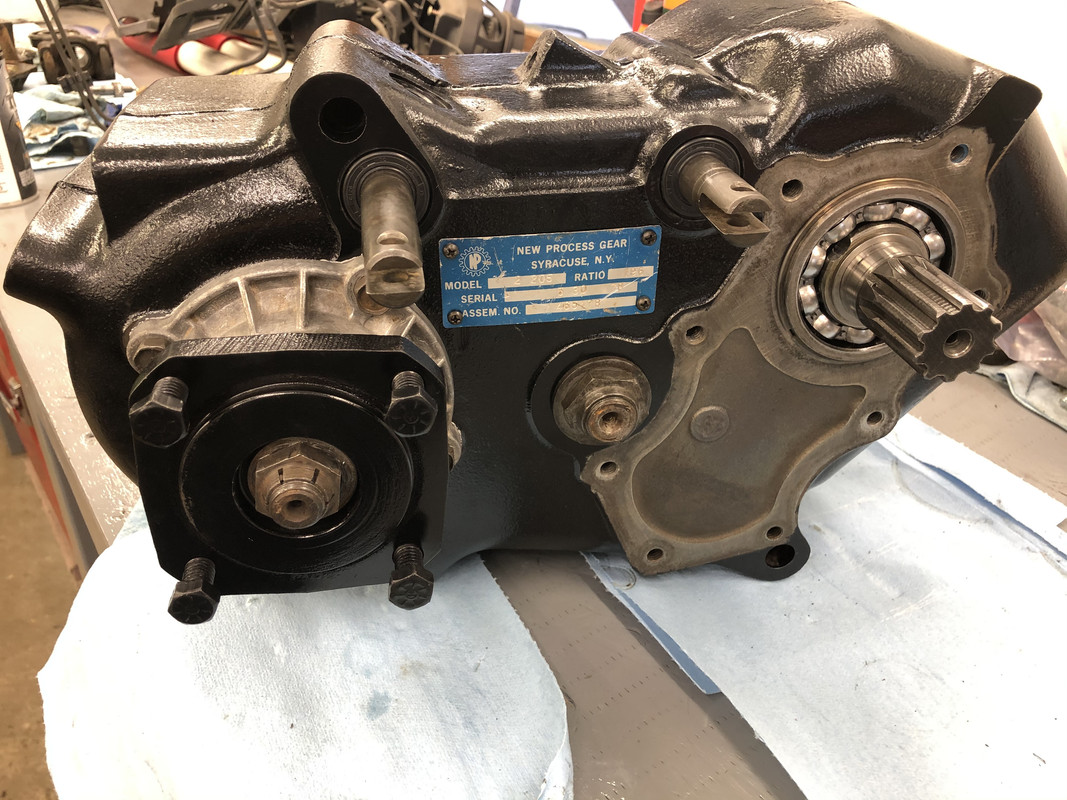
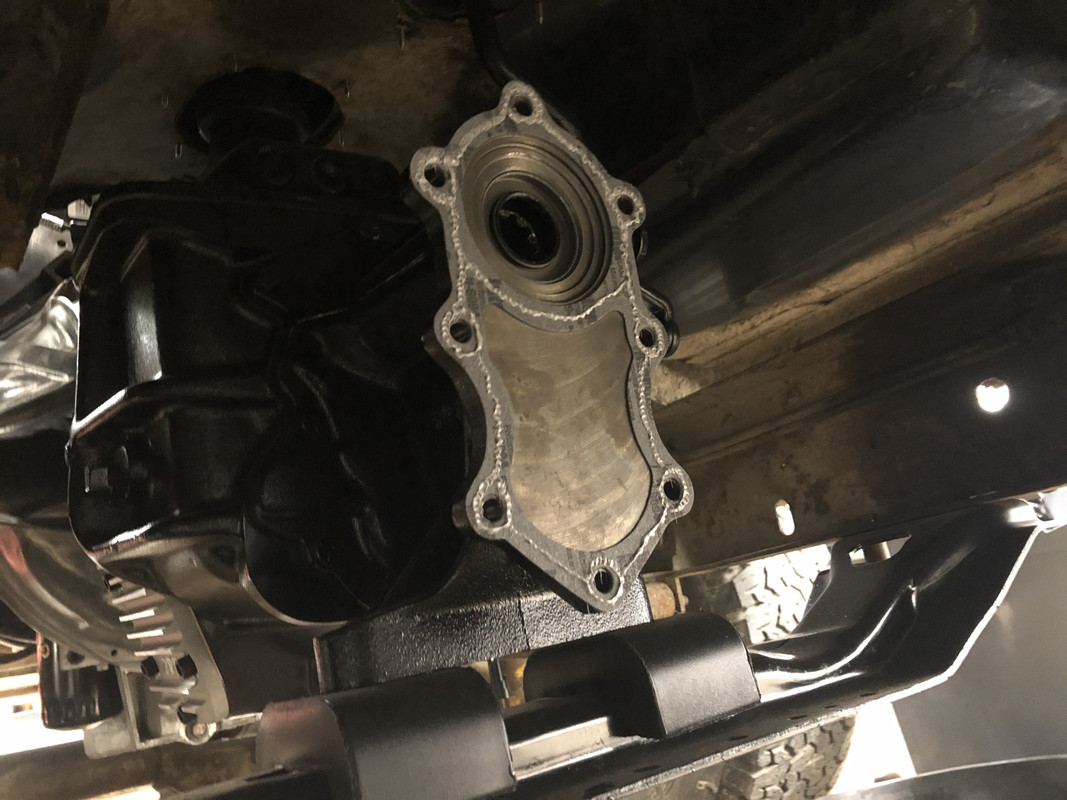
So, I am EXTREMELY happy to report that the transmission has not leaked a drop of fluid all week. I think I’m finally moving past that saga. The next step now is the transfer case! Yeah, it’s dirty. We’ll fix that though.
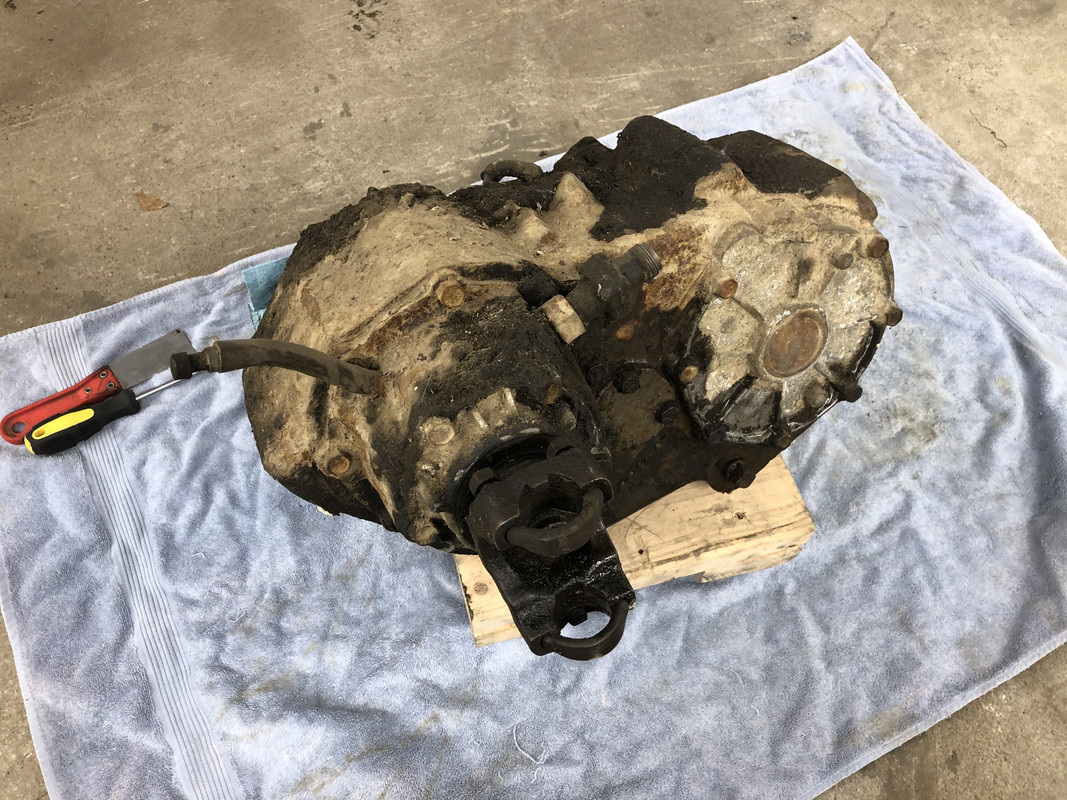
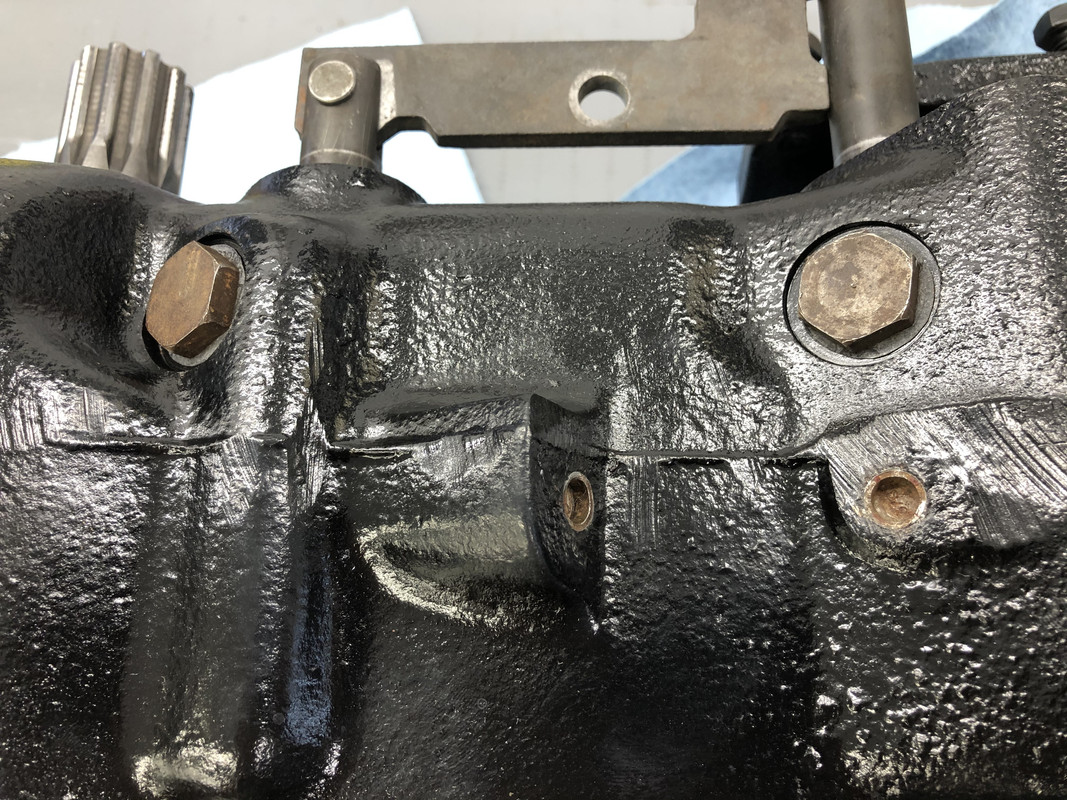
I scraped off most of the big chunks that I could, then heaved it up on the bench for disassembly.
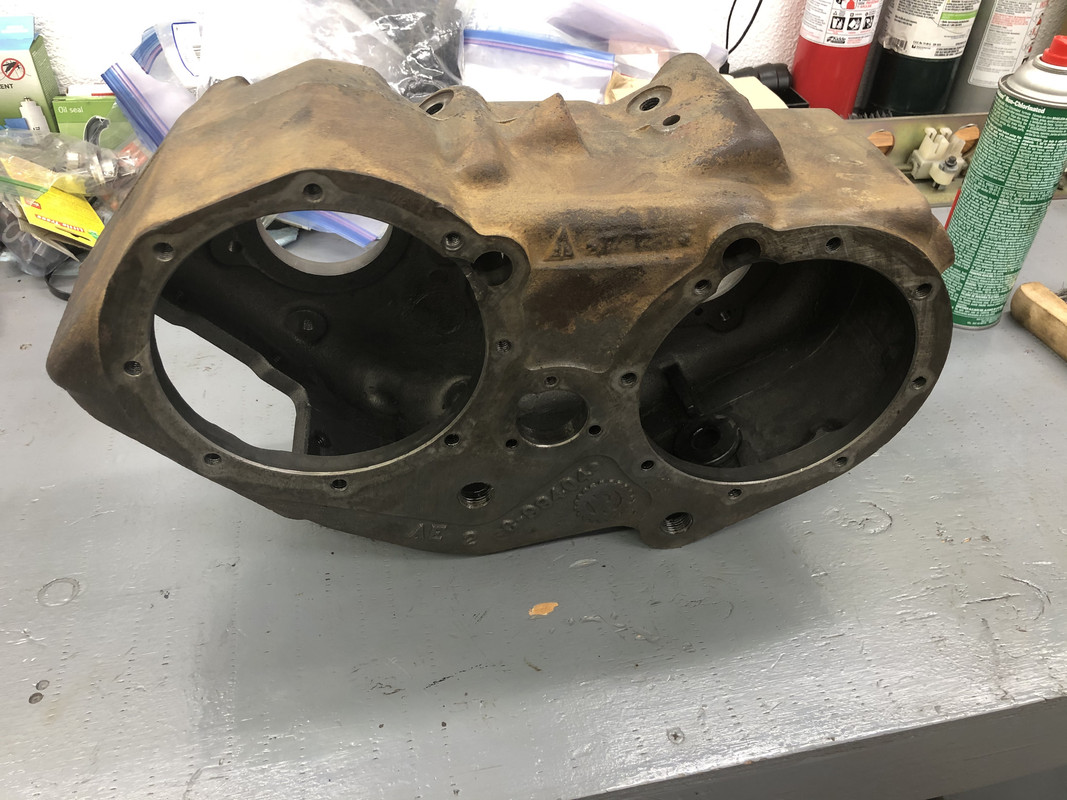
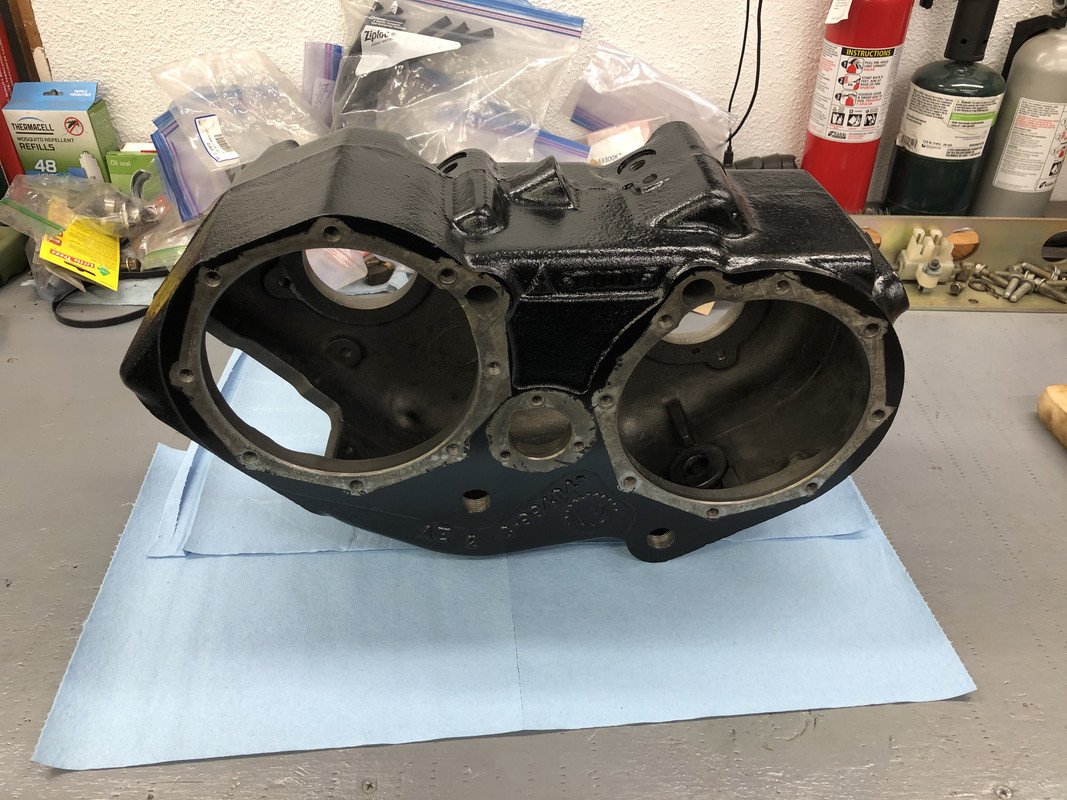
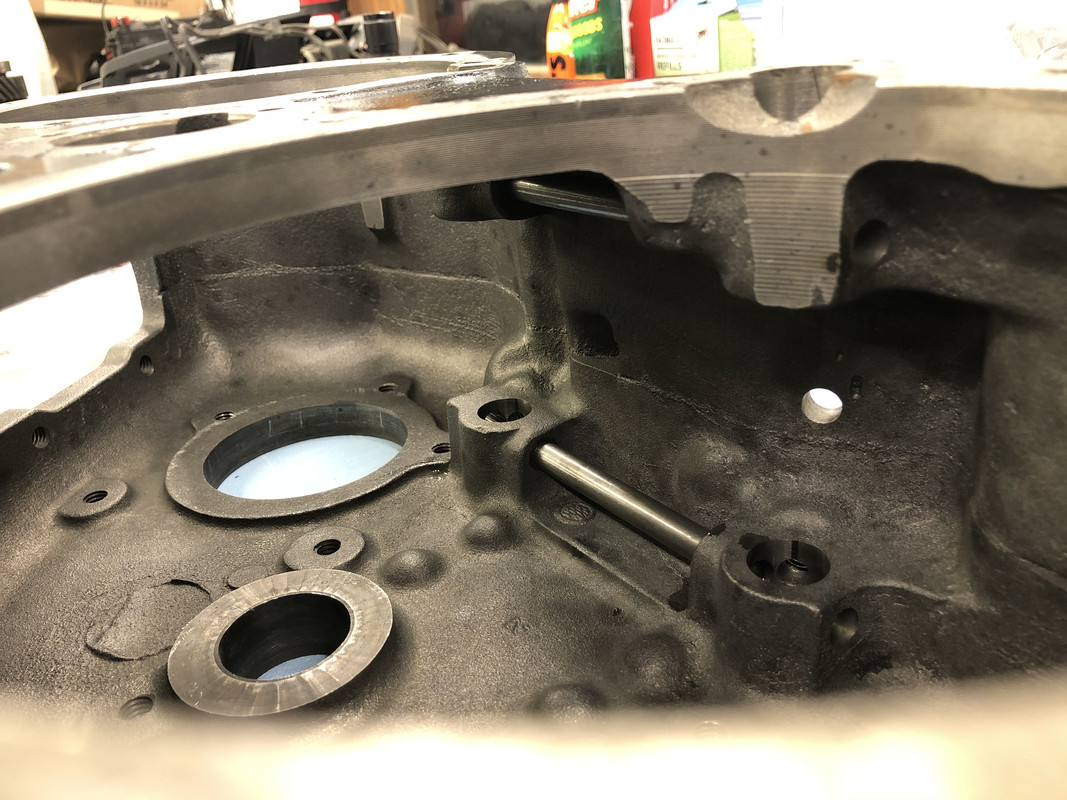
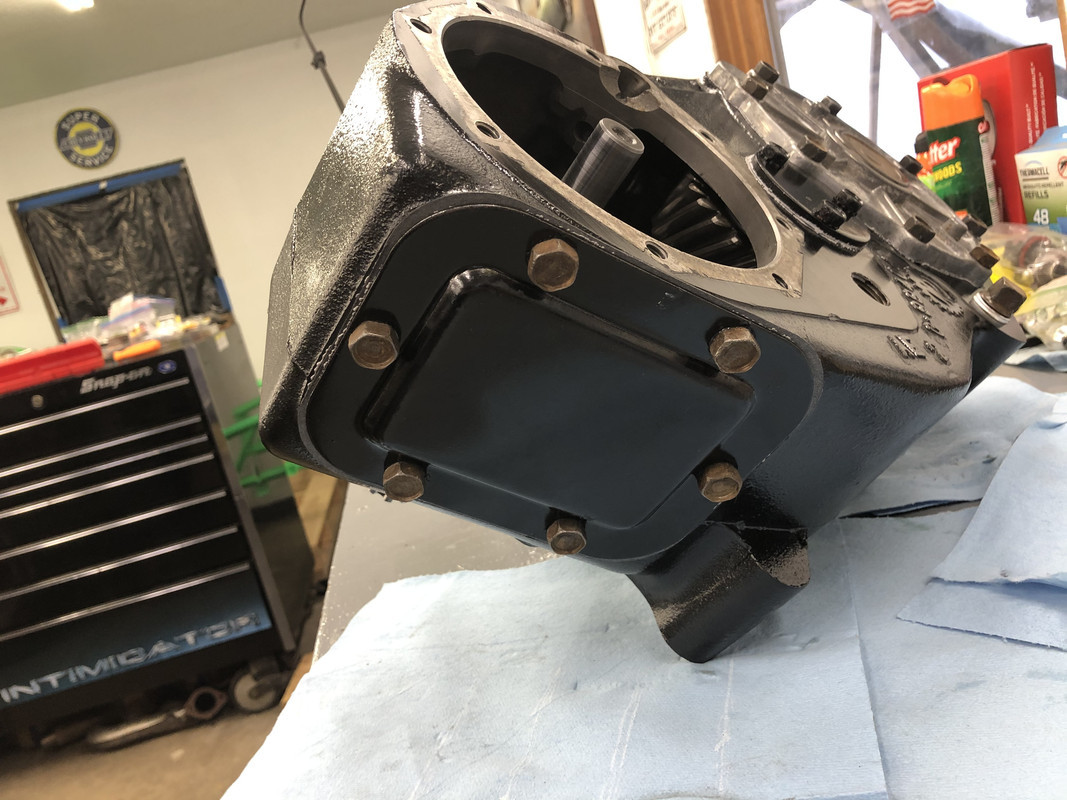
Case housing stripped, wire brushed to remove all the fine dirt, and wiped down with brake clean.
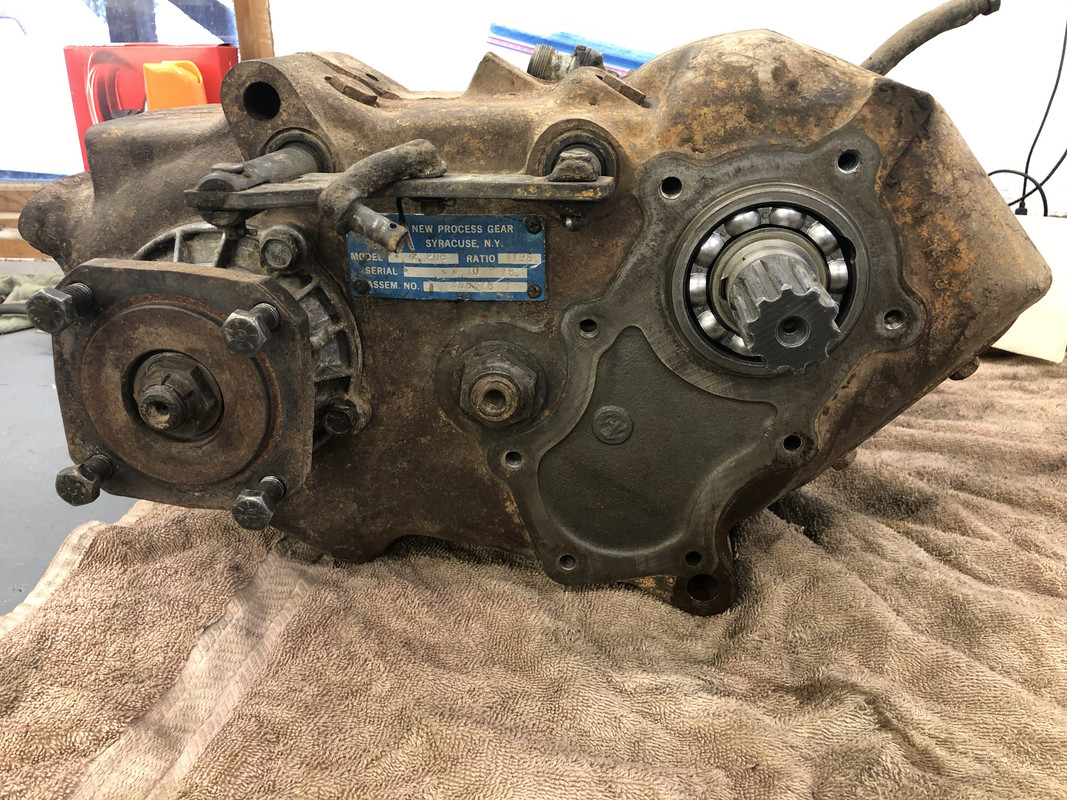
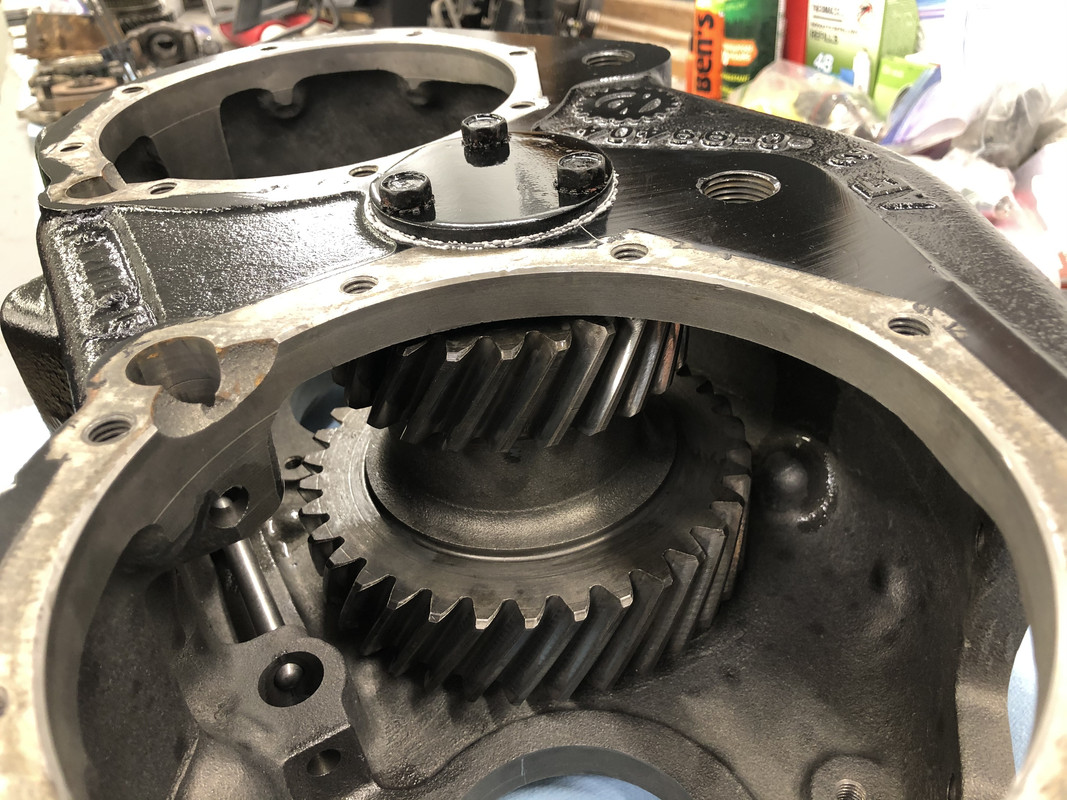
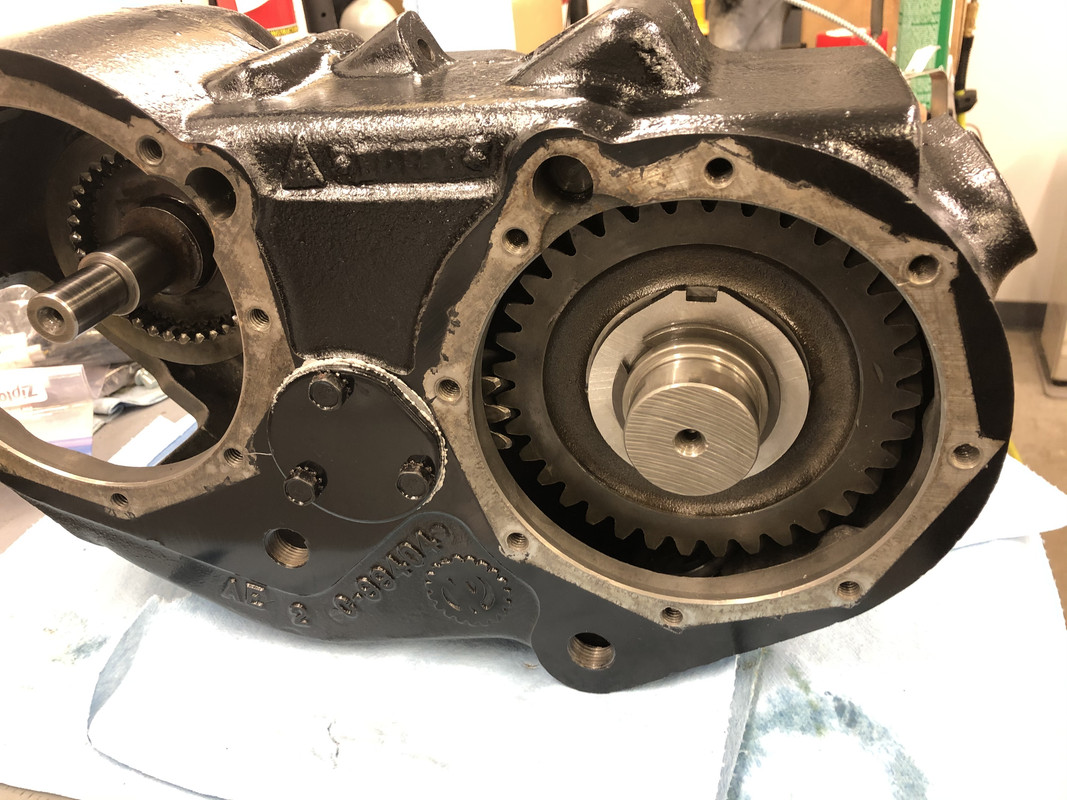
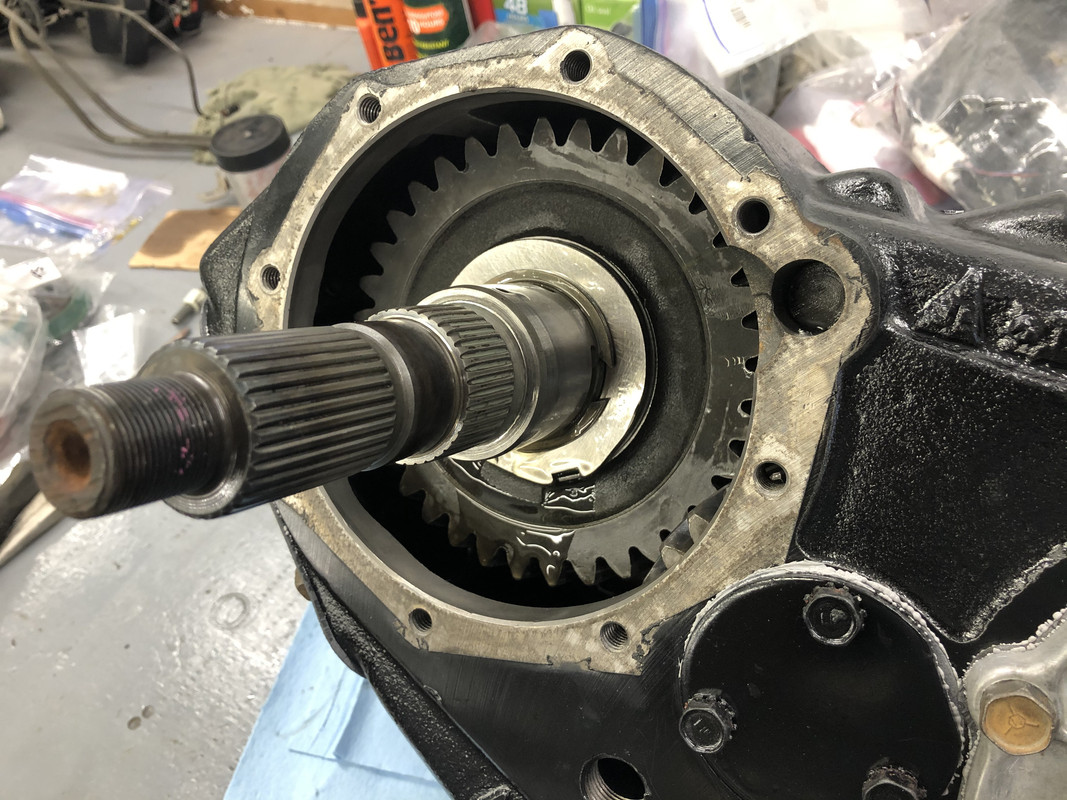
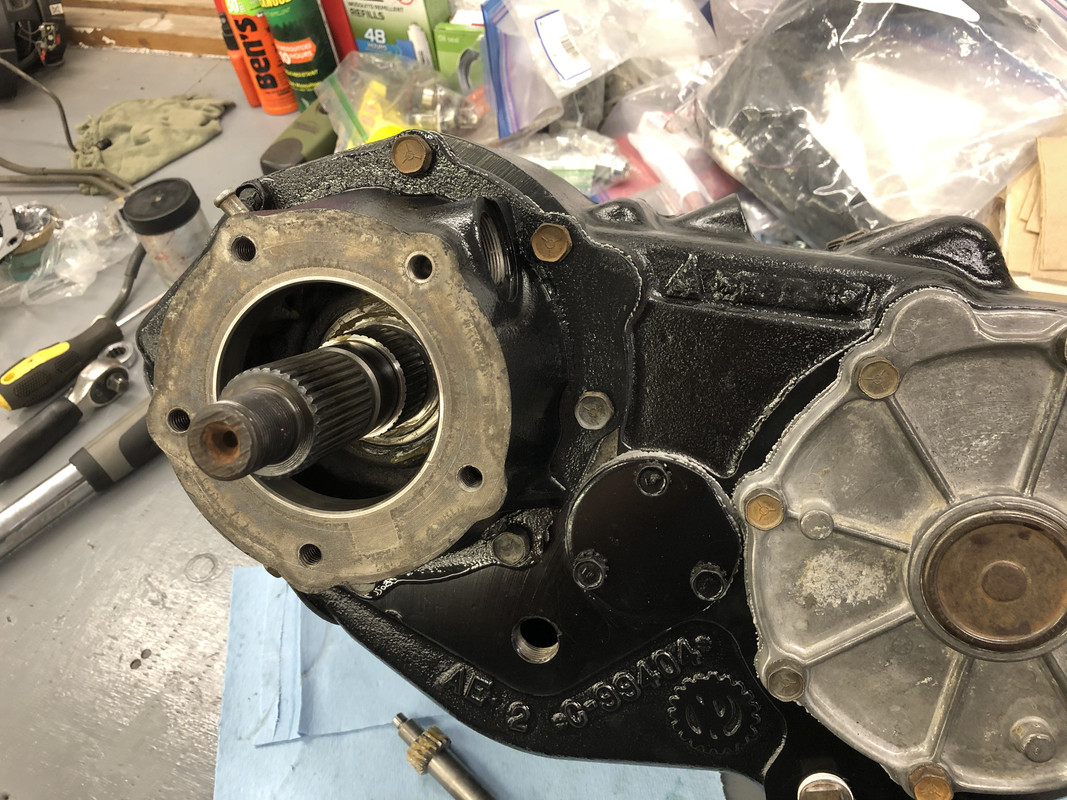
Internals! Which will get cleaned at a later time. Everything appears to be in great shape, so I’m happy.

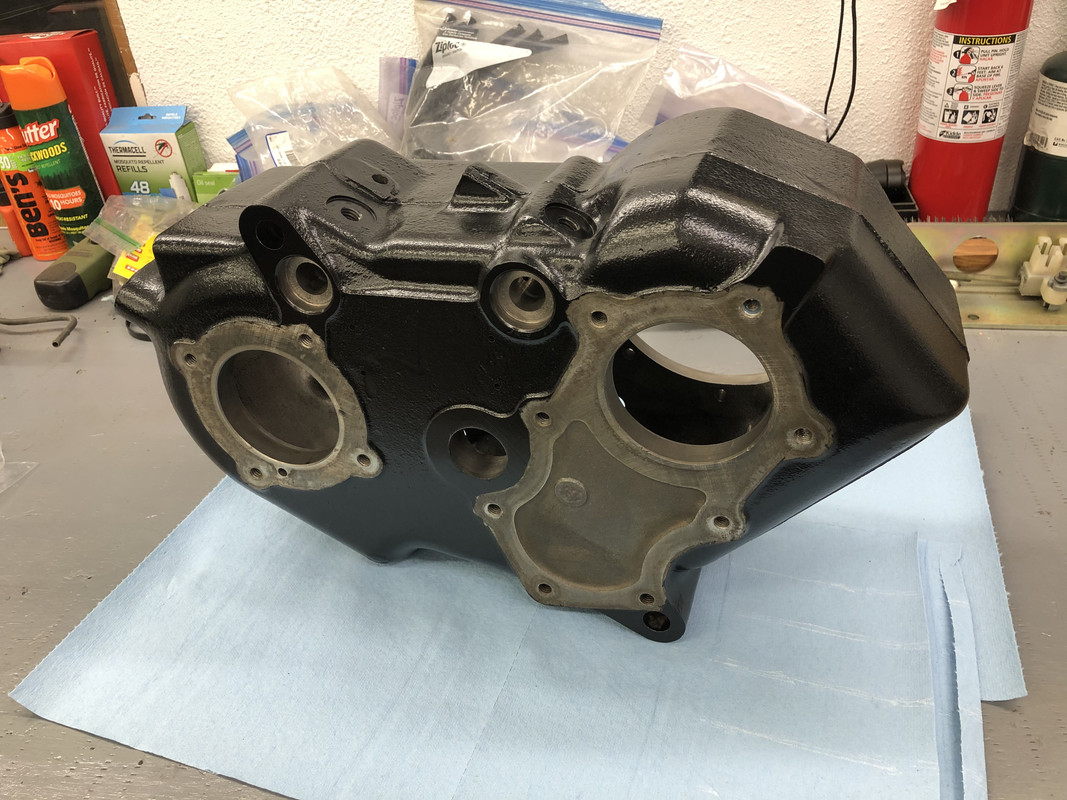
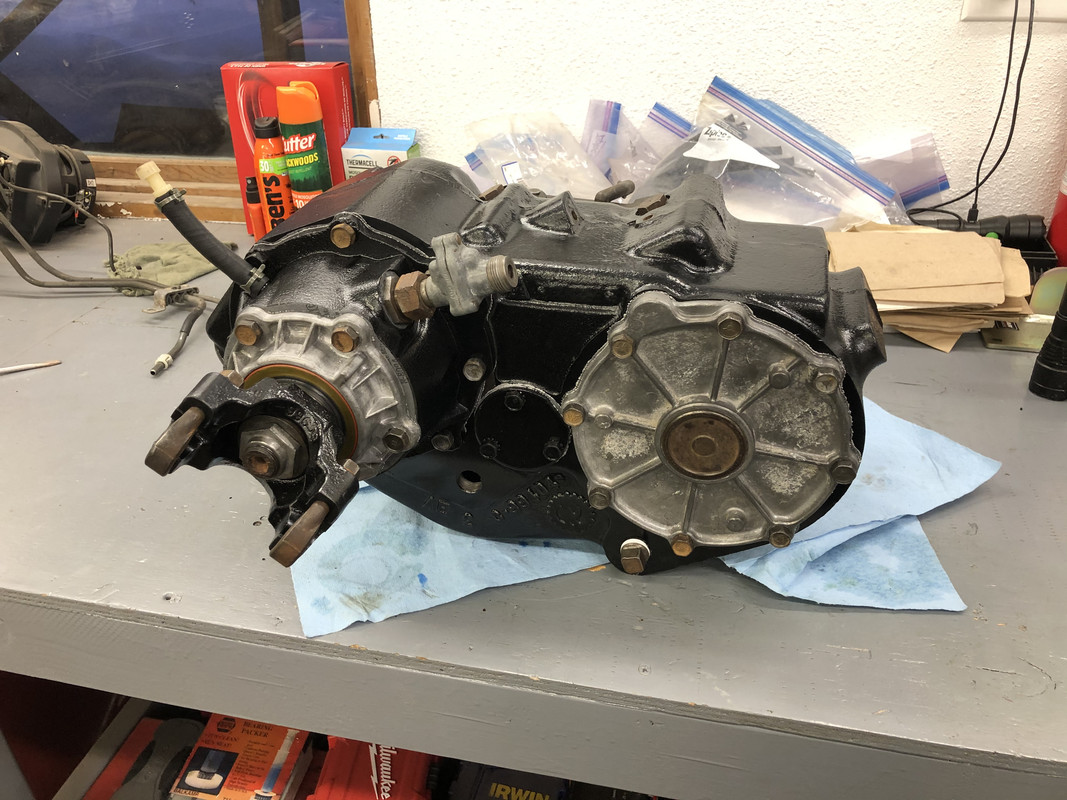
Taped the housing off for paint! Unfortunately this side is all I have time for this weekend.
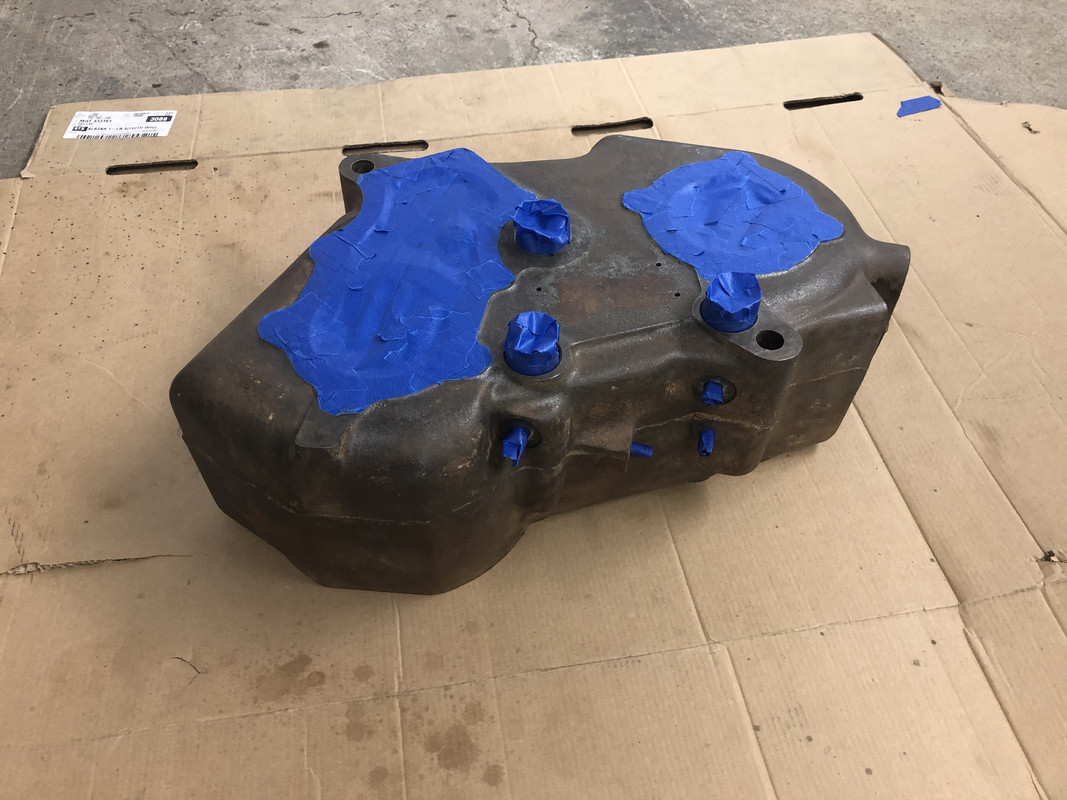
Aaaaaand paint! Hopefully by this time next weekend, it will be a complete transfer case again!

I scraped off most of the big chunks that I could, then heaved it up on the bench for disassembly.
Case housing stripped, wire brushed to remove all the fine dirt, and wiped down with brake clean.
Internals! Which will get cleaned at a later time. Everything appears to be in great shape, so I’m happy.
Taped the housing off for paint! Unfortunately this side is all I have time for this weekend.
Aaaaaand paint! Hopefully by this time next weekend, it will be a complete transfer case again!
01-23-2021 | 03:20 AM
#64
Thread Starter
TECH Regular
Joined: Oct 2011
Posts: 413
Likes: 159
From: Alaska
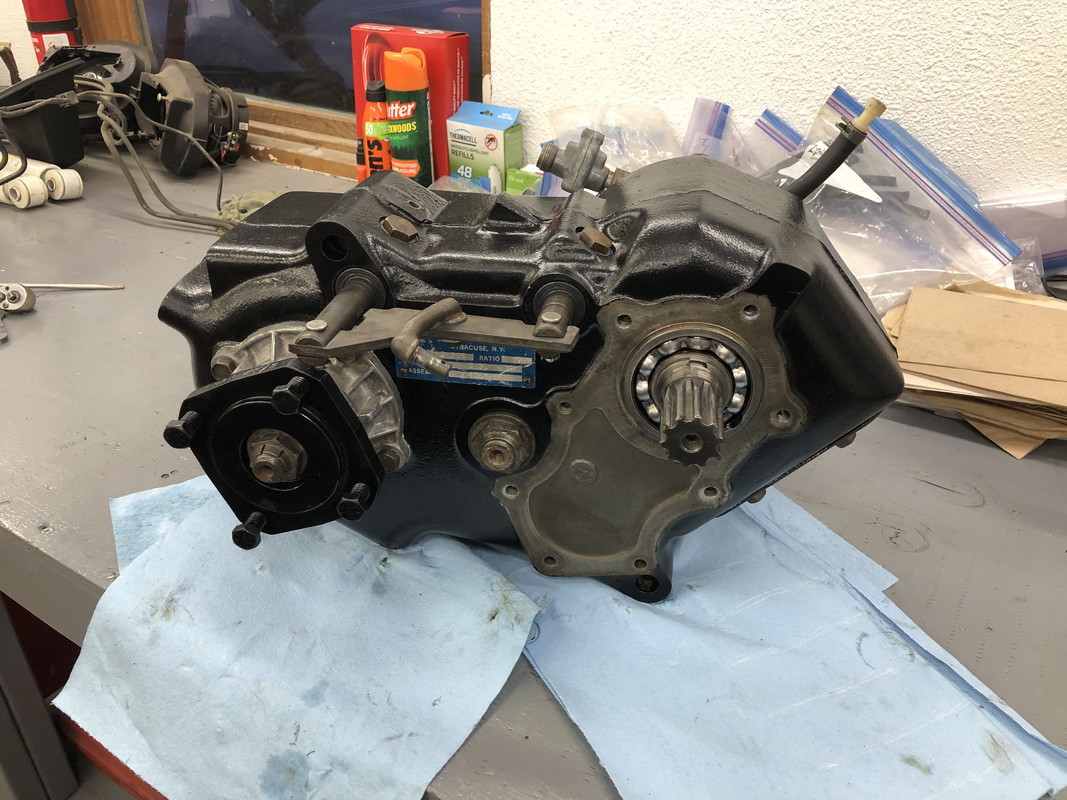
I started off the weekend by painting the other side of the case.

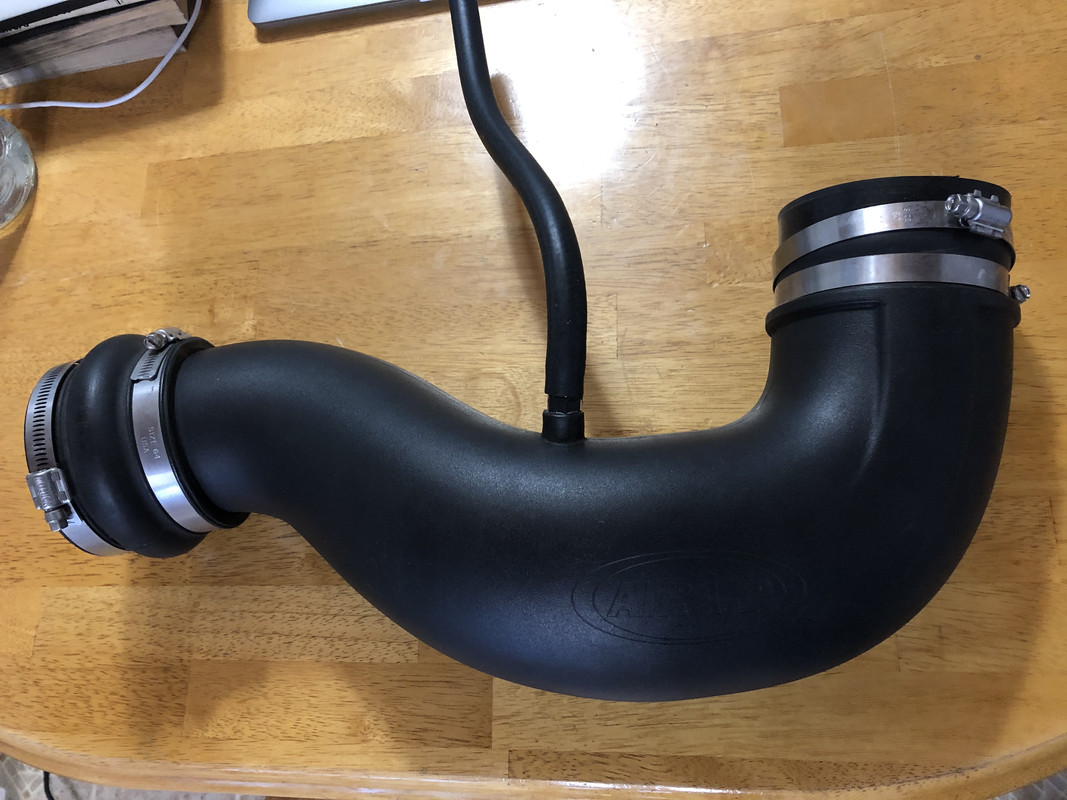
A few other parts showed up as well. Airaid intake tube, and a few more wiring pieces from Summit.
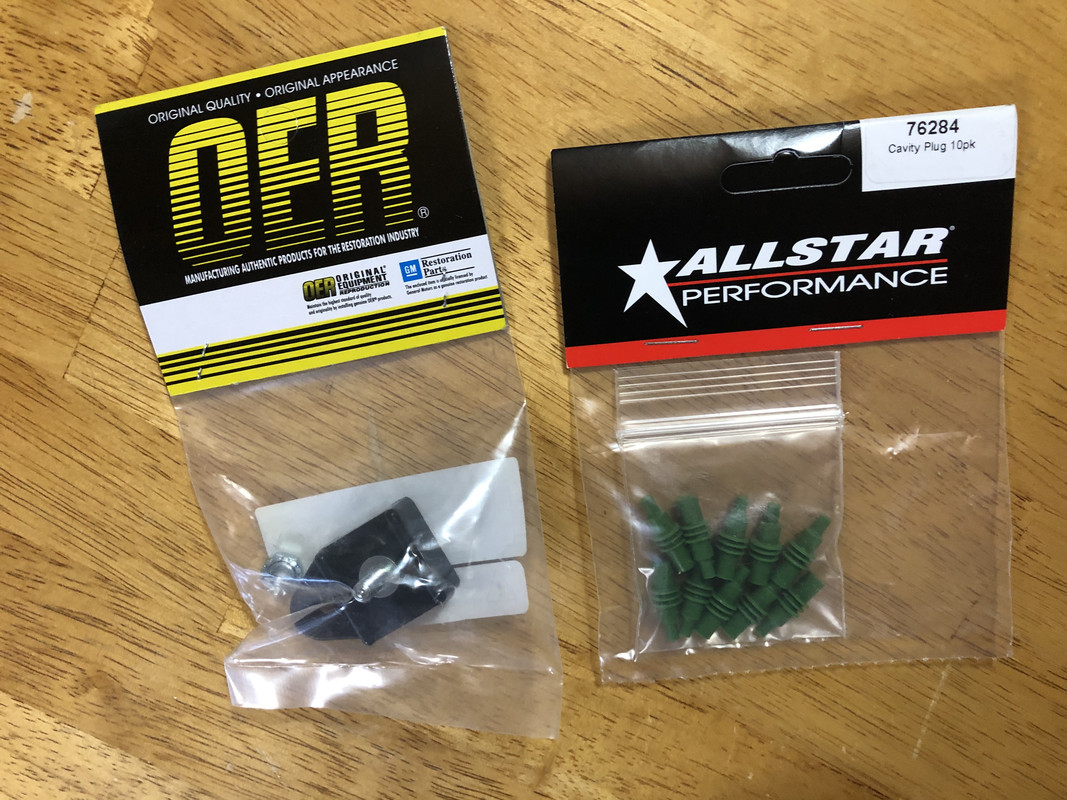
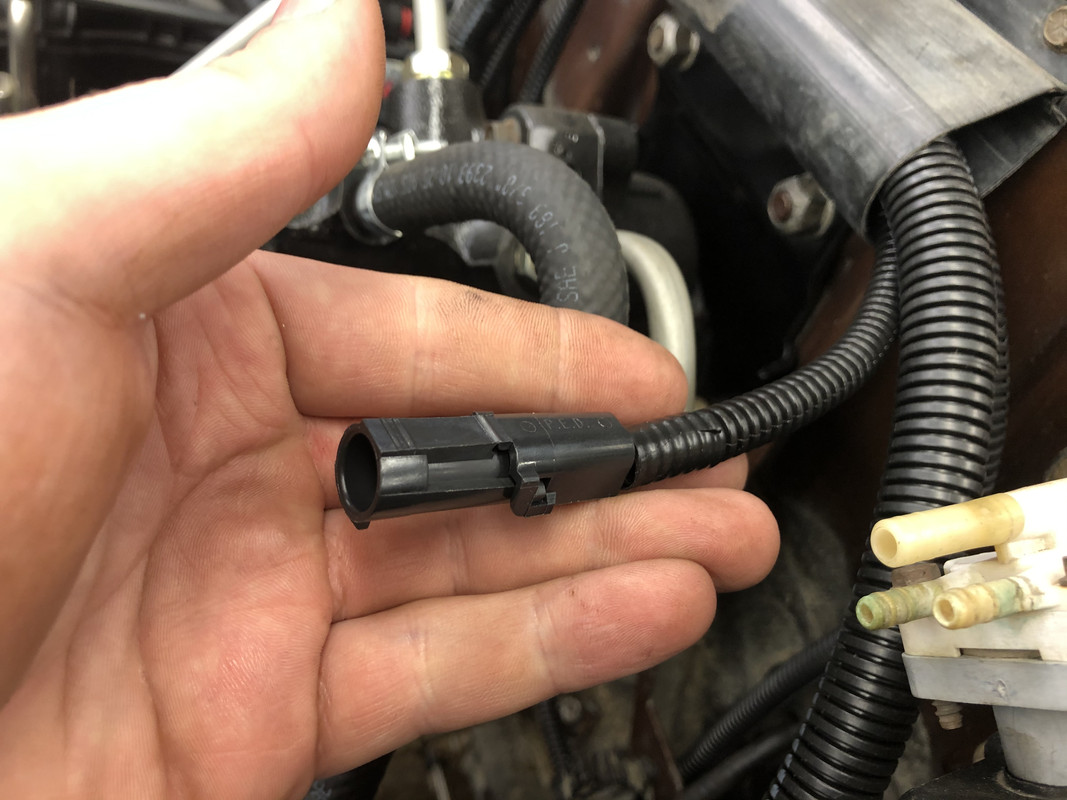
Depinned the Holley accessory connector for the electric fan relay grounds only.

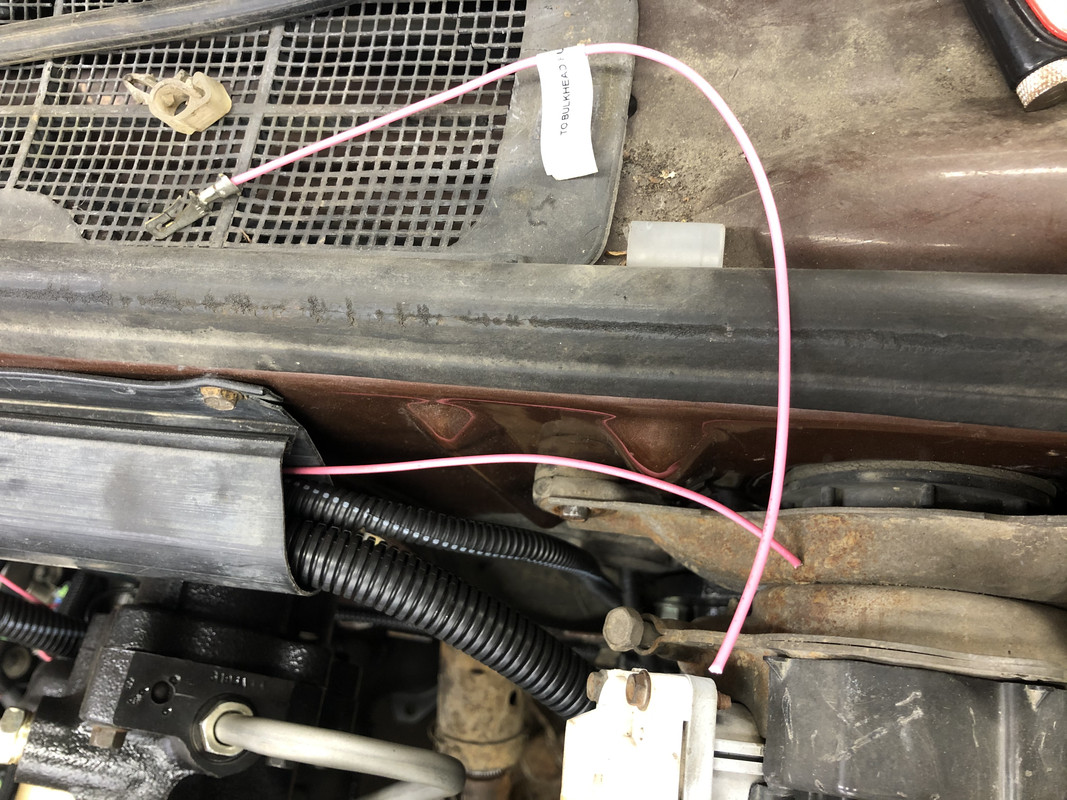
This is something that always bothers me on these trucks. In order to remove the harness, either the harness needs to be depinned, or the tanks need to be dropped. Added a quick connector for the fuel sending unit in case this one ever needs to come out.
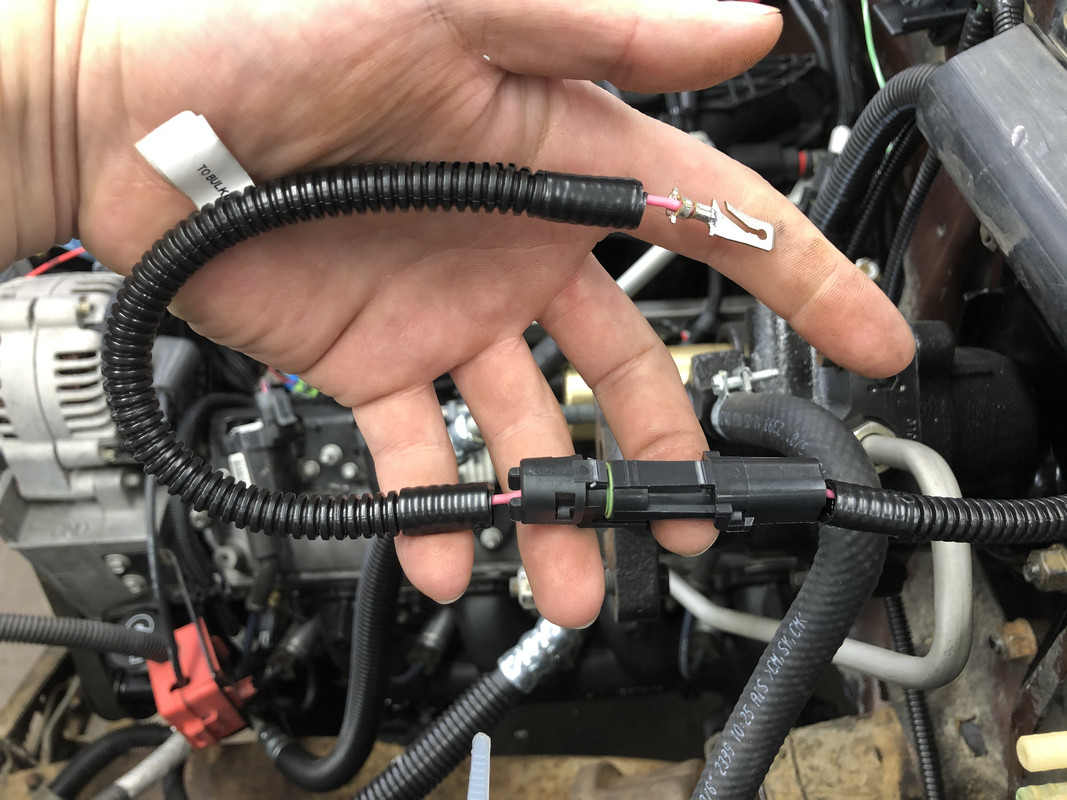
I also blanked off the currently unneeded Tach wire.
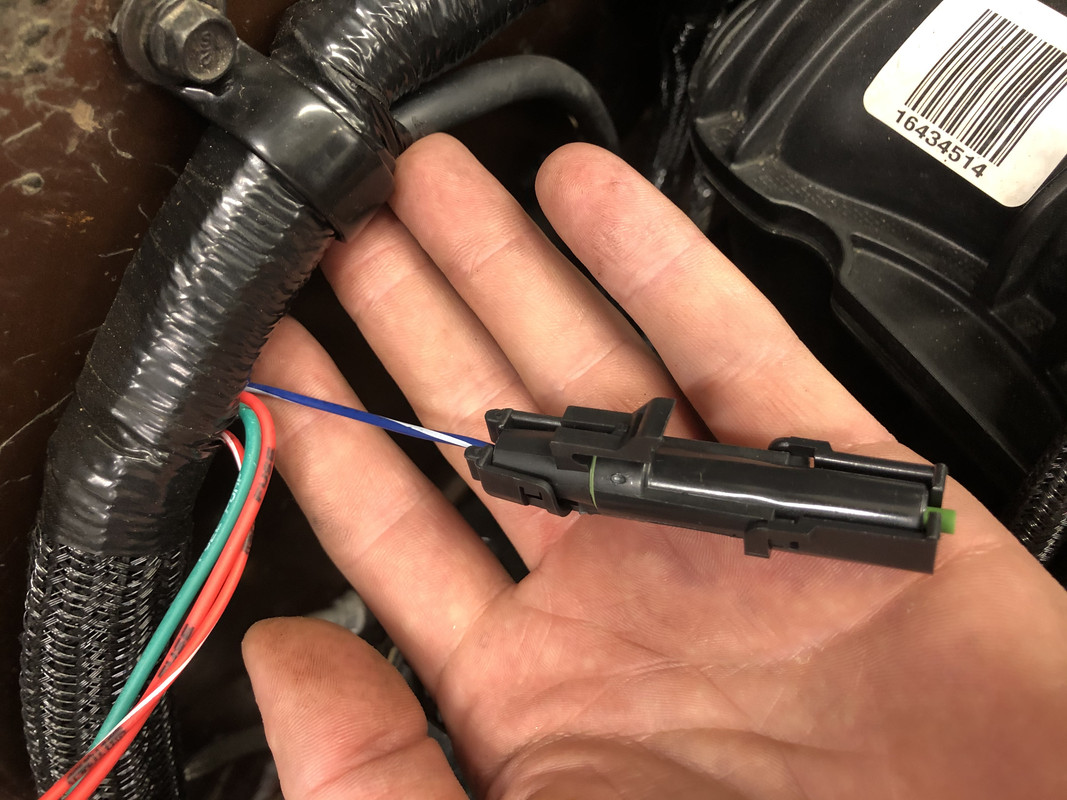
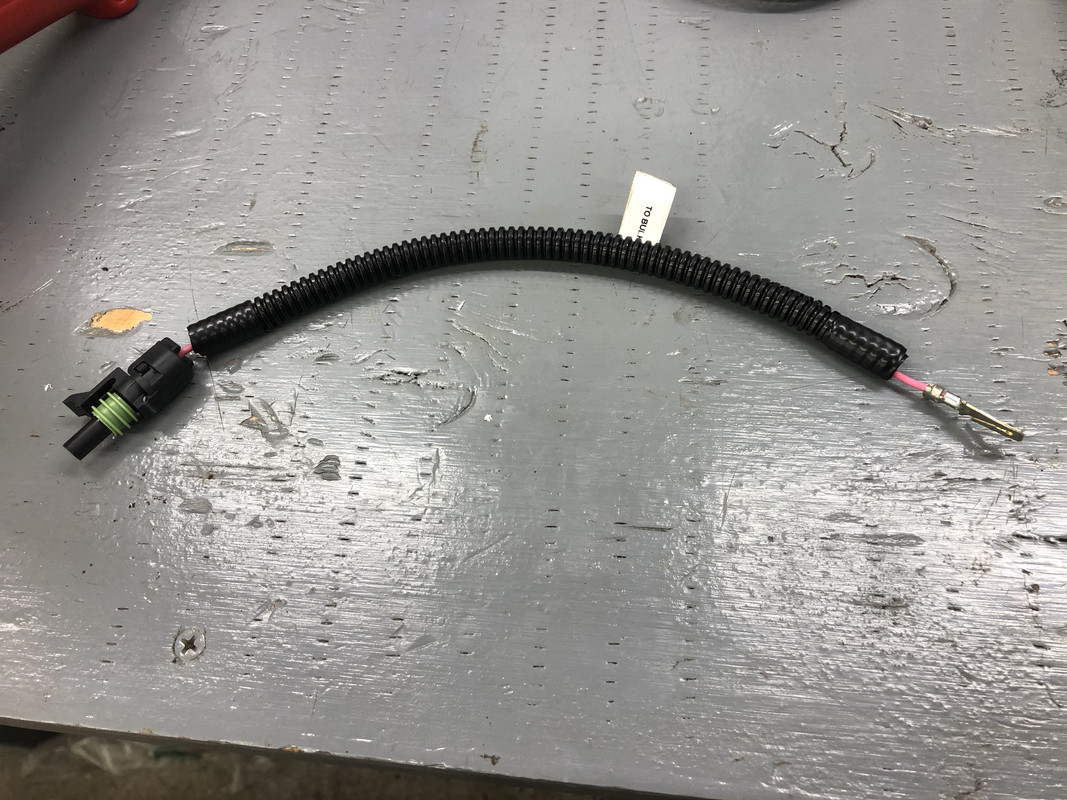
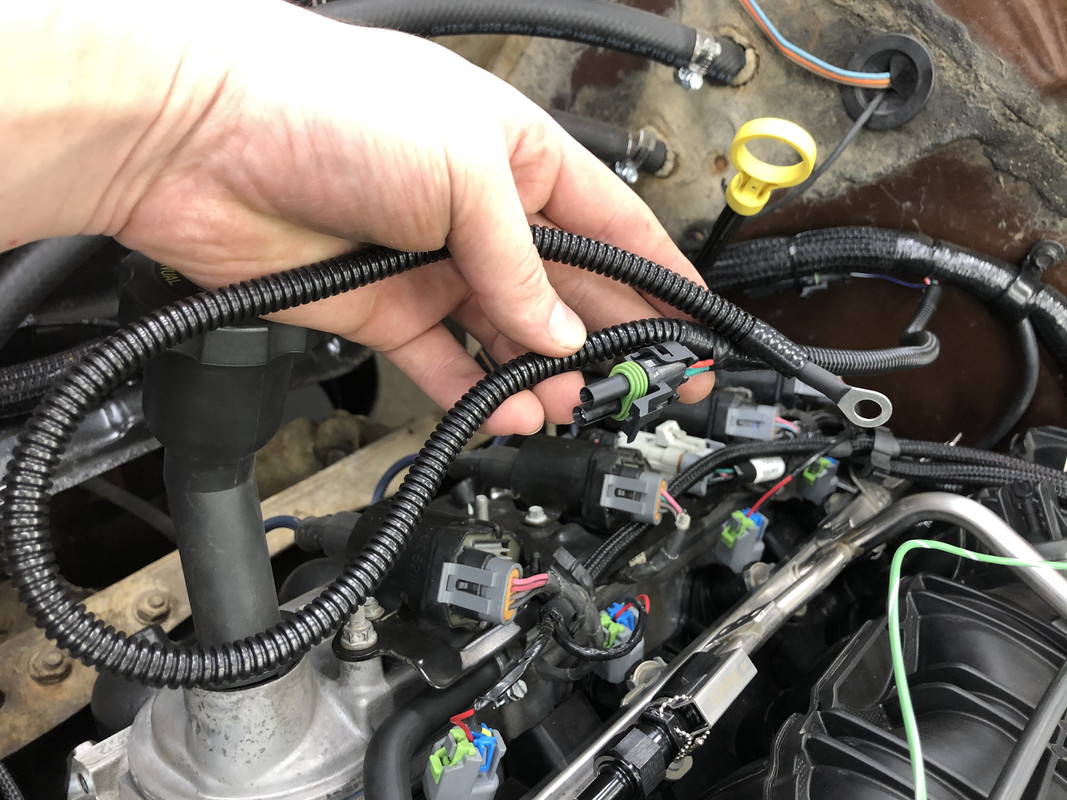
This is a sub harness for the remaining wires on the Terminator X. Power, Ignition, and Fuel Pump. Power is the ring terminal, which will run to the factory junction block for battery power. Ignition is on the two pin connector, and will utilize the distributor power wire on the engine bay harness. Fuel pump is the other wire on the two pin connector, and will connect to the fuel pump harness to drive the relays.
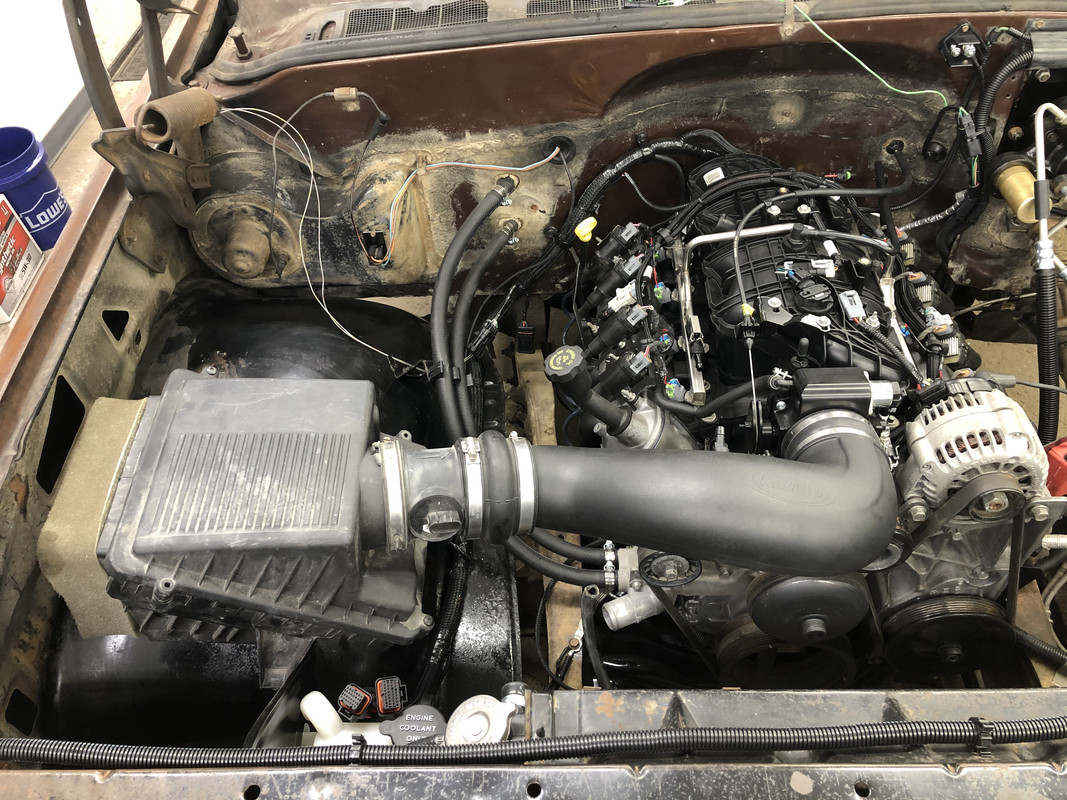
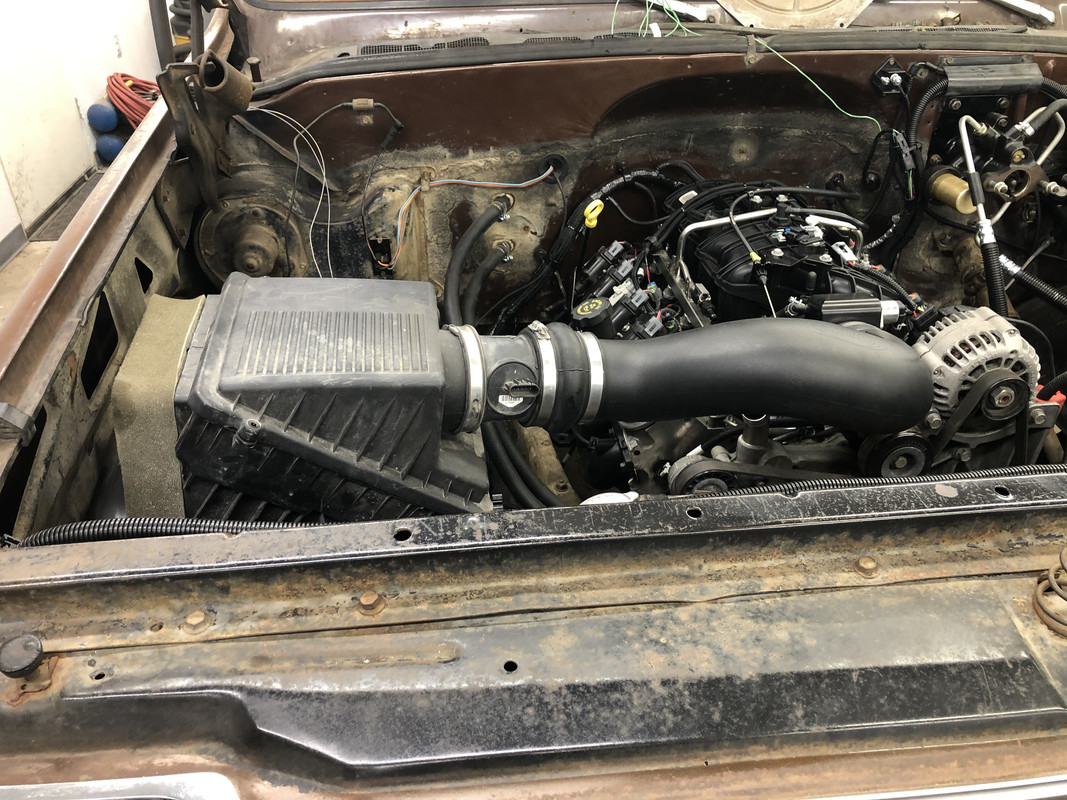
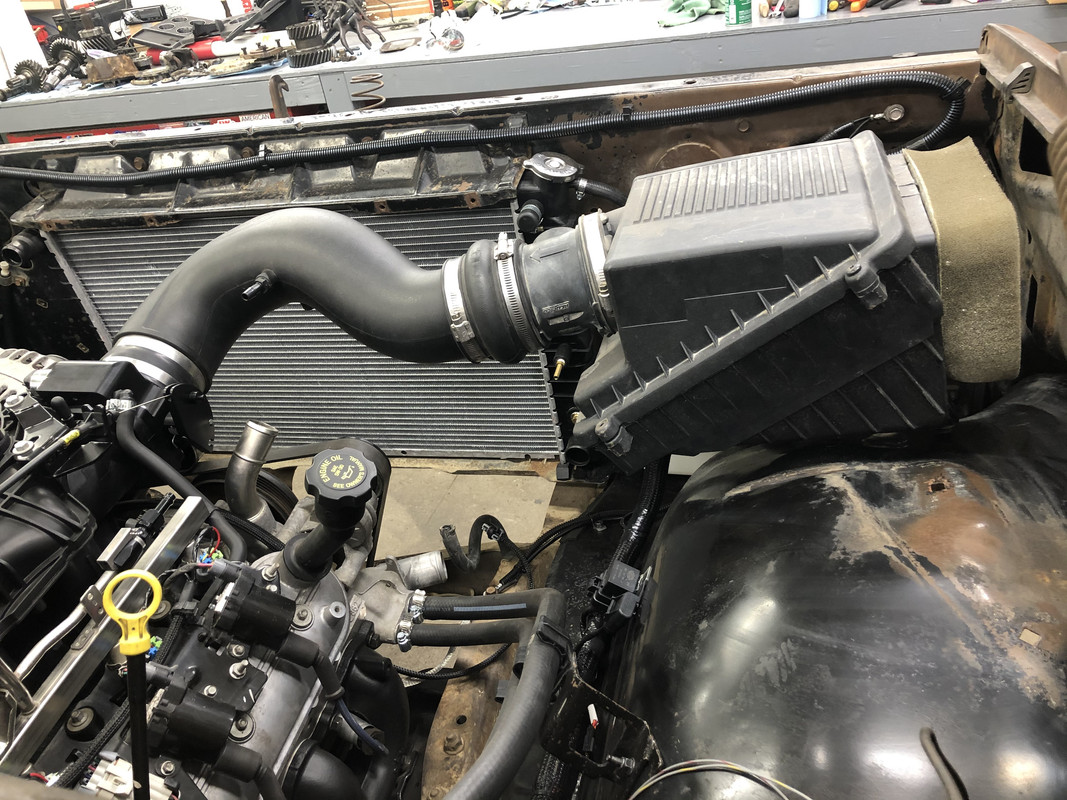
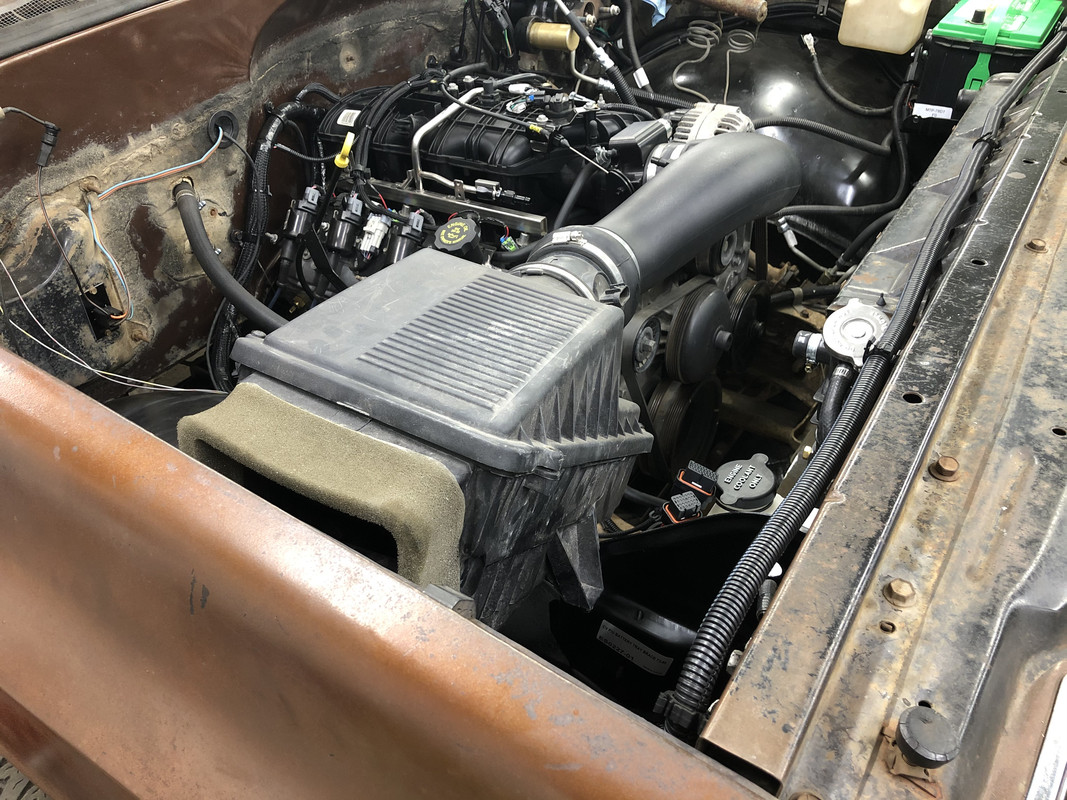
Next, I mocked up the air intake system just to get an idea of where everything will potentially sit. Unfortunately, I had to remove the factory jack mounted on the fender, but it likely wouldn’t have ever been able to get high enough for this lifted truck anyway.
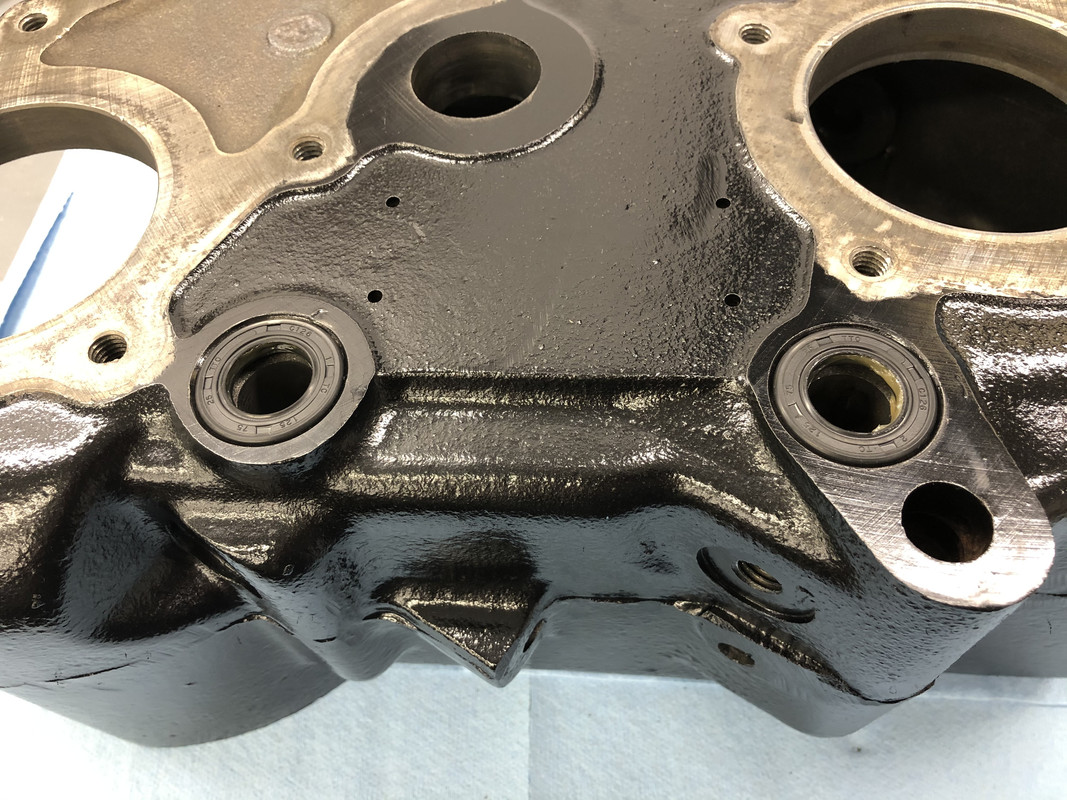
Back to the transfer case now that the paint is dry!
New shift shaft seals installed
Lockout pins
Idler gears and shaft installed
Shift forks and input shaft
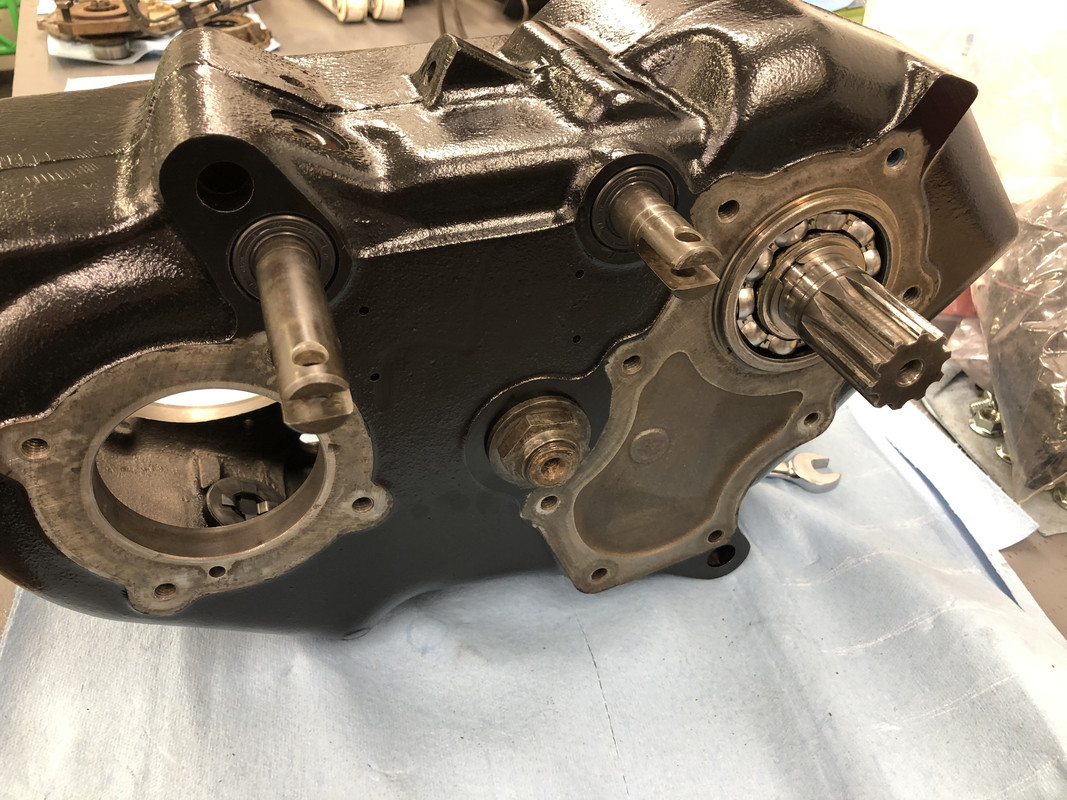
Front output cluster
Front output bearing retainer with new seal
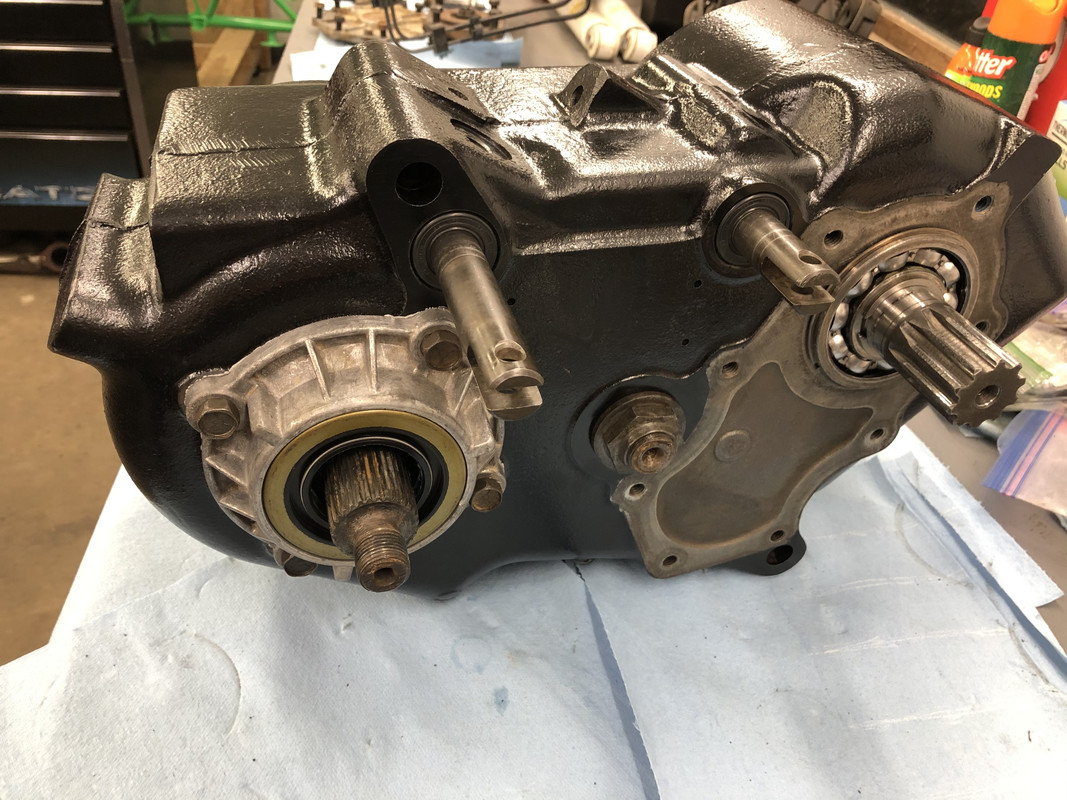
Rear support plate!
A few other parts showed up as well. Airaid intake tube, and a few more wiring pieces from Summit.
Depinned the Holley accessory connector for the electric fan relay grounds only.
This is something that always bothers me on these trucks. In order to remove the harness, either the harness needs to be depinned, or the tanks need to be dropped. Added a quick connector for the fuel sending unit in case this one ever needs to come out.
I also blanked off the currently unneeded Tach wire.
This is a sub harness for the remaining wires on the Terminator X. Power, Ignition, and Fuel Pump. Power is the ring terminal, which will run to the factory junction block for battery power. Ignition is on the two pin connector, and will utilize the distributor power wire on the engine bay harness. Fuel pump is the other wire on the two pin connector, and will connect to the fuel pump harness to drive the relays.
Next, I mocked up the air intake system just to get an idea of where everything will potentially sit. Unfortunately, I had to remove the factory jack mounted on the fender, but it likely wouldn’t have ever been able to get high enough for this lifted truck anyway.
Back to the transfer case now that the paint is dry!
New shift shaft seals installed
Lockout pins
Idler gears and shaft installed
Shift forks and input shaft
Front output cluster
Front output bearing retainer with new seal
Rear support plate!
The following users liked this post:
kipps (01-23-2021)
01-24-2021 | 12:39 AM
#65
Thread Starter
TECH Regular
Joined: Oct 2011
Posts: 413
Likes: 159
From: Alaska
More transfer case fun!
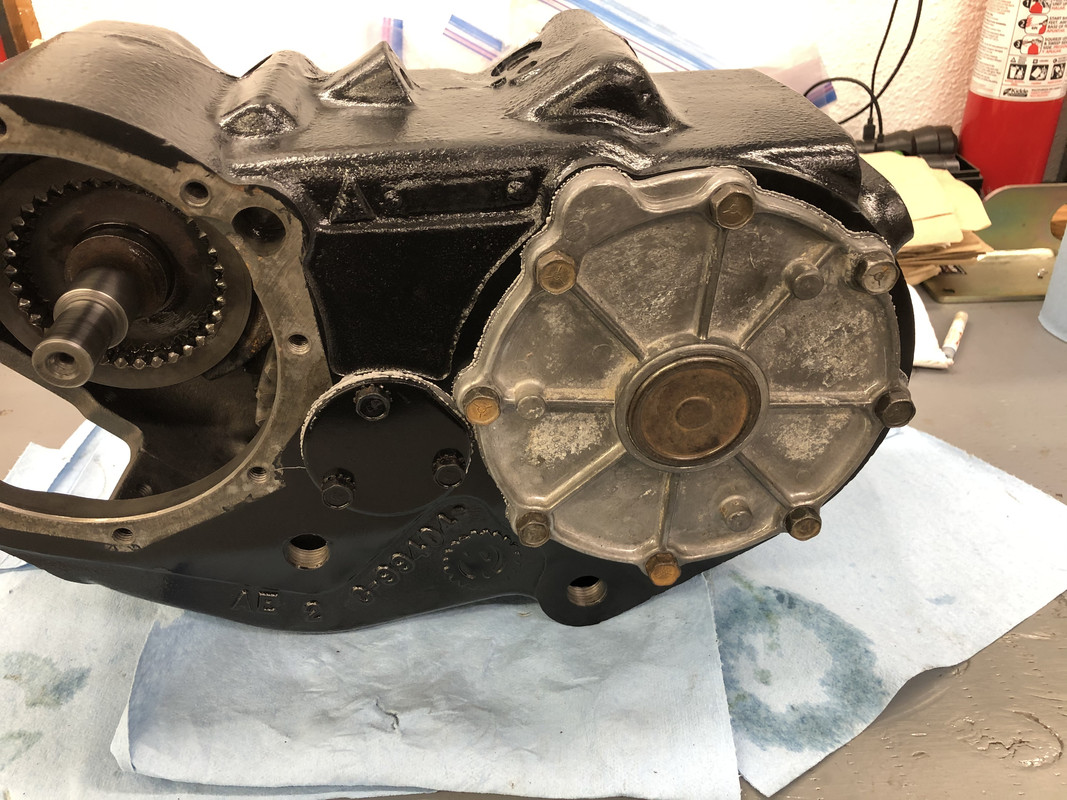
I painted a few more parts overnight. Installed the front output cover and yoke, and the serial tag.
Also installed the PTO cover plate.
Then the rear output gear assembly.
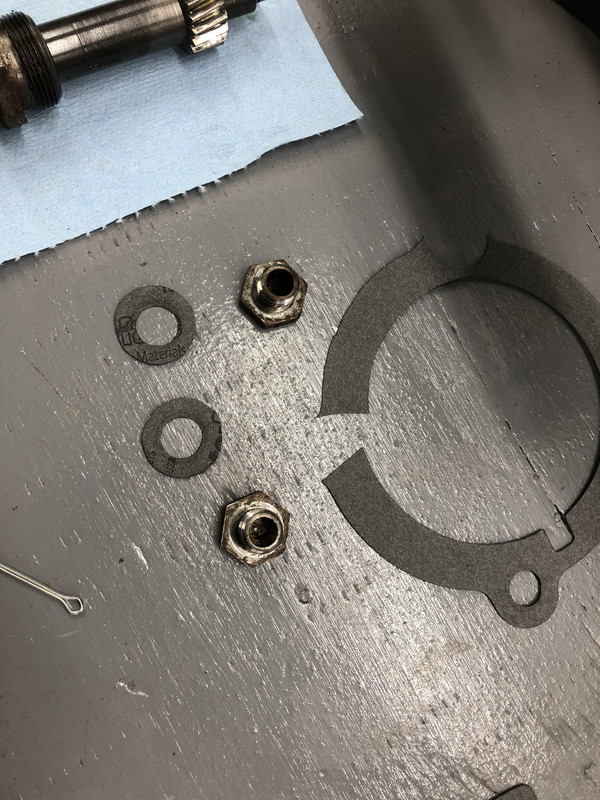
I had to make my own gaskets out of an extra one, because these weren’t included.
Detents and plugs installed!
Installed the rear output extension housing.
Along with the seal housing and speedometer drive components.

Rear output yoke installed!
Shift linkage installed, it’s complete!
Prepping the gasket surfaces with some sealant for install.
About ready to roll this thing into me and bench press it into place!
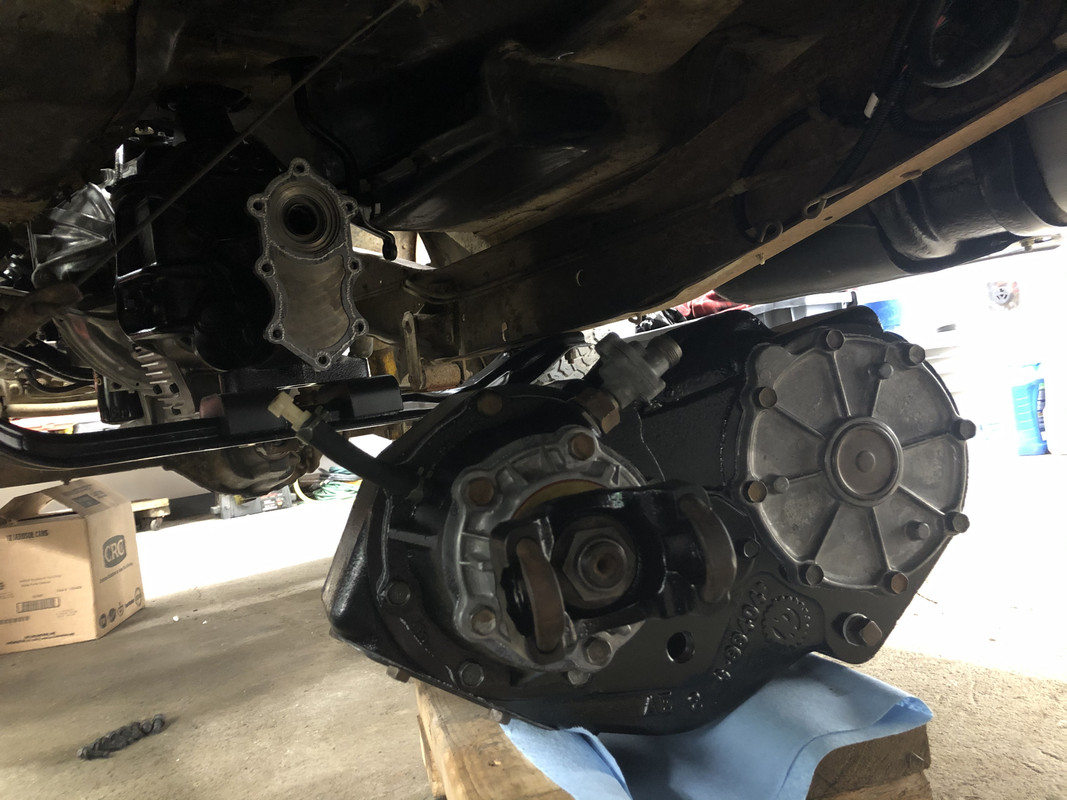
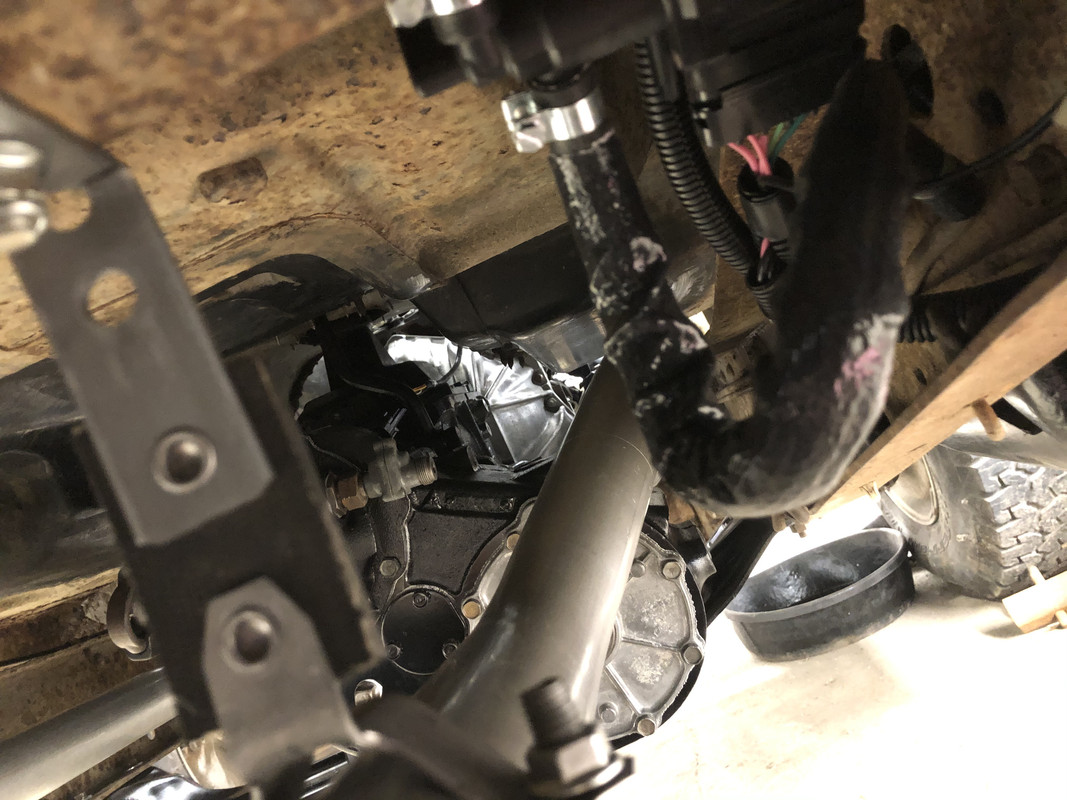
After a few choice words and a little bit of struggling with turning the input shaft and holding the transfer case from crushing me with just one arm, it’s installed!

I painted a few more parts overnight. Installed the front output cover and yoke, and the serial tag.
Also installed the PTO cover plate.
Then the rear output gear assembly.
I had to make my own gaskets out of an extra one, because these weren’t included.
Detents and plugs installed!
Installed the rear output extension housing.
Along with the seal housing and speedometer drive components.
Rear output yoke installed!
Shift linkage installed, it’s complete!
Prepping the gasket surfaces with some sealant for install.
About ready to roll this thing into me and bench press it into place!
After a few choice words and a little bit of struggling with turning the input shaft and holding the transfer case from crushing me with just one arm, it’s installed!

The following users liked this post:
kipps (01-26-2021)
01-30-2021 | 01:36 AM
#69
Thread Starter
TECH Regular
Joined: Oct 2011
Posts: 413
Likes: 159
From: Alaska
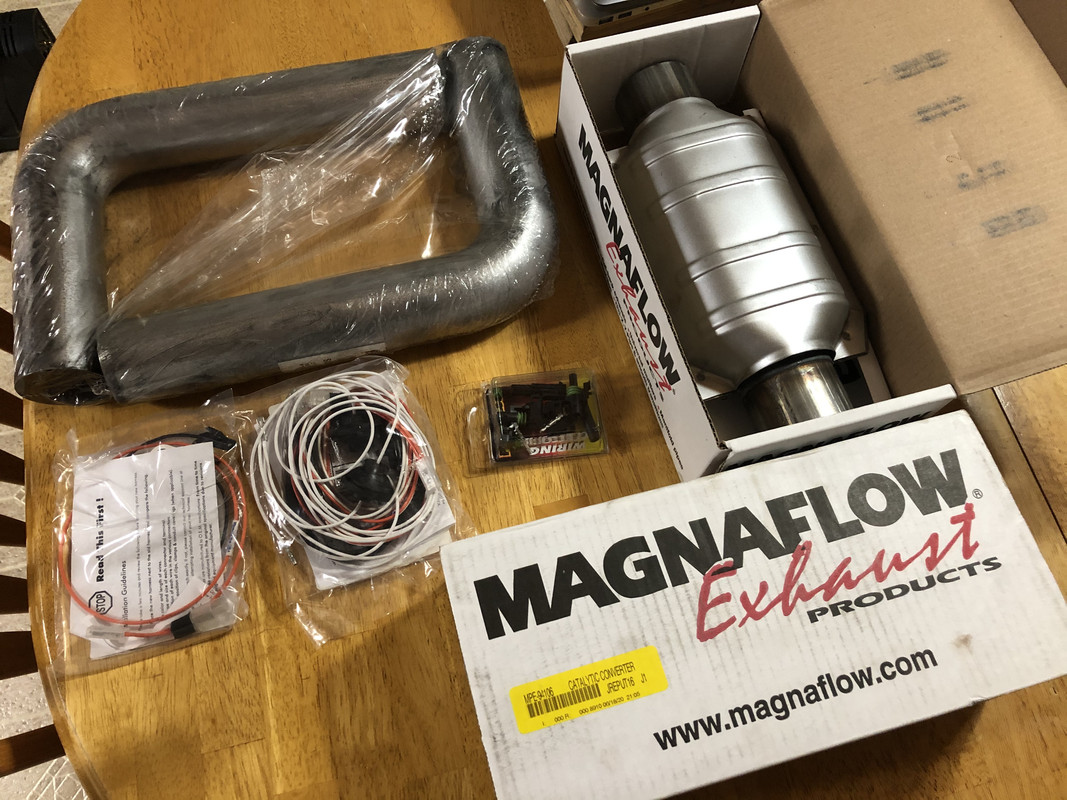
Several more parts showed up for the weekend! Exhaust elbows, catalytic converters, dash clock and door switch harnesses, and another electrical connector all came in!
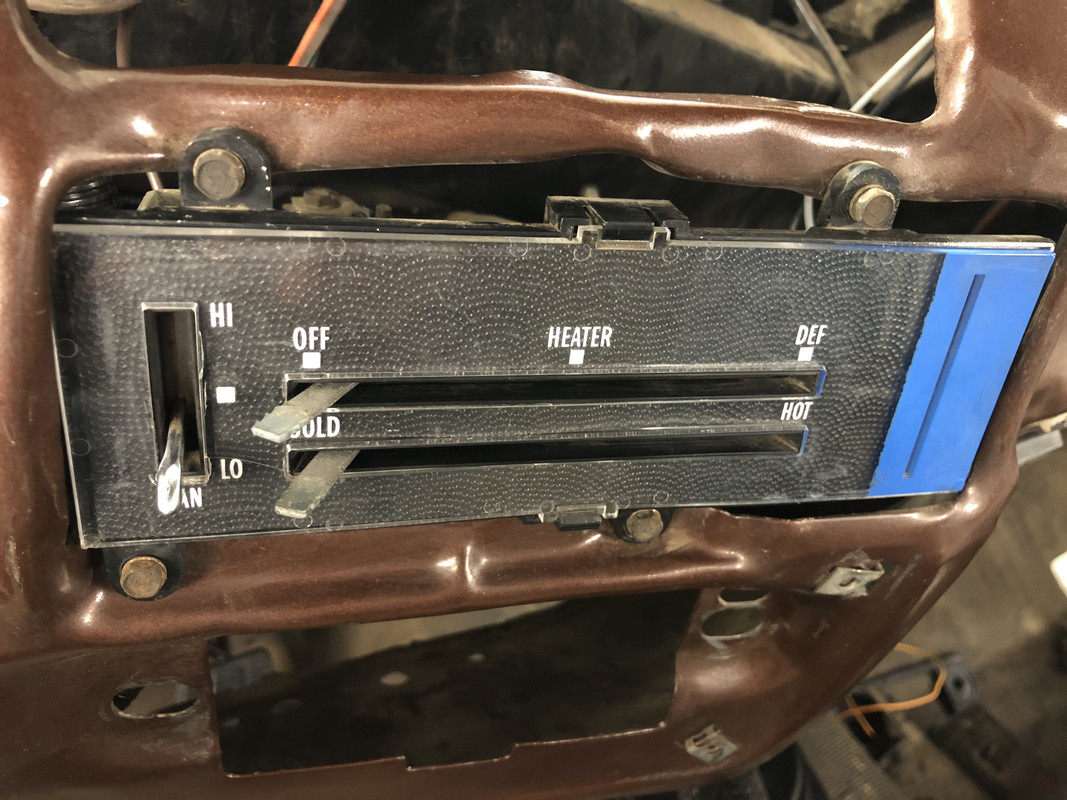
I started on this little side project since it’s been bothering me, and I know I’ll need to tackle it before the dash is buttoned up. I could have sworn that a few years back, individual components for these HVAC control panel were available, but now you can only buy a whole unit. This one works fine, but has the paper trim worn out and the ***** are missing. Instead of shelling out $100 for a new one just for a piece of paper, I’m going to refinish this one.
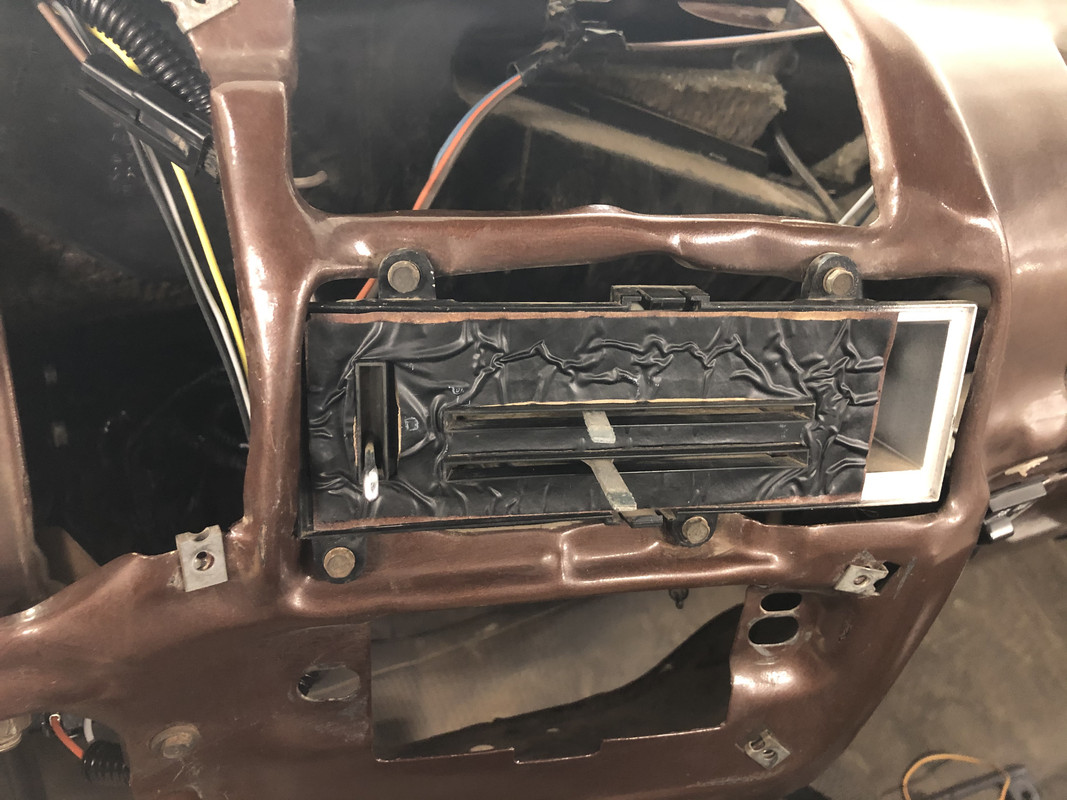
This one is in bad shape.
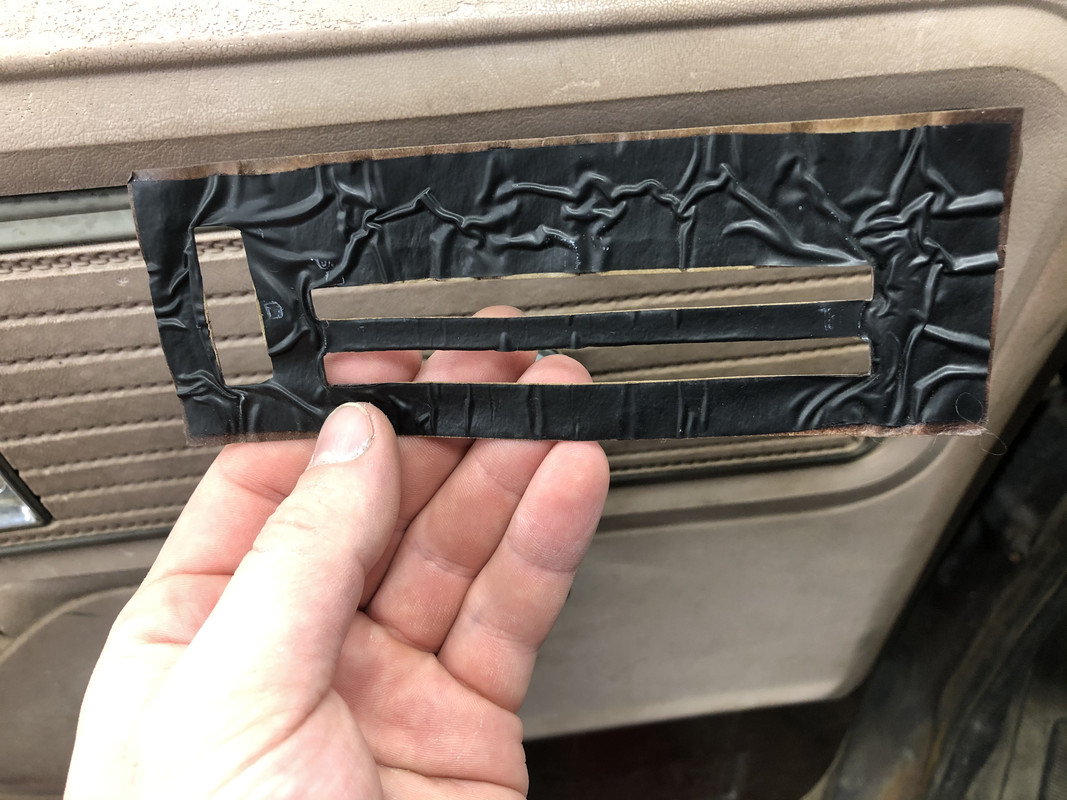
I have no idea where I got this from, but I had some very thin, textured plastic sheeting laying around that I knew I kept because I would need it some day. Well, that day is here!
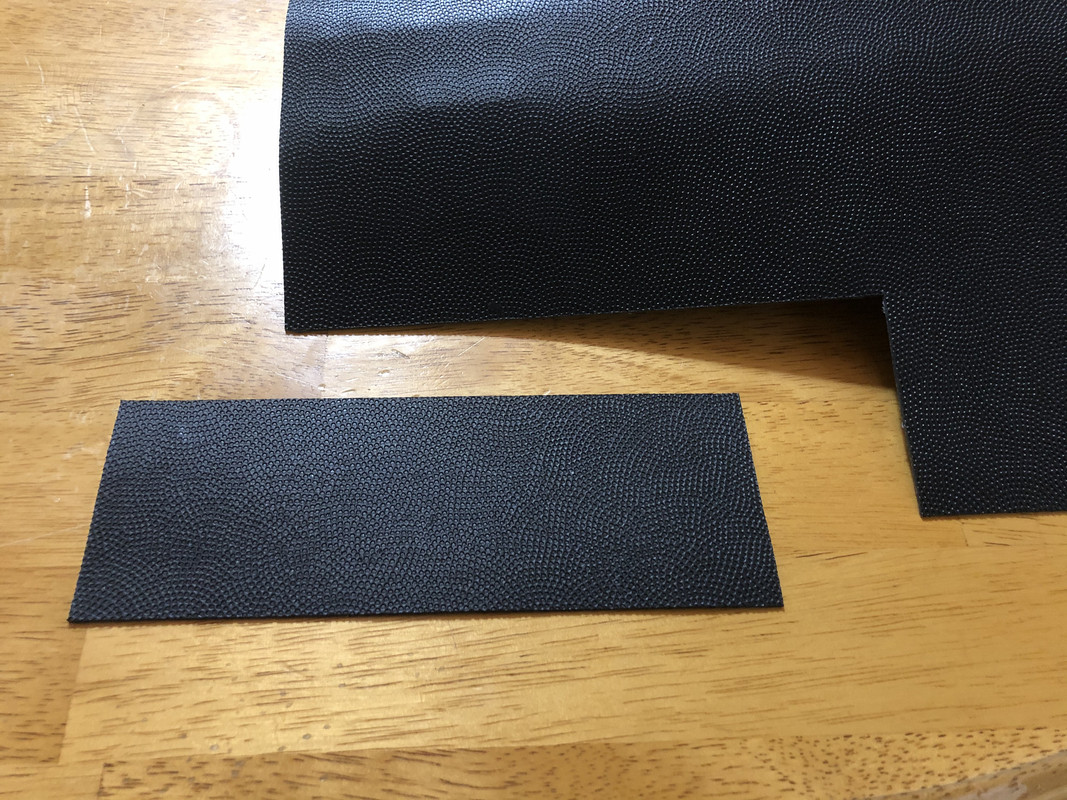
Overlaid, and cut out a template.
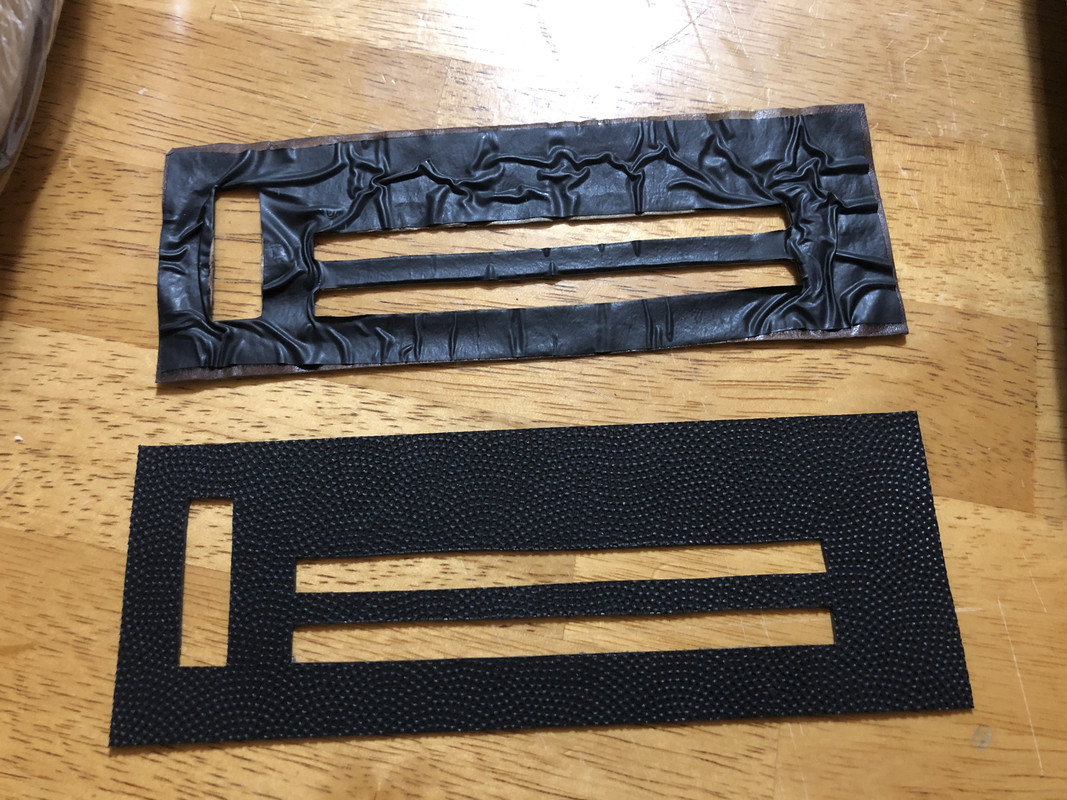
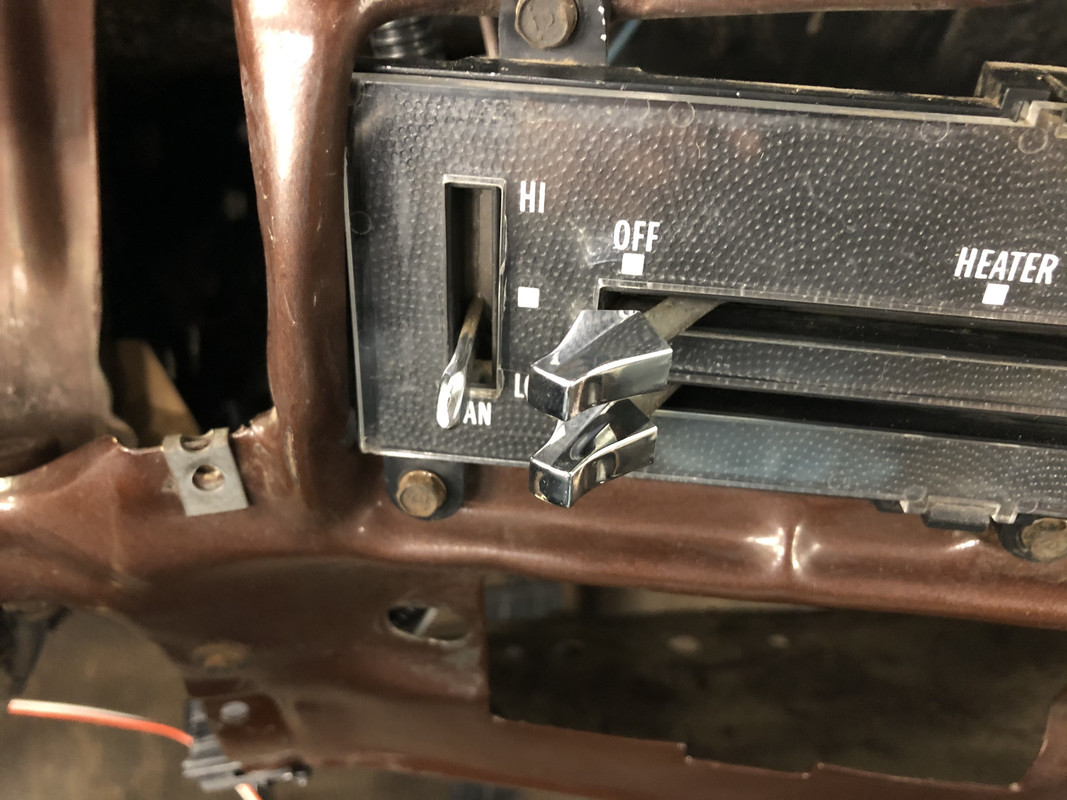
Test fitting, it needed very minimal trimming!
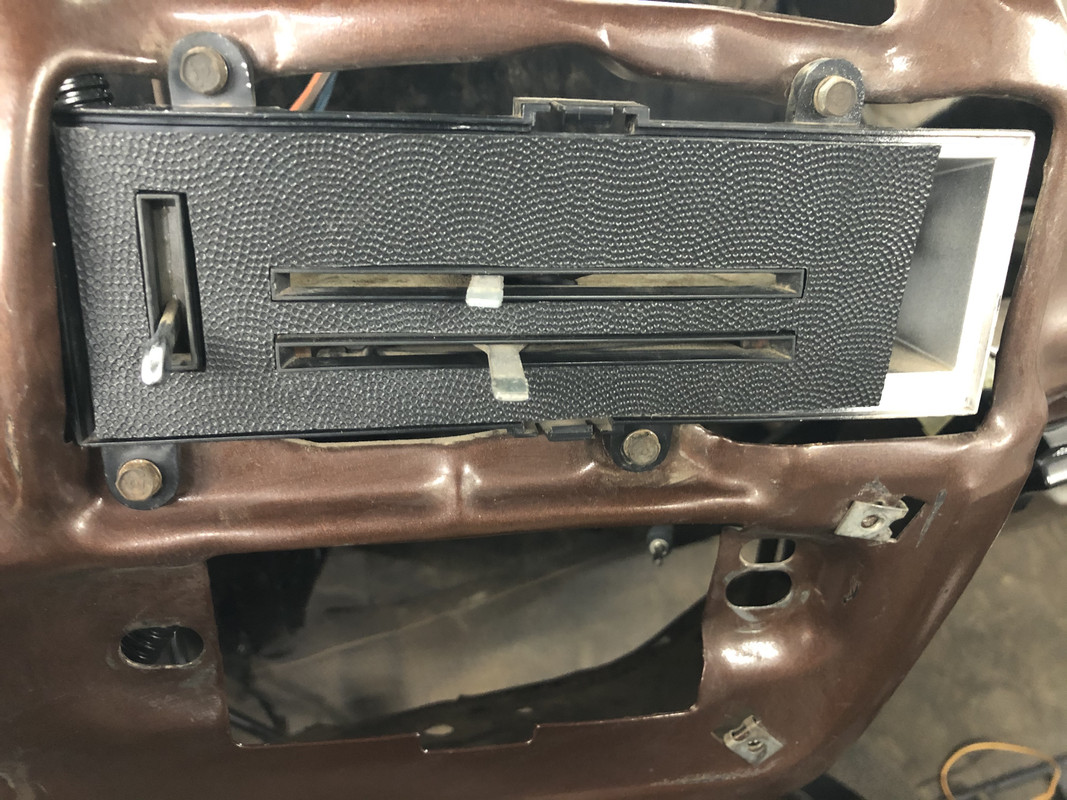
Lens cleaned and reinstalled.
And new *****! It looks much better than before.
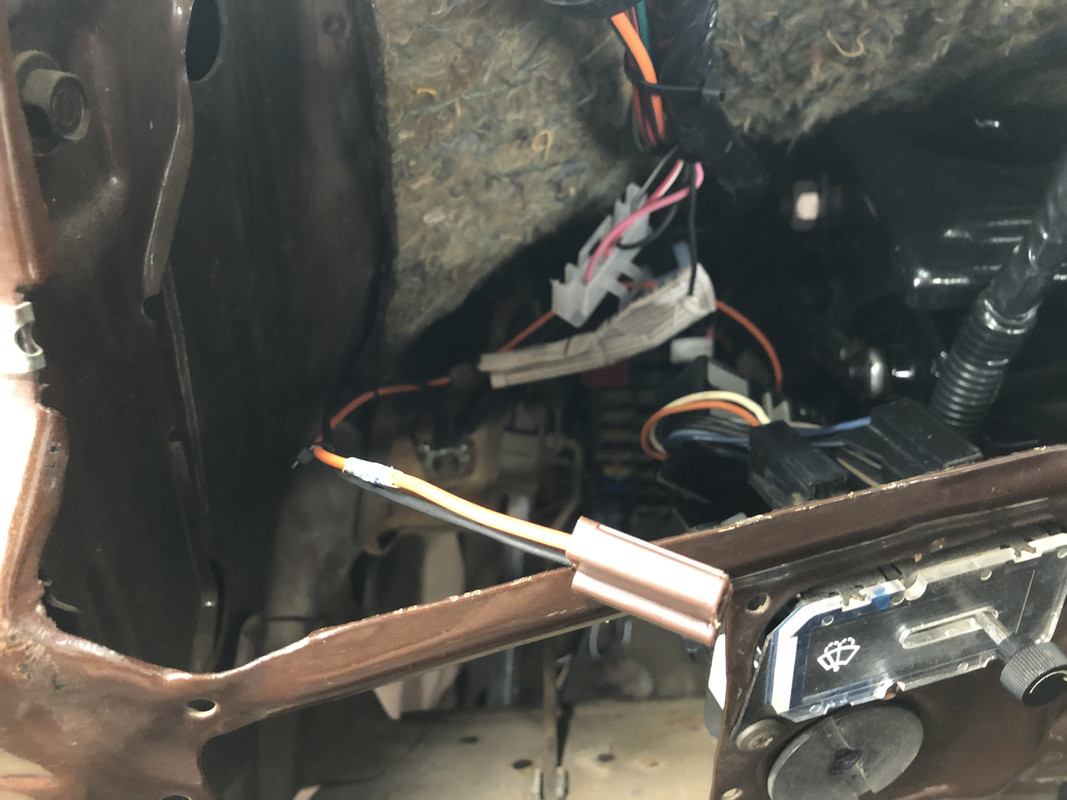
I also ran the door pin harness and clock harness.
I started on this little side project since it’s been bothering me, and I know I’ll need to tackle it before the dash is buttoned up. I could have sworn that a few years back, individual components for these HVAC control panel were available, but now you can only buy a whole unit. This one works fine, but has the paper trim worn out and the ***** are missing. Instead of shelling out $100 for a new one just for a piece of paper, I’m going to refinish this one.
This one is in bad shape.
I have no idea where I got this from, but I had some very thin, textured plastic sheeting laying around that I knew I kept because I would need it some day. Well, that day is here!
Overlaid, and cut out a template.
Test fitting, it needed very minimal trimming!
Lens cleaned and reinstalled.
And new *****! It looks much better than before.
I also ran the door pin harness and clock harness.
01-30-2021 | 02:01 AM
#70
Thread Starter
TECH Regular
Joined: Oct 2011
Posts: 413
Likes: 159
From: Alaska
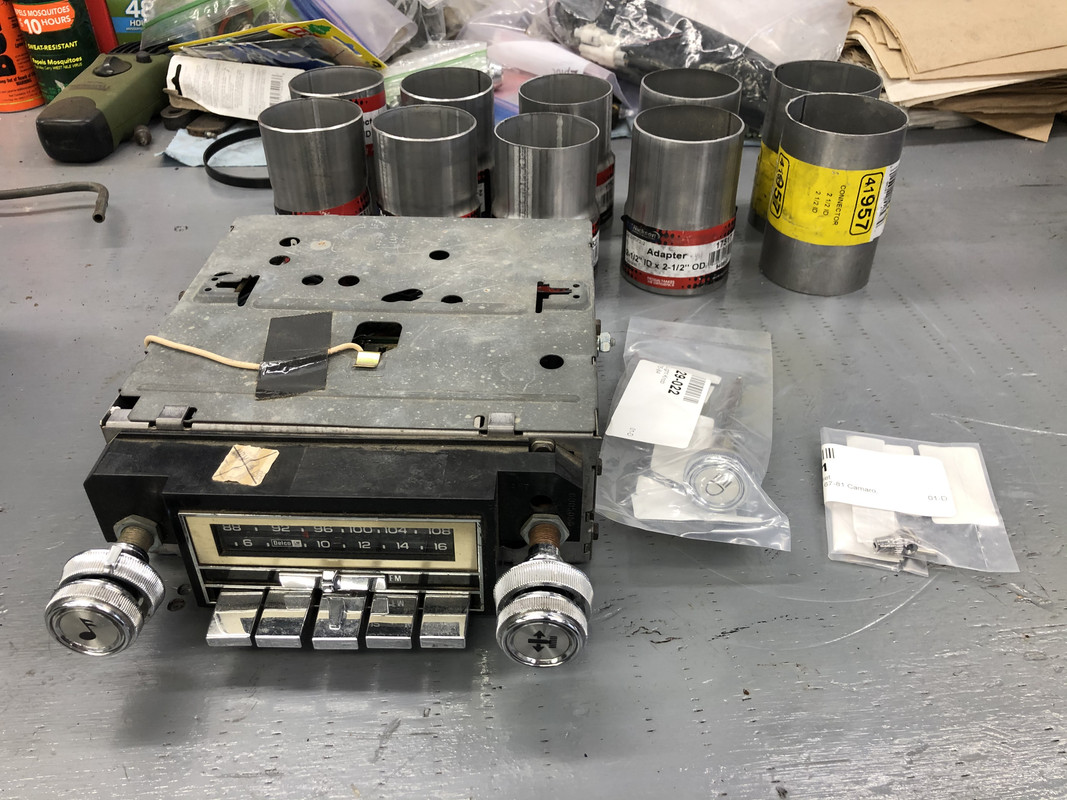
A few more parts showed up later in the day! I ordered a factory stereo off of eBay. These are going for stupid money, untested. This one turns on but unknown beyond that. Time will tell if I bought a $100 paper weight. At least it’ll look pretty! The headlight switch **** and clock ***** both came in as well. I also picked up an assortment of exhaust connectors and adapters from the parts stores.
Headlight **** installed!
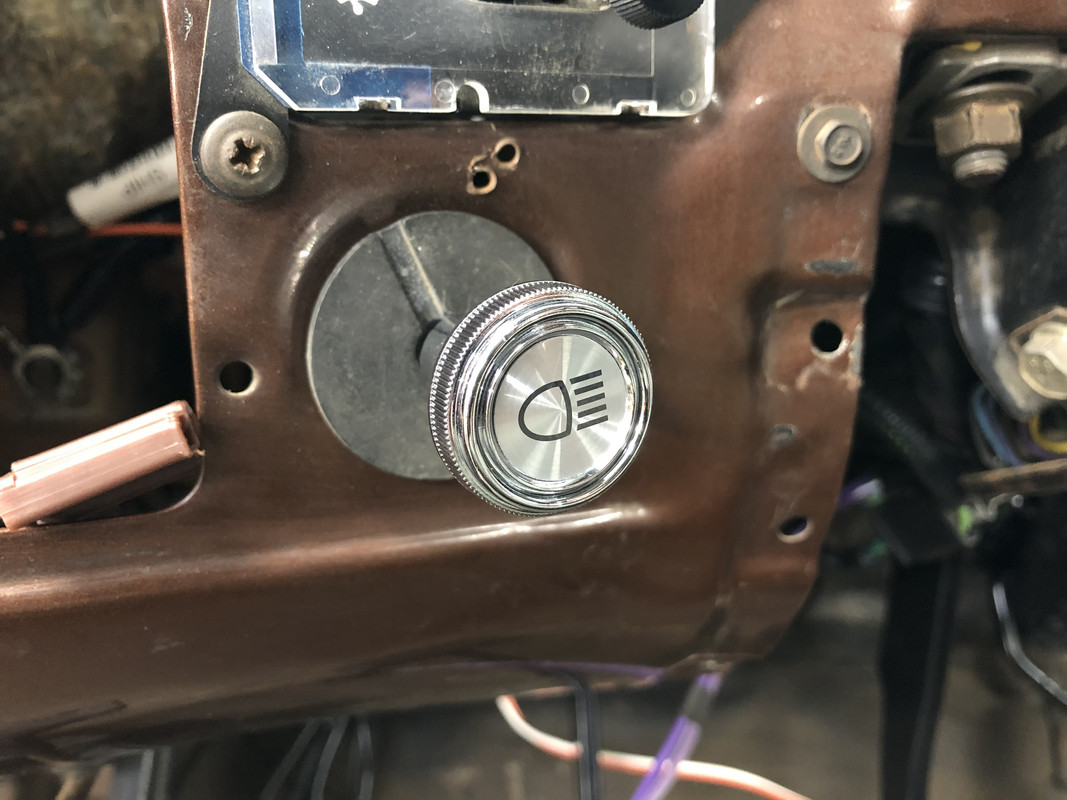
Clock **** installed!
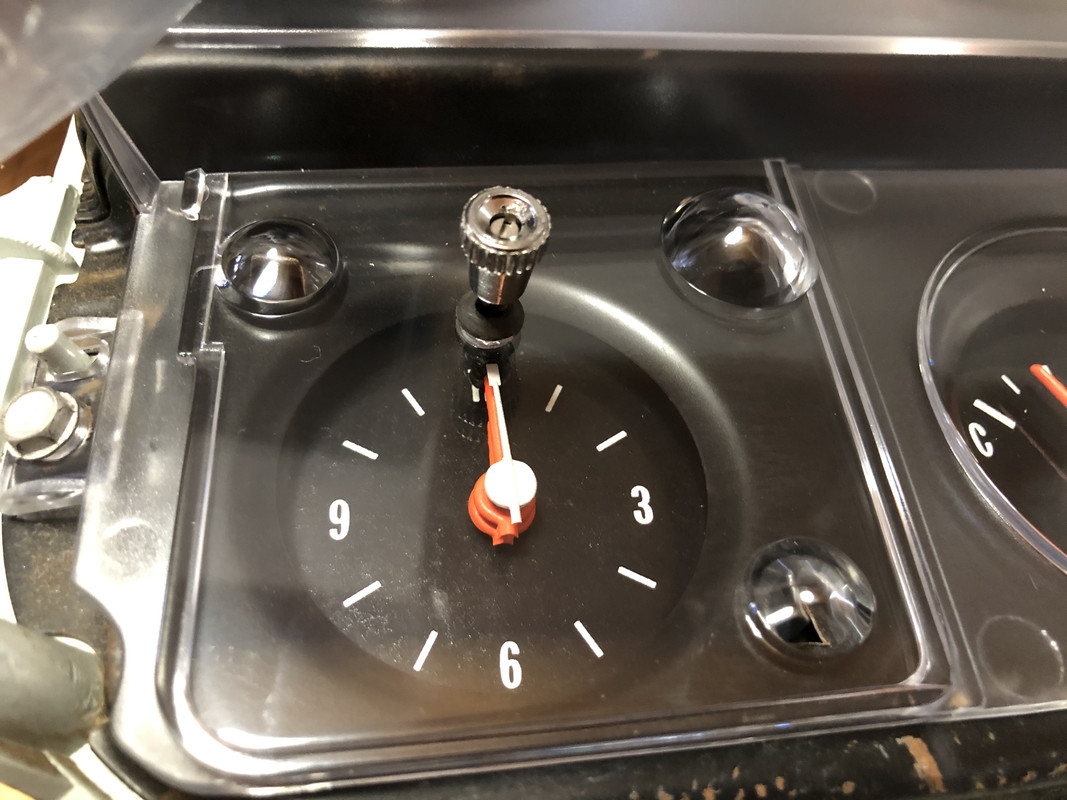
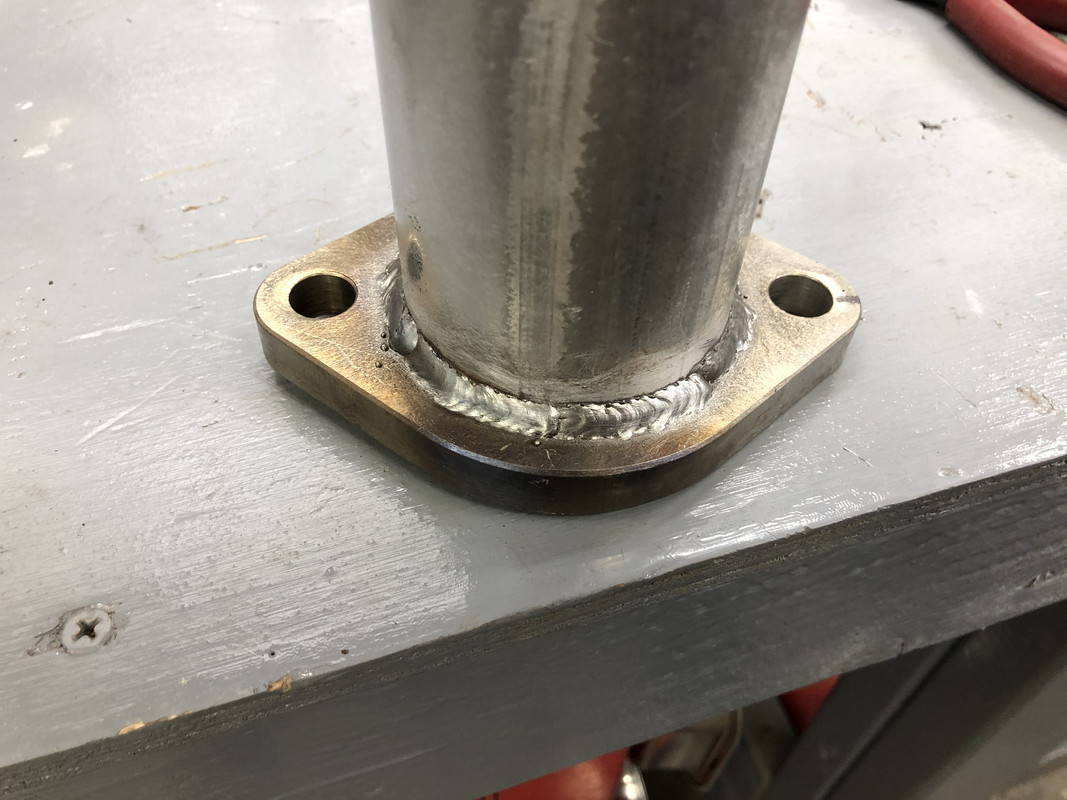
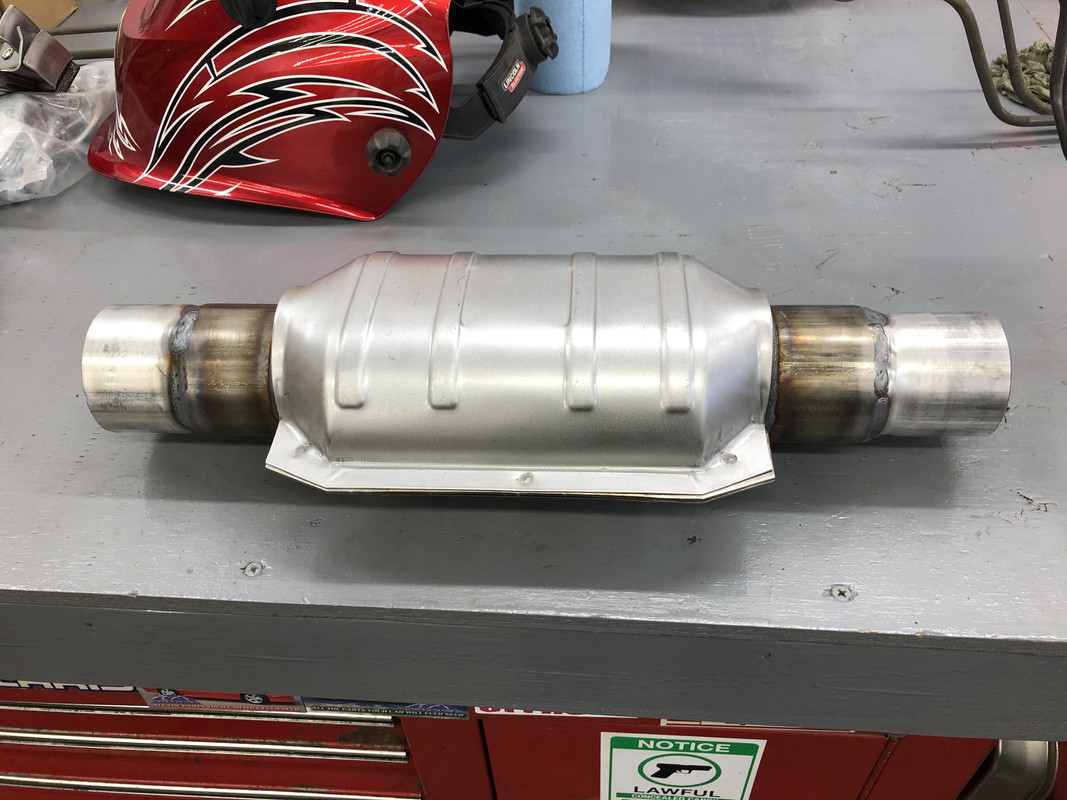
Time to finally start on the exhaust system! This was one of the first parts I purchased for the truck, but one of the last to go on! It’s a Hooker 2.25” true dual system, designed for this truck but meant to be a header-back system. Since this is obviously no longer a small block based platform and I’m also not utilizing headers, I’ll be making a few modifications to adapt to the manifolds, as well as adding a pair of high flow catalytic converters to the system. I sized these slightly higher than the rest of the system, at 2.5”, to provide a small additional increase in flow through them. I started with the elbows and a pair of bare flanges to make the downtubes from the manifolds.
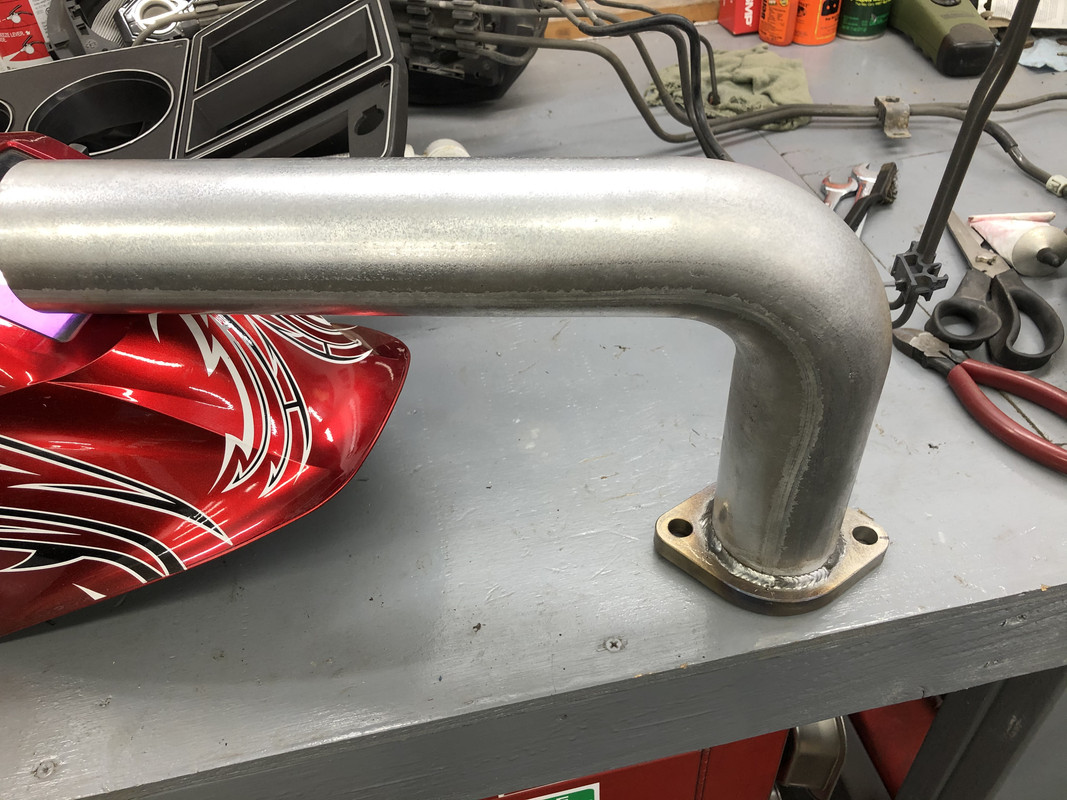
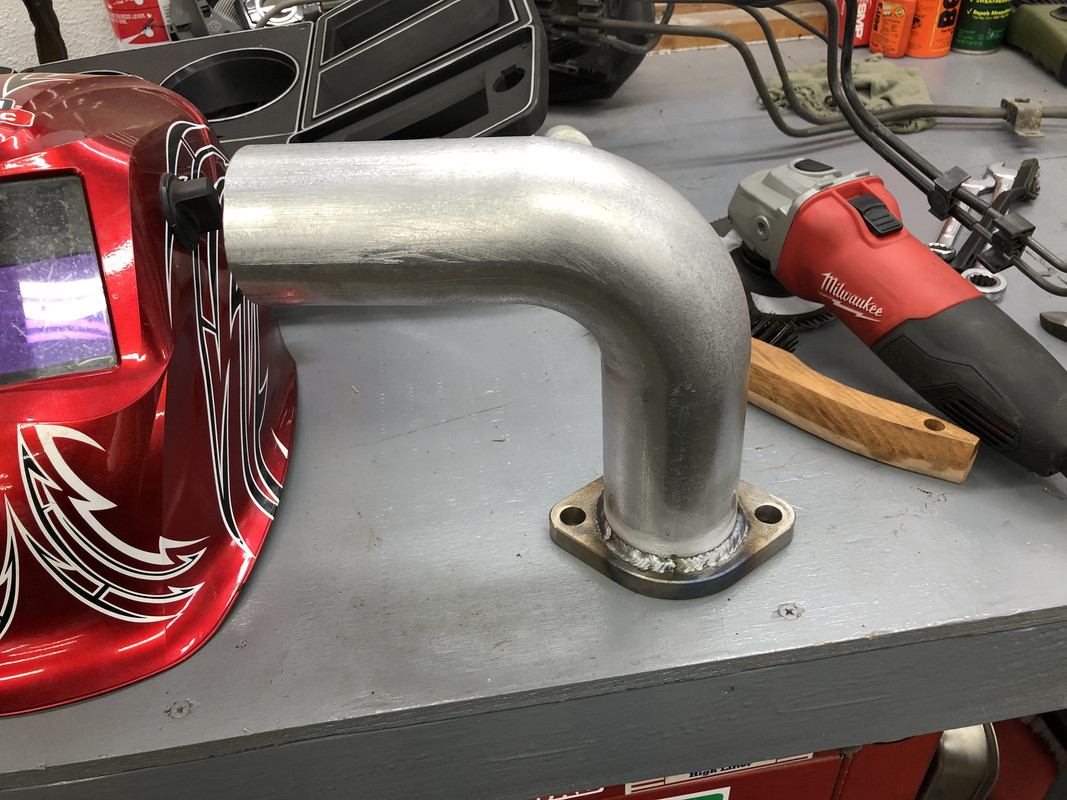
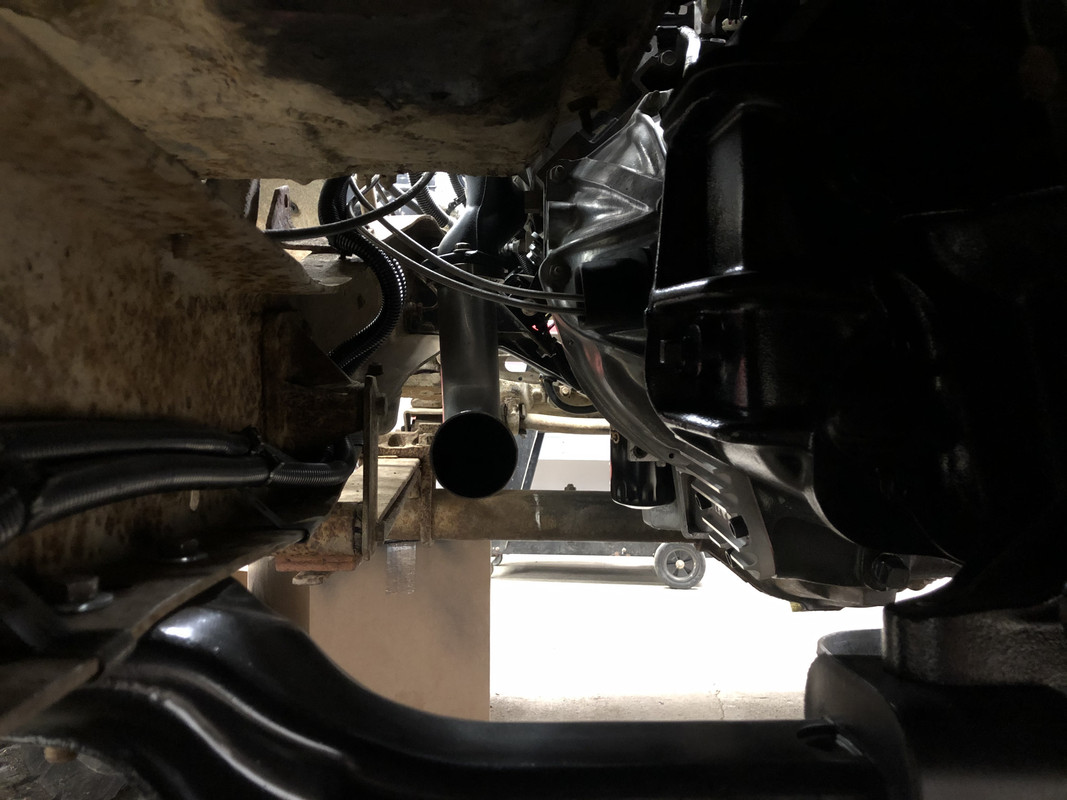
Test fitting alignment. I don’t think I can get that much better!
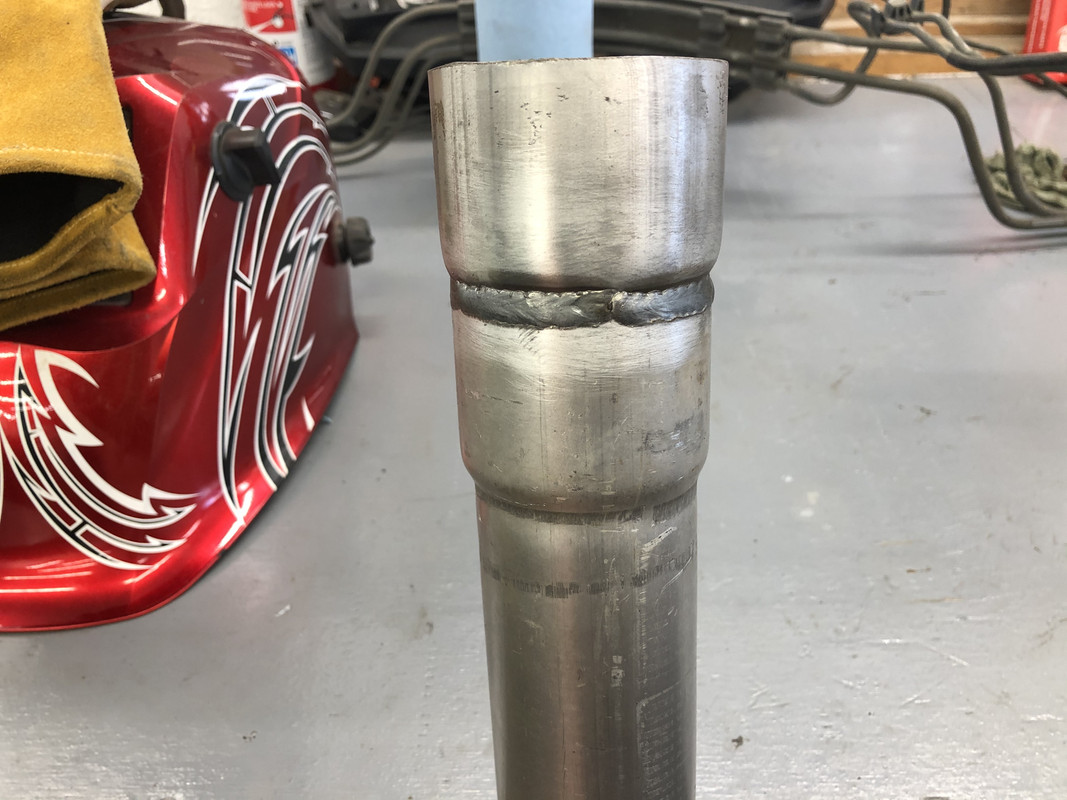
The downtubes were also 2.5”, so the header pipes needed a reducer to go between the two.
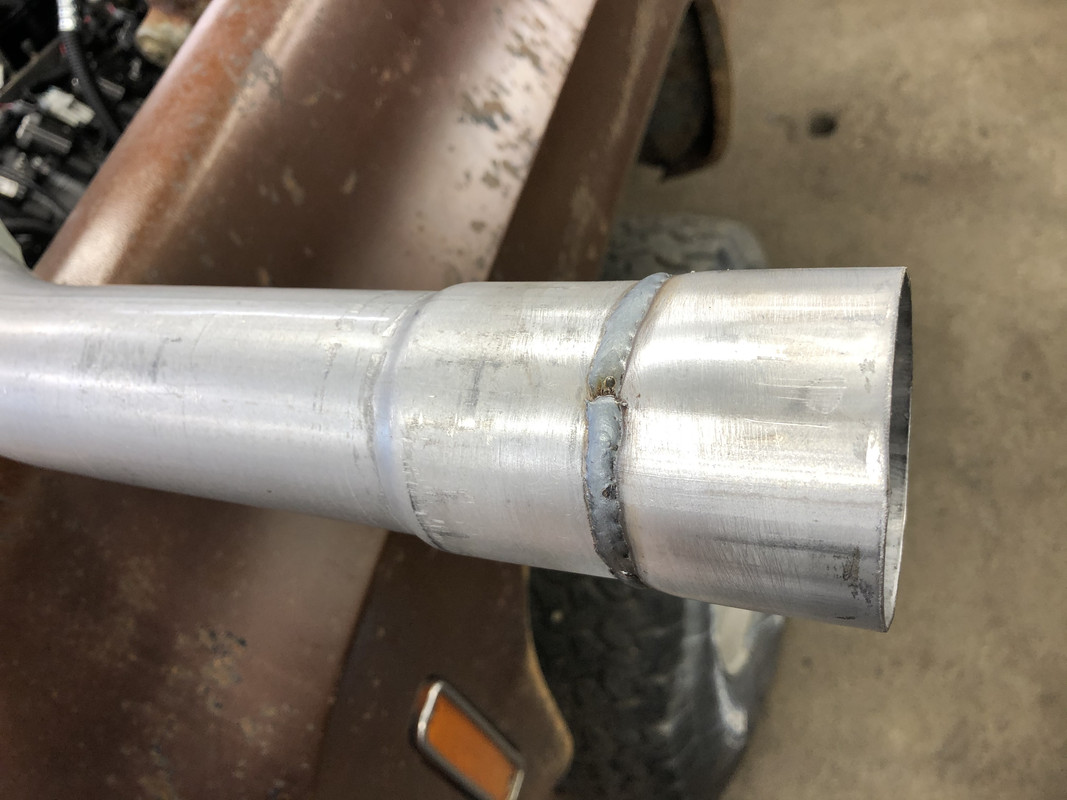
I’m slitting all of my slip joints, so I can make all of the connections with band clamps, which will allow for any future disassembly to be done with ease.

Catalytic converter done on the front.

Muffler outlet completed. I had to cut quite a bit out of this extension pipe due to the added cats.
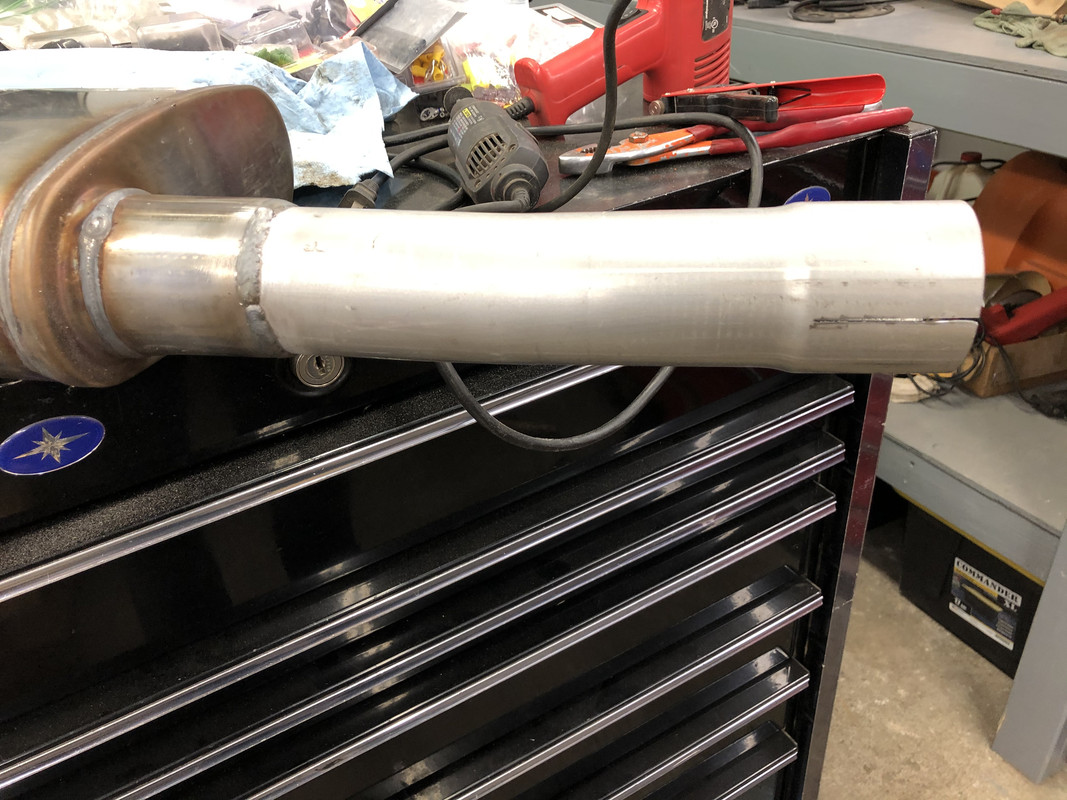
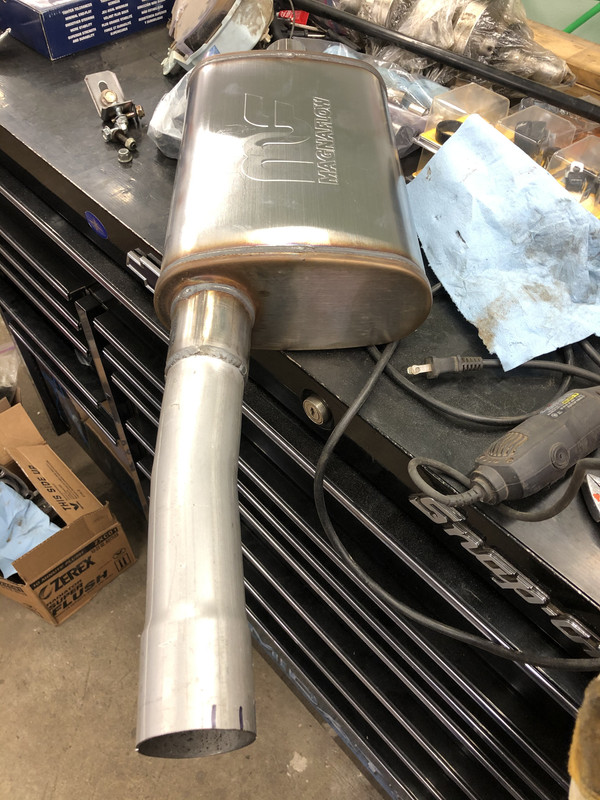
And here’s how the passenger side looks all assembled!


Drivers side tomorrow!
Headlight **** installed!
Clock **** installed!
Time to finally start on the exhaust system! This was one of the first parts I purchased for the truck, but one of the last to go on!
Test fitting alignment. I don’t think I can get that much better!
The downtubes were also 2.5”, so the header pipes needed a reducer to go between the two.
I’m slitting all of my slip joints, so I can make all of the connections with band clamps, which will allow for any future disassembly to be done with ease.
Catalytic converter done on the front.
Muffler outlet completed. I had to cut quite a bit out of this extension pipe due to the added cats.
And here’s how the passenger side looks all assembled!
Drivers side tomorrow!
The following users liked this post:
y5mgisi (11-09-2022)

 01-30-2021 | 11:21 PM
#72
Thread Starter
TECH Regular
Joined: Oct 2011
Posts: 413
Likes: 159
From: Alaska
Thank you! That’s not usually something I would consider about myself.
Started on the driver’s side today! This will go a lot smoother now that I’ve figured out what’s happening on the passenger side.

Started with the reducer for the header pipe.
Set up the adapters for the catalytic converter.
Decided where the O2 sensor was going to mount. I ended up going with just after the collector on the drivers side since there was quite a bit more room.
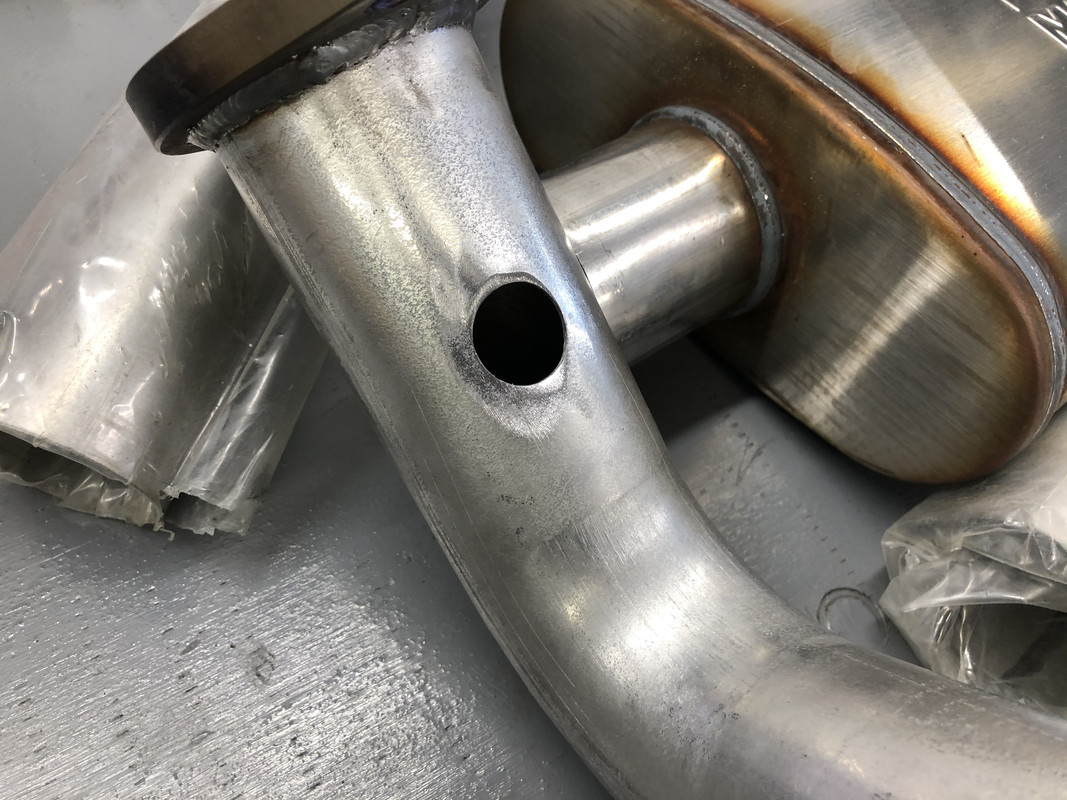
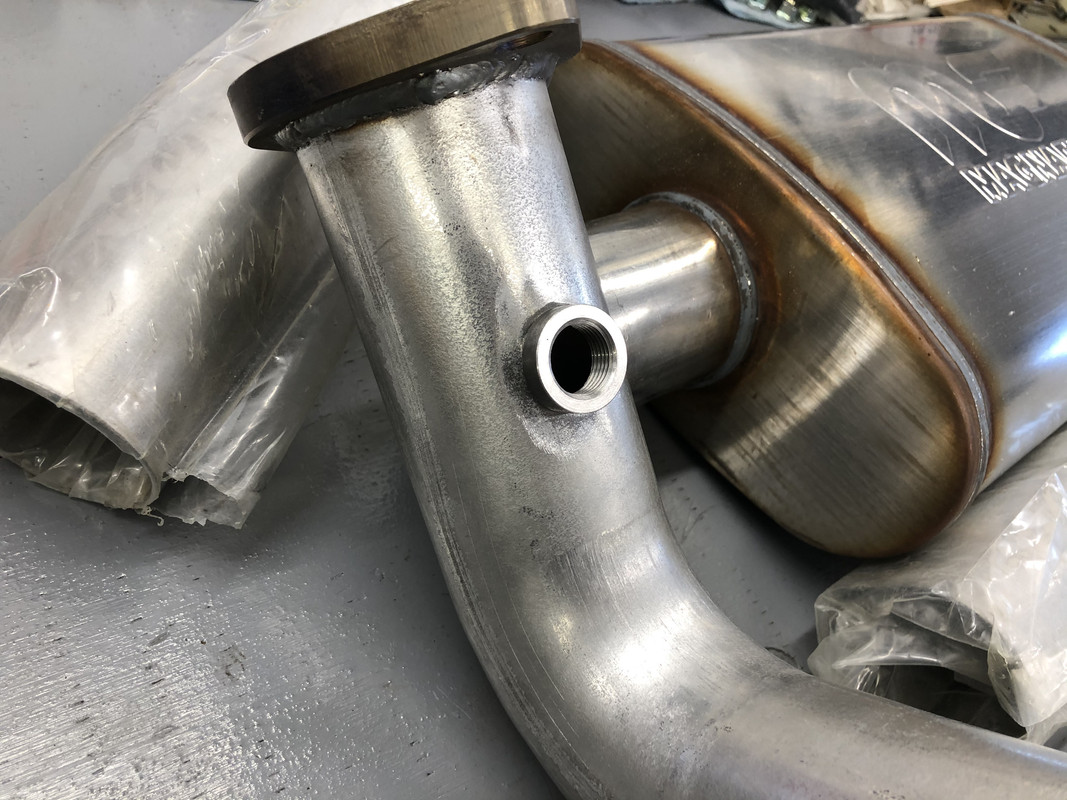
Bung installed!
Header pipe mounted.

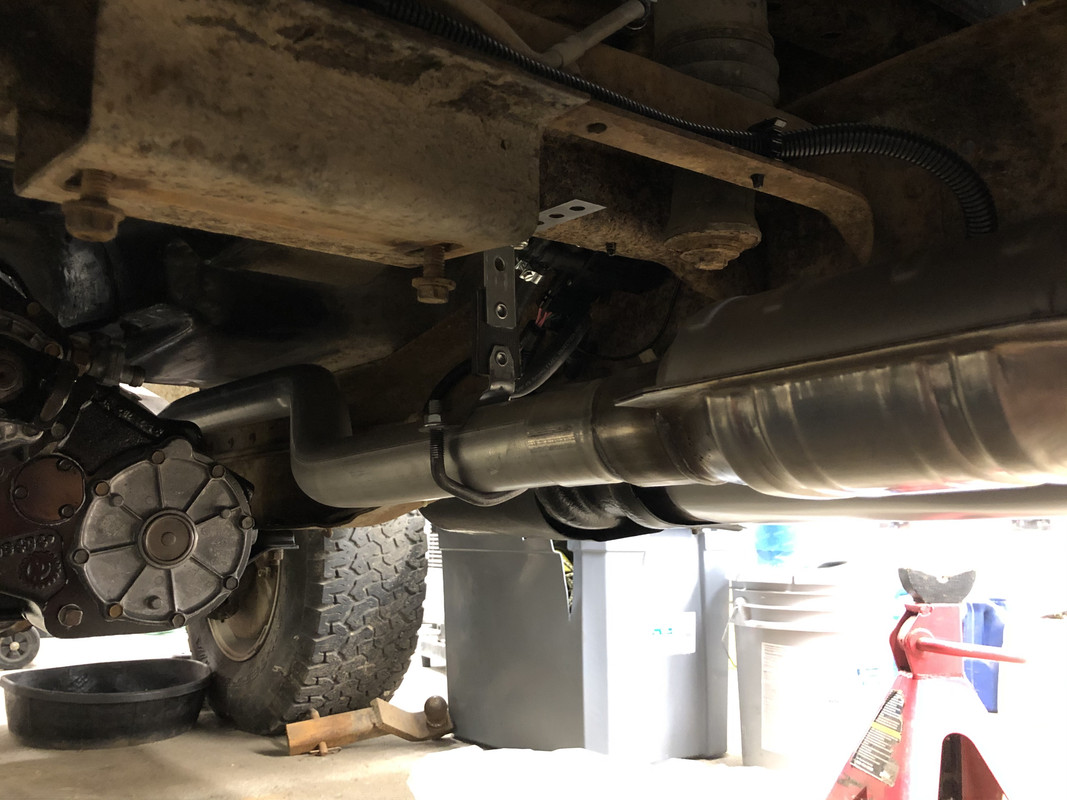
Catalytic converter and muffler mounted.
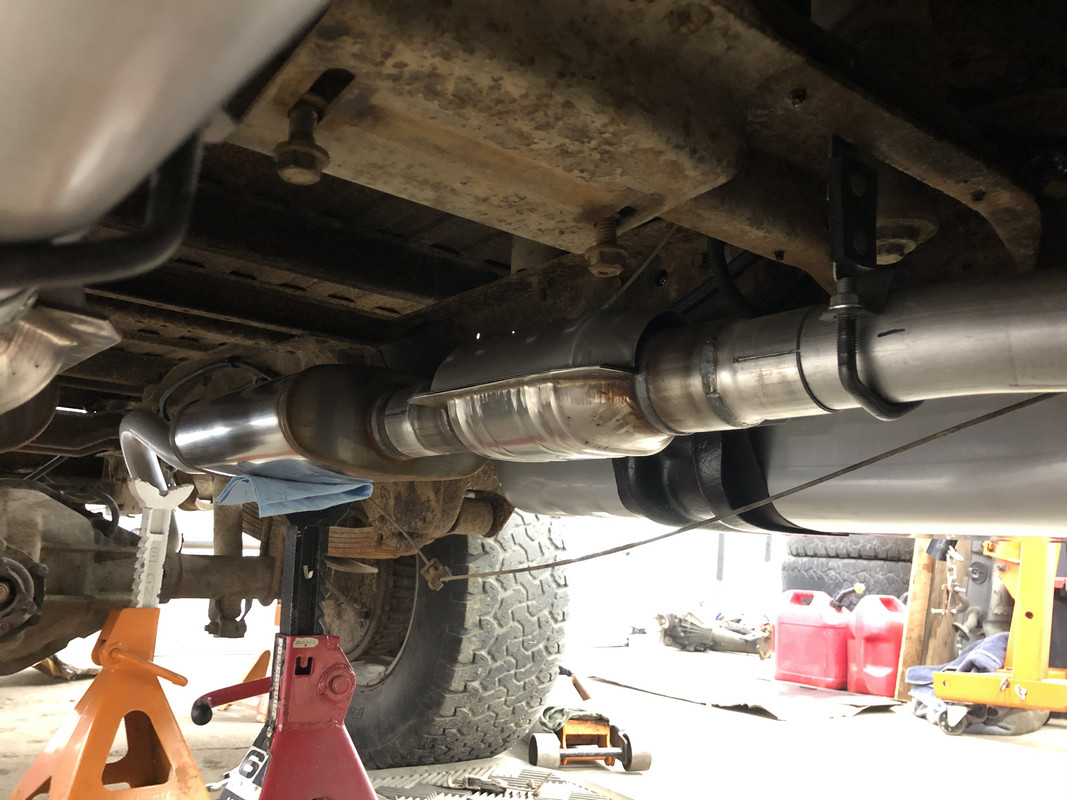
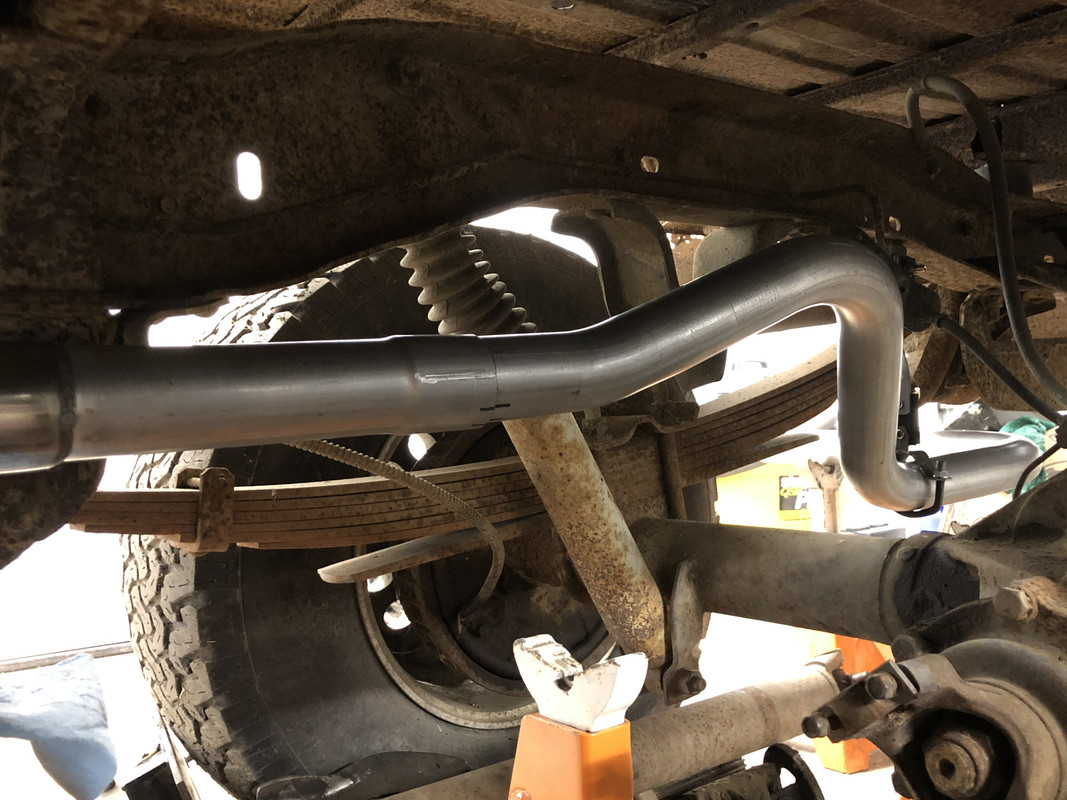
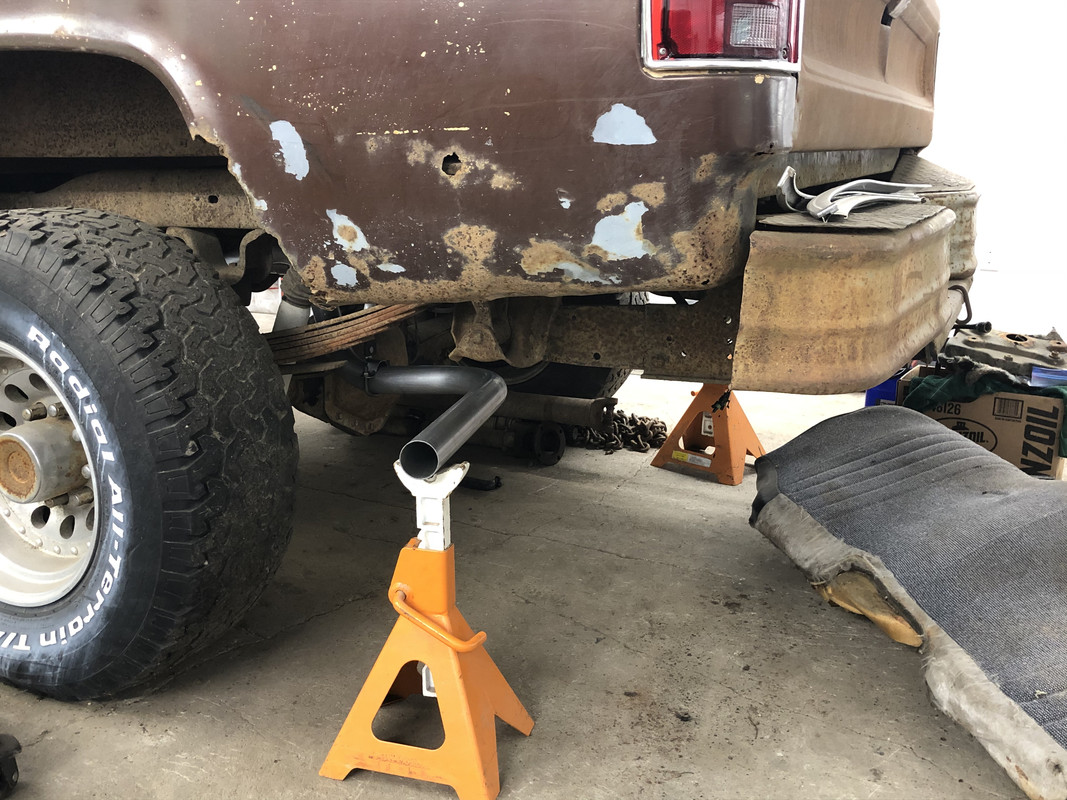
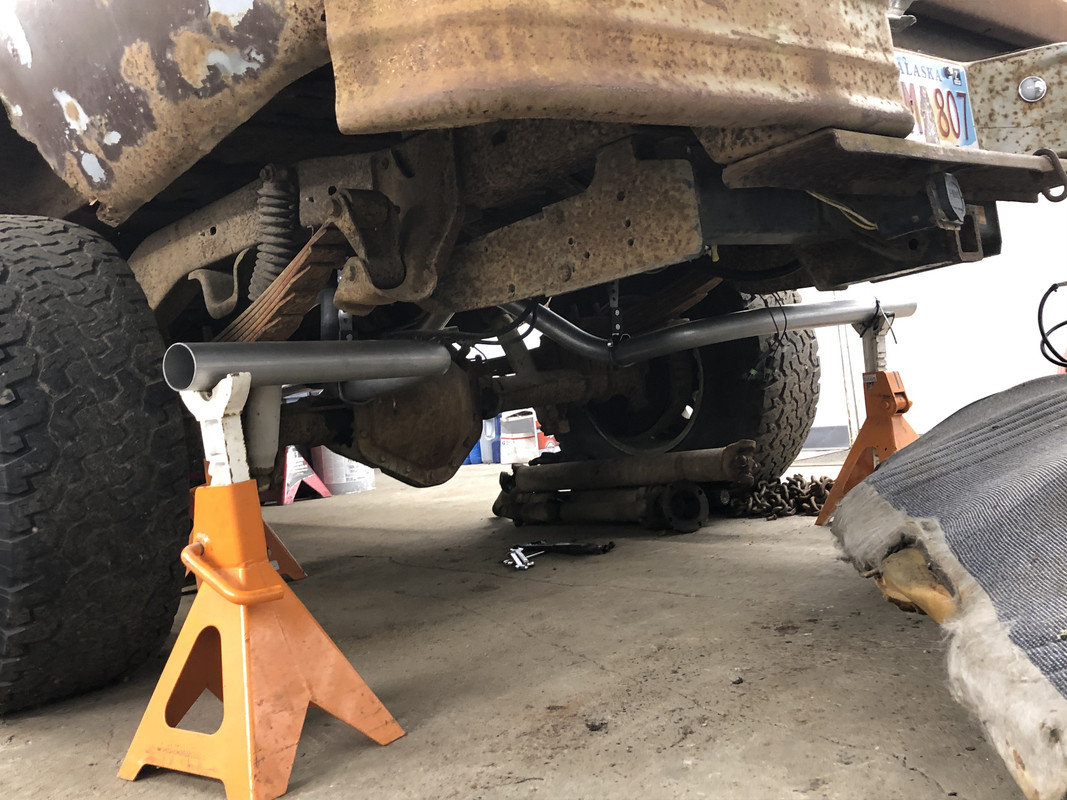
Tailpipes mounted over the axle.
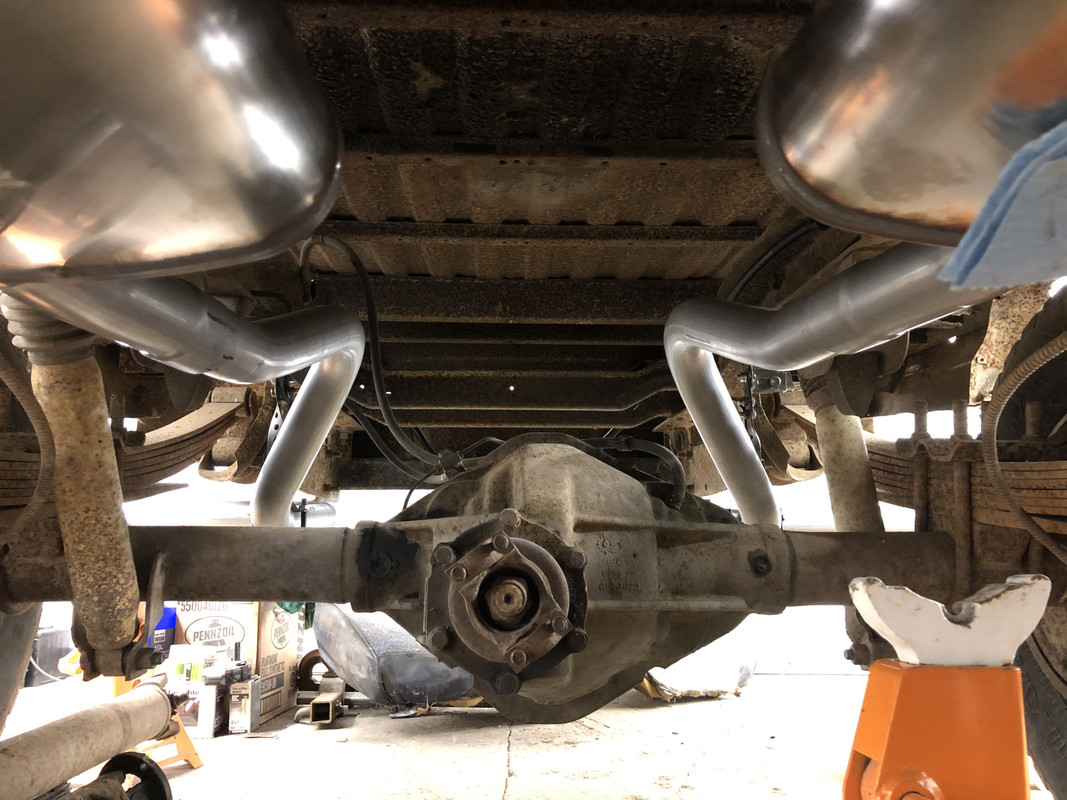
Approximate mounting once everything gets bolted together.
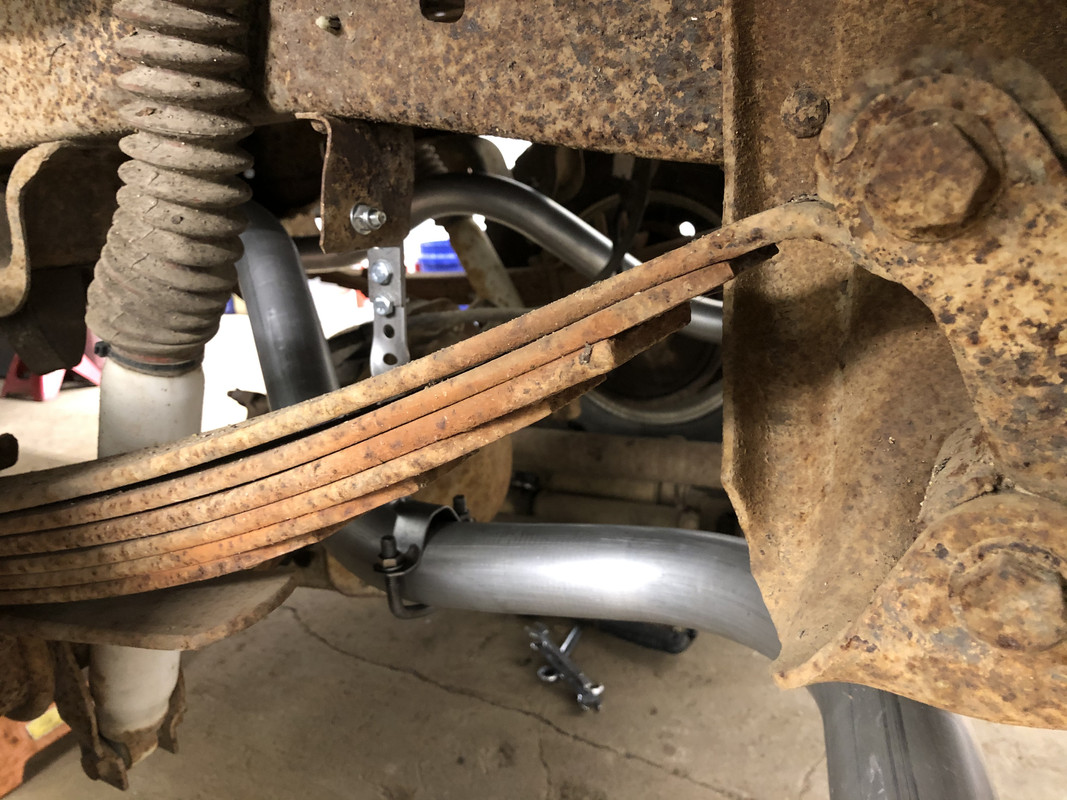
And as a final touch, I installed fire sleeve over the length of fuel line that sits nearby the pipe. It probably wouldn’t have been an issue as it’s not super close, but definitely better to be safe than sorry when dealing with fuel!
Started on the driver’s side today! This will go a lot smoother now that I’ve figured out what’s happening on the passenger side.
Started with the reducer for the header pipe.
Set up the adapters for the catalytic converter.
Decided where the O2 sensor was going to mount. I ended up going with just after the collector on the drivers side since there was quite a bit more room.
Bung installed!
Header pipe mounted.
Catalytic converter and muffler mounted.
Tailpipes mounted over the axle.
Approximate mounting once everything gets bolted together.
And as a final touch, I installed fire sleeve over the length of fuel line that sits nearby the pipe. It probably wouldn’t have been an issue as it’s not super close, but definitely better to be safe than sorry when dealing with fuel!
The following users liked this post:
y5mgisi (11-09-2022)
 01-31-2021 | 03:38 PM
#76
Thread Starter
TECH Regular
Joined: Oct 2011
Posts: 413
Likes: 159
From: Alaska
Thanks Andrew! You’ll definitely be hearing from me when it gets to that part. I didn’t order the handheld so I’ll be starting and tuning directly off a laptop for this one. Would you have any recommendations right off, or just wait until it runs and see how things look?
01-31-2021 | 04:03 PM
#77
Joined: Mar 2003
Posts: 10,244
Likes: 1,530
From: The City of Fountains
Thanks Andrew! You�ll definitely be hearing from me when it gets to that part. I didn�t order the handheld so I�ll be starting and tuning directly off a laptop for this one. Would you have any recommendations right off, or just wait until it runs and see how things look?
Andrew
01-31-2021 | 09:38 PM
#78
Thread Starter
TECH Regular
Joined: Oct 2011
Posts: 413
Likes: 159
From: Alaska
Thanks, man. I’ll definitely get ahold of you before I get it fired up. I actually have to find a new laptop first! 
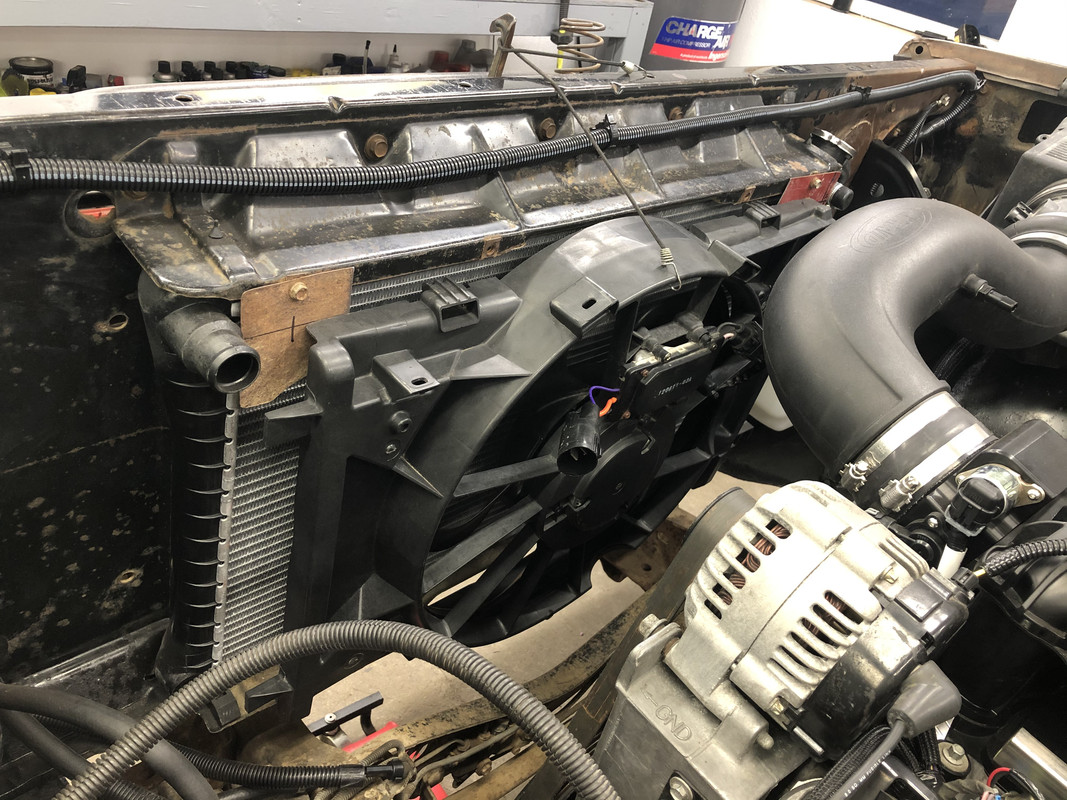
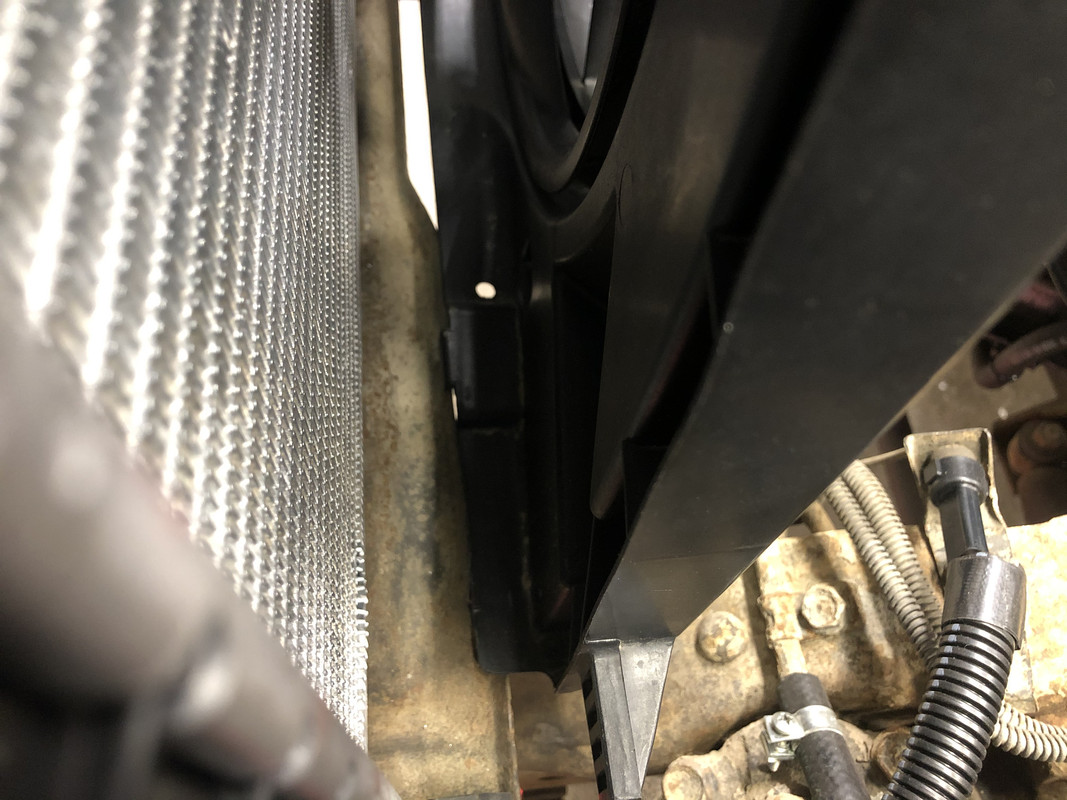
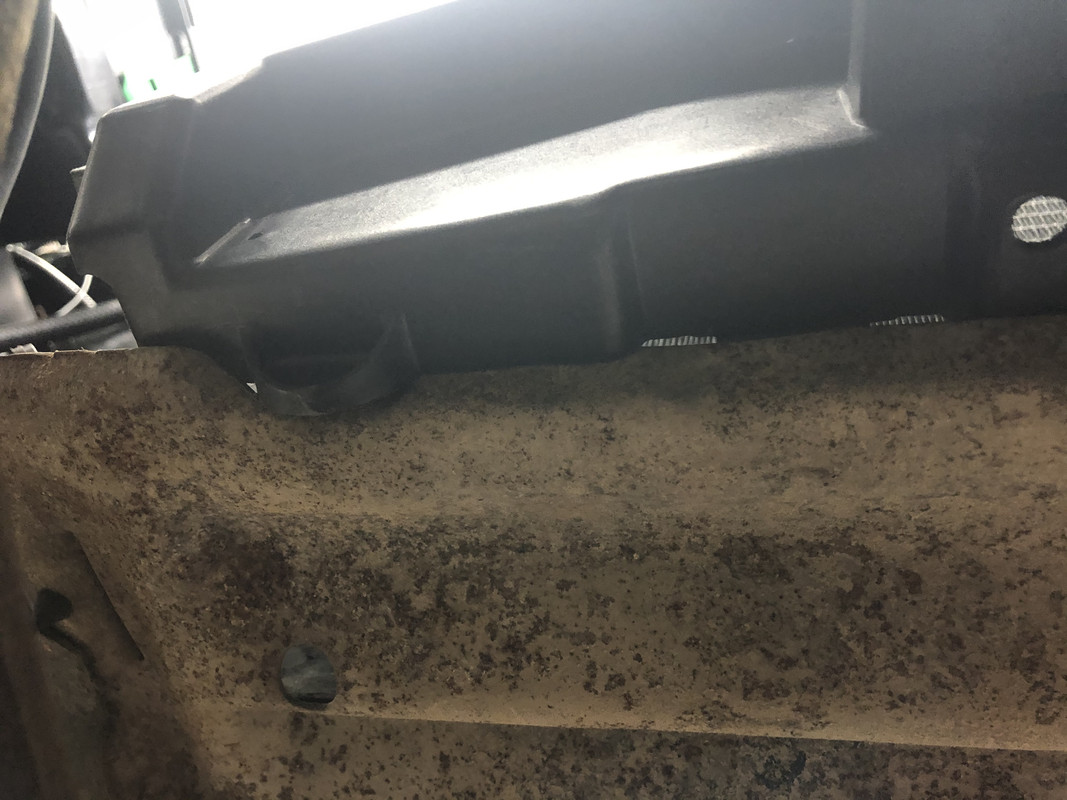
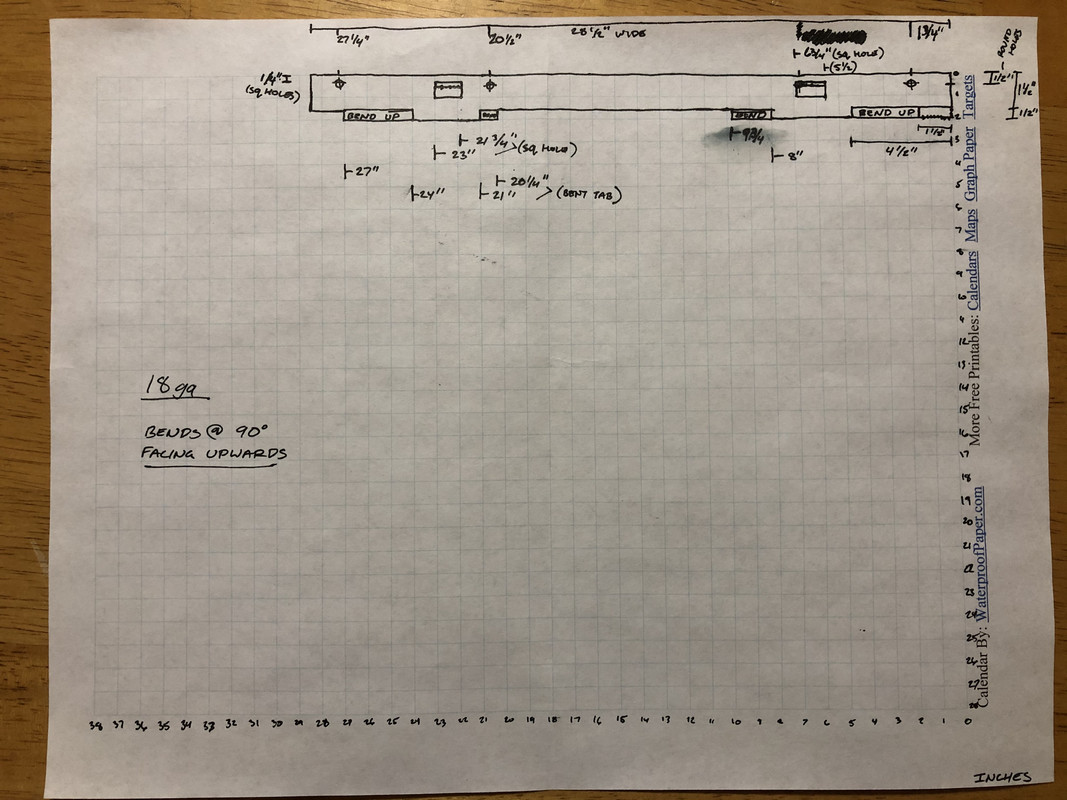
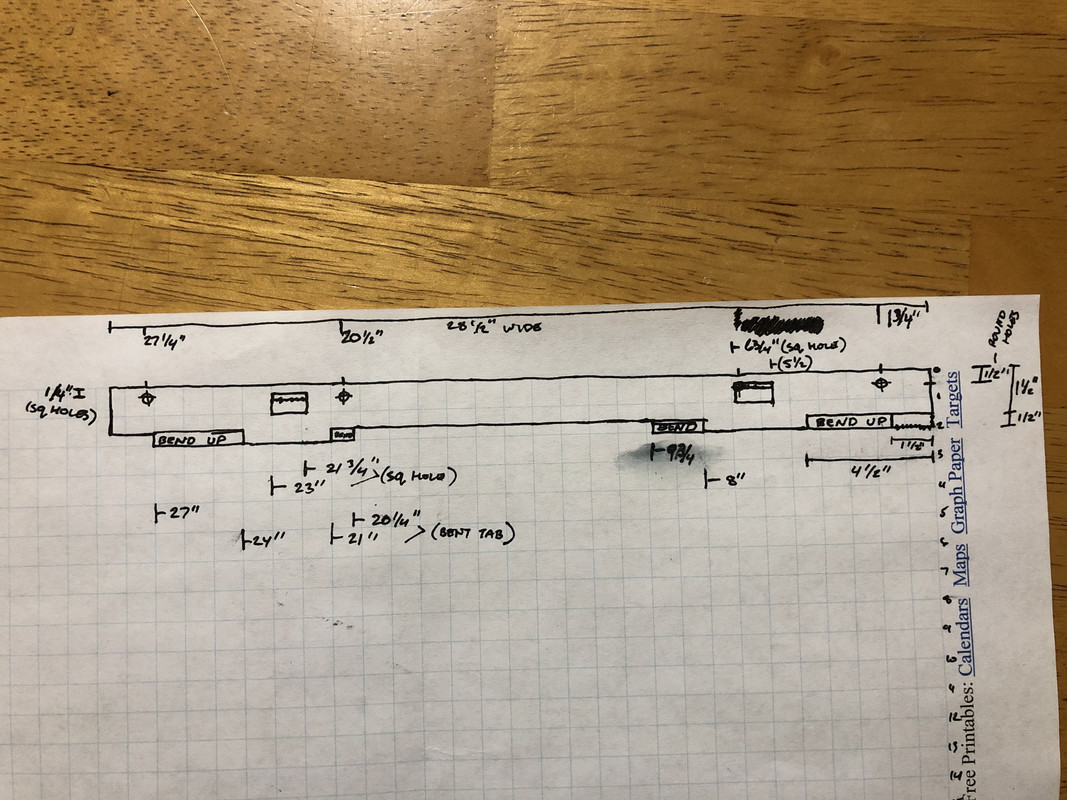
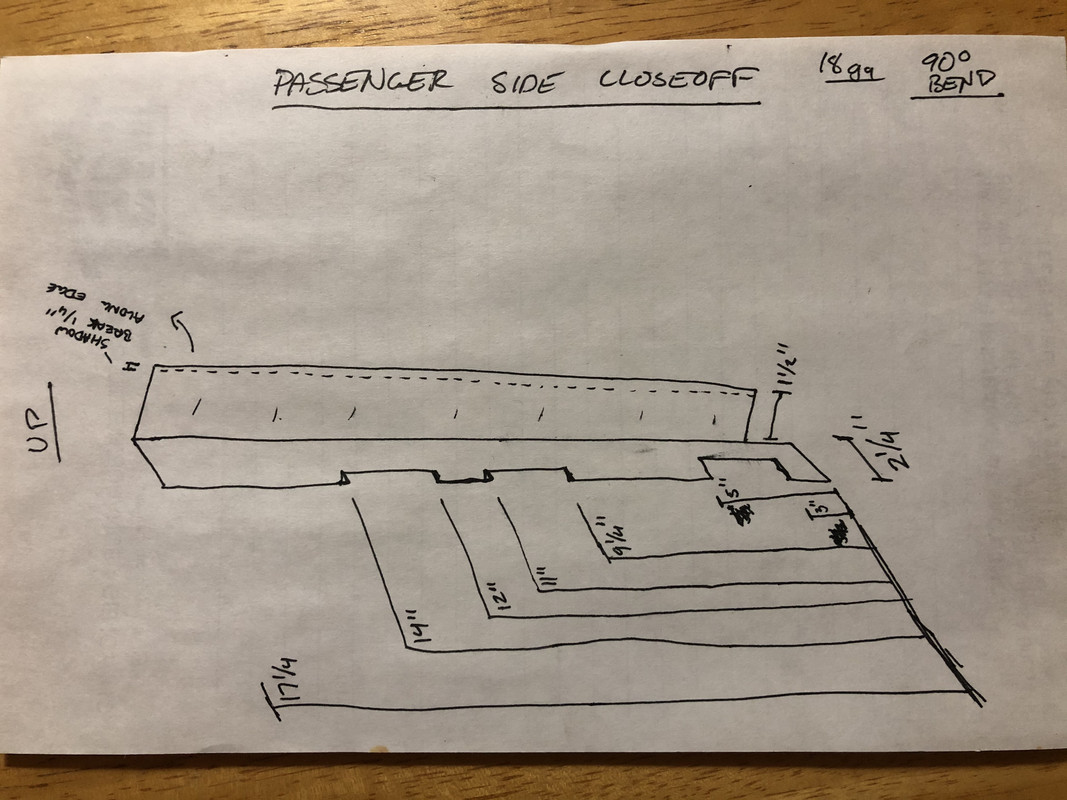
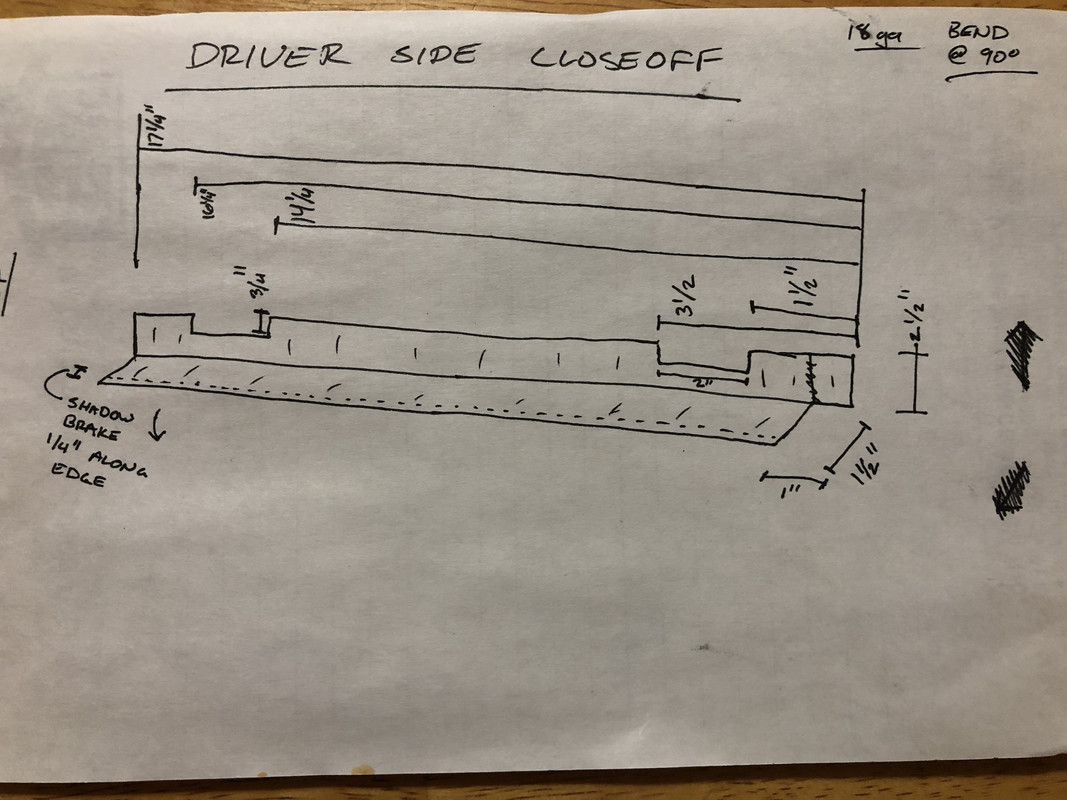
Time for a little change of pace! I’ve been planning on running an electric fan, and been doing research on what everyone seems to like using. Ford Windstar seemed to be the pick for Square Bodies, but I wasn’t a fan (pun intended) of how it mounted or had excessive bracketry all over. After junkyard hunting and looking up endless specs on fans, I settled on a 2010-2012 Ford Fusion fan. The fan seems to fit the radiator opening well, I believe is PWM capable, is available in much newer vehicles, and it drops right in place at the bottom, just like the factory shroud. I’m not kidding! I’ll be having a few pieces of sheet metal bent up to properly fill the side and top gaps, but I feel like this will be a great fit.
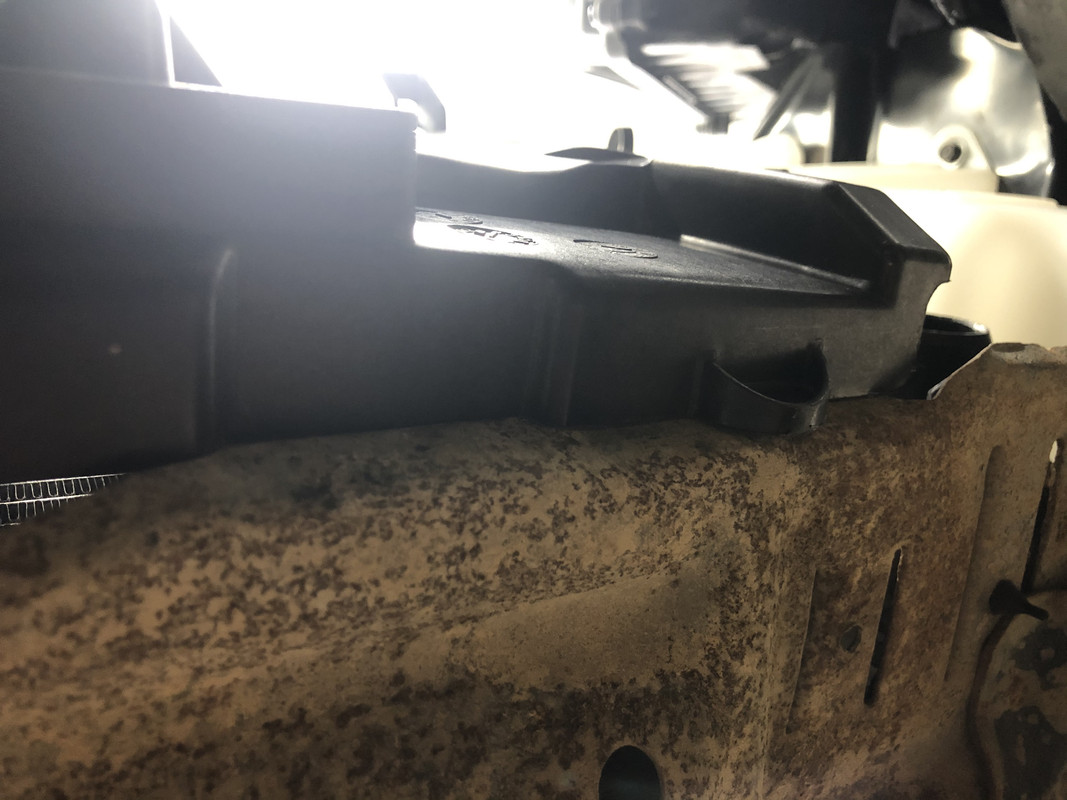
Here are the drawings I made for the three pieces that will be made up, if anyone is interested in producing them themselves.
Time for a little change of pace! I’ve been planning on running an electric fan, and been doing research on what everyone seems to like using. Ford Windstar seemed to be the pick for Square Bodies, but I wasn’t a fan (pun intended) of how it mounted or had excessive bracketry all over. After junkyard hunting and looking up endless specs on fans, I settled on a 2010-2012 Ford Fusion fan. The fan seems to fit the radiator opening well, I believe is PWM capable, is available in much newer vehicles, and it drops right in place at the bottom, just like the factory shroud. I’m not kidding! I’ll be having a few pieces of sheet metal bent up to properly fill the side and top gaps, but I feel like this will be a great fit.
Here are the drawings I made for the three pieces that will be made up, if anyone is interested in producing them themselves.
The following 2 users liked this post by Nick_R_23:
Project GatTagO (01-31-2021), y5mgisi (11-09-2022)
01-31-2021 | 09:53 PM
#79
Joined: Mar 2003
Posts: 10,244
Likes: 1,530
From: The City of Fountains
Thanks, man. I�ll definitely get ahold of you before I get it fired up. I actually have to find a new laptop first!
Time for a little change of pace! I�ve been planning on running an electric fan, and been doing research on what everyone seems to like using. Ford Windstar seemed to be the pick for Square Bodies, but I wasn�t a fan (pun intended) of how it mounted or had excessive bracketry all over. After junkyard hunting and looking up endless specs on fans, I settled on a 2010-2012 Ford Fusion fan. The fan seems to fit the radiator opening well, I believe is PWM capable, is available in much newer vehicles, and it drops right in place at the bottom, just like the factory shroud. I�m not kidding! I�ll be having a few pieces of sheet metal bent up to properly fill the side and top gaps, but I feel like this will be a great fit.
Here are the drawings I made for the three pieces that will be made up, if anyone is interested in producing them themselves.
The other good PWM fan option is the C7 Corvette fan. It is a brushless motor and has the controller built in.
I've done both with Holley EFI.
Andrew
The following users liked this post:
Project GatTagO (02-01-2021)