When you click on links to various merchants on this site and make a purchase, this can result in this site earning a commission. Affiliate programs and affiliations include, but are not limited to, the eBay Partner Network.
Trying to decide if i'm goign to paint the manifolds and engine in this new BBQ paint copper. The black has always held up in the past. This looks more brown to me, but looked ok on the more reflective surface of the can. Also not sure the paint will stick to polished manifolds. Tempted to just do the standard black and leave the manifolds alone. Opinions on the copper/bronze color?
whoa, I'm definitely trying this out. Not a fan of the color though. I'm going to see if I can find a silver or something that matches the LS7 headers. I like the black.
I kind of like the color, especially for that car. Has a classis or old timey theme to it. Try it out and you can always respray it if you decide to change it up.
Keep your eyes open for some used tubular control arms for that Mustang II front end. Lose some weight, gain some caster (stability), heim ends instead of bushings (stability), increase travel and gain room (no more strut rods). If you need even more travel look at AJE's hat mod kit. Switches you to a taller coilover type shock and increases travel even more. At the ET this should run, you probably will not need much travel. maybe even limiters.
Timing parts finally came. Engine is almost ready to drop in. waiting on my rockers to see if the factory valve covers will fit. Prob paint the VC black. Not really a fan of the brown, was hoping it would grow on me.
I'll say the Speedmaster electric water pump had a few flaws. The alum spacers were not especially flat. So I had to flat sand them. Also one of the spacers hit the head and needed "clearanced" . Its nice you can re-clock it. My Rad setup has the inlet and out let on different sides of the Rad.
Last edited by Forcefed86; 12-24-2020 at 12:07 AM.
2 dropped spindles, if you have the ground clearance. See them regularly on Facebook and craigslist. The Heidts ones are pretty nice pieces. Saw a pair for $150 about 2 weeks ago.
Was a little worried I wouldn't fit in the cab without a ton of work. Those cheap plastic seats take up a TON of space. Made some new mounts and tossed in my Kirky and its not to bad! Much lower seating position and I have plenty of leg room now.
Originally Posted by Bad Apache
2 dropped spindles, if you have the ground clearance. See them regularly on Facebook and craigslist. The Heidts ones are pretty nice pieces. Saw a pair for $150 about 2 weeks ago.
I think I'll have the clearance. It will defiantly have some sort of drop spindles on it eventually. Friend donated a pair of tubular A-arms as well, pretty excited about those! I'll get it mobile first, then tackle the lowering and suspension.
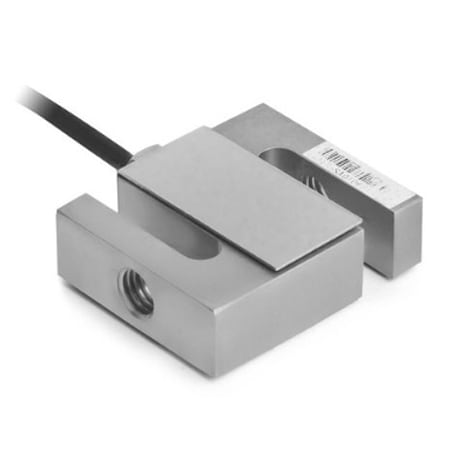
I will say for lack of a better term the "titty" style pucks aren't my favorite. You basically have to put the load of the entire car on that one little point. So if you'd not making a plate/housing for it, this style seems a little more practical. Also always feel like I'm going to leave a dimple in the stamped steel using the puck style. (which hasn't happened yet) but its also harder to balance the car on that tiny point as well if your going for FWD/AFT weights w/ 2 scales
Last edited by Forcefed86; 12-29-2020 at 09:34 AM.
Car is looking badass. I think for the engine block, it gets tricky with a yellow car (my 67 is yellow too). Kinda want a neat color but not one that pops too much like red. How about darker blue, green, or gold?
Car is looking badass. I think for the engine block, it gets tricky with a yellow car (my 67 is yellow too). Kinda want a neat color but not one that pops too much like red. How about darker blue, green, or gold?
Thanks! Won't be sticking with the yellow either. I'd like to get it together and running first though. Then I'll likely drop it off for a quick and dirty 1 day body and paint procedure at a buds.
Few small things out of the way this weekend.
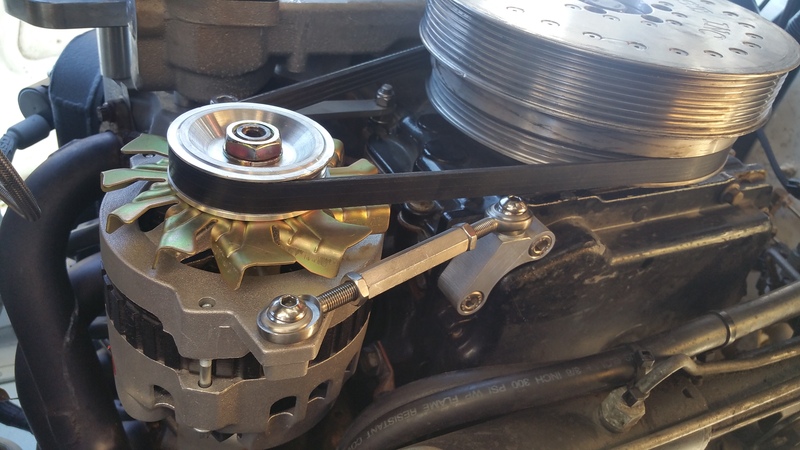
Pass side lower alternator mount is done. Went with AEI CNC kit. Buddy had a new chrome CS130 140A 1 wire and sold it to me cheap. Also happened to have the correct length belt laying around. It was a 6 rib, so I cut 2 ribs off. Hope the under driven pulley has enough RPM to kick the alt on. Crank pulley was also given to me. Believe its one of these cheapie amazon SFI pulleys. 25% UD I'd guess.
Also had a wild idea for air filters that I'm not sure about. Ordered some of the cheap china carb velocity stacks. I'm aware these flow horribly, but I'd just be leaving them on for cruising on the street. I like how they look by themselves... a little big maybe, but look period correct I think.
Headlights on the Model T's were huge! I ordered a set of actual Model T headlights and returned them... they were massive! Also once you add the actual head lights I bought on the front of the car, it looks overcrowded and a little silly with 4 "headlights". Though moving the headlights inboard did look better I think. IDK, what do you all think? Keep the funky filters? Or back to the drawing board?
I like that idea! Do you know of any small housings I could put them in? Those would fit great where the original little fog lamps were. Guessing those likely put out more light than the 4.5" china motorcycle lights I have too.
These look like they are an enclosed "fog light" version that require a standard H11 head light bulb. Think this would put out enough light? Or better off playing with the 80-100w+ LED bulbs?


 12-19-2020, 08:22 AM


 Hope the under driven pulley has enough RPM to kick the alt on. Crank pulley was also given to me. Believe its one of these cheapie amazon SFI pulleys. 25% UD I'd guess.