When you click on links to various merchants on this site and make a purchase, this can result in this site earning a commission. Affiliate programs and affiliations include, but are not limited to, the eBay Partner Network.
Andrew, I probably replaced and got rid of the OEM stereo around the turn of the century. The first single DIN didn't last too long and then I got the Blaupunk around 2005. My garage is so full of stuff that any time I can throw something out, it's going out so I don't have any of those stereos.
From the previous pictures, you can see that the bottom section was already ready to receive a double DIN head unit. Because of this, installation was mostly wiring. I planned on using an external amplifier. This amp happened to be an NOS Audiovox unit that I purchased brand new in the early 1990s. I was in the active duty Air Force and the base exchange had it for a good price. Even though Audiovox is nowhere close to high end equipment, the audio specs aren't bad at all. 75 watts RMS into 4 channels. Until installing it in the coupe last winder, the amp had never been removed from it's plastic bag and it still had the protective film over the clear, plexiglass top cover. It may be Audiovox but it's pretty good looking and so far, it's been producing good clean power.
I used a Crutchfield supplied wiring adapter to easily connect up to the factory wiring.
I always prefer non-insulated connectors and covering them with adhesive lined, shrink wrap tubing. Nothing is crimped yet in this picture.
Because of the external amp, subwoofer and back up camera, there was a lot of wiring to run. The fact that the interior was out of the car at the time made it so much easier to route the multiple RCA cables through the dash and back to the trunk. Even though the Kenwood head unit is a "mech-less" unit (with no CD player) and resulting shallow depth, it was still difficult getting all of the many wires tucked in place behind the unit. In this next picture, you can see some of the wiring. The wiring harness in the previous pictures is not in this next photo.
There's a lot of wiring in there!
Cutting some threads in the plastic for the trim bezel around the Kenwood DMX809S.
The round silver thing in the lower left corner of the trim bezel is an LED that changes color from green to yellow to red to indicate when and how fast the DCC controlled electric radiator fan is running.
These Foxbodies are bass challenged so I knew I had to have a subwoofer for good audio. I probably would've purchased a small 8"-10" sub but I couldn't pass up the deal on this brand new Kenwood 12" subwoofer.
This is my Kenwood 12" sub. It's a little big for this car but i got this brand new subwoofer for free from my nephew. I found a decent subwoofer box and mounted the sub into it. If my trunk were bigger, I would've purchased a bigger box. This one is about as small as I could go and still be within the acceptable size envelope for a 12" sub.
Here is that brand new Audiovox amp that I've owned for 30+ years. It still has the protective plastic on it. I wired it up and made sure that it worked before mounting it and cleaning up the wiring. You can see my subwoofer in front of the amplifier.
After putting that subwoofer box into the trunk along with the battery, there just wasn't much storage space left in the trunk. There was no way I was going to lay that Audiovox amp down on the floor because my trunk would've been unusable. I needed to mount the amplifier vertically.
To do so, I made brackets that mounted to the bottom of the rear package tray. I couldn't even see under there without using a mirror that I laid on the floor of the trunk. Here is a picture of the brackets: This picture is looking forward into the rear seat back (with the circles.) At the top of the picture mounted to the package tray bottom are the aluminum brackets that are going to hold the amplifier vertically.
This picture was taken with the camera on the trunk floor looking up.
I used a 3/8" thick, plastic cutting board. The thickness and density of the cutting board were perfect. Because the amp was going to be touching the subwoofer box, I thought that it would be best if I insulated it as much as possible from vibrations. I used 1/4" adhesive lined foam.
The other side of the board was completely covered in foam.
Here you can see how I vertically mounted the amplifier. The wiring is cleaned up and routed nicely.
This view shows where the amp is in relation to the subwoofer. All of that stick on foam is needed to protect against vibration.
I've got channels one and two powering the two rear speakers. I've got channels three and four bridged to provide 150 watts RMS to the subwoofer. Nothing crazy but it's a decent amount of power.
With the amplifier hanging like that, I actually have a little bit of usable room in the trunk. I can actually fit something like a soft sided duffel bag in there if I'm going to take the car on a road trip. I can probably fit some tools in there as well.
That is my concern as well. I knew that the mounted amplifier would be touching the subwoofer box. The amp is not mounted to the subwoofer box but rather to the brackets (hanging from above) I showed in the pictures. However, the full foam covering the white board is against the subwoofer box. The sub box is covered in that standard carpeting that you see on pretty much all subwoofer boxes. The subwoofer box is sitting on the trunk floor and is cable tied into place to keep from moving around.
I did a bunch of online research a year ago about this vibration issue. Some said that their amps were directly mounted to the sub box. The general consensus was to avoid having the amp touch the sub box. I've got quite a bit of foam vibration insulation so I think that is going to help a lot. Nonetheless, there is going to be a lot of subwoofer vibration in that small trunk no matter where I'd placed the amplifier. If it dies, I'll buy a modern, more efficient amplifier and perhaps mount it somewhere else.
I'm going to continue with the stereo. I've been driving the car with the installed stereo and I've noticed some things. First, the stereo sounds absolutely fantastic when the engine isn't running. Just awesome. In fact, before I got the car running on 25 Nov 2023, there were times when I'd just sit in the car and blast the stereo. That old school amplifier really sucks the electricity and I had to keep a strong battery charger connected to the battery otherwise the voltage would drop below 12 in no time. That Audiovox is electrical power hungry.
Second, while driving down the road the Hooker 3" exhaust with dumps in front of the rear differential really drowns out the stereo sound. It seems that 90% of the stereo's bass disappears. Hopefully the Pypes tailpipes will cure that audio problem.
Finally, tying to play with Apple Car Play controls on the double DIN Kenwood while it sits low and in front of the shifter becomes a little bit of a problem. My older daughter had mentioned to be last year that I really need to relocate the Kennwood head unit above the HVAC controls the way modern cars do it. I recently saw this: NEW 1990-1993 RADIO RELOCATION DOUBLE DIN TRIM BEZEL
When I first saw this kit it looked a little odd to me. I couldn't figure out what made it look odd. Finally, I realized that everything is on a single plane, The OEM setup has the HVAC oontrols and stereo in different planes that is very obvious in the last three pictures of post #404. The "monoplane" look is a little weird to me but I'm going to do it anyway for more user friendliness of the Kennwood head unit. It'll be especially helpful if I'm using the GPS navigation.
With my current leaking heater core and the fact that I've got to pull the entire dash to replace it, now looks like the right time to relocate the stereo. At the moment, the dash is taken apart but not pulled out of the car. The radio relocation kit has been ordered but has not arrived, As time allows, I'll continue the work on the heater core replacement while waiting for the relocation kit to arrive.
It's been almost 2 1/2 months since I've updated this build thread. I'm going to let you know what has been going on with the car lately because it ties in with the above post (#410.)
Probably around mid January 2024, I was driving the car back from a local car gathering and I was running the heater. I got a whiff of antifreeze. I got home and parked the car and forgot about it. The next day while walking past the car, I noticed liquid underneath where the AC condensation drains. I looked closely and sure enough, it was antifreeze. The heater core was leaking. Ugh!
Obviously this required pulling the dash to access the top of the HVAC box to remove and replace the heater core. I thought about buying a pricey, NOS genuine Ford heater core but then I remembered that my current leaking heater core was a newer (2007-2008) genuine Ford heater core. Since I wasn't impressed with it's lifespan, I went with a Rock Auto, china made heater core. Hopefully I won't regret that decision.
I watched youTube videos that said that I could access the heater core without removing the HVAC box. The dash needed to be removed but the reason that I didn't want to remove the HVAC box was because my AC system was fully charged and blowing very cold air. The videos said that I had some AC hose slack that would allow me to pull the HVAC box back enough to access the heater core lid. However, I also realized that my AC wasn't OEM Ford AC and that my custom made hoses wouldn't have near the extra slack that the OEM hoses did.
You can see that the double DIN Kenwood stereo is out. What a perfect time to swap the HVAC controls and the stereo with the kit that I linked in the previous post.
There is the HVAC box hanging by the two surface rusted, metal straps.
I'm pointing to where the leaking heater core was. I used a squirt bottle filled with water to get rinse water into this area to flush out as much antifreeze as I could so that I wouldn't have to smell antifreeze for the next 6 months!
The area where my genuine Ford heater core was leaking was from one of the tubes that the hoses connect to. The actual core was perfectly fine. For that reason, I kept the Ford heater core because it could be brazed back up.
The only way that I got enough AC hose slack to move the HVAC box far enough aft was to remove the compressor from it's bracket.
New, china heater core in, lid bolted down and a new, big nylon cable tie is keeping the whole HVAC box together. I had to replace the AC evaporator back in 2007-2008. To do so required cutting the box in half where the factory plastic welded the upper to the lower. I couldn't plastic weld it back together back then so I sealed it with black silicone and used the two large cable ties to keep the two halves together.
I ordered the HVAC controls/stereo swap kit that I linked in post 410.
Pre swap. I need to do some plastic cutting.
Easy to do with this saw.
HVAC panel in place. The instructions tell you exactly where to drill the new holes to mount this. Unfortunately for my car, the panel was about 2mm too high and the two white dots were slightly at the bottom of the panel were slightly visible through the new bezel cutout. Black, cloth Tesa electrical tape to the rescue.
Because you have to monkey around with a lot of wires (stereo and HVAC) and HVAC vacuum lines, the swap kit instructions wisely say to test all stereo and HVAC controls before buttoning everything back up. Good news: my HVAC controls all worked. Bad news: the stereo was dead .
I spent the next two weeks testing and checking all of my wiring. I even removed the fuse box and checked the wires on the backside where they come into the fuse box. I looked up schematics on the internet. I wasted sooooooo much time dealing with this and I was frustrated to the nth degree.
No voltage at the stereo connector. Test light not lit.
I even checked my wires on the back side of the fuse box and everything checked out good.
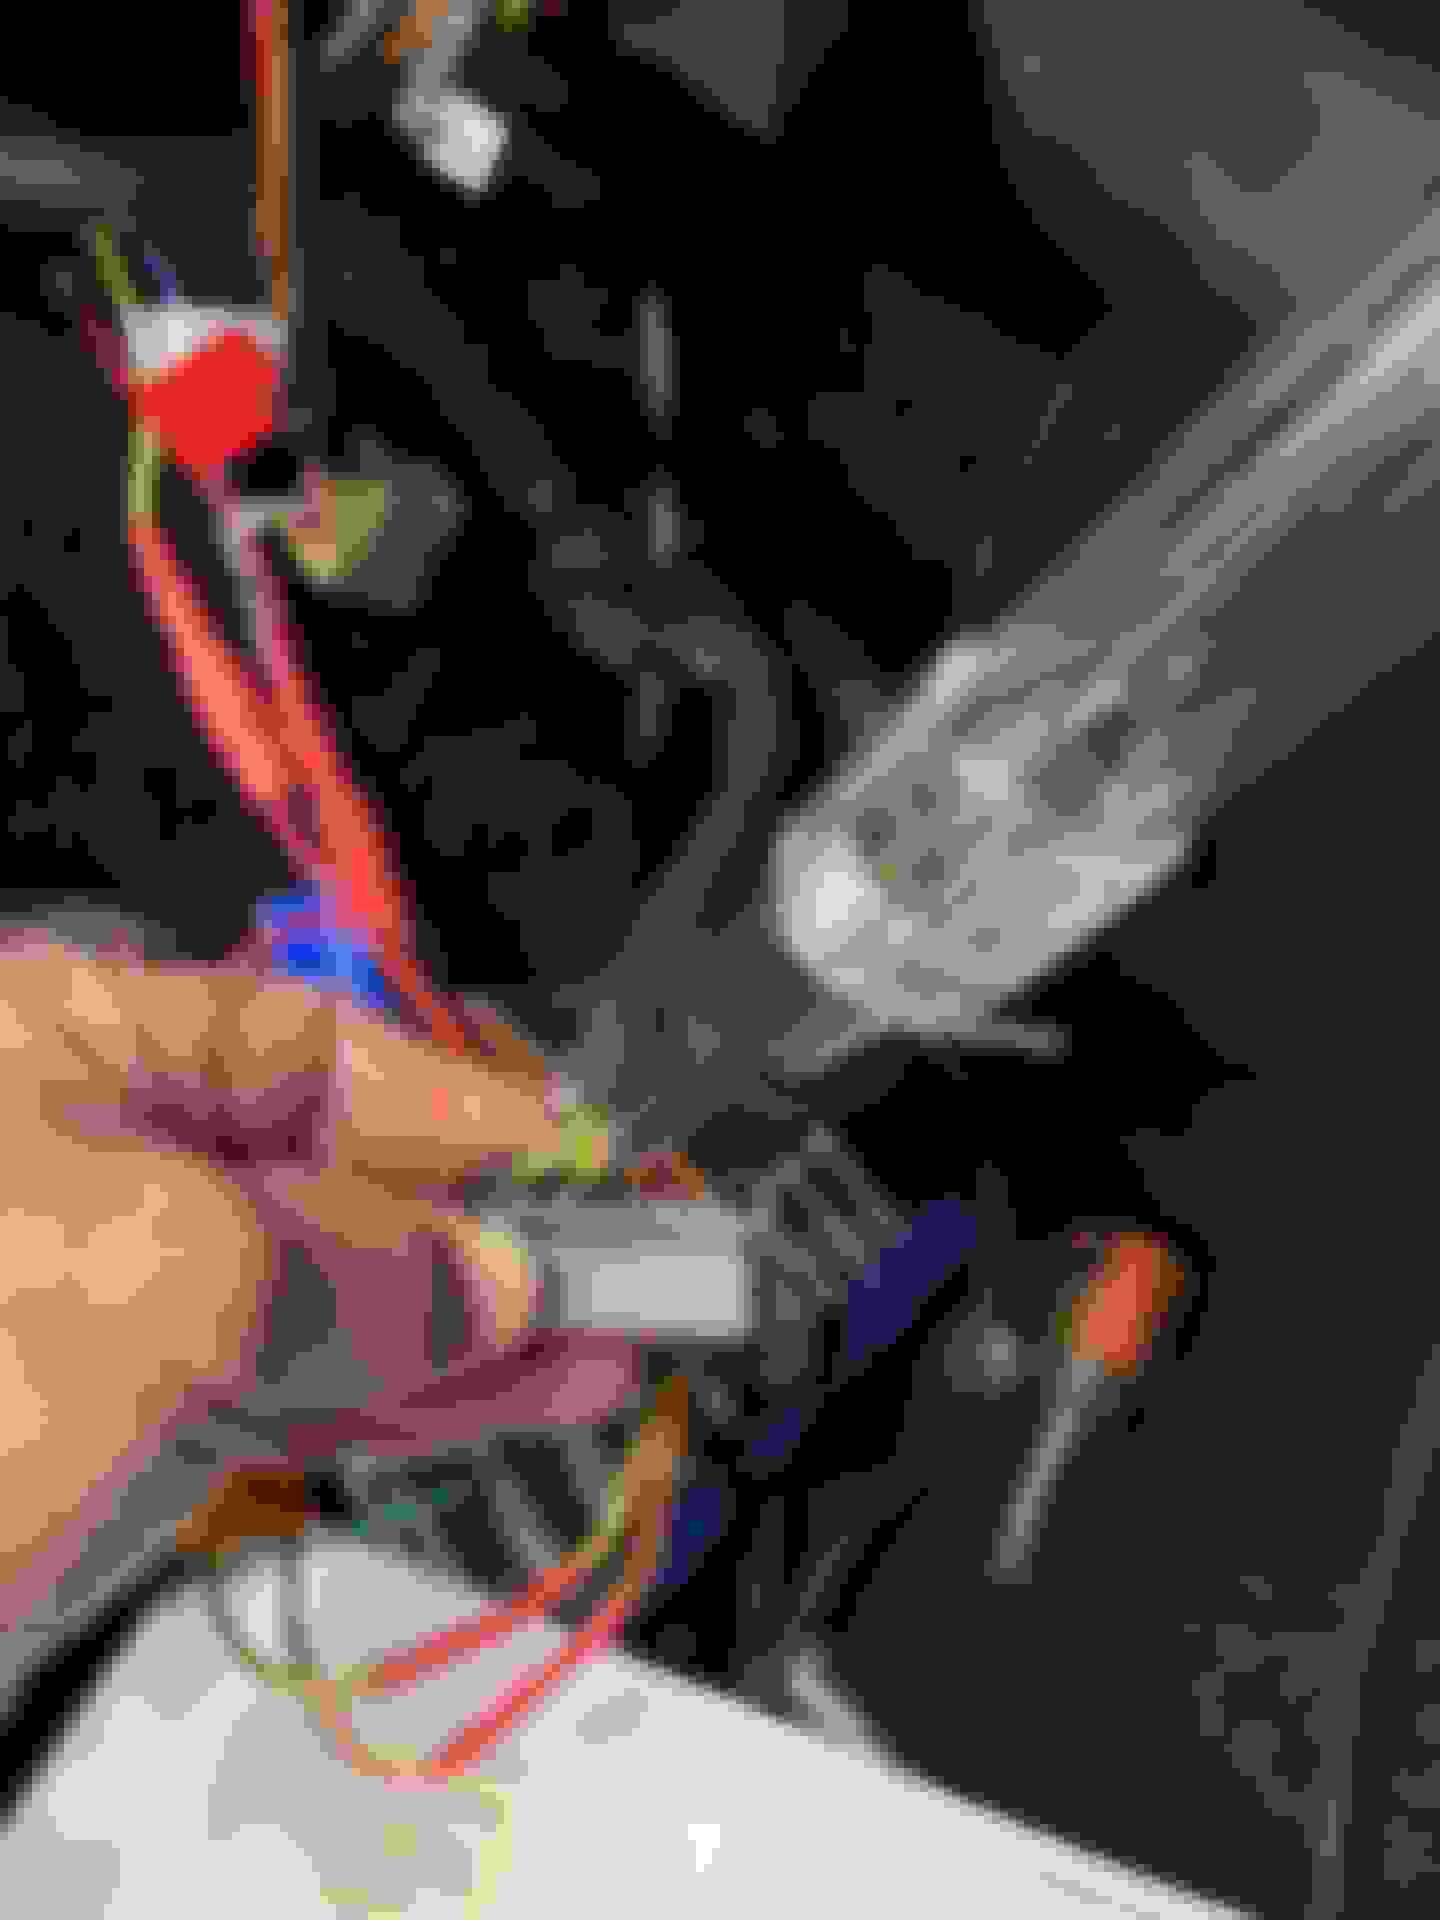
Fistful of stereo wiring. All of this was connected to the car by only one wire shown in the next picture.
Only one wire?!? Yes, the whole fistful of stereo wires were connected to the car by just this one ground wire. Something isn't connected!!!!
The disconnected "car" connector was this. I had thought that it was one of the airbag connectors. My airbag is inoperative because the blue, airbag module boxes are bad so when I saw this disconnected behind the stereo, I thought it was no big deal. Now, I realized this was for the stereo.
There is the stereo end connector below the "Y up."
To make sure I don't make this mistake again, I wrote a "Y" on the stereo side connector.
Finally!
Last edited by dannyual777; 04-14-2024 at 07:20 PM.
Finally, on 20 March 2024, I took the car for a test drive with the new heater core and swapped HVAC/stereo. The good news: the heater core didn't leak, my AC worked and the stereo played just fine. The bad: the vent blower motor quit working and my DCC controlled, Lincoln MK VIII electric fan quit as well. I monitored the engine temperature and got the car home safely.
Back in early January 2024, I had a problem where the MK VIII fan quit working. The pigtail's female terminals had burned. The pigtail plugs right into the fan motor which has male terminals that are recessed. The male terminals are hard to access for cleaning but I did the best that I could. I was able to order a new, heavy duty pigtail with the female terminals from Amazon.
Unfortunately, the hard to clean male terminals made the connection to the new pigtail unreliable. When I got home on the day of my test drive, I kept the engine running, raised the hood and grabbed the pigtail where it plugged into the male terminals on the fan motor. The fan kicked on immediately. I knew I couldn't trust it and it was time for new.
I went to Rock Auto and was hoping that I could order a new, OEM MK VIII fan motor but it wasn't to be. Only china made replacements were available.
Several years ago, Andrew had suggested that I install a modern, pulse width modulated (PWM) fan and let the Holley Dominator control it. I contacted Andrew and he suggested that I order a new, OEM C7 Corvette fan from Rock Auto. As of today, 14 April 2024, $232.79 for a genuine, GM fan made by Spal in Italy! 2019 C7 Corvette PWM Fan
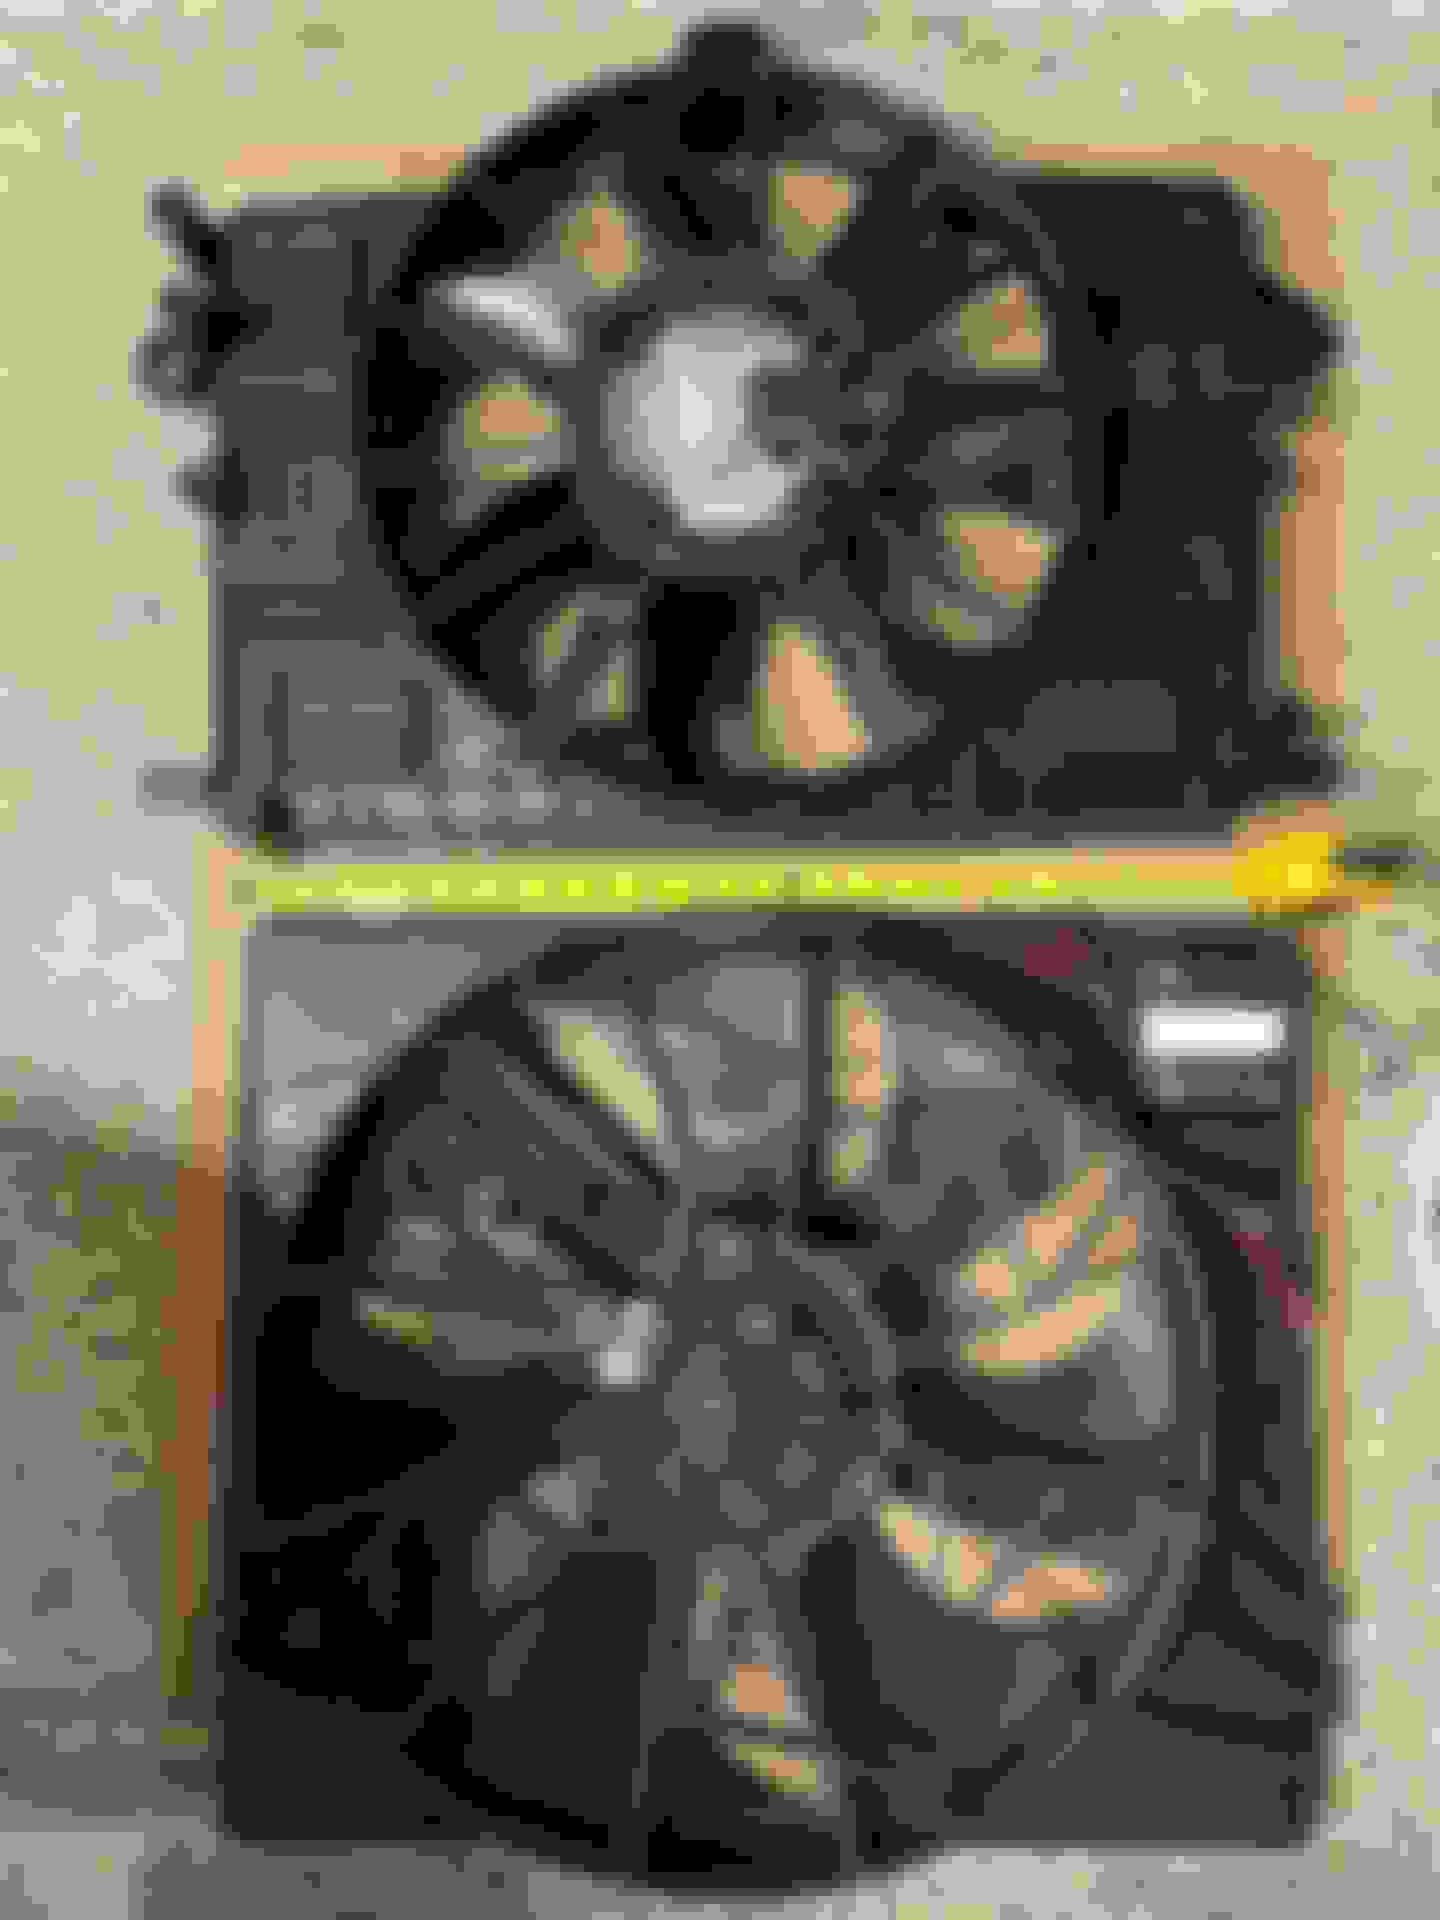
The fan arrived in this very large box in the foreground. However, I was surprised when I opened the box to see how small the fan was.
Physically, the C7 fan (top) is much smaller that the mid 90's, Lincoln MK VIII fan. However the C7 fan is a very powerful, brushless fan; 600 watts. It cools a supercharged Corvette so it should be able to cool my NA LS3. BTW, you can see the unreliable connection right at the motor on the MK VIII fan.
The shiny rubber seal right up against the radiator fins is black silicone rubber tubing. I purchased 10' of it from a seller on Amazon. It's very soft and pliable and stands up to high temperatures. Using a box cutter, I split the tubing from one side to the middle. This allowed be to place the cut tubing over the fan shroud plastic edge creating a nice seal. It was only 10 bucks for 10' of tubing.
Here is the wiring harness that I purchased directly from Vintage Air (VTA-231088):
This is a heavy duty wiring harness with large, 6AWG power and ground cables. The connector is a Japanese Yazaki connector that plugs right into the SPAL fan.
I recently found the same harness much cheaper from Summit Racing: VTA-231088 Granted, this isn't inexpensive but its way less than it was direct from VA. On the other hand, it's not in stock as I type this from Summit and I had it at my house in less than two days ordering direct from VA.
My old MK VIII fan had the wiring on top of the fan and I wanted to clean the wiring up for this install. I decided to run all of the fan's wiring from the bottom. Before running the wires, I covered them with Flexo coverings. Adds time and effort to the install but it protects the wires and makes for a very professional looking job!
Techflex Flexo PET is on the left. Its an expandable covering. I have 1/8" and 3/8". Techflex says that it expands to 2X it's size but I've found that it'll actually go a little more than that. You'll just see more of the wire inside the covering. The covering on the left is a split, Flexo F6 in 1/4" size. It's the modern version of the now old school, split loom tubing.
1/4" Flexo F6
The wire in the middle of the picture is the VA, 6AWG cable inside the 1/8" PET covering. The cable is slightly larger than 1/4" OD which expands out the black, nylon braids and the red cable jacket shows. I kinda like the reddish look. Yes, I should get rid of the old school split loom tubing. Too bad I've got a ton of it on hand.


 01-28-2024, 08:20 AM


 .
.