

My LS1/T56 swap into '68 Chevy C-10 stepside
 11-13-2005 | 08:59 PM
#42
Ok, update - I got the mounts drilled out ...Got the mounts mounted...got the engine sitting right on the mounts and ready to bolt down, then I started balancing the engine+tranny out and ... THE TRANNY DOESN'T FIT! Looks like with my particular setup I need a high-hump.  This kinda explains why I had so many damned problems getting that bastard in the first couple times.
Hehe, make this setback # 5 million. I might cut the tranny hump out just so I can get that bad boy mounted in there and secured. Will allow me to move onto other things.
For those interested, I'll post links to what I'm talking about and include them on the post as attachments also just for reference.
This is where the tranny smacks into the hump. Mind you, the engine is sitting nearly perfectly to be bolted in - if only the tranny would lift another 2-3"....
http://satellitehead.com/images/68ch...lems%20008.jpg
Here's a picture from the other side .... note the tranny is sitting right on the hump...
http://satellitehead.com/images/68ch...lems%20005.jpg
I can't even get it up on the crossmember. I'm about 1" away from accomplishing that feat - and the tranny won't jack up another inch....
http://satellitehead.com/images/68ch...lems%20007.jpg
Going to look for a tall hump now.
This kinda explains why I had so many damned problems getting that bastard in the first couple times.Hehe, make this setback # 5 million. I might cut the tranny hump out just so I can get that bad boy mounted in there and secured. Will allow me to move onto other things.
For those interested, I'll post links to what I'm talking about and include them on the post as attachments also just for reference.
This is where the tranny smacks into the hump. Mind you, the engine is sitting nearly perfectly to be bolted in - if only the tranny would lift another 2-3"....
http://satellitehead.com/images/68ch...lems%20008.jpg
Here's a picture from the other side .... note the tranny is sitting right on the hump...
http://satellitehead.com/images/68ch...lems%20005.jpg
I can't even get it up on the crossmember. I'm about 1" away from accomplishing that feat - and the tranny won't jack up another inch....
http://satellitehead.com/images/68ch...lems%20007.jpg
Going to look for a tall hump now.
11-16-2005 | 08:58 AM
#44

Teching In
Joined: Feb 2005
Posts: 45
Likes: 0
Shifty PM me I was using the same frame as you before I got my c5 suspension. I have alot of parts you might need. I also have front 1978 suburban suspension with 12 inch rotors new bearings and seals. Oh and the rotors are the small chevy car lug pattern from a 1990 1LE camaro. I also have the motor mount plates the painless wiring harness for that engine and tranny. It is the one with 4 feet of additional wiring so you can put it up behind the dash or under the seat. I have sway bars power steering box narrowed ford 9 inch rear end with disc brakes. Has been narrowed to use 315's out back. Let me know or e-mail me. Bubba-22@excite.com
 12-03-2005 | 11:48 AM
#46
It's listed on the first page of this thread. Sorry for the delay, I haven't been in town for a couple of weeks.
Direct link: https://ls1tech.com/forums/showpost....6&postcount=20
Might want to read the entire post next time I have all the info on everything of my swap in this entire thread, part numbers, contacts, etc.
PS - anyone looking into this swap - FBodyChopshop ( www.fbodychopshop.com ) is where I've been buying most of my used parts - Ask for Tony. The guy is great, parts are great, shipping is very reasonable. Excellent guy to deal with.
Direct link: https://ls1tech.com/forums/showpost....6&postcount=20
Might want to read the entire post next time
I have all the info on everything of my swap in this entire thread, part numbers, contacts, etc.PS - anyone looking into this swap - FBodyChopshop ( www.fbodychopshop.com ) is where I've been buying most of my used parts - Ask for Tony. The guy is great, parts are great, shipping is very reasonable. Excellent guy to deal with.
12-03-2005 | 01:21 PM
#47
11 Second Club
Joined: Feb 2002
Posts: 198
Likes: 0
From: victoria canada.
shifty, that sucks about the trans hump.
I never thought of that, as I have an original 4speed cab with the tall, bolt in hump. I guess you now have to cut that hump out and get a 4speed hump and bolt it in. At least the holes are already in the 4speed hump to assist you.
Mine just slid right in like a dirty *****.
Good luck with it all. I finally got mine running a couple of days ago. You will be happy, as mine is kinda crazy to drive. Traction is a big problem once again. Also some people around here were concerned with my swap in regards to ride height as the all aluminum motor versus my all cast iron motors weight. Well I didn't really notice anything, but I didn't measure either. All I can say is the truck has the same rake that it had before.
I never thought of that, as I have an original 4speed cab with the tall, bolt in hump. I guess you now have to cut that hump out and get a 4speed hump and bolt it in. At least the holes are already in the 4speed hump to assist you.
Mine just slid right in like a dirty *****.
Good luck with it all. I finally got mine running a couple of days ago. You will be happy, as mine is kinda crazy to drive. Traction is a big problem once again.
Also some people around here were concerned with my swap in regards to ride height as the all aluminum motor versus my all cast iron motors weight. Well I didn't really notice anything, but I didn't measure either. All I can say is the truck has the same rake that it had before.
12-03-2005 | 11:58 PM
#48
Don't hafta cut it out anymore because IT'S CUT OUT!!! WOOHOOO!
I finally got a day to work on it today after several weeks of driving around hanging out with family and going to more weddings than I care to think about. I actually spent about 5 hours of dedicated time today getting it all put together. Images are attached to this post for a couple of highlights.
When I laid the tall hump onto the cab floor, I noticed that they had bead-rolled pattern on the floor that matched up perfectly with what needed to be cut out, so I had a factory pattern. The hardest part was working through the body seam. Took a combination of a pneumatic nibbler, sawzall and a jigsaw with a metal bit (sawzall only cuts good in a straight line).
Basic process: I placed the high-hump on the cab floor and measured where it should be. Spraypainted the bolt holes to have a visual of where they will be for reference. I used a �" drill bit to drill my pilot hole, then used a nibbler to nibble out the rough square of the primary hole. Once I nibbled up to the body seam, it took a pair of tin snips to cut it loose (should have used the sawzall, hindsight is 20/20 ). The top arch of the tranny hump was the worst to cut out and will take the most cleanup. I still haven't cut or tapped any holes for the high hump, won't get that done until I'm on cleanup.
Once both pieces were out, everything lifted and bolted up perfectly and you can see the end results below. Need to take an angle grinder to everything tomorrow and smoth it all out, then sand and primer with some rustoleum (paint will come once drivetrain and suspension are done). Still not sure what to do about the body seam I cut through, if anyone has advice, I'm all ears
I also notice that the tranny xmember doesn't fall into any of the stock holes. It's going to be a real pain in the *** to try to drill the framerails with the cab on. I hope to hell I don't hafta pull the cab off, I don't have the resources for that in my garage and the truck ain't moving. I'm going to square it up tomorrow and try to get it tackwelded in the corners to see what I'm looking at for more work.
EDIT: I realize, in retrospect, that the smartest thing I could have done to get a new tranny xmember in WITHOUT any cutting/grinding/sanding and without removing the cab, would have been to use http://www.classicperform.com's tranny crossmember for 60-72 pickups (part# CP9427). This only requires bolts in the bottom of the framerail to go in and gives excellent clearance.
I also noticed that I forgot to put my e-brake cable OVER the tranny xmember, so now I need to figure out how to disassemble the e-brake cable so I can mount it over the hump and tighten it back up.
It's so nice to have a cleaner garage again ... now if I could just get rid of the stupid inline engines, I'd be good to go
Anyway, everything else looks good. Gotta figure out this week what all I can take off the top of the engine for emissions. I'm still not sure. Need to order blockoff plates for those items too and send off my harness for some hacking - don't want to pay $400+ (minimum) for a Painless kit.
I finally got a day to work on it today after several weeks of driving around hanging out with family and going to more weddings than I care to think about. I actually spent about 5 hours of dedicated time today getting it all put together. Images are attached to this post for a couple of highlights.
When I laid the tall hump onto the cab floor, I noticed that they had bead-rolled pattern on the floor that matched up perfectly with what needed to be cut out, so I had a factory pattern. The hardest part was working through the body seam. Took a combination of a pneumatic nibbler, sawzall and a jigsaw with a metal bit (sawzall only cuts good in a straight line).
Basic process: I placed the high-hump on the cab floor and measured where it should be. Spraypainted the bolt holes to have a visual of where they will be for reference. I used a �" drill bit to drill my pilot hole, then used a nibbler to nibble out the rough square of the primary hole. Once I nibbled up to the body seam, it took a pair of tin snips to cut it loose (should have used the sawzall, hindsight is 20/20
). The top arch of the tranny hump was the worst to cut out and will take the most cleanup. I still haven't cut or tapped any holes for the high hump, won't get that done until I'm on cleanup.Once both pieces were out, everything lifted and bolted up perfectly and you can see the end results below. Need to take an angle grinder to everything tomorrow and smoth it all out, then sand and primer with some rustoleum (paint will come once drivetrain and suspension are done). Still not sure what to do about the body seam I cut through, if anyone has advice, I'm all ears
I also notice that the tranny xmember doesn't fall into any of the stock holes
. It's going to be a real pain in the *** to try to drill the framerails with the cab on. I hope to hell I don't hafta pull the cab off, I don't have the resources for that in my garage and the truck ain't moving. I'm going to square it up tomorrow and try to get it tackwelded in the corners to see what I'm looking at for more work.EDIT: I realize, in retrospect, that the smartest thing I could have done to get a new tranny xmember in WITHOUT any cutting/grinding/sanding and without removing the cab, would have been to use http://www.classicperform.com's tranny crossmember for 60-72 pickups (part# CP9427). This only requires bolts in the bottom of the framerail to go in and gives excellent clearance.
I also noticed that I forgot to put my e-brake cable OVER the tranny xmember, so now I need to figure out how to disassemble the e-brake cable so I can mount it over the hump and tighten it back up.
It's so nice to have a cleaner garage again ... now if I could just get rid of the stupid inline engines, I'd be good to go
Anyway, everything else looks good. Gotta figure out this week what all I can take off the top of the engine for emissions. I'm still not sure. Need to order blockoff plates for those items too and send off my harness for some hacking - don't want to pay $400+ (minimum) for a Painless kit.
Last edited by shifty`; 03-02-2019 at 04:20 PM. Reason: Updated pics to fix dead
12-04-2005 | 12:04 AM
#49
More pic, of the end result ...
I love the ECE GenIII motor mount kit; perfectly clean install. I literally had to do zero fabrication and it bolted up perfectly with no modification. Best $250 I spent on this project.
I love the ECE GenIII motor mount kit; perfectly clean install. I literally had to do zero fabrication and it bolted up perfectly with no modification. Best $250 I spent on this project.
 12-07-2005 | 10:55 PM
#52
On The Tree
Joined: Oct 2004
Posts: 131
Likes: 3
Originally Posted by shifty`
Don't hafta cut it out anymore because IT'S CUT OUT!!! WOOHOOO!I also notice that the tranny xmember doesn't fall into any of the stock holes . It's going to be a real pain in the *** to try to drill the framerails with the cab on. I hope to hell I don't hafta pull the cab off, I don't have the resources for that in my garage and the truck ain't moving. I'm going to square it up tomorrow and try to get it tackwelded in the corners to see what I'm looking at for more work.
. It's going to be a real pain in the *** to try to drill the framerails with the cab on. I hope to hell I don't hafta pull the cab off, I don't have the resources for that in my garage and the truck ain't moving. I'm going to square it up tomorrow and try to get it tackwelded in the corners to see what I'm looking at for more work.
12-08-2005 | 03:06 PM
#53
11 Second Club
Joined: Feb 2002
Posts: 198
Likes: 0
From: victoria canada.
Stock factory automatic crossmembers bolt to both the top and bottom of the frame.
If it doesn't then the top of the frame can and does flex outward. There is nothing supporting the upper part of the frame from the motor mount to the main cross member where the driveshaft steady bearing bolts up.
If it doesn't then the top of the frame can and does flex outward. There is nothing supporting the upper part of the frame from the motor mount to the main cross member where the driveshaft steady bearing bolts up.
01-23-2006 | 02:01 PM
#55
I might actually get some work done this week now that holidays are over with. I'm going to order the ECE auto tranny xmember and see if it'll bolt up a little straighter. My Pro 5.0 shifter shift kit will be in tomorrow or wednesday and I plan to bolt that up as well.
I've been looking into the fuel delivery situation. ECE makes a nice steel tank that supports in-tank or external fuel pumps, but it's expensive as hell. Doesn't come with any of the hassles of aluminum and is supposed to be a direct bolt-in (moving a xmember back, but whatever...).
Will post pics when done with this stuff.
01-25-2006 | 04:00 PM
#57
His prices are better - he hasn't responded to a post I'd made over there asking for pricing.
the big diff'ce between ECE and FCG's parts ... ECE is selling a steel tank, which will dent instead of rip/tear if it ever is slammed into, ECE's has a baffle to keep gas from sloshing around, ECE comes with every last piece of hardware you could ever need, the spare crossmember you'll need, they spent a lot of time R&D'ing their tank. I've seen Mark's work, it's damned nice and I have really been lulling over it for the past week on whether I want to go with his or ECE...but every ECE product I have bought thus far has been worth the extra few bucks, the craftsmanship is second to none. If Mark could toss together something in Steel for $300-400 that bolts to the frame rails as nice and cleanly as the ECE tank, I'd buy it in a freakin' heartbeat.
Meanwhile, I got the Pro 5.0 shift kit in last night - simple install. Now that it's on, I'm trying to get my hydraulic hoses for the power steering setup purchased and fitted together, going to try to clean up the tranny hole this weekend, get the driveshaft measured and taken in for trimming (and new U Joints, etc.) and trim up the tranny hump cover. Will certainly post pics of progress as always. Project is back on ... full steam ahead!
01-28-2006 | 12:56 AM
#59
Awesome progress, shifty, I read the whole 3 pages... For your Xmember problem, you could always get a Competition Engineering mount like I did, and mount that inside some C-channel, and simply line up the holes you drill in the C-channel to bolt it to the frame. I didnt notice if your frame was boxed or not, but if it isnt, it would not only add more strength, it'd work great. Here's what i mean...
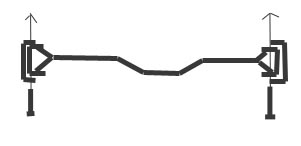
I used a piece of angle iron, as my subframe was already "boxed", so here's what i did for a better illustration.

just an idea
good luck
olly
I used a piece of angle iron, as my subframe was already "boxed", so here's what i did for a better illustration.
just an idea
good luck
olly
01-29-2006 | 06:32 PM
#60

Teching In

Joined: Oct 2005
Posts: 26
Likes: 0
From: Watertown, CT
I assumed FCG's tanks were baffled. Here is what he said to me in a PM 11/05
"I would recommend a 16 gallon version. The tank is $375 + shipping. The in-tank fuel pump is $250 + shipping. The fuel pump price is not marked up. You can see the pump specs @ www.yogisinc.com .
The $375 includes tank, sending unit, filler tube and mounting hardware. Turn around is 3-4 weeks. Total would be $635+ shipping. Let me know if you have any other questions.
Thanks, Mark"
I thought that sounded good, let me know what you think