'71 Chevelle - LS1/T56 - In progress
 06-27-2006 | 05:19 PM
#21
Originally Posted by alocker
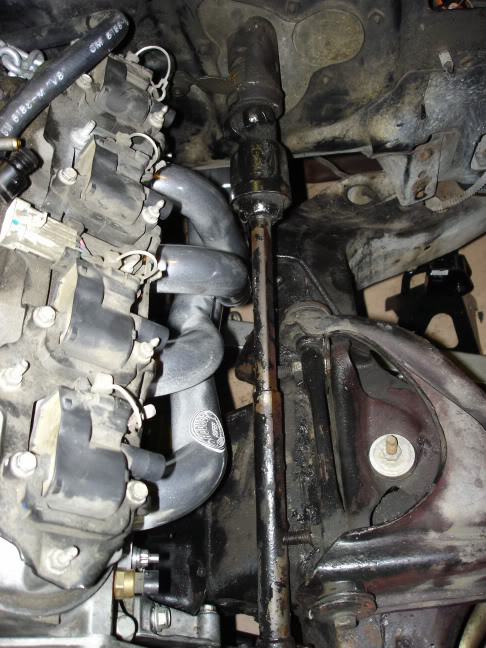
While your out taking pics, can you get one that shows the driver side framerail and steering shaft clearance? Thanks.
 06-27-2006 | 10:33 PM
#23

I'm getting ready to do this same swap for a customer. Just got the Hookers, waiting on the swap mounts. The car is a perfect show car, I'm wondering if I should yank the front clip to do this install.....
Also, was that much trans tunnel needed out for the T56? I thought it was just tight in the back by the shifter.
Also, was that much trans tunnel needed out for the T56? I thought it was just tight in the back by the shifter.
06-28-2006 | 08:53 AM
#24
Originally Posted by Whistler
Also, was that much trans tunnel needed out for the T56? I thought it was just tight in the back by the shifter.
I think if you run S&P style mounts you don't have to cut as much, but have to relocated A/C compressor and possibly alternator if you're using f-body accessories.
06-29-2006 | 04:18 PM
#25
On The Tree
Joined: Dec 2003
Posts: 126
Likes: 0
From: Delaware
what did you do for a drive shaft.. I have a 71 chevelle that i'm putting a ls1 t56 in and i have a complete 2000 donor car.. Right now the chevelle has a turbo 400 with a drive shaft to a 12 bolt rear.. Did you have to order a drive shaft or did it all fit??? thanks
06-29-2006 | 04:38 PM
#26
I have not done anything yet, but I currently have a custom shaft from Advance Driveline here in Orlando. When I bought my trans I got the T56 output shaft w/ it and I plan on having that put on my driveshaft. The driveshaft will definately need to be shortened and I will have them do that when they install the trans yoke.
06-30-2006 | 08:47 AM
#27
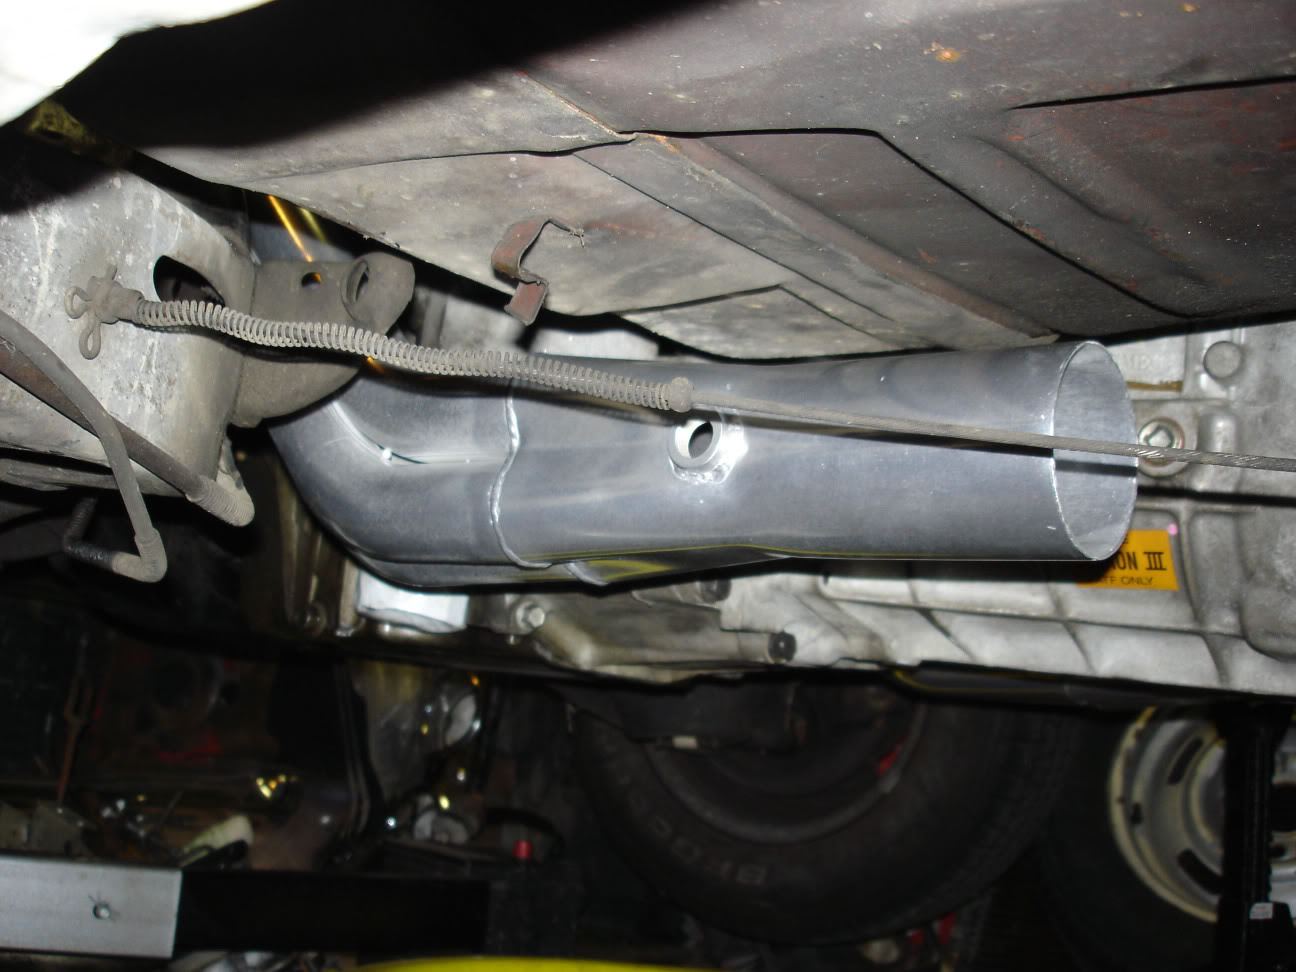
Ok. I took some measurements this morning before work and it it 6" to the inside and 9" to the outside of the collector. This is the distance away from the T56.
They end right before where the trans gets larger. A little below and forward of the first solenoid on the drivers side of the trans. Kind of hard to explain, but I didn't have time for a pic. Look at the very first post in this thread where I have the motor on the stand and the trans next to it. Right where the strap is going around the trans is where I am trying to describe.
Let me know if this helps or needs more description/measurements.
 07-18-2006 | 12:49 PM
#31

TECH Apprentice
Joined: Oct 2002
Posts: 310
Likes: 0
From: san Antonio
Any more updates on this swap??? I have a 71 chevelle also and a complete donor car with all accessories, pedals, etc. My chevelle currently has no motor and a TH350 sitting in it....
I plan on going with a carb setup so I don't have to worry about swapping the computer etc over. I was planning on purchasing a wiring kit from www.itsasnapwiring.com and hoping this would be all I need for wiring.
I plan on going with a carb setup so I don't have to worry about swapping the computer etc over. I was planning on purchasing a wiring kit from www.itsasnapwiring.com and hoping this would be all I need for wiring.
07-18-2006 | 02:11 PM
#32
I have been busy and have not gotten much more done. I just got the fuel system in the mail from racetronix the other day. I think one of the best reasons for doing this swap is for the fuel injection. I will post more soon. I should start hanging the gas tank in the next week or so.
07-20-2006 | 01:40 PM
#34


Originally Posted by malibu350
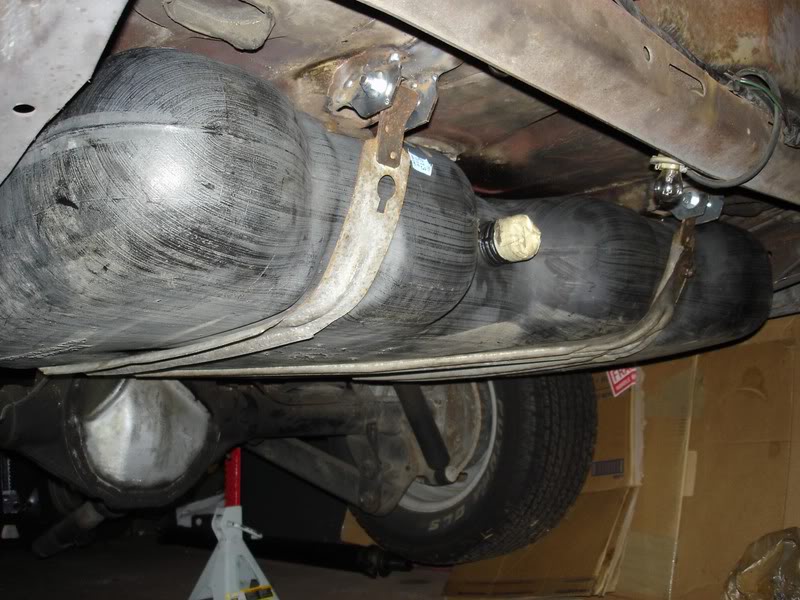
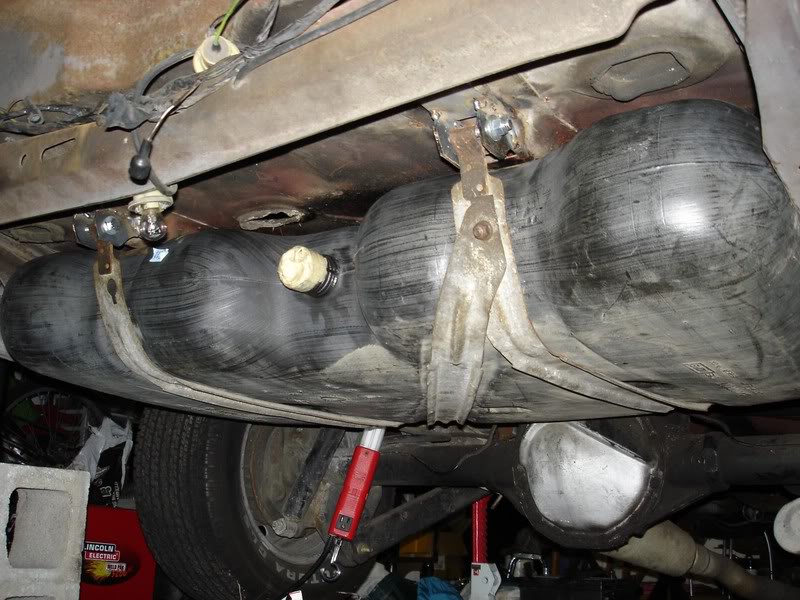
Do you have any pics of the gas tank it self? Is it going to be an easy swap and keep the same fill location?
07-20-2006 | 06:05 PM
#35
I had input into that thread also.. here are few pictures of my tank. wasn't that hard do to! was cheap also!
Only con would be that it hangs low than the stock tank. I should find out soon, about to fire it up !
http://www.cardomain.com/ride/2353903/9
Only con would be that it hangs low than the stock tank. I should find out soon, about to fire it up !
http://www.cardomain.com/ride/2353903/9
07-21-2006 | 10:50 AM
#37
I have not done any fab'in up yet. But I think from what I have guess-a-mated.. it should be ok, There is enough room.
I will have to come up with a way to mount the base of the air cleaner off of the intake using the bolts that hold the coils to the valve cover or use some of the intake(I don't really want to do that) bolts.
I think I have come up with a way to cut up the orignal (repo) air cleaner and run a alum tube from the rubber elbow to a false/raised bottom inside the cleaner. Have not started it yet.. or I may just fab up a whole new air Cleaner box.
will keep u posted
07-21-2006 | 10:59 AM
#38
Originally Posted by bczee
I have not done any fab'in up yet. But I think from what I have guess-a-mated.. it should be ok, There is enough room.
I will have to come up with a way to mount the base of the air cleaner off of the intake using the bolts that hold the coils to the valve cover or use some of the intake(I don't really want to do that) bolts.
I think I have come up with a way to cut up the orignal (repo) air cleaner and run a alum tube from the rubber elbow to a false/raised bottom inside the cleaner. Have not started it yet.. or I may just fab up a whole new air Cleaner box.
will keep u posted
I will have to come up with a way to mount the base of the air cleaner off of the intake using the bolts that hold the coils to the valve cover or use some of the intake(I don't really want to do that) bolts.
I think I have come up with a way to cut up the orignal (repo) air cleaner and run a alum tube from the rubber elbow to a false/raised bottom inside the cleaner. Have not started it yet.. or I may just fab up a whole new air Cleaner box.
will keep u posted
 09-06-2006 | 08:36 AM
#39
As promissed I finally got cracking on the Chevelle again. I am really pumped to get this thing running and still have a lot of work ahead, but it will run in the next month or so. I have to go to Vegas for a friends Bachelor party this month and I'm sure it will put a damper on my budget.
Here she is now.
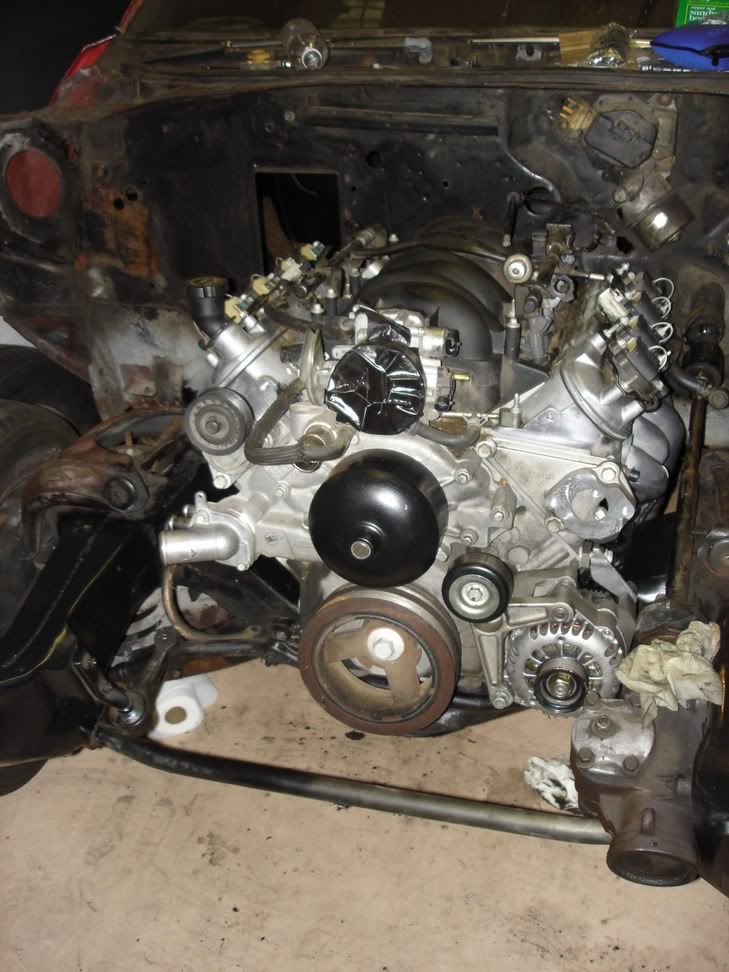
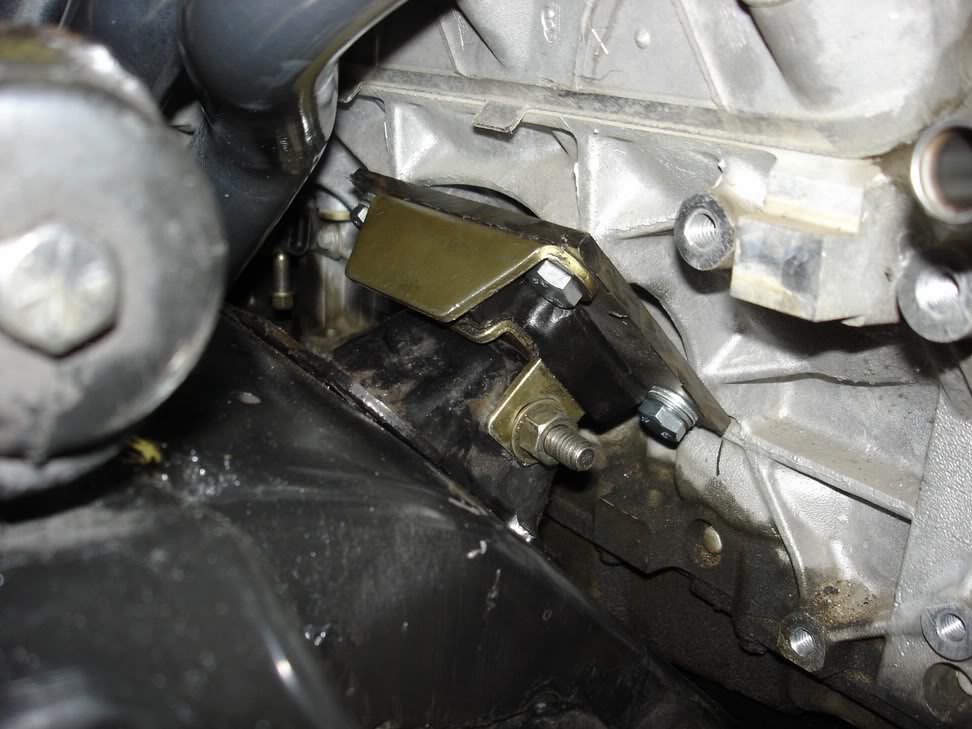
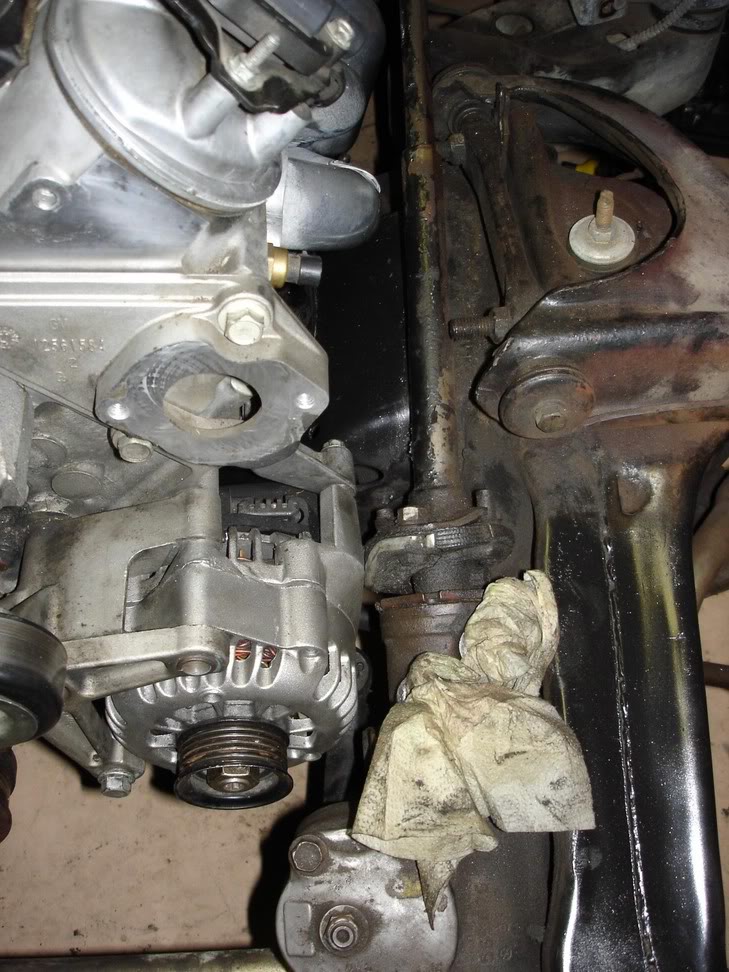
I got my BRP style mounts cut and bolted to the motor. I am using the energy suspension short and wide mounts. I think my Chevelle has the 307 clam shells/cages that the motor mounts bolt to. These are supposedly taller than the 350/454 style so I can run the shorter motor mounts. I do not have a lot of clearance, but I think it will be fine. I don't see the motor twisting that much under power.
I don't think the motor is sitting totally straight right now. It looks like the drivers side is a little lower than the passenger.
I have a little inteference problem w/ the rag joint and the alternator mount. I just ordered the Lee Manufacturing 3/4" koint for my Grand Cherokee box and hopefully it is a little smaller. If anyone knows chime in. If not I will shim the motor up a little.
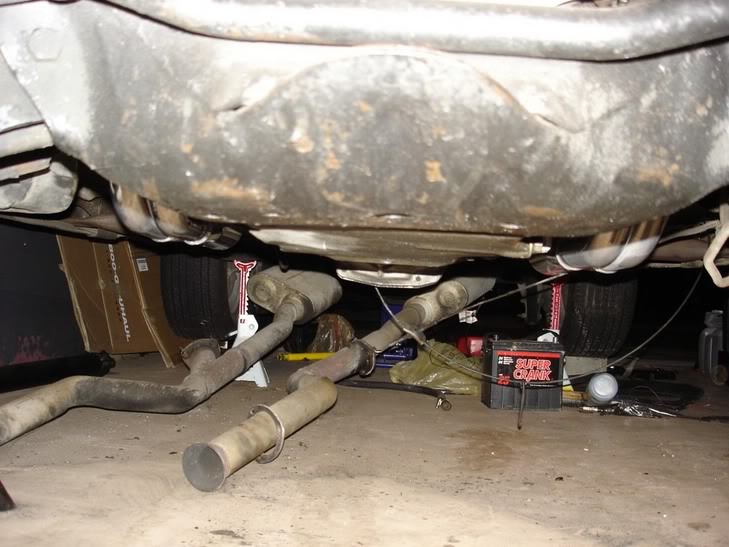
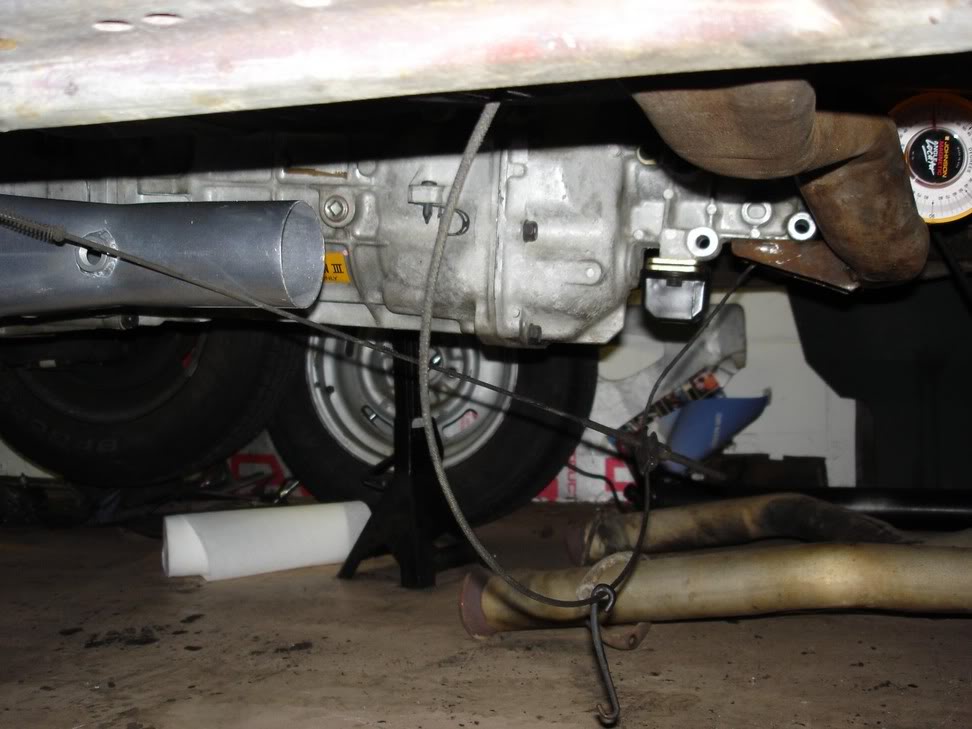
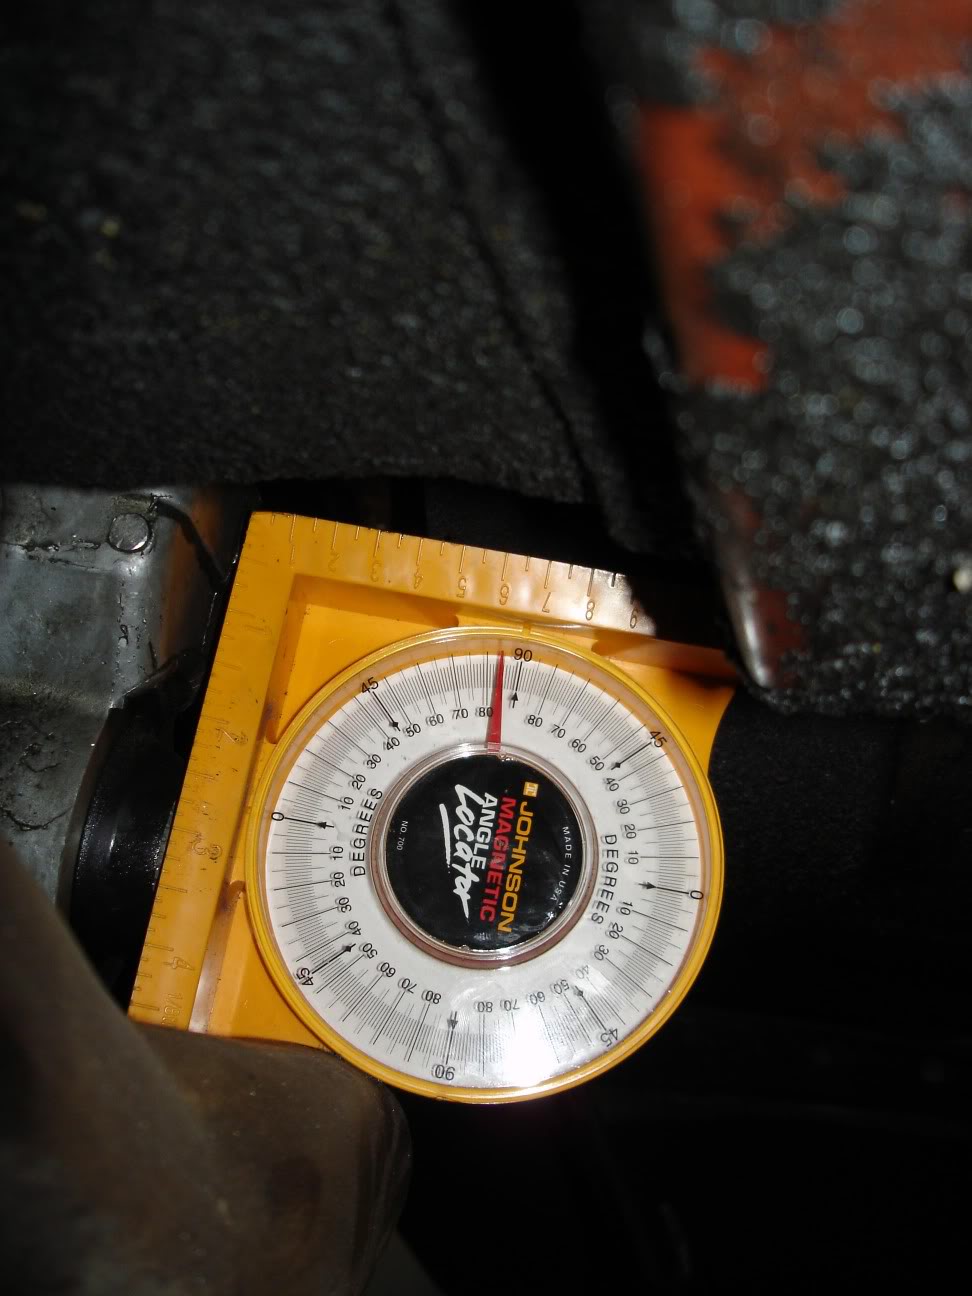
I think the trans might be a little low. After looking at the others that have done this I shouldn't have to drop the crossmember this much. It is sitting at about 6* down right now so after I move it to the correct 3* it will raise up a little.
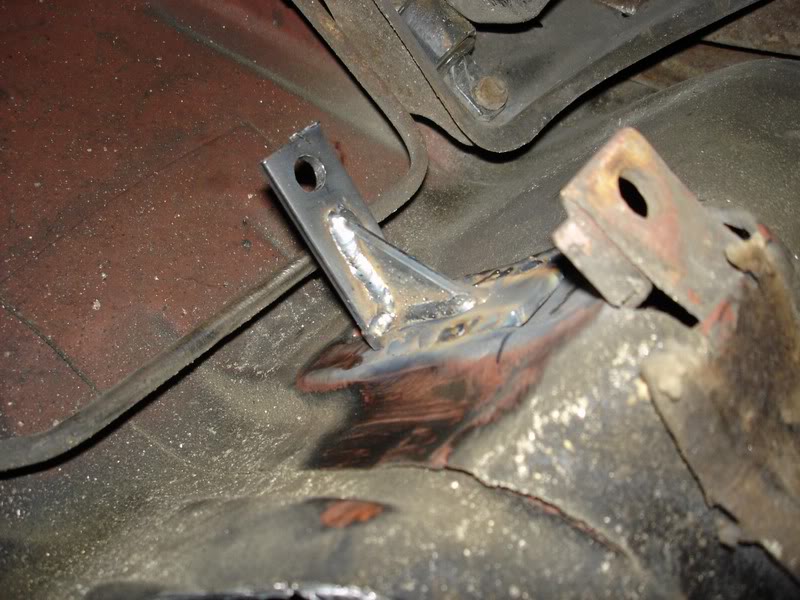
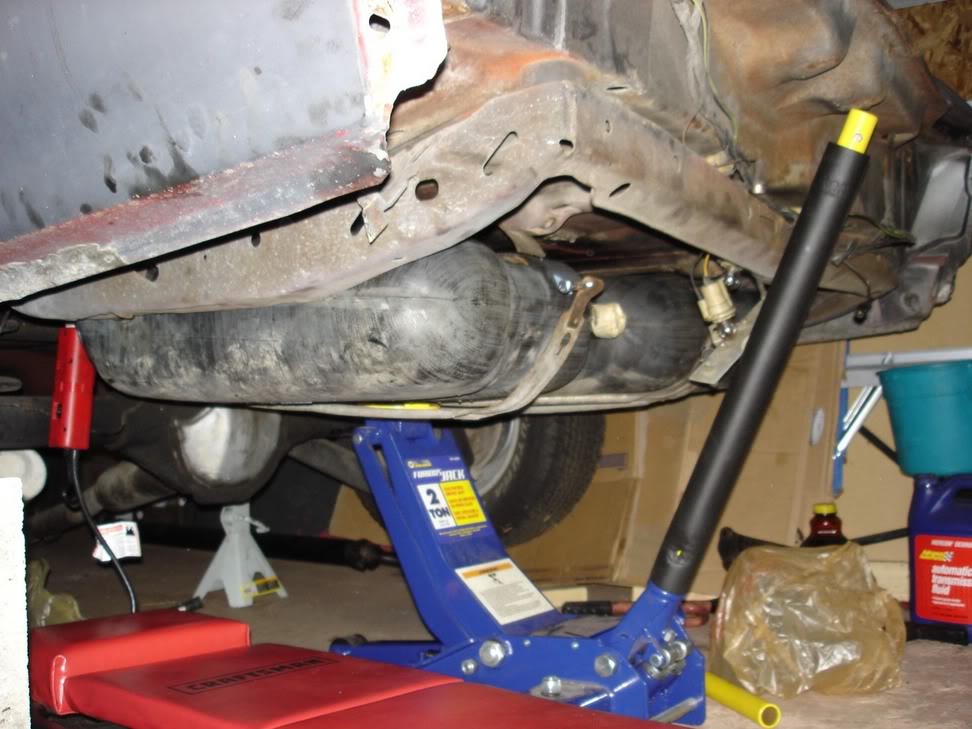
I got the gas tank lined up and the hole cut in the floor of the trunk. I am in the process of fabbing up some new brackets for the Impala tank straps to mount to.

Well that's about it for now. I am going to try and get the gas tank fully mounted over the next couple nights. I need to do a little more grinding on my brackets and weld them in.
I also have some questions about measuring to check that the motor is straight and level, but I will ask those in another thread.
Here she is now.
I got my BRP style mounts cut and bolted to the motor. I am using the energy suspension short and wide mounts. I think my Chevelle has the 307 clam shells/cages that the motor mounts bolt to. These are supposedly taller than the 350/454 style so I can run the shorter motor mounts. I do not have a lot of clearance, but I think it will be fine. I don't see the motor twisting that much under power.
I don't think the motor is sitting totally straight right now. It looks like the drivers side is a little lower than the passenger.
I have a little inteference problem w/ the rag joint and the alternator mount. I just ordered the Lee Manufacturing 3/4" koint for my Grand Cherokee box and hopefully it is a little smaller. If anyone knows chime in. If not I will shim the motor up a little.
I think the trans might be a little low. After looking at the others that have done this I shouldn't have to drop the crossmember this much. It is sitting at about 6* down right now so after I move it to the correct 3* it will raise up a little.
I got the gas tank lined up and the hole cut in the floor of the trunk. I am in the process of fabbing up some new brackets for the Impala tank straps to mount to.
Well that's about it for now. I am going to try and get the gas tank fully mounted over the next couple nights. I need to do a little more grinding on my brackets and weld them in.
I also have some questions about measuring to check that the motor is straight and level, but I will ask those in another thread.
09-08-2006 | 07:56 PM
#40
Well I just got done installing the gas tank. I made some new brackets for the impala straps to mount on. I just need to cover the top in the trunk now. On to the next project.