


67 chevelle project

Thread Starter
Teching In
Joined: Jun 2006
Posts: 34
Likes: 0
From: Fort Worth, Texas
Originally Posted by autolodge
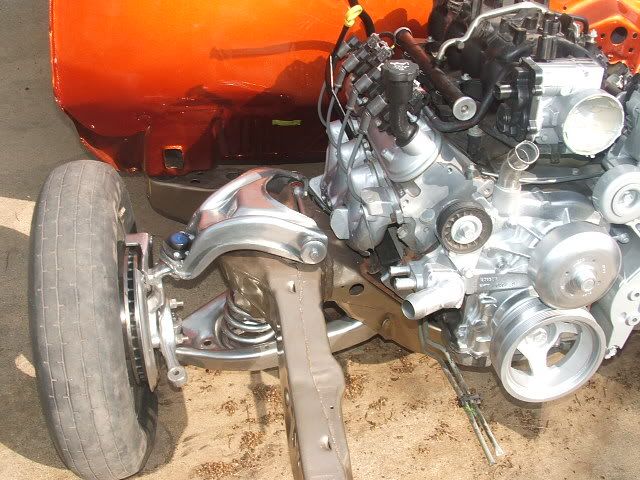
Man that is gonna be smokin! How much clearence do you have around the sump area of your truck pan? did you have to mod your crossmember or pan at all? Thanks for your time, craig
Thread Starter
Teching In
Joined: Jun 2006
Posts: 34
Likes: 0
From: Fort Worth, Texas
Originally Posted by maro67
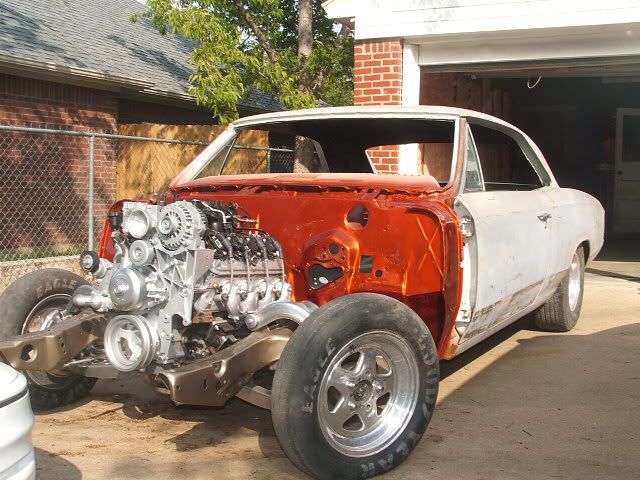
that is a killer looking chevelle man awsom stuff. is that a 6.0L ?
Thread Starter
Teching In
Joined: Jun 2006
Posts: 34
Likes: 0
From: Fort Worth, Texas
Originally Posted by jfman
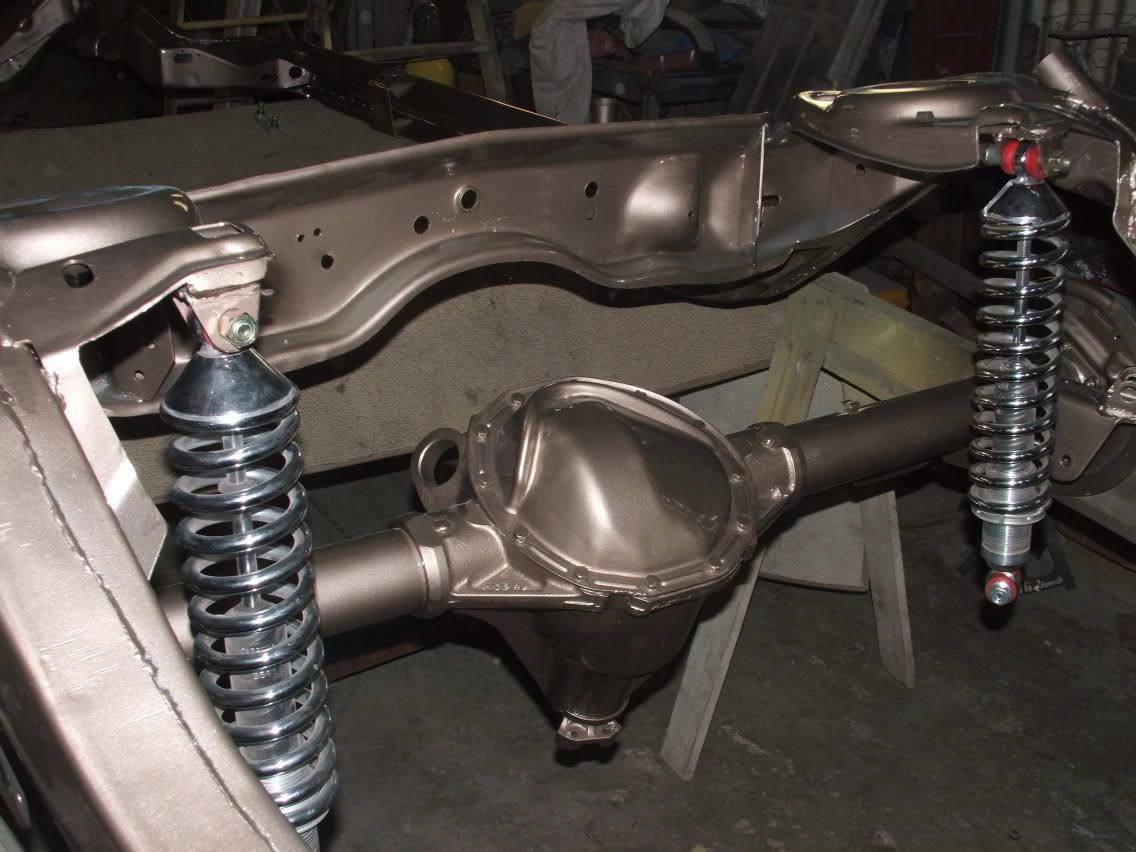
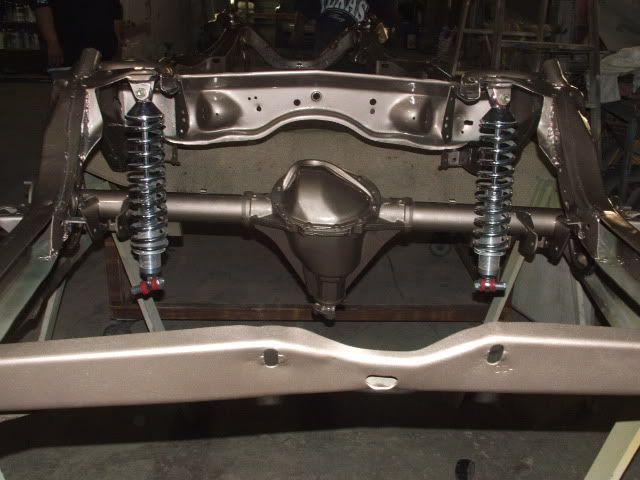
I see you ditched the crappy coils out back....
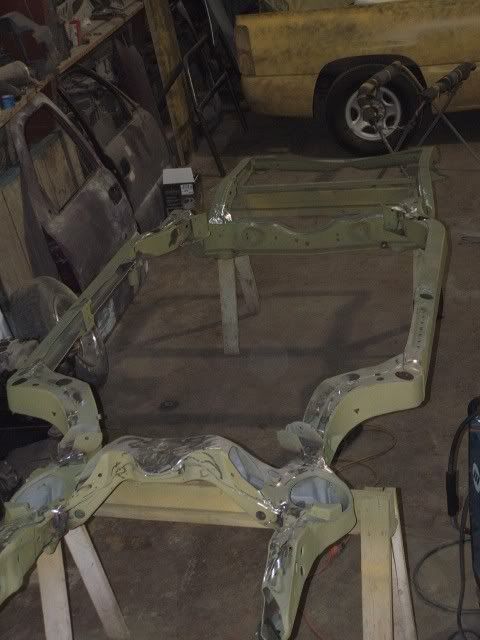
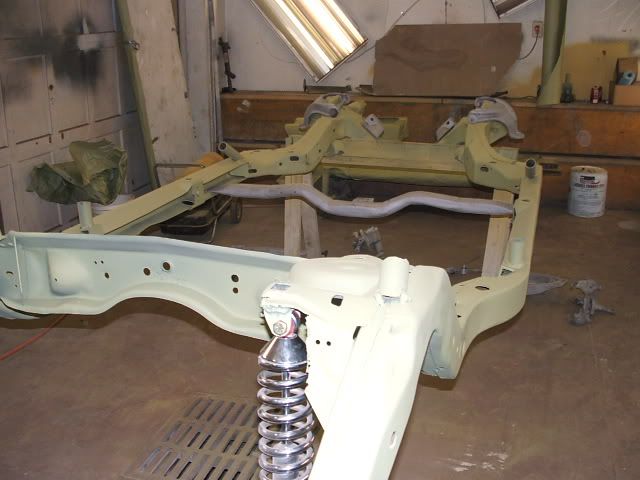
What kind of setup do you have on the rear ? Got better pics of it ? Maybe with the body off the frame ?
What kind of setup do you have on the rear ? Got better pics of it ? Maybe with the body off the frame ?
LS1 Tech Stories
The Best V8 Stories One Small Block at Time

Topdon ONE vs. Artidiag 800 BT2: Which is the Diagnostic Tablet For You?
Pouria Savadkouei
Gas Monkey Built a 6-Wheel Ferrari Testarossa With a Corvette LT4 Engine
Verdad Gallardo
7 Most Reliable High-Performance Engines GM Has Ever Built
Verdad Gallardo
Amazing '71 Camaro Restomod Is Modern Muscle Car Under the Skin
Verdad Gallardo
6 Common C5 Corvette Failures and What's Involved In Repairing Them
Pouria Savadkouei
Retro Modern Bandit Pontiac Trans AM Comes With Burt Reynolds' Autograph
Verdad Gallardo
Top 10 Greatest Cadillac V Series Performance Models Ever, Ranked
Pouria Savadkouei
Top 10 Most Powerful Chevy Trucks Ever Made!

Hennessey's New Supercharged Silverado ZR2 Has 700 HP
Verdad Gallardo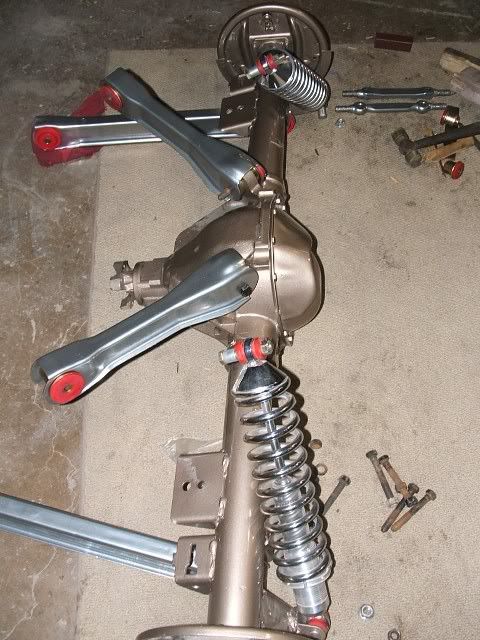
Thread Starter
Teching In
Joined: Jun 2006
Posts: 34
Likes: 0
From: Fort Worth, Texas
Originally Posted by 98BanditWS6
Nice project man, that is a beautiful color 
Is the motor completely stock?? That intake manifold looks pretty tall...
Is the motor completely stock?? That intake manifold looks pretty tall...
