


Chevelle Mount Issues.

Thread Starter
Joined: Sep 2005
Posts: 796
Likes: 0
From: Edmond, Oklahoma
Well I finally got the correct frame mounts in today and I went ahead and stabbed the motor. Lemme just say that the term shoehorning is an understatement. I can only assume that the situation on 68+ chevelles must be better because I had to to modify the firewall a bit with a hammer to get the motor to drop down in there. Once I got past the oil Pan I had more than plenty of room but there was one bolt on the drivers side in the tranny bellhousing that really gave me the most problems. If you were doing the install like John67 and putting the engine and tranny in (700r4 tranny for me) before the body was on it wouldn't be a problem as long as you never needed to take it out without removing the body.
Thread Starter
Joined: Sep 2005
Posts: 796
Likes: 0
From: Edmond, Oklahoma
I will try and get some pictures of the modifications I made to the firewall to help you out. They were truly very minor took me less than 10 minutes with a hammer and a 2x4.
Thread Starter
Joined: Sep 2005
Posts: 796
Likes: 0
From: Edmond, Oklahoma
I got the engine situated exactly where I like it but I still need to snap some pictures with you guys but my camera is at my house in stillwater whereas my car is in edmond. I like where the engine is sitting as far as the driveline alignment and everything but there is no way the alternator is gonna clear the power steering box. What did you guys do about the alternator clearance? Stealth71 it looks like you had good clearance with it somehow?
Thread Starter
Joined: Sep 2005
Posts: 796
Likes: 0
From: Edmond, Oklahoma
Dickey P I thought I was gonna have tie rod issues at first but I ended up raising the motor a bit more with the SBC Tall and Narrow mounts and that fixed that problem. I have the whole front clip off the car and without that weight the Greease Zert is pretty close to the pan when you turn the wheels all the way to the left but it does clear and I think it won't be and issue once the car has the full front end weight on it.
Chevelle guys- Any suggestion for the alternator steering box issue?
Chevelle guys- Any suggestion for the alternator steering box issue?

Registered User
Joined: May 2007
Posts: 3
Likes: 0
pistolpete
thanks for the info.
my engine swap has the alternator above the power steering pump and box
there are no clearance issues, however i need to switch the power steering lines to -6an fittings. i bought the engine from turnkey engine supply in california. the bracket looks the same as my 2004 corvette zo6 if i could figure out how to post pics i would gladly trade you pics for your oil pan/steering.
i found a number on the casting 1257806 8 gm dont kow if its a part# or what.
the bracket looks like a one peice that the alt, ps pump and idler pulley are attached to
hope this helps
For my 71 Chevelle, I am using Tall / Narrow mounts and stock 99' F-Body accessories, it is very tight but cleared the pully on the Alternator and the steering box. No problem on the steering rods or anything else.
LS1 Tech Stories
The Best V8 Stories One Small Block at Time

Topdon ONE vs. Artidiag 800 BT2: Which is the Diagnostic Tablet For You?
Pouria Savadkouei
Gas Monkey Built a 6-Wheel Ferrari Testarossa With a Corvette LT4 Engine
Verdad Gallardo
7 Most Reliable High-Performance Engines GM Has Ever Built
Verdad Gallardo
Amazing '71 Camaro Restomod Is Modern Muscle Car Under the Skin
Verdad Gallardo
6 Common C5 Corvette Failures and What's Involved In Repairing Them
Pouria Savadkouei
Retro Modern Bandit Pontiac Trans AM Comes With Burt Reynolds' Autograph
Verdad Gallardo
Top 10 Greatest Cadillac V Series Performance Models Ever, Ranked
Pouria Savadkouei
Top 10 Most Powerful Chevy Trucks Ever Made!

Hennessey's New Supercharged Silverado ZR2 Has 700 HP
Verdad Gallardo Thread Starter
Joined: Sep 2005
Posts: 796
Likes: 0
From: Edmond, Oklahoma
dickey P-Sounds like I should have bought the Corvette accessories afterall but I think I can make it work just was looking for any ingenius ideas I might have missed. I should be able to get you some pics of the oil pan and tie rods pretty soon and post them up.
bczee-I dunno what I have done differently really but its definitely and issue. I could move the engine up a bit more but I would hate to go much more for the tranny tunnel to tranny clearance. I too am using the energy suspension tall/narrow mounts.
bczee-I dunno what I have done differently really but its definitely and issue. I could move the engine up a bit more but I would hate to go much more for the tranny tunnel to tranny clearance. I too am using the energy suspension tall/narrow mounts.
Pist0lpete..
Yup. .the higher you go on the engine.. well also cause the trany to set higher.. that is why I (and others) had to raise the trans tunnel.
The way things are going for you, I think the best thing to do would be to build your own custom frame mounts.
You can just used some 1/4" steel plate as the base and bolt them to the stock location or where it will work out best. Then use the 3/8" (or larger?) steel bent into a U shape, you can drill the holes at the whatever height you need the engine too be at then just set the engine and mounts into place and then weld the U's to the base plate once the engine is sitting correctly. You can also add a bit more spacing or less to the U to be able to jack the engine forward or back. That is what I did to get the engine to sit centered between the firewall and steering box.
You might try to build a few mocked ones up first with different heights as trials ones.
Thread Starter
Joined: Sep 2005
Posts: 796
Likes: 0
From: Edmond, Oklahoma
I like the way you are thinking and that may be my final solution, however I am gonna try my best to avoid doing something like that. If only for the fact that I don't have access to a mig. I am seriously considering investing in one but I would much rather spend that money elsewhere.
You can alway just drop everything into place, shift it around to where you like. Mark the base plate where the U bracket or mounting ears (or what ever it turns out to look like) would sit (use tape to mark the location) and then remove all, drop by your buddy house who owns a welder or the local muffer shop and have them weld it up for $10-20 !?!?
In the end, extra effort, design and engineering will pay off as you get it the way you want it ! My engine must have been in and out about a dozen time trying to get it the way I wanted to sit and everything cleared (close but cleared).
In the end, extra effort, design and engineering will pay off as you get it the way you want it ! My engine must have been in and out about a dozen time trying to get it the way I wanted to sit and everything cleared (close but cleared).

TECH Enthusiast
Joined: Apr 2006
Posts: 630
Likes: 1
From: New York City
just an update on my 67. thought i had it all worked out with the the short and wide engine mounts and the short and wide frame mounts .oil pan cleared,4l80 was tight ,steering looked good until i went to mount the vintage air compressor.so now im moving the engine foward and up a littlt bit,so short and wide is turning into tall and narrow. and i moved the mounts toward the rear of the motor to move it foward to clear the outputs of the compressor,and did some grinding here and there on the compressor and corvette mounting bracket trying to get the compressor in tight .im trying not to notch the chasis.i wont be drilling any holes until i get ac issues , steering & exhaust worked out. pistopete, what headers are u using?
Yup.. that is the one of the Reasons that swaps using the S&P, ATS, etc style mounts requires AC relocation. That 2" or so runs right into the back of the AC compressor or its hose manifold.
Using BRP Style moust allow the OEM Compressor to be mounted in the stock location. But may require the Frame to be notched, unless you move the engine forward enough to clear the frame/compressor.
status us on what your are doing.
Using BRP Style moust allow the OEM Compressor to be mounted in the stock location. But may require the Frame to be notched, unless you move the engine forward enough to clear the frame/compressor.
status us on what your are doing.
Thread Starter
Joined: Sep 2005
Posts: 796
Likes: 0
From: Edmond, Oklahoma
John, I plan on using the hooker ls1 swap headers. I am saving up for them as we speak that $650 isn't easy to swallow. I don't have any plans for A/C yet since my car is a non A/C car that makes the vintage air at $800 way down the list in priorities. I do however plan to do it in the future and I will seriously look into making my own brackets.
Thread Starter
Joined: Sep 2005
Posts: 796
Likes: 0
From: Edmond, Oklahoma
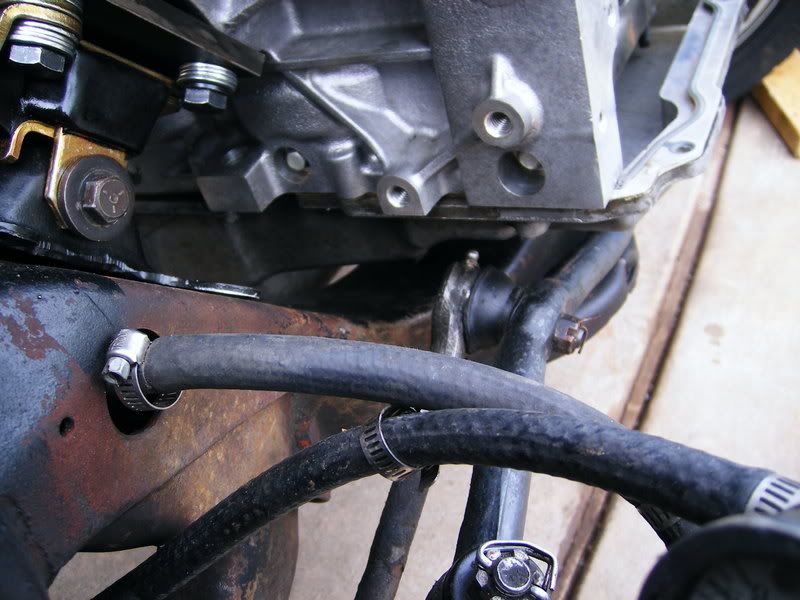
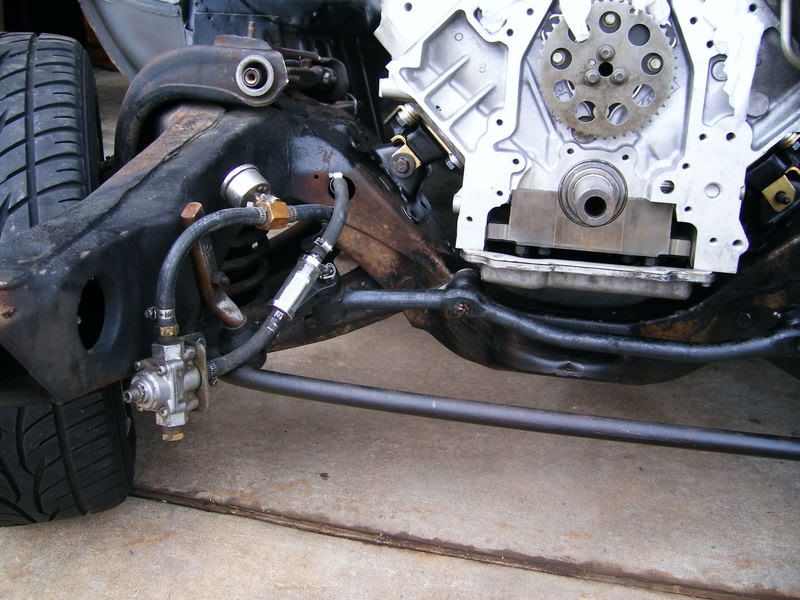
Here are a few pictures of my progress so far especially ones of the clearance around the oil pan:
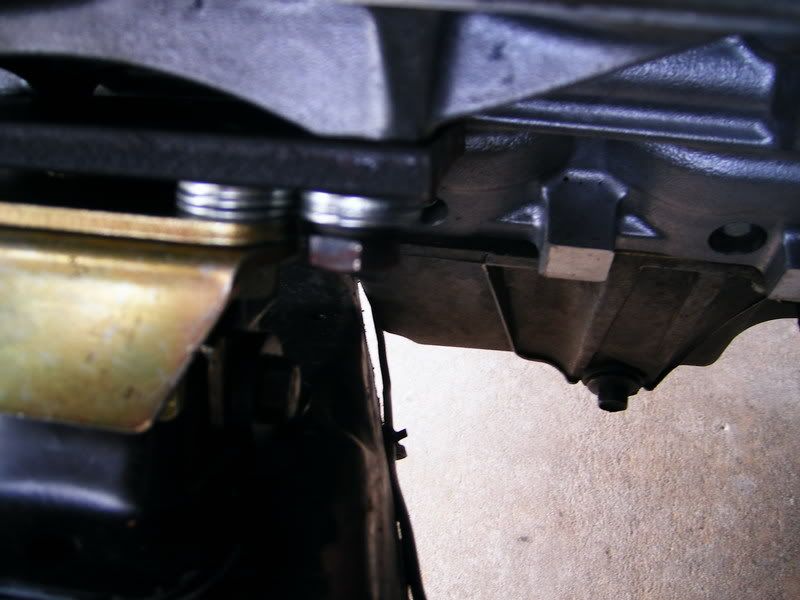
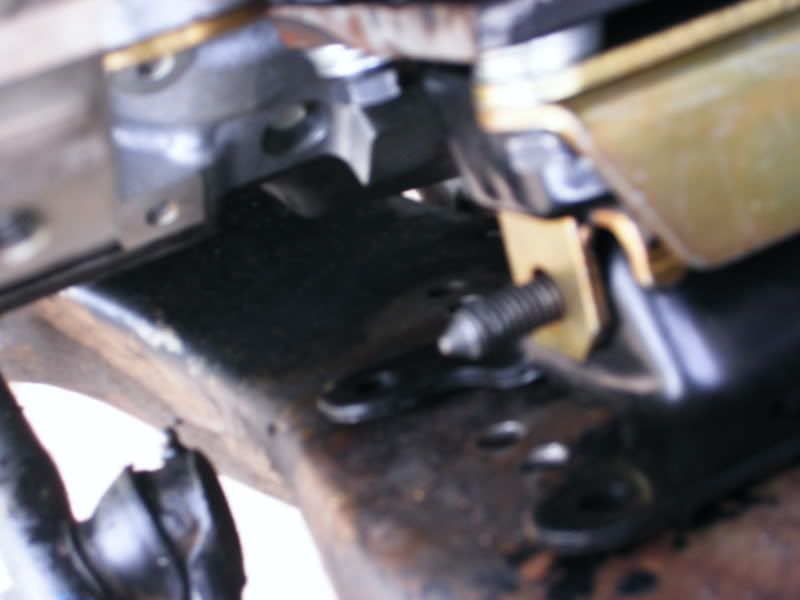


I don't plan on using all those washers haha I just was using a bolt that was too long and I may end up adding another 1/8 inch steel spacer but not use all the washers.
I don't plan on using all those washers haha I just was using a bolt that was too long and I may end up adding another 1/8 inch steel spacer but not use all the washers.
Thread Starter
Joined: Sep 2005
Posts: 796
Likes: 0
From: Edmond, Oklahoma
I am pretty satisfied with the steering linkage and overall oil pan clearance although now that I look at the pictures they are a bit deceiving but there is plenty of room. My newest issue has to do with the tranny linkage. Any of you guys that did the swap with an Automatic have any problems with your hooker LS1 swap headers hitting the shifting linkage?
Edit: I also ending up getting my alternator clearance where I needed it by grinding away a bit on the steering box. Not my first choice of action but it seems to work fine and I managed not to hit any of the internal fluid passages in the box.
Edit: I also ending up getting my alternator clearance where I needed it by grinding away a bit on the steering box. Not my first choice of action but it seems to work fine and I managed not to hit any of the internal fluid passages in the box.
Good going.. This is what Hot Rodding is all about.. making somehting fit where it didn't before.
Yeah. On my alternator and steering box.. I had to grind the box abit also to clear the pulley and also the back alternator support bracket right at the rag joint.
keep us posted..
Yeah. On my alternator and steering box.. I had to grind the box abit also to clear the pulley and also the back alternator support bracket right at the rag joint.
keep us posted..