

Mark's LS1 2nd Gen Camaro build


 01-24-2010, 09:36 PM
#246
11 Second Club
Thread Starter
Join Date: Mar 2008
Location: New Westminster, B.C., Canada
Posts: 445
Likes: 0
Received 1 Like
on
1 Post

I took care of a thorn in my side today. I had put in a power steering pressure regulator thinking that I was going to have way too easy steering. I didn't. In fact it was way too heavy with the regulator at full flow. I was bummed about the whole thing, so as I do, I moved on and ignored it, being there is a lot of other stuff I can do to distract me. I removed the regulator and re did my lines. Seems way better. Although I haven't tried it with the wheels on the ground yet. I also started doing the cooling fans wiring, and the horns. Horns were easy, but the fans are giving me stress. I wanted to use the signal from the ECM to trigger them but it doesn't seem to work. More research here I guess. If anyone knows what that might be please chime in!
Pump before:

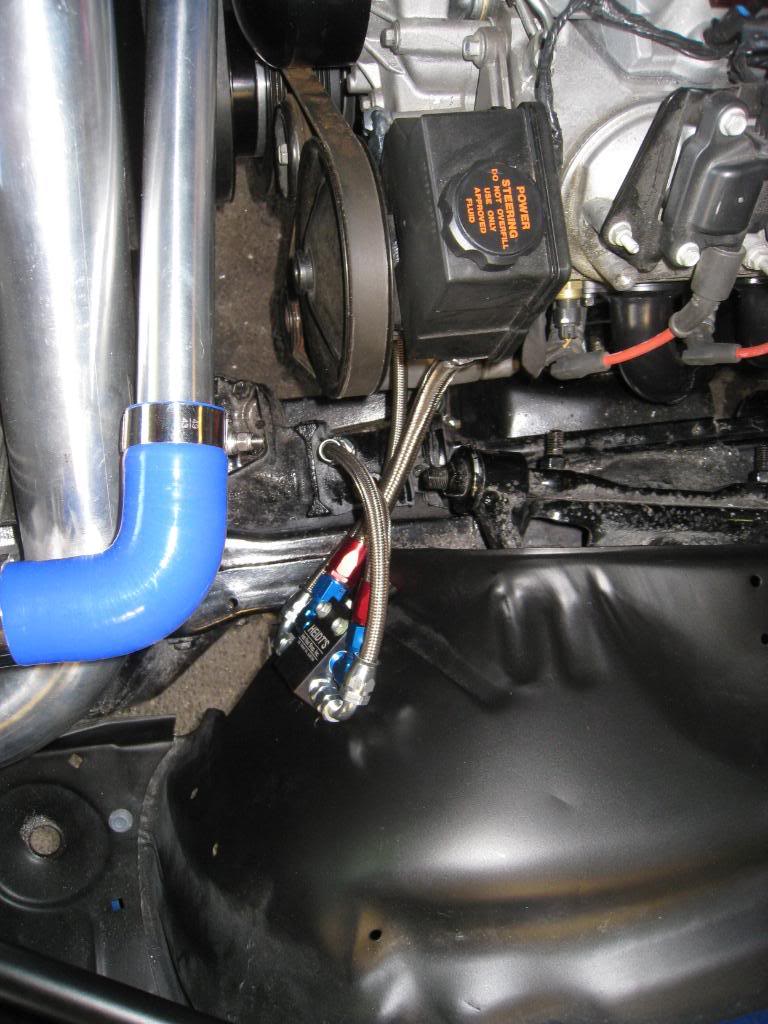
And After:
Pump before:
And After:
01-24-2010, 10:11 PM
#248
11 Second Club
Thread Starter
Join Date: Mar 2008
Location: New Westminster, B.C., Canada
Posts: 445
Likes: 0
Received 1 Like
on
1 Post
I searched for the wiring schematics for my donor car's motor (07 corvette-LS2) printed them all out, laid out the harness on the floor with roughly 20 pages of schematics, then started identifying wires and 'weeding out' stuff I didn't need. It took me a week. I don't think I would do it that way again. I would buy a harness from Speartech. I think he also does a re-flash on your computer to remove the vats and secondary O2 sensors etc.
01-26-2010, 04:03 PM
#249
11 Second Club
Thread Starter
Join Date: Mar 2008
Location: New Westminster, B.C., Canada
Posts: 445
Likes: 0
Received 1 Like
on
1 Post
ARGHHHHHH....
I need help. I can't seem to get my ecm to turn on my fans. From what I have researched, on my LS2 the dark green wire (#58) on my E38 ECM should send a ground signal when switched. When I switch the fans on through HP tuners it does nothing. If I run the motor till it is well into fan on temp, it does nothing....
I need help. I can't seem to get my ecm to turn on my fans. From what I have researched, on my LS2 the dark green wire (#58) on my E38 ECM should send a ground signal when switched. When I switch the fans on through HP tuners it does nothing. If I run the motor till it is well into fan on temp, it does nothing....
01-26-2010, 04:21 PM
#250
TECH Resident

ARGHHHHHH....
I need help. I can't seem to get my ecm to turn on my fans. From what I have researched, on my LS2 the dark green wire (#58) on my E38 ECM should send a ground signal when switched. When I switch the fans on through HP tuners it does nothing. If I run the motor till it is well into fan on temp, it does nothing....
I need help. I can't seem to get my ecm to turn on my fans. From what I have researched, on my LS2 the dark green wire (#58) on my E38 ECM should send a ground signal when switched. When I switch the fans on through HP tuners it does nothing. If I run the motor till it is well into fan on temp, it does nothing....
You need to switch to "discrete" fans if you havent already + get "state vs desired" all done + "output state" done. Assuming you have a vette tune. If this isnt clear, feel free to PM.
And your thoughts on doing these harnesses personally is advice that rings very true. There is a lot of work to do these late model harnesses and paying a specialist like Speartech to do them is excellent advice.
What type of fittings did you use to screw into the power steering box? Are they O ring seal or SAE flare type like the factory?
 01-26-2010, 05:03 PM
#251
11 Second Club
Thread Starter
Join Date: Mar 2008
Location: New Westminster, B.C., Canada
Posts: 445
Likes: 0
Received 1 Like
on
1 Post
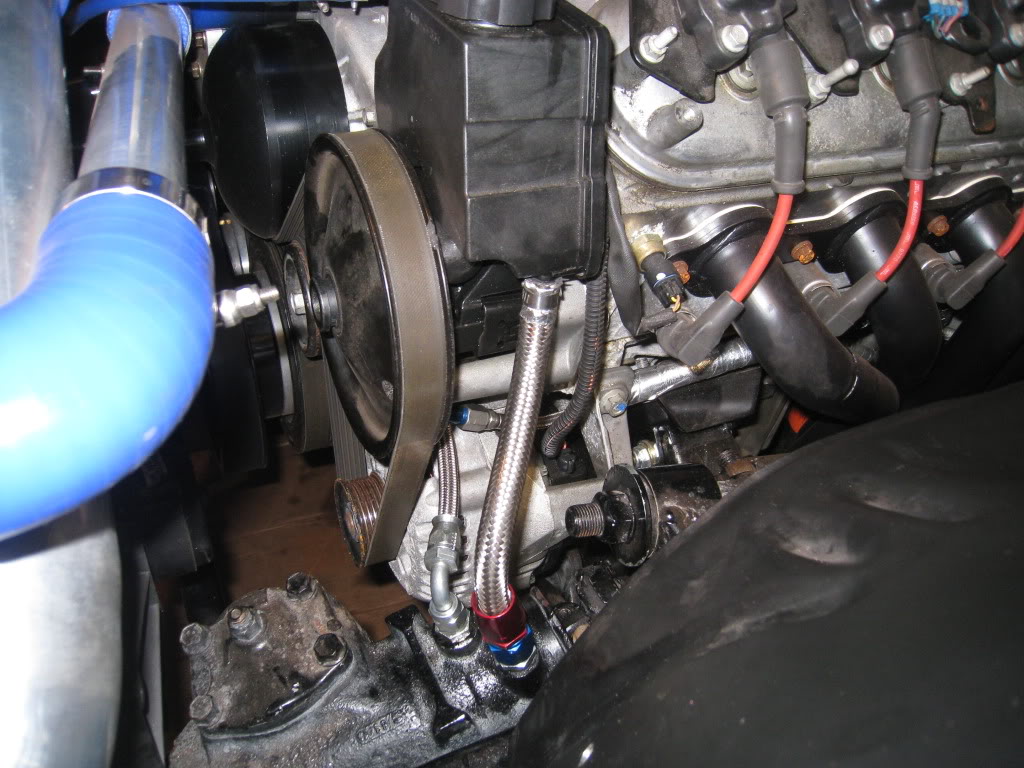
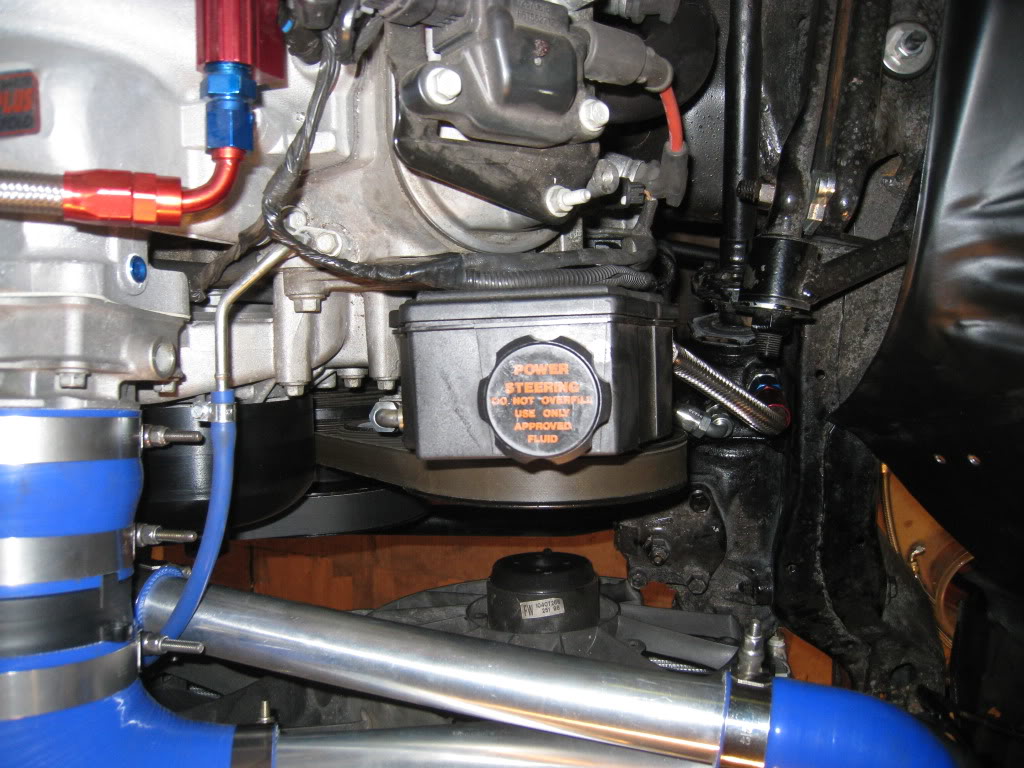
I used all aeroquip stuff for mine and made my own lines. Other than the adapter fittings I needed, 2 @ -6 90 degree fittings around 12" of high pressure teflon -6 steel braided line, less than 12" of -8 steel braided rubber hose, 1 straight -8 hose end fitting, and 1 hose clamp.
The steering box fittings are 11/16-18 inverted flare (pressure side)-closest to motor
and 5/8-18 inverted flare (return side)
I used -6 teflon steelbraided line for the pressure side and -8 standard steel braided line for the return.
The adapter from the LSx steering pump is M16x1.5
Adapter part numbers...
Aeroquip FCM2608 (-6 x M16 x 1.5) High Pressure Adapter - this is the -O- ring type adapter for the pump
Aeroquip FCM2965 (-6 X 11/16 - 18) High Pressure Adapter <--these are inverted flare adapter fittings.
Russel 640400 (-8 x 5/8 - 18) High Pressure Adapter <-------
Last edited by Marktainium; 02-28-2010 at 07:34 PM.
01-27-2010, 12:02 AM
#252
11 Second Club
Thread Starter
Join Date: Mar 2008
Location: New Westminster, B.C., Canada
Posts: 445
Likes: 0
Received 1 Like
on
1 Post
A big thanks to rsz288 ! Gave me the parameters to get my fans going. Without these forums this build would be impossible! Thanks so much!
01-31-2010, 09:31 PM
#253
11 Second Club
Thread Starter
Join Date: Mar 2008
Location: New Westminster, B.C., Canada
Posts: 445
Likes: 0
Received 1 Like
on
1 Post
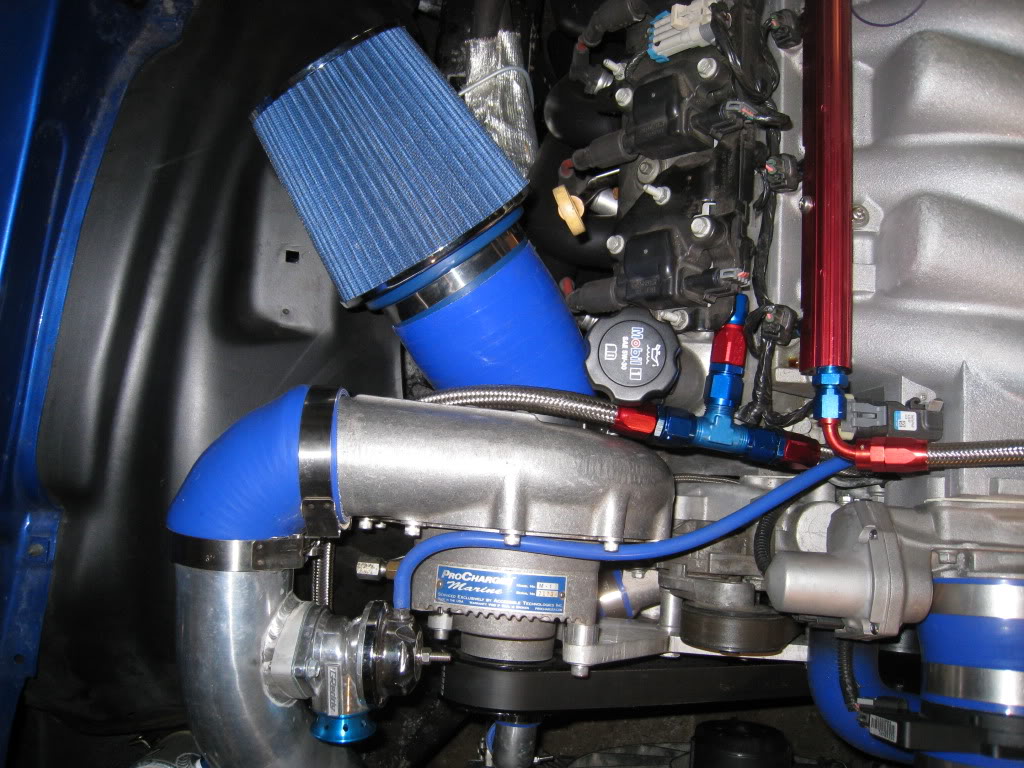
Even MORE aeroquip fittings!!! Thought I was done with all these costly little buggers! I am running an oil breather / puke tank and had to get fittings for it. It's almost an addiction. Thing is, once you have a bunch of them, you can't just use a simple rubber hose and clamp, can you?
I'm starting to get down to the little things that are less rewarding to do. Got the air filter in, sort of. I want to enclose it in a heat resistant box, that gathers air from under the fender, but I also want to drive the car this summer... I'm telling myself that it's good to leave some things to do later. Also got the horns in, but don't like the wiring much, or the brackets, so they may come out again. Sound good though. Put in a coolant resevoir tank as well. It's actually a windshield washer tank for a 67-72 chevy pickup. I hope it doesn't melt.
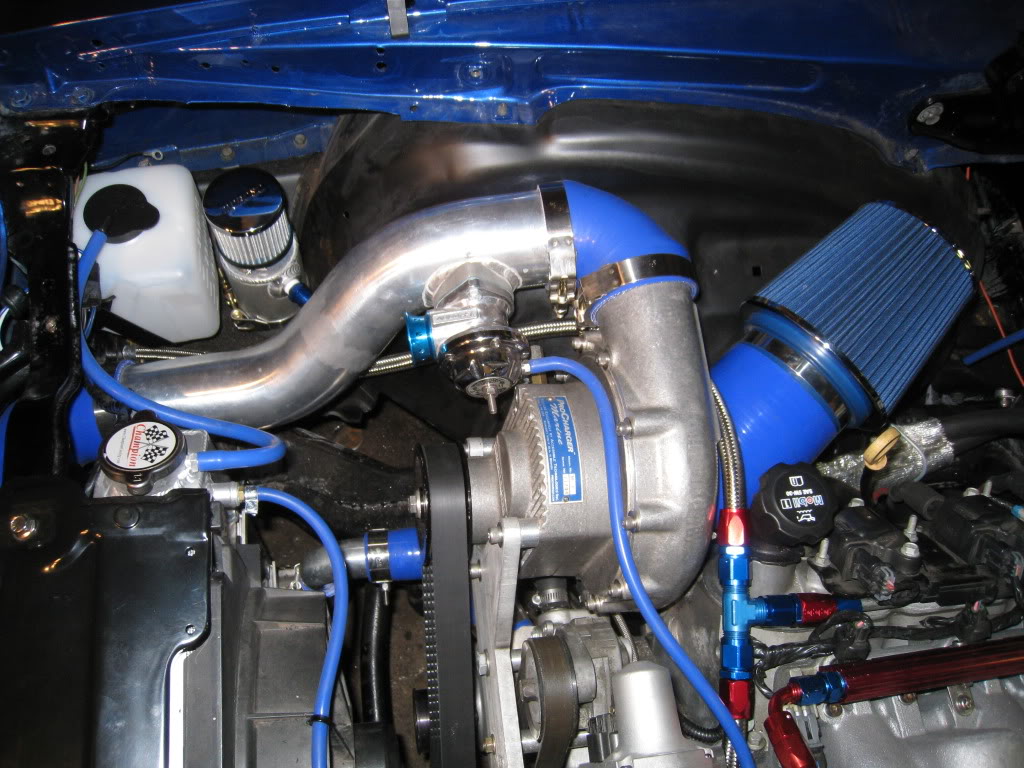
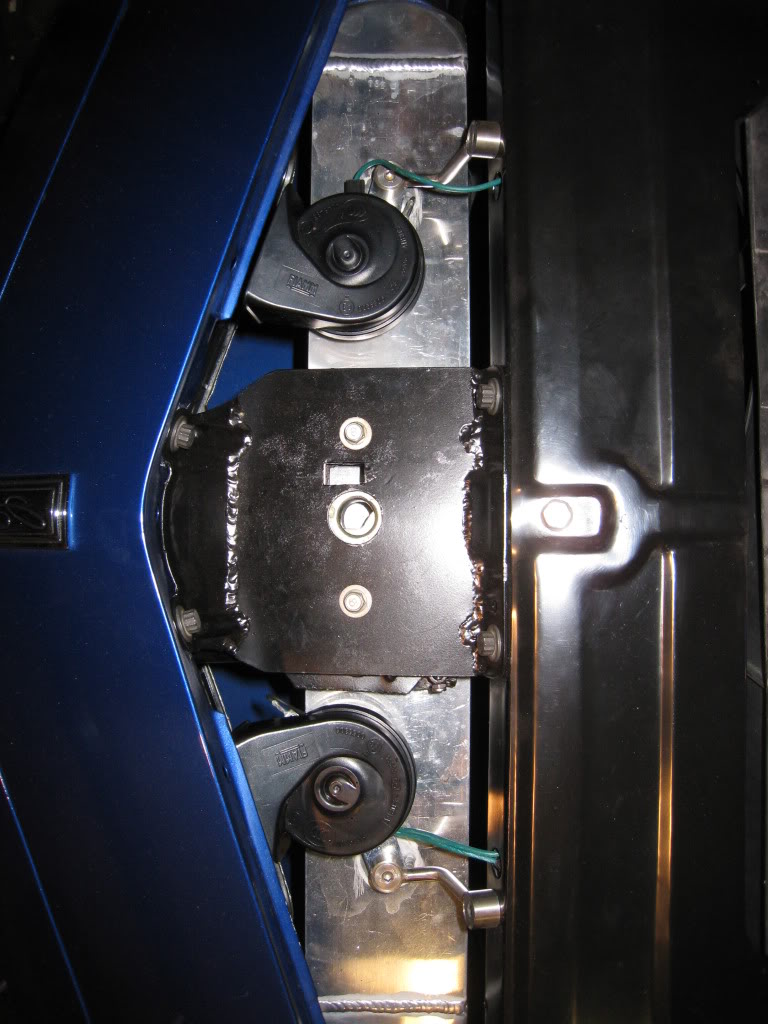
I'm starting to get down to the little things that are less rewarding to do. Got the air filter in, sort of. I want to enclose it in a heat resistant box, that gathers air from under the fender, but I also want to drive the car this summer... I'm telling myself that it's good to leave some things to do later. Also got the horns in, but don't like the wiring much, or the brackets, so they may come out again. Sound good though. Put in a coolant resevoir tank as well. It's actually a windshield washer tank for a 67-72 chevy pickup. I hope it doesn't melt.
 02-02-2010, 12:15 PM
#255
Staging Lane
iTrader: (6)

Join Date: May 2007
Location: hayward, Ca
Posts: 91
Likes: 0
Received 0 Likes
on
0 Posts
Success!! Got the MN12 transmission sorted out and installed. At the end of the day I had to swap the bell housing, hydraulic clutch bearing, shifter, and shifter ball socket thingy. (On the end of the transmission shift shaft). Used the 2 arms and 1 leg on back technique.
At the same time I installed a bulkhead insulated stud for my battery cable. It runs through the inside of the car to the trunk. I had run the cable through a grommet in the firewall but kept having visions of the whole thing going up in smoke. I've found that, with me anyway, if I think of something that could go wrong, it probably will, no matter how remote a chance. Not worth the risk.
At the same time I installed a bulkhead insulated stud for my battery cable. It runs through the inside of the car to the trunk. I had run the cable through a grommet in the firewall but kept having visions of the whole thing going up in smoke. I've found that, with me anyway, if I think of something that could go wrong, it probably will, no matter how remote a chance. Not worth the risk.
i ran the m12 in my chevelle and knew i would have to change out the shifter and socket to run a camaro style shifter but i too was surprised when i ran into problems getting my standard ls1 style starter to fit. instead of swapping out bell housing's for the f body style i modified the starter. i just ground a little of the bell housing away around the starter and i ground alot of the shell the encapsulate's the starter gear. i was nervous that it wouldnt support the gear and shaft while starting but it has lasted for some time now.
great build
02-02-2010, 01:16 PM
#256
11 Second Club
Thread Starter
Join Date: Mar 2008
Location: New Westminster, B.C., Canada
Posts: 445
Likes: 0
Received 1 Like
on
1 Post
It's funny how on these motor's so many pieces look exactly the same but are different by just enough to make life tough. Oh well, live and learn.
02-02-2010, 05:04 PM
#257
11 Second Club
Thread Starter
Join Date: Mar 2008
Location: New Westminster, B.C., Canada
Posts: 445
Likes: 0
Received 1 Like
on
1 Post
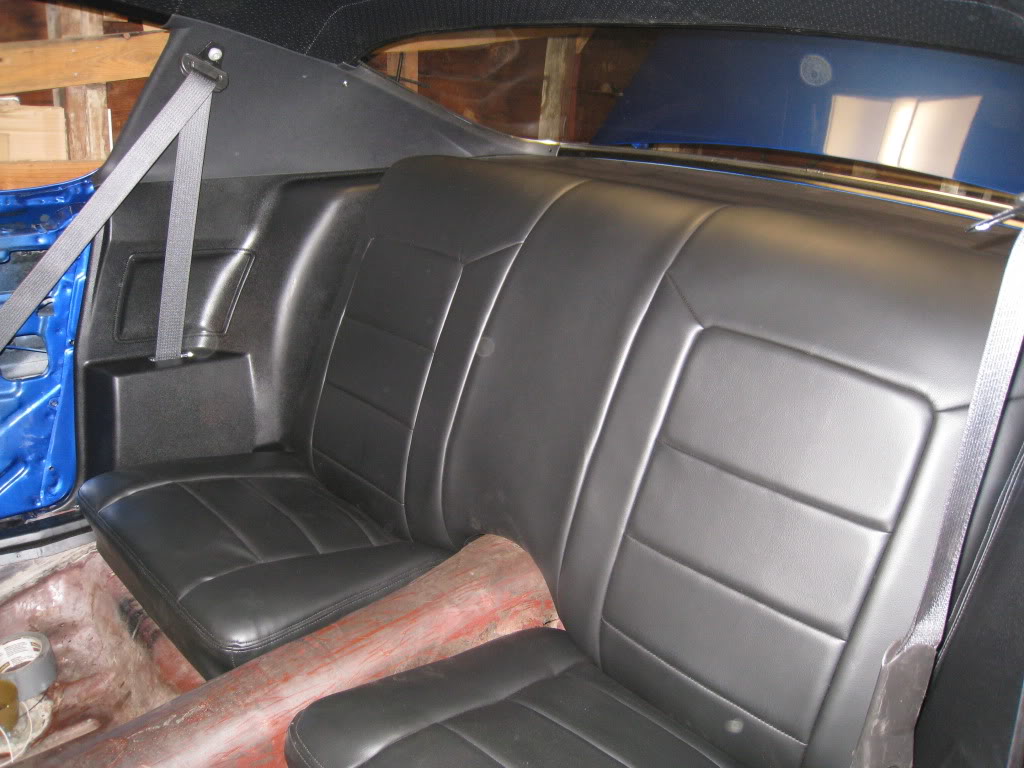
I've decided to put in a roll bar and frame connectors to stiffen this thing up. I started putting the rear seats in and the modified side panels (modern seatbelts) so that I can see where to put the bars. I'm excited and nervous at the same time about the roll bar. Goint to try to make it non-intrusive.
02-04-2010, 07:30 PM
#259
11 Second Club
Thread Starter
Join Date: Mar 2008
Location: New Westminster, B.C., Canada
Posts: 445
Likes: 0
Received 1 Like
on
1 Post
Planned out the cage and frame connectors today, 60 feet of tubing!!! wow!!! Also finished my oil tank mount but forgot my camera, so pics tommorow.
02-05-2010, 07:59 PM
#260
11 Second Club
Thread Starter
Join Date: Mar 2008
Location: New Westminster, B.C., Canada
Posts: 445
Likes: 0
Received 1 Like
on
1 Post
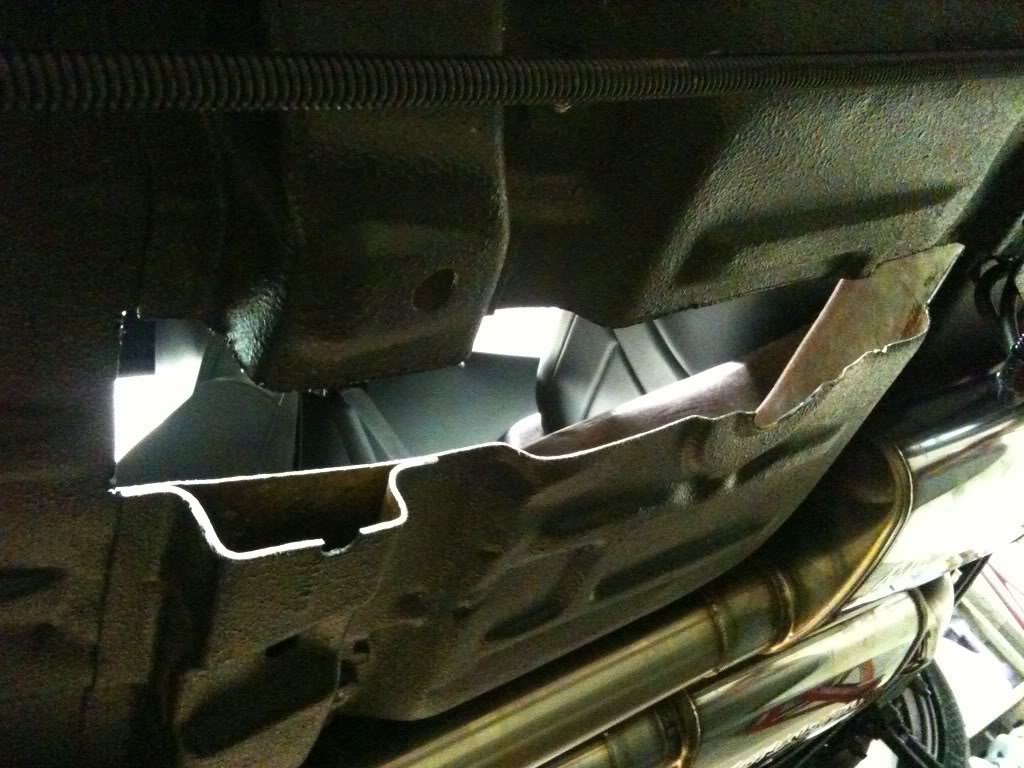
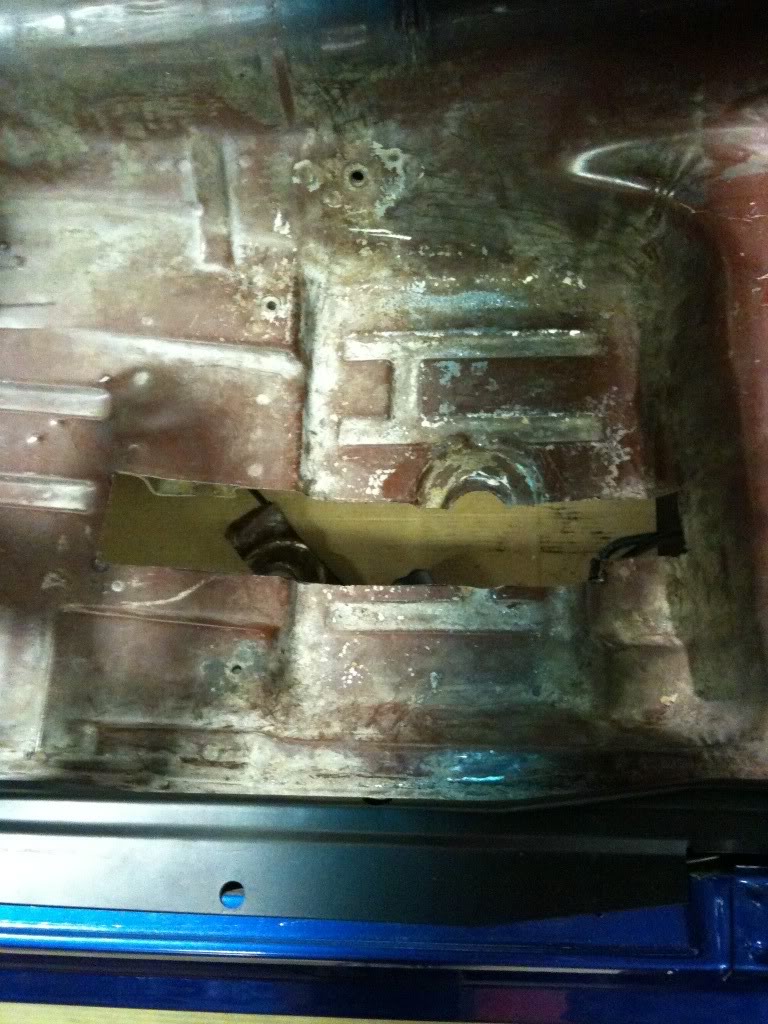
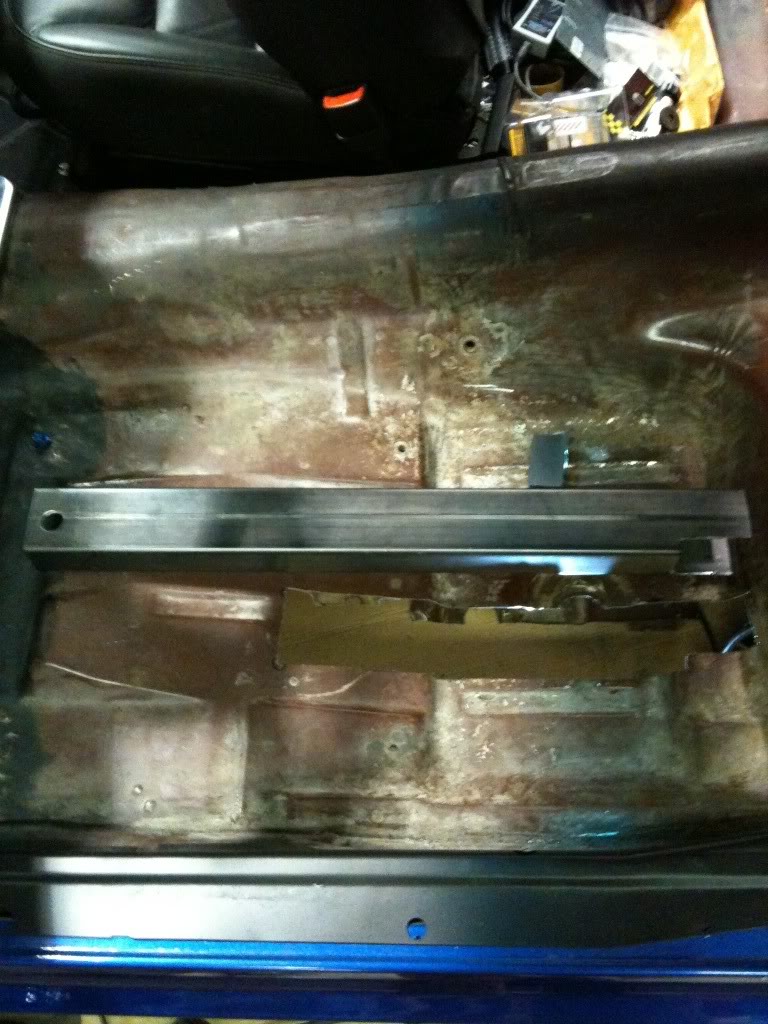
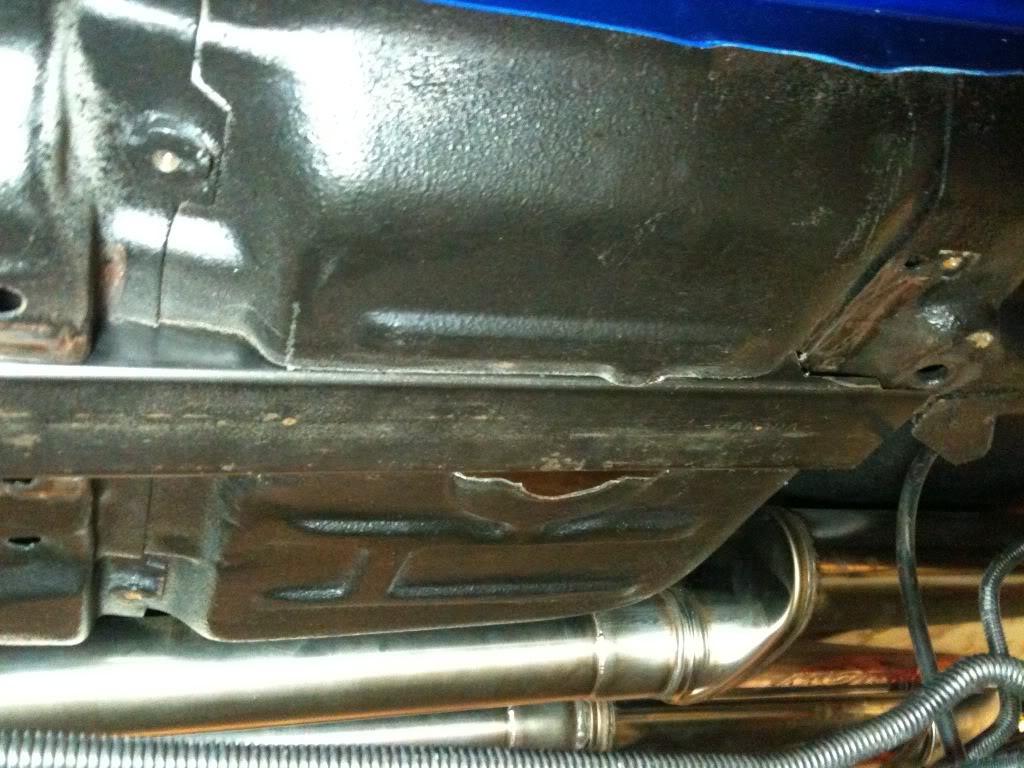
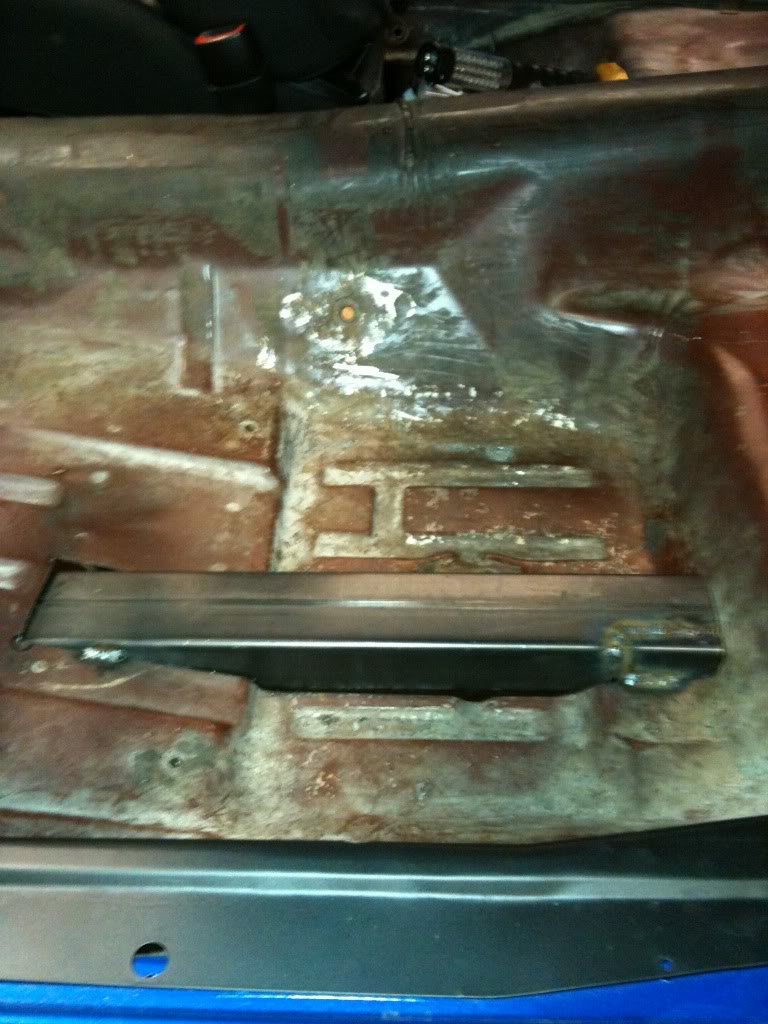
There's no turning back now! I cut a big hole in my floor. I started by using a piece of string to figure out where to cut. I held the string tight from inside the edge of the front subframe and stretched it as I lined up where a straight line from the front subframe would go... Wow, that sounds confusing. Basically I wanted to see where to cut if just say the front subframe was extended straight back. When I found that I marked it. After laying out the straight line, I measured over 3 inches and marked again. After all the layout was done I drilled small holes through the corners and connected the dots. I drilled a few small holes close together so that I could get my saw blade through, then cut away.
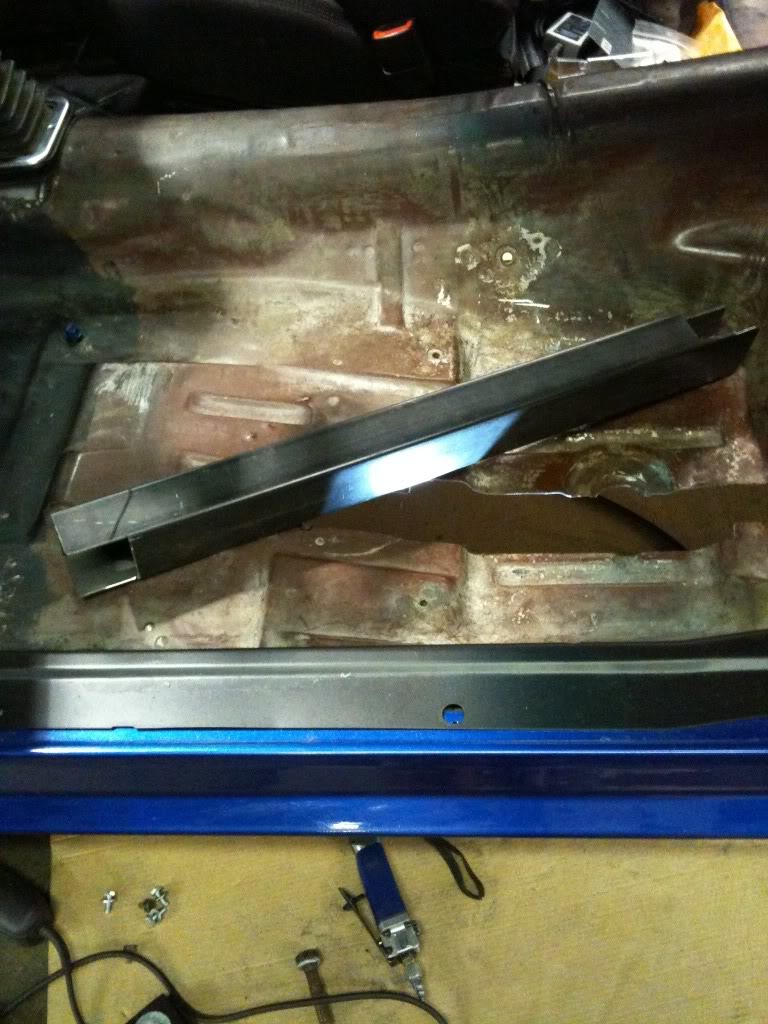
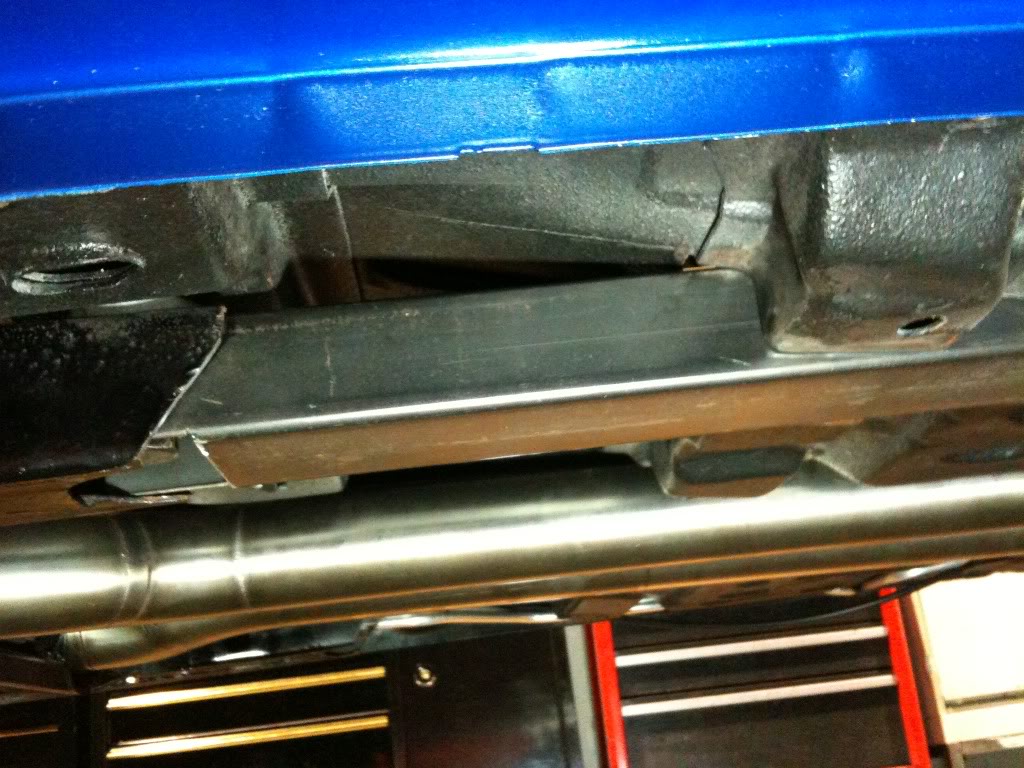
I then measured the length of tubing I would need and cut that. At the front the tubing goes inside of the original subframe. I cut a 2 inch "window" out of the end of it, and drilled a hole in it for the original front subframe mount bolt. In the back I trimmed the tubing to fit. There was a bit of fine tuning, (trimming) and then I bolted it in. I started welding it in. Monday I will continue welding, and boxing in the rear subframe.
Forgot the camera, again, so had to use my cellphone. -sorry-
Last edited by Marktainium; 02-05-2010 at 09:08 PM.