Mark's LS1 2nd Gen Camaro build


 04-21-2011, 12:52 AM
#362
11 Second Club
Thread Starter
Join Date: Mar 2008
Location: New Westminster, B.C., Canada
Posts: 445
Likes: 0
Received 1 Like
on
1 Post

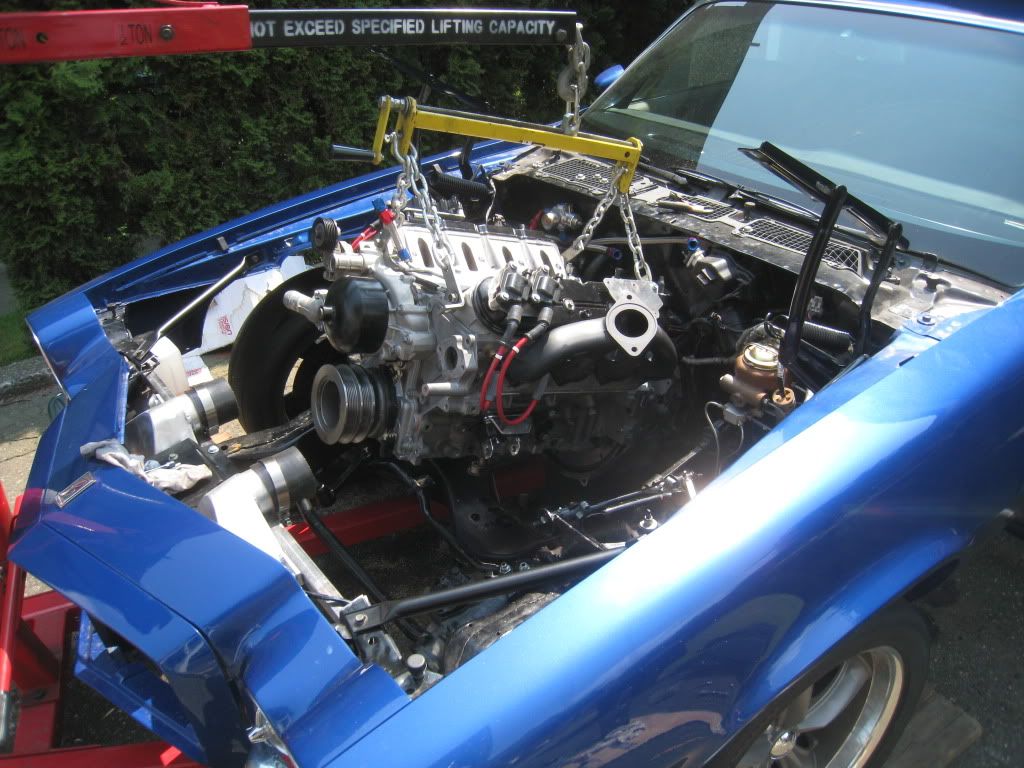
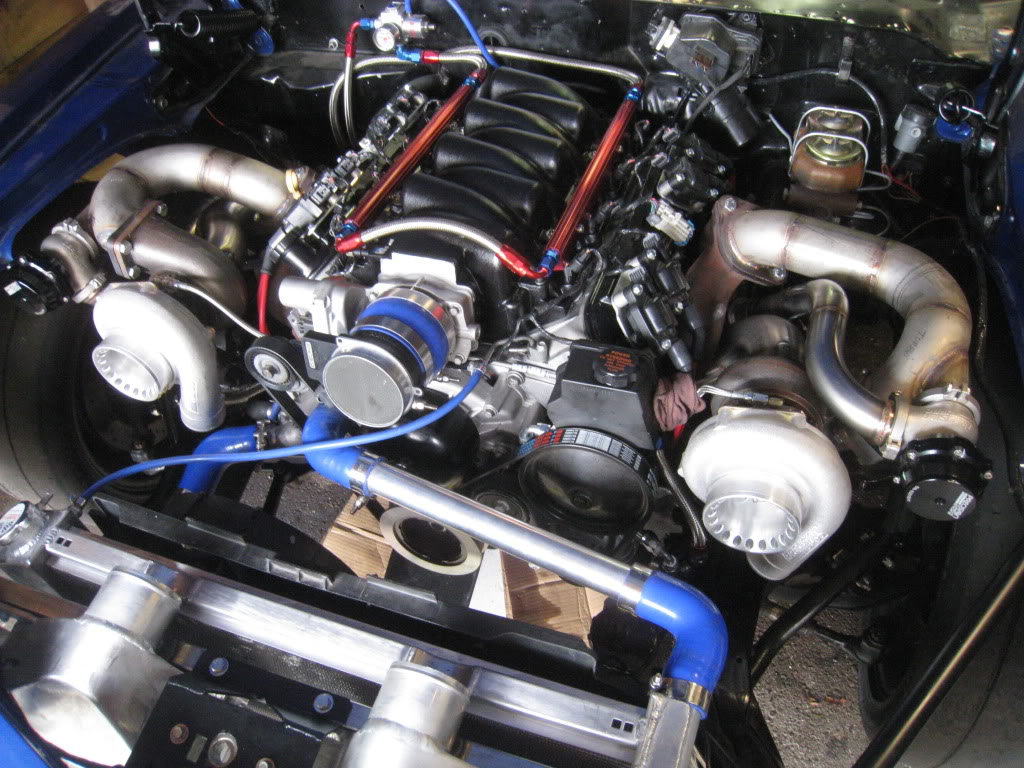
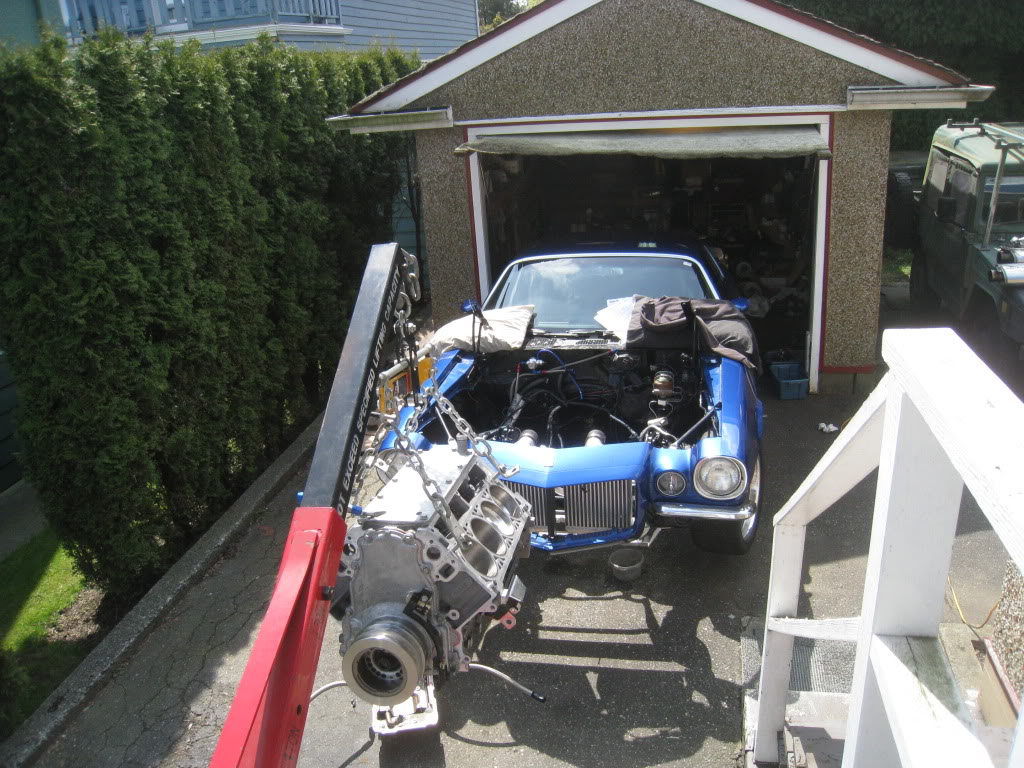
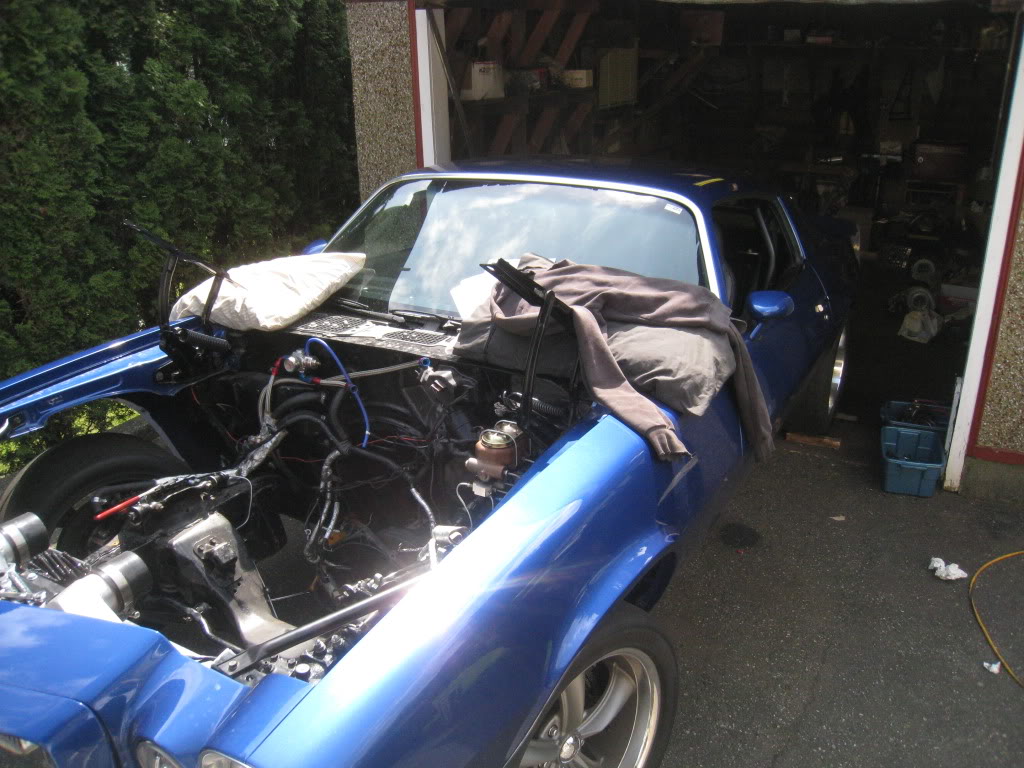
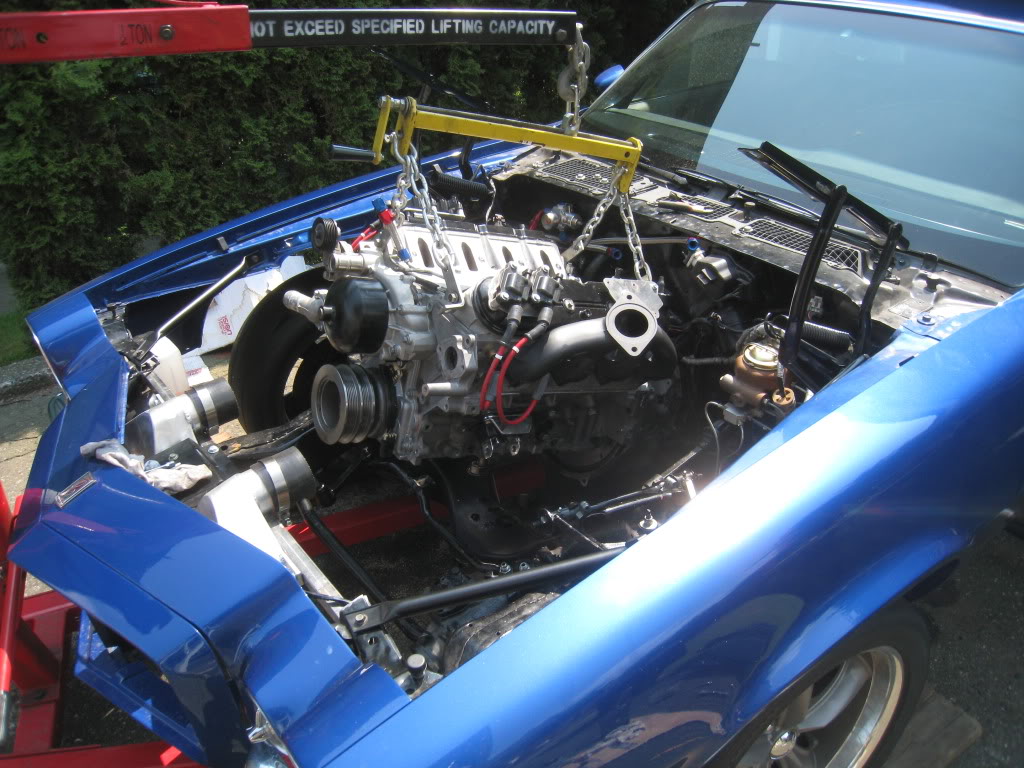
So the new motor is in. I got the Turbo oil drains and feeds hooked up, all the sensors are in, spark plugs are in, water pump installed, dipstick, alternator installed and wired, starter in and wired. I put in my 52pound injectors and am going to fire it up on my old supercharger tune. I need to do 500 miles to break in the clutch before I can dyno it anyway, and I figured that will give the motor some time to break in as well. I still have to mount my coils but have a pretty decent idea in mind. Need to spend some time working some more aluminum there. Hope to fire it up by the weekend even though I won't have the top intercooler pipe done yet. Gotta hear it run!

04-22-2011, 11:46 PM
#364
11 Second Club
Thread Starter
Join Date: Mar 2008
Location: New Westminster, B.C., Canada
Posts: 445
Likes: 0
Received 1 Like
on
1 Post
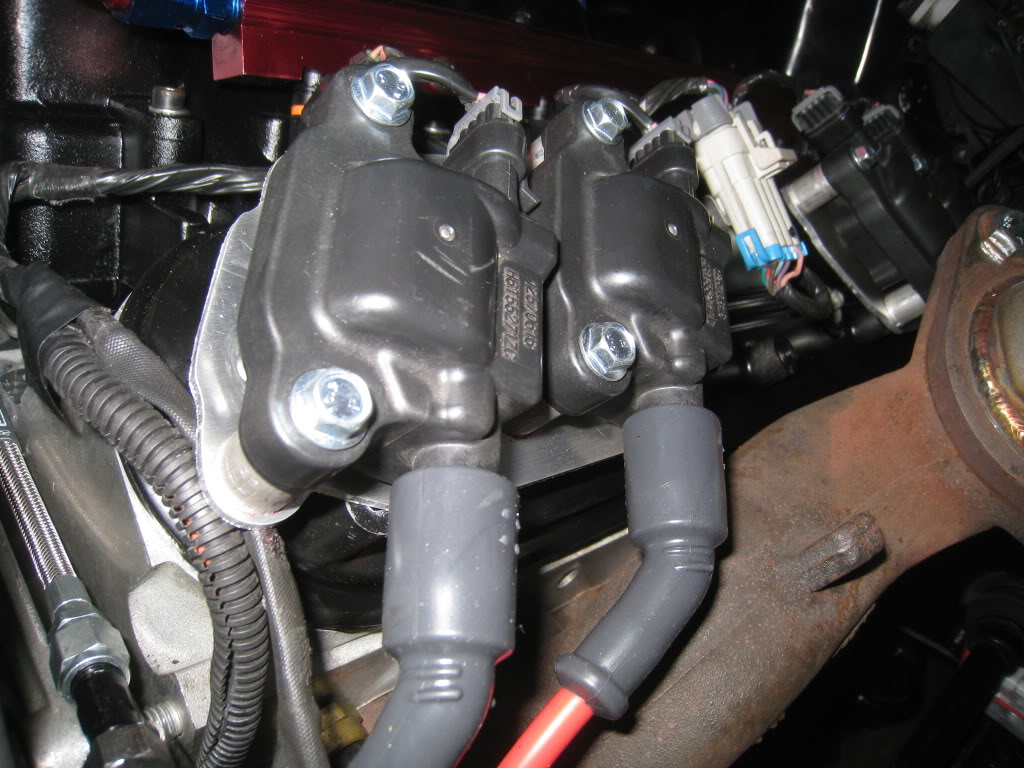
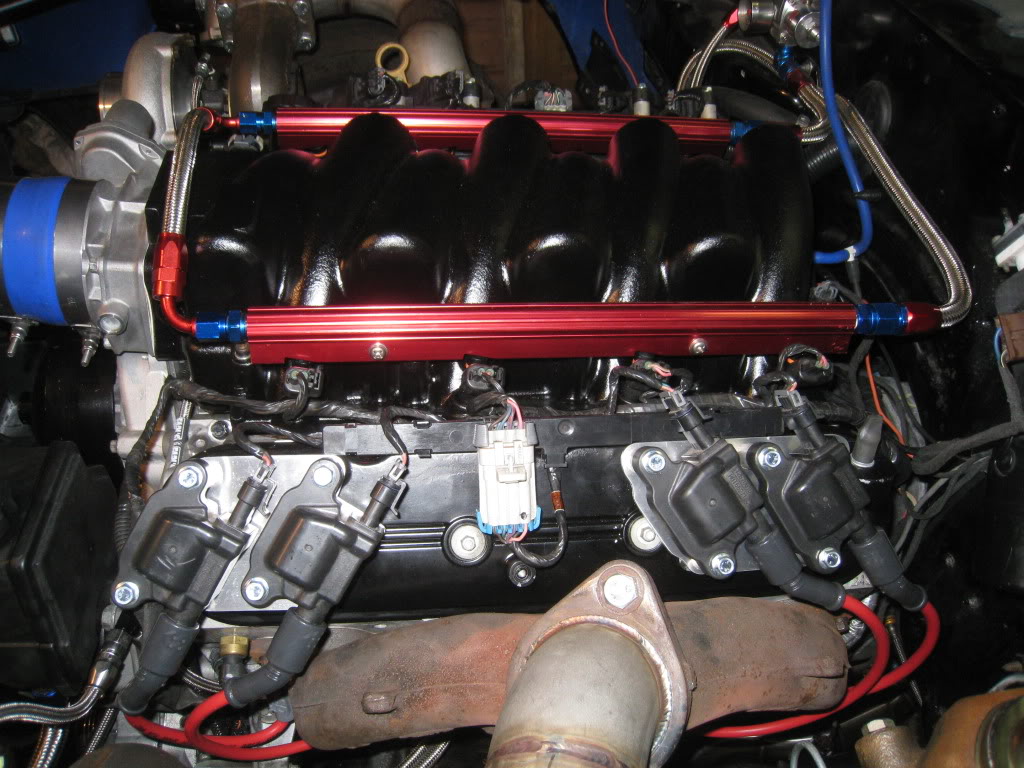
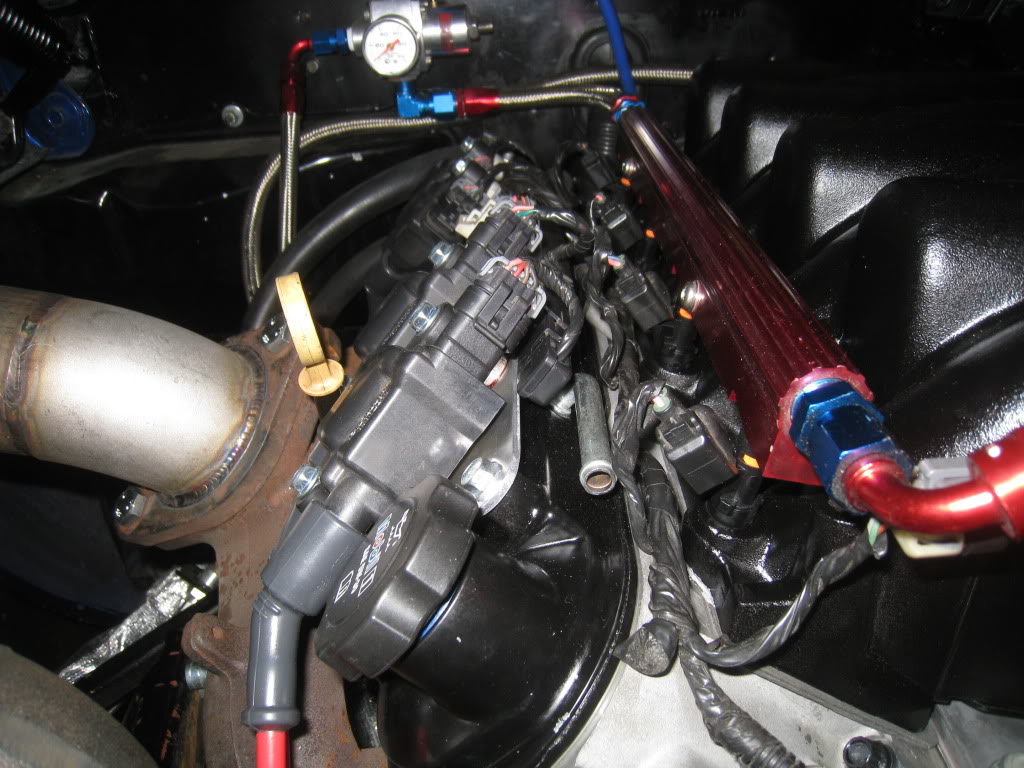
Spent a good chunk of my day making brackets to hold my iginition coils. I'm so lucky to have access to a shop that has metalworking equipment. The notcher is one of my favorite tools right now. I still do a lot of hand filing though, as that is somehow really rewarding to me. It's as close to being an artist as I get. Can't draw to save my life, but give me a chunk of aluminum, the notcher, and a file, and I'll make something purdy!


 05-01-2011, 08:31 PM
#371
11 Second Club
Thread Starter
Join Date: Mar 2008
Location: New Westminster, B.C., Canada
Posts: 445
Likes: 0
Received 1 Like
on
1 Post
I got it fired up with the exhaust on, no exhaust gaskets though, and ended up hearing a weird knocking sound. I've researched the heck out of it, some say it's lifter noise. I'm not sure so out it comes again for inspection. Better safe than sorry...
05-03-2011, 01:25 AM
#373
11 Second Club
Thread Starter
Join Date: Mar 2008
Location: New Westminster, B.C., Canada
Posts: 445
Likes: 0
Received 1 Like
on
1 Post
Tore it all down and inspected. As suggested it was all fine. Seems to be the dreaded piston slap. I guess there are pistons available with an offset piston pin to reduce the slap. I wish I'd known about the offset pin before hand. Oh well... Should have it all re-assembled and running on the weekend.
05-29-2011, 04:17 PM
#374
Launching!
iTrader: (7)

Join Date: Dec 2006
Location: Maryland
Posts: 252
Likes: 0
Received 0 Likes
on
0 Posts
quick question, how did you determine you needed a 1k resistor for your tach? I have a 79 T/A and want to hook up the original tach... didnt seem like its right with the 1k resistor..... Just trying to figure out the math or electronics needed....
05-29-2011, 08:59 PM
#375
11 Second Club
Thread Starter
Join Date: Mar 2008
Location: New Westminster, B.C., Canada
Posts: 445
Likes: 0
Received 1 Like
on
1 Post
I just did research on tach problems to see what others had done. It seems the tach signal from the ls ecm's needed to be lowered in order to provide a usable signal for the autometer tachometer. I'm not sure if the same aplies to the stock tach.

 05-31-2011, 09:51 PM
#378
11 Second Club
Thread Starter
Join Date: Mar 2008
Location: New Westminster, B.C., Canada
Posts: 445
Likes: 0
Received 1 Like
on
1 Post
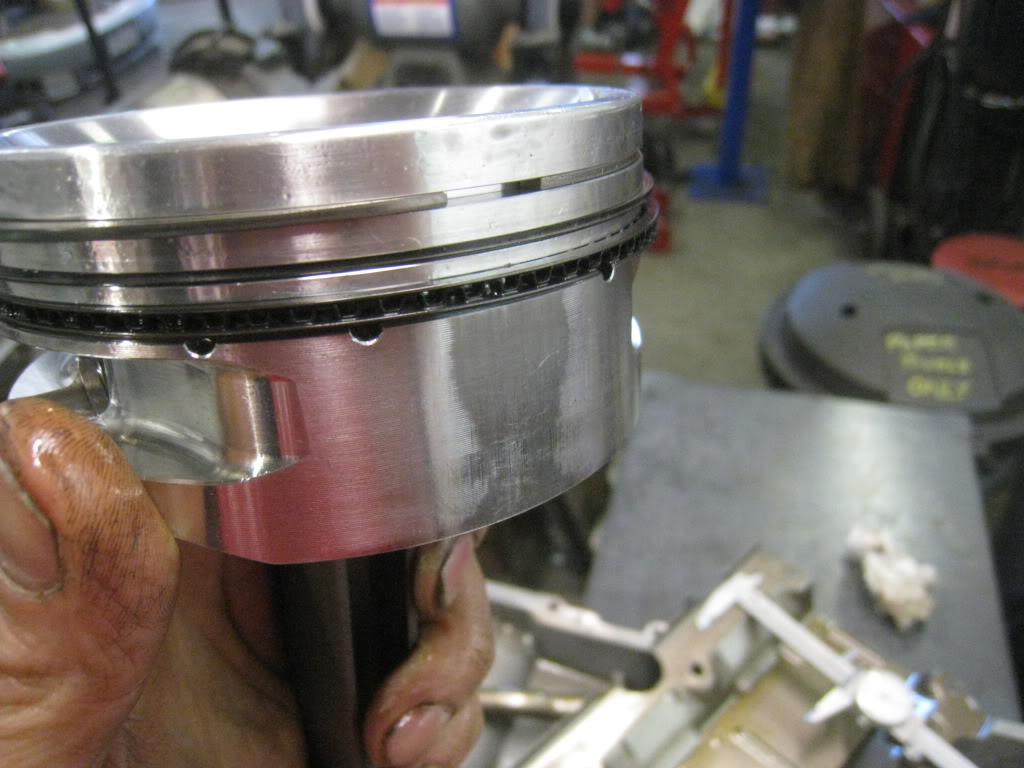
A quick update, Well, after tearing it down I found excessive scuffing on the piston sides, both major and minor thrust sides. I took a bunch of pics and relayed them to the piston manufacturer. he had me send them back to him for inspection. He sent them out to an independent measuring company, who measures to within a millionth of an inch. Turns out the pistons are ok but the problem was that the oil ring support ring that I received was the wrong size. From what I was told , once it was installed into the oil ring groove, being that it was for a slightly smaller diameter piston, it deformed into a wavy shape which in turn pinched the oil control ring which in turn prevented proper piston skirt / side lubrication. I have since received the pistons back, with new rings, and new support rings.
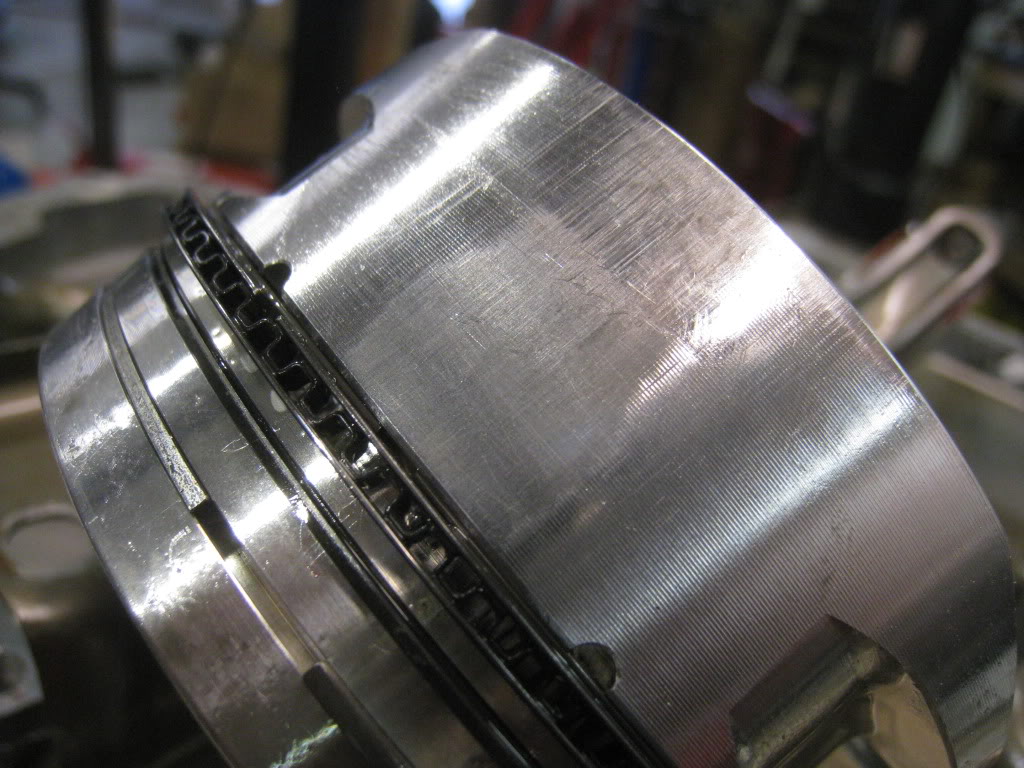
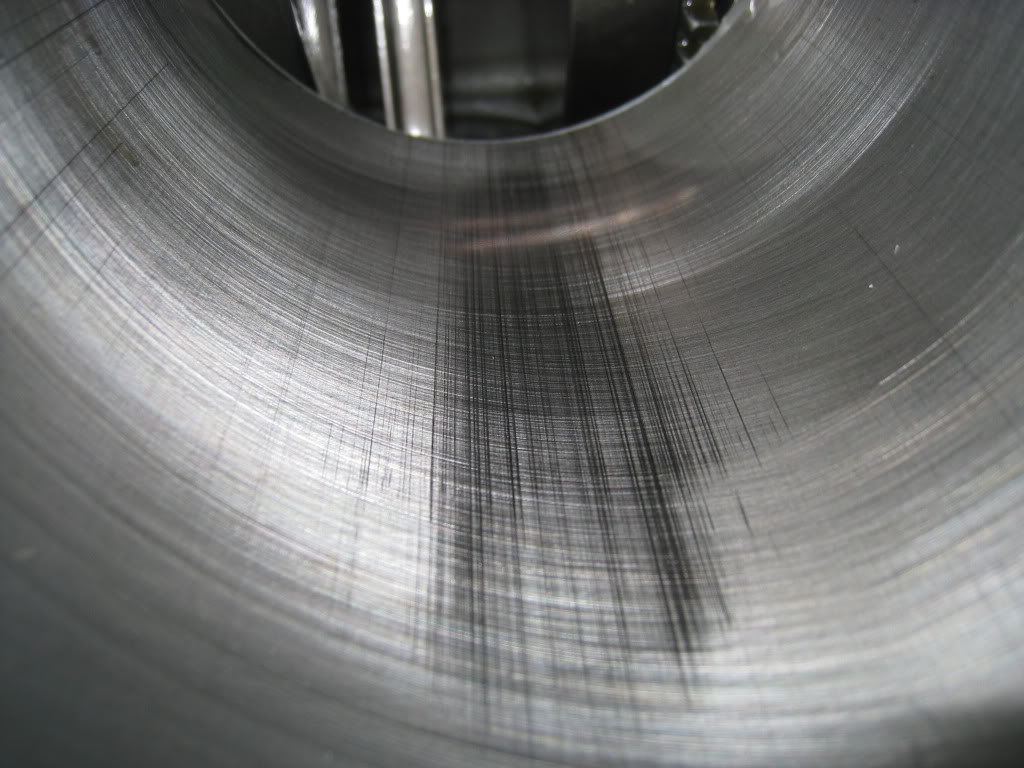
I'm getting pretty good at filing rings, as this is the third set for this engine, which still hasn't been driven.
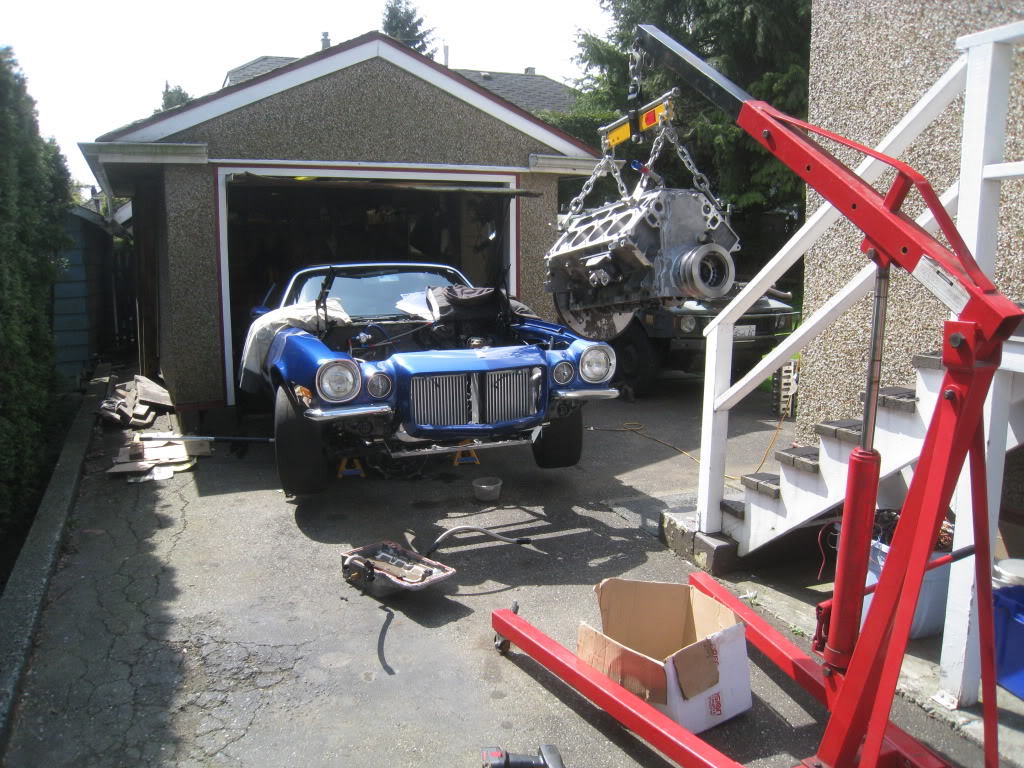
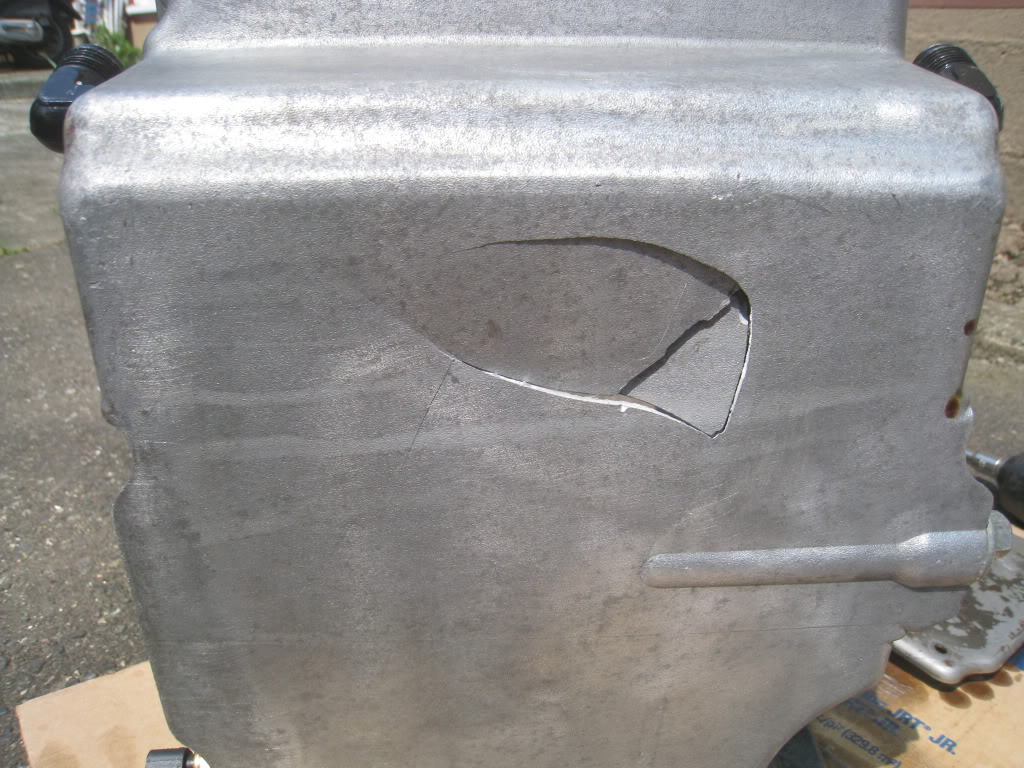
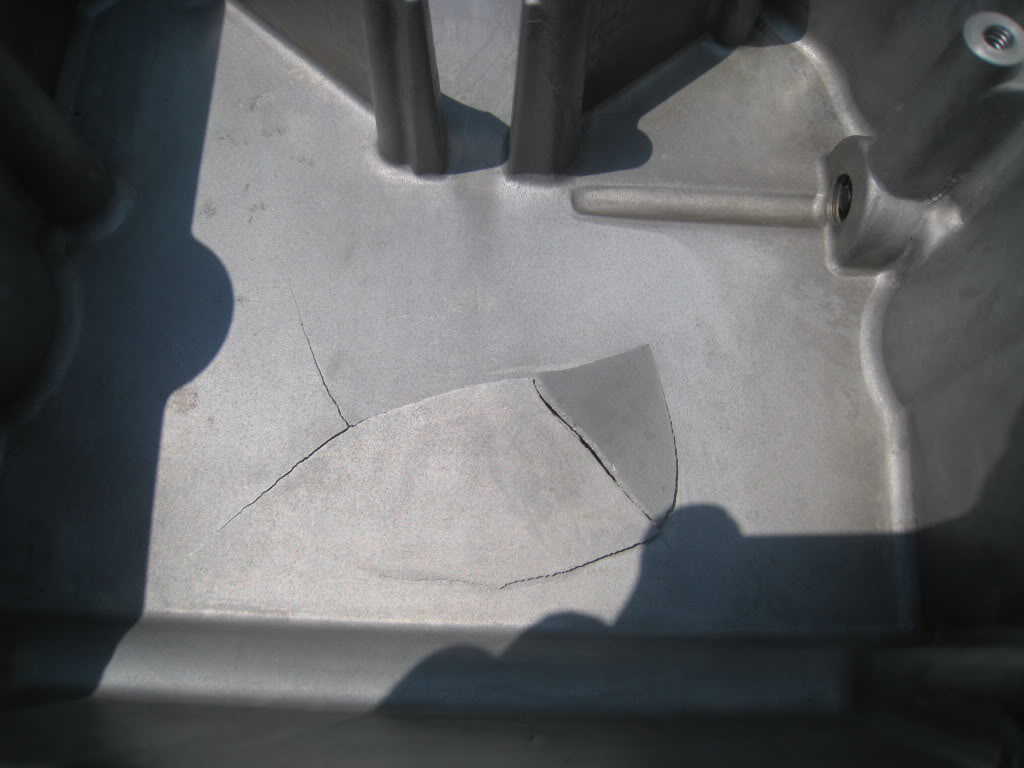
I got everything put back together this last weekend and was lowering the car down off of the jackstands to fire it up when a wheel fell off of my jack causing the jack to stop moving and the car moved on the jack which ended up with the jack going through the oil pan. AWESOME!
I pulled the motor back out the next day, and tried to weld up the cracks but as the pan cooled the welds cracked. I ordered another oil pan and am waiting for that now.
My patience is being severely tested, and I'm close to locking up the garage and breaking off the key in the locks. My birthday is a week from today, I hope to have it driving by then.
I'm getting pretty good at filing rings, as this is the third set for this engine, which still hasn't been driven.
I got everything put back together this last weekend and was lowering the car down off of the jackstands to fire it up when a wheel fell off of my jack causing the jack to stop moving and the car moved on the jack which ended up with the jack going through the oil pan. AWESOME!
I pulled the motor back out the next day, and tried to weld up the cracks but as the pan cooled the welds cracked. I ordered another oil pan and am waiting for that now.
My patience is being severely tested, and I'm close to locking up the garage and breaking off the key in the locks. My birthday is a week from today, I hope to have it driving by then.
Last edited by Marktainium; 05-31-2011 at 10:03 PM.