

Mark's LS1 2nd Gen Camaro build

 12-01-2010, 12:22 AM
#322
It's a sweet combo. I can't wait to see if I will be able to light up my tires at highway speed! Update on the piston issue... Racetec and Scat have been great! I have been speaking to both of them and am very satisfied with the service thus far. I'll be sending my piston's back today, (no expense to me) and really appreciate the fact that good customer service isn't dead!

So is it a piston machining issue I assume? Looking at your measurements I don't see how you could lose anything from the rods without having a massive parts failure. Good to know they are taking care of you.
01-25-2011, 05:22 PM
#323
11 Second Club
Thread Starter
Join Date: Mar 2008
Location: New Westminster, B.C., Canada
Posts: 445
Likes: 0
Received 1 Like
on
1 Post

There wasn't any room for rod machining. In talking to racetec they had never had such an issue. I'm not sure if I'm the first one to use this particular combo, but it is a big dish, and I didn't feel that machining the piston would leave enough material under the crown. I guess racetec felt the same way as I haven't got the pistons back yet. I expect a call today.
Last edited by Marktainium; 01-25-2011 at 06:26 PM.
01-25-2011, 06:40 PM
#324
11 Second Club
Thread Starter
Join Date: Mar 2008
Location: New Westminster, B.C., Canada
Posts: 445
Likes: 0
Received 1 Like
on
1 Post
Got the call from racetec. It seems somewhere along the line from where I initially ordered my rotating assembly from to actually receiving it someone sold me or included a piston set that was not reccommended for the numbers or boost that I am looking to achieve. Mike at Racetec was vigilant and realized this before sending back the wrong pistons I should be made aware of this. The pistons I had originally got were autotec brand, which are rated to a lower hp rating. He explained to me in great detail the differences and that he was first and foremost concerned that I have the correct parts, not just parts that would work, but parts that would last. Customer service is still alive and kicking in some places. Thanks Mike for showing me that. As far as the last piston issue, the engineers are addressing that as well, so others won't have this issue. He believes there may have been a forging issue there but don't quote me on that.
02-10-2011, 09:30 AM
#325
Registered User

Join Date: Feb 2011
Location: central,AR
Posts: 1
Likes: 0
Received 0 Likes
on
0 Posts
Hey guys Im just getting started w/ LS swap on my sons 71' camaro and need some tips on eng /trans mounts,headers,accesories etc... Im starting with 6.0l from cad escalade and 4l60e.
02-10-2011, 12:44 PM
#326
11 Second Club
Thread Starter
Join Date: Mar 2008
Location: New Westminster, B.C., Canada
Posts: 445
Likes: 0
Received 1 Like
on
1 Post
There is tons of info on that swap. If you read this thread from the start you should have all the info you need. One thing for sure though is to use the F-body pan.

 02-25-2011, 10:44 PM
#328
11 Second Club
Thread Starter
Join Date: Mar 2008
Location: New Westminster, B.C., Canada
Posts: 445
Likes: 0
Received 1 Like
on
1 Post
I decided to lower my radiator 3" so that I can put my intercooler piping over the top of the radiator and straight into the throttle body. On the procharger setup I used a side to side intercooler, but with the twin turbo's I decided to go with 2 seperate top to bottom 12"x12"x4" intercoolers (core size). I hope this doesn't end up getting filed under the "seemed like a good idea at the time" section. I've been taking lot's of pic's for this and will add them asap.
02-26-2011, 12:22 PM
#329
11 Second Club
Thread Starter
Join Date: Mar 2008
Location: New Westminster, B.C., Canada
Posts: 445
Likes: 0
Received 1 Like
on
1 Post
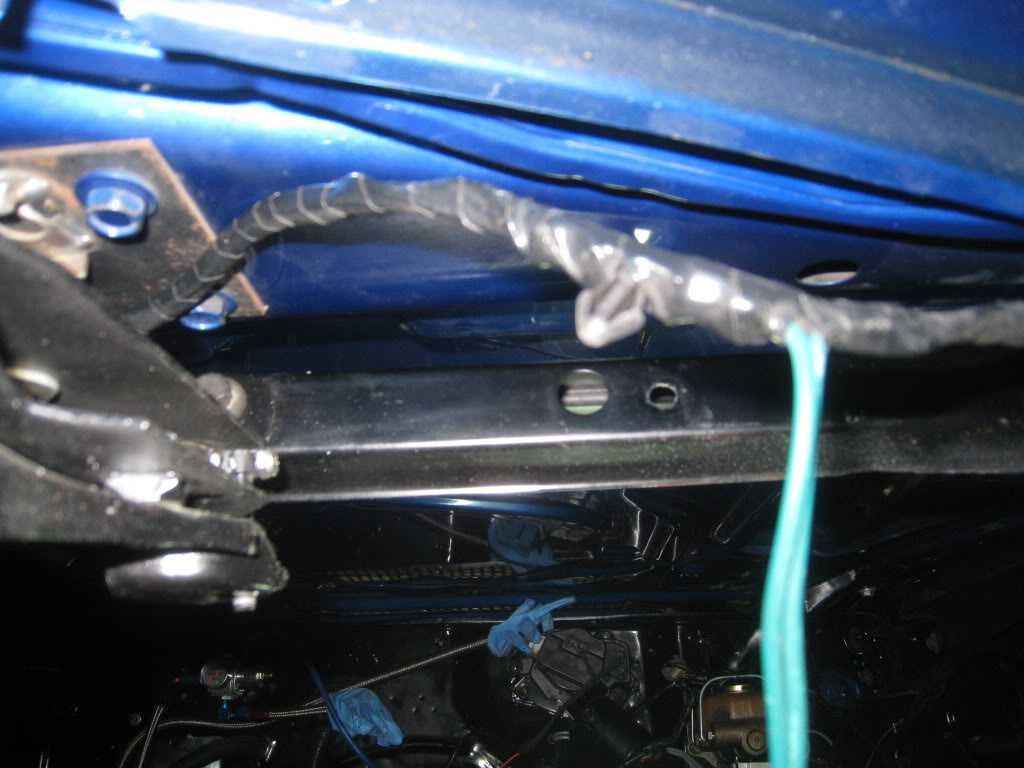
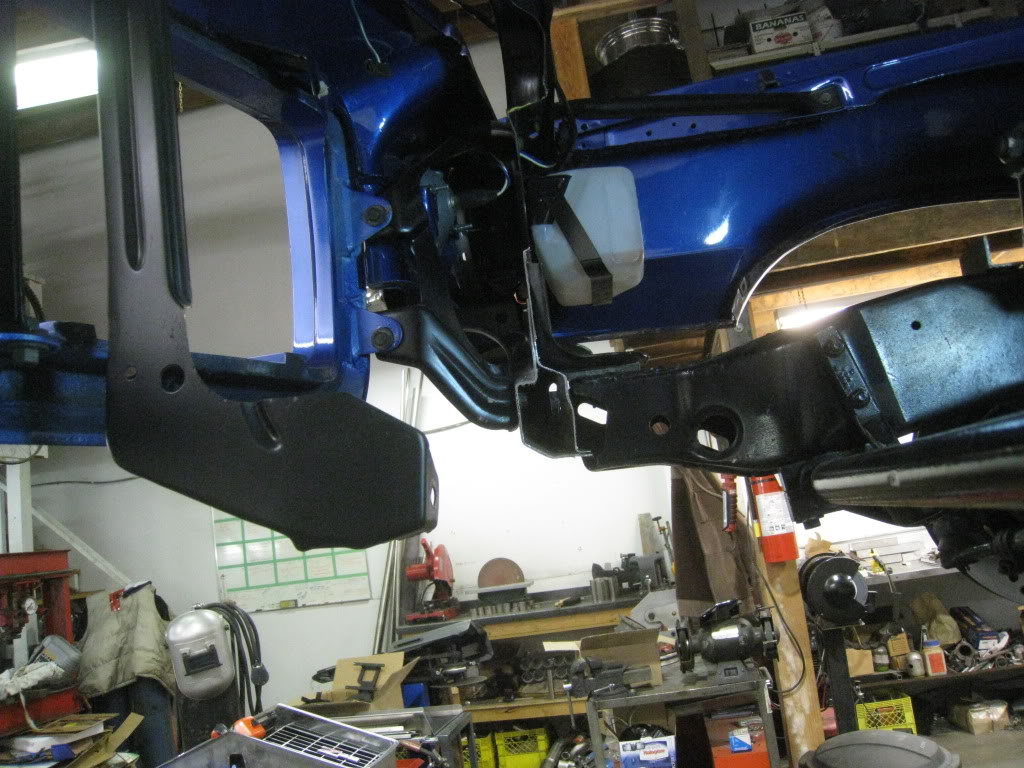
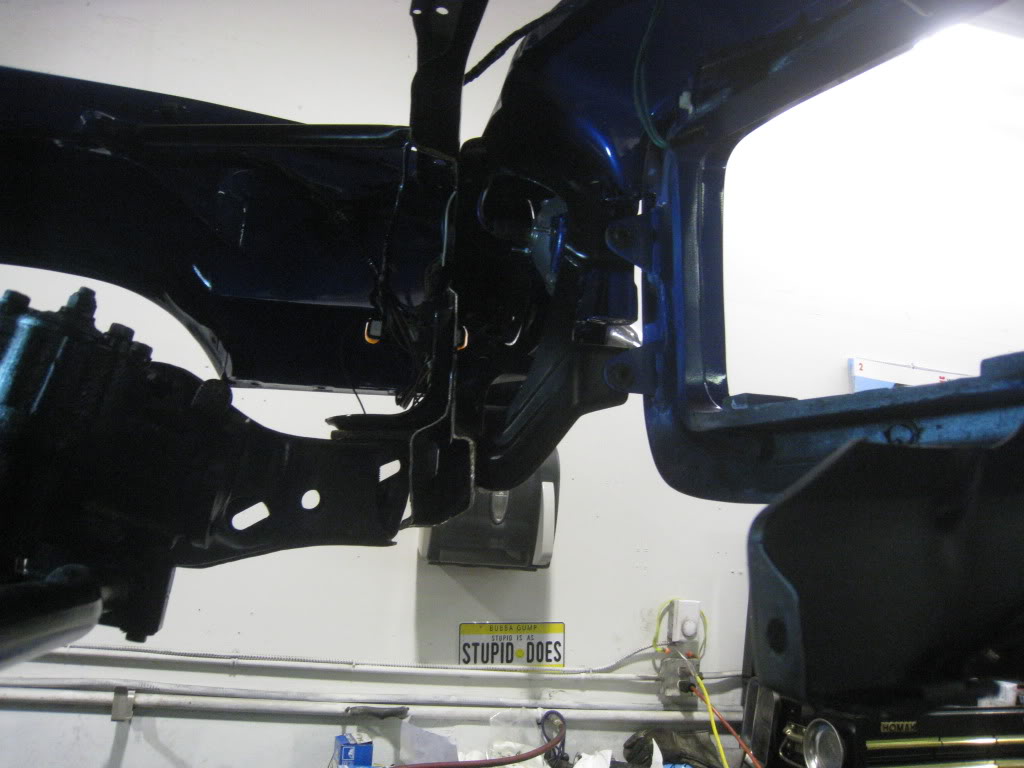
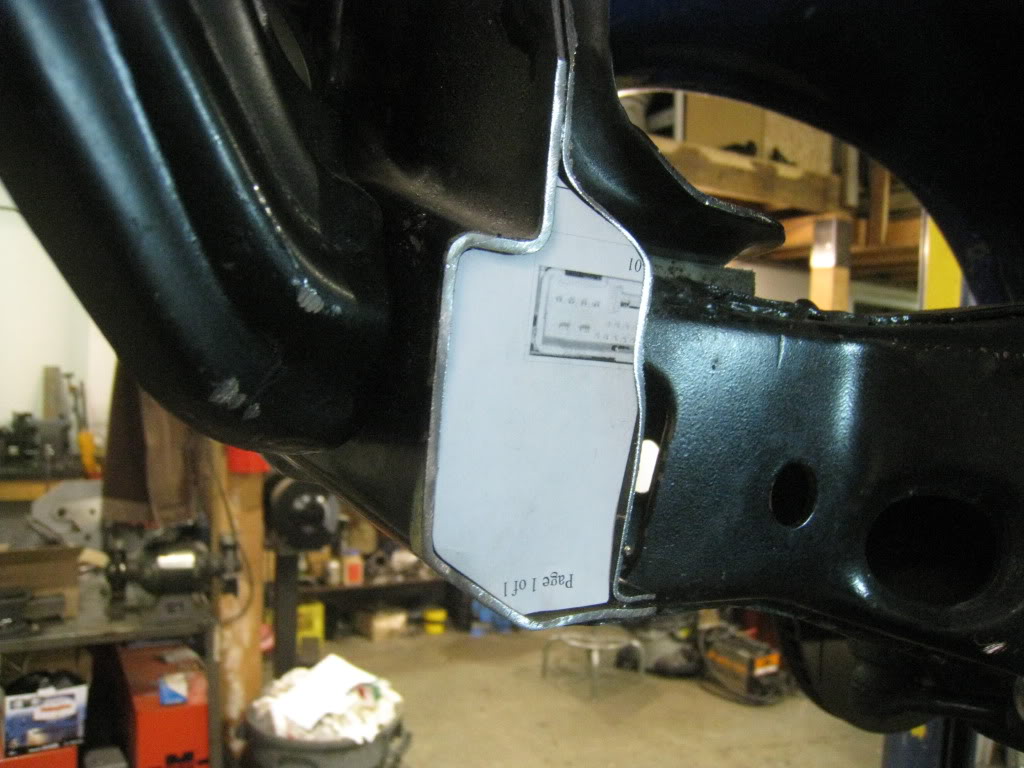
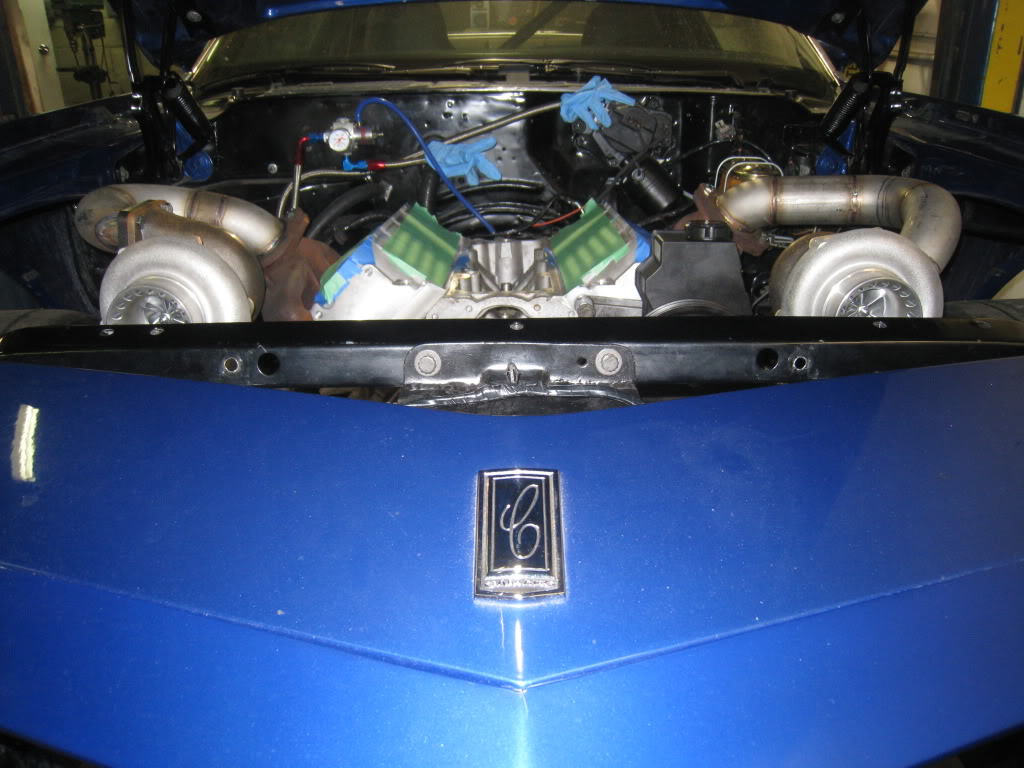
Ok, so here's what I am starting with. This shot shows the space between the upper rad support and the hood. It's about 5/8" to 3/4" at best. The hood latch is in the lower left corner of this shot. It isn't stock as I had to fabricate that as well to accomodate the old intercooler. I may still have to do something else for the hood latch, but am holding out until I actually have the new intercoolers in hand to mock them up and see where everything fits.
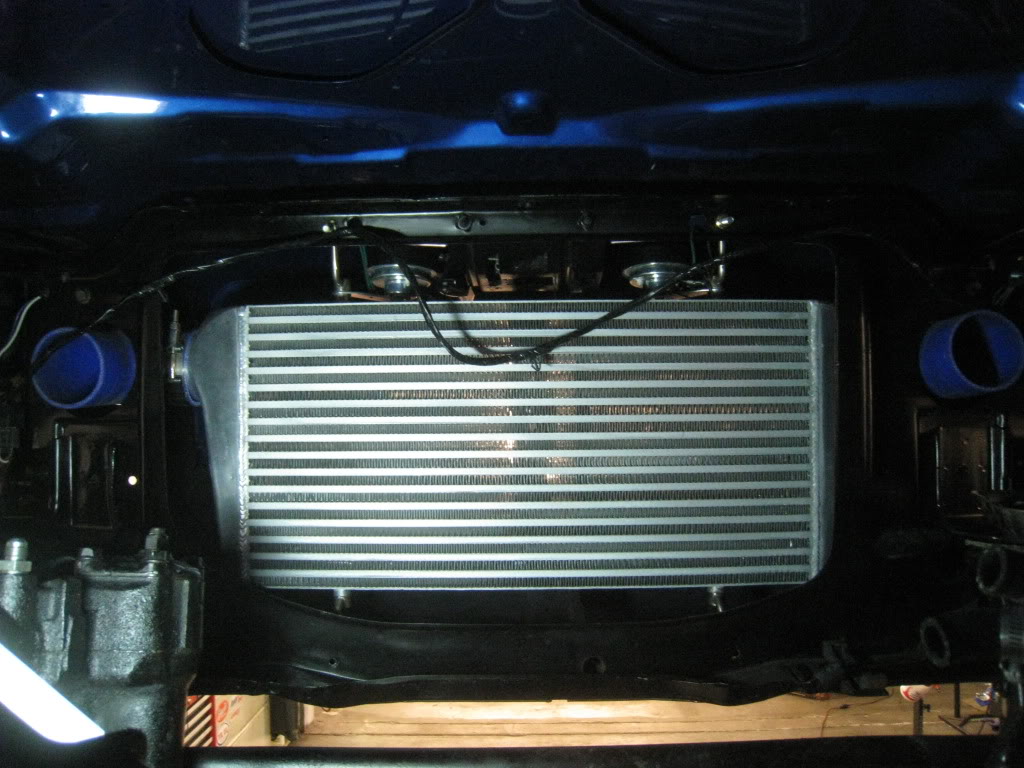
Here's the original intercooler. core size is 12"x24"x4"
Rad support
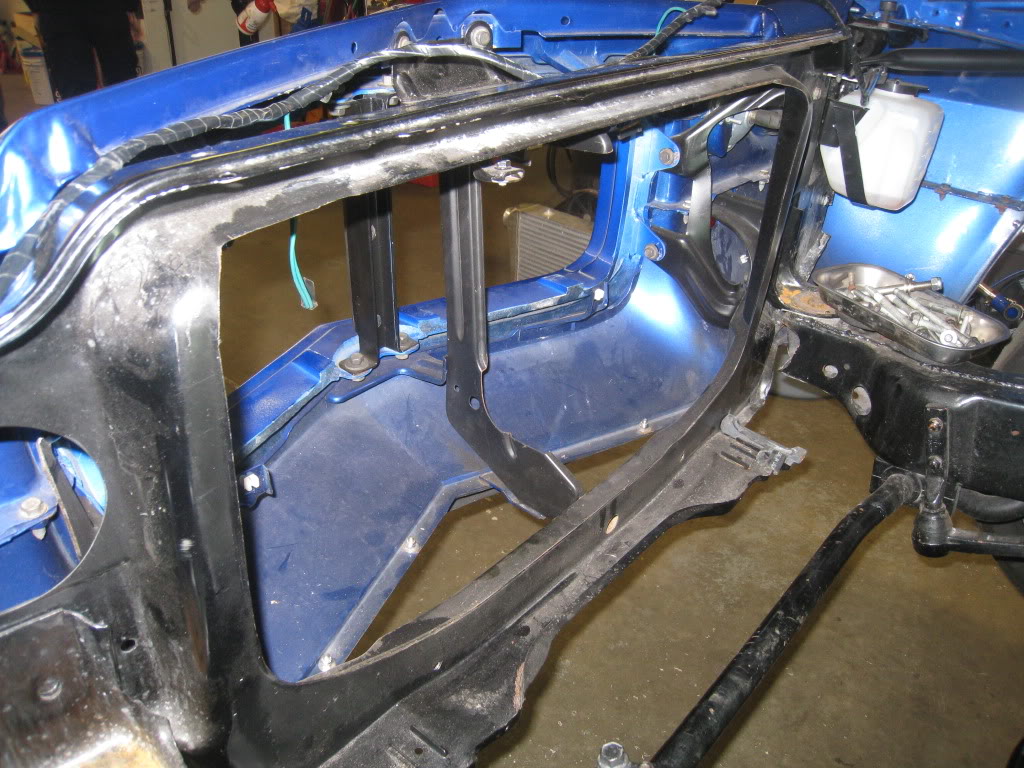
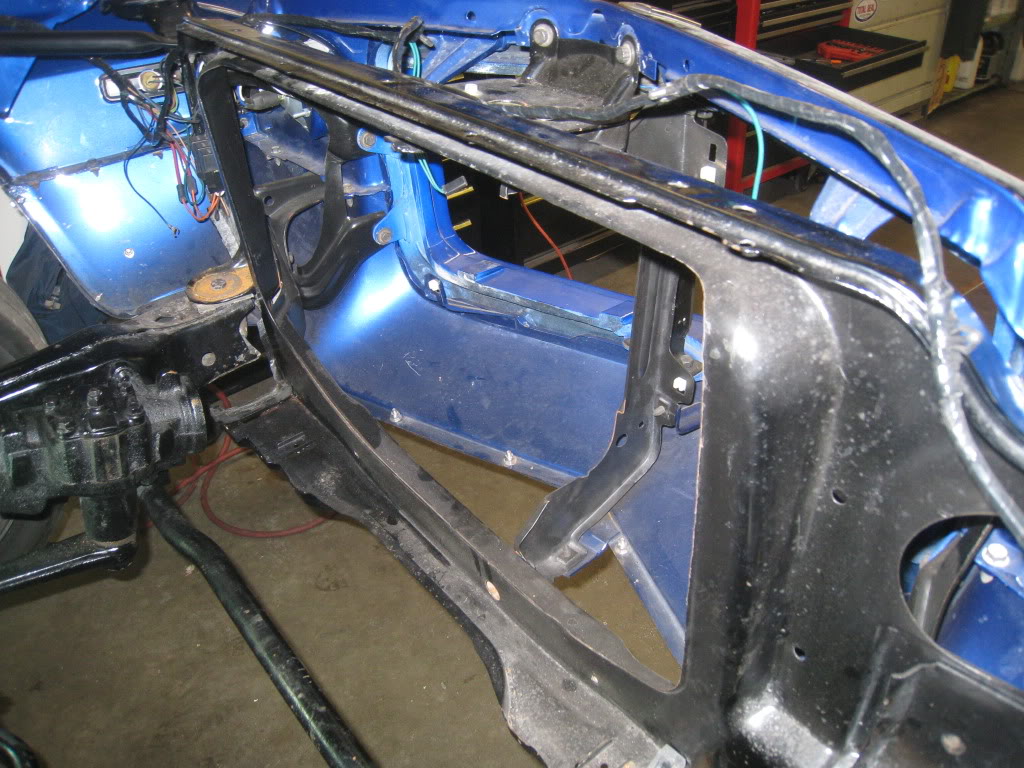
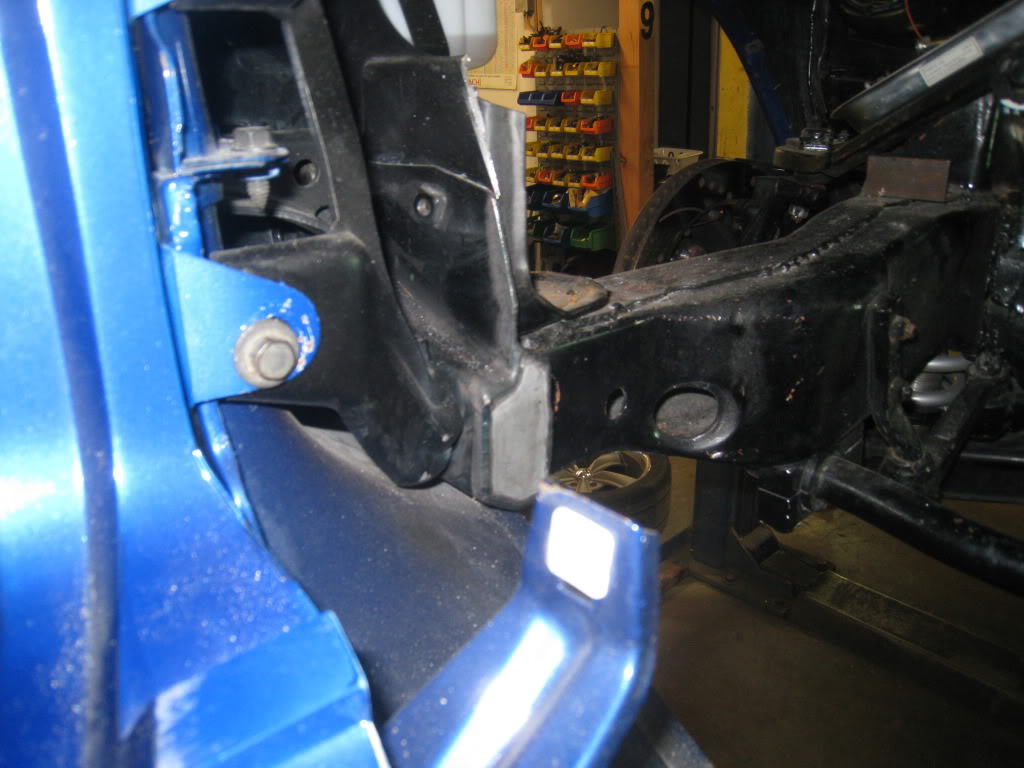
Here's what I cut out. I figured that I wanted to move my rad forward about 3" and down 3". This keeps it above the lip of the chin spoiler, and flush with the original rad support sheet metal after the formed part is cut out.
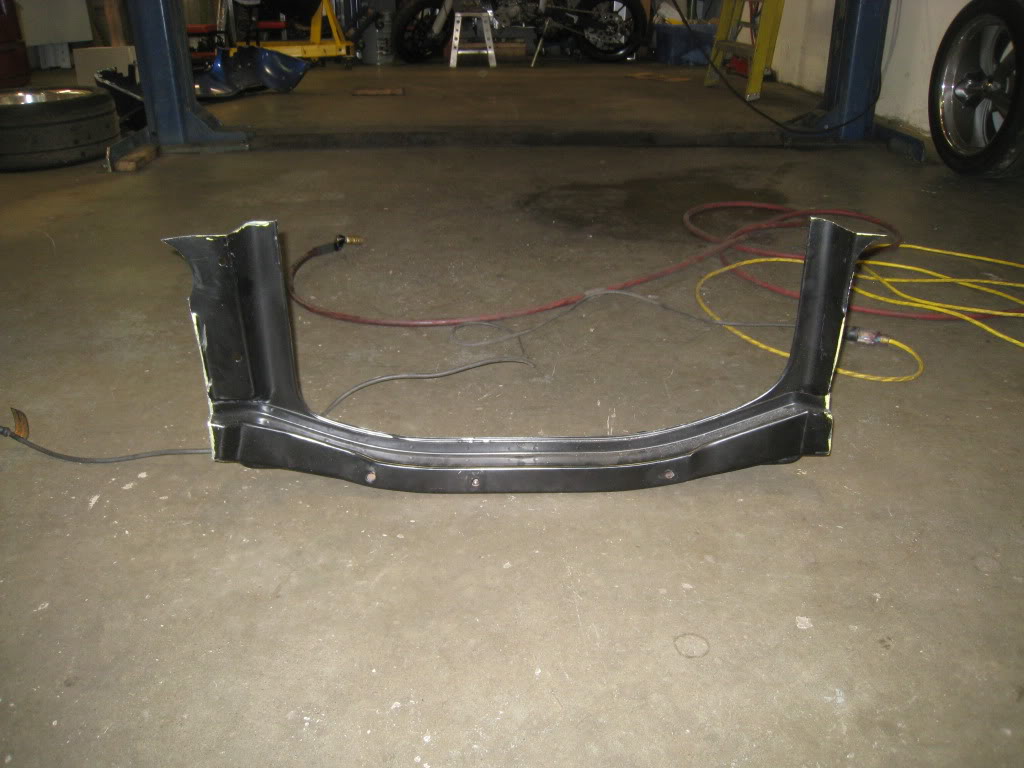
I removed the lower valance to cut out the rad support. Enter Sawzall!
Here's the original intercooler. core size is 12"x24"x4"
Rad support
Here's what I cut out. I figured that I wanted to move my rad forward about 3" and down 3". This keeps it above the lip of the chin spoiler, and flush with the original rad support sheet metal after the formed part is cut out.
I removed the lower valance to cut out the rad support. Enter Sawzall!
02-26-2011, 12:32 PM
#330
11 Second Club
Thread Starter
Join Date: Mar 2008
Location: New Westminster, B.C., Canada
Posts: 445
Likes: 0
Received 1 Like
on
1 Post
Next I used paper to trace out caps for the rad support frame ends. An easy way to do this which I use all the time is this. Hold a clean sheet of white paper over the shape you want to trace, and without moving the paper around too much, gently rub your dirty fingers across the paper over the edges of the object. I use this method when I need to make my own gaskets as well. In this case, I cut the tracing out through the middle of the image and then transferred the paper to 18 guage steel.
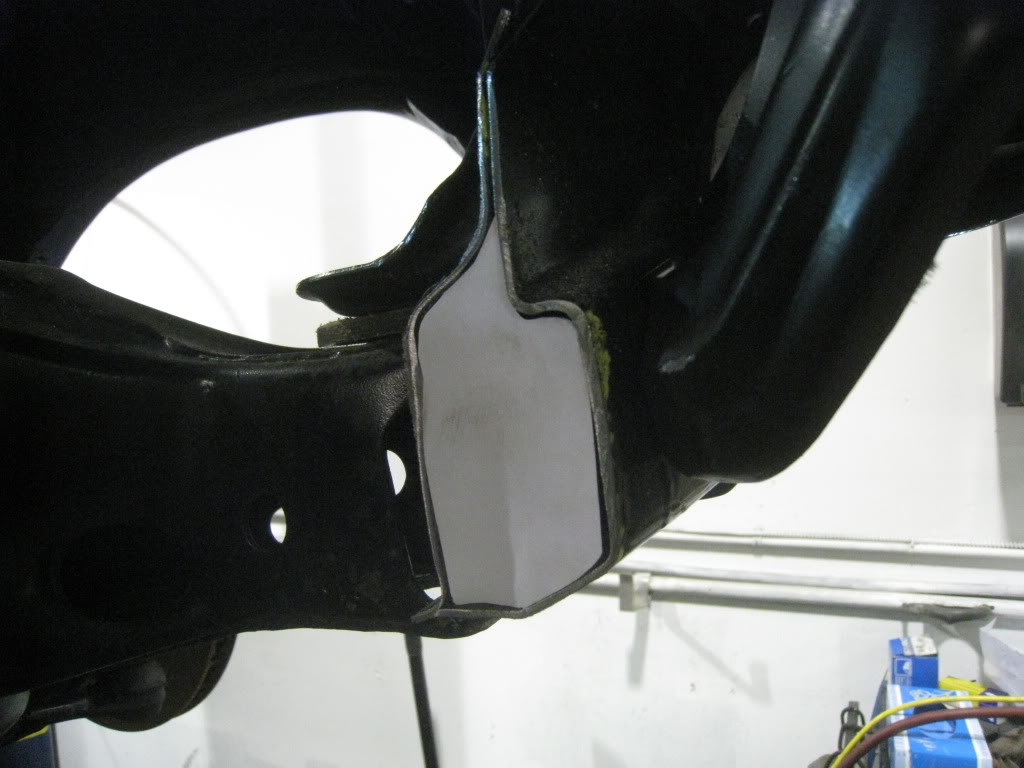
Steel caps tig welded in
More to come...
Steel caps tig welded in
More to come...
03-01-2011, 09:06 PM
#332
11 Second Club
Thread Starter
Join Date: Mar 2008
Location: New Westminster, B.C., Canada
Posts: 445
Likes: 0
Received 1 Like
on
1 Post
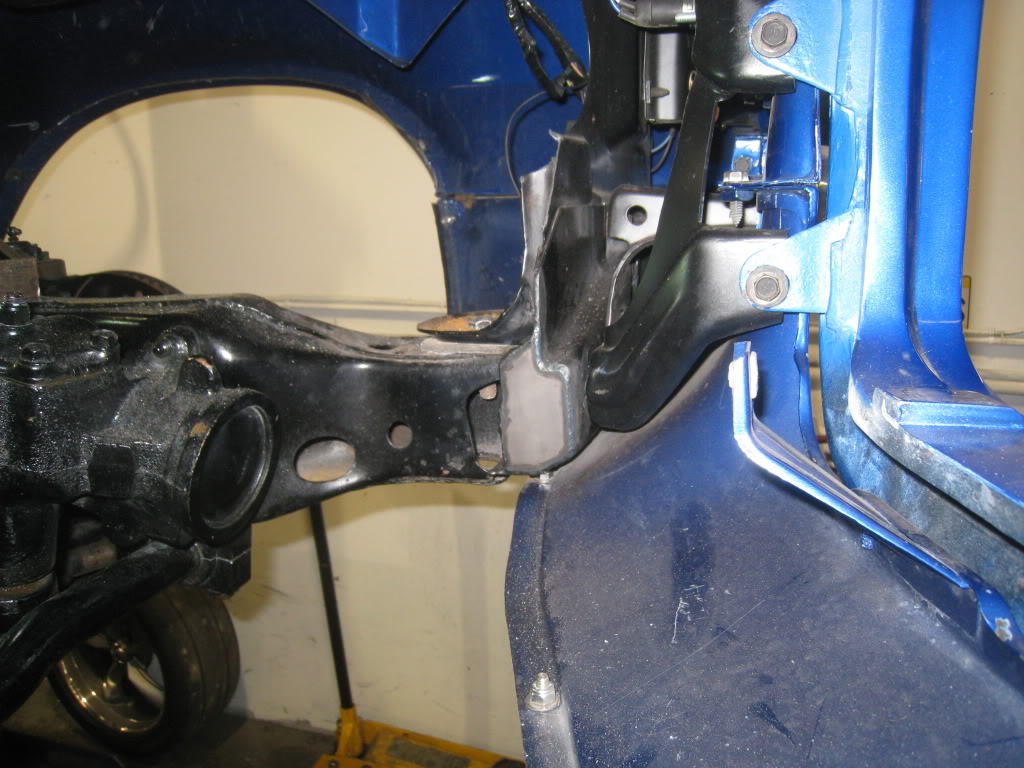
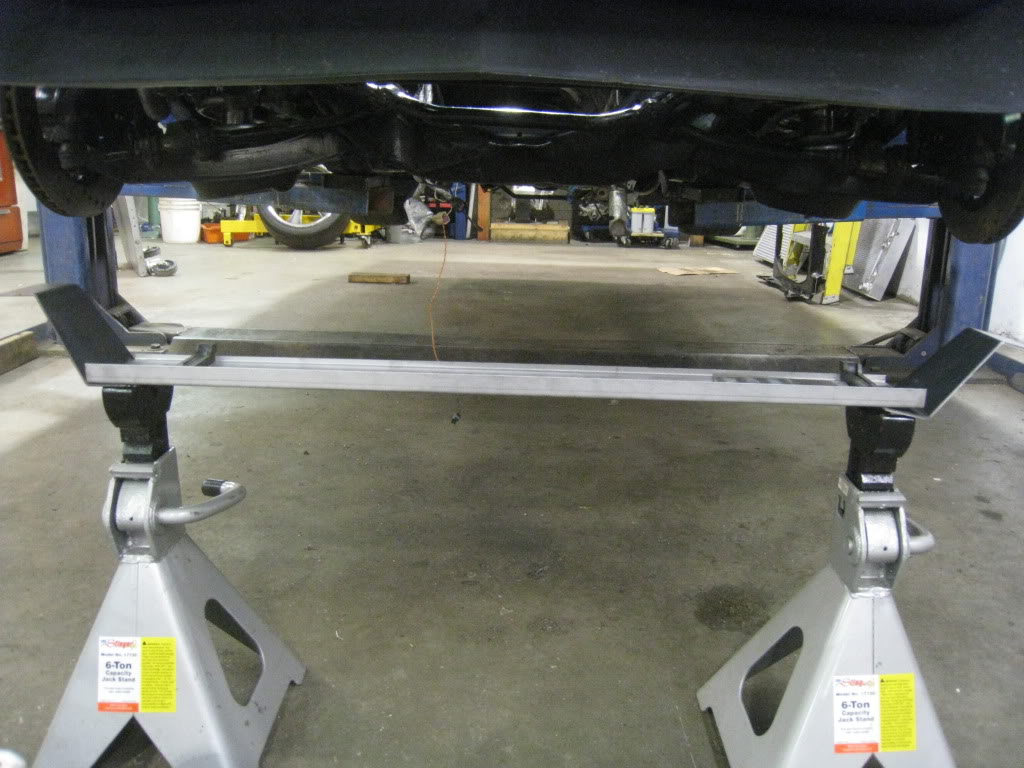
A little more progress... I took some 18 guage steel and formed it to hold the original rubber saddles. I then drilled 1/4" holes in the appropriate spots to locate the rubbers. I put the radiator in place on top of a pair of jackstands and lowered the car until I found my desired clearance. I used some welding rod and bent it to give me a guide for making the drop down brackets to support the formed piece. I cut these out of 14 guage. formed them and checked out the fit. I will be mounting these from the bottom bolted into the front subframe. I decided to stop at this point and wait until I can mock up the intercoolers just to be sure everything fits before welding anything.
03-02-2011, 10:24 PM
#333
11 Second Club
Thread Starter
Join Date: Mar 2008
Location: New Westminster, B.C., Canada
Posts: 445
Likes: 0
Received 1 Like
on
1 Post
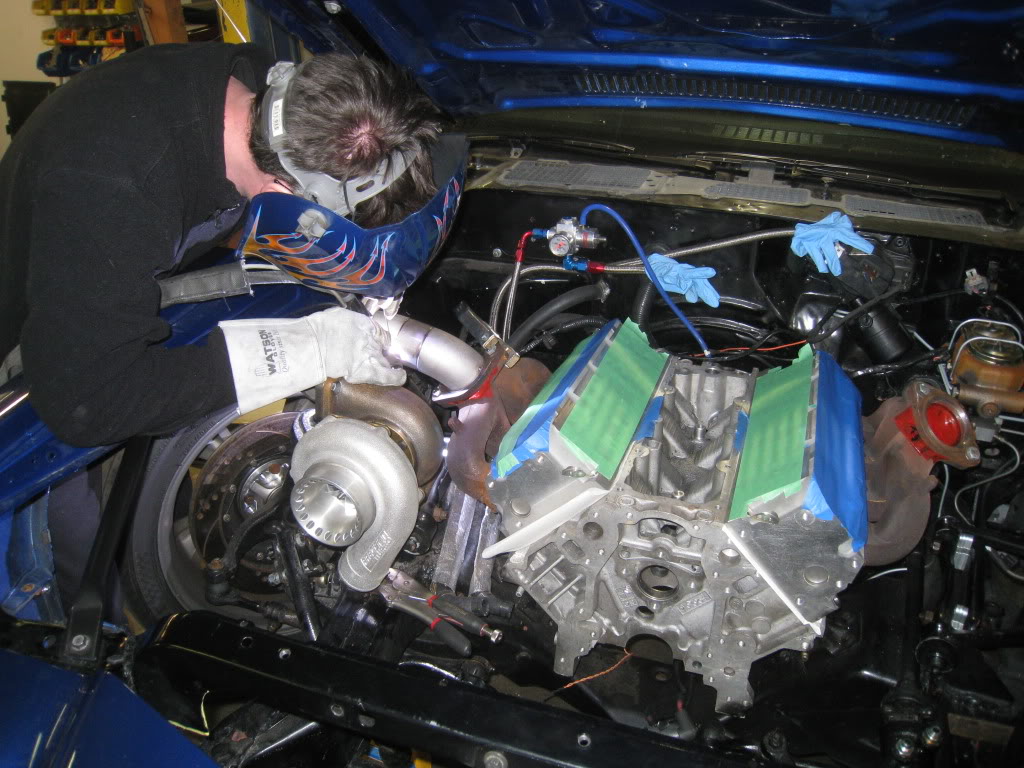
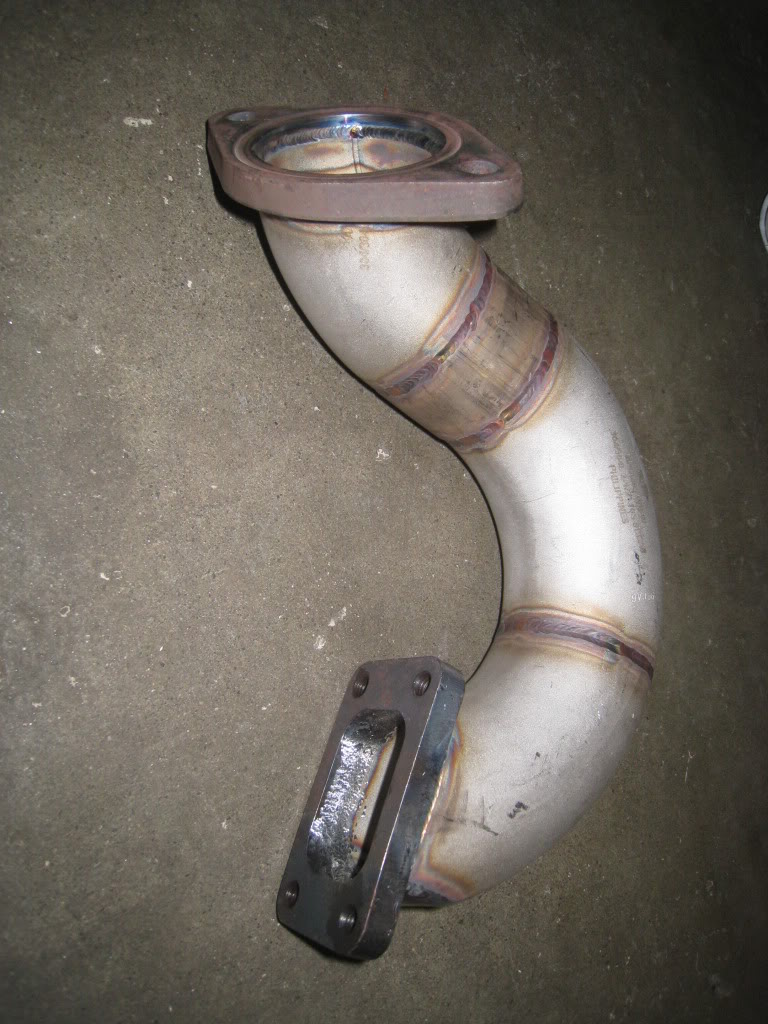
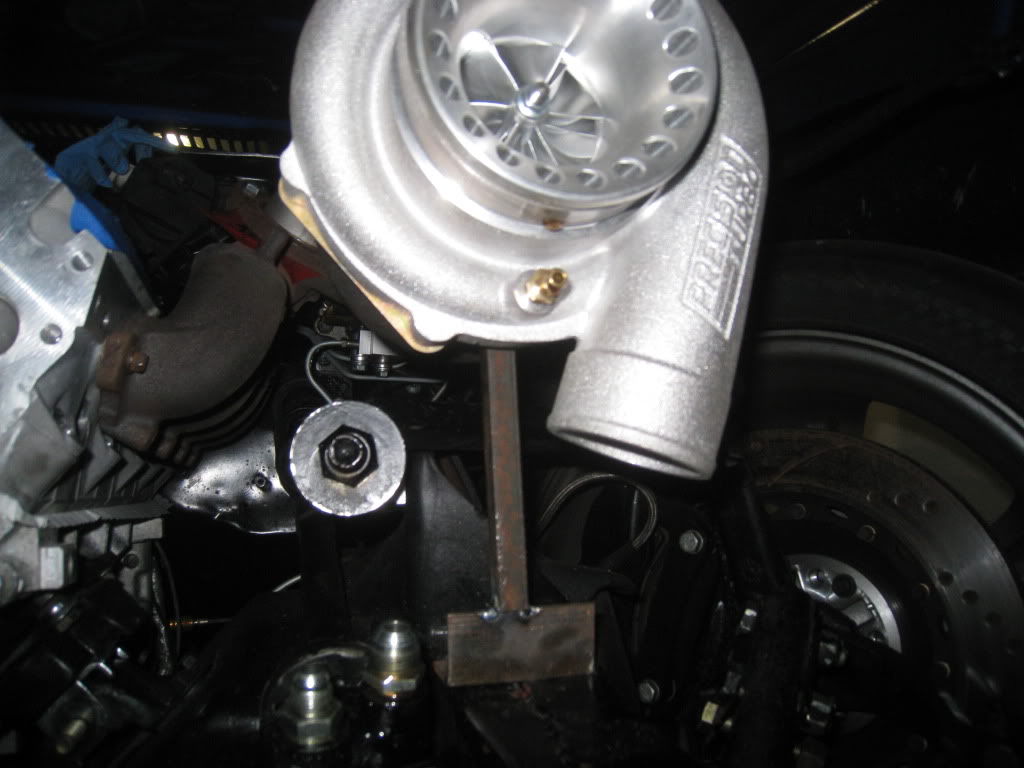
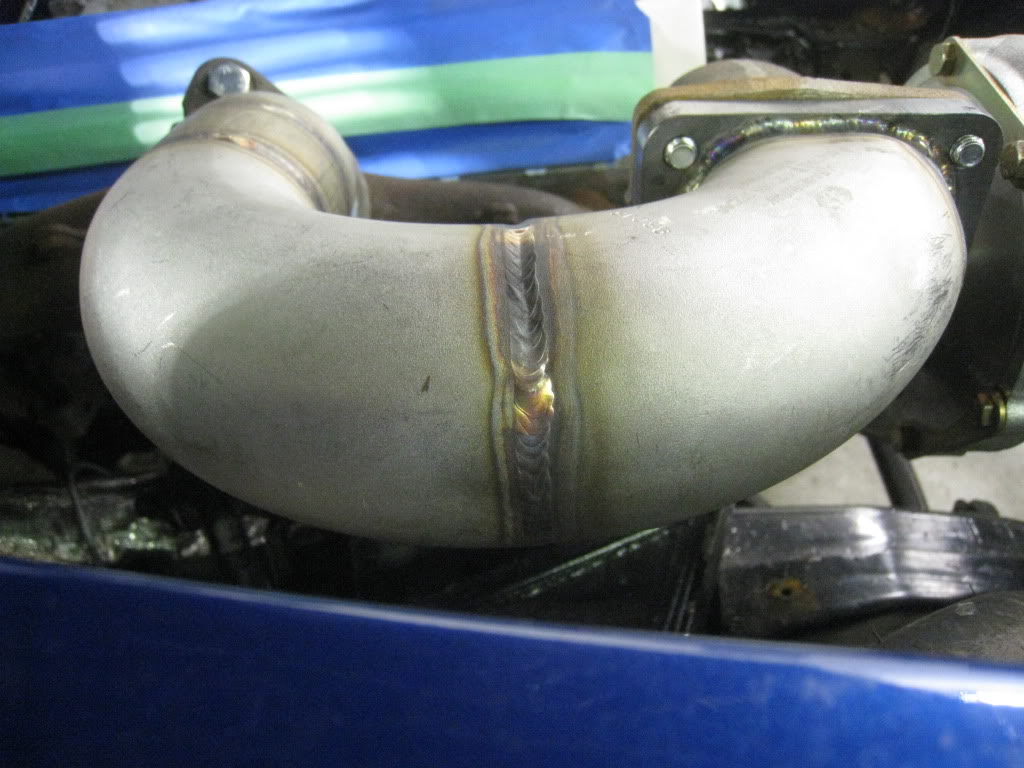
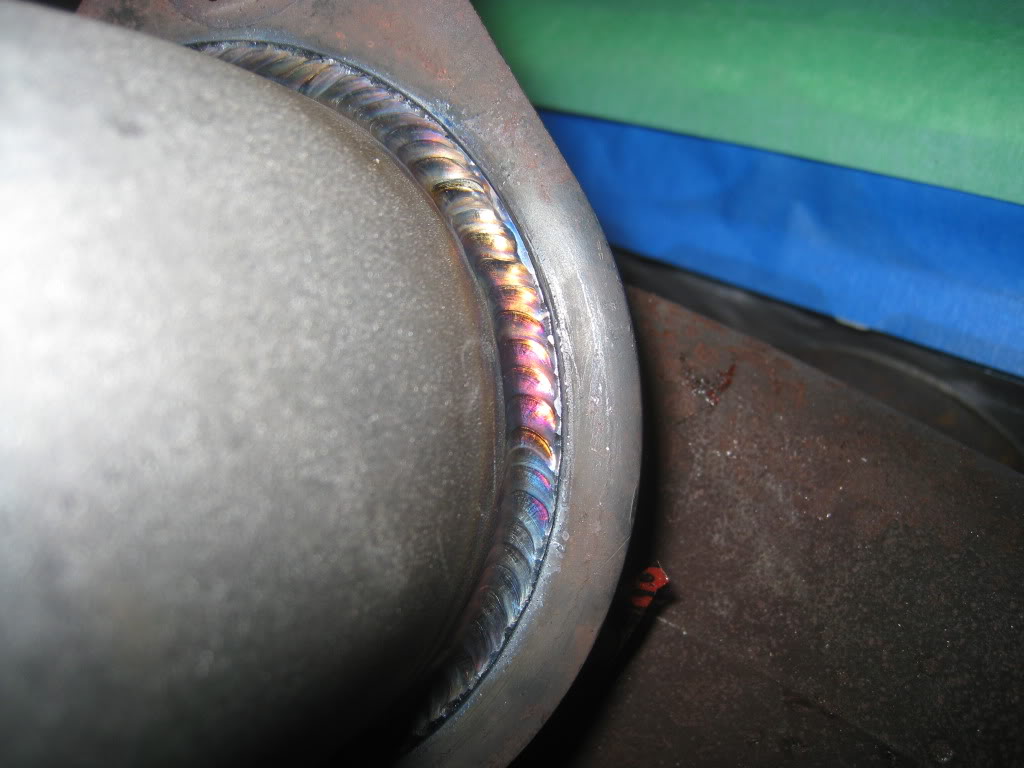
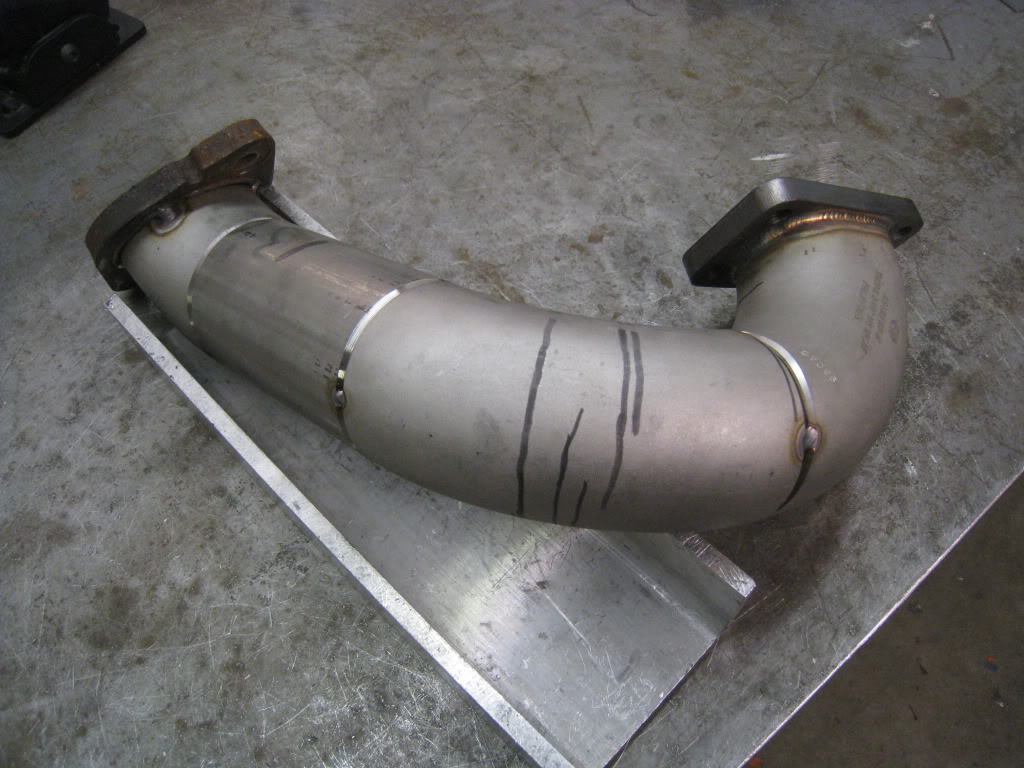
Got some work done today on the turbo to manifold pipes. I am using schedule 10 2.5" stainless steel pipe for these. As always a big thanks goes out to Mike and Ryan at Custom Metalcraft.
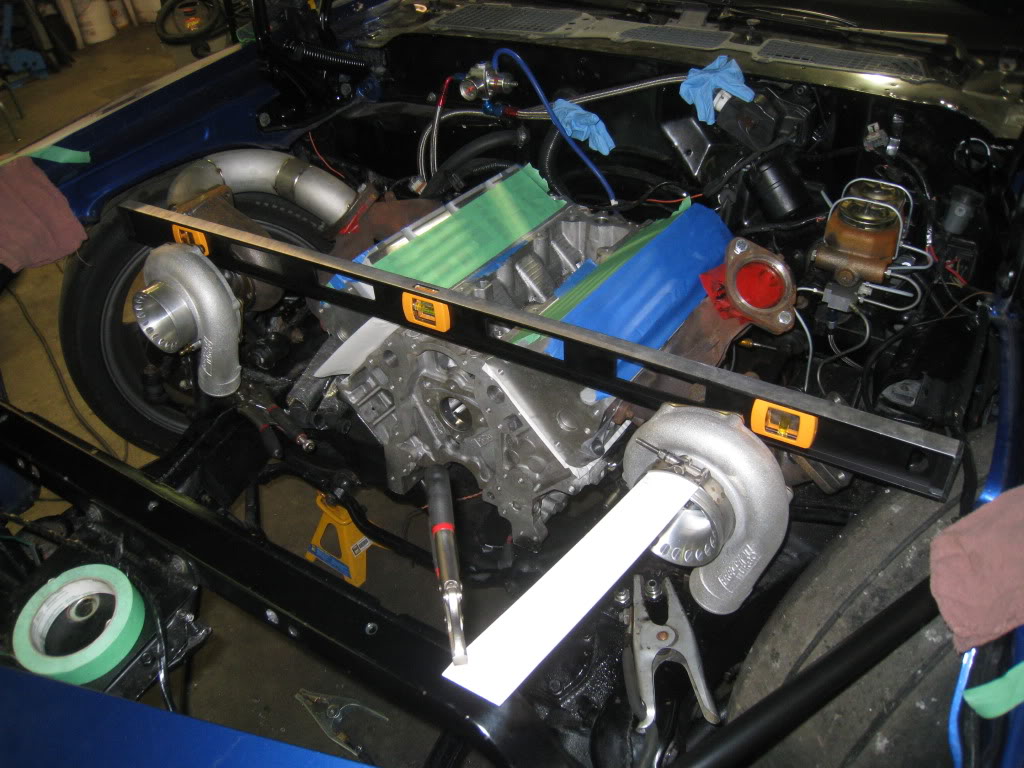
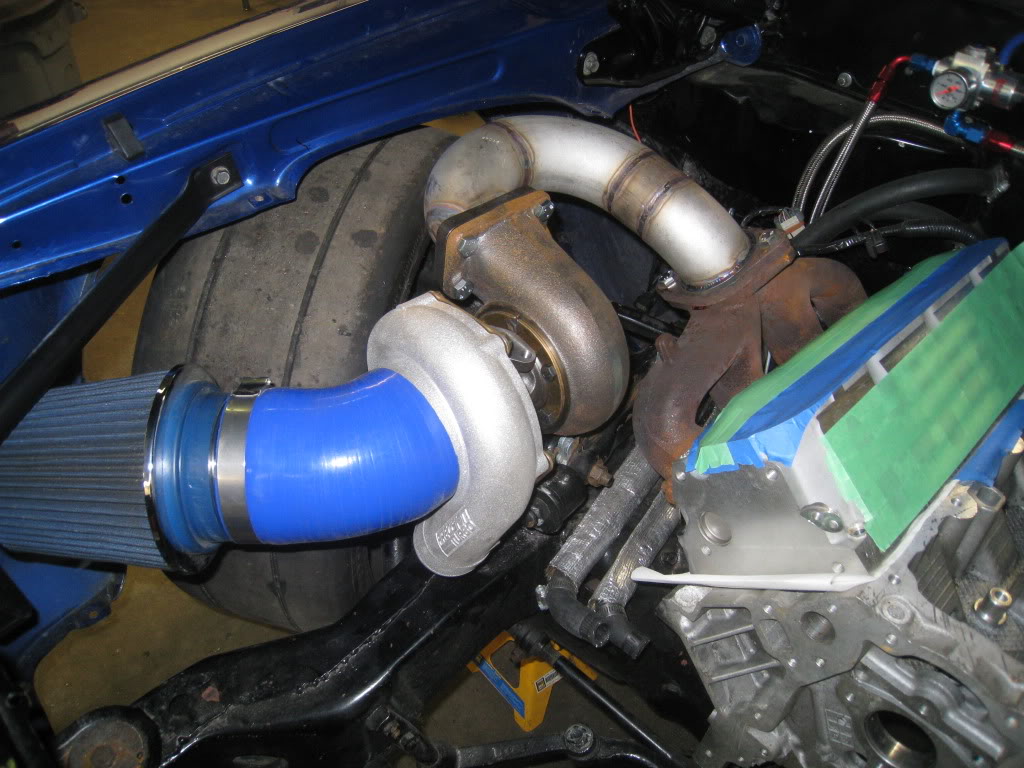
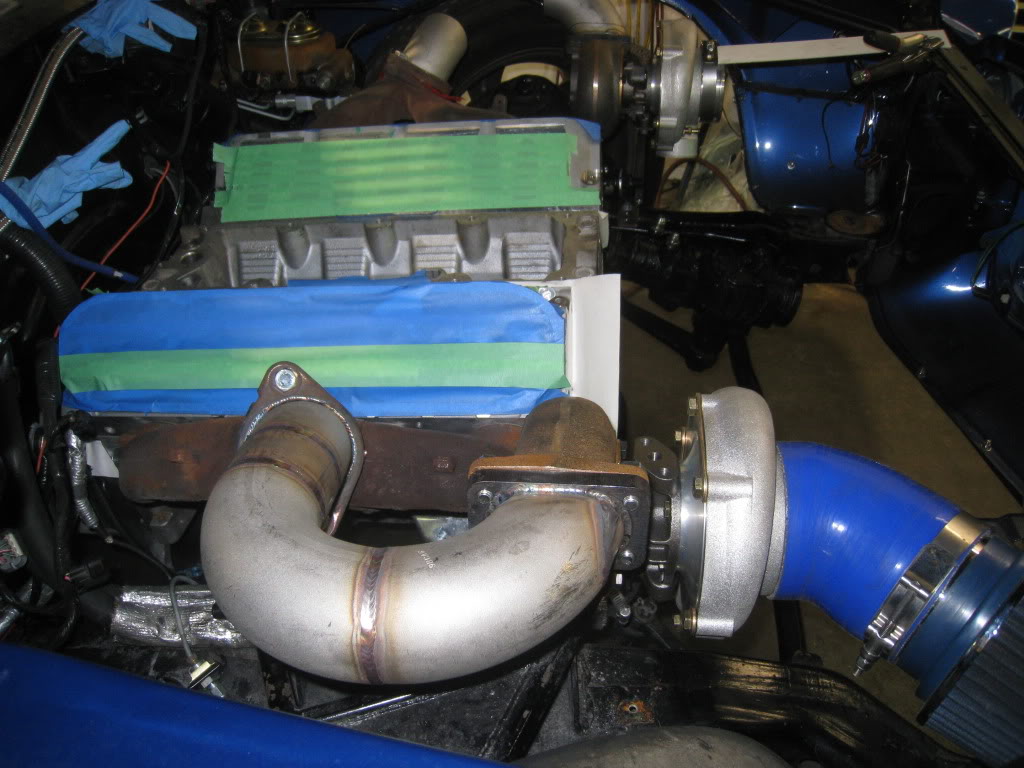
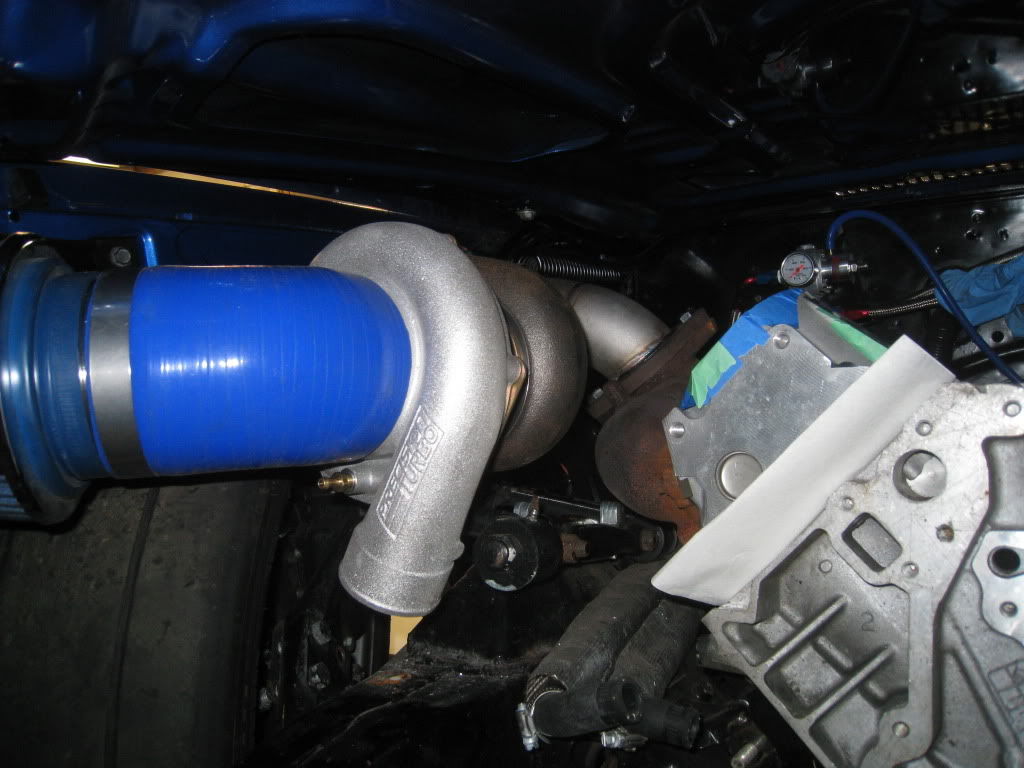
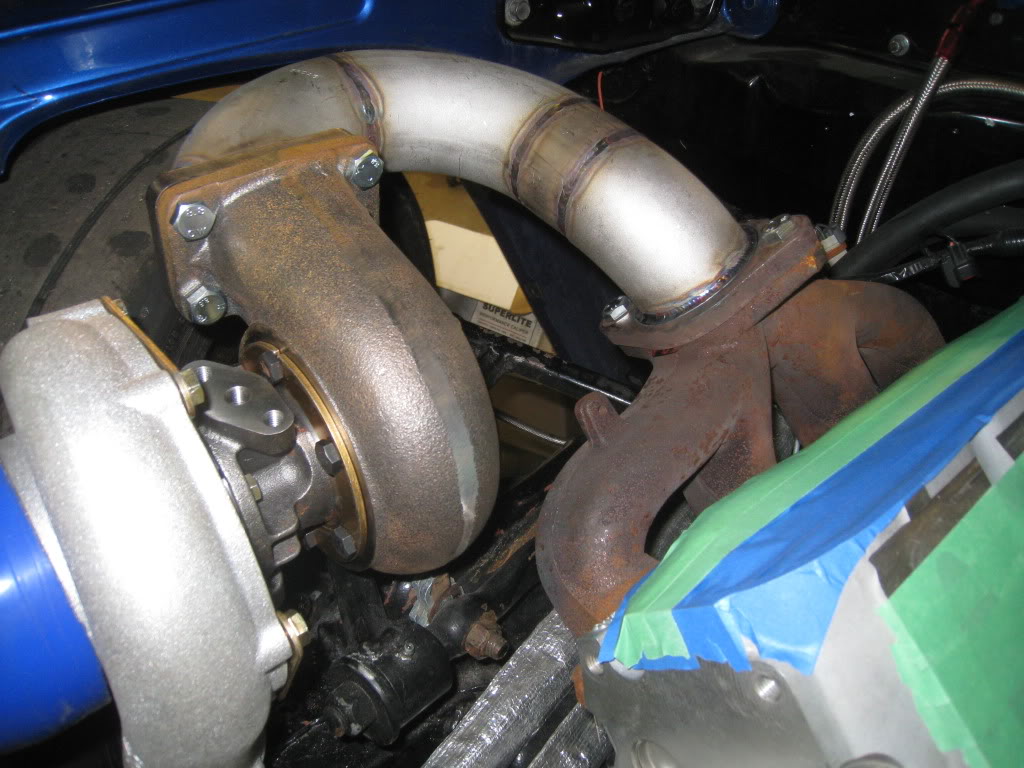
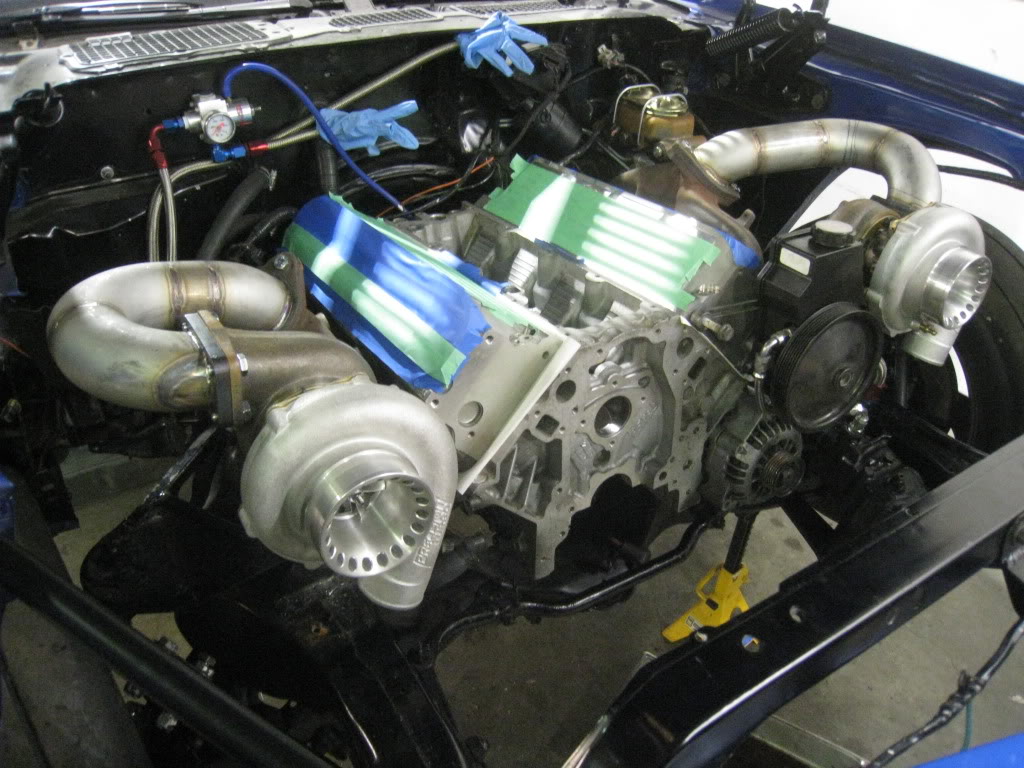
Turbos mocked up, passenger side was the more difficult side, so did that first.
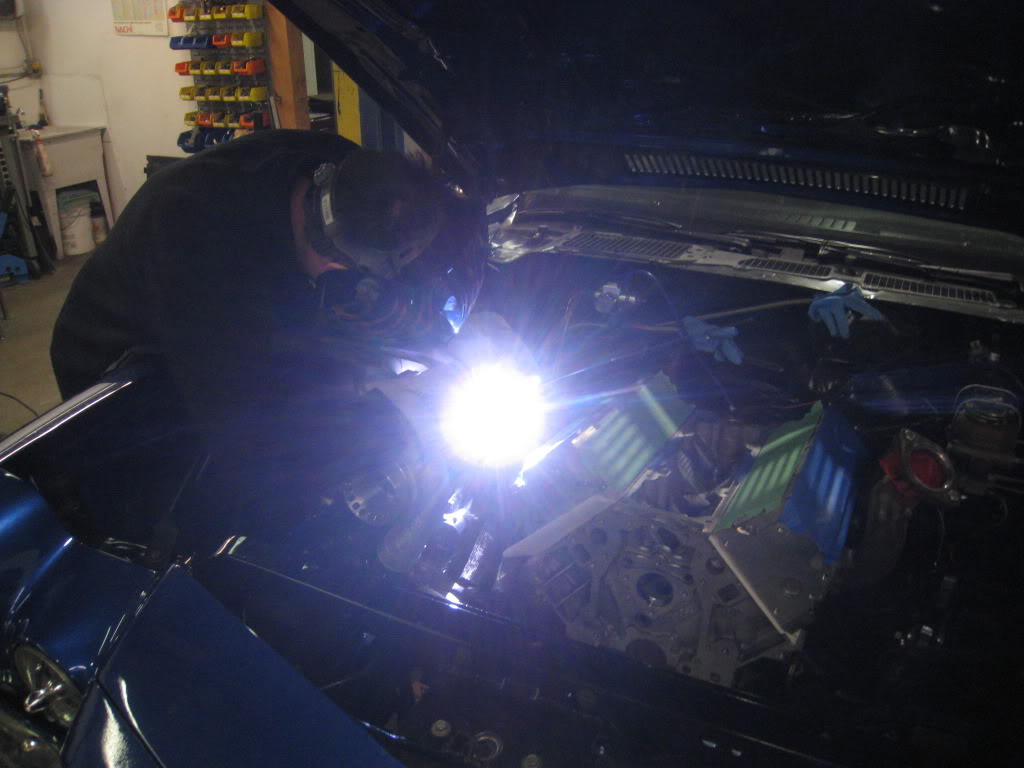
Some various pics of the process.

I did all the mock up with the springs removed from the front suspension, and the wheels on and jacked up to bottomoed out with the wheel turned both ways to be sure there would be no clearance issues later. I will be making my own inner fenders. I also continually checked the clearance to the hood.
Turbos mocked up, passenger side was the more difficult side, so did that first.
Some various pics of the process.
I did all the mock up with the springs removed from the front suspension, and the wheels on and jacked up to bottomoed out with the wheel turned both ways to be sure there would be no clearance issues later. I will be making my own inner fenders. I also continually checked the clearance to the hood.
03-02-2011, 11:04 PM
#335
11 Second Club
Thread Starter
Join Date: Mar 2008
Location: New Westminster, B.C., Canada
Posts: 445
Likes: 0
Received 1 Like
on
1 Post
Its not all good, I'm broke. I can only do this stuff because I pre-bought all the parts when I was working. ***Lesson to be learned??? Stock up while you can!***
Some more pics...
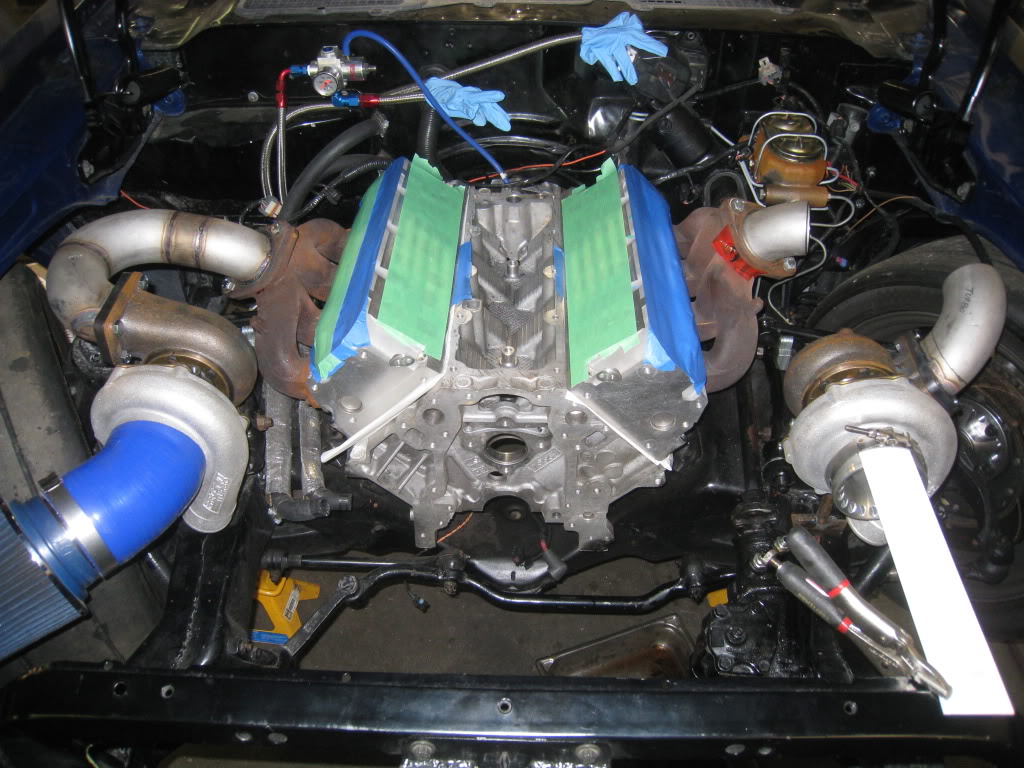
Trying to figure out exactly where to put the wastegates. These are Precision Turbo 46mm units.

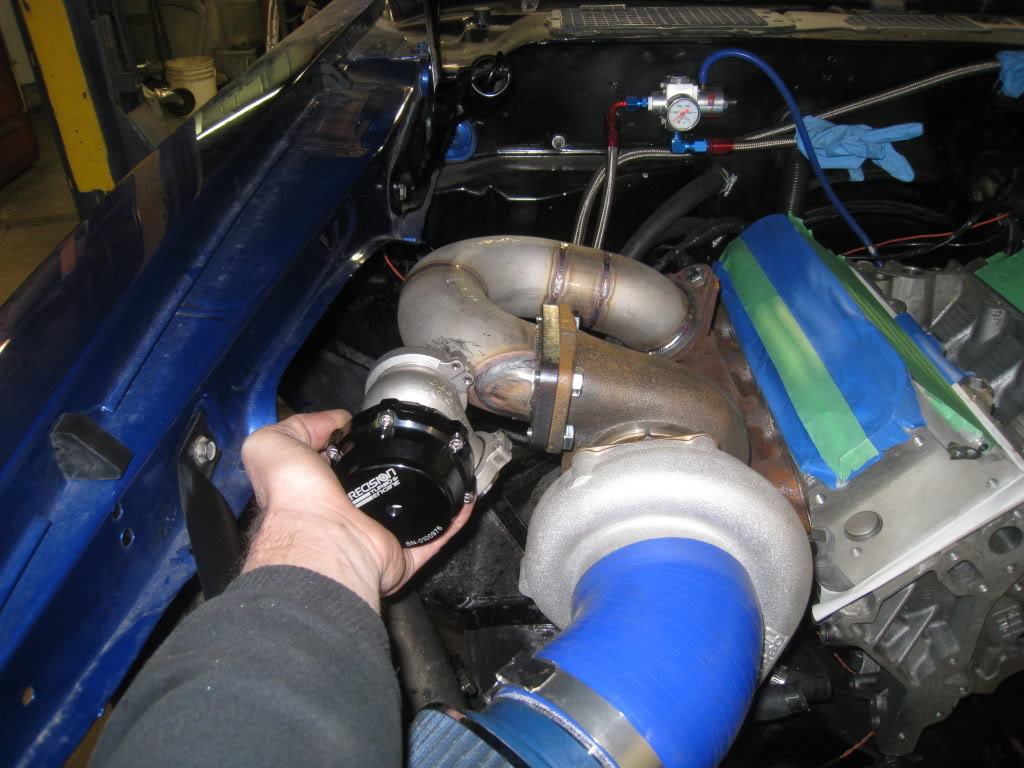
Some more pics...
Trying to figure out exactly where to put the wastegates. These are Precision Turbo 46mm units.
 03-03-2011, 10:06 PM
#338
11 Second Club
Thread Starter
Join Date: Mar 2008
Location: New Westminster, B.C., Canada
Posts: 445
Likes: 0
Received 1 Like
on
1 Post
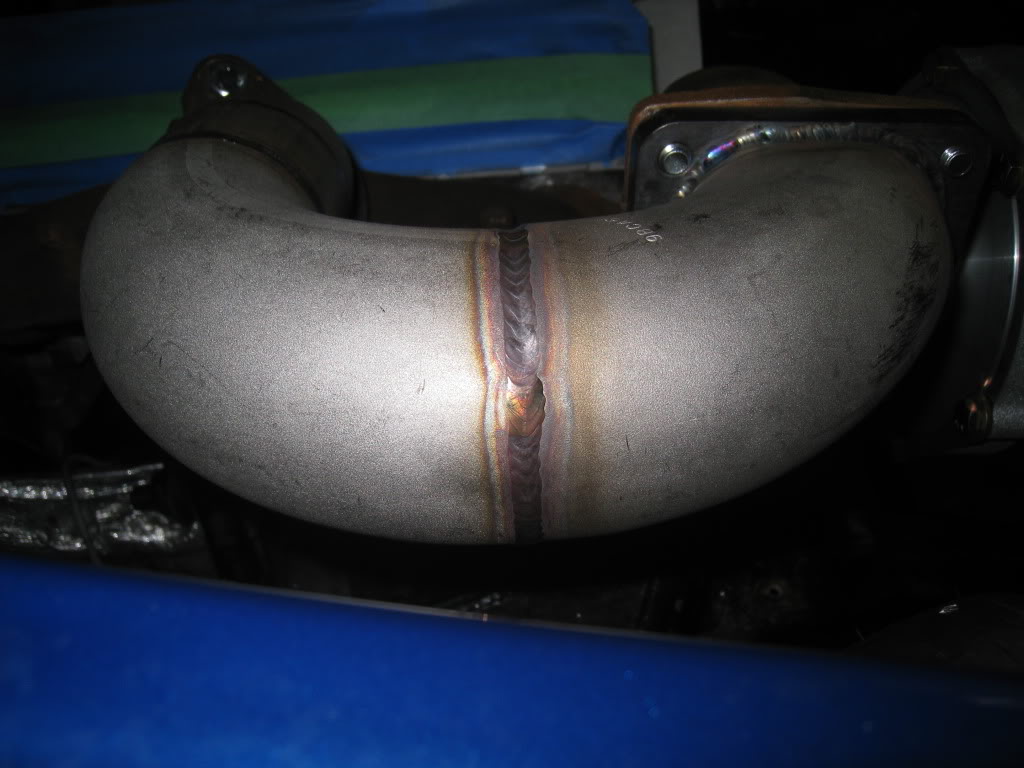
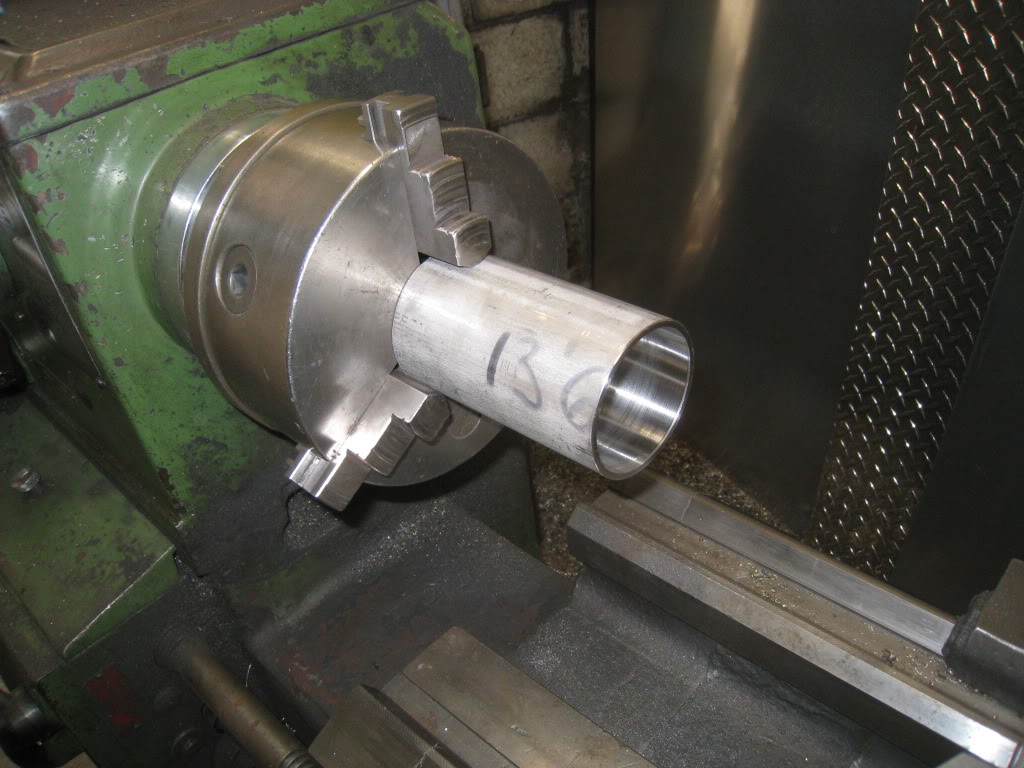
I got the other side done today... YAY!!! I ran into an issue with my pipe though. Trying to find schedule 10, 2.5" stainless steel straight pipe was tough. Especially when you only need 6 inches of it. So tough that no one had it. One guy could get it, but I would have to buy a 20 foot length and he would still have to order it. Solution? Bought 6 inches of schedule 40, 2.5" pipe and spent a good hour on the lathe boring it out. Problem solved.
Pipe in lathe
Drivers side pipe before final welding
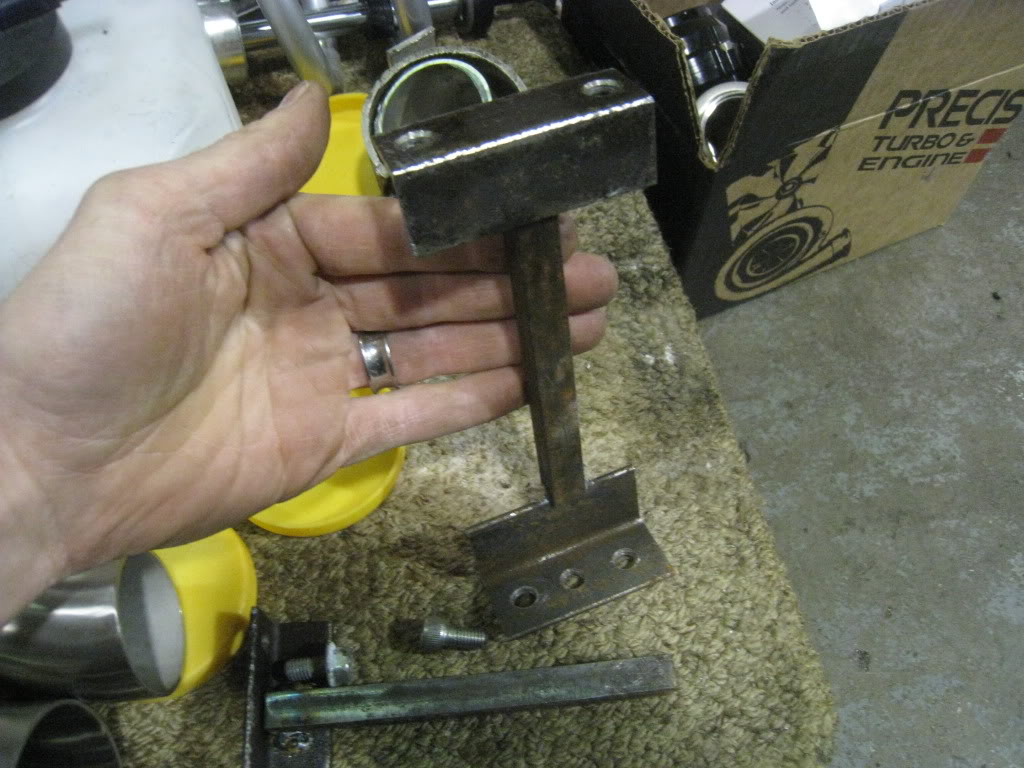
All mocked up
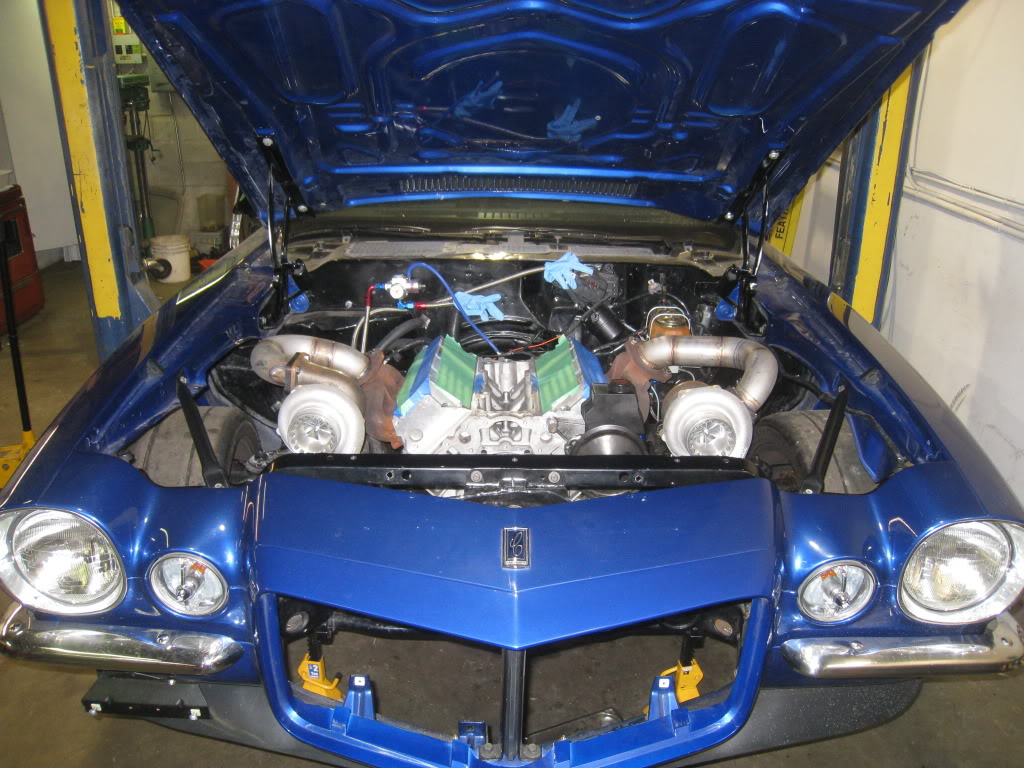

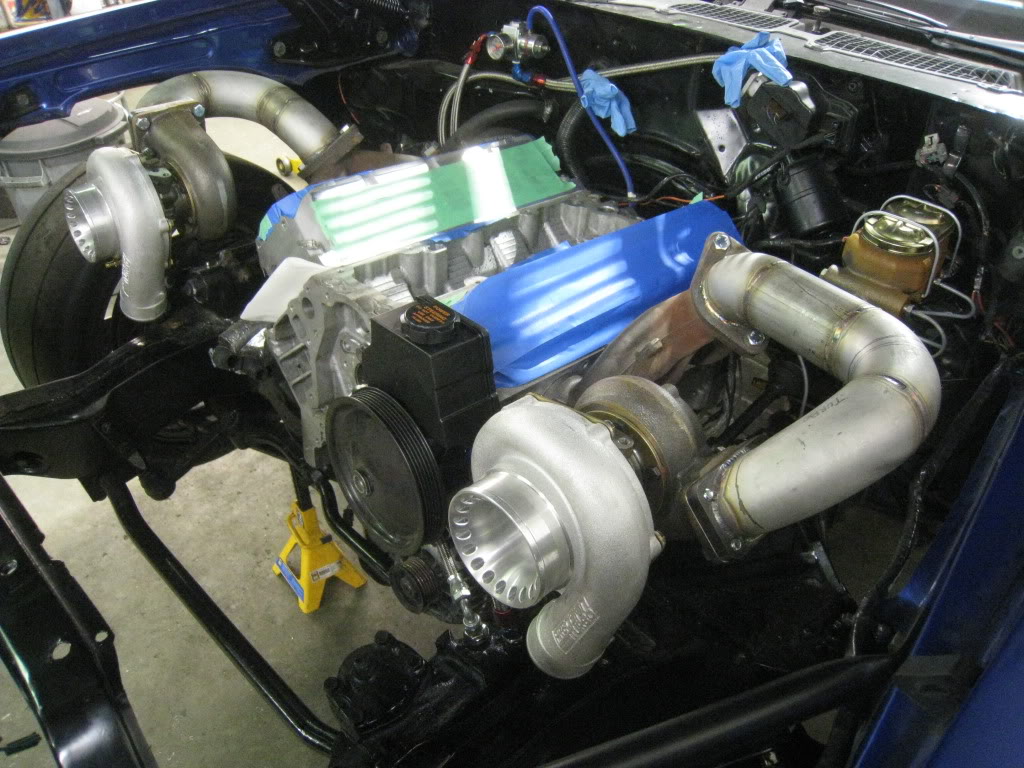
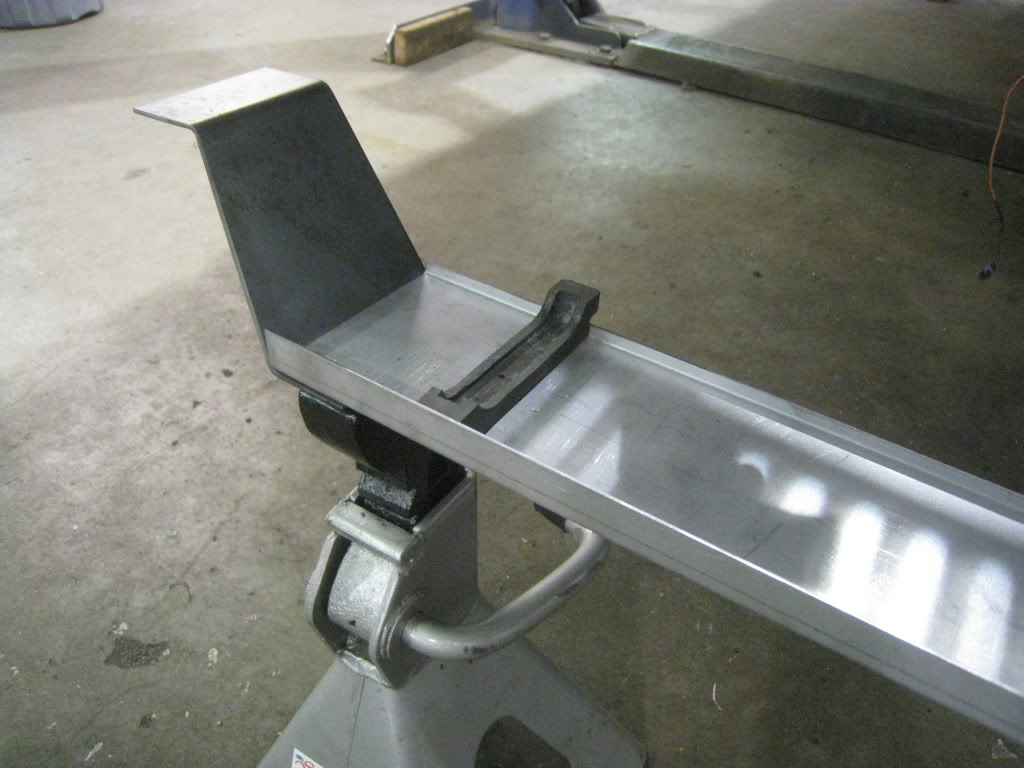
The stands I made to hold the turbo's in place while building pipe
Pipe in lathe
Drivers side pipe before final welding
All mocked up
The stands I made to hold the turbo's in place while building pipe


