
Cam only, winter upgrades. Bitch in on a diet


 11-12-2009, 08:49 PM
#182

the painted seats look good. That's a nice color as well. your right on the aluminum color jumping out. I usualy have them powder coated that black wrinkle finish. Blends in real nice with a carpeted interior then.
are those the racecraft seat brackets?
are those the racecraft seat brackets?
11-14-2009, 07:49 PM
#183
thanks robbie, you have been a big help Ive been following the little things you have done. And try to do what works "better" on these cars then the normal race/bracket cookie cutter car stuff EVERYone dose. My friend Nickcarlson that works and Newera, and with patrick budd right now at a new shop DillangerProcars. Like half of the guys from ProCar started it, and dose REALLY badass custom fab stuff too. Is that same way, he did the welding for my wolfe. but would like to have the time/money to do more stuff. One thing I'm going to add is some carbon fiber covers for my doorbars. The nice outlaw cars have now a days. My driver doorbar has some chips form the belt hitting it when I just jump out of the car. That and Im still wanted to order a quatermax 4130 fab9 and build one with a TA for this car. I think I could save 50-65#s over my s60, mild steel random tech TA I have still. What do you think about that?
Yes there the racecraft rails. if you notice in the pics, I cut them down a little. I still have 2 holes to move them forward/back. But didnt need them to be so long with 5 holes and longer then the seat, so should look a little more custom. And trimmed the bottom of them a little. They still have a profile the follows the floorpan. They probally just used the same profile of them as they weld on seat brakets that follow the floor shape. But with a carpet I think it was pushing the carpet down to much into the foor profile making it wavy.
And I drilled the 3 hole saw holes for something trick looking.
The passenger seat is hard to move back far with the way the floor is tight on the side of the concel. Before I painted everything I wanted to move the passenger seat back a little more then those seat brackets would let you. That one bracket they had to make different and its one piece. I was going to cut a little triangle out of the back inside corner of the seat and weld a patch, you wouldn't see or feel it under the cover. But all I had to do was use a mini sledge to dent the bottom square corner were the weld seam is that seat. That let you move the bracket back another 3/4 inch and drill a new set of holes. And then the other side bracket is like the other 3 so you have enough holes to line them up one more back.
But really, I would like to just weld some alum legs to the seat, with the position I use it at now I really like. Make the car more simple to work on, less bolts and save a little weight. But I don't have a TIG myself, I just wanted to paint them to get them back in. There still some nice days this year.
11-15-2009, 09:26 PM
#184
the carbon covers for the door bars are nice. We use those in a lot of cars here. we use to use stainless tubing to do the same thing. The carbon is def. lighter though.
Im not a big dana fan. Hard to go wrong with a 9". If built right you can make it pretty light. I'm building a sheetmetal rear for a 4th gen car here real soon once I finish a GTO I have in the shop. If you put good parts in the 9" you'll be glad you went that route.
The seat brackets look good.
Im not a big dana fan. Hard to go wrong with a 9". If built right you can make it pretty light. I'm building a sheetmetal rear for a 4th gen car here real soon once I finish a GTO I have in the shop. If you put good parts in the 9" you'll be glad you went that route.
The seat brackets look good.
11-17-2009, 12:00 AM
#185
Ya, thanks.
So if I ditch the dana, and make a fab9. I would deffinalty like to make the TA the gose right to tabs on the housing. And elimanate to whole braket, to a stock style bracket bolted to the housing deal.
http://www.racecraft.com/bmz_cache/d...age.122x81.jpg
http://www.racecraft.com/bmz_cache/0...age.122x81.jpg
But is that still stock suspention??? Like the MWC, and the racecraft style fab9s are right now?
I look under some of the 10.5, 275 drs "stock suspention" cars, and shocks inside, simi min tubs, 4-5 LCA holes on both ends, narrowed the rod end width. the fox bodys are full 4links lol
I'm just thinking for down thy road what I'm gona do with the car, you know.
haha my roomate put this on a local site.
http://farm3.static.flickr.com/2514/...741f6ee9_o.jpg
So if I ditch the dana, and make a fab9. I would deffinalty like to make the TA the gose right to tabs on the housing. And elimanate to whole braket, to a stock style bracket bolted to the housing deal.
http://www.racecraft.com/bmz_cache/d...age.122x81.jpg
http://www.racecraft.com/bmz_cache/0...age.122x81.jpg
But is that still stock suspention??? Like the MWC, and the racecraft style fab9s are right now?
I look under some of the 10.5, 275 drs "stock suspention" cars, and
shocks inside, simi min tubs, 4-5 LCA holes on both ends, narrowed the rod end width. the fox bodys are full 4links lolI'm just thinking for down thy road what I'm gona do with the car, you know.
haha my roomate put this on a local site.
http://farm3.static.flickr.com/2514/...741f6ee9_o.jpg
Last edited by studderin; 11-17-2009 at 12:41 AM.
11-17-2009, 06:15 AM
#186

Some stock suspension classes will bitch if the tq arm doesn't mount to the rear the same way the factory one does. I talked to a couple chassis guys down south, and that's the reason Madman still has his bolt to the big bulky chunk of cast iron.
IMO it's somewhat questionable... and I don't know if they are going to check it that close. As long as the lca'a are still in the factory tab's, and the car has a tq arm I don't think they will give you much of a hard time.
Shock relocation is generally o.k, you can move the phb too some, as long as you still have it on the car again, you should be o.k.
11-17-2009, 10:31 PM
#187
I've never ran into an issue with a torque arm on the housing. your going to have to cut the floor up though if the car sits low. If your starting from scratch, I would put it straight to the housing. That big cast metal piece bolted to the housing method is a pretty antiquated way of doing it. I can see if its required by the rules though.
11-21-2009, 07:58 PM
#190
10 Second Club
iTrader: (16)

Join Date: May 2009
Location: Miami, FL
Posts: 434
Likes: 0
Received 0 Likes
on
0 Posts

Just got done reading this thread and I have some observations......
1. That steering wheel is badass! I have got to get one of those!
2. Your car has come out very nice, nice work, you should be proud.
3. I need to take some more weight off of my car
I noticed that you had some issues with mounting that wheel in the car, Is there anything you would do differently if you had to do it again?
12-09-2009, 08:56 PM
#191
thanks,
the aftermarket wheel hub (grant/sparco/momo) I htink are all the same and are for a 3rd gen. When you put them on they will bottem out into the plastics, coversing the guts of the cloume and rub. I searched and most guys just put a big washer over the shaft behind the hub to space it out.
I put the hub in a lath, and turned down a OD to fit into the plastic cover. So it dosn't rub, and had a overlap so you can't see into the gap if it was spaced out.

 01-11-2010, 08:31 AM
#195
11 Second Club
iTrader: (15)

Join Date: Aug 2004
Location: Rochester,N.Y.
Posts: 157
Likes: 0
Received 0 Likes
on
0 Posts
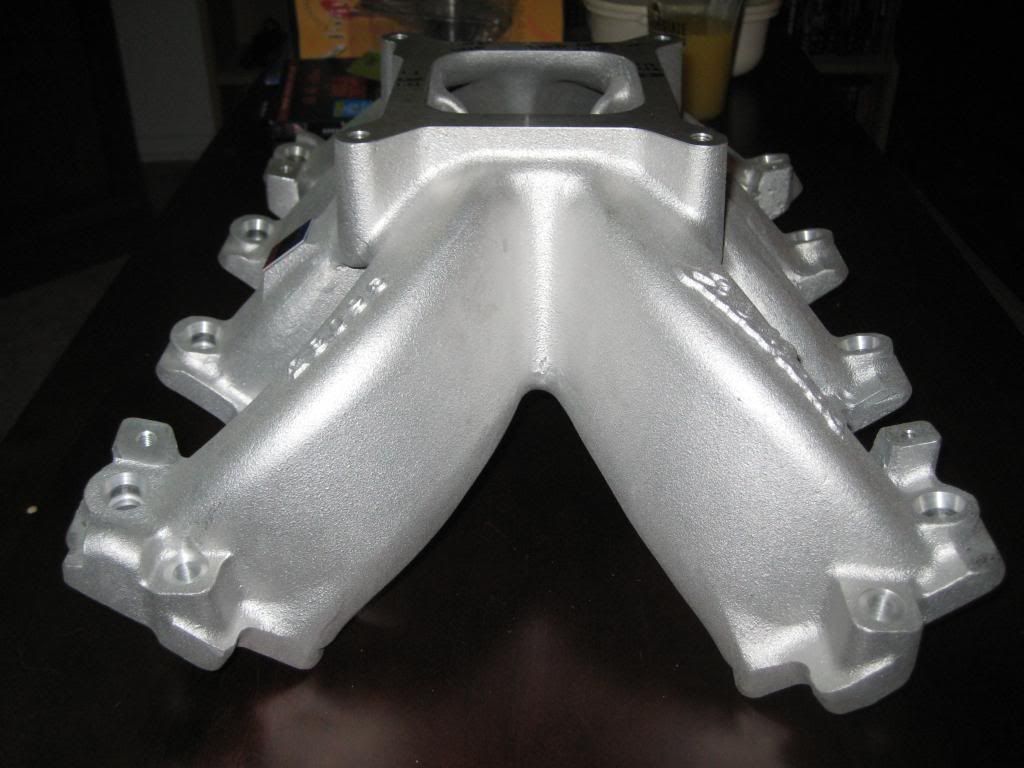
I want one of those intake's,Johnny.
I'm getting ready to start gutting/cutting my car up.
Oh yeah,this is an awesome thread!!!! Congrats!!! A lot of great info
I'm getting ready to start gutting/cutting my car up.
Oh yeah,this is an awesome thread!!!! Congrats!!! A lot of great info
01-11-2010, 10:32 PM
#198
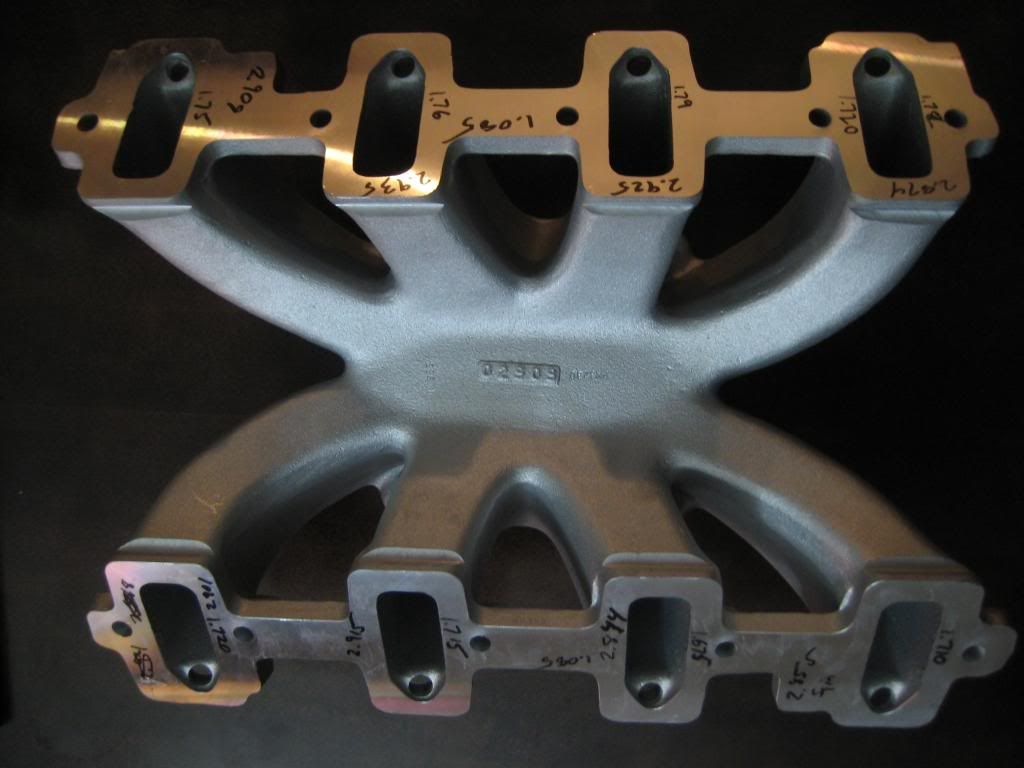
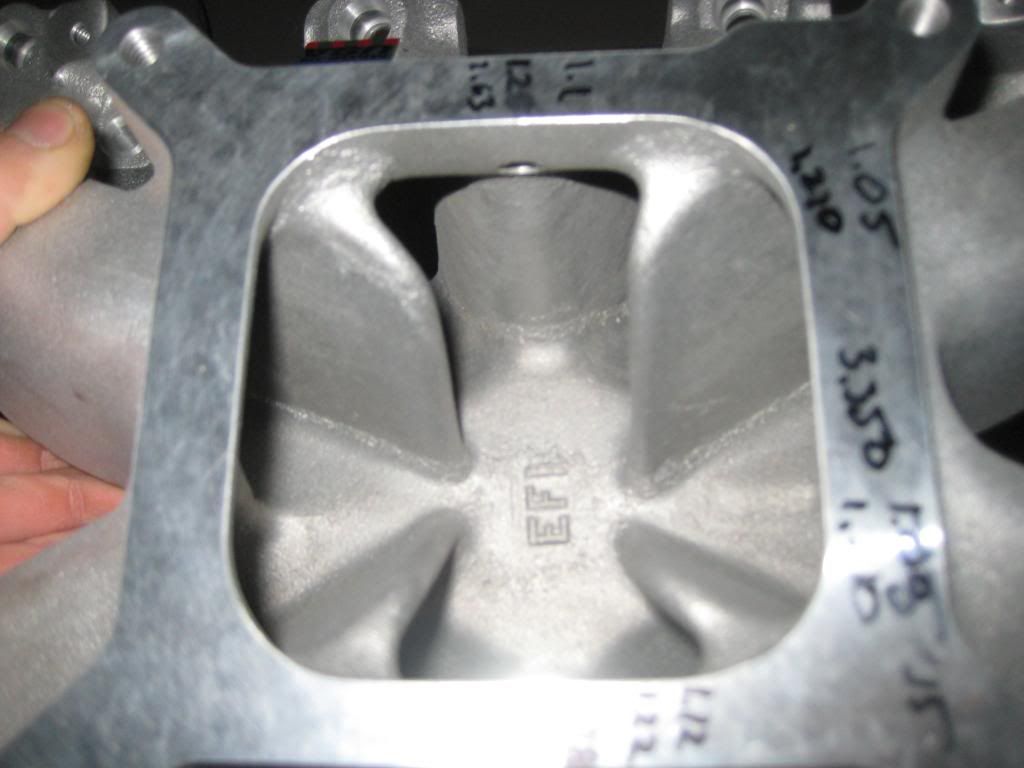
I'm gona do some weight saving on the intake, with a Bport 
Its bigger then stock heads tho. as cast this super vic is 1.08 x 2.7x
Stock heads are only .950ish at the pushrod pinch depending on the parting line/shift. The inlet is only 1.01
Its bigger then stock heads tho.
as cast this super vic is 1.08 x 2.7x Stock heads are only .950ish at the pushrod pinch depending on the parting line/shift. The inlet is only 1.01
Last edited by studderin; 01-12-2010 at 06:34 PM. Reason: corrected runner sizes
 01-12-2010, 04:22 PM
#200
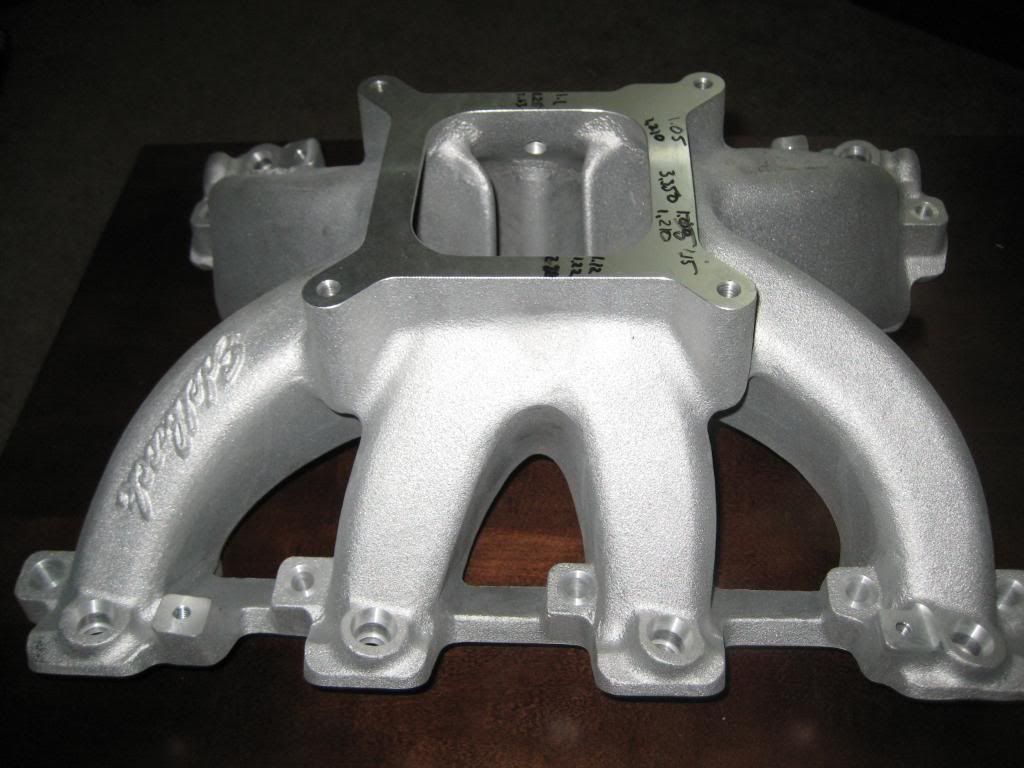
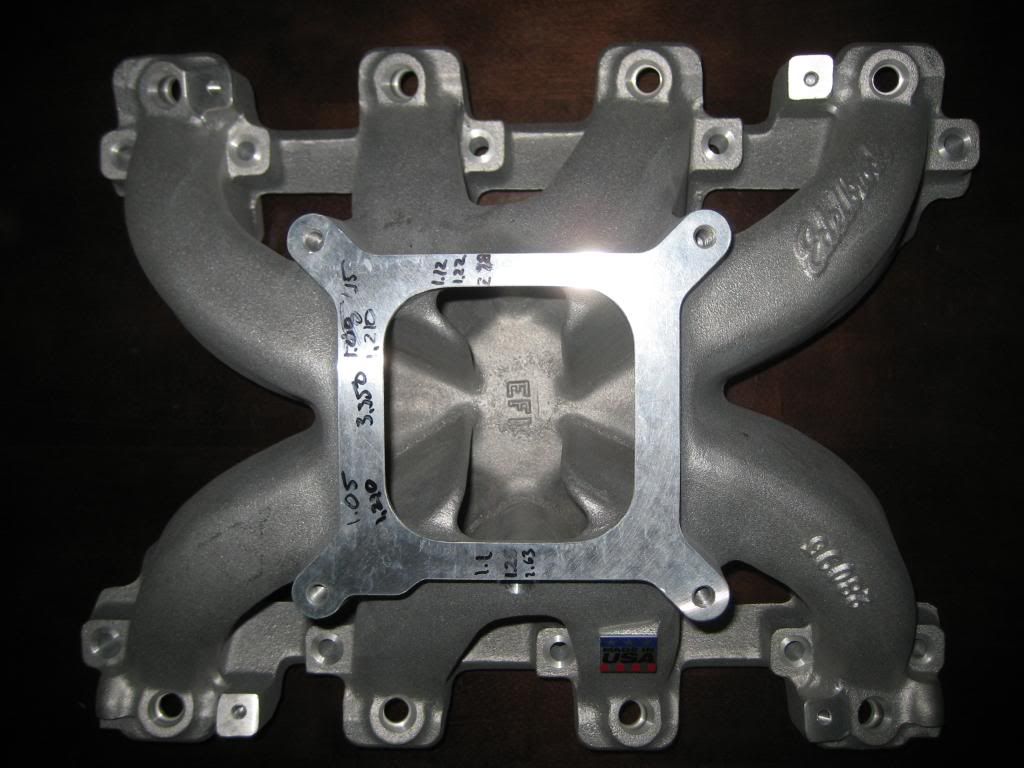
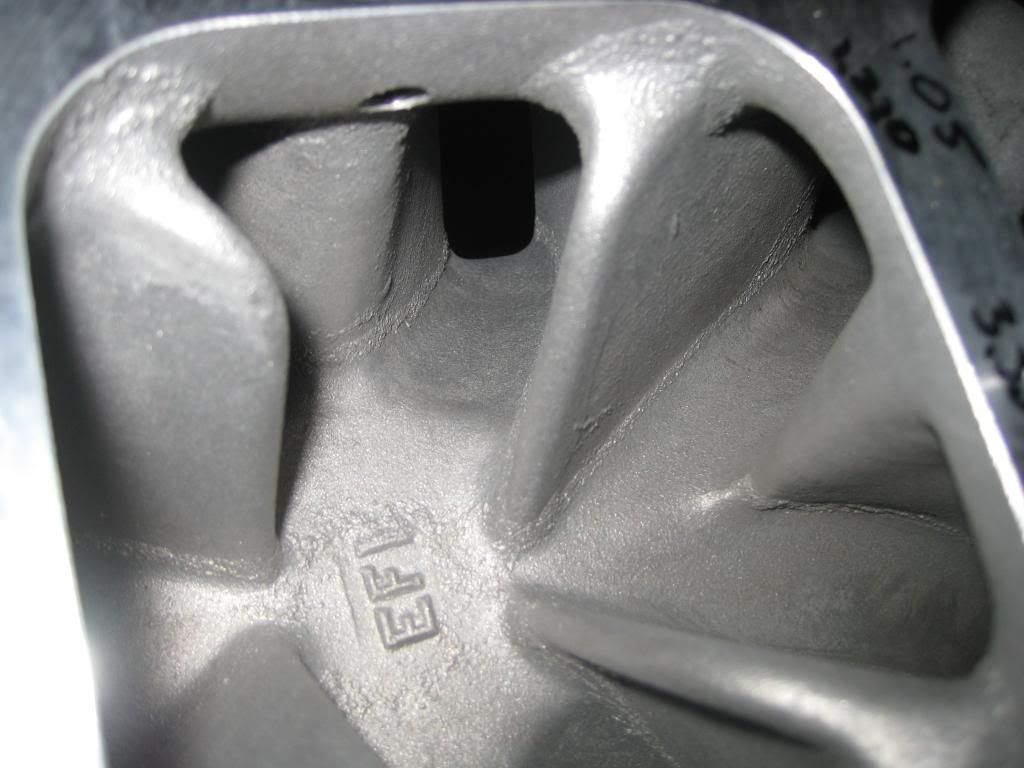
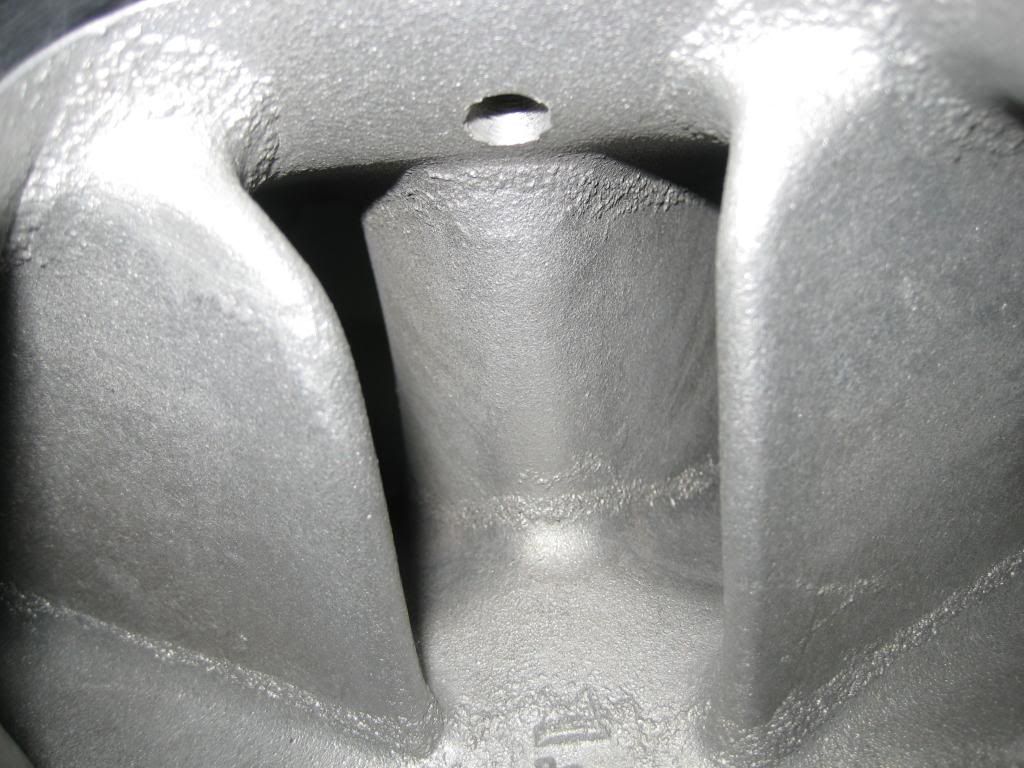
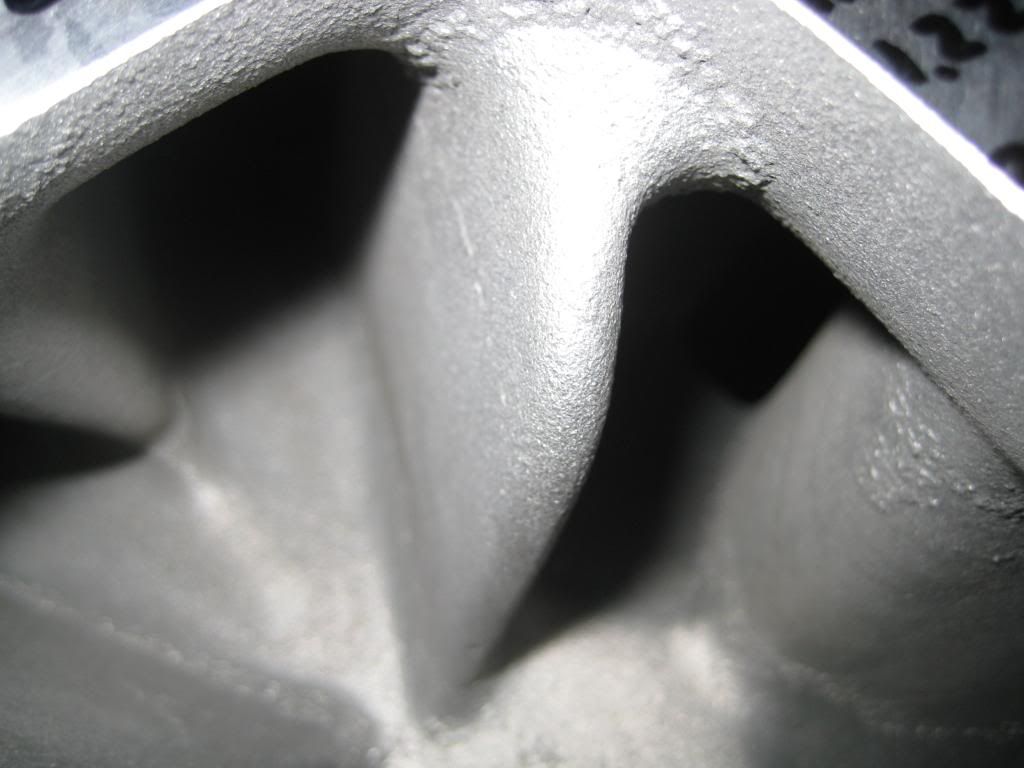
don't worry about the intake being bigger than the heads it won't hurt flow...it is only when it is the other way around does it hurt the flow...I have done multiple test with airfilters and tube to verify this at work on our flow machine...
that think should rip when it is done...looks to need some work...those internal walls look very restrictive...I would love to get a hold of one of those and do some flow testing on it...what setup are you going with... Tb or carb...elbow?
that think should rip when it is done...looks to need some work...those internal walls look very restrictive...I would love to get a hold of one of those and do some flow testing on it...what setup are you going with... Tb or carb...elbow?
Last edited by chrs1313; 01-12-2010 at 09:26 PM.