Drag Racing Tech
Sponsored by:
Sponsored by:

Couple quick pics of my Camaro project

Thread Tools
 
Search this Thread
 
Old 08-27-2009, 03:20 PM
  #21  
TECH Fanatic
iTrader: (1)
 
kmracer's Avatar
 
Join Date: Jul 2006
Location: Washington DC
Posts: 1,444
Likes: 0
Received 0 Likes on 0 Posts

Default


........... ^ more pics!
Old 08-28-2009, 02:33 PM
  #22  
FormerVendor
Thread Starter
iTrader: (18)
 
Jon@Texas-Speed's Avatar
 
Join Date: Sep 2004
Location: Lubbock, TX
Posts: 3,043
Likes: 0
Received 2 Likes on 2 Posts
Default

haha... I'll get some more up for ya tonight or tomorrow.
Old 08-28-2009, 09:50 PM
  #23  
11 Second Club
iTrader: (44)
 
promod1955's Avatar
 
Join Date: Sep 2002
Location: Virginia Beach, VA
Posts: 1,312
Likes: 0
Received 2 Likes on 2 Posts

Default

looks good. I like the black front rims and the black on the rear bead locks
Old 08-29-2009, 09:25 AM
  #24  
"The Drag Racing Director"
iTrader: (10)
 
Coach 02 A3 Z/28's Avatar
 
Join Date: Jan 2002
Location: Tomball, TX.
Posts: 7,538
Received 4 Likes on 4 Posts

Default

Great looking wheels. Good luck. You have a PM.

Coach
Old 08-29-2009, 10:32 AM
  #25  
TECH Fanatic
iTrader: (4)
 
2XR95Z28's Avatar
 
Join Date: Jul 2007
Location: Davenport, IA
Posts: 1,351
Likes: 0
Received 0 Likes on 0 Posts

Default

that wheel and tire set up looks amazing! Love the car...
Old 08-29-2009, 04:46 PM
  #26  
FormerVendor
Thread Starter
iTrader: (18)
 
Jon@Texas-Speed's Avatar
 
Join Date: Sep 2004
Location: Lubbock, TX
Posts: 3,043
Likes: 0
Received 2 Likes on 2 Posts
Default

Thanks guys!

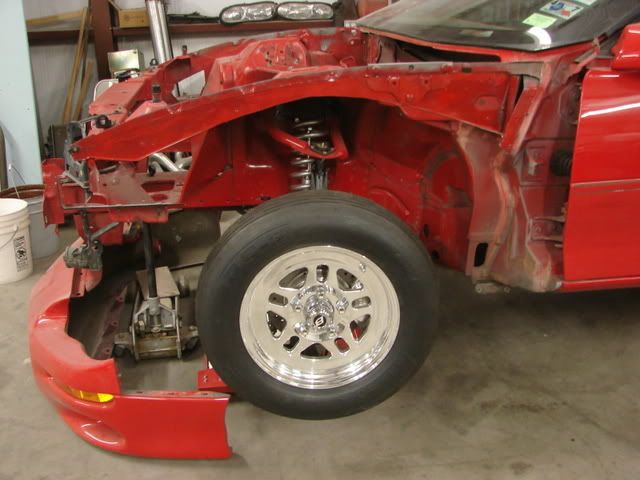
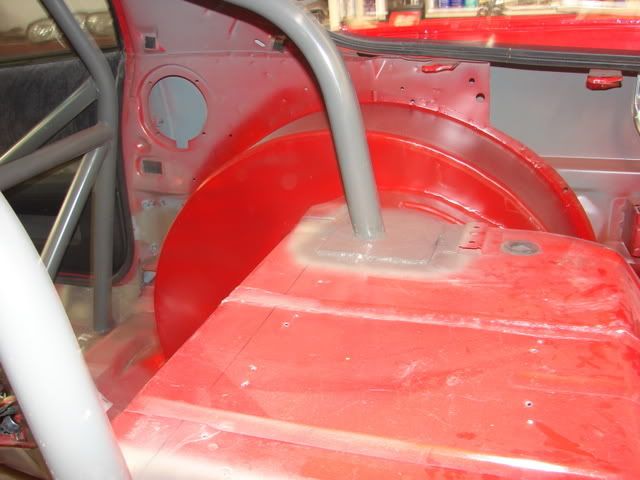
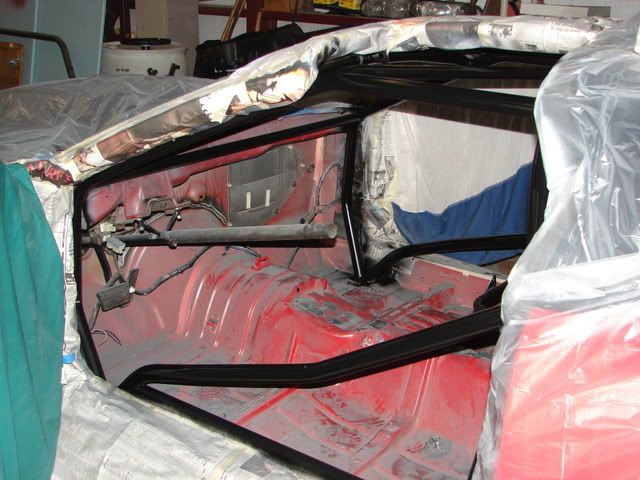
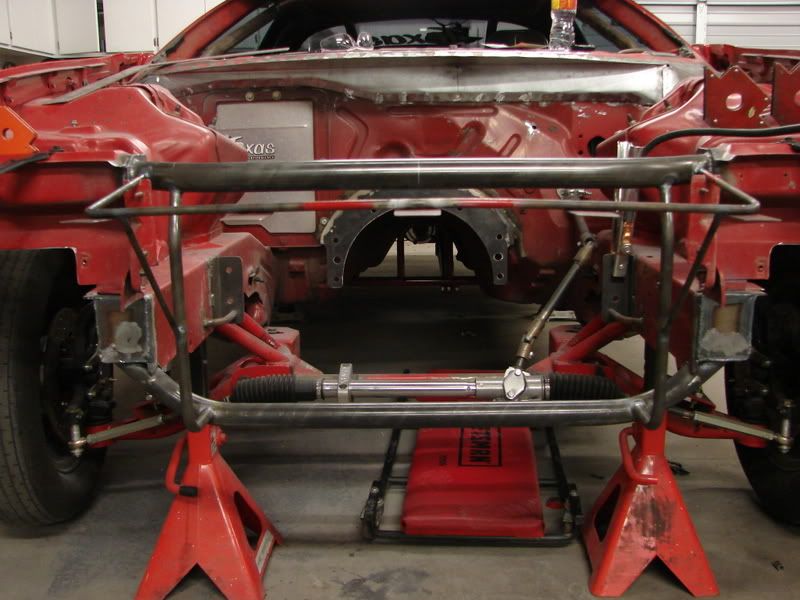
Here's what started this mess. A nitrous backfire ruined the previous setup.


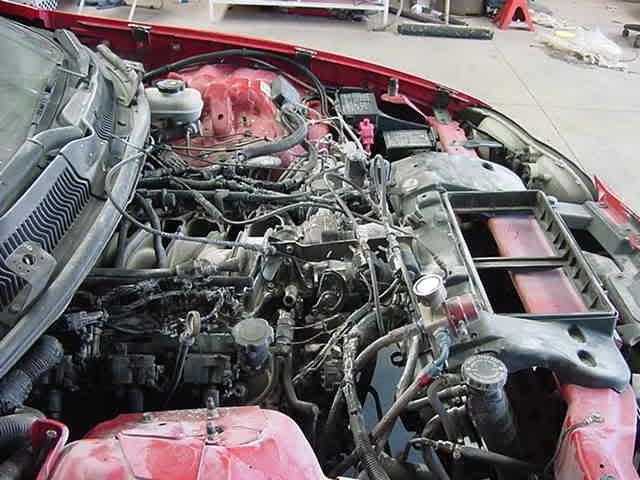
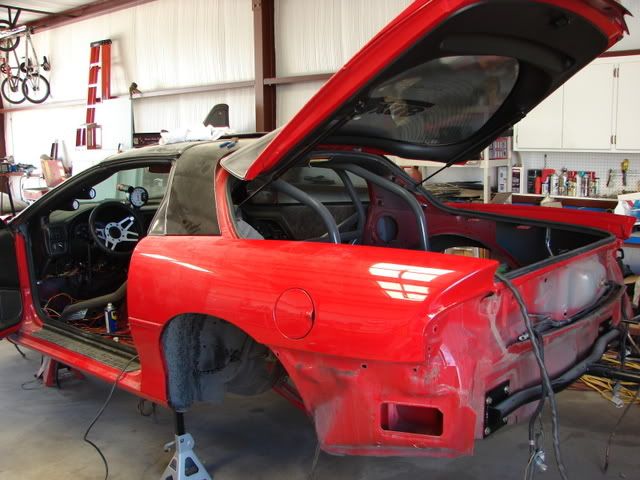
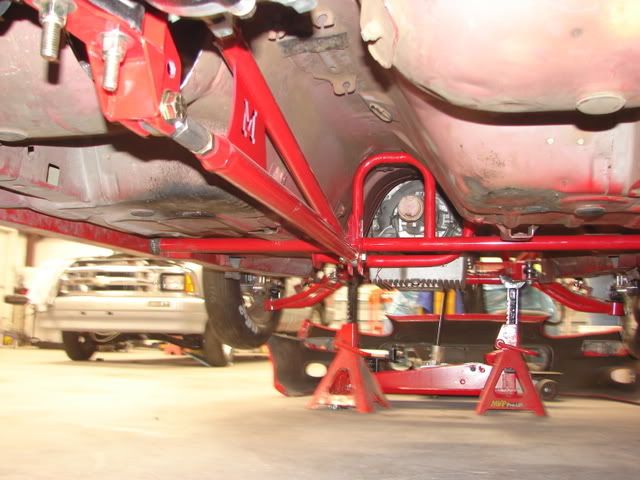
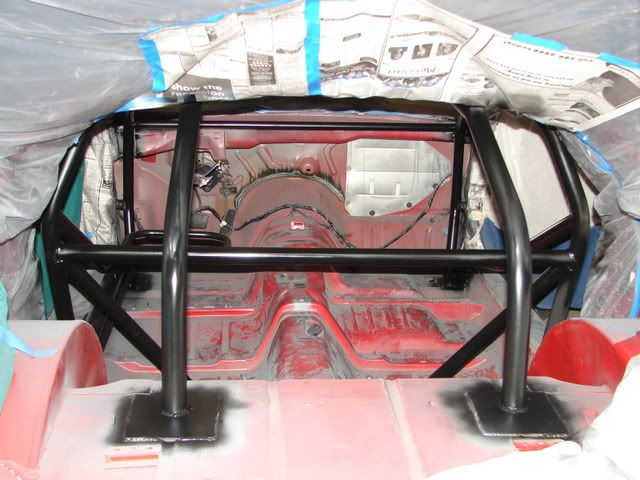
Basically tore the car apart for minitub and 10 pt. install.


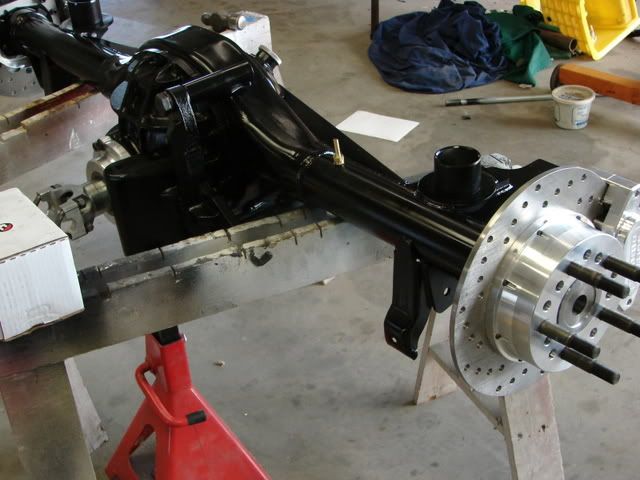
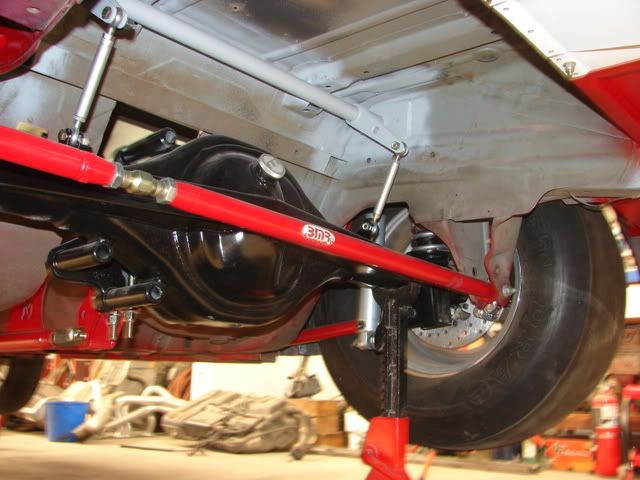
New rearend in and Wolfe Anti-rollbar


Last edited by Jon@Texas-Speed; 08-30-2009 at 02:28 PM.
Old 08-29-2009, 04:50 PM
  #27  
FormerVendor
Thread Starter
iTrader: (18)
 
Jon@Texas-Speed's Avatar
 
Join Date: Sep 2004
Location: Lubbock, TX
Posts: 3,043
Likes: 0
Received 2 Likes on 2 Posts
Default


Madman TA


Front Suspension


Old 08-29-2009, 04:54 PM
  #28  
FormerVendor
Thread Starter
iTrader: (18)
 
Jon@Texas-Speed's Avatar
 
Join Date: Sep 2004
Location: Lubbock, TX
Posts: 3,043
Likes: 0
Received 2 Likes on 2 Posts
Default

Minitubs in and Fuel Cell


Cage and Paint


Motor Plate


Last edited by Jon@Texas-Speed; 08-30-2009 at 02:22 PM.
Old 08-29-2009, 05:03 PM
  #29  
FormerVendor
Thread Starter
iTrader: (18)
 
Jon@Texas-Speed's Avatar
 
Join Date: Sep 2004
Location: Lubbock, TX
Posts: 3,043
Likes: 0
Received 2 Likes on 2 Posts
Default

Front End


Carpet and interior starting to go back.


Finally a wheel swap gets us up to date!


Sorry for the bad pics on some. I'll post up more as I make more progress! Post up any questions or comments!

Thanks!
Jon
Old 08-29-2009, 09:46 PM
  #30  
TECH Enthusiast
iTrader: (43)
 
csjta2's Avatar
 
Join Date: Aug 2004
Location: Richmond, VA
Posts: 571
Received 0 Likes on 0 Posts

Default

Nice build!

How did you mount your midplate?
Old 08-30-2009, 12:18 AM
  #31  
10 Second Club
iTrader: (5)
 
DanZ28's Avatar
 
Join Date: Nov 2001
Location: Cali/Bay Area
Posts: 3,412
Likes: 0
Received 0 Likes on 0 Posts

Default

Very nice build!!
Old 08-30-2009, 02:27 PM
  #32  
FormerVendor
Thread Starter
iTrader: (18)
 
Jon@Texas-Speed's Avatar
 
Join Date: Sep 2004
Location: Lubbock, TX
Posts: 3,043
Likes: 0
Received 2 Likes on 2 Posts
Default

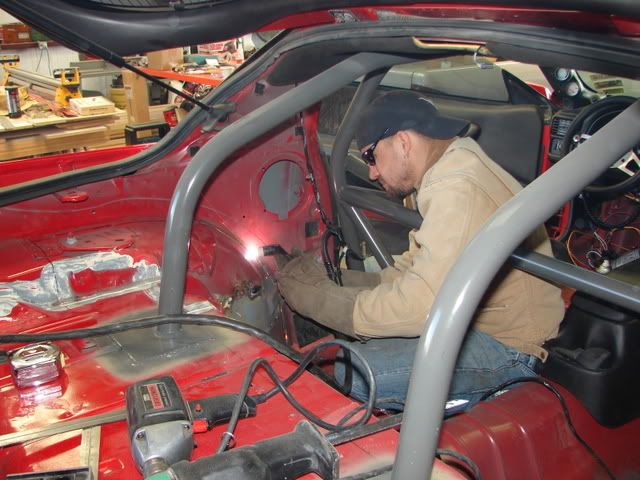
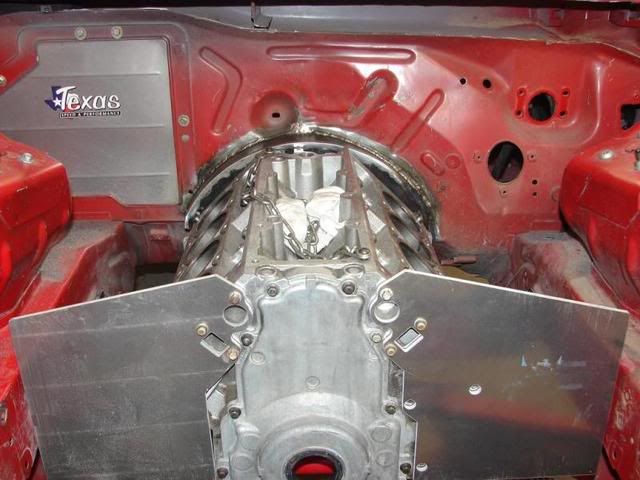
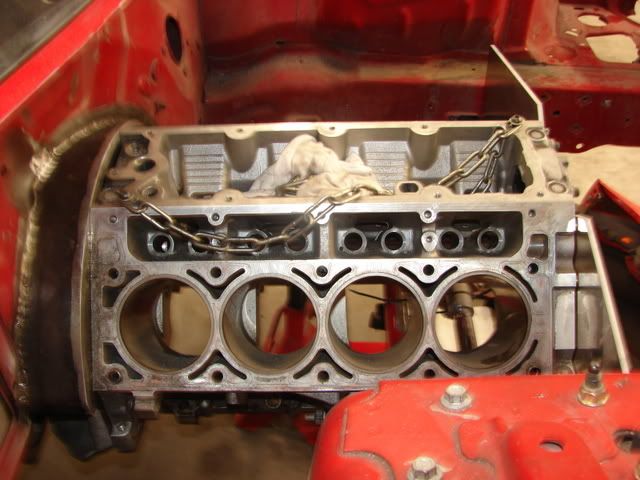
I posted some bigger pics on the midplate/motor plate setup. Basically rolled some sheet metal and cut an acutal midplate to fit and welded it together and welded it to the firewall. Be sure to leave enough room to get to the bolts if you build one this way. I have seem them like this before where they are so tight underneath that you can't get the bolts out!

The front we built some rails to make it easier to set the motor in. You can set the front plates on the rails, line the tranny dowels up and just slide the motor back into place. Makes it a whole lot easier to set everything in and line it all up.
Old 08-30-2009, 02:56 PM
  #33  
10 Second Club
iTrader: (5)
 
DanZ28's Avatar
 
Join Date: Nov 2001
Location: Cali/Bay Area
Posts: 3,412
Likes: 0
Received 0 Likes on 0 Posts

Default

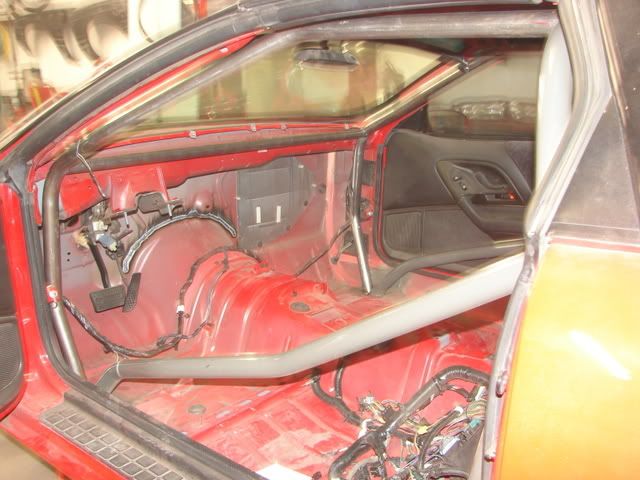
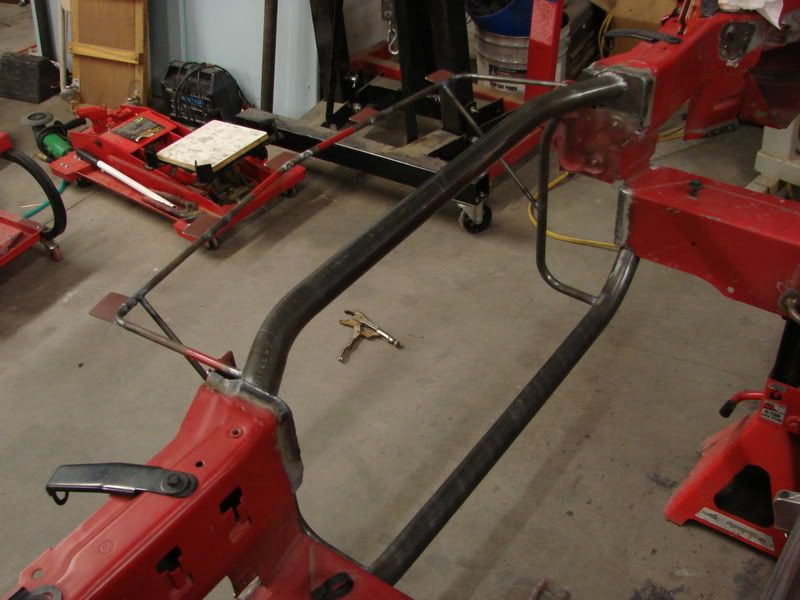
Jon, i'm just getting ready start cutting back my cowl area, any pointers? I see yours looks pretty nice, just cut out the old one and fab up a new piece?
Old 08-30-2009, 03:04 PM
  #34  
FormerVendor
Thread Starter
iTrader: (18)
 
Jon@Texas-Speed's Avatar
 
Join Date: Sep 2004
Location: Lubbock, TX
Posts: 3,043
Likes: 0
Received 2 Likes on 2 Posts
Default

It turned out better than I thought it would. I have some painted pics I will take next time I'm in town working on the car. Basically cut it all out and then take some sheet metal, break it 90* and then massage it into place. Takes a lot of trimming, bending, and spot welding on both top and bottom. Once you get it put in, seal it up and you should be ready to go.
Old 08-30-2009, 03:15 PM
  #35  
10 Second Club
iTrader: (5)
 
DanZ28's Avatar
 
Join Date: Nov 2001
Location: Cali/Bay Area
Posts: 3,412
Likes: 0
Received 0 Likes on 0 Posts

Default

Ok, sounds good. Yours looks nicer then some ive seen out there so I'll try to copy that best i can..
Old 08-30-2009, 07:36 PM
  #36  
TECH Enthusiast
iTrader: (52)
 
cbra-klla's Avatar
 
Join Date: Jun 2007
Location: Summersville, WV
Posts: 523
Likes: 0
Received 0 Likes on 0 Posts

Default

definelty some nice work
Old 08-30-2009, 08:33 PM
  #37  
10 Second Club
iTrader: (74)
 
ls1pwrdss's Avatar
 
Join Date: Jan 2003
Posts: 900
Likes: 0
Received 0 Likes on 0 Posts

Default

looking good there jon
Old 09-02-2009, 12:23 AM
  #38  
TECH Apprentice
iTrader: (58)
 
1badA3Z's Avatar
 
Join Date: Dec 2005
Location: In the ls1 shop!
Posts: 360
Likes: 0
Received 0 Likes on 0 Posts

Default

Looking good jon,its guna be badass!!
Old 09-08-2009, 11:14 AM
  #39  
TECH Fanatic
iTrader: (3)
 
Fire67's Avatar
 
Join Date: Feb 2005
Location: Naples, FL
Posts: 1,118
Likes: 0
Received 0 Likes on 0 Posts

Default

x2 on more cowl pics!!! Im cutting mine right now.
Old 09-08-2009, 11:53 AM
  #40  
FormerVendor
Thread Starter
iTrader: (18)
 
Jon@Texas-Speed's Avatar
 
Join Date: Sep 2004
Location: Lubbock, TX
Posts: 3,043
Likes: 0
Received 2 Likes on 2 Posts
Default

I'll try to get some pics up tonight of the engine compartment. It's painted now with the brake lines run and starting on the wiring. Now if I can find a block!


Quick Reply: Couple quick pics of my Camaro project


All times are GMT -5. The time now is 05:42 PM.