
Pictures of my winter Race car complete re-wiring project
 02-25-2010, 12:24 AM
#41
TECH Resident
Thread Starter
iTrader: (46)

Join Date: Dec 2001
Location: Some where in the Corn Fields of Illinois
Posts: 821
Likes: 0
Received 0 Likes
on
0 Posts

holy mother of god thats a lot of **** for a race car! What the hell is it all for? lol I need to wire my car and didnt think it would be close to that many wires. Is any of that for the engine harness? or all body related acc. stuff?
For mine i have in my head that the computer is gonna be a stand-alone unit so pulg into the computer, power it and plug it into the engine, done. Then wire headlights, tail lights, break lights and pwr windows and done again.
For mine i have in my head that the computer is gonna be a stand-alone unit so pulg into the computer, power it and plug it into the engine, done. Then wire headlights, tail lights, break lights and pwr windows and done again.
Believe it or not, there isn't as many wires as you might think. The big bundle of wires coming in from the left side of the board actually has 3 harnesses in it. On bundle is all the relay turn on inputs from the overhead 8 switch panel, the second bundle is the output wires from the relay going out to the driverside of the car, and the third bundle is the relay output wires going to the passenger side of the car. Using these small relay/fuse panels consolidated a LOT of wires into a smaller area, but cleaner.
As for a quick run down of items.... 2 Fuel pumps, water pump, fan, BS3 options and timer enable relay, tach input from BS3, BS3 turn on 12V, BS3 two step, BS3 datalog on, Timing retard input for BS3 boost pins, 2 stages of nitrous, purge setup, custom crank trigger signals into BS3, 2 stage progressive controler, transbrake outputs to solenoid/FJO progressive/2step, parking lights, dash gauges, secondary switch panel for nitrous control and associated gauges, brake lights, automatic hatch open, trans brake, line lock and thats just what I can think of off the top of my head right now.
Theres more to wiring a car than you might think.

 02-25-2010, 12:26 AM
#42
TECH Resident
Thread Starter
iTrader: (46)
Join Date: Dec 2001
Location: Some where in the Corn Fields of Illinois
Posts: 821
Likes: 0
Received 0 Likes
on
0 Posts
If you leave the harness going from door to door with the small black box the windows will work with a 12 volt source. The brown is the 12 volt on the driverside plug. The small orange is power mirror. The orange with a black stripe is power locks. If you don't get crazy when you take out the factory harness the windows, locks, and mirrors are very simple.
The car that I wired before I did mine, had nothing but wire stubs sticking out of the doors. No module or wiring or anything. With the black box intact it would be very easy. Everyone seems to wild with cutting wiring out and that gets disposed of.
02-25-2010, 04:48 AM
#43


Believe it or not, there isn't as many wires as you might think. The big bundle of wires coming in from the left side of the board actually has 3 harnesses in it. On bundle is all the relay turn on inputs from the overhead 8 switch panel, the second bundle is the output wires from the relay going out to the driverside of the car, and the third bundle is the relay output wires going to the passenger side of the car. Using these small relay/fuse panels consolidated a LOT of wires into a smaller area, but cleaner.
As for a quick run down of items.... 2 Fuel pumps, water pump, fan, BS3 options and timer enable relay, tach input from BS3, BS3 turn on 12V, BS3 two step, BS3 datalog on, Timing retard input for BS3 boost pins, 2 stages of nitrous, purge setup, custom crank trigger signals into BS3, 2 stage progressive controler, transbrake outputs to solenoid/FJO progressive/2step, parking lights, dash gauges, secondary switch panel for nitrous control and associated gauges, brake lights, automatic hatch open, trans brake, line lock and thats just what I can think of off the top of my head right now.
Theres more to wiring a car than you might think.
I have all the black bos and whatnot, and if I "must" keep it I will, but I'd prefer to just do like you had, lop it all out. I'm taking the power mirror's, and leaving them there but I don't need them working, and the power lock solenoids are going in the doors, I don't need that anymore either.
02-25-2010, 08:40 AM
#46
LS1TECH Sponsor
iTrader: (25)

Join Date: Aug 2004
Location: Bowling Green, Ky
Posts: 282
Likes: 0
Received 0 Likes
on
0 Posts
Awesome. My 3rd gen has a power junction on the driver's side the powers all the accessories. : ) Windows, locks and mirrors.
Not to get off subject but I'm surprised you don't have a dash bar in your cage setup.
Jessie
Not to get off subject but I'm surprised you don't have a dash bar in your cage setup.
Jessie
02-25-2010, 08:50 AM
#47
Dash bar isn't needed until you go 25.x, an 8.50 cert doesn't have to have one, never a bad idea to have though, it's on my list of things to add when the nose gets finished up just because there's so much being removed out of the front, that it would probably be a good idea to put that there in case the car ever ends up in the wall... I don't want the motor to come visit me.
 02-26-2010, 02:44 PM
#50
TECH Regular
iTrader: (1)

Join Date: Aug 2005
Location: Huntingtown, MD
Posts: 465
Likes: 0
Received 0 Likes
on
0 Posts
Haha im one of those idiots that stripped the car and threw EVERYTHING away. What did you do to to get those windows working again? I used 12v's to move my windows up and down for the chassis guy, but you said just a basic relay would not work? What else could i use?
02-26-2010, 07:04 PM
#51
TECH Regular
iTrader: (1)

Join Date: Sep 2004
Location: Natick mass 508
Posts: 406
Likes: 0
Received 0 Likes
on
0 Posts
looks very nice man great work ill have to throw up sum pics of mine its right along the same lines as that with the dist. blocks and quick connects makes workin on the car much more pleasurable for sure...but not as pretty as that i thought i was doin good till i saw this thread looks mint just like the rest of your car i love that thing its uber clean ...the windows ive got workin with just 12 volts and a uses the factory switches tied together to swap the power/ground and they work just like factory but with out the bcm and auto down ill see if i can pop the switches out and put together a wiring diagram to share along with a few other lil tricks ive come up with when wiring up the car
 03-02-2010, 10:21 PM
#56
TECH Resident
Thread Starter
iTrader: (46)
Join Date: Dec 2001
Location: Some where in the Corn Fields of Illinois
Posts: 821
Likes: 0
Received 0 Likes
on
0 Posts
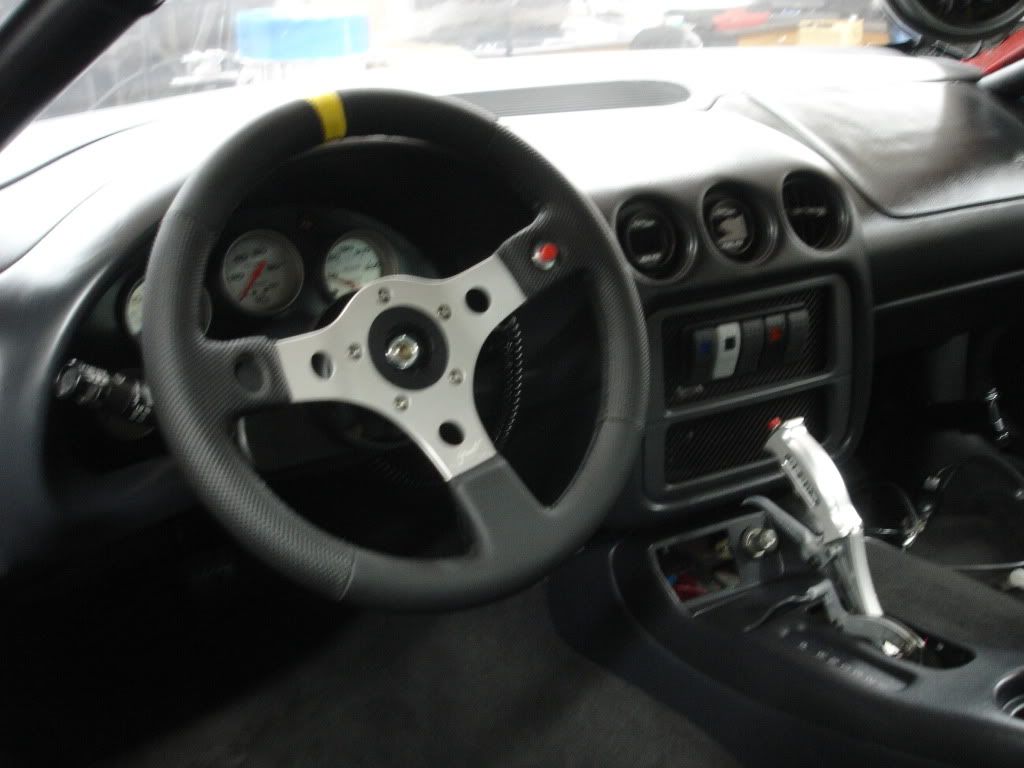
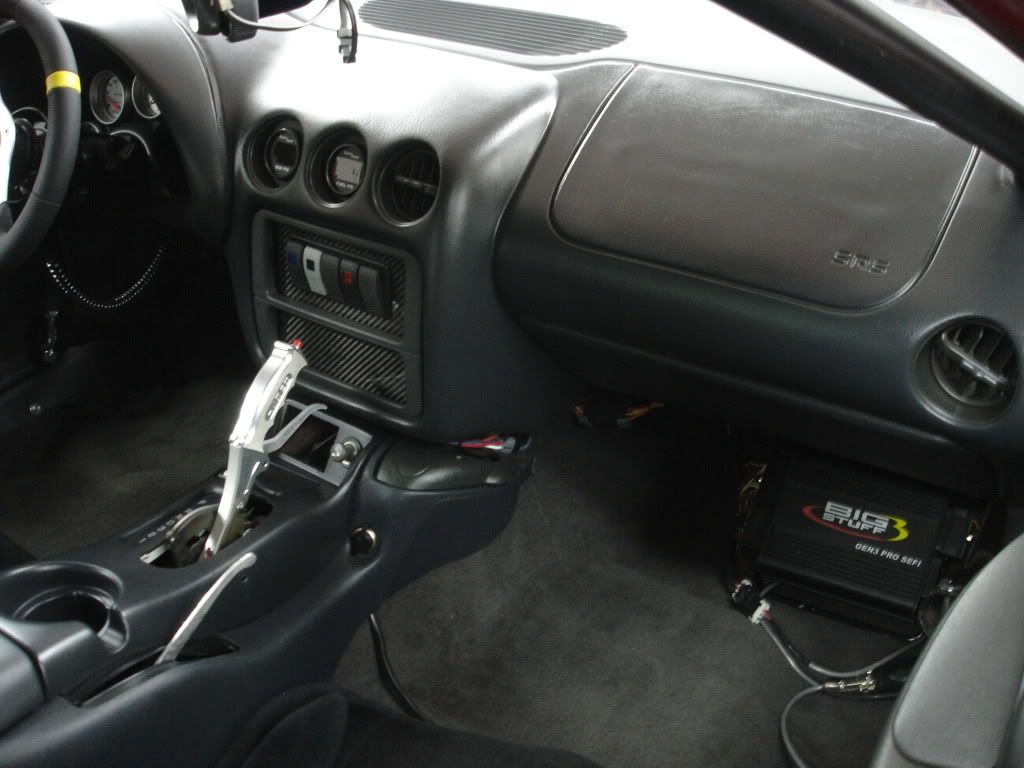
Here are some updated pictures of the interior now that its back together. I also made a new switch panel for the radio/ac area out of carbon sheet and some nice rocker switches.
I also included a few pics of the back of the relay boards.

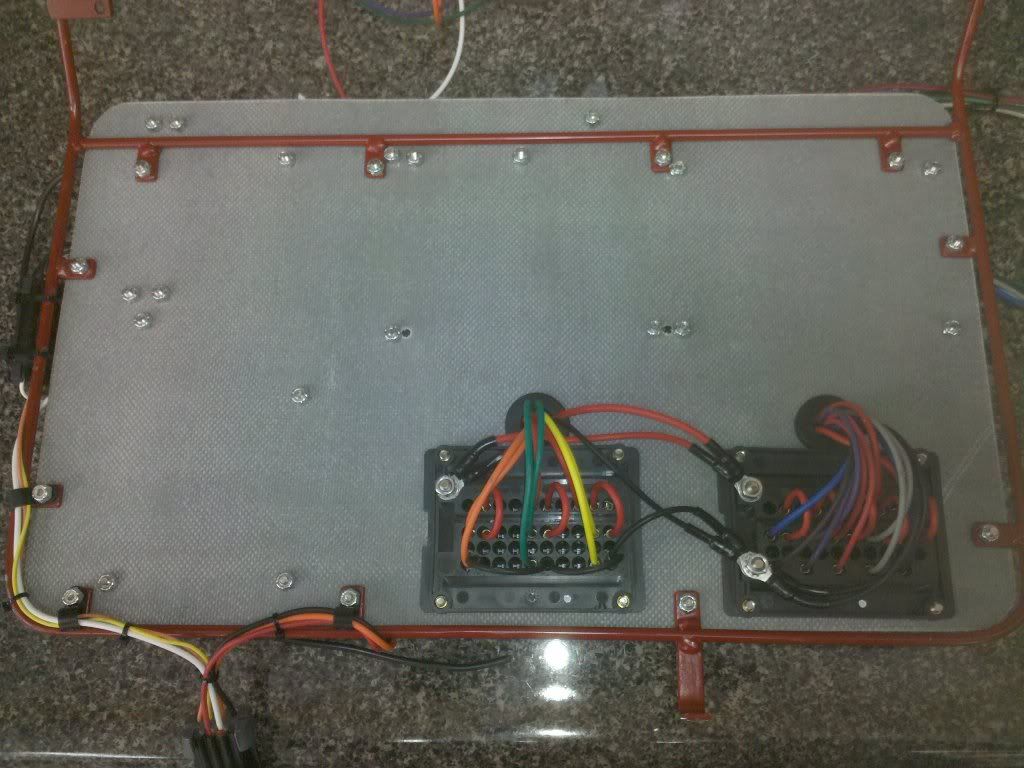

I also included a few pics of the back of the relay boards.
03-02-2010, 10:31 PM
#57
TECH Resident
Thread Starter
iTrader: (46)
Join Date: Dec 2001
Location: Some where in the Corn Fields of Illinois
Posts: 821
Likes: 0
Received 0 Likes
on
0 Posts
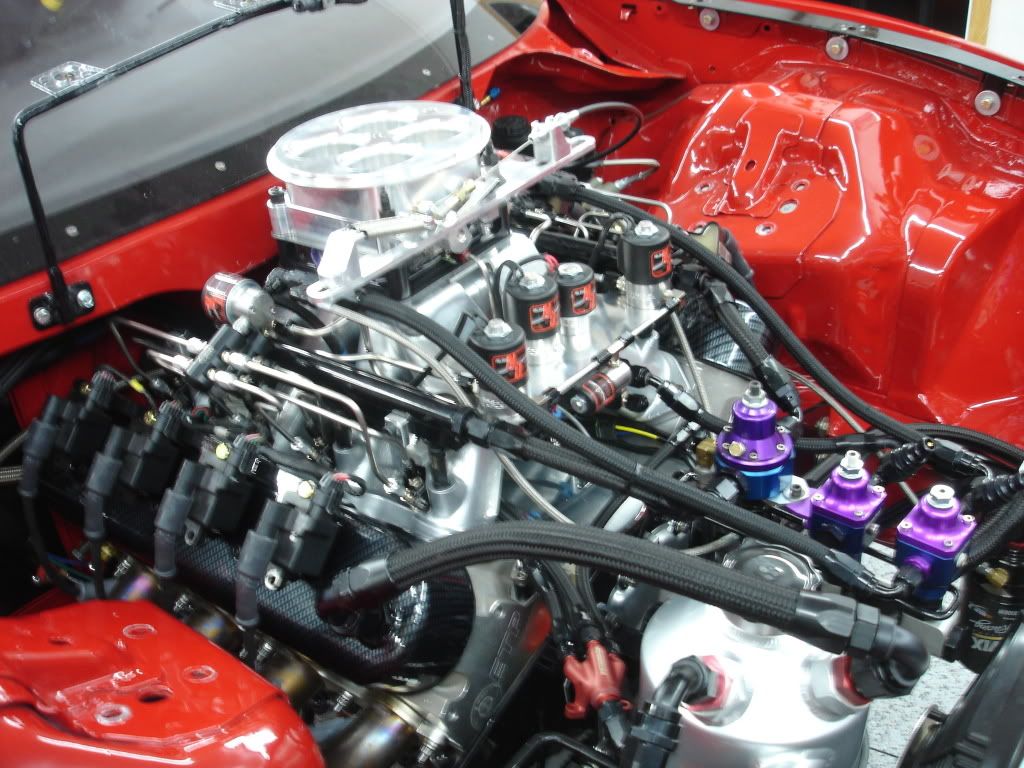
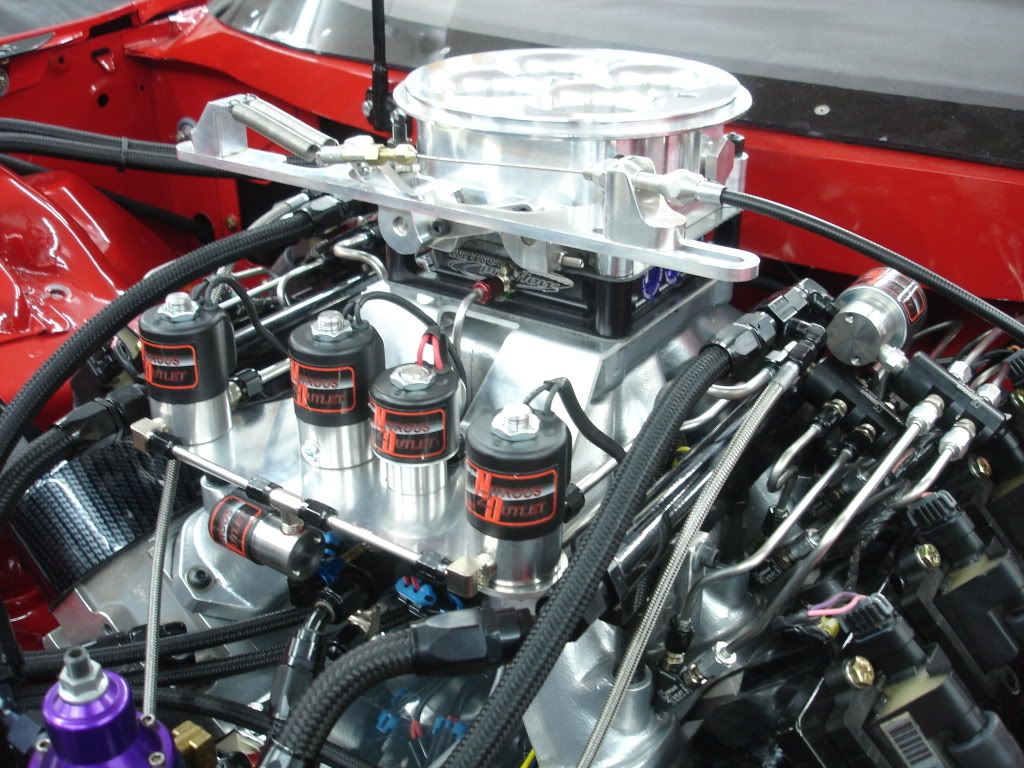
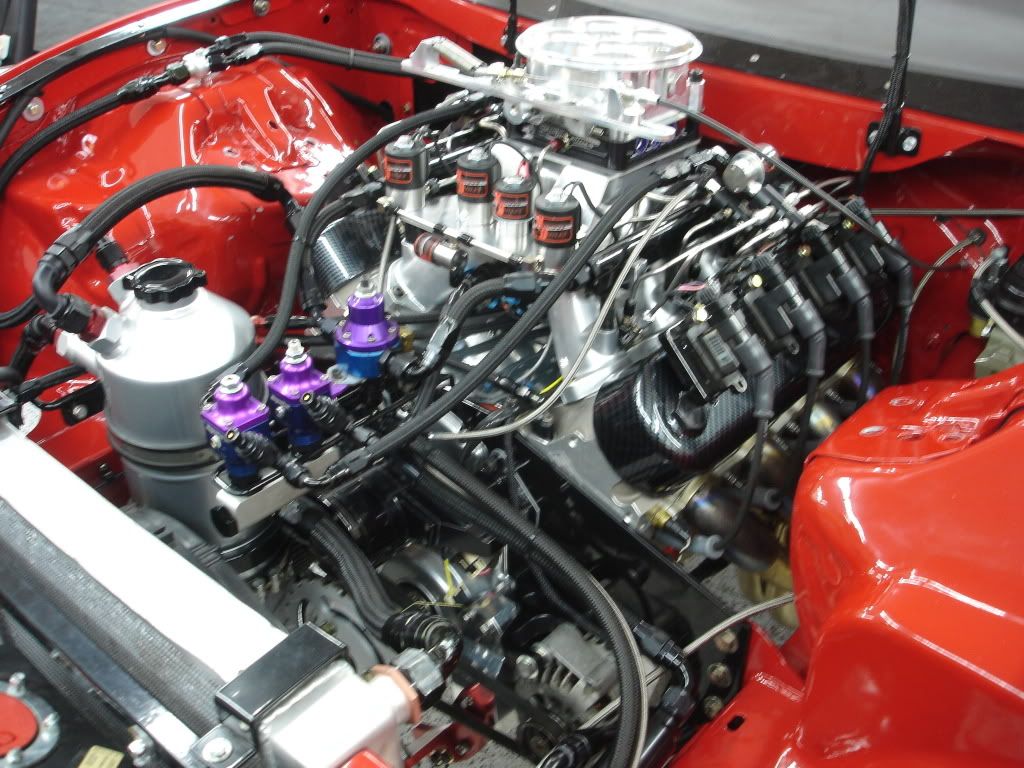
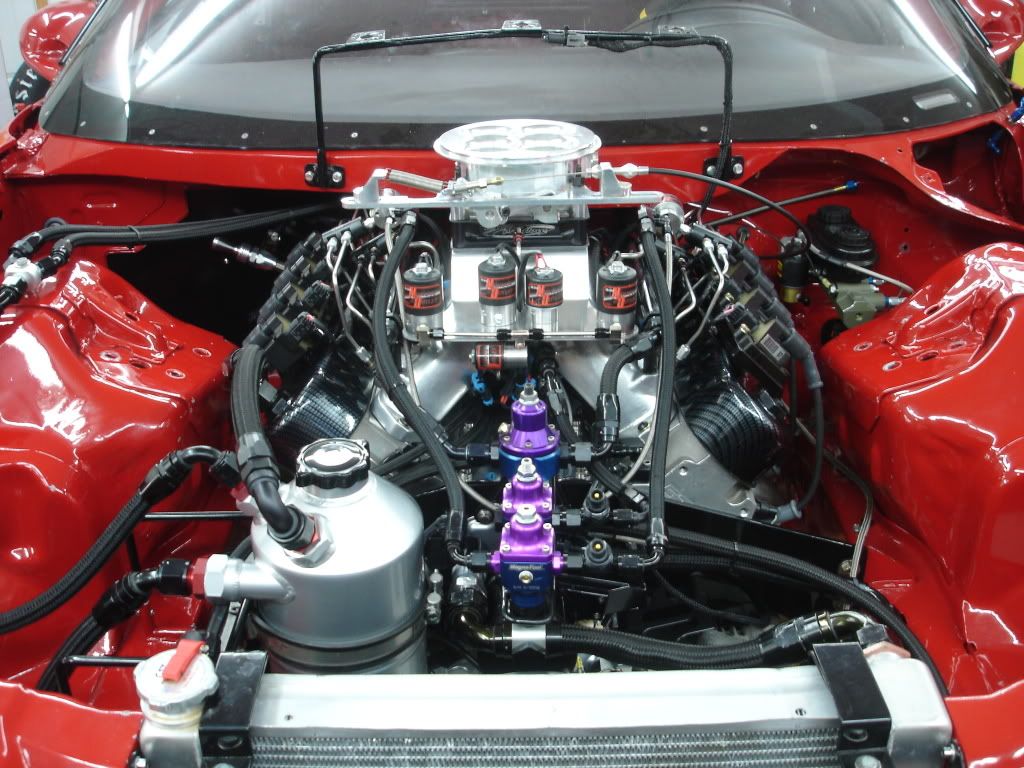
Here are some new pictures of the engine etc after the initial assembly and startup on sunday. Car is basically done waiting on a kmember setup.
 03-02-2010, 11:59 PM
#59
On The Tree
iTrader: (13)
Join Date: Aug 2006
Location: st.louis,Mo
Posts: 160
Likes: 0
Received 0 Likes
on
0 Posts
 I love it, reminds me of wiring boards back in school where wires could never cross each other on top of a board.
Rewired mine to a stand alone using one box from the engine bay but looks nowhere nere this nice, though i only spent money on soldering. thing i will redo mine now.
03-03-2010, 01:12 AM
#60
2 - One for each stage of nitrous plus the fuel injection
Hopefully he can help you out with the rest!
