
The Turbo Ta Build Thread
 05-11-2010, 08:56 PM
#41


we kinda thought about it.. probably could of done it, but would of been tight fit, plus alot of heat from the manifold on the alt..
I returned that pump, and am just going to go to a remote setup, and do the plates on the block for the 4 -12's...
Thank you though. Chris
I returned that pump, and am just going to go to a remote setup, and do the plates on the block for the 4 -12's...
Thank you though. Chris
 05-11-2010, 09:44 PM
#42
Carpet is Ozite. it is a pain. It comes 80" wide, and how ever long you order it, i got 5 yrds.
Everyone on here buys it from
http://www.yourautotrim.com/black7.html
Thanks, Chris
Everyone on here buys it from
http://www.yourautotrim.com/black7.html
Thanks, Chris
Ive heard 4 yards should work perfect for these cars. what do you think?
05-11-2010, 09:58 PM
#43
Chris
Ps... Use scottkeen as the coupon code. Its good for 15% off.
 05-11-2010, 10:04 PM
#44
Mine is the black. I got 5 yards.. If you are just going the the flat spot in truck, and not doing the trunk i bet 4 yrds is more then enough. I have alot left over. I can try to meausre it maybe end of the week, or weekend, and let you know what i have left.
Chris
Ps... Use scottkeen as the coupon code. Its good for 15% off.
Chris
Ps... Use scottkeen as the coupon code. Its good for 15% off.
Might try that grey if they dont get black soon, if not Ill find some crappy stuff local and just use it.
05-12-2010, 06:52 PM
#45
Staging Lane

Join Date: Dec 2009
Location: Cordova, IL.
Posts: 55
Likes: 0
Received 0 Likes
on
0 Posts
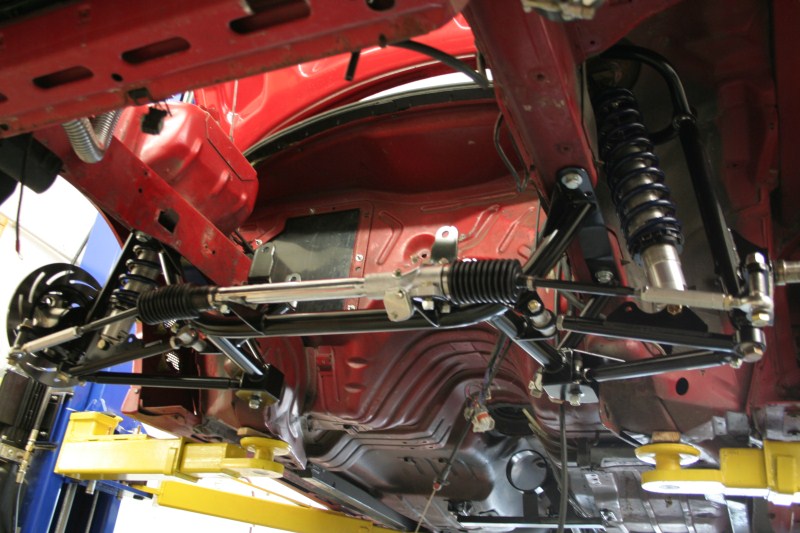
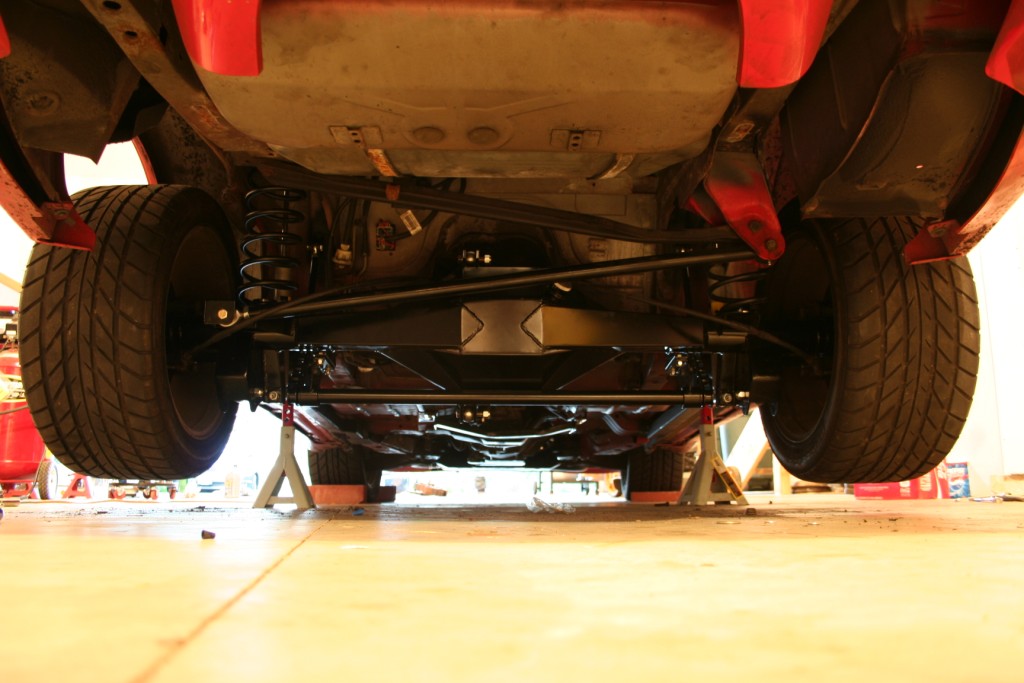
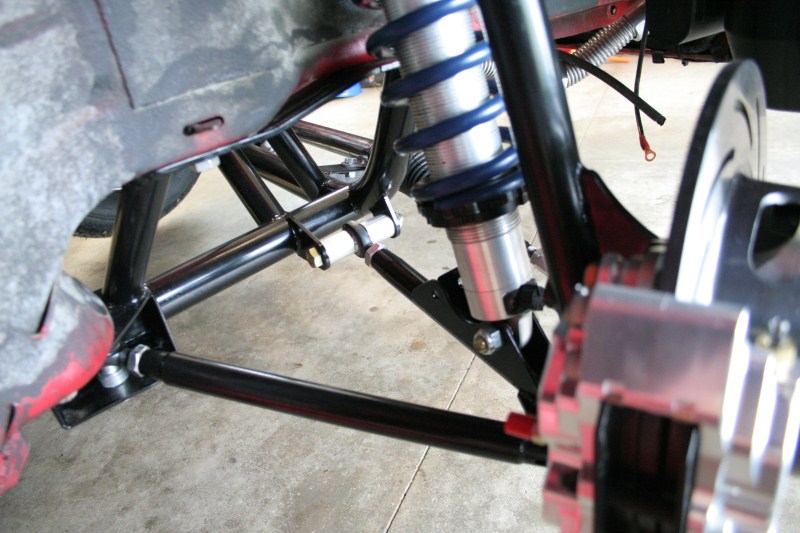
Suspension is All midwest Chassis Everywhere.
Rear Lower control arms, and panhard bar
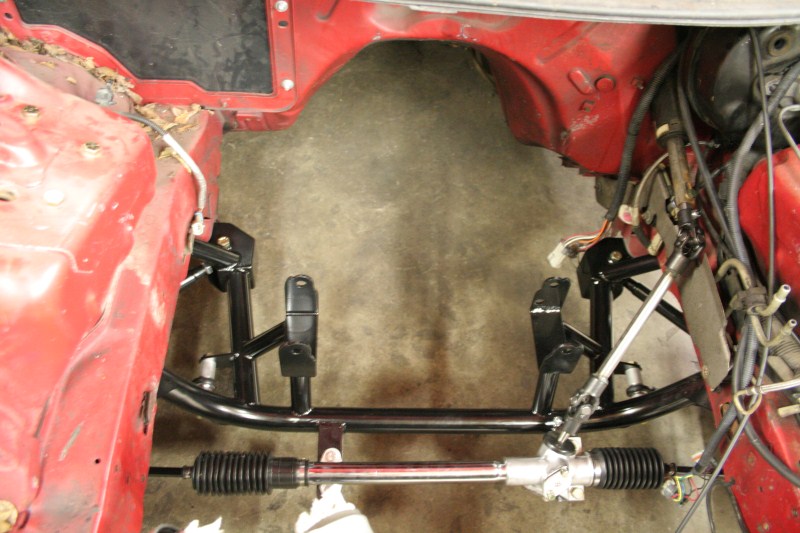
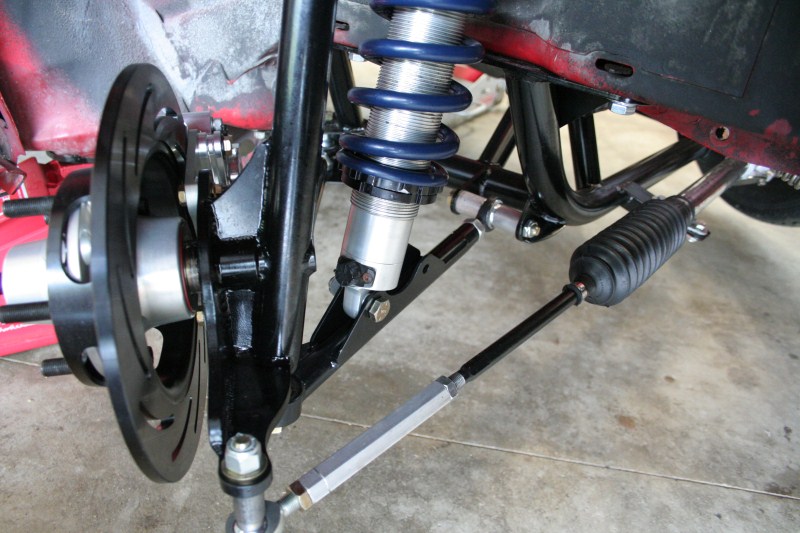
Fron Upper, and lower control arm, Spindle, Manual rack, K Member
Rear stock spring, with Comp Engingeering strut
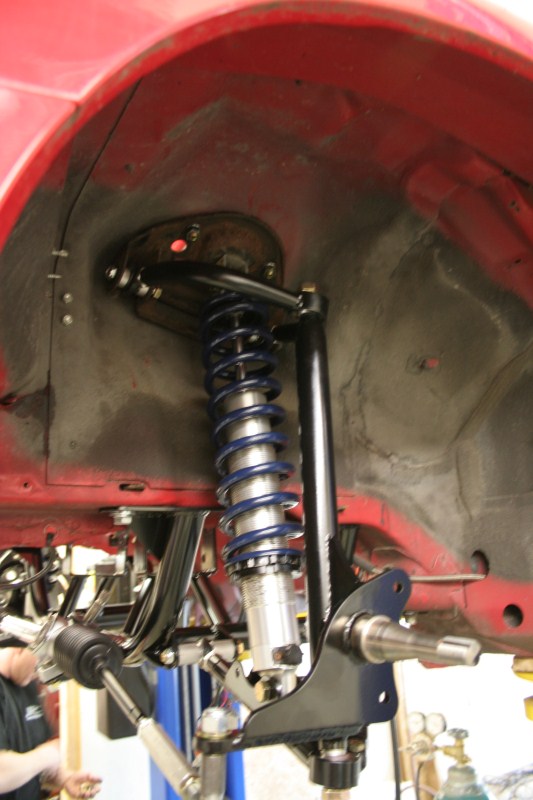
Front Stage Drag coilover
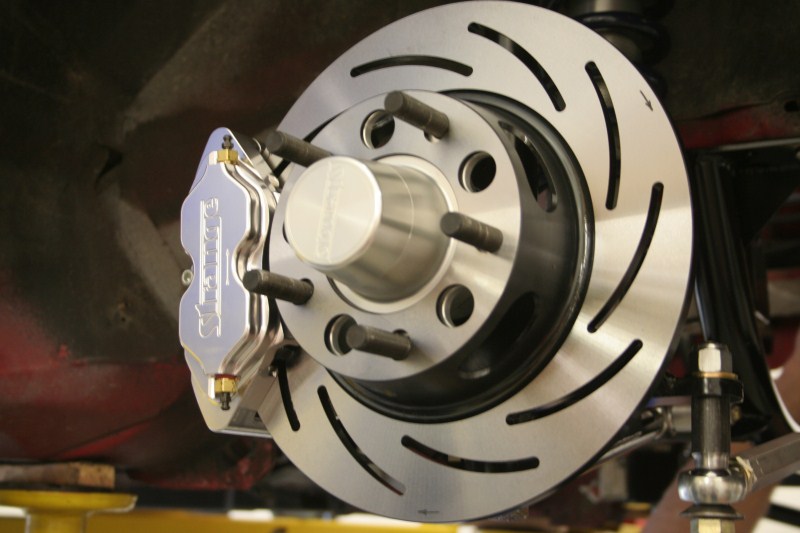

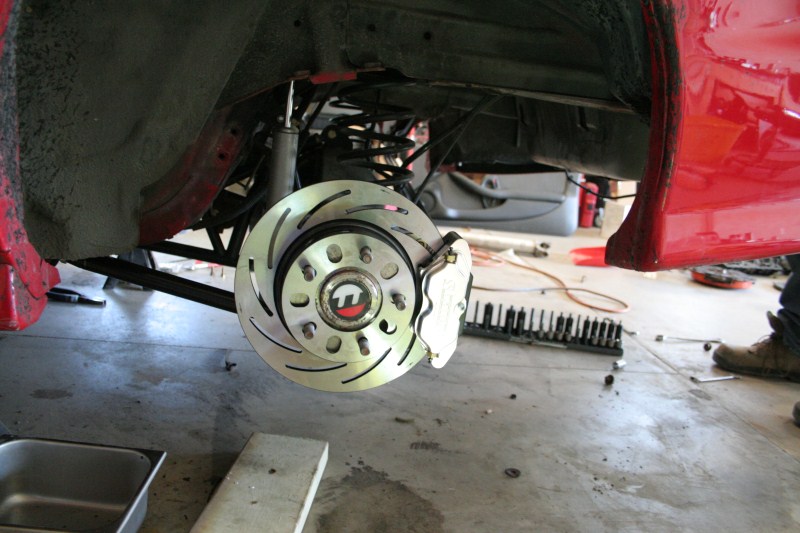
Brakes
Midwest chassis Manual Master
Replume the entire Car with brake line, and Strange 4 piston drag brakes @ all 4 corners
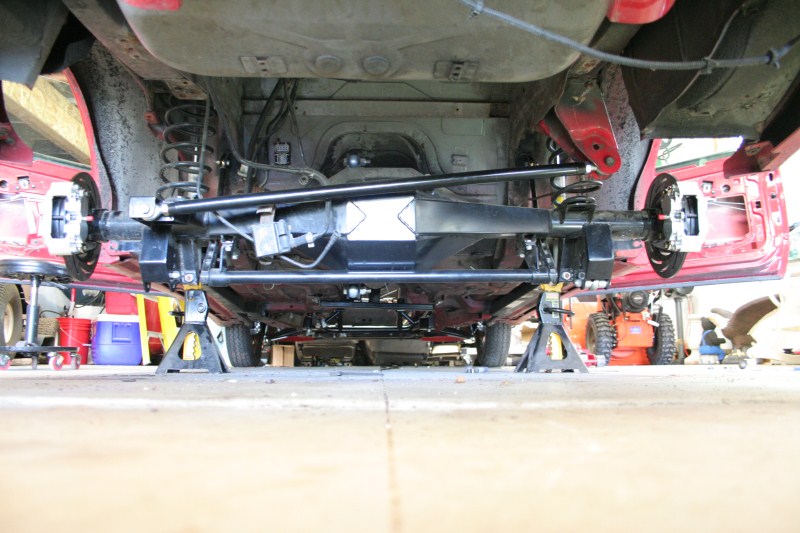
Rear End
Midwest Chassis Fab 9
spool, 35 spline axles, ect
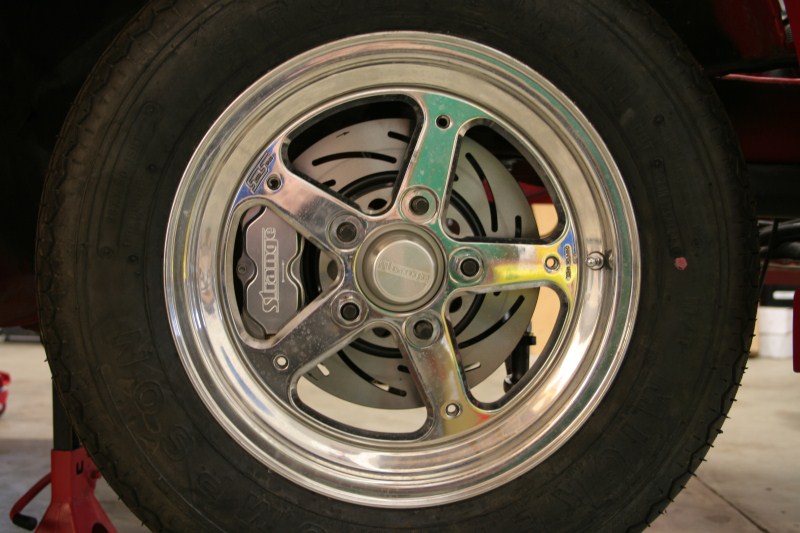
Here is a shot of the stock brakes
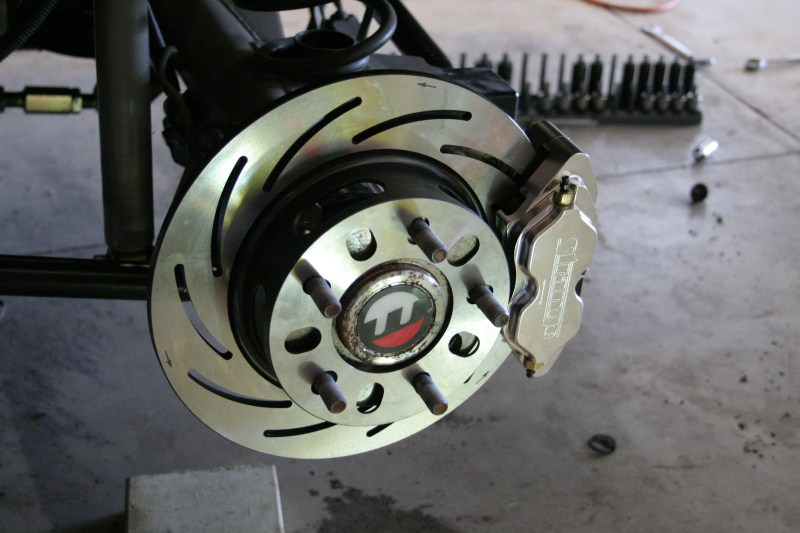
A couple of comparison shots between the stock rotor and the strange rotor
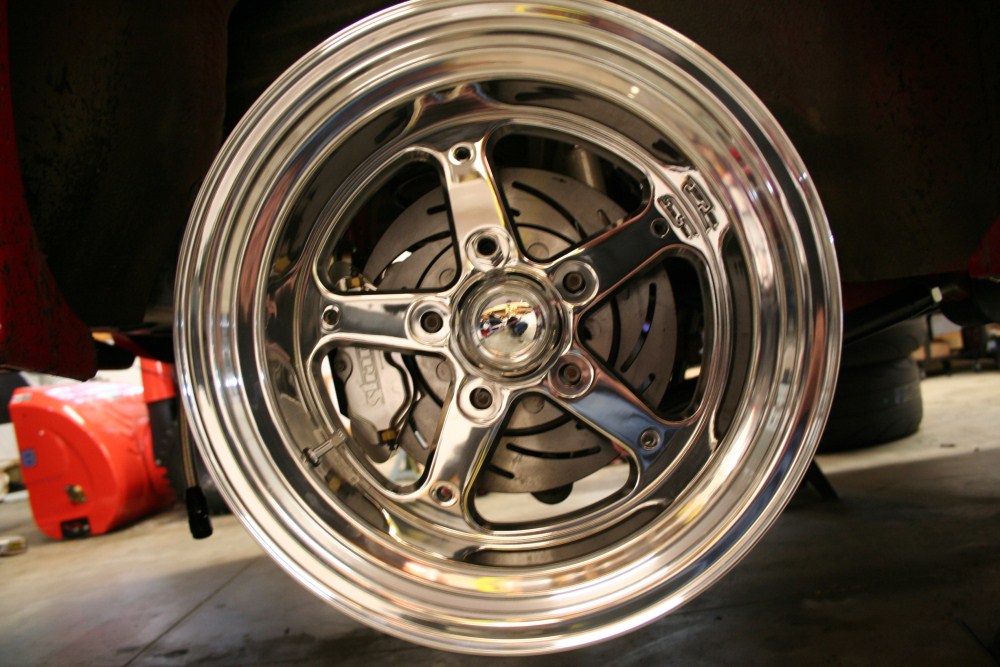
And the strange brakes done
Eric thats looking good, may have to give you a call.
Can you work up a price on the complete front end with out motor mounts? Including the brakes.
 05-14-2010, 06:12 AM
#49
TECH Senior Member
iTrader: (21)
Join Date: Nov 2001
Location: Cecil County Raceway!!!
Posts: 8,484
Likes: 0
Received 0 Likes
on
0 Posts

looks great so far...
how fast do you plan on going? IIRC, that 42-76 turbo ran out of steam pretty quickly on Kyle's old setup and they had to switch to an S88 for that reason...
how fast do you plan on going? IIRC, that 42-76 turbo ran out of steam pretty quickly on Kyle's old setup and they had to switch to an S88 for that reason...
06-06-2010, 05:24 PM
#51
OK it has been a few weeks now, may as well have an update! We took one weekend off, and had some slow weekends in there, but we got after it full force yesterday and knocked out a lot of work. We will start with 5-14, all we really got accomplished was measuring for push rods, and mocking up the turbo.

I made a new Oil feel line for the turbo, and got started on a new drain for it as well. That was really all we got done that entire weekend
Next up was the weekend of the 28th, where we got some parts in but not a ton of work done again.
Here are the axles back from being shortened 3" each by Moser
 \
\
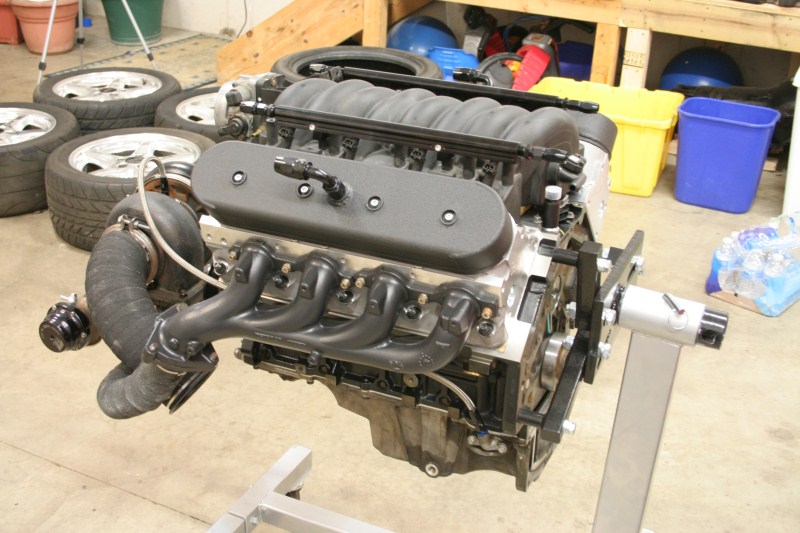
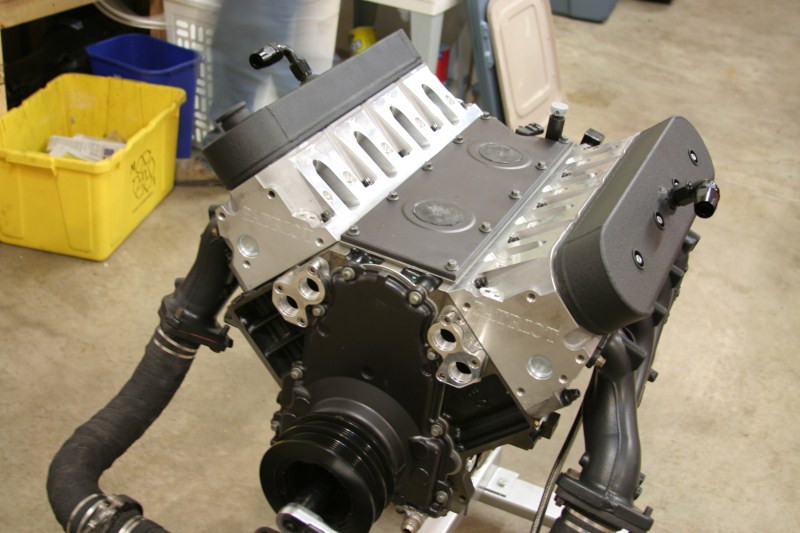
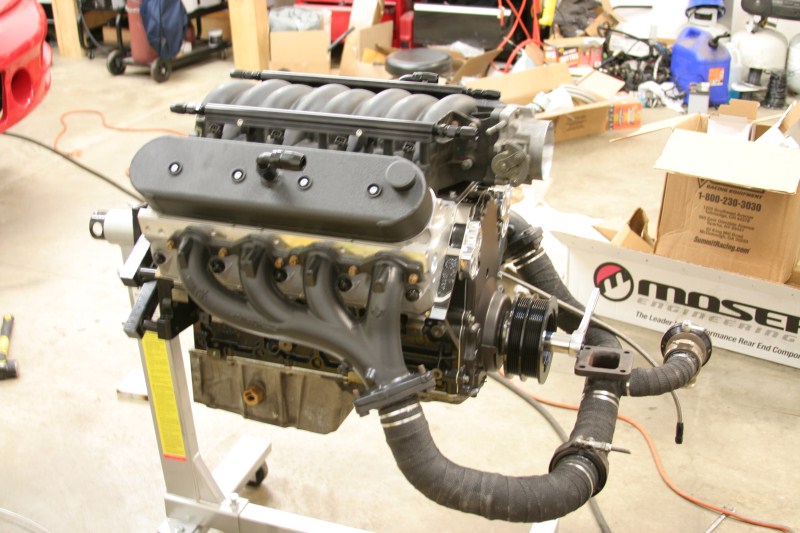
We plugged the holes for the knock sensors (we won’t be running them anymore) and installed the valley cover. Also (no pics) installed the push rods and buttoned up the motor. You can also see the -12 adapters for running the remote water pump installed on the front of the motor.
Quick shot of the motor all ready to go, rockers, valve covers, intake manifold, fuel rails, etc. are all torqued for the final time.
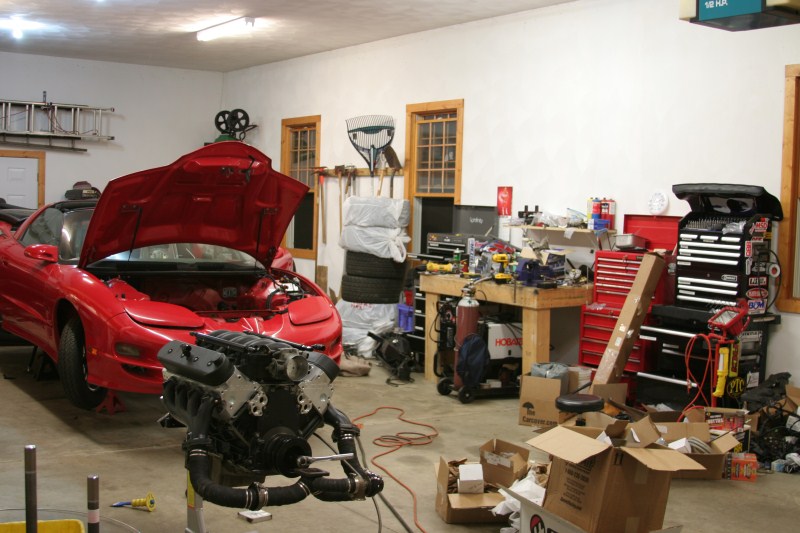
Just a quick shot of the garage before we burned all the boxes.
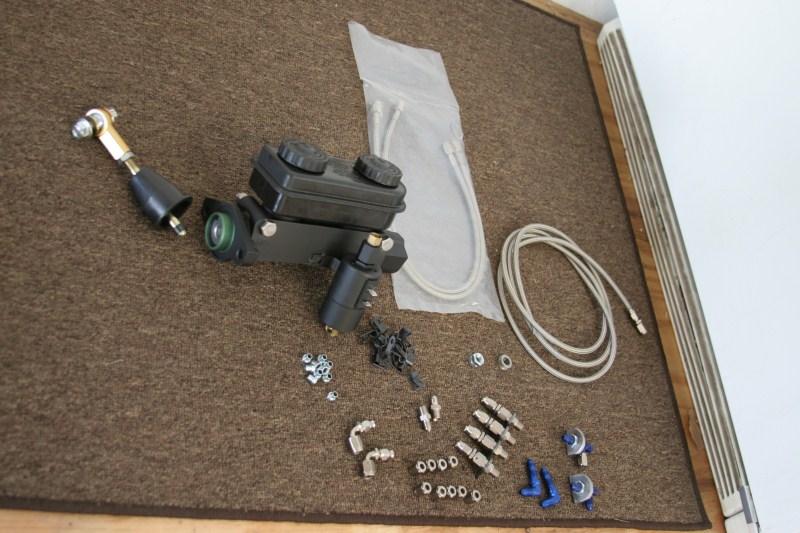
I also whipped up a mount for the line lock which you can see on the master cylinder in this pic along with most of the parts needed for the brake lines (from Jerry Bickle race cars)
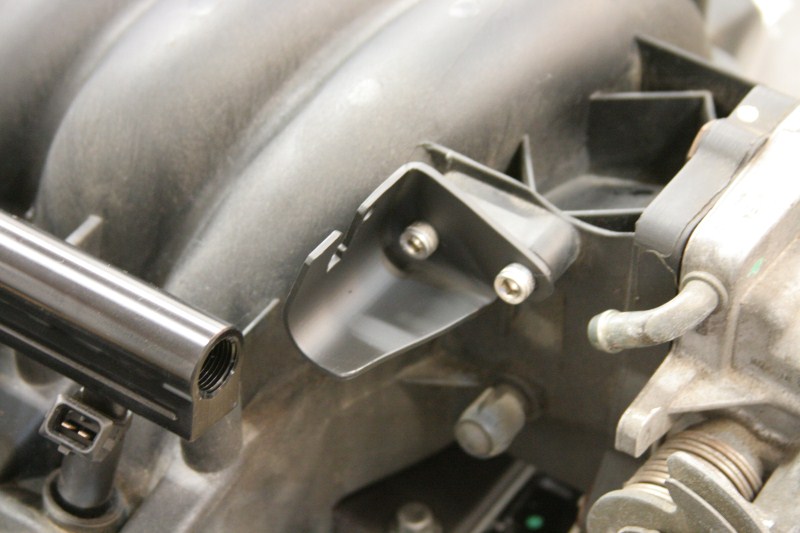
Modified the stock throttle cable bracket
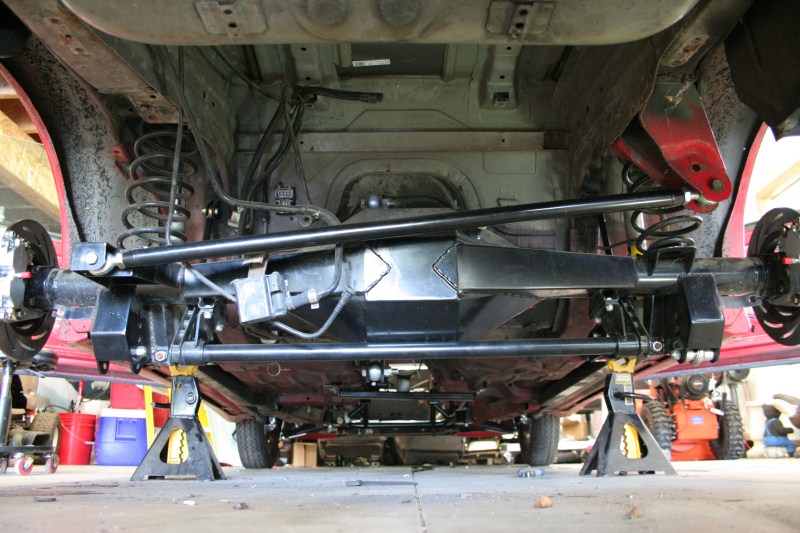
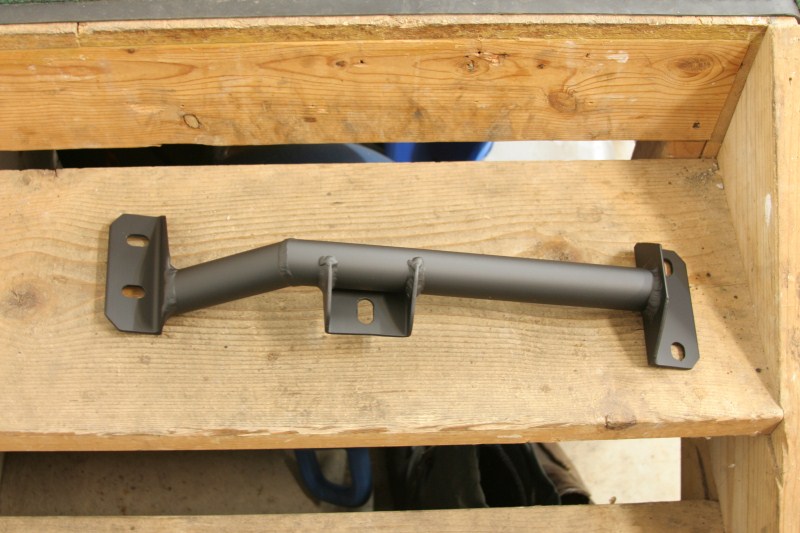
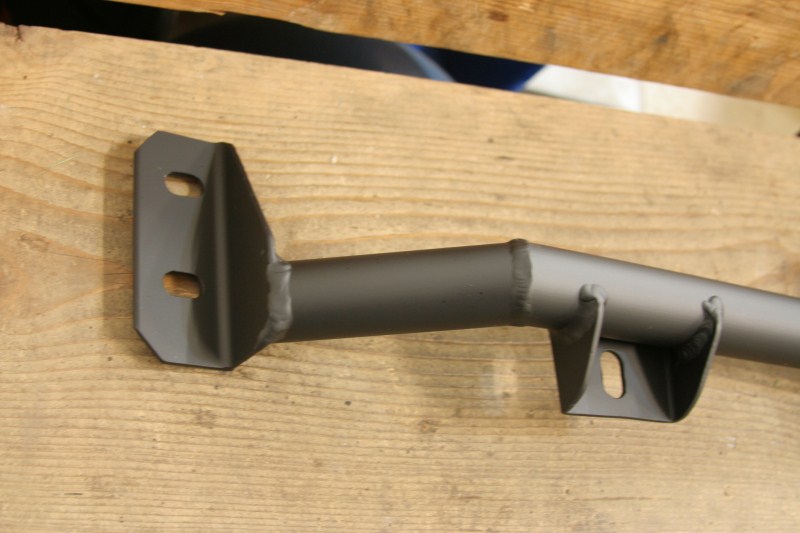
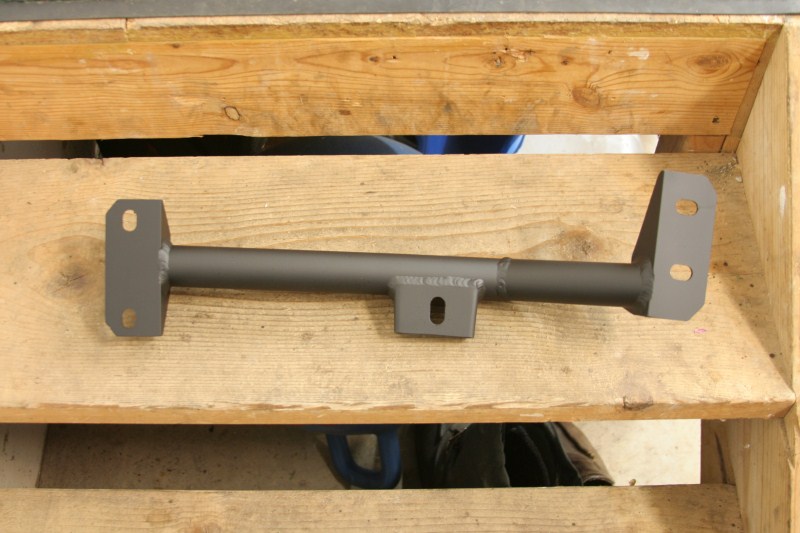
Here are a few pics of the Aluminum trans cross member that Eric at Midwest Chassis made for us.
We also got the rear end back in the car with the axles in and the brakes mounted, I didn’t bother taking any pics though.
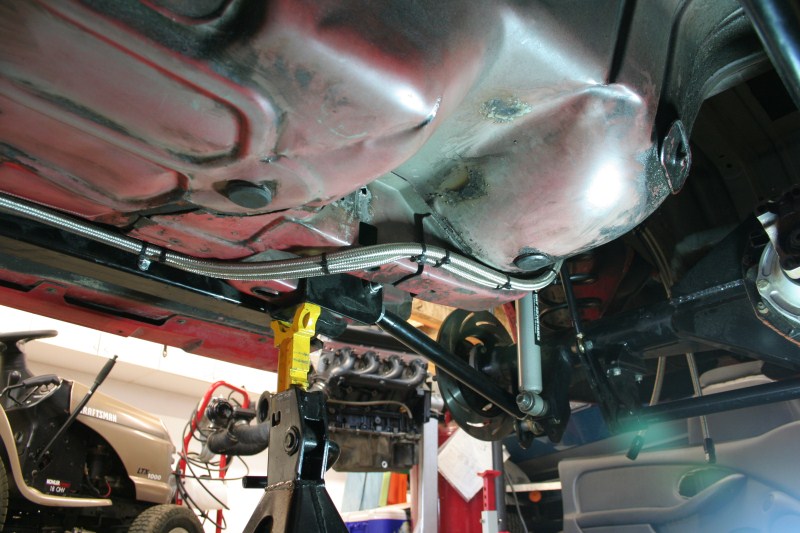
Now we are up to yesterday where we knocked out some major work. We will start with running the new fuel lines. I spent a while making up some lines, then dove under the car and had at it. Here is the start of it all.
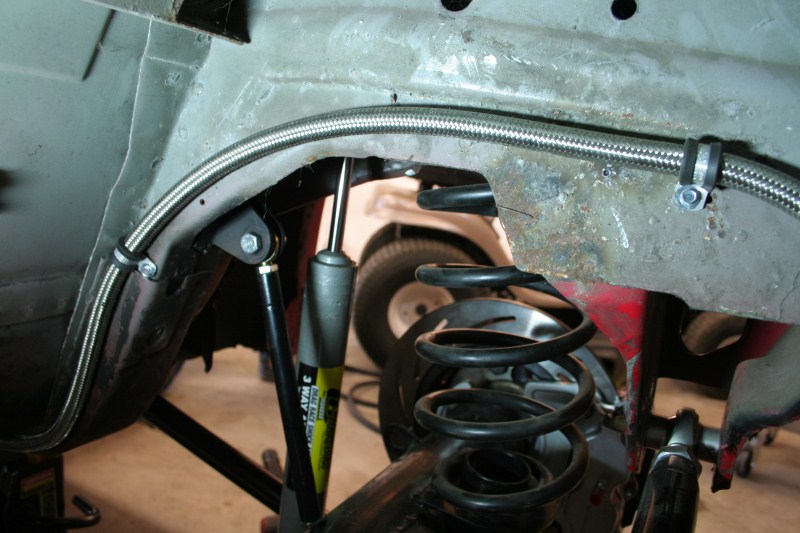
Nothing to exciting to say here, so I will just throw up some pics
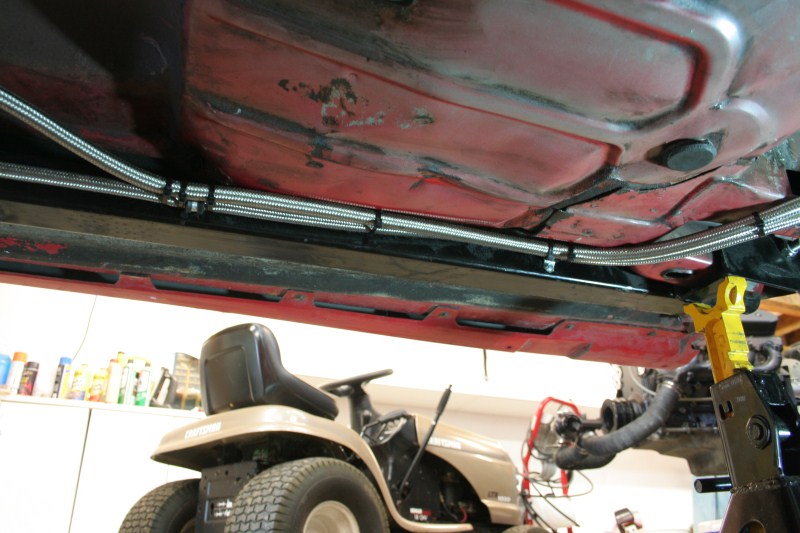
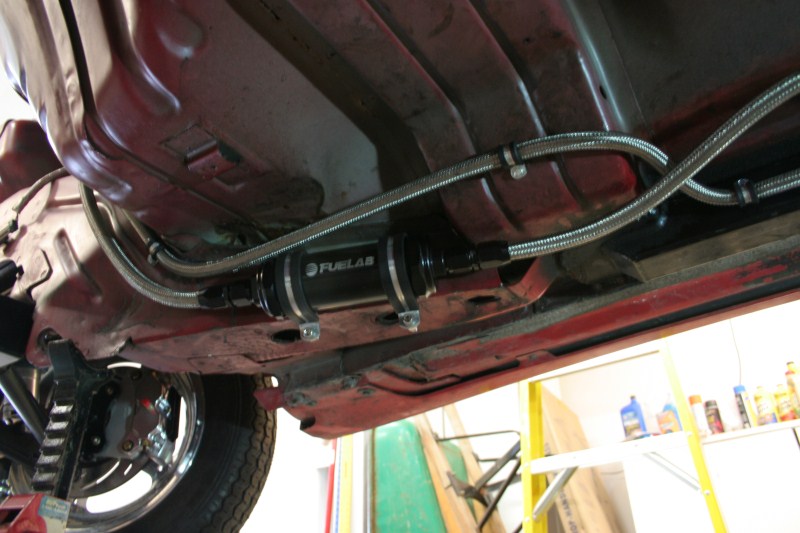
Left a little loop so that we can get the fuel filter on and off without too much hassle.
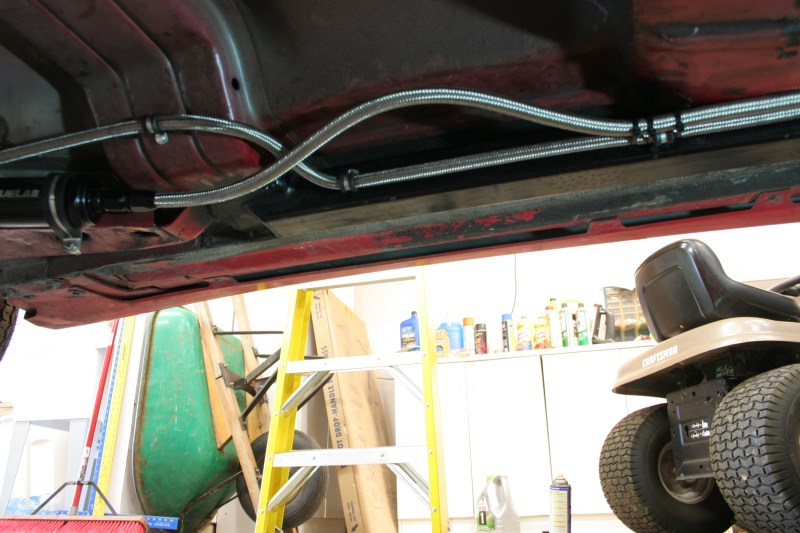
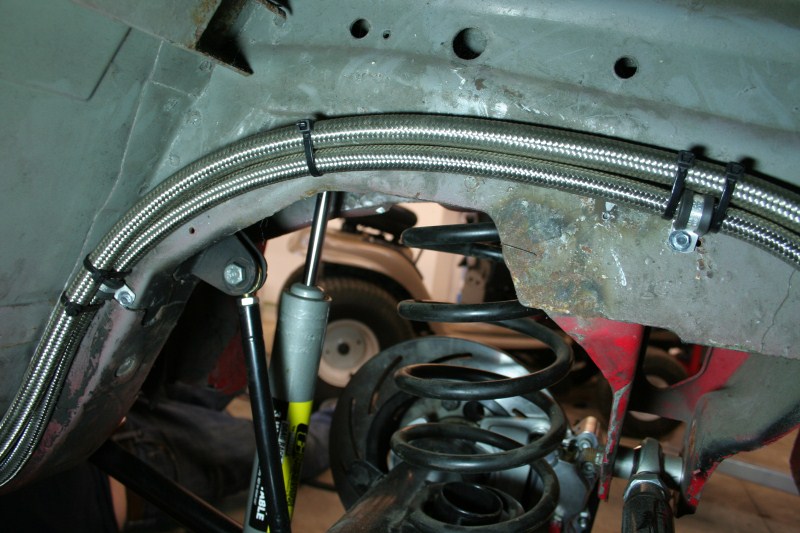
This is where we stopped with the fuel lines for now, until we get the motor in
Chris was inside the car working on the wiring when he wasn’t busy under the car helping me run the lines. Once we both finished up we put the dash back in for the first time.
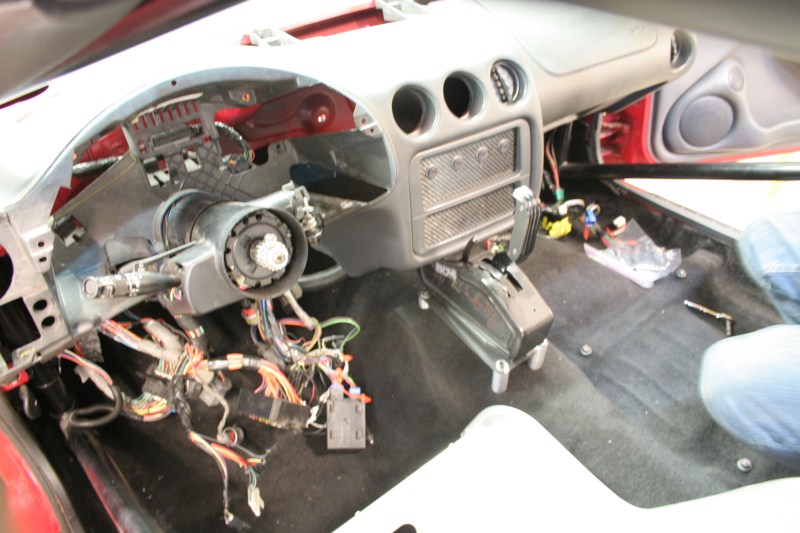
We did not realize how close the dash was going to be to the shifter, but we lucked out and it clears just fine. Another 1/2 of an inch though and we would not be so happy.
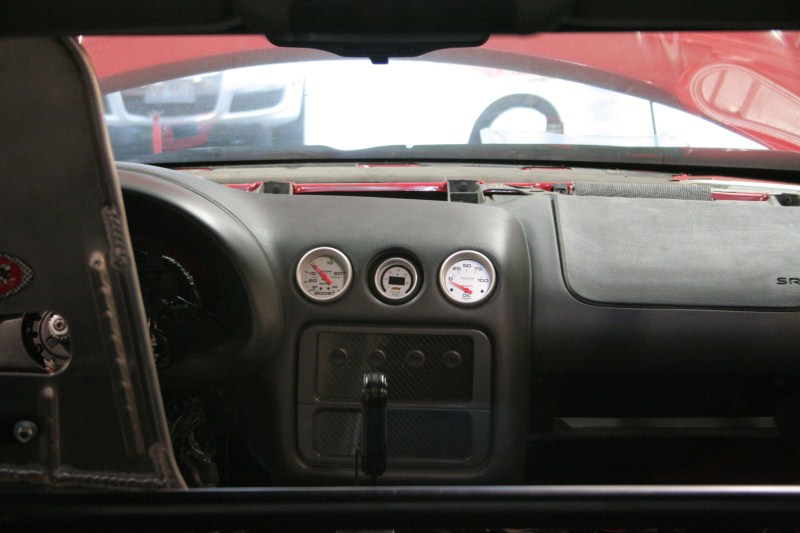
Played with how to lay out the gauges
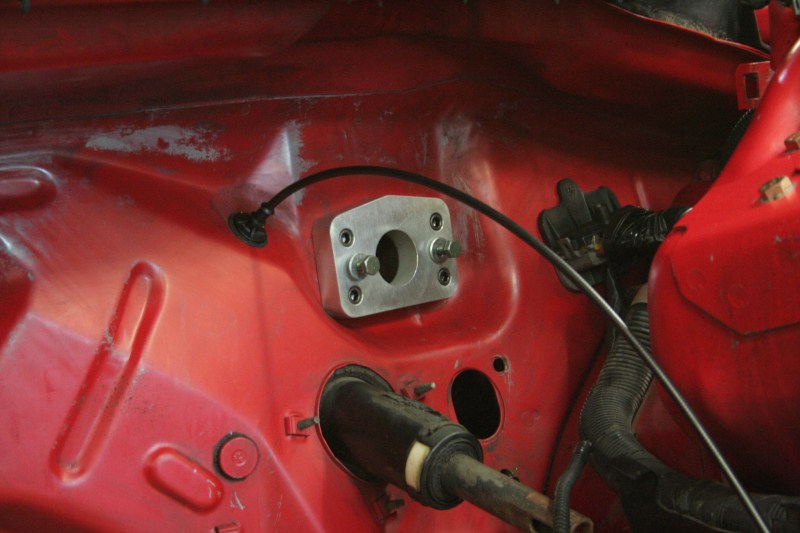
Here is the adapter plate for the manual master
We ended up taking the dash back out so that we could get the shifter all wrapped up. Had to install and wire the neutral safety switch and the reverse light switch. We also had to install and route the shifter cable while we were at it, then reinstall the cover and the grip. After that we put the dash back in for the last time, also trimmed and installed the passenger a-pillar cover. After that we fixed the broken driver side window and re-installed the driver door panel. I didn’t get pictures of any of this, because it was 3am by this time and I wanted to take a shower and pass out. So as you can see progress is being made, but it hasn’t been to interesting to post. We are closing in on finishing the car though, so the next few weekends should be busy. As always thanks for looking!
Sean
I made a new Oil feel line for the turbo, and got started on a new drain for it as well. That was really all we got done that entire weekend
Next up was the weekend of the 28th, where we got some parts in but not a ton of work done again.
Here are the axles back from being shortened 3" each by Moser
\We plugged the holes for the knock sensors (we won’t be running them anymore) and installed the valley cover. Also (no pics) installed the push rods and buttoned up the motor. You can also see the -12 adapters for running the remote water pump installed on the front of the motor.
Quick shot of the motor all ready to go, rockers, valve covers, intake manifold, fuel rails, etc. are all torqued for the final time.
Just a quick shot of the garage before we burned all the boxes.
I also whipped up a mount for the line lock which you can see on the master cylinder in this pic along with most of the parts needed for the brake lines (from Jerry Bickle race cars)
Modified the stock throttle cable bracket
Here are a few pics of the Aluminum trans cross member that Eric at Midwest Chassis made for us.
We also got the rear end back in the car with the axles in and the brakes mounted, I didn’t bother taking any pics though.
Now we are up to yesterday where we knocked out some major work. We will start with running the new fuel lines. I spent a while making up some lines, then dove under the car and had at it. Here is the start of it all.
Nothing to exciting to say here, so I will just throw up some pics
Left a little loop so that we can get the fuel filter on and off without too much hassle.
This is where we stopped with the fuel lines for now, until we get the motor in
Chris was inside the car working on the wiring when he wasn’t busy under the car helping me run the lines. Once we both finished up we put the dash back in for the first time.
We did not realize how close the dash was going to be to the shifter, but we lucked out and it clears just fine. Another 1/2 of an inch though and we would not be so happy.
Played with how to lay out the gauges
Here is the adapter plate for the manual master
We ended up taking the dash back out so that we could get the shifter all wrapped up. Had to install and wire the neutral safety switch and the reverse light switch. We also had to install and route the shifter cable while we were at it, then reinstall the cover and the grip. After that we put the dash back in for the last time, also trimmed and installed the passenger a-pillar cover. After that we fixed the broken driver side window and re-installed the driver door panel. I didn’t get pictures of any of this, because it was 3am by this time and I wanted to take a shower and pass out. So as you can see progress is being made, but it hasn’t been to interesting to post. We are closing in on finishing the car though, so the next few weekends should be busy. As always thanks for looking!
Sean


 06-10-2010, 11:32 PM
#54
I recently did my brothers front struts,I noticed that the top upper control arm mounts were pretty rusty as well as the rubber things in them.It kind of concerned me a little.I didn't know if they could crack so I went ahead and replaced them.I saw a little rust on your upper control mount.It concerned me a little?man hope Im not being to picky.

 06-11-2010, 11:24 AM
#55
On The Tree
iTrader: (4)
Join Date: Jul 2008
Location: New Jersey
Posts: 109
Likes: 0
Received 0 Likes
on
0 Posts
RobZ Where did you get the new upper a arm mounts? I've been looking to get new ones for my 93Z28. I figured if I'm putting all new front end components on why not get new mounts also. I just ordered the strut mounts and I just need the upper a arm mount.
thanks Jeff
thanks Jeff
06-12-2010, 11:20 AM
#56

I will have new ones out soon that will be lighter than the stock ones, but they are initially designed to be used with an integrated double shear shock mount like the setup is in these pics. I may do more of a stock replacement option later if there is enough interest. these were the original shocks on this car and were converted from stock stud upper mount style to the bearing style.
06-12-2010, 11:28 AM
#57
I recently did my brothers front struts,I noticed that the top upper control arm mounts were pretty rusty as well as the rubber things in them.It kind of concerned me a little.I didn't know if they could crack so I went ahead and replaced them.I saw a little rust on your upper control mount.It concerned me a little?man hope Im not being to picky.
Thanks, Eric
06-13-2010, 07:12 AM
#60