Mini Tubbing
#1
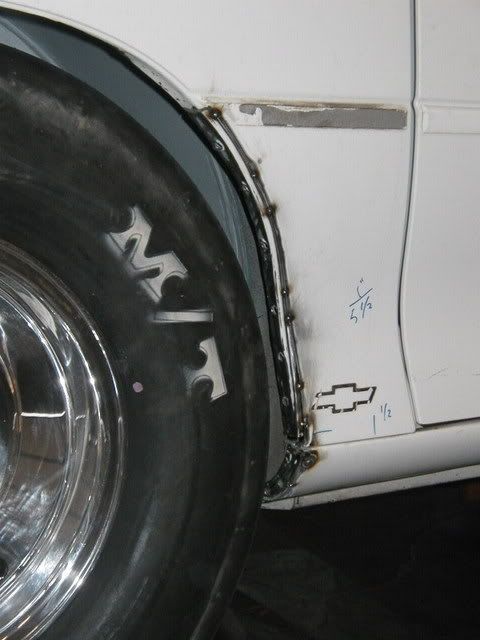
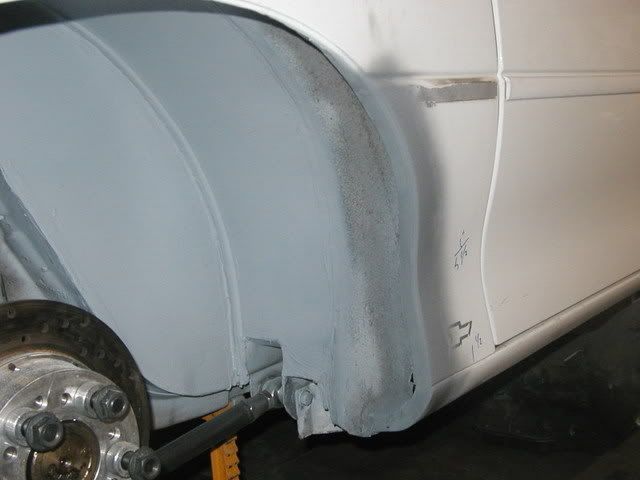
I recently started mini tubbing my 98 Camaro and noticed from a lot of photos of the other mini tub jobs I have seen that people mount the front/bottom on the mini tub above the LCA bracket.
I rotated my tub forward more so that the bracket and holes in the frame/floor are all covered and just cut out where the LCA goes to avoid running 2 separate pieces in this area. So there is just one small square cut out in the corner. It sits almost flush over the side of factory tub on the little ledge at the wheel well at the bottom.
Anyone else doing it this way and have some photos?
I used a 36" tub also.
I'll add photos soon to share but have no camera at the moment.
#5
http://www.wolferacecraft.com/images...bodymini03.jpg
99% of the mini tubs jobs I have seen position the tub so it sits just above LCA bracket like this photo and end up using a separate 2nd piece to cover the cut out sections in the frame.
My tub goes all the way down to almost the bottom of the LCA bracket and it only has one small section cut out for the LCA to fit and the rest of the tub is flat and straight across the bottom to the other side.
http://www.wolferacecraft.com/images...bodymini04.jpg
In this photo they leave part the factory tub at the bottom, I cut all of that out down to the bottom, cut straight across 90* to the frame edge and on the body panel because the tub travels at an angle so I cut to make it 90* and straighten it out.
So it looks like the full tub runs all the way around from front to back.
I was seeing if anyone else had theirs done like mine and if they had photos.
Last edited by chrismorales75; 10-25-2007 at 07:26 PM.
Trending Topics
#8
That looks simular to mine but I only cut out the bottom 1/2 of the LCA bracket, and then the tub goes down to the bottom of the LCA bracket and across to the factory tub about 1/4 above the little ledge on the inside of the wheel well.
BTW that looks pretty nice, did you trim the outer wheel well yet or you running a 28" or shorter tire?
BTW that looks pretty nice, did you trim the outer wheel well yet or you running a 28" or shorter tire?
#9
I used a piece of 1/8th inch x 8 inches widex 15 inches long and 1/8th inch x 8" wide x 21 or so inches on the drivers side.
I just used some cardboard, cut out the shape then traced, trimmed and bent the metal so it fits inside of the frame, I didn't want to loose that 1/8th" by welding it to the outside

#10
Ah yes! I had mine that way, but cut it up to where it is. Don't know why, just did.
Yeah, already moved the front part of that fender, it has a 29.5 on there now. In that first pic notice how the inside part of my outer tub is flush with body compared to JR's.

Yeah, already moved the front part of that fender, it has a 29.5 on there now. In that first pic notice how the inside part of my outer tub is flush with body compared to JR's.

#11
Yes I see the tub. How much did you trim yours on the front and rear part of the wheel lip?
I was going to go 325 50 15, But I think I want to go 30x11-15.
That will be good. I just need to finish it before i start out like I did to my other car. I was just going to mini tub my last car and it came out of my garage with 33x16.5's with a tube frame back half LOL
I was going to go 325 50 15, But I think I want to go 30x11-15.
That will be good. I just need to finish it before i start out like I did to my other car. I was just going to mini tub my last car and it came out of my garage with 33x16.5's with a tube frame back half LOL
#13
My minitub is not a kit, but I have to ask....if you are gonna minitub why not take it all the way into the framerail? Why leave that 1.5 inches?
Here is mine
http://
David
Here is mine
http://

David
It is around 18" if you go that far maybe a hair more.
I cut out the lower section to relocate my lower control arms inbetween the frame and bracket and the arms sit on the inside of the tub which is 16".
It's actually pointless to go 16" unless you relocate the LCA because the LCA will be the first place to hit anyways and offset LCA's only give you 14-14 1/2" of clearance to the outside lip of the wheel well.
I only went 16" and relocated the LCA's so I can run a the biggest tire I can and still keep the back seat, which I have to modify slightly to get it to go back and look factory stock.
#15
No photos yet, just trimmed the area thats next to the tub on the side of the floor where the seat cushion goes to the factory frame.
The LCA mounts in between the frame and factory bracket, then a hole is drilled through the frame and a bolt slides through and uses the factory bracket to tighten it to.
Then you mount the LCA brackets on the opposite side so that the shock mount will now be on the outside, swap left to right - right to left.
The factory shock mounts in the same spot, so everything lines up nice without need for custom brackets.
#17
Sure, I was actually working on it some today. I decided to move the tub so I have 17" from the fender to tub.
I am going to run a 15x12 with a 315 60 15 and wanted to have room inside and out, so that will give me almost 1.5" per side of the tire for clearance but I'll probably tuck it in a little bit since I want to lower the car.
I am relocating the top of the shock mount, going 17" will cut off the upper shock bolt.
It's easy to remount it, you just cut at the bottom of the sheet metal where the recessed curve is around the shock mount and then hammer it in about 1/2 - 3/4". Drill a new hole and that's done.
Also I am keeping my rear seat so I took off the upholstery on the rear seat and cut off the metal brackets and some of the plastic, then slide the cover back over. It looks factory but when you put it in between the tubs both sides can smash in about 2 or 2 1/2" per side.
Also am going to cut the panhard mount in half and relocate the panhard bolt hole in more so it is flush with the tub. Just going to use some 1/8th" plate inside the factory mount to box it in then redrill the once I set the car to ride hight with the tires on the car, that way I can make sure it sits at 0*.
I will get photos soon it is coming out great, redid all of my lines, am using the angle grinder to cut and it's coming out great.
#19
Mine will be a lower mount adjustable with a long bolt that is adjusted by using a socket to turn the adjuster from under the spring mount.
Will post pics am buying a camera and will scan the pics for you guys.


