

glass hood guys, any reason for rails vs brackets???
 07-02-2008, 08:30 AM
#21
TECH Junkie
iTrader: (12)
Join Date: Jun 2002
Location: Fall River, MA
Posts: 3,151
Likes: 0
Received 0 Likes
on
0 Posts

I got the VFN Extended.
I'll try to take some pics of my setup today. My cousin made all the brackets, but they are adjustable to go up and down. We just bolted them into each fender bolt. Came out nice, then he made a bracket for the front of the nose.
I'll try to take some pics of my setup today. My cousin made all the brackets, but they are adjustable to go up and down. We just bolted them into each fender bolt. Came out nice, then he made a bracket for the front of the nose.
 07-02-2008, 08:47 AM
#22
10 Second Club
iTrader: (12)
Join Date: Dec 2004
Location: Birmingham, Alabama
Posts: 2,034
Likes: 0
Received 0 Likes
on
0 Posts
Post some pics of your setup!
07-02-2008, 11:41 AM
#23

Sounds like we used the same Home Depot aluminum,hehe.
One thing I forgot to mention was I put the duz fasteners in a vise and heated them and bent them 90 degrees, then I riveted them to the aluminum stock. I didn't have to cut the hood at all but I did have to trim the fender lip a bit so the fasteners would clear.
One thing I forgot to mention was I put the duz fasteners in a vise and heated them and bent them 90 degrees, then I riveted them to the aluminum stock. I didn't have to cut the hood at all but I did have to trim the fender lip a bit so the fasteners would clear.
07-02-2008, 12:04 PM
#24
10 Second Club
iTrader: (12)
Join Date: Dec 2004
Location: Birmingham, Alabama
Posts: 2,034
Likes: 0
Received 0 Likes
on
0 Posts
Yup I got my aluminum from Lowes! lol I had to trim the hell out of the lip on mine.. For example.. If you just sat the hood on the car before trimming or cutting or touching anything the hood was about a 1/4in high over the tops of the fenders..
07-02-2008, 02:44 PM
#25
9 Second Club
Thread Starter
iTrader: (4)

Join Date: Dec 2004
Location: Cali
Posts: 2,607
Likes: 0
Received 0 Likes
on
0 Posts
wow... i wonder why all you guys got the 90 deg lip and I didn't.....
seems like it makes my hood a bit easier to fit without it....
I trimmed the back end of my hood yesterday and took another 1" off of the back.... Came out real good and I got the areas near the windshield and mirrors where I want it... now I just need to make the cowl even and get it about a 1/4 inch off the windshield so that air pressure doesn't build up and the air can escape to keep the hood from wanting to rip off.... I think that'll help...


 07-11-2008, 09:43 PM
#30
9 Second Club
Join Date: Dec 2006
Location: Gardendale AL
Posts: 61
Likes: 0
Received 0 Likes
on
0 Posts
(1QuickT-A here) I sent them a PM but never got a reply back..
So.. I made my own set and they work great.. I also figured out that if you mount the hood and leave the car out in the sun for a while the hood will fit a lot better.
So.. I made my own set and they work great.. I also figured out that if you mount the hood and leave the car out in the sun for a while the hood will fit a lot better.
Last edited by Pure One; 07-11-2008 at 09:44 PM. Reason: forgot to sign in on my own name..
07-11-2008, 10:00 PM
#31
10 Second Club
iTrader: (12)
Join Date: Dec 2004
Location: Birmingham, Alabama
Posts: 2,034
Likes: 0
Received 0 Likes
on
0 Posts
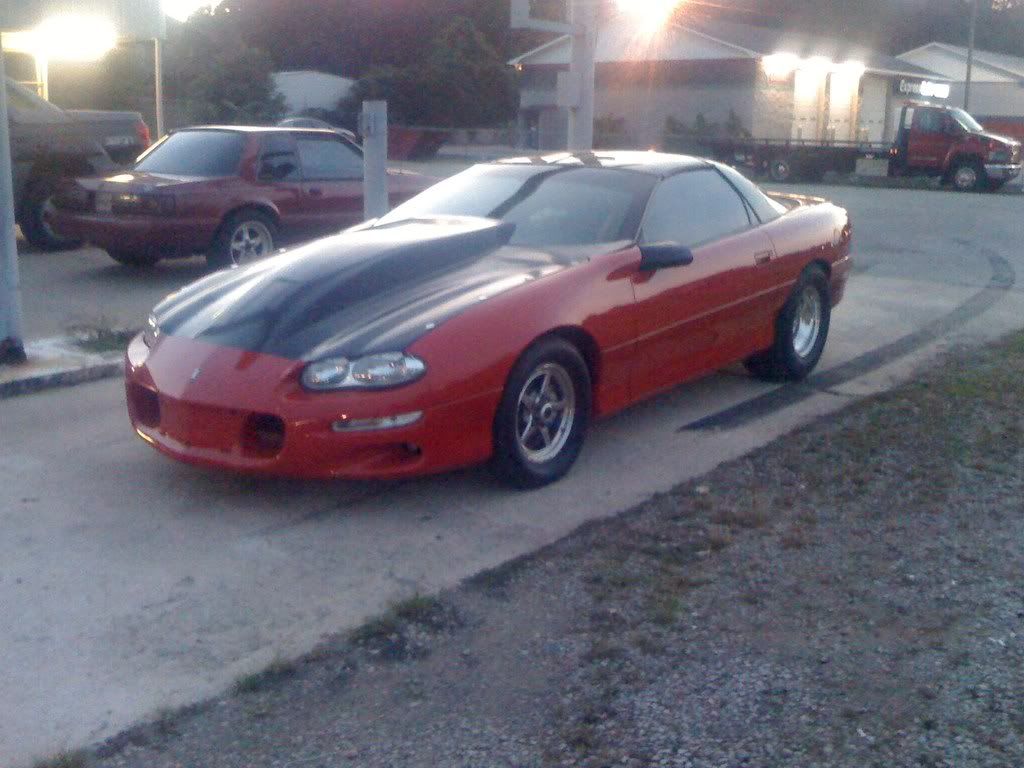
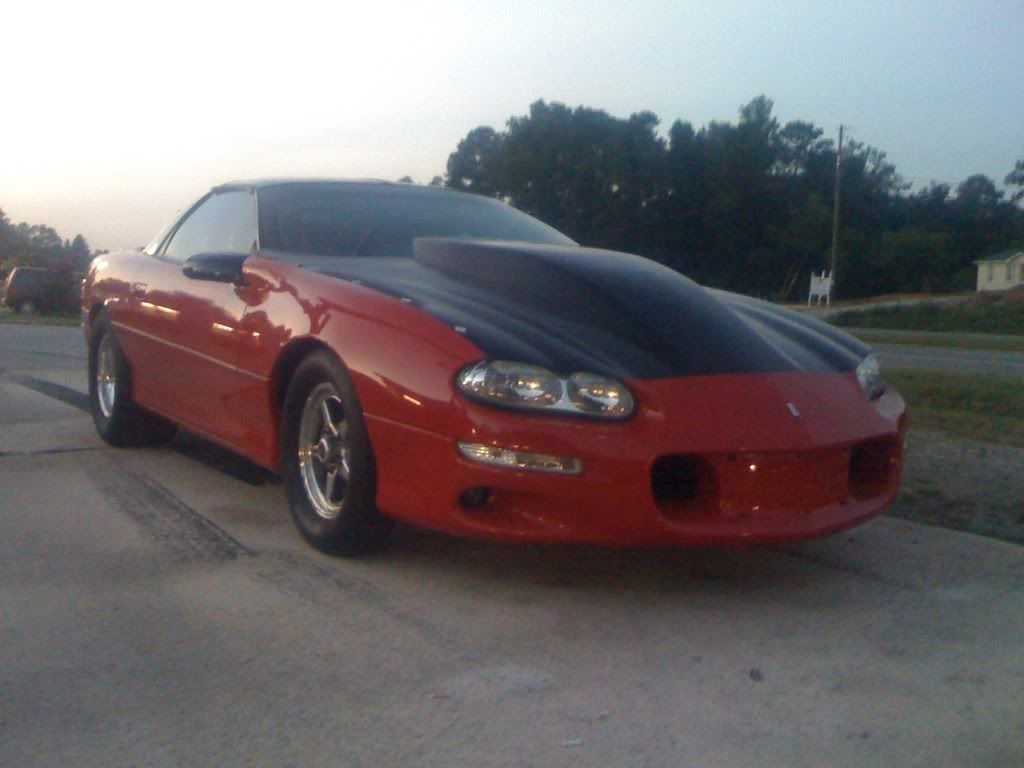
Here you go.. A pic of my car with the Sunoco Extended Cowl pin on hood from VFN.. Finally got the bitch mounted up good. Still have to add 3 fasteners across the front and 1 on each side in the back corner.


 07-15-2008, 04:48 PM
#37
TECH Junkie
iTrader: (10)
Join Date: Nov 2002
Location: Deerfield Beach, FL
Posts: 3,672
Likes: 0
Received 0 Likes
on
0 Posts
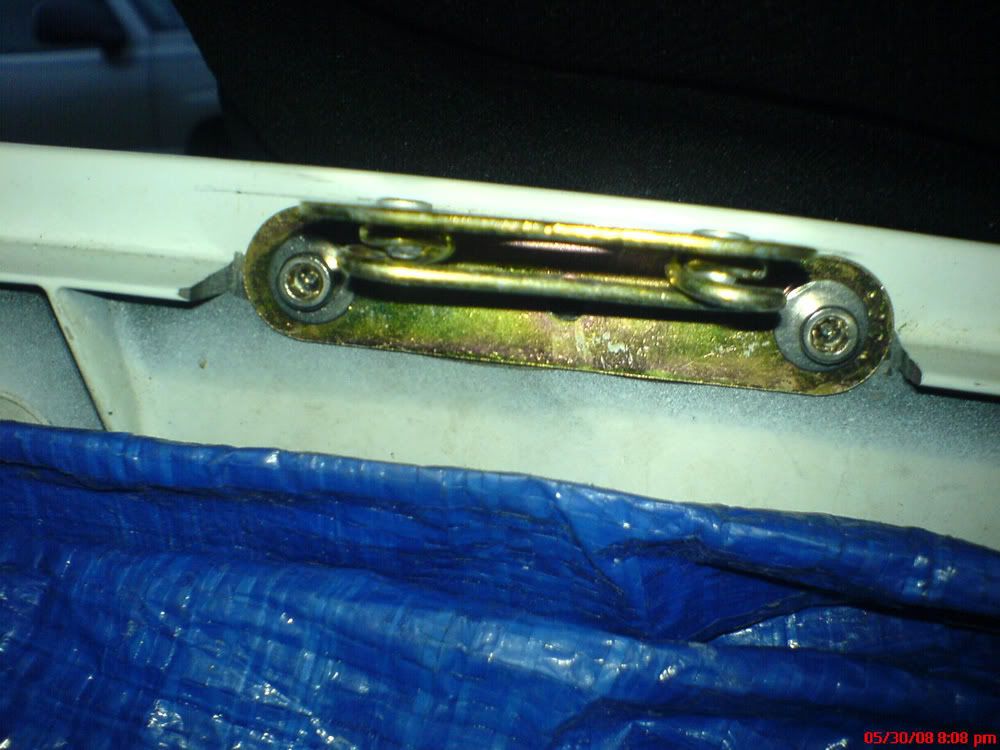
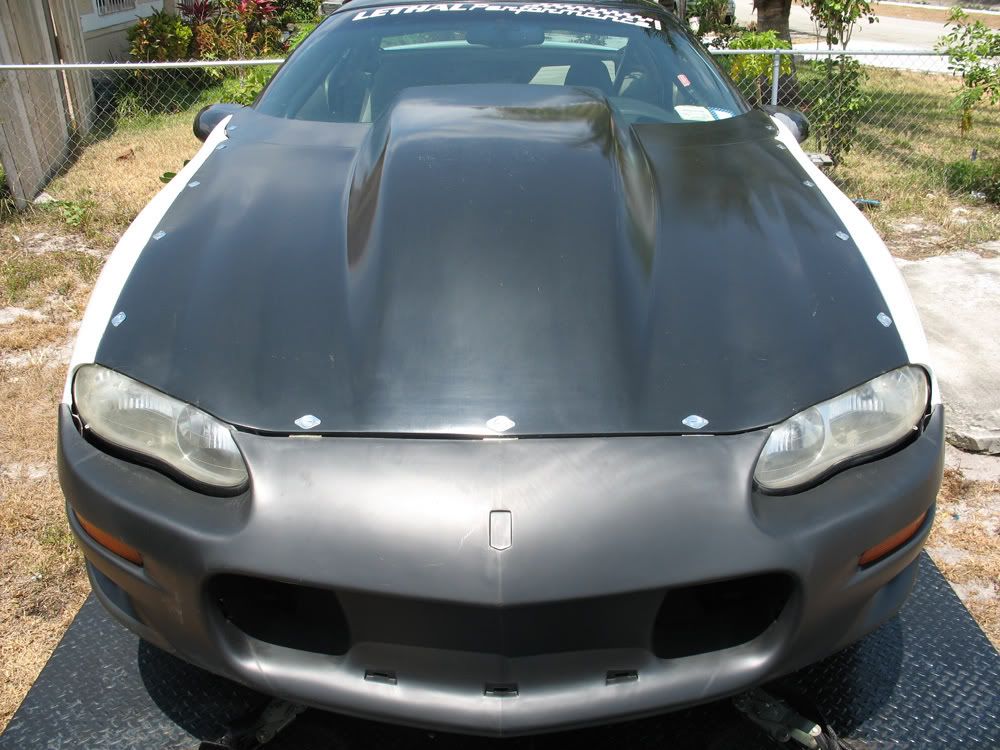
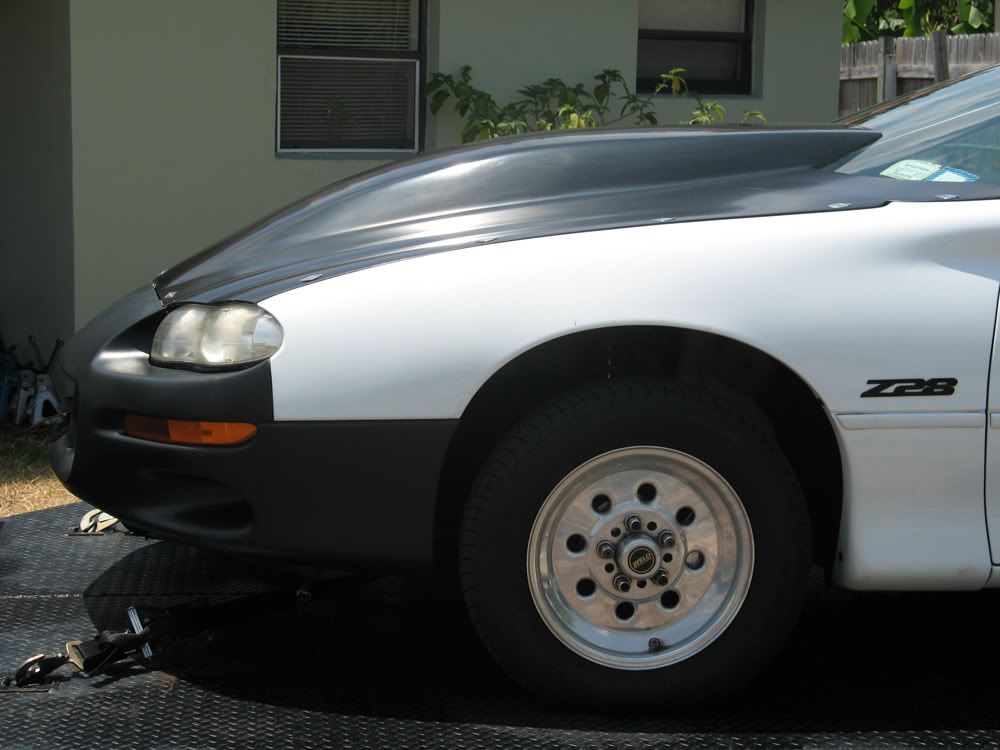
For everyone else, here's some pics of how my buddy did mine:

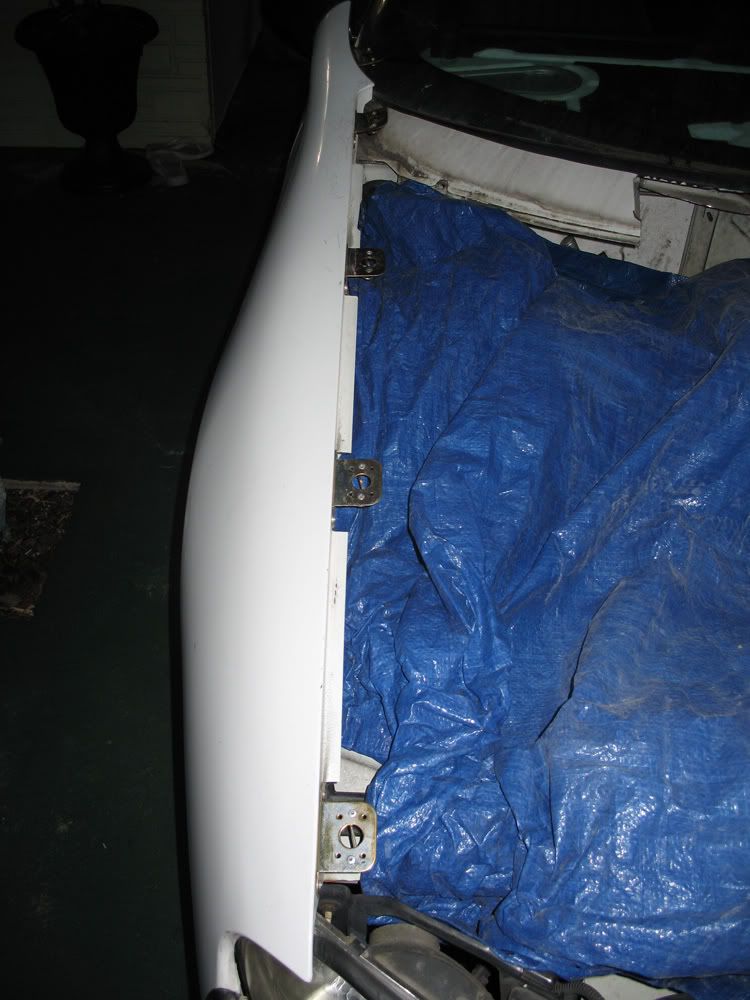
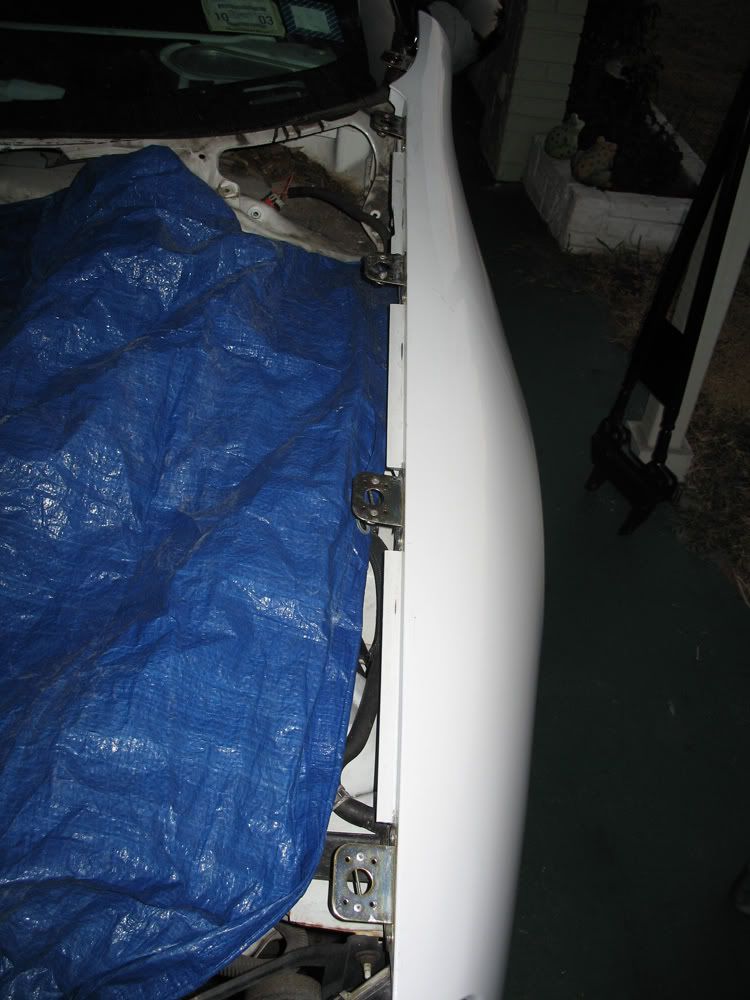
We originally used rivets, but was told to replace the rivets with 10/32's nuts and bolts with washers on each side, so I went back through and did that:

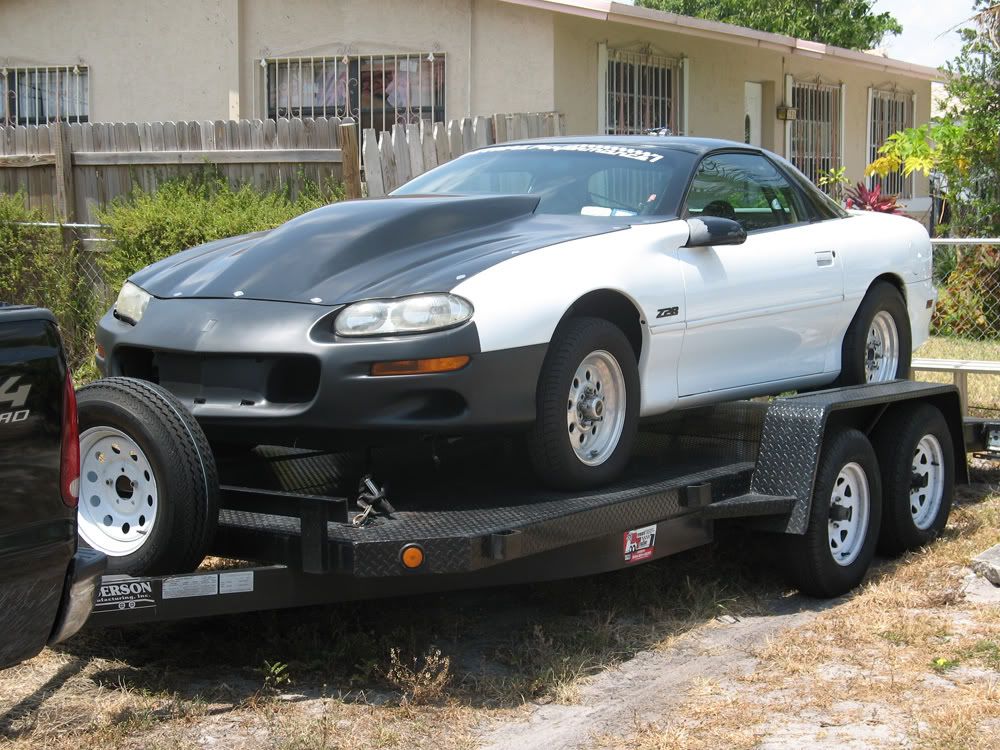
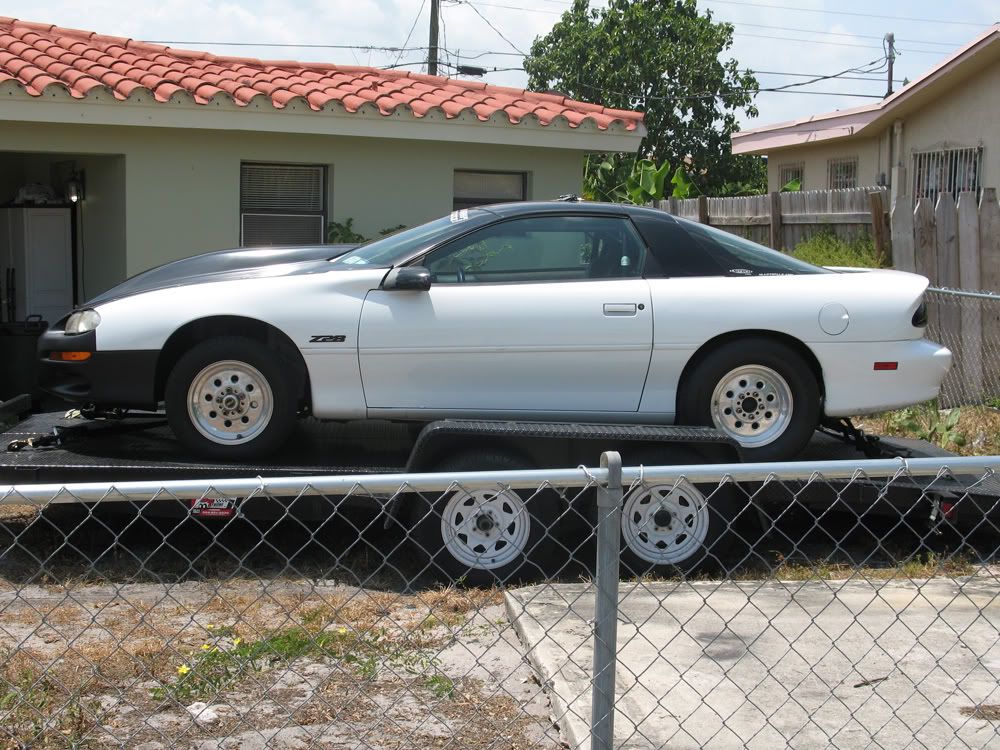
And here's how she looks on the car after I brought her home from my buddies house (at that time she still wasn't running, why she was on the trailer):

 07-22-2008, 06:50 PM
#39


Here are some pics of the rails, we had to tweek a few holes and will be cutting the finish parts Thursday. The rail kit will be $200.00 for the 2pc adjustable and $155.00 for the 1pcs rail kit. The difference being the two piece bolt to the fender without removing the inner lip. The one piece rail requires removing the inner lip that the stock hood sets on. I will put something on our website tomorrow, my IT guy is gone for the day.
Mark
http://www.racecraft.com
Last edited by Racecraft Inc.; 07-31-2008 at 11:30 AM. Reason: change pricing